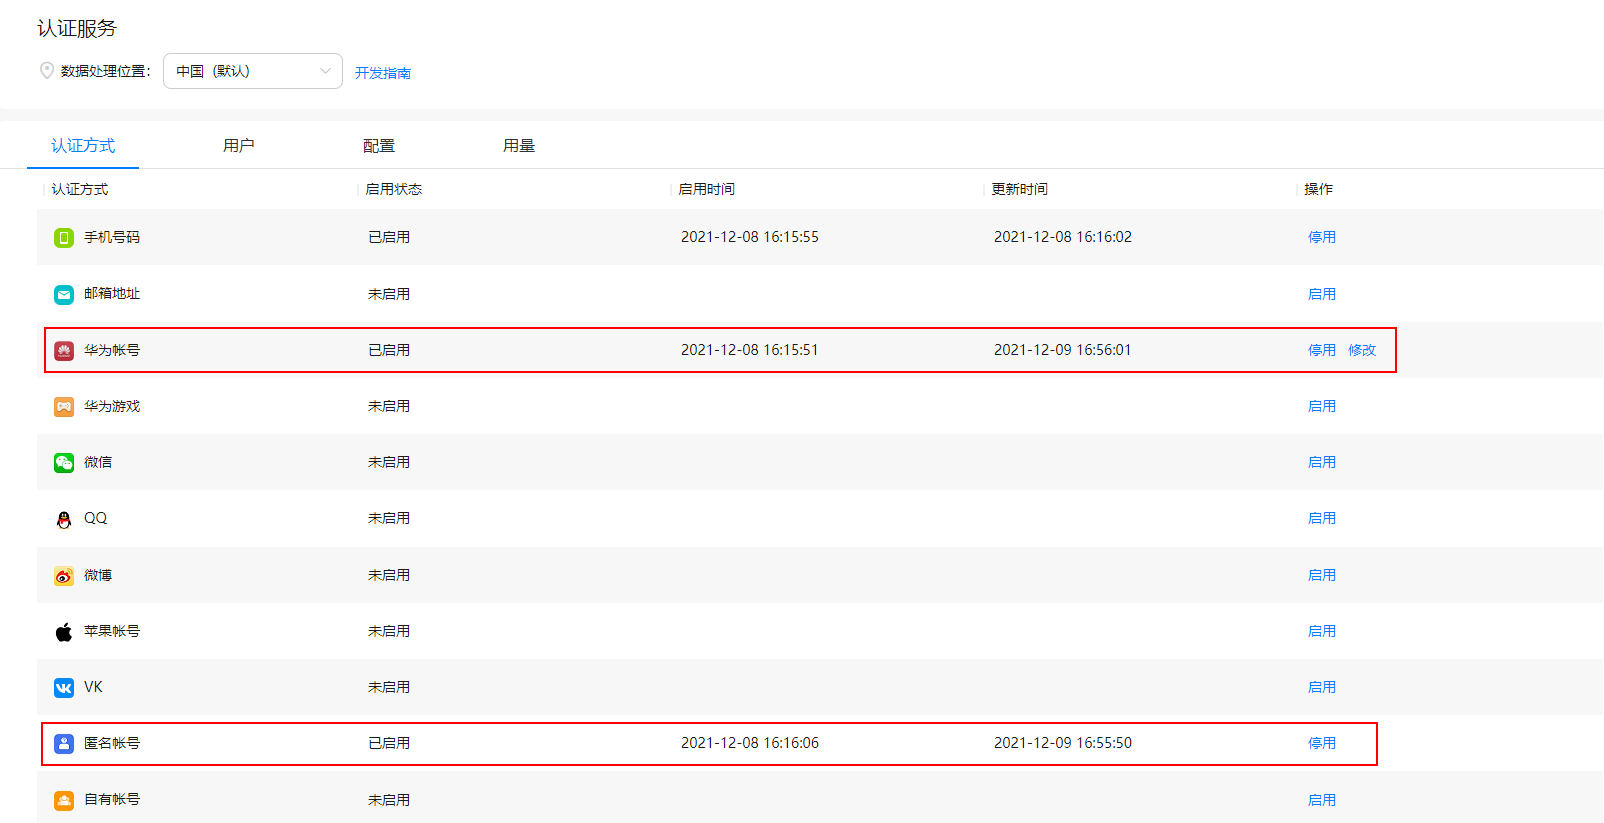
AppGallery Connect认证服务提供了云侧服务和SDK,可以帮助开发者为应用快速构建安全可靠的用户认证系统,以便应用可以对用户进行身份认证。AppGallery Connect认证服务支持多种认证方式,并与其他Serverless服务紧密集成,开发者可以通过简单的规则定义来保护用户的数据安全。
通过集成AppGallery Connect认证服务提供的Auth Service SDK,开发者可以对接包括华为帐号、微信、Facebook、Twitter在内的多种第三方用户认证系统,并将认证凭据上报给AppGallery Connect认证服务云侧。在下次登录时,应用便可直接通过AppGallery Connect认证服务获取用户的个人基本信息和其他Serverless服务中受安全规则保护的数据。
AppGallery Connect认证服务可以极大减少开发者在用户认证系统构建和运维上的投入和成本。
在本次Codelab中,您将建立一个能够具备使用AppGallery Connect认证服务匿名帐号与认证华为帐号的Android应用程序,您的应用程序将包含:
必须为Android 4.2及以上版本。
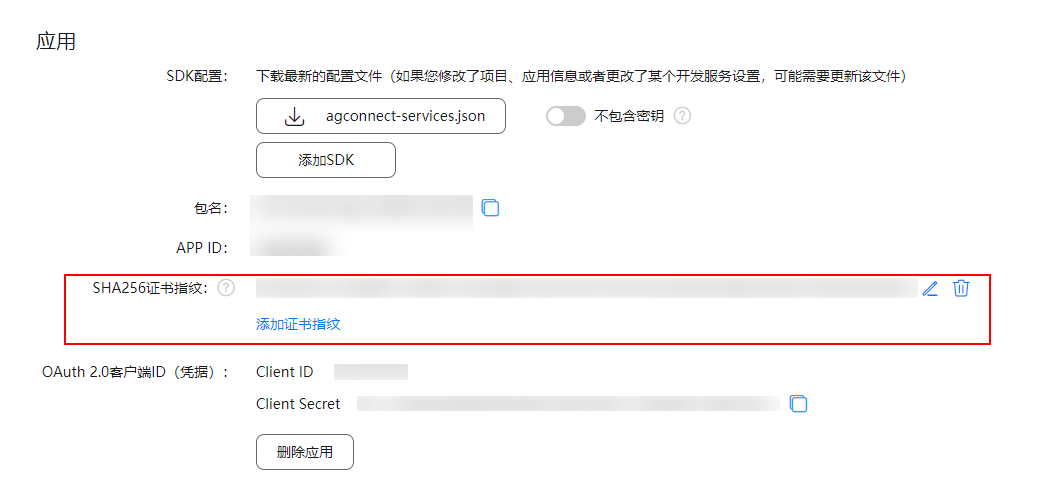
集成AppGallery Connect认证服务,需要完成以下准备工作

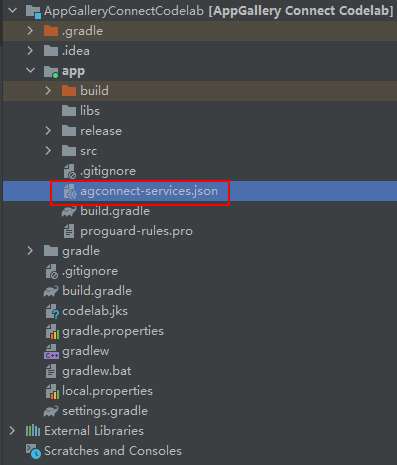
针对Android Studio开发环境,华为提供了maven仓集成方式的SDK包,开发前需集成SDK到您的Android Studio项目中。
//配置如下地址
apply plugin: 'com.huawei.agconnect'

dependencies {
        //配置如下地址
        implementation 'com.huawei.agconnect:agconnect-auth:1.6.5.300'
        implementation "com.huawei.agconnect:agconnect-auth-huawei:1.6.5.300"
    }

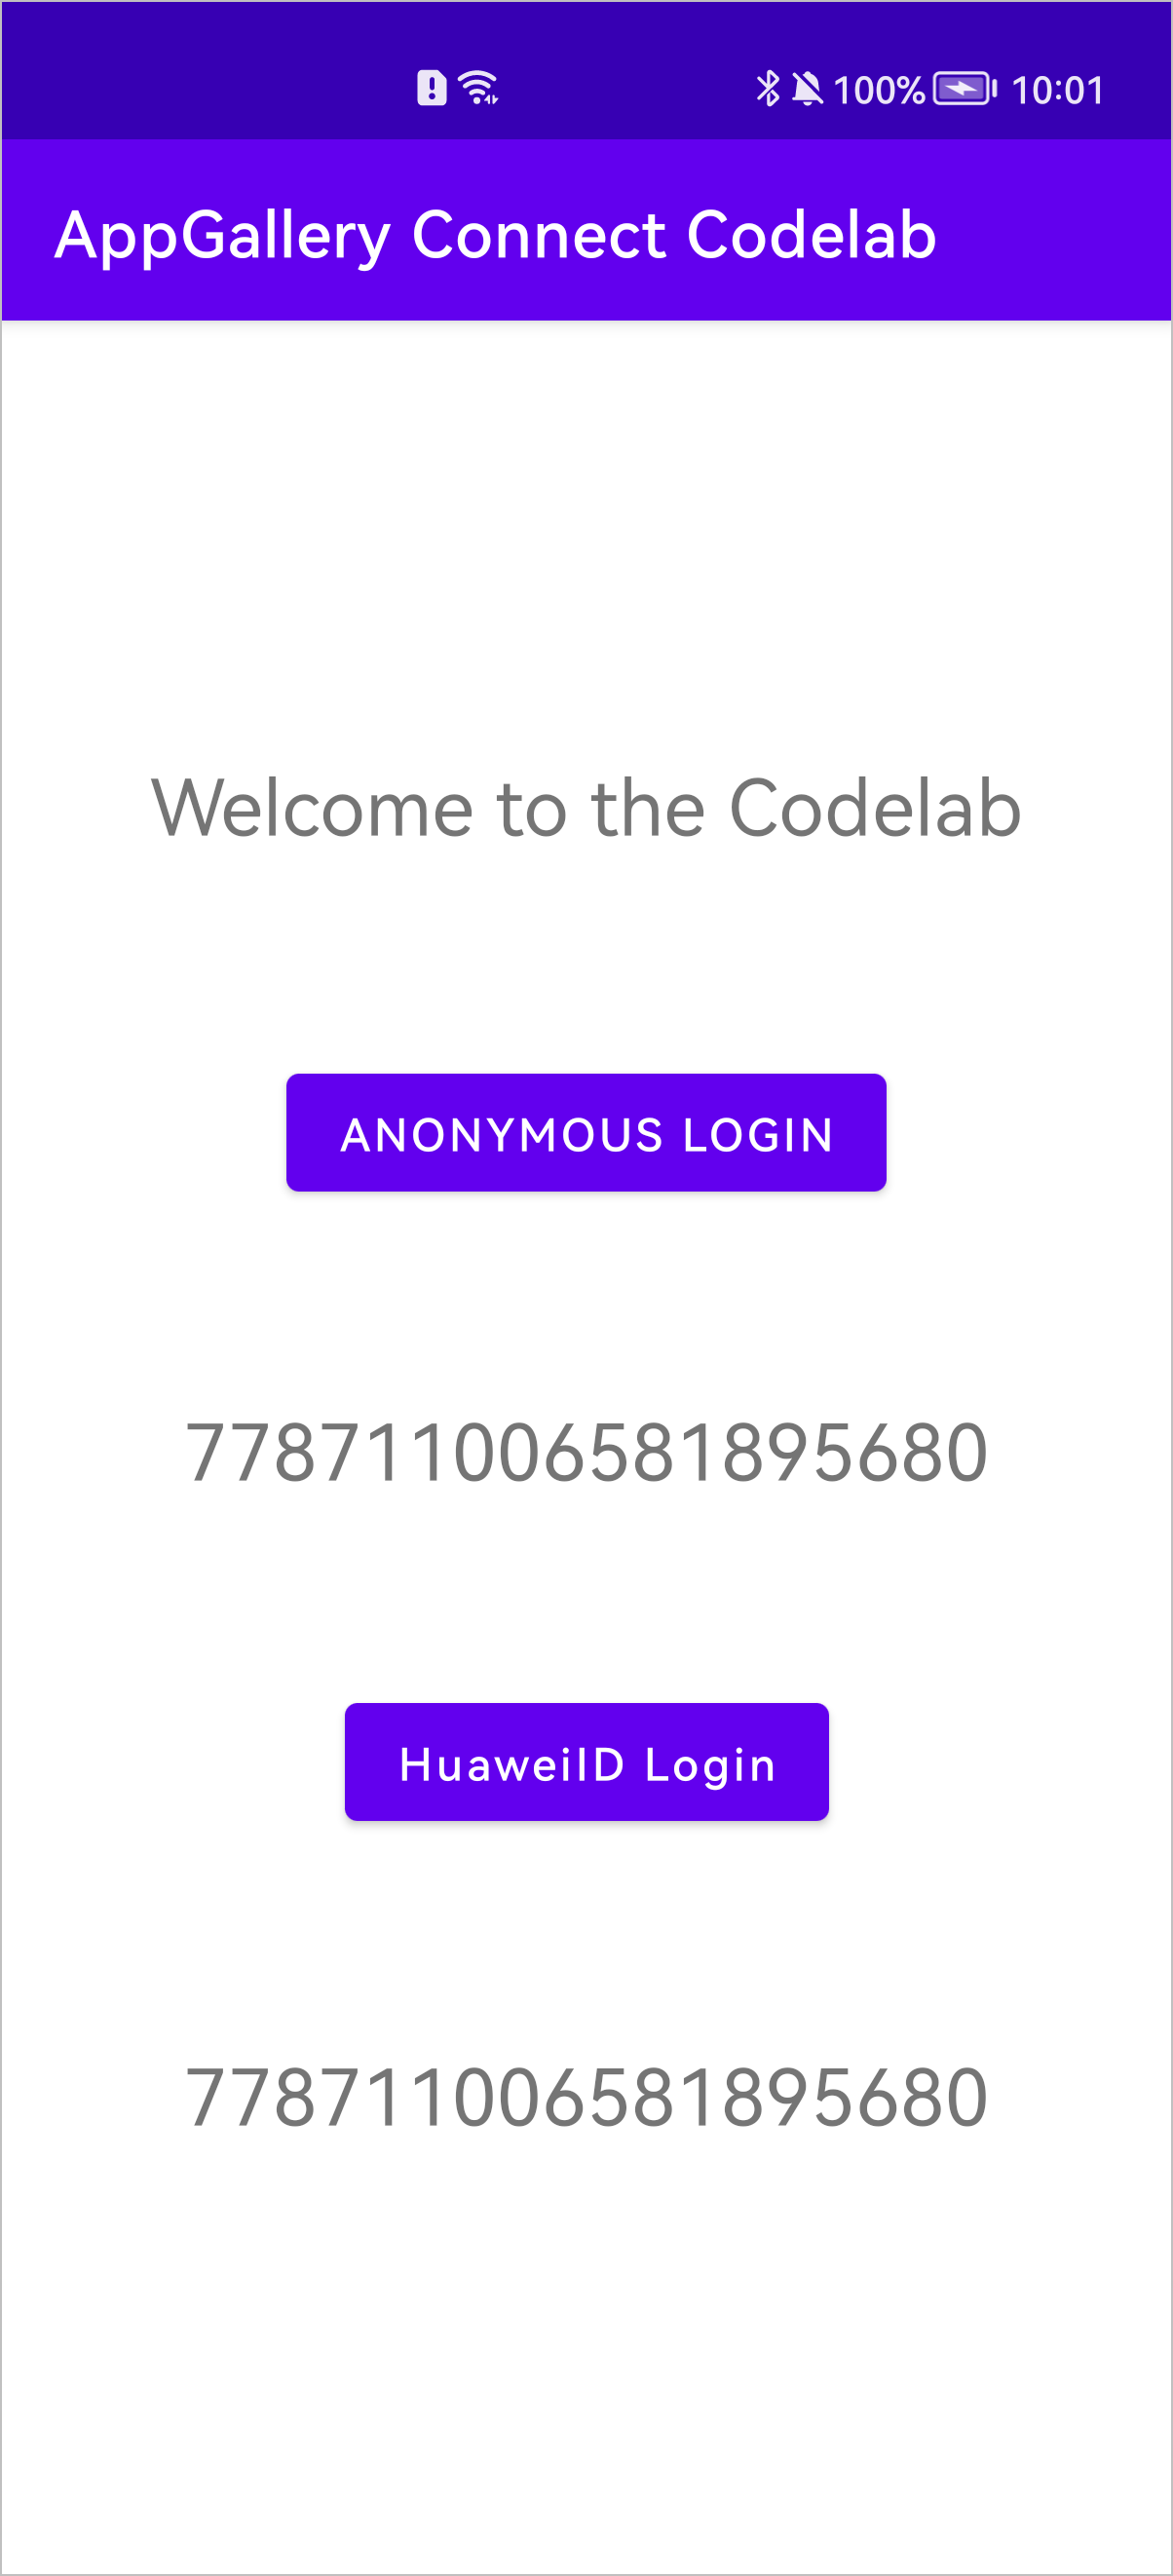
本次Codelab中您可以在Android Studio工程中创建一个布局页面,参照下图进行UI设计,具备简单的匿名帐号与华为帐号绑定入口即可。
布局代码如下:
<?xml version="1.0" encoding="utf-8"?>
<androidx.constraintlayout.widget.ConstraintLayout xmlns:android="http://schemas.android.com/apk/res/android"
    xmlns:app="http://schemas.android.com/apk/res-auto"
    xmlns:tools="http://schemas.android.com/tools"
    android:layout_width="match_parent"
    android:layout_height="match_parent"
    tools:context=".MainActivity">

    <TextView
        android:layout_width="wrap_content"
        android:layout_height="wrap_content"
        android:text="Welcome to the Codelab"
        android:textSize="24dp"
        android:textAlignment="center"
        app:layout_constraintBottom_toBottomOf="parent"
        app:layout_constraintLeft_toLeftOf="parent"
        app:layout_constraintRight_toRightOf="parent"
        app:layout_constraintTop_toTopOf="parent"
        app:layout_constraintVertical_bias="0.2" />

    <Button
        android:id="@+id/anonymous_button"
        android:layout_width="wrap_content"
        android:layout_height="wrap_content"
        android:text="Anonymous Login"
        app:layout_constraintBottom_toBottomOf="parent"
        app:layout_constraintLeft_toLeftOf="parent"
        app:layout_constraintRight_toRightOf="parent"
        app:layout_constraintTop_toTopOf="parent"
        app:layout_constraintVertical_bias="0.35" />

    <TextView
        android:id="@+id/anonymous_result"
        android:layout_width="wrap_content"
        android:layout_height="wrap_content"
        android:textSize="24dp"
        android:textAlignment="center"
        app:layout_constraintBottom_toBottomOf="parent"
        app:layout_constraintLeft_toLeftOf="parent"
        app:layout_constraintRight_toRightOf="parent"
        app:layout_constraintTop_toTopOf="parent"
        app:layout_constraintVertical_bias="0.5" />

    <Button
        android:id="@+id/huaweiid_button"
        android:layout_width="wrap_content"
        android:layout_height="wrap_content"
        android:text="HuaweiID Login"
        android:textAllCaps="false"
        app:layout_constraintBottom_toBottomOf="parent"
        app:layout_constraintLeft_toLeftOf="parent"
        app:layout_constraintRight_toRightOf="parent"
        app:layout_constraintTop_toTopOf="parent"
        app:layout_constraintVertical_bias="0.65" />


    <TextView
        android:id="@+id/result_text"
        android:layout_width="wrap_content"
        android:layout_height="wrap_content"
        android:textSize="24dp"
        android:textAlignment="center"
        app:layout_constraintBottom_toBottomOf="parent"
        app:layout_constraintLeft_toLeftOf="parent"
        app:layout_constraintRight_toRightOf="parent"
        app:layout_constraintTop_toTopOf="parent"
        app:layout_constraintVertical_bias="0.8" />

</androidx.constraintlayout.widget.ConstraintLayout>
Button anonymousBtn = findViewById(R.id.anonymous_button);
anonymousBtn.setOnClickListener(view -> AGConnectAuth.getInstance().signInAnonymously()
            .addOnSuccessListener(signInResult -> {
        AGConnectUser user = signInResult.getUser();
        String uid = user.getUid();
        anonymousResult.setText(uid);
        Log.i(TAG, "UidValue: " + uid);
    }).addOnFailureListener(e -> {
        anonymousResult.setText("Anonymous SignIn failed");
        Log.e(TAG, "UidValue: " + e.getMessage());
    }));
Button huaweiidButton = findViewById(R.id.huaweiid_button);
huaweiidButton.setOnClickListener(view -> AGConnectAuth.getInstance().getCurrentUser().link(MainActivity.this, AGConnectAuthCredential.HMS_Provider)
            .addOnSuccessListener(signInResult -> {
                String hwUid = signInResult.getUser().getUid();
                result.setText(hwUid);
                Log.i(TAG, "UidValue: " + hwUid);
            }).addOnFailureListener(e -> {
                result.setText("HWID SignIn failed");
                Log.e(TAG, "UidValue: " + e.getMessage());
            }));

祝贺您,您已经成功地构建了您的第一个集成AppGallery Connect认证服务的应用程序,并学到了如何使用AppGallery Connect认证服务构建用户认证系统。
AppGallery Connect认证服务的相关API介绍请参见API索引。
本Codelab中所用demo源码下载链接:源码下载