集成Accelerate Kit能力,需要完成以下准备工作:
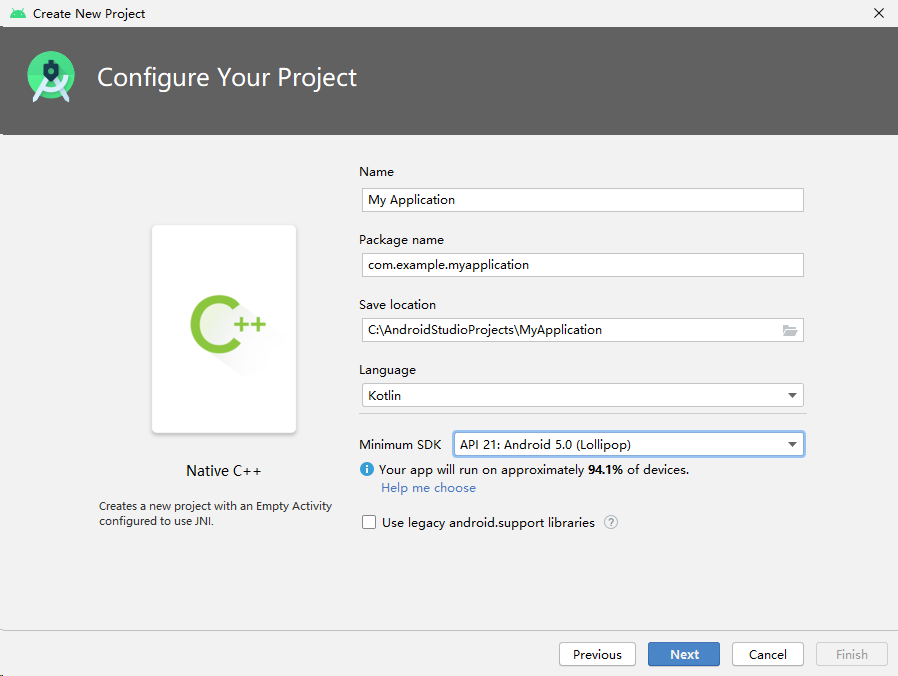
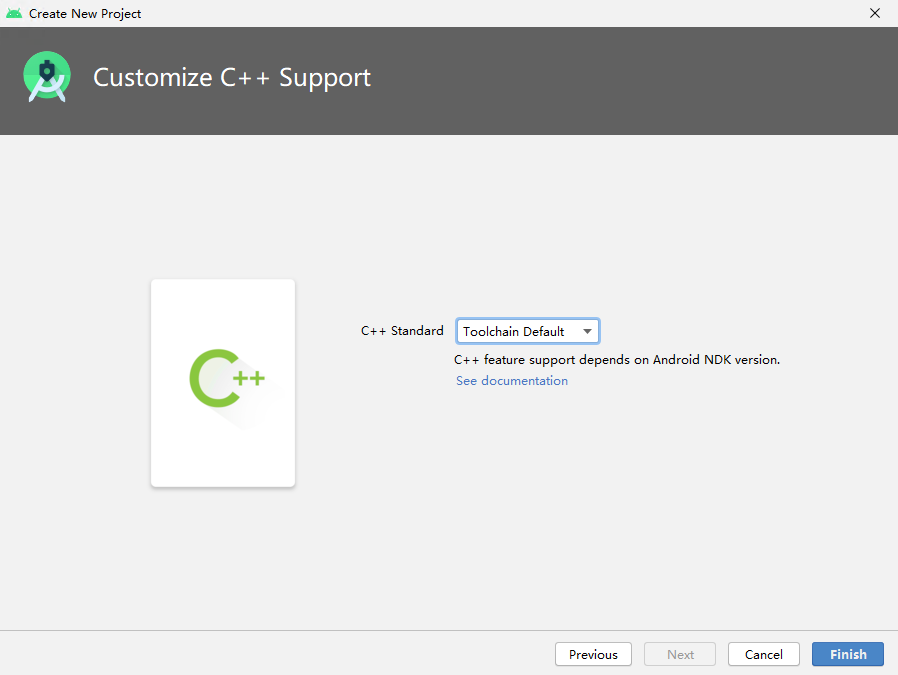
步骤 1 - 创建Android Stuido Project。

步骤 2 - 修改gradle文件。
打开/app/build.gradle文件,添加如下信息:

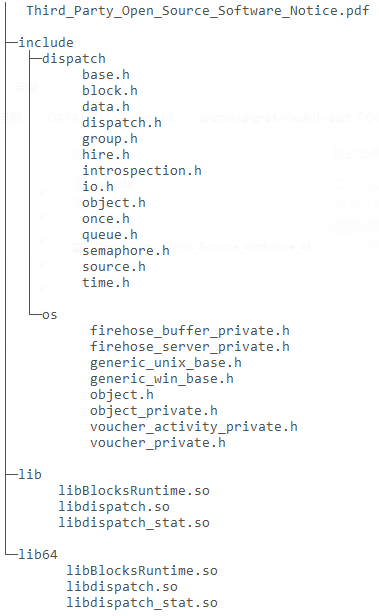
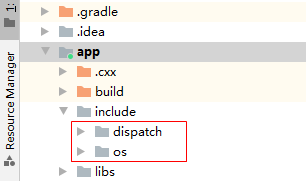
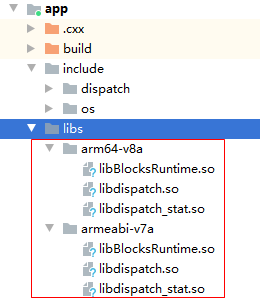
步骤 3 - 复制库和头文件。
# For more information about using CMake with Android Studio, read the
# documentation: https://d.android.com/studio/projects/add-native-code.html

# Sets the minimum version of CMake required to build the native library.

cmake_minimum_required(VERSION 3.4.1)

# Creates and names a library, sets it as either STATIC
# or SHARED, and provides the relative paths to its source code.
# You can define multiple libraries, and CMake builds them for you.
# Gradle automatically packages shared libraries with your APK.

add_library( # Sets the name of the library.
native-lib

# Sets the library as a shared library.
SHARED

# Provides a relative path to your source file(s).
native-lib.cpp )

# Searches for a specified prebuilt library and stores the path as a
# variable. Because CMake includes system libraries in the search path by
# default, you only need to specify the name of the public NDK library
# you want to add. CMake verifies that the library exists before
# completing its build.

target_include_directories(
native-lib
PRIVATE
${CMAKE_SOURCE_DIR}/../../../include)

find_library( # Sets the name of the path variable.
log-lib

# Specifies the name of the NDK library that
# you want CMake to locate.
log )

add_library(
dispatch
SHARED
IMPORTED)

set_target_properties(
dispatch
PROPERTIES IMPORTED_LOCATION
${CMAKE_SOURCE_DIR}/../../../libs/${ANDROID_ABI}/libdispatch.so)

add_library(
BlocksRuntime
SHARED
IMPORTED)

set_target_properties(
BlocksRuntime
PROPERTIES IMPORTED_LOCATION
${CMAKE_SOURCE_DIR}/../../../libs/${ANDROID_ABI}/libBlocksRuntime.so)

target_compile_options(native-lib PRIVATE -fblocks)

# Specifies libraries CMake should link to your target library. You
# can link multiple libraries, such as libraries you define in this
# build script, prebuilt third-party libraries, or system libraries.

target_link_libraries( # Specifies the target library.
native-lib
dispatch
BlocksRuntime
# Links the target library to the log library
# included in the NDK.
${log-lib} )
—-结束
本小节您将尝试使用Accelerate Kit的主要接口来进行π的计算。在这里我们通过使用格雷戈里-莱布尼茨无穷级数来计算π,公式如下:
我们可以将这个任务分为8个task(task0、...、task7),每个task分别计算这个无穷级数的一部分,最后将这8个和相加从而得到 ,进而求得,进而求得π。
设置无穷级数的计算个数n,总任务数threads,并且初始化计算结果pi。由于pi需要在后续的叠加计算中进行更新修改,因此需要加上__block的修饰符。
_block double pi = 0;
int n = 1000000;
int threads = 8;
dispatch_queue_t accumulator = dispatch_queue_create("Compute pi", NULL);
dispatch_apply(threads, DISPATCH_APPLY_AUTO, ^(size_t idx){
//π的分步计算实现
});
int start = idx * (n / threads);
int end = (idx + 1) * (n / threads);
double sum = 0;
for (int k = start; k < end; k++) {
double flag = (k & 1) ? -1.0 : 1.0;
sum += flag / (2 * k + 1);
}
调用dispatch_sync用于计算各个任务的sum总和,即8个任务均完成后得到 。
。
dispatch_sync(accumulator, ^{
pi += sum;
});
dispatch_release(accumulator);
extern "C" JNIEXPORT jstring JNICALL
Java_com_example_example_MainActivity_stringFromJNI(
JNIEnv* env,
jobject /* this */)
{
std::stringstream ss;
ss << std::setprecision(20) << calculate_pi();
return env->NewStringUTF(ss.str().c_str());
}
至此我们完成了π的加速计算。下面给出实例完整代码app/src/main/cpp/native-lib.cpp:
#include <jni.h>
#include <string>
#include <sstream>
#include <iomanip>
#include <android/log.h>
#include <dispatch/dispatch.h>
double calculate_pi(void)
{
__block double pi = 0;
int n = 1000000;
int threads = 8;
dispatch_queue_t accumulator = dispatch_queue_create("Compute pi", NULL);
dispatch_apply(threads, DISPATCH_APPLY_AUTO, ^(size_t idx){
int start = idx * (n / threads);
int end = (idx + 1) * (n / threads);
double sum = 0;
for (int k = start; k < end; k++) {
double flag = (k & 1) ? -1.0 : 1.0;
sum += flag / (2 * k + 1);
}
dispatch_sync(accumulator, ^{
pi += sum;
});
});
dispatch_release(accumulator);
return pi * 4;
}
extern "C" JNIEXPORT jstring JNICALL
Java_com_example_example_MainActivity_stringFromJNI(
JNIEnv* env,
jobject /* this */)
{
std::stringstream ss;
ss << std::setprecision(20) << calculate_pi();
return env->NewStringUTF(ss.str().c_str());
}
干得好,您已经成功完成了Accelerate Kit集成并学到了:
您可以阅读下面链接,了解更多相关的信息。
请参见相关文档
本Codelab中所用demo源码下载地址如下: