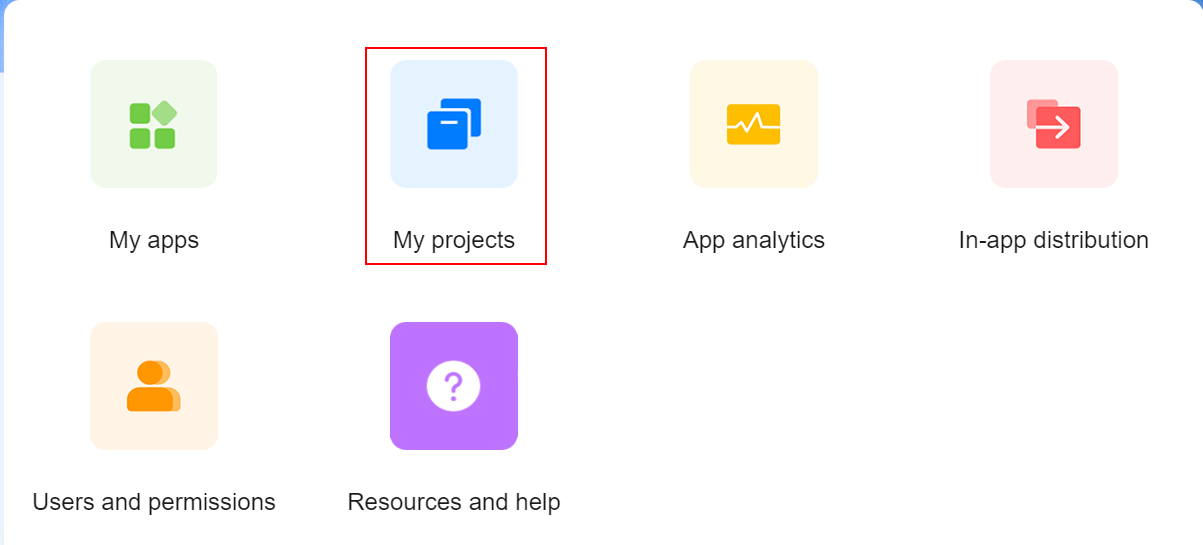
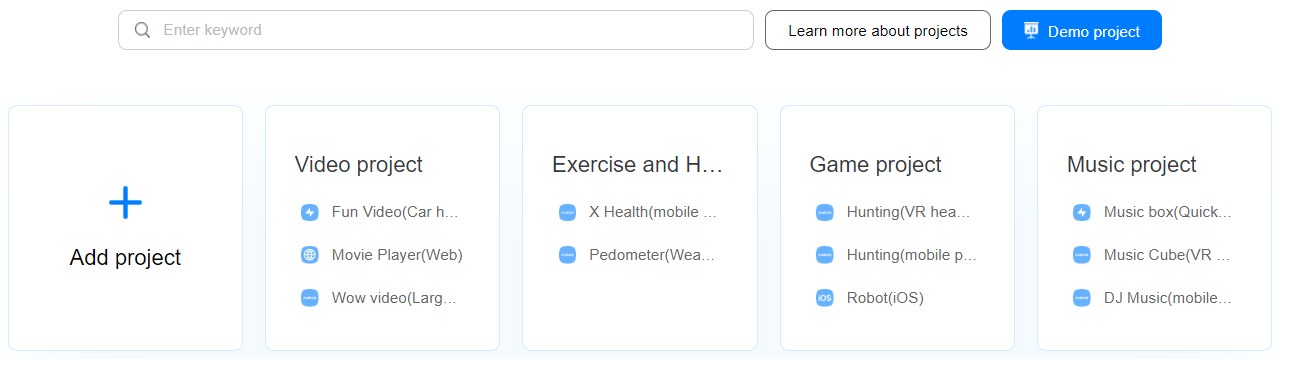
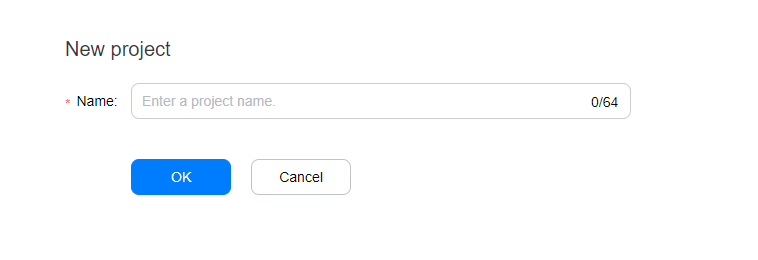
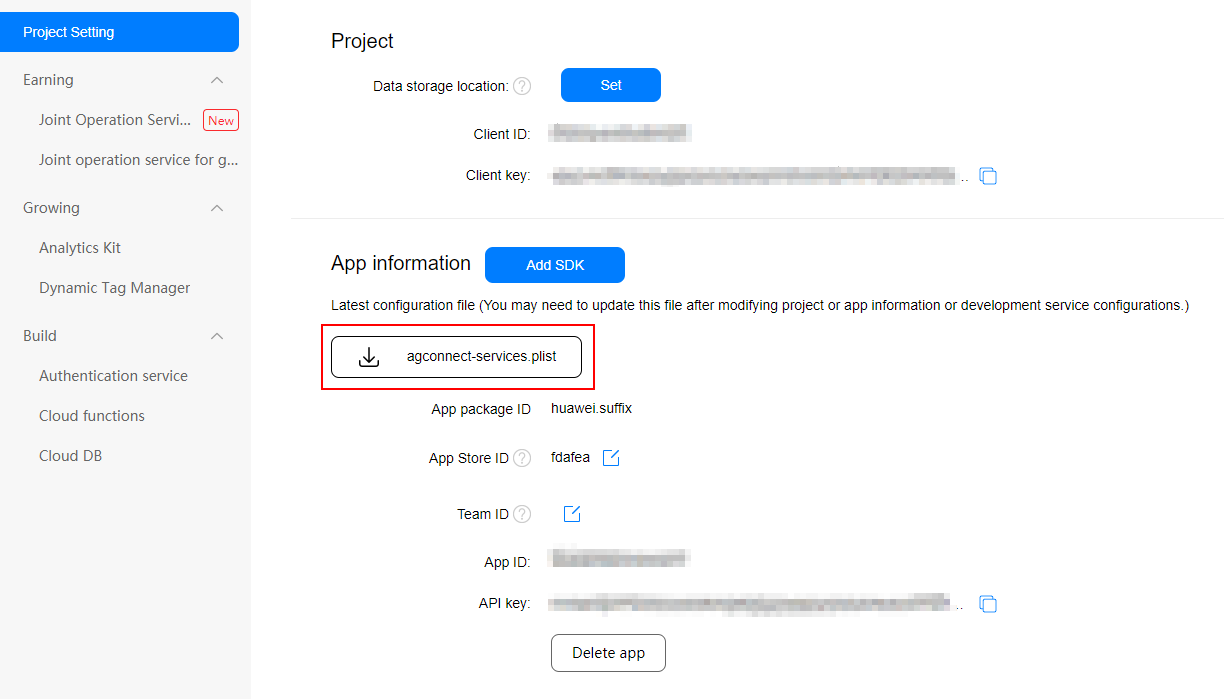
You can create a project first and then add an app to the project. When creating an app, you are required to configure information of your app, such as the app name, app package ID, and platform. After the creation, AppGallery Connect will generate basic configuration information for your app.

  1. Access AppGallery Connect and sign in with your account and password.
  2. Click My projects.
  3. Click Add project. In the dialog box that is displayed, enter the project name, and click OK.
  4. Go to Project settings > General information. On the page displayed, click Add app.
  5. On the Add app page, set Platform, App package ID, and App name based on your needs.
  6. Then you can view app information such as the app package ID and app ID under My projects.

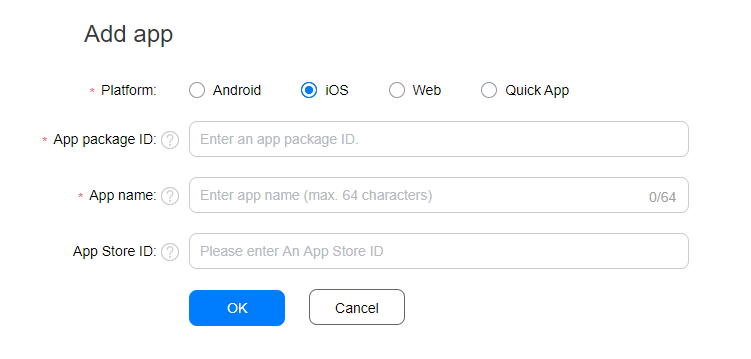
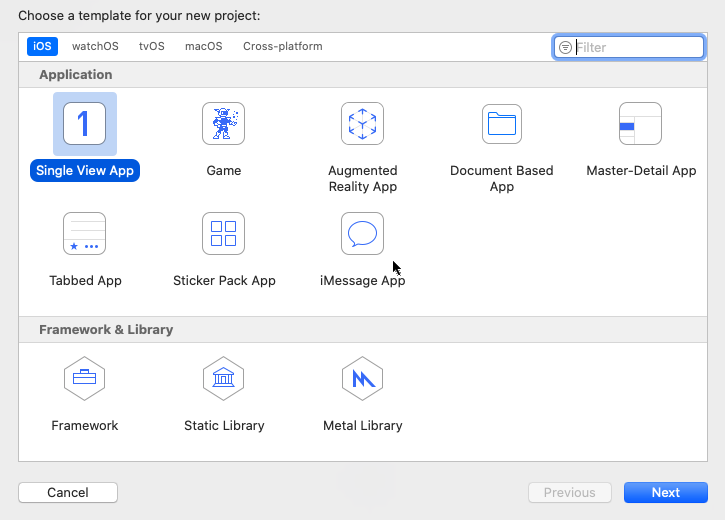
You can use Xcode to create an app. The bundle ID of the app must be the same as the app package ID entered in AppGallery Connect.

  1. Start Xcode and click Create a new Xcode project to create a project.
  2. Select Simple View App under Choose a template for your new project and click Next.
  3. Enter the product name, organization name, organization identifier, bundle identifier (same as the app package ID), and language under Choose options for your new project, and click Next.
  4. Set the local storage location and click Create to complete app creation.
  1. Open the CLI and navigate to the location of the Xcode project.
  2. Create a Podfile. Skip this step if a Podfile already exists.
    cd project-directory pod init
  3. Add the pod on which the AppGallery Connect base SDK depends to the Podfile.
    pod 'AGConnectCore'
Code copied