App Linking allows links to work across platforms even on devices where your app is not installed. You can use these links to direct users to promotional information or native app content that they can share with others. You can create links of App Linking and send them to users, or allow users to share links dynamically generated in your app. Anyone who receives a link can tap it to access the linked content.
When a user taps a link of App Linking:
In this codelab, you will build a HarmonyOS app that integrates App Linking. Your app will:
To integrate App Linking of AppGallery Connect, you must complete the following preparations:

If you are using DevEco Studio, you can integrate SDKs by using the Maven repository into your DevEco Studio project before development.
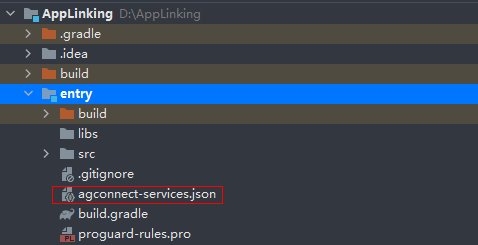
dependencies {
    ...
    implementation 'com.huawei.agconnect:agconnect-applinking-harmony:1.1.0.300'
    ...
}

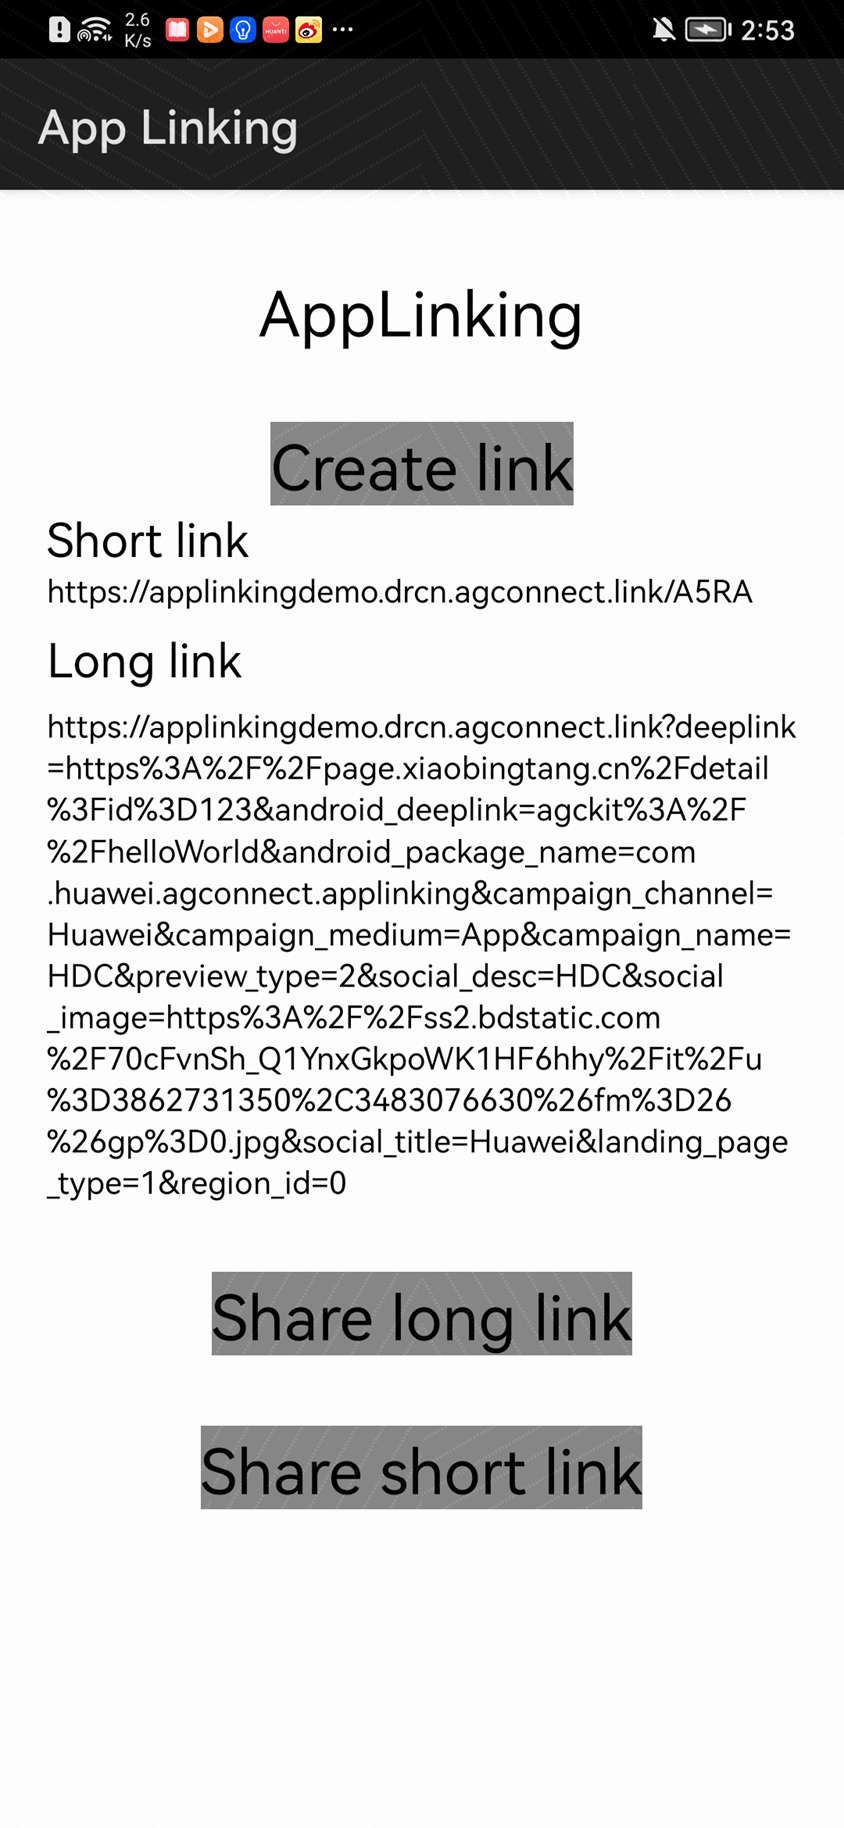
You can create a page in your DevEco Studio project and design the UI according to the following figure, with buttons to create and share links of App Linking.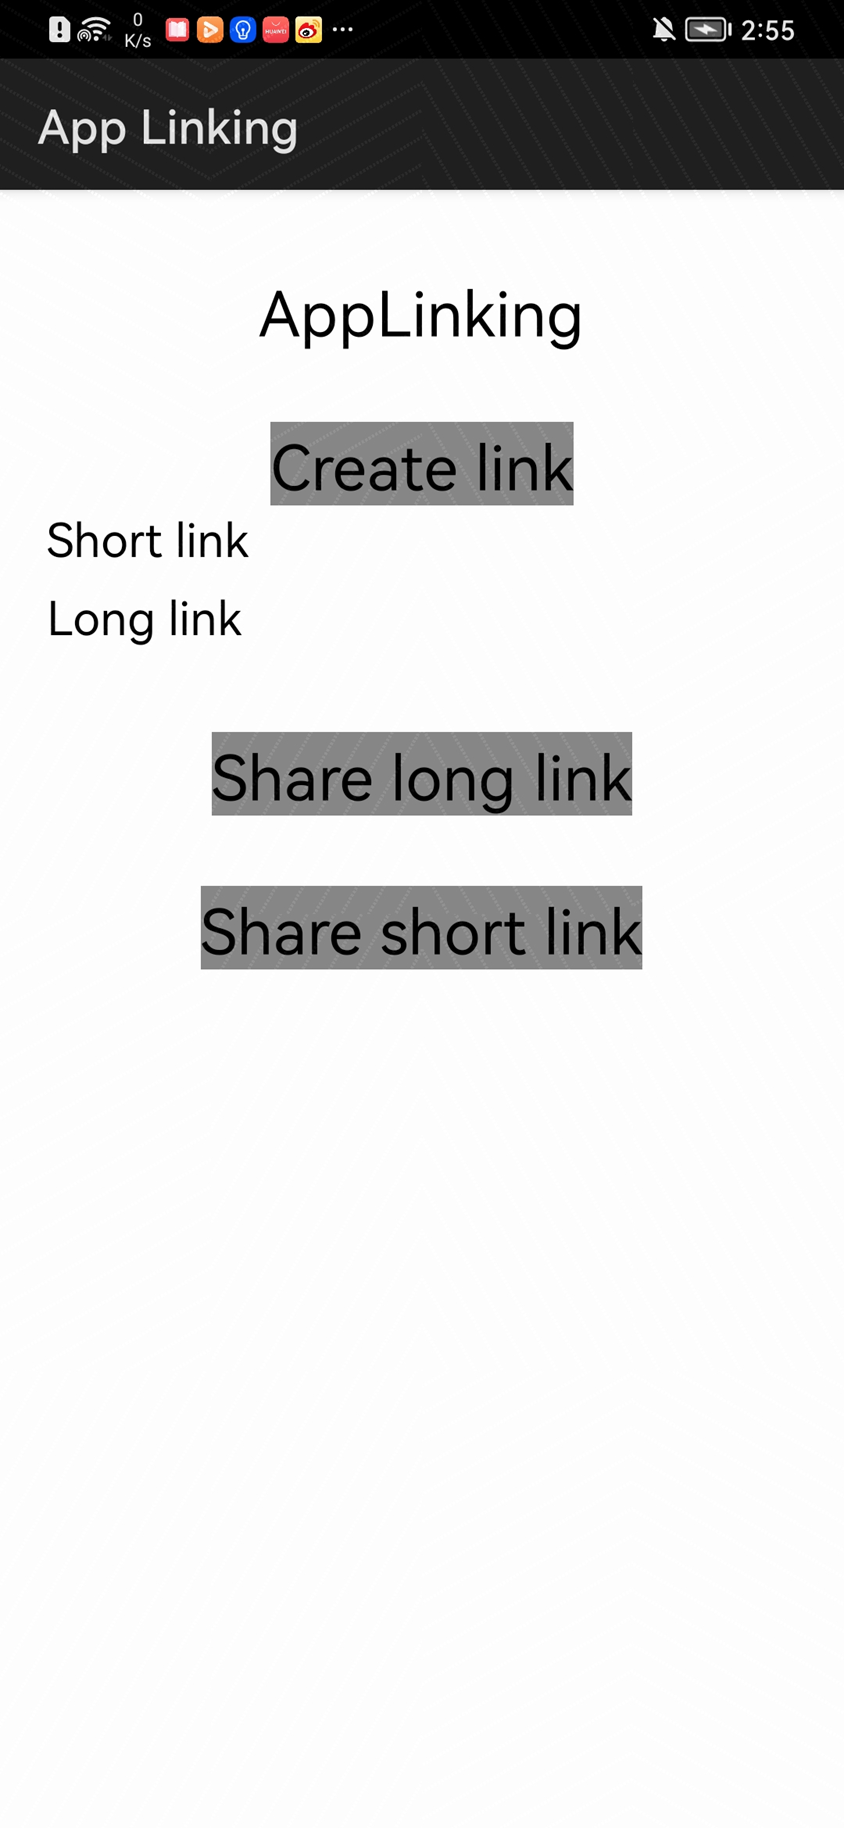
The sample code for the layout file is as follows:
<?xml version="1.0" encoding="utf-8"?>
<DirectionalLayout
        xmlns:ohos="http://schemas.huawei.com/res/ohos"
        ohos:height="match_parent"
        ohos:width="match_parent"
        ohos:alignment="top"
        ohos:orientation="vertical">

    <Text
            ohos:id="$+id:AppLinking"
            ohos:height="match_content"
            ohos:width="match_content"
            ohos:layout_alignment="horizontal_center"
            ohos:top_margin="100"
            ohos:text_size="80"
            ohos:left_margin="60"
            ohos:right_margin="60"
            ohos:multiple_lines="true"
            ohos:text="AppLinking"
    />

    <Button
            ohos:id="$+id:createButton"
            ohos:height="match_content"
            ohos:width="match_content"
            ohos:layout_alignment="horizontal_center"
            ohos:top_margin="30vp"
            ohos:text_size="80"
            ohos:background_element="$graphic:background_ability_main"
            ohos:text="Create link"
    />

    <Text
            ohos:height="match_content"
            ohos:width="match_content"
            ohos:left_margin="60"
            ohos:right_margin="60"
            ohos:multiple_lines="true"
            ohos:text_size="60"
            ohos:text="Short link"
    />

    <Text
            ohos:id="$+id:shortlink"
            ohos:height="match_content"
            ohos:width="match_content"
            ohos:left_margin="60"
            ohos:right_margin="60"
            ohos:multiple_lines="true"
            ohos:text_size="40"
    />

    <Text
            ohos:height="match_content"
            ohos:width="match_content"
            ohos:top_margin="20"
            ohos:left_margin="60"
            ohos:right_margin="60"
            ohos:multiple_lines="true"
            ohos:text_size="60"
            ohos:text="Long link"
    />

    <Text
            ohos:id="$+id:longlink"
            ohos:height="match_content"
            ohos:width="match_content"
            ohos:top_margin="20"
            ohos:left_margin="60"
            ohos:right_margin="60"
            ohos:multiple_lines="true"
            ohos:text_size="40"
    />

    <Button
            ohos:id="$+id:shareLongButton"
            ohos:height="match_content"
            ohos:width="match_content"
            ohos:top_margin="30vp"
            ohos:layout_alignment="horizontal_center"
            ohos:text_size="80"
            ohos:background_element="$graphic:background_ability_main"
            ohos:text="Share long link"
    />

    <Button
            ohos:id="$+id:shareShortButton"
            ohos:height="match_content"
            ohos:width="match_content"
            ohos:top_margin="30vp"
            ohos:layout_alignment="horizontal_center"
            ohos:text_size="80"
            ohos:background_element="$graphic:background_ability_main"
            ohos:text="Share short link"
    />
</DirectionalLayout>
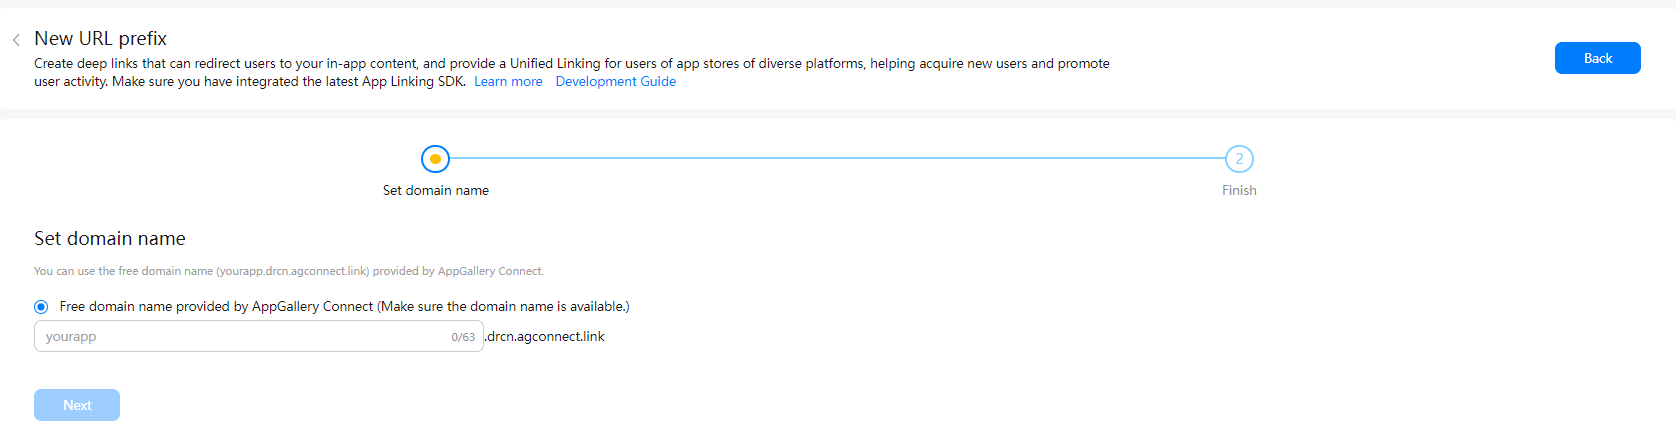
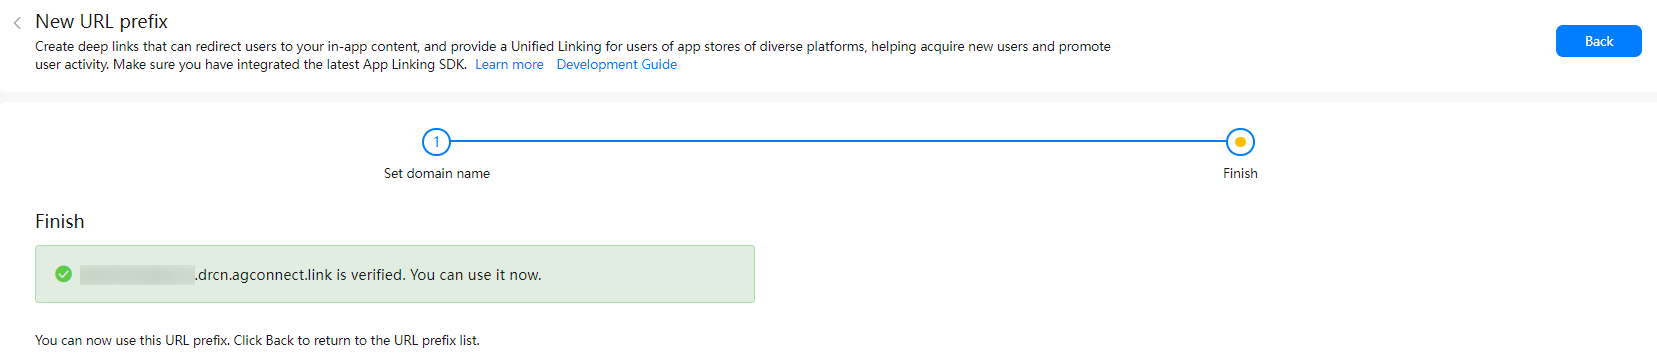
When creating links of App Linking in your app, you need to specify the URL prefix and deep link. In this codelab, the URL prefix and deep link have been configured.
import com.huawei.agconnect.applinking.AppLinking;
import com.huawei.agconnect.applinking.ResourceTable;
import ohos.aafwk.ability.AbilitySlice;
import ohos.aafwk.content.Intent;
import ohos.aafwk.content.Operation;
import ohos.agp.components.Button;
import ohos.agp.components.Component;
import ohos.agp.components.Text;
import ohos.hiviewdfx.HiLog;
import ohos.hiviewdfx.HiLogLabel;
import ohos.utils.net.Uri;
Button createButton = (Button) findComponentById(ResourceTable.Id_createButton);
Button shareLongButton = (Button) findComponentById(ResourceTable.Id_shareLongButton);
Button shareShortButton = (Button) findComponentById(ResourceTable.Id_shareShortButton);

createButton.setClickedListener(new Component.ClickedListener() {
           @Override
           public void onClick(Component component) {
               createLinking();
           }
});

shareLongButton.setClickedListener(new Component.ClickedListener() {
    @Override
    public void onClick(Component component) {
        shareLink(longLink.getText());
    }
});

shareShortButton.setClickedListener(new Component.ClickedListener() {
    @Override
    public void onClick(Component component) {
        shareLink(shortLink.getText());
    }
});
AGConnectAppLinking.getInstance();
public void createLinking(){
    AppLinking.Builder builder =
            AppLinking.newBuilder()
                    .setIsShowPreview(true)
                    .setUriPrefix(DOMAIN_URI_PREFIX)
                    .setDeepLink(Uri.parse(DEEP_LINK))
                    .setHarmonyLinkInfo(
                            AppLinking.HarmonyLinkInfo.newBuilder()
                                    .setHarmonyDeepLink("agckit://helloWorld")
                                    .build())
                    .setCampaignInfo(
                            AppLinking.CampaignInfo.newBuilder()
                                    .setName("HDC")
                                    .setSource("Huawei")
                                    .setMedium("App")
                                    .build())
                    // Display the preview page.
                    .setPreviewType(AppLinking.LinkingPreviewType.SocialInfo)
                    .setSocialCardInfo(
                            AppLinking.SocialCardInfo.newBuilder()
                                    .setDescription("HDC")
                                    .setTitle("Huawei")
                                    .setImageUrl("https://ss2.bdstatic.com/70cFvnSh_Q1YnxGkpoWK1HF6hhy/it/u=3862731350,3483076630&fm=26&gp=0.jpg")
                                    .build());
    LongUri = builder.buildAppLinking().getUri().toString();
    longLink.setText(LongUri);
    HiLog.info(hiLogLabel,"this is LongUri: " + LongUri);

    builder.buildShortAppLinking().addOnSuccessListener(shortAppLinking ->
    {
        ShortUri = shortAppLinking.getShortUrl().toString();
        shortLink.setText(ShortUri);
        HiLog.info(hiLogLabel,"this is ShortLink: " + ShortUri);
    }).addOnFailureListener(e -> {

    });
}
public void shareLink(String appLinking){
    if (appLinking != null) {
        Intent intent = new Intent();
        Operation operation = new Intent.OperationBuilder().withUri(Uri.parse(appLinking)).build();
        intent.setOperation(operation);
        startAbility(intent);
    }
}
"skills": [
  {
	"entities": [
	  "entity.system.home",
	  "android.intent.action.VIEW"
	],
	"actions": [
	  "action.system.home",
	  "entity.system.default",
	  "entity.system.browsable"
	],
	"uris": [
	  {
		"scheme": "agckit",
		"host": "www.example.com"
	  }
	]
  }
]
AGConnectAppLinking.getInstance()
            .getAppLinking(getAbility())
            .addOnSuccessListener(
                    resolvedLinkData -> {
                        if(resolvedLinkData != null){
                            StringBuilder stringBuffer = new StringBuilder();
                            if(resolvedLinkData.getDeepLink() != null){
                                stringBuffer.append(resolvedLinkData.getDeepLink().toString());
                                // Redirect to the actual page after parsing the deep link.
                                Intent intents = new Intent();
                                intents.setUri(Uri.parse(resolvedLinkData.getDeepLink().toString()));
                                startAbility(intents);
                            }
                        }
                    })
            .addOnFailureListener(
                    e -> {
                        AGCLogger.e("ApplinkingAbilitySlice", "getAppLinking:onFailure", e);
                    });
Well done. You have successfully built an app that integrates App Linking of AppGallery Connect and learned how to: