HUAWEI Camera Engine provides developers with a set of EMUI-compatible camera capability APIs. Developers can use the HUAWEI Camera Engine to quickly integrate capabilities of Huawei cameras to their apps to extend the app's shooting functions and provide better shooting experience for users.
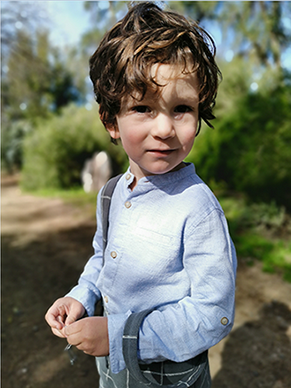
Portrait mode is one of the camera modes available in HUAWEI Camera Engine. It allows you to:
In this Codelab, you will use the HUAWEI Camera Engine to build an Android camera app that can use the portrait shooting function of the Huawei system camera, and implement portrait blurring and beautification effects.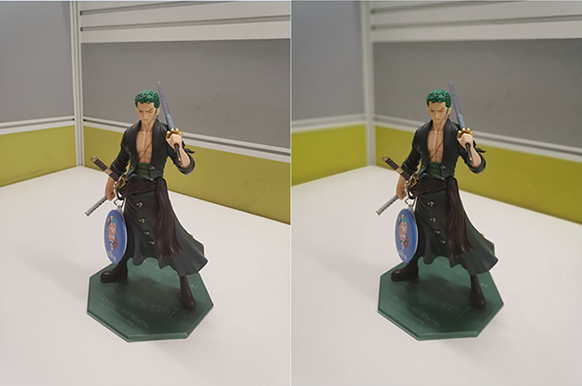
Default mode (left) VS Portrait mode (right)
Hardware Requirements
Software Requirements
1.Add the following permissions to the Manifest file of your project:
<uses-permission android:name="android.permission.CAMERA"/>
<uses-permission android:name="android.permission.RECORD_AUDIO"/>
<uses-permission android:name="android.permission.WRITE_EXTERNAL_STORAGE"/>
2.Dynamically request permissions:
private static final String[] PERMISSIONS_ARRAY = new String[] {Manifest.permission.WRITE_EXTERNAL_STORAGE,
Manifest.permission.CAMERA, Manifest.permission.RECORD_AUDIO, Manifest.permission.ACCESS_FINE_LOCATION};
private static List<String> permissionsList = new ArrayList<>(PERMISSIONS_ARRAY.length);
/**
* Dynamically request the WRITE_EXTERNAL_STORAGE CAMERA RECORD_AUDIO permission.
*
* @param activity App activity
 */
public static void requestPermission(final Activity activity) {
        for (String permission : PERMISSIONS_ARRAY) {

if (ContextCompat.checkSelfPermission(activity, permission) != PackageManager.PERMISSION_GRANTED) {

        permissionsList.add(permission);

}
        }
        ActivityCompat.requestPermissions(activity,

permissionsList.toArray(new String[permissionsList.size()]),REQUEST_CODE_ASK_PERMISSIONS);
}
You can quickly obtain the sample code and add it to the project by using the function cards provided by the IDE. Take portrait mode as an example. Find the Portrait mode capability card by going to EMUI > Kit Assistant > Media > CameraEngine > Portrait Mode.
Find the Camera Enginecard.
private @Mode.Type int mCurrentModeType;
private CameraKit mCameraKit;
private ModeCharacteristics mModeCharacteristics;

private void createMode() {
        mCameraKit = CameraKit.getInstance(getApplicationContext());
        if (mCameraKit == null) {

Log.e(TAG, "This device does not support CameraKit!");
        }
        /** Query camera id list*/
        String[] cameraLists = mCameraKit.getCameraIdList();
        if ((cameraLists != null) && (cameraLists.length > 0)) {

Log.i(TAG, "Try to use camera with id " + cameraLists[0]);

/** Query supported modes of this device*/

int[] modes = mCameraKit.getSupportedModes(cameraLists[0]);

if (!Arrays.stream(modes).anyMatch((i) -> i == mCurrentModeType)) {

        Log.w(TAG, "Current mode is not supported in this device!");

        return;

}

mCameraKit.createMode(cameraLists[0], mCurrentModeType, mModeStateCallback, mCameraKitHandler);
        }
}
The portrait mode instance can be obtained from the input parameter after onCreated in mModeStateCallback is called back.
/**Obtain the mode object from the onCreated callback. Initialize ModeConfig.Builder by using the behavior status callback, data callback, and corresponding thread as input parameters. Configure the preview surface and photo size, and set the configuration item to mMode by running the configure command to activate the mode.*/
private void configMode() {
        Log.i(TAG, "configMode begin");
        /** Query supported preview size*/
        List<Size> previewSizes = mModeCharacteristics.getSupportedPreviewSizes(SurfaceTexture.class);
        /** Query supported capture size*/
        List<Size> captureSizes = mModeCharacteristics.getSupportedCaptureSizes(ImageFormat.JPEG);
        Log.d(TAG, "configMode: captureSizes = " + captureSizes.size() + ";previewSizes=" + previewSizes.size());
        /** Use the first one or default 4000x3000*/
        mCaptureSize = captureSizes.stream().findFirst().orElse(new Size(4000, 3000));
        /** Use the same ratio with preview*/
        mPreviewSize = previewSizes.stream().filter((size) -> Math.abs((1.0f * size.getHeight() / size.getWidth()) - (1.0f * mCaptureSize.getHeight() / mCaptureSize.getWidth())) < 0.01).findFirst().get();
        Log.i(TAG, "configMode: mCaptureSize = " + mCaptureSize + ";mPreviewSize=" + mPreviewSize);
        /** Update view*/
        runOnUiThread(() -> mTextureView.setAspectRatio(mPreviewSize.getHeight(), mPreviewSize.getWidth()));
        SurfaceTexture texture = mTextureView.getSurfaceTexture();
        if (texture == null) {
        Log.e(TAG, "configMode: texture=null!");
        return;
        }
        /** Set buffer size of view*/
        texture.setDefaultBufferSize(mPreviewSize.getWidth(), mPreviewSize.getHeight());
        /** Get surface of texture*/
        Surface surface = new Surface(texture);
        /** Add preview and capture parameters to config builder*/
        modeConfigBuilder.addPreviewSurface(surface).addCaptureImage(mCaptureSize, ImageFormat.JPEG);
        /** Set callback for config builder*/
        modeConfigBuilder.setDataCallback(actionDataCallback, mCameraKitHandler);
        modeConfigBuilder.setStateCallback(actionStateCallback, mCameraKitHandler);
        /** Configure mode*/
        mMode.configure();
        Log.i(TAG, "configMode end");
}
Use ModeConfig.Builder to configure the status callback and data callback of the mode and the handler where the callback is executed. From the status callback, you can obtain information such as the status change after the preview function is enabled, shooting end status, manual focus end status, and face detection result. From the data callback, you can obtain the data results (such as the image data) generated during mode action execution. You can also configure the preview surface and shooting resolution using ModeConfig.Builder.
/* After the onConfigured callback is received, the mode is successfully configured and enabled. In this case, run the startPreview command to enable the preview function. */
private void startPreview() {
    mMode.startPreview();
}
/*You can use ModeCharacteristics#getSupportedParameters to query the parameters supported in the current mode (for example, background blurring and beautification). You can use ModeCharacteristics#getParameterRange to query the value range supported by parameters and use Mode#setParameter to set the corresponding effect. */
/* Set background blurring effect. */
mMode.setParameter(RequestKey.HW_PORTRAIT_SPOTS_BOKEH, validValue);
/* Set beautification mode: smooth skin. */
int[] smoothLevels = modeCharacteristics.getSupportedBeauty(Metadata.BeautyType.HW_BEAUTY_SKIN_SMOOTH);
if (smoothLevels != null && smoothLevels.length != 0) {
    mMode.setBeauty(Metadata.BeautyType.HW_BEAUTY_SKIN_SMOOTH, smoothLevels[smoothLevels.length - 1]);
}
/* Users can call takePicture, such as by touching a configured button, to take photos. The onImageAvailable callback is used asynchronously to return the image data. */
mMode.takePicture();
/* Take the data callback as an example. Obtain the image from the callback after shooting. */
private final ActionDataCallback actionDataCallback = new ActionDataCallback() {
    @Override
    public void onImageAvailable(Mode mode, int id, Image image) {
        super.onImageAvailable(mode, id, image);
        Log.d(TAG, "onImageAvailable");
        new ImageSaver(image, mFile, CameraKitActivity.this).run();
    }
};
/*Release the resource when the app is switched to the background.*/
@Override
protected void onPause() {
    if (mBackgroundHandler != null) {
        mBackgroundHandler.post(new Runnable() {
            @Override
            public void run() {
                if (mMode != null) {
                    mMode.release();
                    mMode = null;
                }
            }
        });
    }
    super.onPause();
}
You have successfully completed this Codelab and learned to:
For more information about HUAWEI Camera Engine, visit the following website: