Cloud Storage is scalable and maintenance-free. By integrating the Cloud Storage SDK, you can store high volumes of data such as images, audios, and videos generated by your users to the cloud or download these data from the cloud.
In this codelab, you will build an app that integrates Cloud Storage capabilities. Your app will allow users to upload a file to the cloud and download it to a local path by calling APIs.
To integrate Cloud Storage of AppGallery Connect, you must complete the following preparations:
For details, please refer to Configuring App Information in AppGallery Connect.
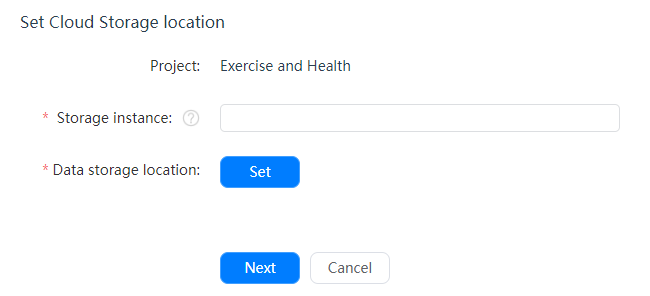
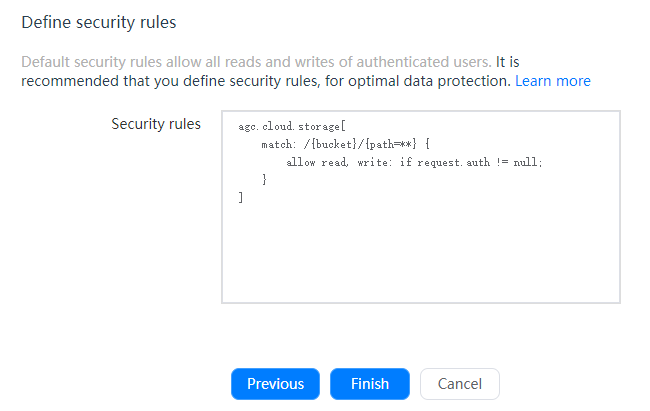
Before integrating the Cloud Storage SDK, you need to enable Cloud Storage in AppGallery Connect.
If you are using Node.js, you need to integrate the Cloud Storage SDK into your Node.js project before development.
"dependencies": {
"@agconnect/cloudstorage-server": "1.0.0"
}
npm install
Before calling the Cloud Storage SDK, import the authentication credential to the SDK.
const {AGCClient, CredentialParser} = require('@agconnect/common-server');
const {StorageManagement} = require('@agconnect/cloudstorage-server');
const credential = CredentialParser.toCredential(' [PATH]/agc-apiclient-xxx-xxx.json');
AGCClient.initialize(credential);
You can call related APIs of the Cloud Storage SDK to develop functions.
Before using Cloud Storage APIs, you need to initialize the cloud storage instance, storage instance, and file instance as required. You can obtain the storage instance name from the storage instance box on the Project settings > Build > Cloud Storage page of AppGallery Connect. The testFile.txt file in the code is only an example. Replace it with the actual storage instance name and file name.
const storage = new StorageManagement();
const bucket = storage.bucket('test-bucket');
const file = bucket.file('testFile.txt');
Call the uploadFile() method to upload the file to the cloud.
function uploadFile() {
  const storage = new StorageManagement();
  const bucket = storage.bucket(bucketName);

  bucket.upload('./test.txt').then(res =>  console.log(res)).catch(err => console.log(err));
}
(The test.txt file to be uploaded is configured in the project code.)
Call the downloadFile() method to download the file just uploaded from the cloud server to a local path. The file is saved in the upload path specified by localFile.
const fs = require('fs');
function downloadFile() {
  const storage = new StorageManagement();
  const bucket = storage.bucket(bucketName);
  const remoteFile = bucket.file('test.txt');
  const localFile = './test.txt';

  remoteFile.createReadStream()
    .on('error', err => {
    })
    .on('end', () => {
    })
    .pipe(fs.createWriteStream(localFile))
}
function getFileMetadata() {
const storage = new StorageManagement();
const bucket = storage.bucket(bucketName);
const file = bucket.file('test.txt');
file.getMetadata().then(res => {
console.log(res);
}).catch(err => {
console.log(err);
})
}
function updateFileMetadata() {
const storage = new StorageManagement();
const bucket = storage.bucket(bucketName);
const file = bucket.file('test.txt');

const metadata = {
contentLanguage: 'en-US',
customMetadata: {
  test: 'test'
}
};

file.setMetadata(metadata).then(res => {
console.log(res);
}).catch(err => {
console.log(err);
})
}
Call the getFileList() method to obtain the file list from the cloud server.
function getFileList() {
  const storage = new StorageManagement();
  const bucket = storage.bucket(bucketName);

  bucket.getFiles({delimiter: '/'}).then(res => {
    console.log(res);
  }).catch(err => {
    console.log(err);
  })
}
Call the deleteFile() method to delete the uploaded file from the cloud server.
function deleteFile() {
  const storage = new StorageManagement();
  const bucket = storage.bucket(bucketName);
  const file = bucket.file('test.txt');
  file.delete().then(res => {
  }).catch(err => {
  })
}
You can uncomment related methods in the demo to call them.
function deleteFile() {
  const storage = new StorageManagement();
  const bucket = storage.bucket(bucketName);
  const file = bucket.file('test.txt');
  file.delete().then(res => {
  }).catch(err => {
  })
}
Run the following command in the project directory to test the demo:
node cloudstorage.js
If the file metadata logs are displayed on the console, the file is successfully uploaded.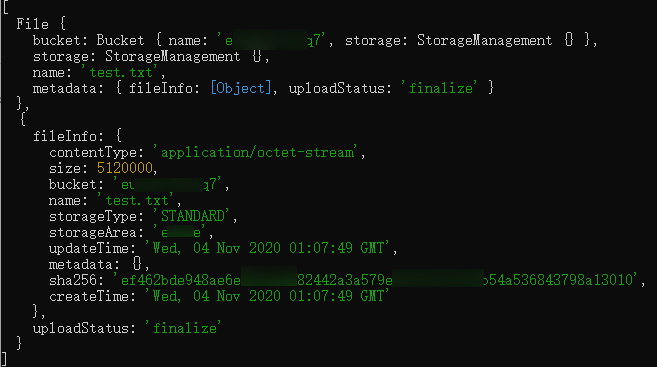
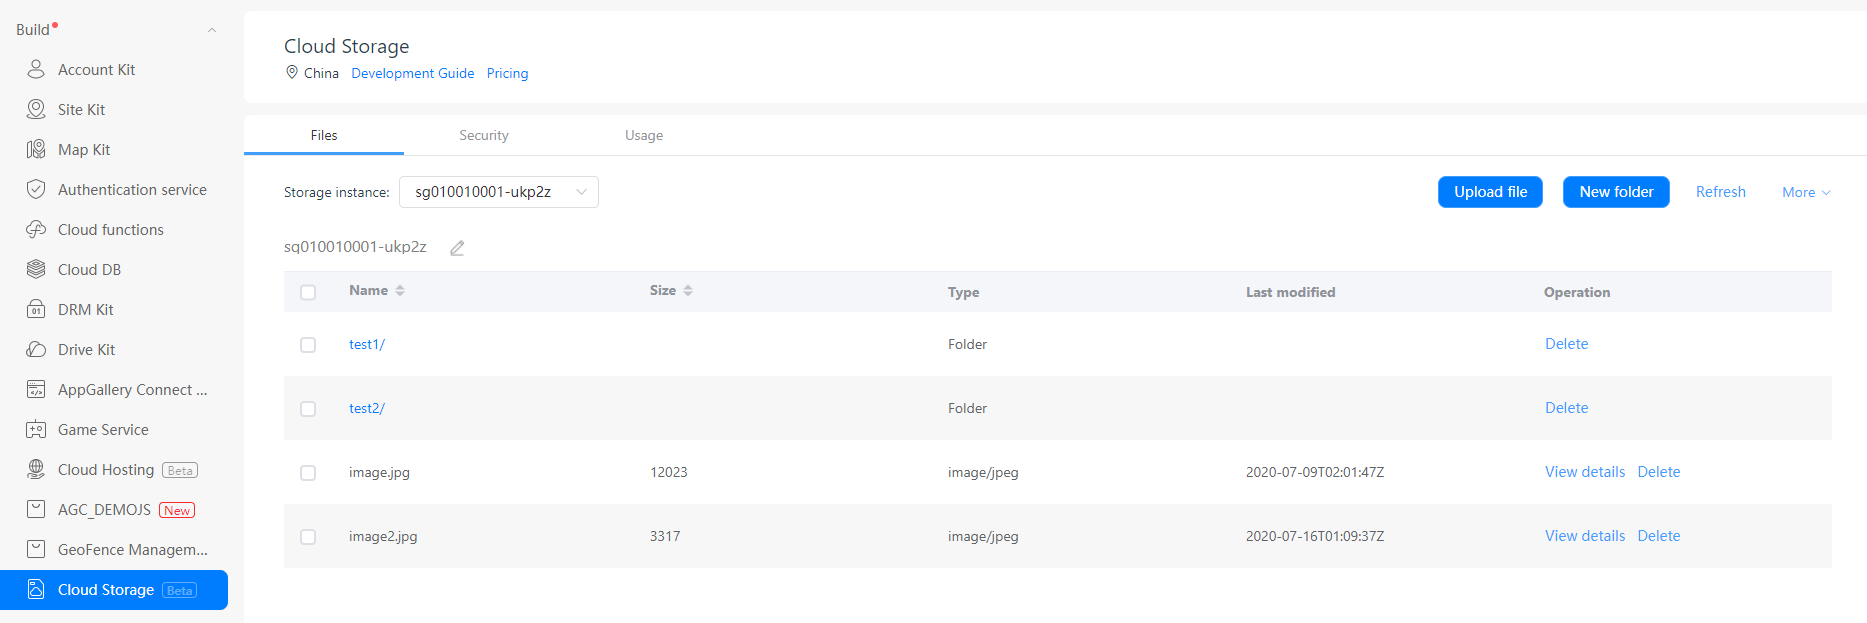
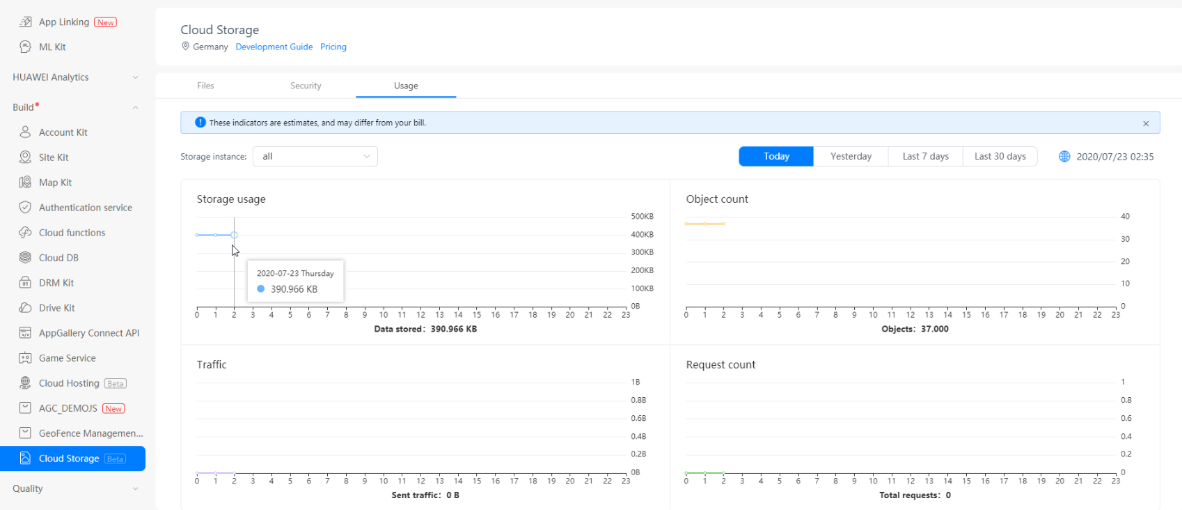
Cloud Storage of AppGallery Connect provides visualized file management and data analysis functions.
Well done. You have successfully built an app that integrates Cloud Storage of AppGallery Connect and learned how to manage Cloud Storage usage in AppGallery Connect.
For details about APIs related to Cloud Storage of AppGallery Connect, please refer to API Reference.
To download the sample code, please click the button below: