Analytics Kit predefines rich analysis models to help you easily understand user behavior and gain in-depth insights into users, products, and content. As such, you can carry out data-driven operations and make informed decisions about app marketing and product optimization.
Analytics Kit implements the following functions using data collected from apps:
In this codelab, you will create a demo app based on the provided demo project. After creating a demo app, you will be able to:
In this codelab, you will learn how to:
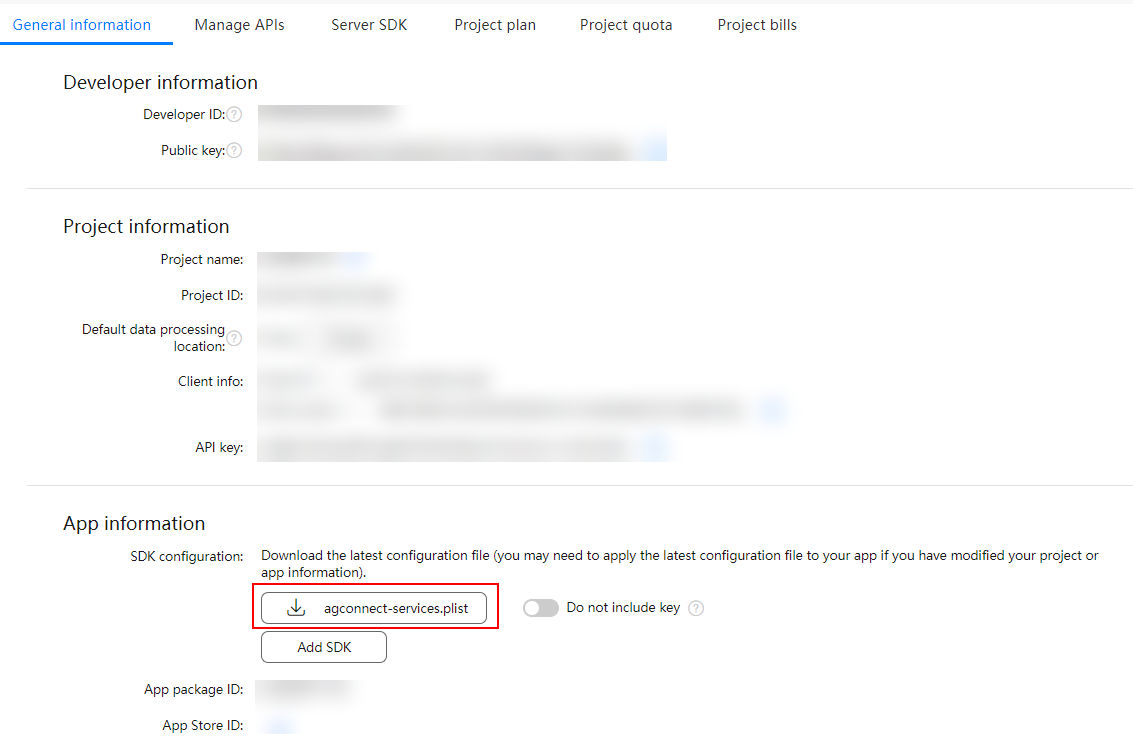
To integrate Analytics Kit, you must complete the following preparations:
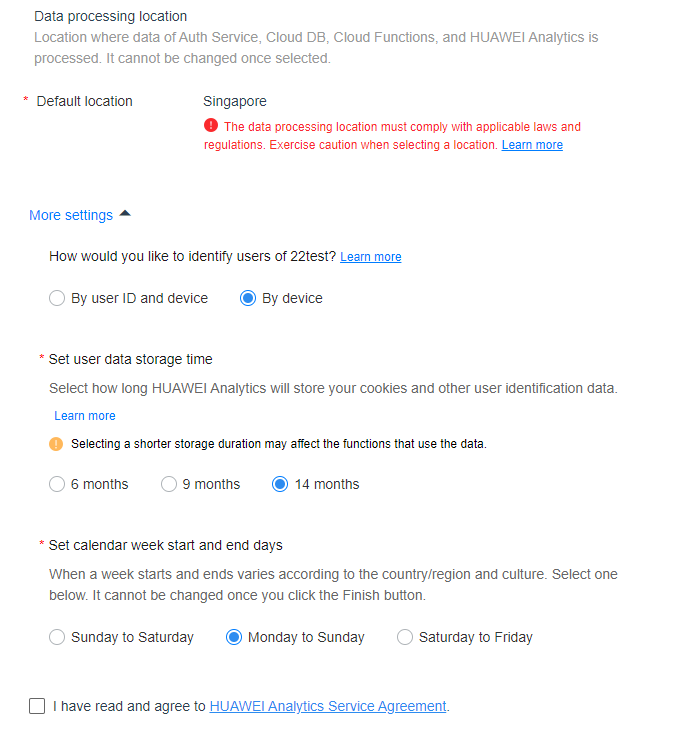
Select any menu under HUAWEI Analytics and click Enable Analytics service. (You must have the app management permission to perform this operation.)
Integrate the Analytics SDK in CocoaPods mode.
target 'hmsAnalyticsKitDemo' do
  # Pods for hmsAnalyticsKitDemo
   pod 'HiAnalytics'
  end
end
$ pod install
In this section, you will try to build a demo with the question answering function to learn how to use the main APIs of Analytics Kit. We have prepared the code for you, meaning you only need to follow the instructions in each step below to learn how to use Analytics Kit to report the events you are interested in, such as answering questions, calculating scores, and setting user attributes.
Import the HiAnalytics class to the PrefixHeader.pch class.
#ifndef PrefixHeader_pch
#define PrefixHeader_pch

// Include any system framework and library headers here that should be included in all compilation units.
// You will also need to set the Prefix Header build setting of one or more of your targets to reference this file.

#import <HiAnalytics/HiAnalytics.h>
#import "HToast.h"

#endif /* PrefixHeader_pch */
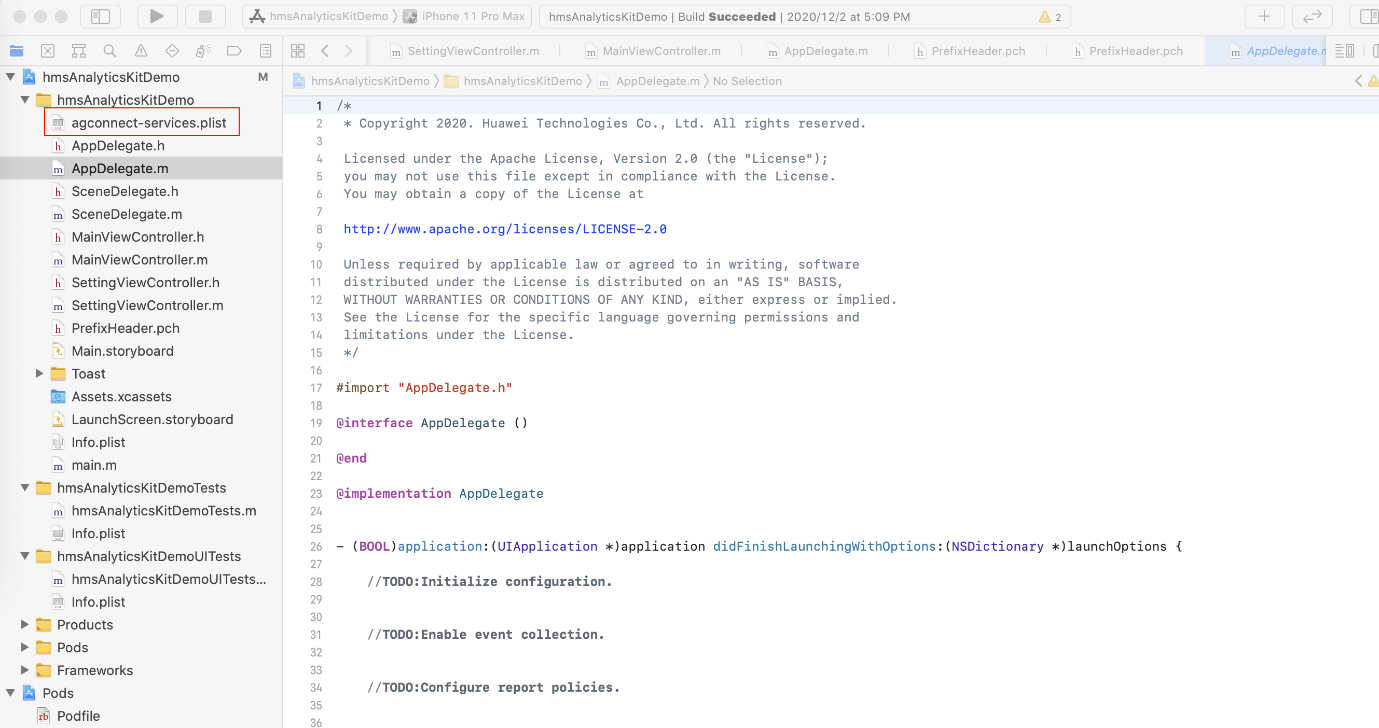
Add the following code to initialize Analytics Kit:
- (BOOL)application:(UIApplication *)application didFinishLaunchingWithOptions:(NSDictionary *)launchOptions {

    // TODO: Initialize the configuration.
    [HiAnalytics config];

    // TODO: Enable event collection.
    [HiAnalytics setAnalyticsEnabled:YES];

    // TODO: Configure reporting policies.
    [HiAnalytics setReportPolicies:@[[HAReportPolicy onMoveBackgroundPolicy],[HAReportPolicy onCacheThresholdPolicy:200]]];

    return YES;
}
- (void)reportAnswerEvt:(NSString *)answer {
    // TODO: Report a custom event.
    // Event name: Answer
    // Event parameters:
    //  -- question: String
    //  -- answer: String
    //  -- answerTime: String

    NSDateFormatter *dateFormat=[[NSDateFormatter alloc]init];
    [dateFormat setDateFormat:@"yyyy-MM-dd HH:mm:ss"];
    NSString *answerTime=[dateFormat stringFromDate:[NSDate date]];

    NSDictionary *parms = @{@"question":self.questionsArray[self.curQuqestionIndex],
                            @"answer":answer,
                            @"answerTime":answerTime};
    // Report a custom event.
    [HiAnalytics onEvent:@"Answer" setParams:parms];
}
- (IBAction)postScoreBtnClick:(UIButton *)sender {
    // TODO: Report a score through the kHAEventSubmitScore event.
    NSDictionary *parms = @{kHAParamScore:[NSNumber numberWithInteger:self.score]};
    // Report a predefined event.
    [HiAnalytics onEvent:kHAEventSubmitScore setParams:parms];
    [HToast showMessage:@"Post score success."];
}
- (IBAction)saveBtnClick:(UIButton *)sender {
    [self.textField resignFirstResponder];
    if (self.textField.text.length<=0) {
        [HToast showMessage:@"Please enter your favorite sport."];
        return;
    }

    // TODO: Set users' favorite sport using the setUserProfile API.
    [HiAnalytics setUserProfile:@"favor_sport" setValue:self.textField.text];
    [HToast showMessage:@"Set user profile success."];
}
- (IBAction)clearCacheBtnClick:(UIButton *)sender {
    // TODO: Clear cached data.
    [HiAnalytics clearCachedData];
    [HToast showMessage:@"Clear cache success."];
}
For details about APIs, please refer to the Analytics Kit API Reference.
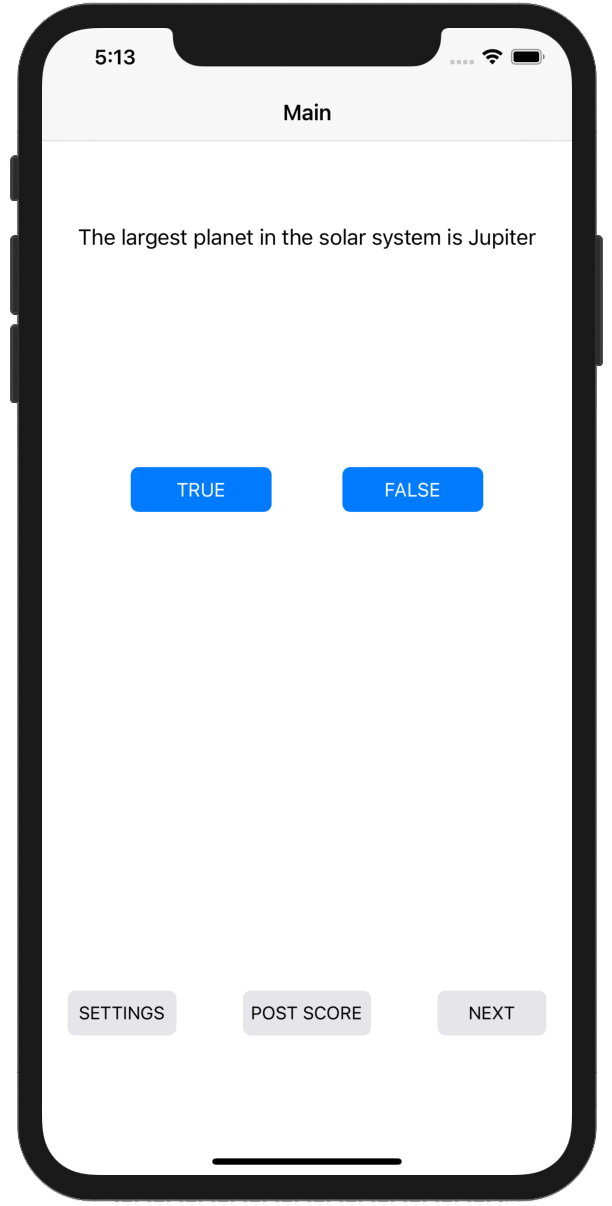
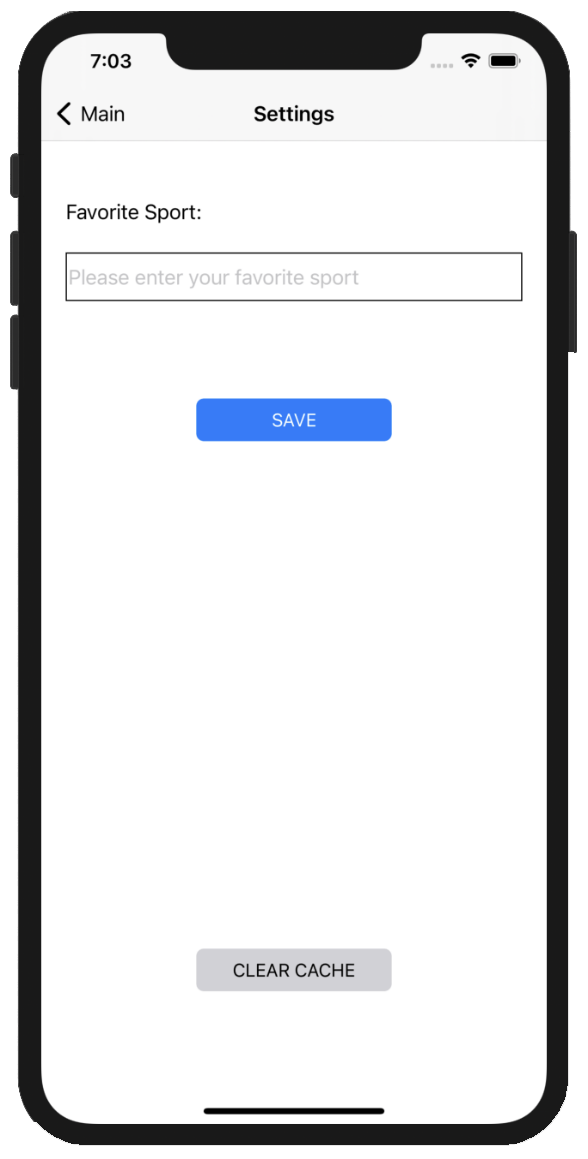
This demo provides an example of integrating Analytics Kit into an app. It provides two screens, one for question answering and one for user attribute setting, to demonstrate how to collect predefined and custom events.
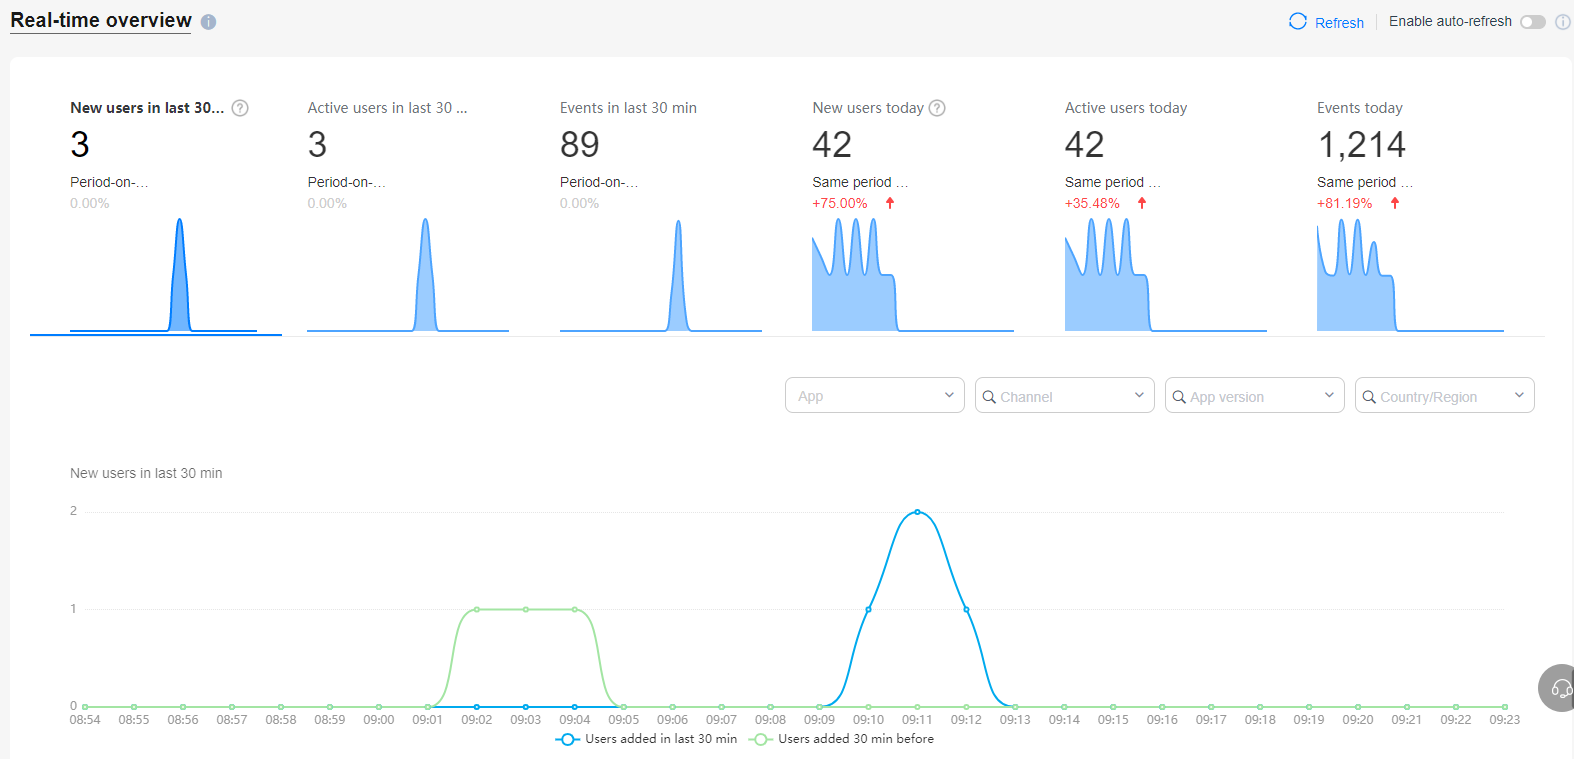
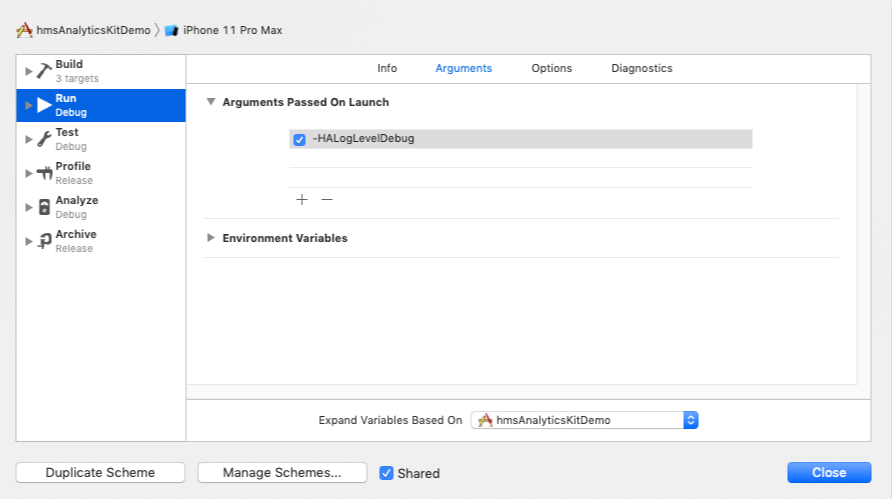
During the development, you can use DebugView to view the event records in real time, observe the results, and adjust the event reporting policies.
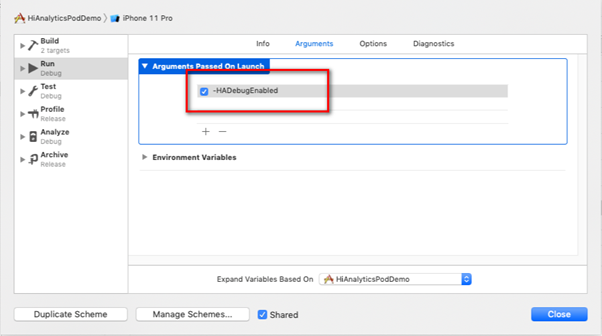
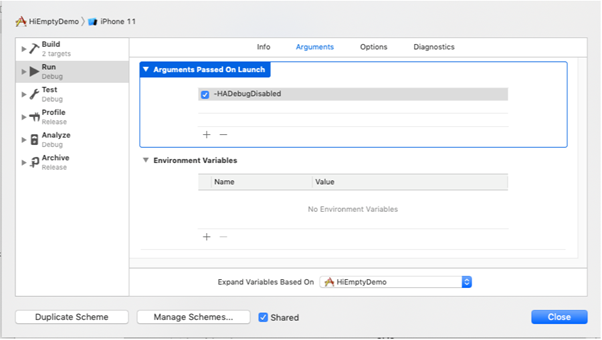
The debug mode remains enabled until you disable it by setting the -HADebugDisabled argument.
Successfully reported data is displayed in AppGallery Connect in real time, as shown in the following figure.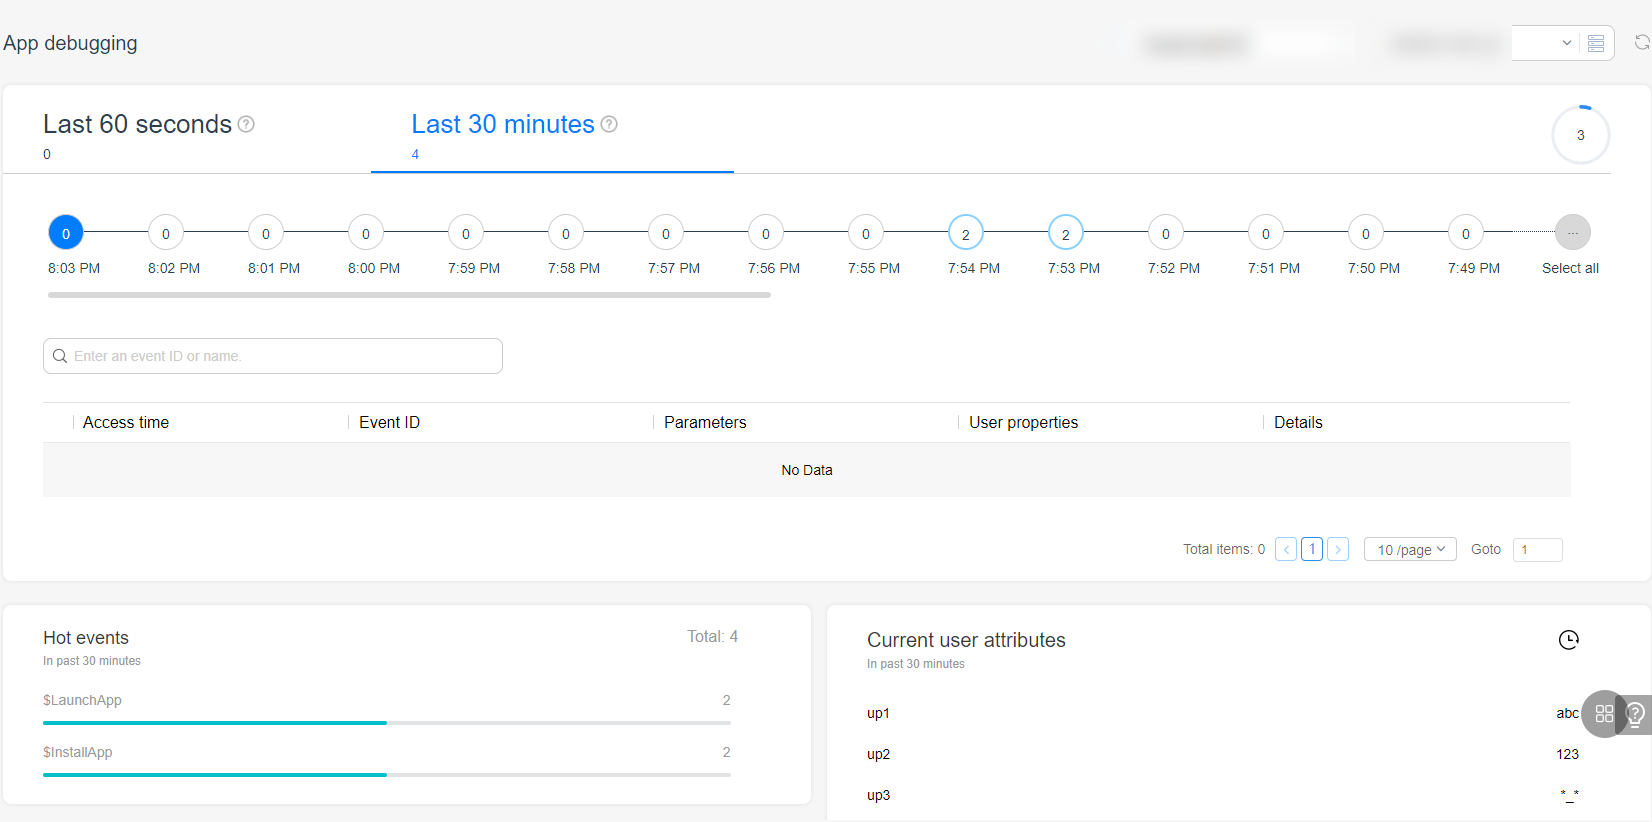
Initialize Analytics Kit in the main thread by using the application:didFinishLaunchingWithOptions method in the AppDelegate.m file. Otherwise, the processing of automatically collected lifecycle events may be affected.
Analytics Kit identifies users through an Anonymous Application ID (AAID).
The AAID will be reset in the following scenarios:
Network access permissions are required for Analytics Kit to report data to AppGallery Connect. The Kit inherits the permissions from the app. That is, you do not need to set network permissions for the Kit separately.
Well done. You have successfully completed this codelab and learned how to:
For more information, please click the following link:
Related documents
To download the sample code, please click the button below: