HUAWEI FIDO2 provides your app with FIDO2 based on the WebAuthn standard. It provides Android Java APIs for apps and browsers, and allows users to complete authentication through roaming authenticators (USB, NFC, and Bluetooth authenticators) and platform authenticators (fingerprint and 3D face authenticators).
In this codelab, you will use the demo project that has been created for you to call HUAWEI FIDO2 client APIs. Through the demo project, you will:
In this codelab, you will learn how to:
To integrate FIDO2 client, you must complete the following preparations:
Sign in to AppGallery Connect, click My projects, find your project, and click your desired app. Then, go to Project settings > Manage APIs. 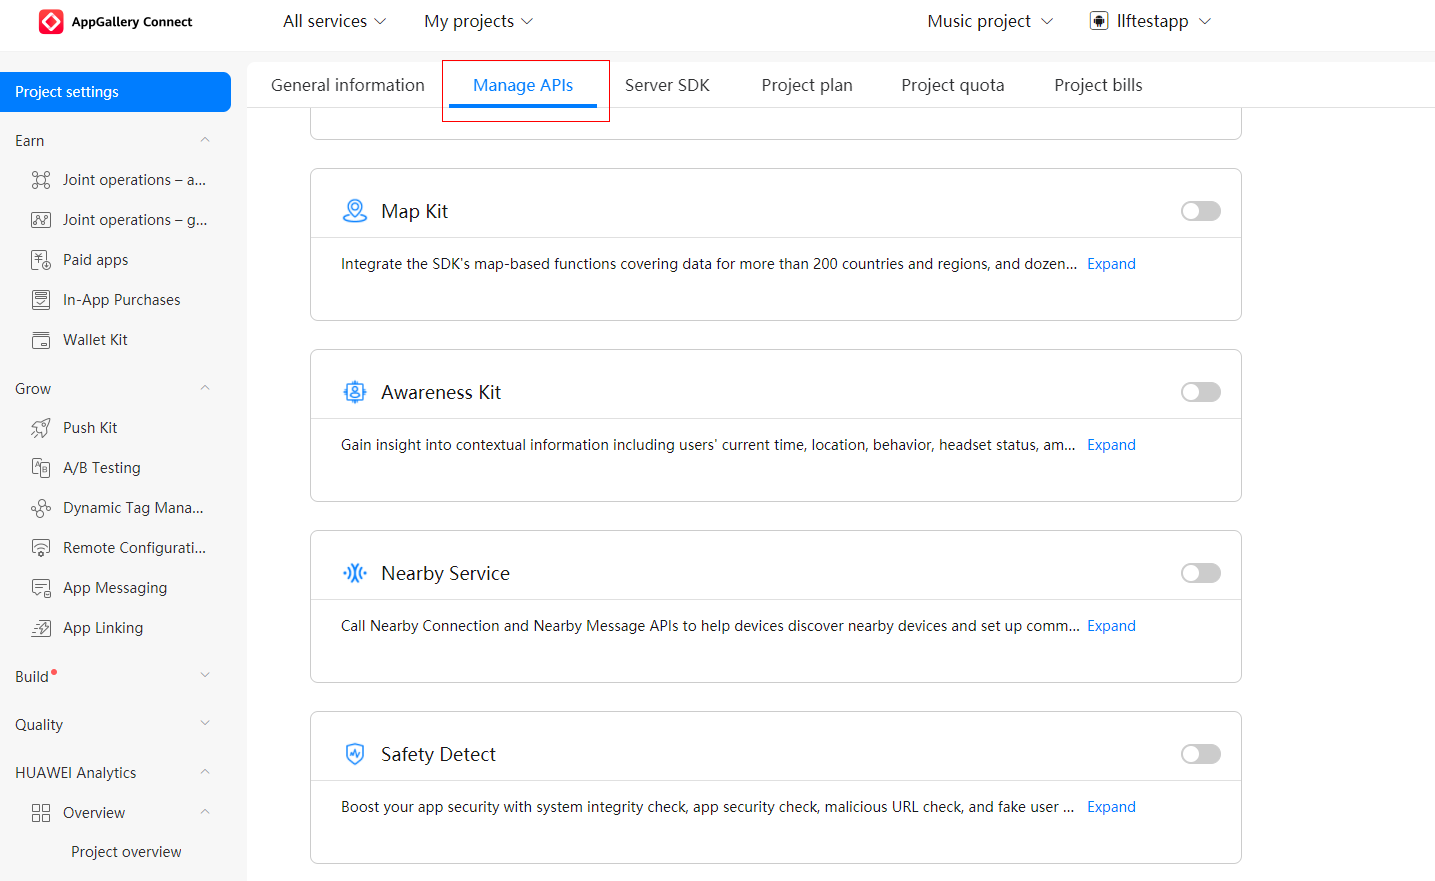
Toggle on the FIDO switch. 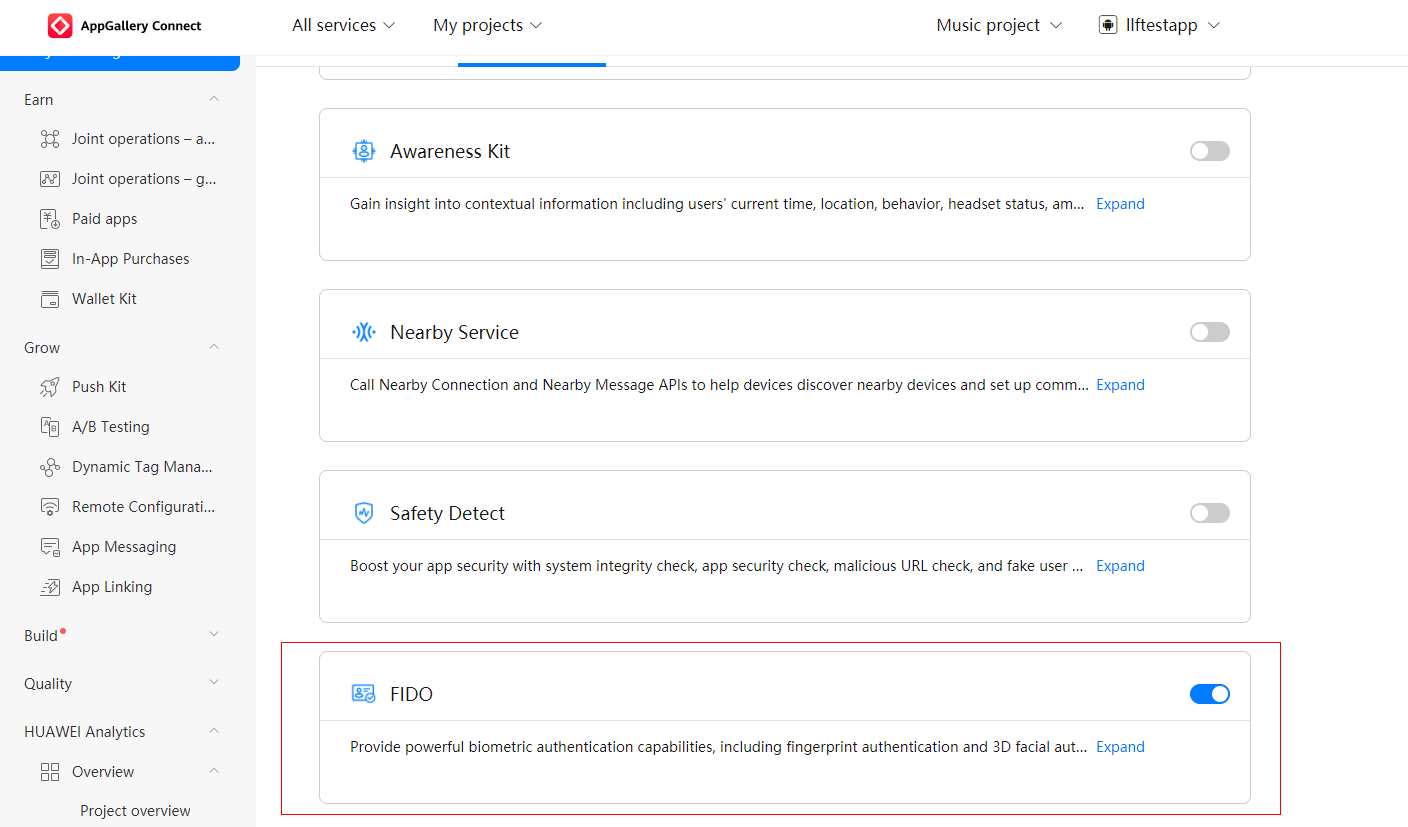
If you are using Android Studio, you can integrate the HMS Core SDK via the Maven repository. Before you start developing an app, integrate the HMS Core SDK into your Android Studio project.
If you have enabled certain services in AppGallery Connect, add the agconnect-services.json file to your app.
步骤 1 - Sign in to AppGallery Connect and click My projects.
步骤 2 - Find your app project and click the app that needs to integrate the HMS Core SDK.
步骤 3 - Go to Project settings > General information. In the App information area, download the agconnect-services.json file.
步骤 4 - Copy the agconnect-services.json file to your app's root directory.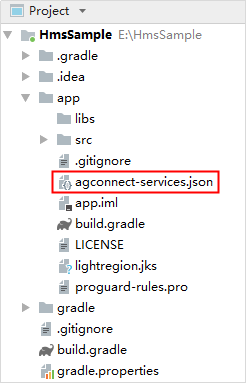
—-End
步骤 1 - Open the build.gradle file in the root directory of your Android Studio project.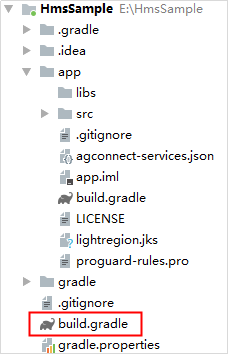
步骤 2 - Add the AppGallery Connect plugin and the Maven repository.
buildscript {
    repositories {
        google()
        jcenter()
        // Configure the Maven repository address for the HMS Core SDK.
        maven {url 'https://developer.huawei.com/repo/'}
    }
    dependencies {
        ...
        // Add the AppGallery Connect plugin configuration. You are advised to use the latest plugin version.
        classpath 'com.huawei.agconnect:agcp:1.6.0.300'
    }
}

allprojects {
    repositories {
        google()
        jcenter()
        // Configure the Maven repository address for the HMS Core SDK.
        maven {url 'https://developer.huawei.com/repo/'}
    }
}
In Gradle 7.0 or later, configuration under allprojects > repositories is migrated to the project-level settings.gradle file.
The following is a configuration example of the settings.gradle file:
dependencyResolutionManagement {
    ...
    repositories {
        google()
        jcenter()
        maven {url 'https://developer.huawei.com/repo/'}
    }
}
—-End
步骤 1 - Open the app-level build.gradle file of your project.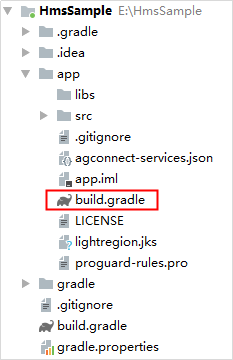
步骤 2 - Add the AppGallery Connect plugin configuration in either of the following methods:
apply plugin: 'com.huawei.agconnect'
plugins {
    id 'com.android.application'
    // Add the following configuration:
    id 'com.huawei.agconnect'
}
步骤 3 - Add build dependencies. (Do not add dependencies on both BioAuthn-AndroidX and BioAuthn.)
dependencies {
    implementation 'com.huawei.hms:fido-fido2:{version}'
}
dependencies {
    implementation 'com.huawei.hms:fido-bioauthn-androidx:{version}'
}
dependencies {
    implementation 'com.huawei.hms:fido-bioauthn:{version}'
}
—-End
android {
    defaultConfig {
        ...
        resConfigs "en", "zh-rCN", "Other languages supported by your app"
    }
}
For details about the languages supported by the HMS Core SDK, please refer to Languages Supported by the HMS Core SDK.
Open the modified build.gradle file again. Click Sync Now in the upper right corner and wait until synchronization is complete.
In the following scenario, configure metadata to prompt users to download HMS Core (APK):
The app store (such as HUAWEI AppGallery) allows your app to download other apps in the background, and you call relevant APIs through an activity.
In the following scenario, skip steps in this section. Currently, no way is available for prompting users to download HMS Core (APK).
The app store (such as Google Play) does not allow your app to download other apps in the background, or you call relevant APIs through a context.
Add the following code to the application element in the AndroidManifest.xml file, prompting users to download HMS Core (APK):
<application ...>
    <meta-data
        android:name="com.huawei.hms.client.channel.androidMarket"
        android:value="false" />
    ...
</application>
After HMS Core (APK) is downloaded, the HMS Core SDK will automatically install or update HMS Core (APK).
In Android 11, the way for an app to query other apps on the user device and interact with them has been changed. IftargetSdkVersionn is300 or later for your app, add the> element in themanifestt element inAndroidManifest.xmll to allow your app to access HMS Core (APK).
<manifest ...>
    ...
    <queries>
        <intent>
            <action android:name="com.huawei.hms.core.aidlservice" />
        </intent>
    </queries>
    ...
</manifest>
FIDO2 provides the WebAuthn-based FIDO2 client. This codelab only describes how to use FIDO2 client APIs. For details about operations related to the app server and FIDO server, please refer to related standards.
To integrate the FIDO2 client, perform the following steps:
Java
Fido2Client fido2Client = Fido2.getFido2Client(this);
Kotlin
Fido2Client fido2Client = Fido2.getFido2Client(this)
Java
// Obtain the challenge value and related policy from the FIDO server, and initiate a Fido2RegistrationRequest
// request.
ServerPublicKeyCredentialCreationOptionsResponse response = fidoServer.getAttestationOptions(request);
if (!ServerStatus.OK.equals(response.getStatus())) {
    Log.e(TAG, getString(R.string.reg_fail) + response.getErrorMessage());
    showError(getString(R.string.reg_fail) + response.getErrorMessage());
}
PublicKeyCredentialCreationOptions publicKeyCredentialCreationOptions =
        ServerUtils.convert2PublicKeyCredentialCreationOptions(fido2Client,response);
Kotlin
// Obtain the challenge value and related policy from the FIDO server, and initiate a Fido2RegistrationRequest
// request.
val response = fidoServer.getAttestationOptions(request)
if (ServerStatus.OK != response.status) {
    Log.e(TAG, getString(R.string.reg_fail) + response.errorMessage)
    showError(getString(R.string.reg_fail) + response.errorMessage)
}
val fido2ClientTmp = fido2Client;
if (fido2ClientTmp != null) {
    val publicKeyCredentialCreationOptions = ServerUtils.convert2PublicKeyCredentialCreationOptions(fido2ClientTmp, response)
    reg2Fido2Client(publicKeyCredentialCreationOptions)
}
Java
fido2Client.getRegistrationIntent(registrationRequest, registrationOptions, new Fido2IntentCallback() {
    @Override
    public void onSuccess(Fido2Intent fido2Intent) {
        fido2Intent.launchFido2Activity(Fido2DemoMainActivity.this, Fido2Client.REGISTRATION_REQUEST);
    }
    @Override
    public void onFailure(int errorCode, CharSequence errString) {
        showError(getString(R.string.reg_fail) + errorCode + "=" + errString);
    }
});
Kotlin
fido2Client!!.getRegistrationIntent(registrationRequest, registrationOptions, object : Fido2IntentCallback {
    override fun onSuccess(fido2Intent: Fido2Intent) {
        fido2Intent.launchFido2Activity(this@Fido2DemoMainActivity, Fido2Client.REGISTRATION_REQUEST)
    }
    override fun onFailure(errorCode: Int, errString: CharSequence) {
        showError(getString(R.string.reg_fail) + errorCode + "=" + errString)
    }
})
Java
switch (requestCode) {
    // Receive the registration response.
    case Fido2Client.REGISTRATION_REQUEST:
        Fido2RegistrationResponse fido2RegistrationResponse = fido2Client.getFido2RegistrationResponse(data);
        reg2Server(fido2RegistrationResponse);
        break;
    // Receive the authentication response.
    case Fido2Client.AUTHENTICATION_REQUEST:
        Fido2AuthenticationResponse fido2AuthenticationResponse =
                fido2Client.getFido2AuthenticationResponse(data);
        auth2Server(fido2AuthenticationResponse);
        break;
    default:
        break;
}
Kotlin
when (requestCode) {
     // Receive the registration response.
     Fido2Client.REGISTRATION_REQUEST -> {
         val fido2RegistrationResponse = fido2Client!!.getFido2RegistrationResponse(data)
         reg2Server(fido2RegistrationResponse)
     }
     // Receive the authentication response.
     Fido2Client.AUTHENTICATION_REQUEST -> {
         val fido2AuthenticationResponse = fido2Client!!.getFido2AuthenticationResponse(data)
         auth2Server(fido2AuthenticationResponse)
     }
     else -> {
     }
 }
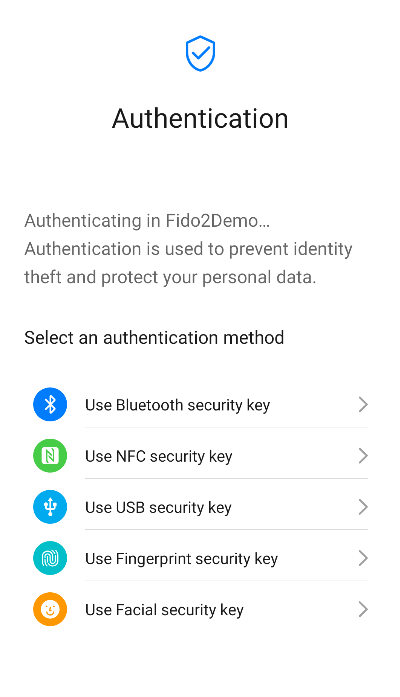
Install the test APK, launch the app, and tap Register or Authenticate.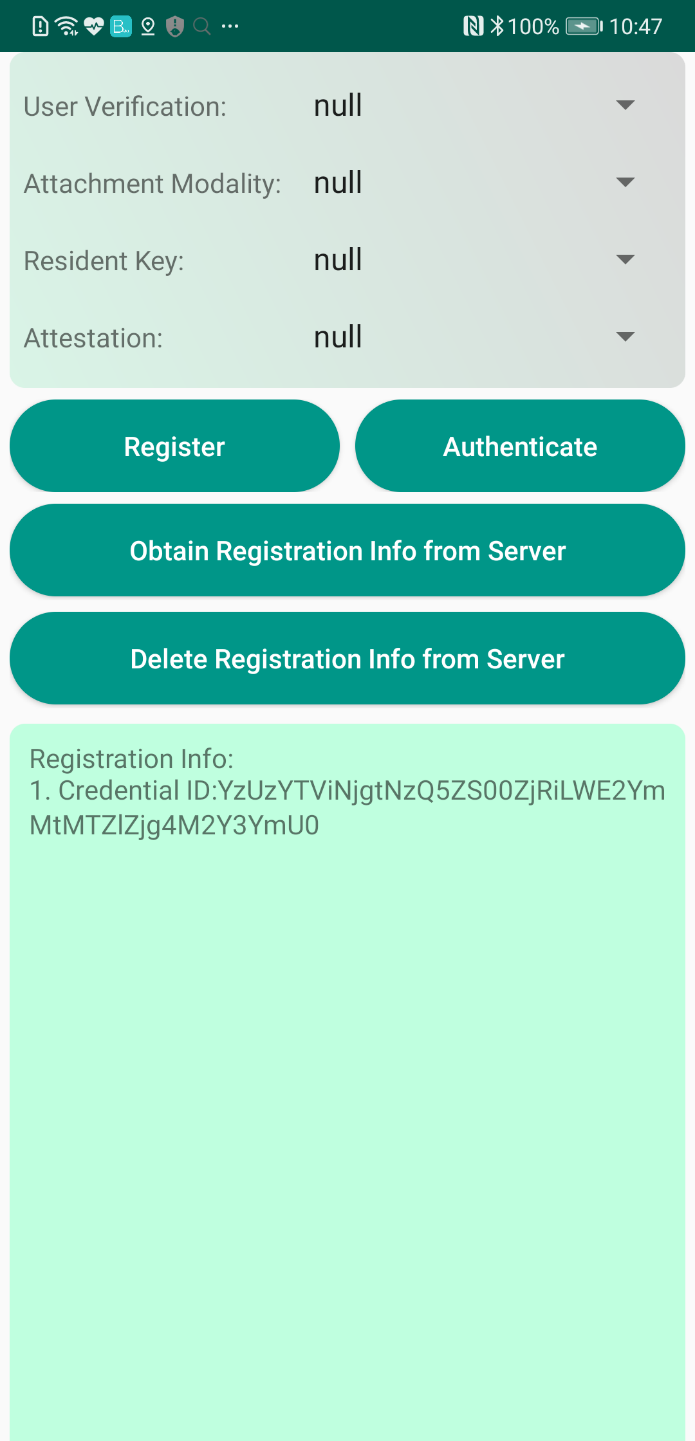
Well done. You have successfully completed this codelab and learned how to:
For more information, please click the following link:
Related documents
To download the sample code, click the link below: