With Dynamic Tag Manager (DTM), you can deploy and update your tag configuration easily and securely on a web-based UI, and realize data-driven operations.
What You Will Create
In this codelab, you will reference dynamic tags created on HUAWEI DTM in the demo project and experience how to:
Use DTM to report user events.
Use Google Analytics to view reported events.
What You Will Learn
In this codelab, you will learn how to:
Create a configuration on the DTM portal in AppGallery Connect.
Reference configured JavaScript scripts in a web app.
Report events to Google Analytics.
Hardware Requirements
A (desktop or laptop) computer that can connect to the Internet
Software Requirements
A text editor, such as VS Code
Google Chrome browser
A web server that supports the demo web app
Required Knowledge
Web app development basics
DTM visual event tracking capabilities
Before configuration, you must complete the following preparations:
To accurately report data to Google Analytics, you need to apply for a tracking ID (similar to UA-000000-2). You can click here to view how to apply for a tracking ID.
After applying for a tracking ID, you can sign in to Google Analytics using your Google account and view reported data.
To facilitate debugging, you can use the Tag Assistant plug-in for the Chrome browser. After installation, the icon will be displayed on the right of the toolbar of the Chrome browser.
Find your app project, and click the desired app name.
Go to Grow > Dynamic Tag Manager and click Enable Dynamic Tag Manager to enable DTM.
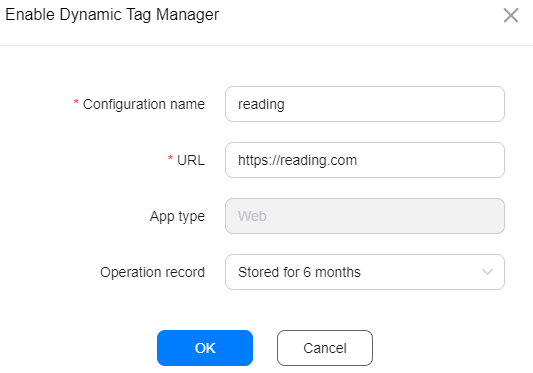
In the dialog box displayed, enter a configuration name, and set Operation record.
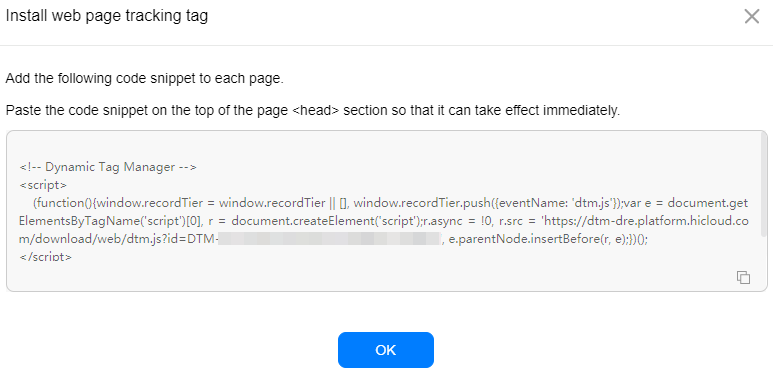
Click OK. The Configuration page is displayed, asking you to install the DTM-Web tracking code snippet.
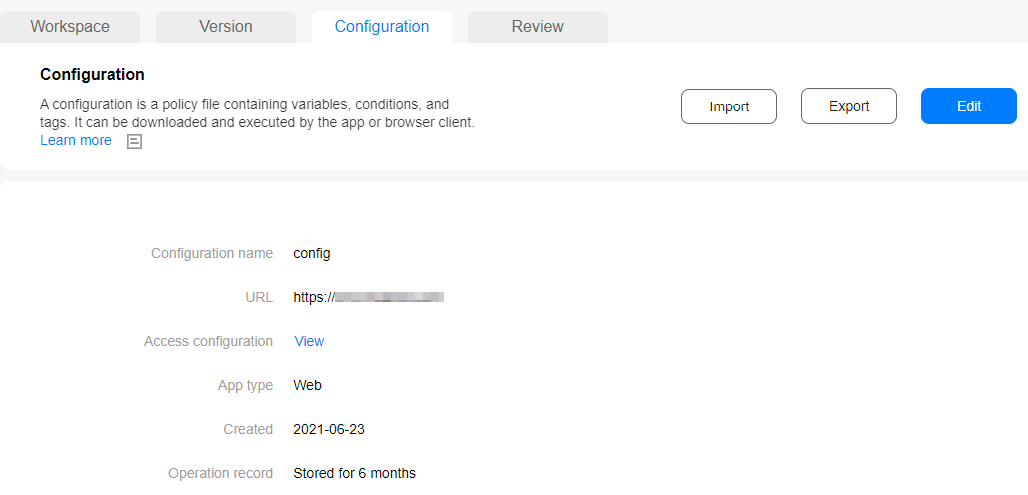
View the created configuration on the Configuration page.
Copy the tracking code snippet to the top of the page <head> block so that it can take effect immediately. The screenshot below shows an example.
Start your web server. (If you do not have a proper web server, please refer to Software Requirements.)
Creating a Variable
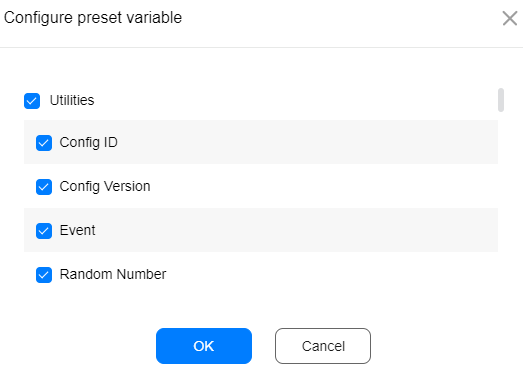
Go to Workspace > Variable, and click Configure.
On the Configure preset variable page displayed, select the preset variable to be created and click OK.
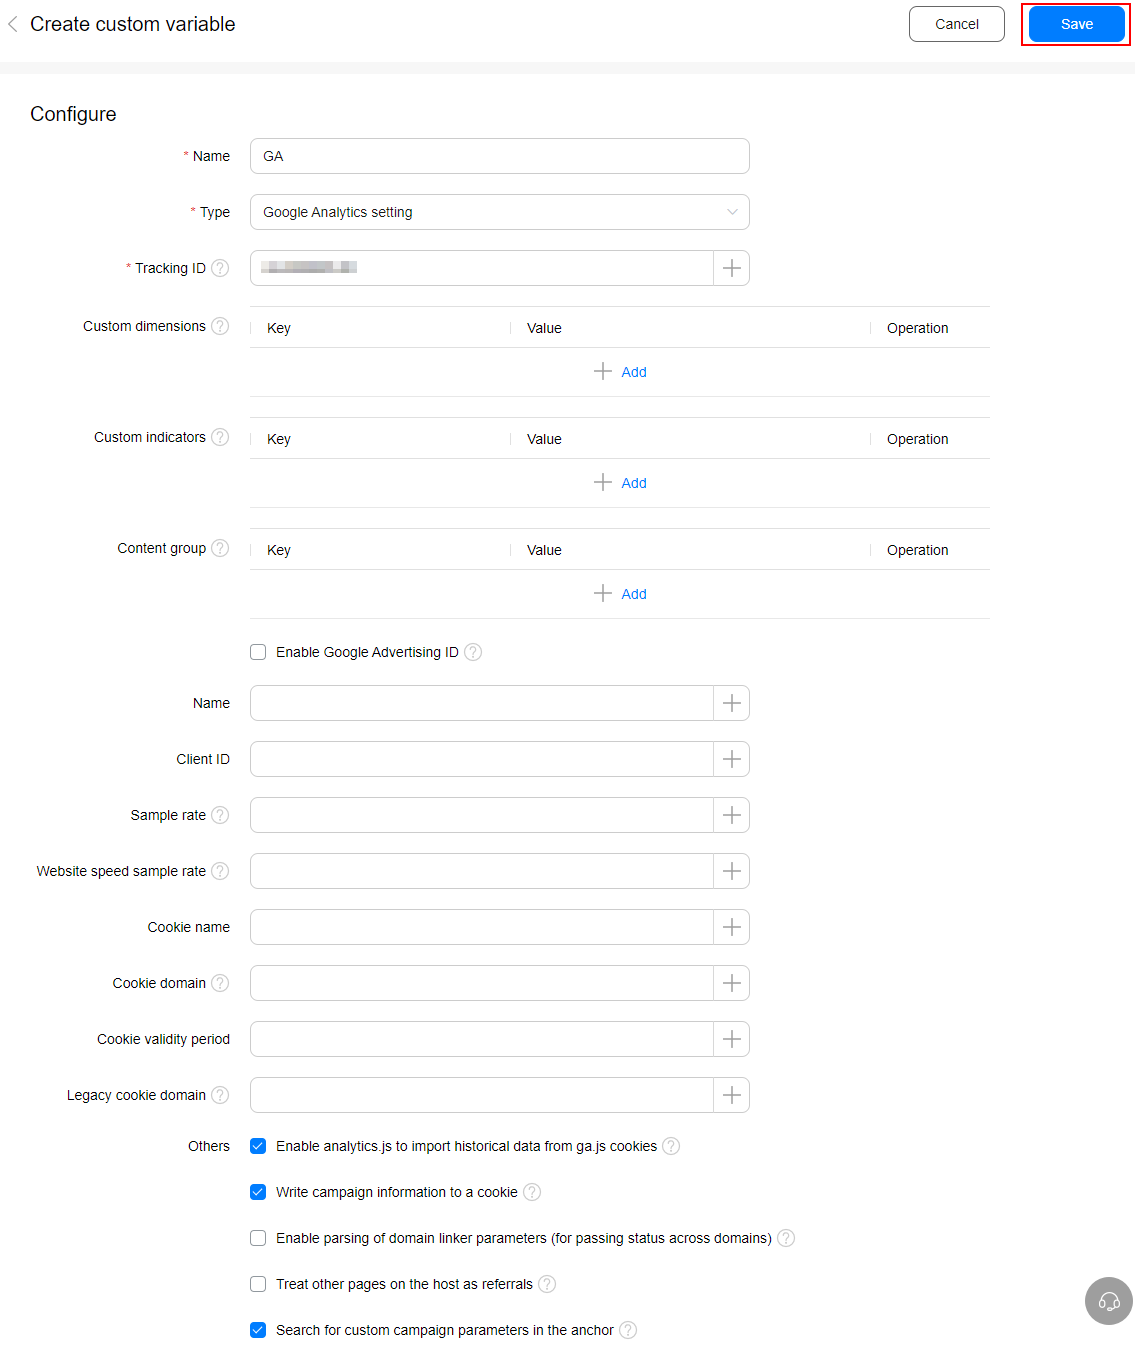
Click Create on the Variable page. On the Create custom variable page displayed, enter GA in the Name text box, set Type and other parameters, and click Save.
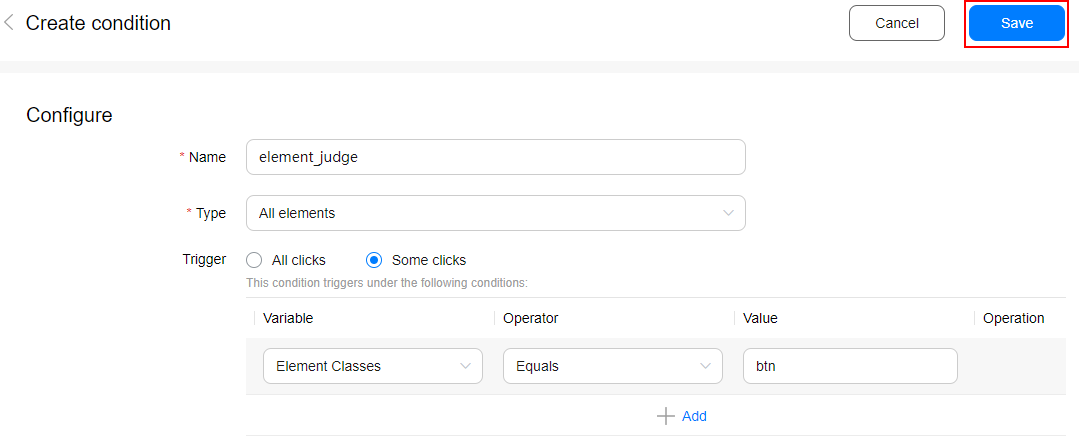
Creating a Condition
Go to Workspace > Condition, and click Create.
On the Create condition page displayed, enter a condition name, select a condition type, and set other related parameters.
Set Variable, Operator, and Value for a trigger if you select a condition type and set Trigger to Some xx (for example, Some clicks). You can click Add to add multiple triggers.
Click Save.
Creating a Tag
Go to Workspace > Tag, and click Create.
On the Create tag page, enter a tag name, select a value for Extension and set related parameters, set Trigger condition and Exception condition, and click Save.
When the specified trigger condition is met, events will be reported to the analytics platform.
When the specified exception condition is met, events will be blocked and not be reported to the analytics platform.
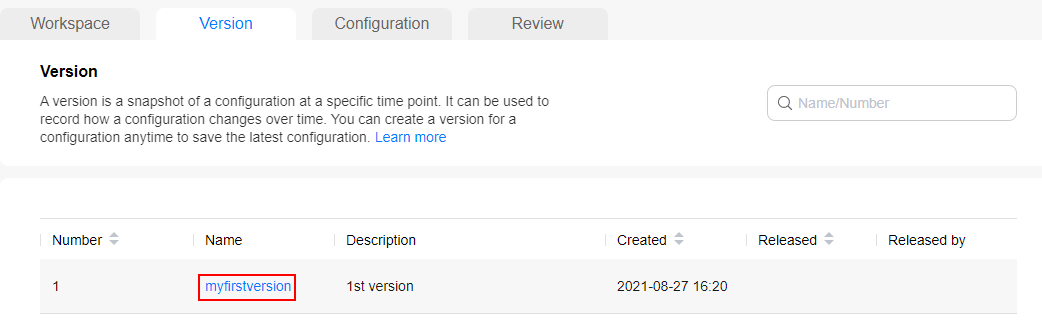
Creating a Version
Click the Workspace tab and then click Create version.
On the Create version page displayed, enter a version name and description, select Create version or Create and release version, and click OK.
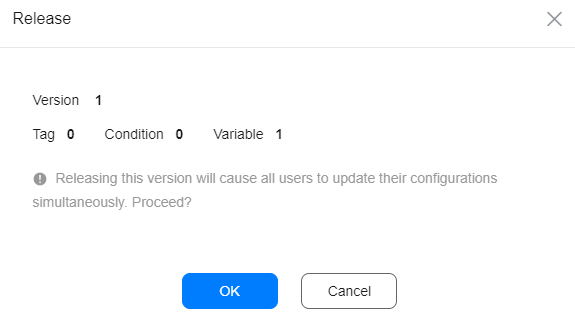
Releasing a Version
On the Version tab page, click a version name to go to the Version details page.
Click Release, and then click OK on the Release page displayed.
Triggering an Event
Open the Chrome browser, enter the demo web app URL in the browser address box, and press Enter.
Click in the toolbar of the Chrome browser to start Tag Assistant, and click Enable.
Refresh the web page, click the click here button to trigger tag execution, and click the Tag Assistant icon in the browser toolbar. If information in the screenshot below is displayed, the relevant event has been triggered and reported.
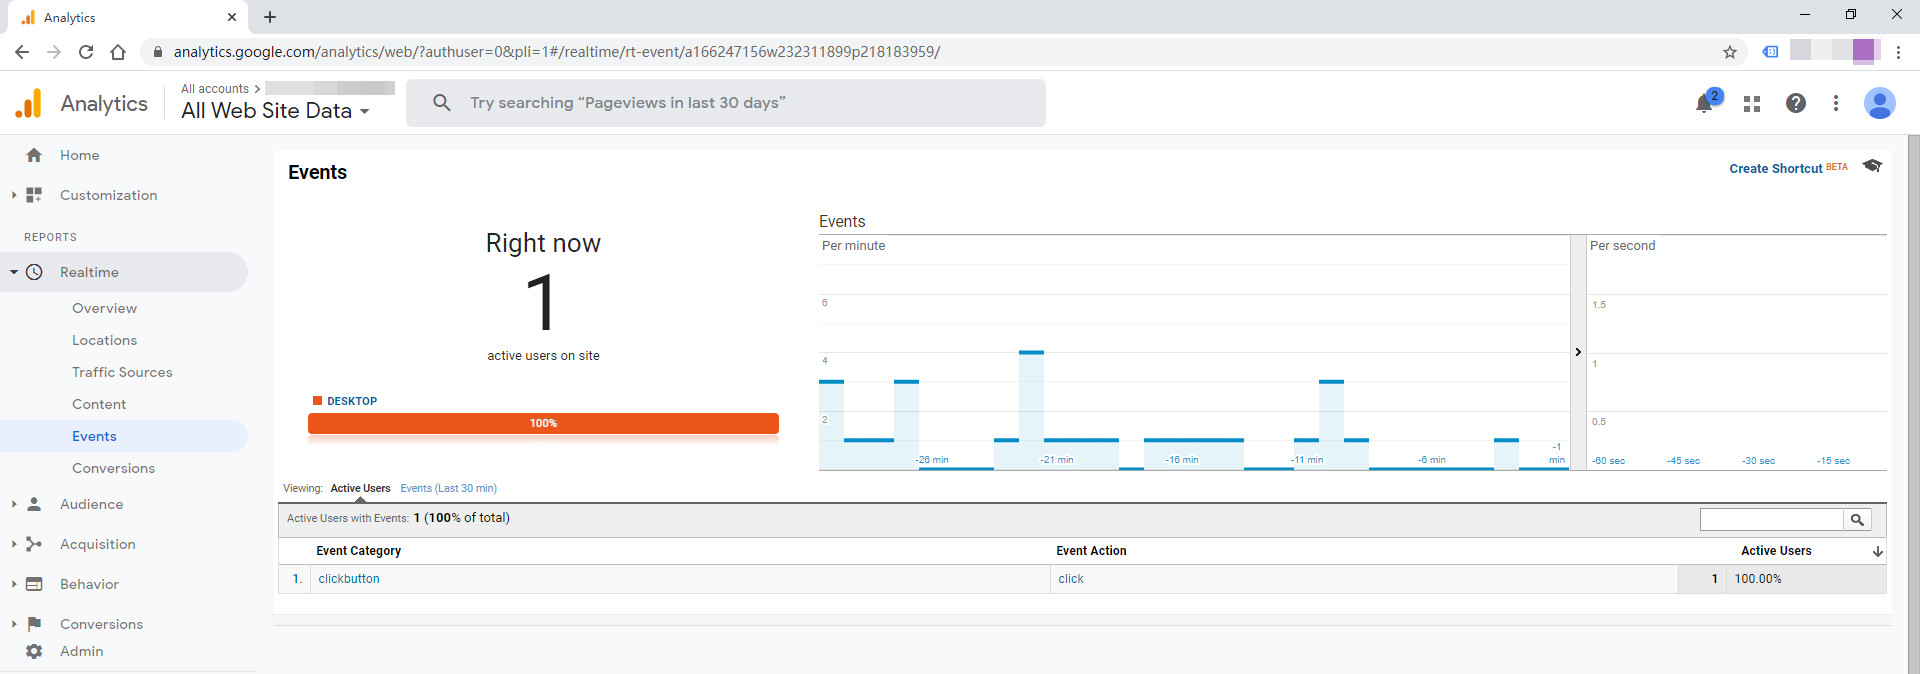
Viewing the Reported Event
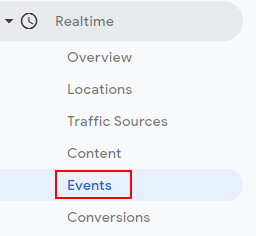
Sign in to Google Analytics and go to Realtime > Events on the left.
View the reported event on the Events page.
Well done. You have successfully completed this codelab and learned how to:
Create a DTM configuration in AppGallery Connect.
Reference configured JavaScript scripts in a web app.
Report events to Google Analytics.
For more information, please click the following link:
Related Documents You can click the button below to download the source code:
 icon will be displayed on the right of the toolbar of the Chrome browser.
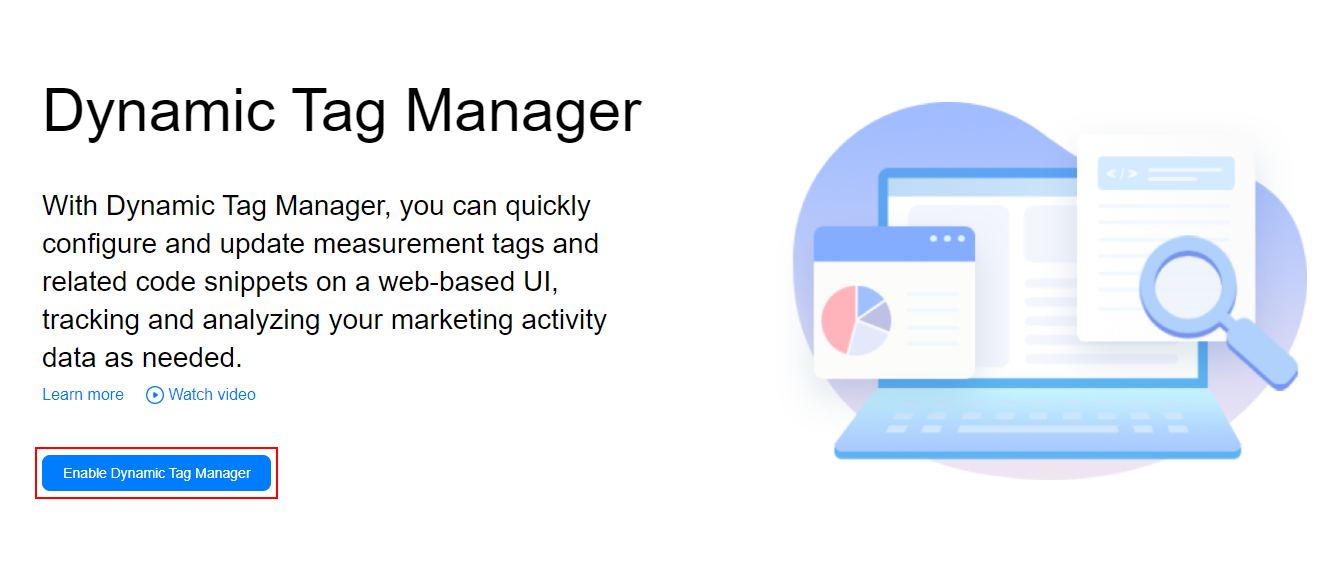


 in the toolbar of the Chrome browser to start Tag Assistant, and click Enable.
 in the browser toolbar. If information in the screenshot below is displayed, the relevant event has been triggered and reported.