HUAWEI Image Kit builds powerful smart editing and scene-specific animation capabilities into your app using the Image Vision SDK and Image Render SDK. By integrating the Image Vision SDK and Image Render SDK, you can quickly access 24 filters and 9 smart layouts as well as the image theme tagging, text arts, image cropping, and animation capabilities.
In this codelab, you will use the demo project that has been created for you to call Image Kit APIs. Through the demo project, you will:
Before you get started, complete the following preparations:
For details, please refer to Preparations for Integrating HUAWEI HMS.
Step 1: Start Android Studio.
Step 2: Choose File > Open, go to the directory where the sample project is decompressed, and click OK.
Step 3: Configure the AppGallery Connect plug-in, Maven repository address, build dependencies, obfuscation scripts, and permissions. (These items have been configured in the sample code. If any of them does not meet your requirements, change it in your own project.)
1. Configure the Maven repository address and AppGallery Connect plug-in in the project's build.gradle file.
allprojects {
    repositories {
        maven { url 'https://developer.huawei.com/repo/' }
        ...
    }
}
buildscript {
    repositories {
       maven {url 'https://developer.huawei.com/repo/'}
        ...
    }
    ...
}
buildscript {
    dependencies {
        classpath 'com.huawei.agconnect:agcp:1.4.1.300'
    }
}
2. Configure the dependency package in the app's build.gradle file.
dependencies {
    ...
    implementation 'com.huawei.hms:image-vision:1.0.3.301'
    implementation 'com.huawei.hms:image-vision-fallback:1.0.3.301'
    ...
}
android {
    ...
    defaultConfig {
        ...
        minSdkVersion 26
        ...
    }
    ...
}
apply plugin: 'com.huawei.agconnect'
3. Configure obfuscation scripts.
-ignorewarnings
-keepattributes *Annotation*
-keepattributes Exceptions
-keepattributes InnerClasses
-keepattributes Signature
-keepattributes SourceFile,LineNumberTable
-keep class com.hianalytics.android.**{*;}
-keep class com.huawei.updatesdk.**{*;}
-keep class com.huawei.hms.**{*;}
"R.string.hms*",
"R.string.connect_server_fail_prompt_toast",
"R.string.getting_message_fail_prompt_toast",
"R.string.no_available_network_prompt_toast",
"R.string.third_app_*",
"R.string.upsdk_*",
"R.layout.hms*",
"R.layout.upsdk_*",
"R.drawable.upsdk*",
"R.color.upsdk*",
"R.dimen.upsdk*",
"R.style.upsdk*",
"R.string.agc*"
4. Configure permissions in the AndroidManifest.xml file.
<uses-permission android:name="android.permission.INTERNET"/>
<uses-permission android:name="android.permission.ACCESS_NETWORK_STATE"/>
<uses-permission android:name="android.permission.ACCESS_WIFI_STATE"/>
Step 4: In the Android Studio window, choose File > Sync Project with Gradle Files to synchronize the project.
After the project is imported, connect your mobile device to the PC and enable the USB debugging mode. In the Android Studio window, click  to run the project you have created in Android Studio to generate an APK. Then install the APK on the mobile device.
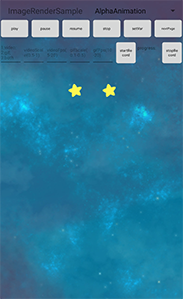
On the home page of the demo app, there are five buttons. From top to bottom, the five buttons provide the filter, smart layout, theme tagging, sticker, and image cropping functions. You can click a button to use the respective function.
Click FILTER. The filter page is displayed.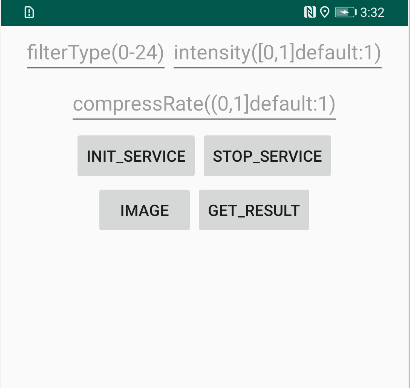
Click SMARTLAYOUT. The smart layout page is displayed.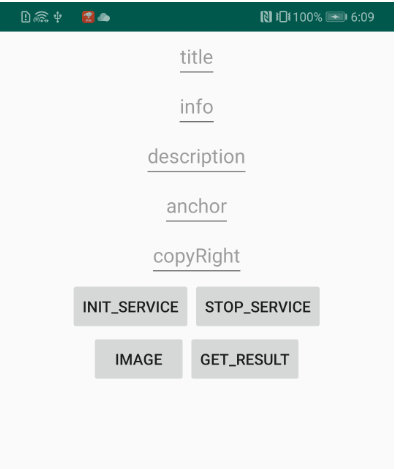
Click THEMETAG. The theme tagging page is displayed.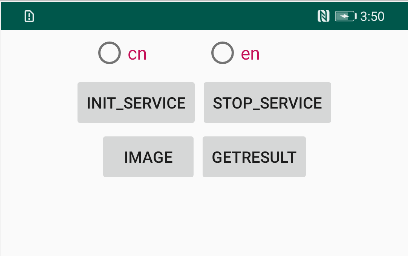
Click STICKER. The sticker page is displayed.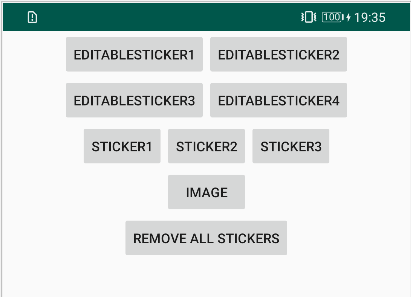
Click CROP, and select the image to be cropped. The image cropping page is displayed.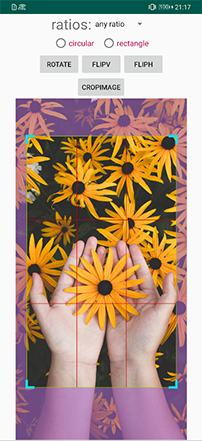
You need to add your images and configure related parameters during this procedure.
Step 1: Import the Image Vision service packages.
import com.huawei.hms.image.vision.*;
import com.huawei.hms.image.vision.bean.ImageVisionResult;
Step 2: Obtain an ImageVision instance.
// Obtain an ImageVisionImpl instance.
ImageVisionImpl imageVisionAPI = ImageVision.getInstance(this);
Step 3: Initialize the service. To call setVisionCallBack during service initialization, your app must implement the ImageVision.VisionCallBack API and override its onSuccess(int successCode) and onFailure(int errorCode) methods. If the ImageVision instance is successfully obtained, the onSuccess method is called and then the Image Vision service is initialized. If the ImageVision instance fails to be initialized, the onFailure method is called and an error code is returned. Your app is allowed to use the Image Vision service only after the successful verification. That is, the value of initCode must be 0, indicating that the initialization is successful.
imageVisionAPI.setVisionCallBack(new ImageVision.VisionCallBack() {
    @Override
    public void onSuccess(int successCode) {
       int initCode = imageVisionAPI.init(context, authJson);
       ...
    }
    @Override
    public void onFailure(int errorCode) {
        ...
    }
});
Description of authJson parameters:
Parameter | Type: | Mandatory or Not | Description |
projectId | String | Yes | Project ID (that is, value of product_id in the agconnect-services.json file) you obtained in Configuring App Information in AppGallery Connect. |
appId | String | Yes | App ID, specified by app_id in the agconnect-services.json file. |
authApiKey | String | Yes | API key, specified by api_key in the agconnect-services.json file. It is used for authentication. |
clientSecret | String | Yes | Client key, specified by client_secret in the agconnect-services.json file. |
clientId | String | Yes | Client ID, specified by client_id in the agconnect-services.json file. |
token | String | No | Session token, which is used to verify an app. It is recommended that the app server obtain the session token from AppGallery Connect using clientId and ClientSecret. |
Step 4: Construct parameter objects.
Parameter | Type | Mandatory or Not | Description |
requestJson | JSONObject | Yes | JSON string containing image processing request parameters. |
imageBitmap | Bitmap | Yes | Image to be processed. The aspect ratio is between 1:3 and 3:1, and the width and height pixels are less than or equal to 8000. |
Description of requestJson parameters:
Parameter | Type | Mandatory or Not | Description |
requestId | String | No | Request ID provided by the Image Vision service. |
taskJson | JSONObject | Yes | JSON string containing detailed service request information. |
authJson | JSONObject | Yes | JSON string containing authentication parameters. |
Description of taskJson parameters:
Parameter | Type | Mandatory or Not | Description |
filterType | int | No | Image index for color mapping. The value ranges from 0 to 24. Value 0 indicates the original image. |
intensity | float | No | Filter strength. The value range is [0, 1.0], and the default value is 1.0. |
compressRate | float | No | Compression rate. The value range is [0, 1.0], and the default value is 1.0. |
filterType mapping:
1 | 2 | 3 | 4 | 5 | 6 | 7 | 8 | 9 | 10 | 11 | 12 |
Black-and-white | Brown tone | Lazy | Freesia | Fuji | Peach pink | Sea salt | Mint | Reed | Vintage | Marshmallow | Moss |
13 | 14 | 15 | 16 | 17 | 18 | 19 | 20 | 21 | 22 | 23 | 24 |
Sunlight | Time | Haze blue | Sunflower | Hard | Bronze yellow | Monochromic tone | Yellow-green tone | Yellow tone | Green tone | Cyan tone | Violet tone |
For details, please refer to the description of authJson parameters in step 3.
Example requestJson parameter configuration:
{
  "requestId":"requestId",
  "taskJson":{"intensity":"1","filterType":"1","compressRate":"1"},
  "authJson":{"projectId":"projectIdTest","appId":"appIdTest","authApiKey":"authApiKeyTest","clientSecret":"CSecretTest","clientId":"CIdTest","token":"tokenTest"}
}
Step 5: Obtain the filter result.
When calling the filter API, you need to specify the bitmap of the image to be processed and the filter effect. The filter service processes the original image based on the specified parameters and returns the bitmap of the processed image. Make sure that you call the getColorFilter() API in the subthread rather than the main thread.
//Obtain the rendering result from visionResult.
new Thread(new Runnable() {
    @Override
    public void run() {
        ImageVisionResult visionResult = imageVisionAPI.getColorFilter(requestJson,imageBitmap);
        }
    }).start();
Description of visionResult parameters:
Parameter | Type | Mandatory or Not | Description |
resultCode | int | Yes | Result code. |
response | JSONObject | No | JSON string containing the return result. |
image | Bitmap | No | Processed image. For an API that directly returns images, this parameter is used by the API to transfer the processed image. |
Description of response parameters:
Parameter | Type | Mandatory or Not | Description |
requestId | String | No | Service request ID. This parameter is available only if it is carried in the service request. |
serviceId | String | Yes | Service name. |
Step 6: Stop the filter service.
If you do not need to use filters any longer, call the imageVisionAPI.stop() API to stop the Image Vision service. If the returned stopCode is 0, the service is successfully stopped.
if (null != imageVisionAPI) {
    int stopCode = imageVisionAPI.stop();
}
You need to add your images and configure related parameters during this procedure.
Step 1: Import the smart layout service packages.
import com.huawei.hms.image.vision.bean.ImageLayoutInfo ;
import com.huawei.hms.image.vision.*;
Step 2: Obtain an ImageVision instance for the smart layout service.
// Obtain an ImageVisionImpl instance.
ImageVisionImpl imageVisionAPI = ImageVision.getInstance(this);
Step 3: Initialize the service. The procedure is the same as that of the filter service. For details, please refer to Development Procedure.
Step 4: Construct parameter objects.
Parameter | Type | Mandatory or Not | Description |
requestJson | JSONObject | Yes | JSON string containing image processing request parameters. |
imageBitmap | Bitmap | Yes | Image to be processed. The aspect ratio is 9:16. |
Description of requestJson parameters:
Parameter | Type | Mandatory or Not | Description |
requestId | String | No | Request ID provided by the Image Vision service. |
taskJson | JSONObject | Yes | JSON string containing detailed service request information. |
authJson | JSONObject | Yes | JSON string containing authentication parameters. |
Description of taskJson parameters:
Parameter | Type | Mandatory or Not | Description |
title | String | Yes | Copywriting title, which is mandatory. The value contains a maximum of 10 characters. The extra characters will be forcibly truncated. |
description | String | Yes | Copywriting content. The value contains a maximum of 66 characters. The extra characters will be forcibly truncated and displayed as an ellipsis (...). |
copyRight | String | No | Name of the copyright holder. The value contains a maximum of 10 characters. The extra characters will be forcibly truncated and displayed as an ellipsis (...). |
anchor | String | No | Link that redirects you to the details. The value contains a maximum of 6 characters. The extra characters will be forcibly truncated and displayed as an ellipsis (...). |
isNeedMask | boolean | No | Indicates whether a background layer is required. |
styleList | JSONArrary | No | Style list. The default value is []. If the default value is used, select text based on whether the description text contains a newline character. If a list is provided, select a style from the list.The value range of this parameter is [‘info1', ‘info2', ..., ‘info9'].info8 represents a vertical layout. Currently, this layout applies only to the Chinese version. info3 is used by default if the user selects info8 but the input title and text are not in Chinese. |
For details about authJson parameters, please refer to "Integrating the Image Vision SDK > Advanced Drill > Implementing the Filter Service > Step 3 > Description of authJson parameters".
Example requestJson parameter configuration:
{
  "requestId":"requestId",
  "taskJson":{"title":"Light luxury for the new gen","description":"Away from hustle and bustle","copyRight":"HUAWEI ScreenMagazine","isNeedMask":false,"anchor":"More >","styleList":["info1"]},
  "authJson":{"projectId":"projectIdTest","appId":"appIdTest","authApiKey":"authApiKeyTest","clientSecret":"CSecretTest","clientId":"CIdTest","token":"tokenTest"}
}
Step 5: Obtain the layout result.
When calling the smart layout API, you need to specify the bitmap of the image to be processed and select the style and text to be added. For details, please refer to the parameter description in step 4. The smart layout service requires a network connection. If no network connection is available, the info3 style is returned by default. The layout style is returned through ImageLayoutInfo. The smart layout service draws a view based on the style contained in ImageLayoutInfo. For detailed operations, please refer to Sample Code. Because network requests sent over the API, you need to call the API in a subthread.
//Obtain the return result from ImageLayoutInfo.
new Thread(new Runnable() {
    @Override
    public void run() {
            ImageLayoutInfo imageLayoutInfo = imageVisionAPI.analyzeImageLayout(requestJson, imageBitmap);
        }
    }).start();
Description of ImageLayoutInfo parameters:
Parameter | Type | Mandatory or Not | Description |
resultCode | int | Yes | Result code. |
viewGroup | ViewGroup | No | Target view. |
maskView | View | No | Background layer. If there is no background layer, the value is null. |
response | JSONObject | No | Return result. |
Description of response parameters:
Parameter | Type | Mandatory or Not | Description |
locationX | int | No | Start position X of the view on the mobile phone. |
locatiinY | int | No | Start position Y of the view on the mobile phone. |
maskColor | int | No | Color value of the background layer. |
colorHeigh | int | No | Height of the background layer. If there is no background layer, the value is 0. |
requestId | String | No | Service request ID. This parameter is available only if it is carried in the service request. |
serviceId | String | Yes | Service name. |
Step 6: Stop the smart layout service.
If you do not need to use smart layout any longer, call the imageVisionAPI.stop() API to stop the service. If the returned stopCode is 0, the service is successfully stopped.
if (null != imageVisionAPI) {
    int stopCode = imageVisionAPI.stop();
}
You need to add your images and configure related parameters during this procedure.
Step 1: Import the theme tagging service packages.
import com.huawei.hms.image.vision.*;
Step 2: Obtain an ImageVision instance for the theme tagging service.
// Obtain an ImageVisionImpl instance.
ImageVisionImpl imageVisionAPI = ImageVision.getInstance(this);
Step 3:Initialize the service. The procedure is the same as that of the filter service. For details, please refer to Development Procedure.
Step 4:Call the theme tagging service. The input parameters are requestJson and imageBitmap.
Parameter | Type | Mandatory or Not | Description |
requestJson | JSONObject | Yes | JSON string containing image processing request parameters. |
imageBitmap | Bitmap | Yes | Bitmap of the image for tagging. |
Description of requestJson parameters:
Parameter | Type | Mandatory or Not | Description |
requestId | String | No | Request ID provided by the Image Vision service. |
taskJson | JSONObject | Yes | JSON string containing detailed service request information. |
authJson | JSONObject | Yes | JSON string containing authentication parameters. |
Description of taskJson parameters:
Parameter | Type | Mandatory or Not | Description |
language | String | Yes | Specifies a language for the tag. The value can be cn (Chinese) or en (English). |
needObjectList | boolean | No | Indicates whether to return the list of objects in the image in advance. |
Example requestJson parameter configuration:
{
  "requestId":"",
  "taskJson":{"language":"cn"},
  "authJson":{"projectId":"projectIdTest","appId":"appIdTest","authApiKey":"authApiKeyTest","clientSecret":"CSecretTest","clientId":"CIdTest","token":"tokenTest"}
}
Step 5: Obtain the theme tagging result.
When calling the theme tagging API, you need to specify the bitmap of the image to be processed. For details, please refer to step 4. The theme tagging service requires a network connection. If no network connection is available, an error code will be returned. Because network requests sent over the API, you need to call the API in a subthread.
// Obtain the return result.
new Thread(new Runnable() {
    @Override
    public void run() {
        ImageVisionResult result = imageVisionAPI.analyzeImageThemeTag(requestJson, imageBitmap);
        }
    }).start();
Description of result parameters:
Parameter | Type | Mandatory or Not | Description |
resultCode | int | Yes | Result code. |
response | JSONObject | No | JSON string containing the return result. |
Description of response parameters:
Parameter | Type | Mandatory or Not | Description |
resultCode | int | Yes | Result code. |
serviceId | String | No | Service ID. |
requestId | String | No | Service request ID. |
tags | JSONArray | No | Tagging result. For details, please refer to "Description of tags parameters." |
objectList | JSONArray | No | List of objects. If needObjectList is true, a list of objects is returned. |
Description of tags parameters:
Parameter | Type | Mandatory or Not | Description |
tagName | String | No | Tag name. |
tagConfidence | float | No | Tag confidence. |
Description of objectList parameters:
Parameter | Type | Mandatory or Not | Description |
type | int | No | Type of an object. |
possibility | Float | No | Tag confidence of the object. |
box | JSONObject | No | Location information of the object. |
Description of box parameters:
Parameter | Type | Mandatory or Not | Description |
width | double | No | Width of the object. |
height | double | No | Height of the object. |
center_x | double | No | Horizontal coordinate of the center of the object. |
center_y | double | No | Vertical coordinate of the center of the object. |
Step 6: Stop the theme tagging service.
If you do not need to use theme tagging any longer, call the imageVisionAPI.stop() API to stop the service. If the returned stopCode is 0, the service is successfully stopped.
if (null != imageVisionAPI) {
    int stopCode = imageVisionAPI.stop();
}
The implementation of all APIs of the sticker service is based on StickerLayout, which is a custom view. The imported service package is com.huawei.hms.image.vision.sticker.StickerLayout, which can be directly integrated into the XML of the layout.
Step 1: Obtain a StickerLayout object.
Call findViewById to obtain the StickerLayout object.
StickerLayout mStickerLayout = findViewById(R.id.sticker_container);
Step 2: Specify resource files.
For stickers, please refer to Sticker Design Guidance & Specification.
For text arts, please refer to Text Art Design Guidance & Specification.
Step 3: Add stickers and text arts.
Call the addSticker API with resource file path and file name to add stickers and text arts. If the return code is 0, the operation is successful. A maximum of 50 stickers and text arts can be added.
int resultCode = mStickerLayout.addSticker(rootPath, fileName);
Description of request parameters:
Parameter | Type | Mandatory or Not | Description |
rootPath | String | Yes | Root directory of resource files. |
fileName | String | Yes | Resource file name. For a sticker, the value is a specified file name. For text arts, the value can be set to null. |
Sample code:
addSticker(rootPath + "sticker 1","sticker_10_editable.png")
addSticker(rootPath + "text art 4", null);
Step 4: Update the text of a text art.
After updating the text art, call setStickerLayoutListener(new StickerLayout.StickerLayoutListener()) callback method
to obtain textEditInfo. Then, use textEditInfo to call setText to edit the text art. At last, use mStickerLayout to call the updateStickerText method to update the text art.
// Obtain a TextEditInfo object.
mStickerLayout.setStickerLayoutListener(new StickerLayout.StickerLayoutListener() {
    @Override
    public void onStickerLayoutClick() {
    }
    @Override
    public void onStickerTouch(int index) {
    }
    @Override
    public void onTextEdit(TextEditInfo textEditInfo) {
        StickerActivity.this.textEditInfo = textEditInfo;
    }
    @Override
    public void needDisallowInterceptTouchEvent(boolean isNeed) {
    }
});
//Update the text art to text art test.
textEditInfo.setText("text art test");
mStickerLayout.updateStickerText(textEditInfo);
All APIs of the image cropping service are implemented based on CropLayoutView, which is a custom view. The imported service package is com.huawei.hms.image.vision.crop.CropLayoutView, which can be directly integrated into the XML of the layout.
Step 1: Obtain a CropLayoutView object.
Call findViewById to obtain the CropLayoutView object.
CropLayoutView cropLayoutView = findViewById(R.id.cropImageView);
Step 2: Set the image to be cropped. After the setting is complete, you can edit the view.
cropLayoutView.setImageBitmap(inputBm);
cropLayoutView.rotateClockwise();
cropLayoutView.flipImageHorizontally();
cropLayoutView.flipImageVertically();
cropLayoutView.setAspectRatio(ratioX, ratioY);
cropLayoutView.setFixedAspectRatio(false);
// Crop a rectangle-shaped image. |
cropLayoutView.setCropShape(CropLayoutView.CropShape.RECTANGLE); |
// Crop an oval-shaped image. |
cropLayoutView.setCropShape(CropLayoutView.CropShape.OVAL); |
Step 3: Adjust the size of the cropped image, and obtain the bitmap of the cropped image.
Bitmap croppedImage = cropLayoutView.getCroppedImage();
Step 1: Start Android Studio.
Step 2: Choose File > Open, go to the directory where the sample project is decompressed, and click OK.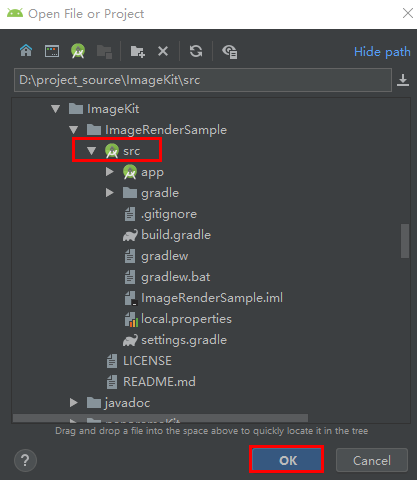
Step 3: Configure the AppGallery Connect plug-in, Maven repository address, build dependencies, obfuscation scripts, and permissions. (These items have been configured in the sample code. If any of them does not meet your requirements, change it in your own project.)
1. Configure the Maven repository address and AppGallery Connect plug-in in the project's build.gradle file.
allprojects {
    repositories {
        maven { url 'https://developer.huawei.com/repo/' }
        ...
    }
}
buildscript {
    repositories {
        maven {url 'https://developer.huawei.com/repo/'}
        ...
    }
    ...
}
buildscript {
    dependencies {
        classpath 'com.huawei.agconnect:agcp:1.4.1.300'
    }
}
2. Configure the dependency package in the app's build.gradle file.
dependencies {
    ...
    implementation 'com.huawei.hms:image-render:1.0.3.303'
    implementation 'com.huawei.hms:image-render-fallback:1.0.3.302'
    ...
}
android {
    ...
    defaultConfig {
    ...
            minSdkVersion 26
        ...
    }
    ...
}
apply plugin: 'com.huawei.agconnect'
3. Configure obfuscation scripts.
-ignorewarnings
-keepattributes *Annotation*
-keepattributes Exceptions
-keepattributes InnerClasses
-keepattributes Signature
-keepattributes SourceFile,LineNumberTable
-keep class com.hianalytics.android.**{*;}
-keep class com.huawei.updatesdk.**{*;}
-keep class com.huawei.hms.**{*;}
"R.string.hms*",
"R.string.connect_server_fail_prompt_toast",
"R.string.getting_message_fail_prompt_toast",
"R.string.no_available_network_prompt_toast",
"R.string.third_app_*",
"R.string.upsdk_*",
"R.layout.hms*",
"R.layout.upsdk_*",
"R.drawable.upsdk*",
"R.color.upsdk*",
"R.dimen.upsdk*",
"R.style.upsdk*",
"R.string.agc*"
4. Configure permissions in the AndroidManifest.xml file.
<uses-permission android:name="android.permission.INTERNET"/>
<uses-permission android:name="android.permission.READ_EXTERNAL_STORAGE"/>
<uses-permission android:name="android.permission.ACCESS_NETWORK_STATE"/>
<uses-permission android:name="android.permission.ACCESS_WIFI_STATE"/>
Step 4: In the Android Studio window, choose File > Sync Project with Gradle Files to synchronize the project.
After the project is imported, connect your mobile device to the PC and enable the USB debugging mode. In the Android Studio window, click to run the project you have created in Android Studio to generate an APK. Then install the APK on the mobile device.
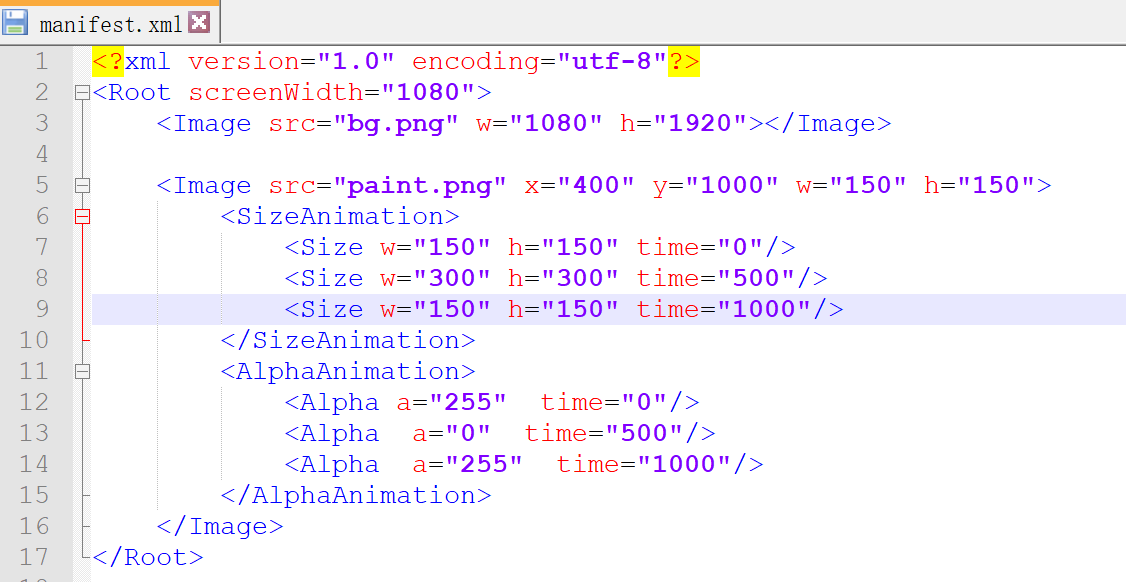
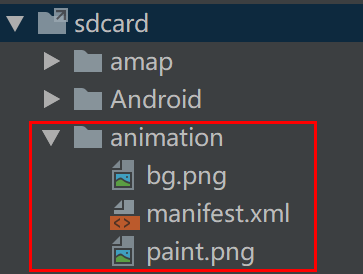
For convenience of operations, resource files and configuration files have been configured in the sample demo project. If you want to design your own animation view, prepare the manifest.xml script in compliance with the XML Syntax Specifications for Image Render and save it with related configuration files to the specified path. Then, you can call the ImageRenderImpl API to display the view.
Step 1: Design the animation in the manifest.xml script and save the script and image resources to a specified path. Example:
Step 2: Import the Image Render service package.
import com.huawei.hms.image.render.*;
Step 3: Obtain an ImageRender instance. This step is mainly to obtain an ImageRender instance by calling the getInstance(Context context, RenderCallBack callback) method. To call the method, your app must implement the RenderCallBack API and override its onSuccess(ImageRenderImpl imageRender) and onFailure(int errorCode) methods. If the ImageRender instance is successfully obtained, the onSuccess method is called. If the ImageRender instance fails to be obtained, the onFailure method is called and an error code is returned.
ImageRenderImpl imageRenderAPI;
// Obtain an ImageRender instance.
ImageRender.getInstance(this, new ImageRender.RenderCallBack() {
    @Override
    public void onSuccess(ImageRenderImpl imageRender) {
        imageRenderAPI = imageRender;
         ...
    }
    @Override
    public void onFailure(int i) {
         ...
    }
});
Step 4: Initialize the ImageRender object. Your app needs to pass the sourcePath (path of the resources to be parsed, for example, sdcard/animation) and authentication information (APIKey or certificate fingerprint, in JSON format). For details, please refer to "Integrating the Image Vision SDK > Advanced Drill > Implementing the Filter Service > Step 3 > Description of authJson parameters". Your app can use the service only after it is successfully authenticated.
Your app can use the service only after it is successfully authenticated.
// Initialize the ImageRender object.
// Obtain the authentication information (APIKey or certificate fingerprint, in JSON format).
int initResult = imageRenderAPI.doInit(sourcePath, getAuthJson());
Step 5: Obtain the view and add it to the created layout. To prevent the view from being truncated, you are advised to set the width and height of the layout to the screen width and height. Currently, two methods are provdied to obtain rendered views.
//Obtain rendered views.
FrameLayout contentView = findViewById(R.id.content);
RenderView renderView = imageRenderAPI.getRenderView();
if (renderView.getResultCode() == ResultCode.SUCCEED) {
View view = renderView.getView();
if (null != view) {
    contentView.addView(view);
} else {
    ...
}
}
private IParseCallBack iParseCallBack = new IParseCallBack() {
@Override
public void onParseEnd() {
    if (null != imageRenderAPI) {
       //Set the variable that determines whether an image is visible. For details, please refer to step 7.
        String name = "var";
        String value = "1";
        imageRenderAPI.setKeyValueInfo("SetVariable", name, value);
        imageRenderAPI.playAnimation();
    }
}
};
RenderView renderView = imageRenderAPI.getRenderView(iParseCallBack);
Step 6: Play, stop, pause, and resume basic animations.
//Play animations.
if (null != imageRenderAPI) {
imageRenderAPI.playAnimation();
}
The pauseAnimation(boolean isEnable) API pauses all basic animations and starts playing the paused animations. A paused animation can be set by setting the name parameter of a basic animation.
Example configuration of paused animations in the manifest.xml script:
<?xml version="1.0" encoding="utf-8"?>
<Root screenWidth="1080">
    <!-- Paused animation: Being palyed when pauseAnimation(true) is called.-->
    <Image src="ty.png" x="0" y="0" w="500" h="500">
        <AlphaAnimation name="animation_flag_pause">
            <Alpha a="0" time="0"/>
            <Alpha a="255" time="500"/>
            <Alpha a="0" time="1000"/>
        </AlphaAnimation>
    </Image>
    <!-- Basic animation:  Being paused when pauseAnimation(true) is called.-->
    <Image src="ty.png" x="500" y="0" w="500" h="500">
        <AlphaAnimation>
            <Alpha a="0" time="0"/>
            <Alpha a="255" time="500"/>
            <Alpha a="0" time="1000"/>
        </AlphaAnimation>
    </Image>
</Root>
Call the pauseAnimation() API.
//Call the pauseAnimation(boolean isEnable) API.  If isEnable is set to true, all basic animations are paused, and the paused animations are played. If isEnable is set to false, all basic animations are paused, and the paused animations are not played.
if (null != imageRenderAPI) {
    imageRenderAPI.pauseAnimation(true);
}
//Stop paused animations.
if (null != imageRenderAPI) {
imageRenderAPI.resumeAnimation();
}
//Stop animations.
if (null != imageRenderAPI) {
imageRenderAPI.stopAnimation();
}
Step 7: Pass information to Image Kit.
Call the setKeyValueInfo(String key, Object ...value) method to pass information to Image Kit. Wherein, key is of the string type. Currently, only SetVariable is supported. value is of the java.lang.Object type. The method can pass multiple parameters at the same time. Currently, the string, int, boolean, and float types are supported if there is only one parameter, whereas only the string type is supported if there are multiple parameters. Image Kit returns the result through RenderObject.
For example, the visibility parameter of an image is specified by the #var variable in the manifest.xml script.
<?xml version="1.0" encoding="utf-8"?>
<Root screenWidth="1080">
    <Var name="var" expression="0"/>
    <Image src="ty.png" x="0" y="0" w="500" h="500" visibility="#var"/>
</Root>
Call the setKeyValueInfo API to set the #var variable to change the image visibility.
//Set the #var variable to 1.
String key = "SetVariable";
String name = "var";
String value = "1";
RenderObject renderObject = imageRenderAPI.setKeyValueInfo(key, name, value);
Step 8: Record animations. mage Kit supports two record types: video and GIF image. Call startRecord and stopRecord to start and stop recording. Call startRecord and stopRecord start and stop recording.
Call startRecord to start recording animations. Only the .mp4 and .gif formats are supported. The input JSON parameters include the record type, compression ratio, and frame rate. Image Kit returns the operation result through IStreamCallBack.
int resultCode = imageRenderAPI.startRecord(json, new IStreamCallBack () {
    ...
    @Override
    void onRecordSuccess(HashMap<String ,Object> map) {
        ...
        String recordType = (String) hashMap.get("recordType");
        byte[] videoBytes = (byte[]) hashMap.get("videoBytes");
        byte[] gifBytes = (byte[]) hashMap.get("gifBytes");
        try {
            if (recordType.equals("1")) {
                if (videoBytes != null) {
                    saveFile(videoBytes, mp4Path);
                }
            } else if (recordType.equals("2")) {
                ...
            } else if (recordType.equals("3")) {
                ...
            }
        } catch (IOException e) {
            ...
        }
        ...
    }
    @Override
    void onRecordFailure(HashMap<String,Object> map) {
        ...
    }
    @Override
    void onProgress(int progress) {
        runOnUiThread(new Runnable() {
            @Override
            public void run() {
                textProgress.setText ("progress: " + progress + "%");
            }
        });
    }
});
private void saveFile (byte[] bytes, String path) throws IOException {
    FileOutputStream fos = new FileOutputStream(new File(path));
    try {
        fos.write(bytes, 0, bytes.length);
        fos.close();
    } catch (IOException e) {
        Log.e(TAG, e.getMessage());
    } finally {
        try {
            fos.close();
        } catch (IOException e) {
            Log.e(TAG, e.getMessage());
        }
    }
}
Description of JSON parameters:
Parameter | Type | Mandatory or Not | Description |
recordType | int | Yes | Record type. The value can be 1, 2, or 3.1: video2: GIF image3: video and GIF image |
videoScale | double | No | Video compression ratio. The value range is [0.5-1], with one decimal place reserved. This parameter is mandatory for video recording. |
videoFps | int | No | Video frame rate. The value range is [5–20]. This parameter is mandatory for video recording. |
gifScale | double | No | GIF compression ratio. The value range is [0.1-0.5], with one decimal place reserved. This parameter is mandatory for GIF image recording. |
gifFps | int | No | GIF frame rate. The value range is [10-20]. This parameter is mandatory for GIF image recording. |
Example JSON parameter configuration:
{"recordType":3;
   video{
    "videoScale":0.5
    "videoFps":16
   }
   gif{
    "gifScale":0.3
    "gifFps":16
   }
}
Description of map parameters returned when IStreamCallBack is successfully called:
Parameter | Type | Description |
recordType | int | Record type. The value can be 1, 2, or 3.1: video2: GIF image3: video and GIF image |
videoBytes | byte[] | Video byte array. |
gifBytes | byte[] | GIF byte array. |
Description of map parameters returned when IStreamCallBack is not successfully called:
Parameter | Type | Description |
errorCode | int | Error code. |
errorMessage | String | Error information. |
Call stopRecord to stop recording animations. If this API is not called when the recording lasts for 15s, the recording automatically stops. The API will not be working if it is called later.
int resultCode = imageRenderAPI.stopRecord();
Step 9: Enable reuse of RenderView in multiple activities.
Call the unBindRenderView and bindRenderView APIs when you enable multiple activities to reuse the same RenderView. Suppose a RenderView instance is obtained by using the getRenderView() method on page A and the rendered view is displayed. If page A jumps to page B, you can unbind the RenderView instance in onPause() of page A and call bindRenderView in the onResum() method of page B to bind the RenderView instance. On page B, the rendered view can be displayed without initialization.
RenderView renderView = imageRenderAPI.getRenderView();
String hashCode = String.valueOf(renderView.getView().hashCode());
@Override
protected void onPause() {
super.onPause();
if (null != imageRenderAPI) {
    int result = imageRenderAPI.unBindRenderView(hashCode);
}
}
@Override
protected void onResume() {
super.onResume();
if(imageRenderAPI==null){
    return;
}
imageRenderAPI.bindRenderView(sourcePath, getAuthJson(), new IBindCallBack() {
    @Override
    public void onBind(RenderView renderView, int errorCode) {
        if (renderView != null) {
            if (renderView.getResultCode() == ResultCode.SUCCEED) {
                final View view = renderView.getView();
                if (null != view) {
                    contentView.addView(view);
                } else {
                    ...
                }
            }
        }
    }
    @Override
    public void onParseEnd() {
        if (null != imageRenderAPI) {
            String name = "var";
            String value = "1";
            imageRenderAPI.setKeyValueInfo("SetVariable", name, value);
            imageRenderAPI.playAnimation();
        }
    }
 });
}
Step 10: Call the removeRenderView() API to remove rendered views and destroy related resources.
//Remove rendered views and destroy related resources.
if (null != imageRenderAPI) {
    imageRenderAPI.removeRenderView();
}
You have successfully completed this CodeLab and learned how to: