Panorama Kit supports interactive viewing of panoramic images and videos in a simulated 360-degree space. You can integrate Panorama Kit into your app through the HMS Core Panorama SDK to easily change a 2D image or video into a 3D view on an Android phone, delivering an immersive user experience.
In this codelab, you will use the demo project to view panoramic images and videos by calling the Panorama SDK.
In this codelab, you will learn how to:
The Panorama SDK can be directly called by devices, without connecting to AppGallery Connect.
Decompress the downloaded sample code package to a local directory.
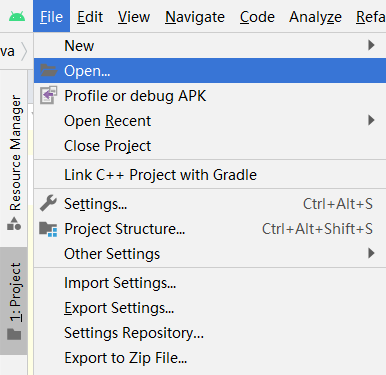
Step 1 Start Android Studio.
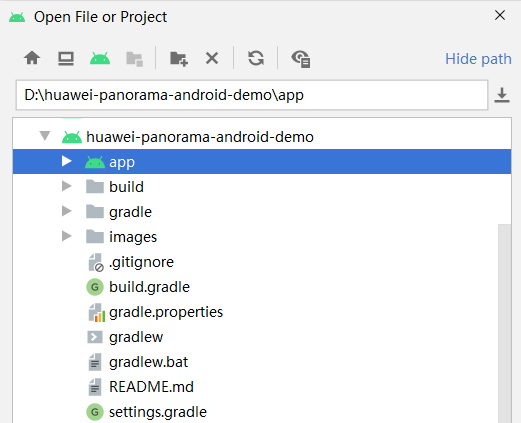
Step 2 Go to File > Open and select the path where the demo project is decompressed.
|
|
Step 3 Click OK to import the demo project.
Step 4 Check the Maven repository address, build dependencies, permissions, and obfuscation script configurations in the demo project. If any of them does not meet your requirements, change it in your own project.
Configure the Maven repository address in the project-level build.gradle file.
buildscript {
    repositories {
        ...
        maven { url 'https://developer.huawei.com/repo/' }
    }
    ...
}

allprojects {
    repositories {
        ...
        maven { url 'https://developer.huawei.com/repo/' }
    }
}
...
Add build dependencies in the app-level build.gradle file.
dependencies {
    ...
    implementation 'com.huawei.hms:panorama:4.0.4.301'
    ...
}
Grant the read and write permissions on external storage devices in the manifest file. (In Android 6.0 or later, you still need to dynamically apply for the permissions.)
    ...
    <uses-permission android:name="android.permission.WRITE_EXTERNAL_STORAGE" />
    ...
Configure the obfuscation script in the app/proguard-rules.pro file.
-ignorewarnings
-keepattributes *Annotation*
-keepattributes Exceptions
-keepattributes InnerClasses
-keepattributes Signature
-keepattributes SourceFile,LineNumberTable
-keep class com.hianalytics.android.**{*;}
-keep class com.huawei.updatesdk.**{*;}
-keep class com.huawei.hms.**{*;}
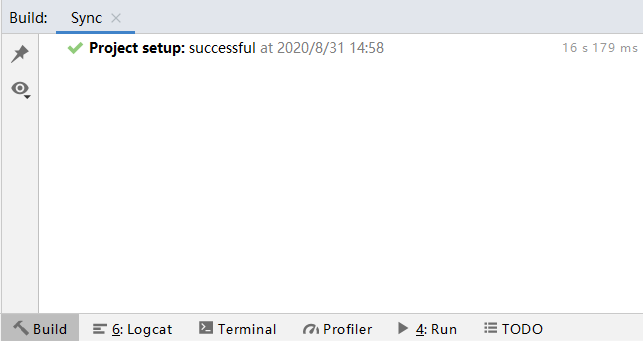
After the demo project is imported and configured, click  to synchronize the project. You can check the synchronization status in the area shown in the following figure.
After the synchronization is complete, click  to run your Android Studio project to generate the APK and install it on your phone for testing. After launching the demo app, you'll see the following screen:
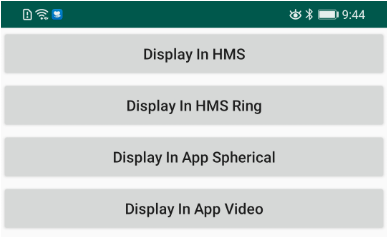
The first three buttons represent three methods for calling the APIs for viewing panoramic images. Tap one of them to view panoramic images.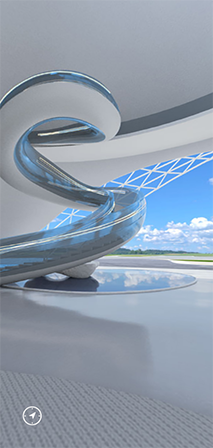
If you want to view panoramic videos, tap the last button.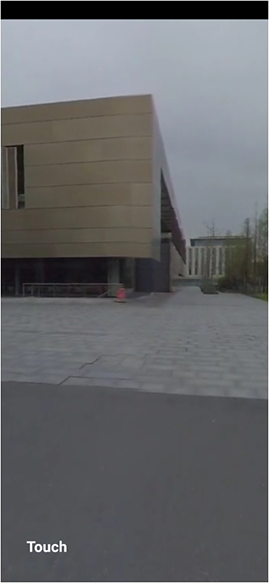
When viewing a panoramic image or video, you can tap  or
or  to change the control mode, respectively.
Set the URI of your desired image. Example:
Uri uri = Uri.parse("android.resource://" + getPackageName() + "/" + R.raw.pano);
To view a panorama in ring mode, specify the panorama type as IMAGE_TYPE_RING through the API.
Panorama.getInstance().loadImageInfo(this, uri, PanoramaInterface.IMAGE_TYPE_RING).setResultCallback(new ResultCallbackImpl());
To use more panorama-related services, call LocalInterface of the Panorama SDK. Please refer to LocalDisplayActivity for specific code.
Step 1 Create a layout.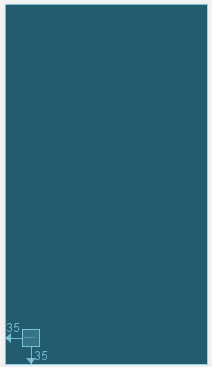
The Layout presents a panoramic view, with an ImageButton (for changing the control mode) in the lower left corner.
Step 2 Obtain the LocalInterface object.
mLocalInterface = Panorama.getInstance().getLocalInstance(this);
Step 3 Perform initialization, and set the image URI and type.
mLocalInterface.init();
mLocalInterface.setImage(uri, PanoramaInterface.IMAGE_TYPE_SPHERICAL);
Step 4 Obtain the view and add it to the new layout.
RelativeLayout mLayout= findViewById(R.id.relativeLayout);
View mPanoramaView= mLocalInterface.getView();
mLayout.addView(mPanoramaView);
Step 5 Listen on the ImageButton event to change the control mode.
mChangeModeButton = findViewById(R.id.changeModeButton);
...
 initControlMode();
...
private void initControlMode() {
    mChangeModeButton.setOnClickListener(new View.OnClickListener() {
        @Override
        public void onClick(View v) {
            if (controlModeCount % 3 == 0) {
                mLocalInstance.setControlMode(PanoramaInterface.CONTROL_TYPE_TOUCH);
                mChangeModeButton.setText(R.string.button_touch);
            } else if (controlModeCount % 3 == 1) {
                mLocalInstance.setControlMode(PanoramaInterface.CONTROL_TYPE_POSE);
                mChangeModeButton.setText(R.string.button_pose);
            } else {
                mLocalInstance.setControlMode(PanoramaInterface.CONTROL_TYPE_MIX);
                mChangeModeButton.setText(R.string.button_mix);
            }
            controlModeCount++;
        }
    });
    mChangeModeButton.performClick();
}
Step 6 Send the view touch control event to the Panorama SDK. (This step assumes that the touch mode is enabled.)
mPanoramaView.setOnTouchListener(this);
@Override
public boolean onTouch(View view, MotionEvent motionEvent) {
    if (mPanoramaView != null && mPanoramaView.equals(view)) {
        if (mLocalInstance != null) {
            mLocalInstance.updateTouchEvent(motionEvent);
            return true;
        }
    }
    return false;
}
Step 7 Click to run your Android Studio project to generate the APK and install it on your phone for testing. After launching the demo app, tap localInterface to check whether the panoramic view is displayed as expected.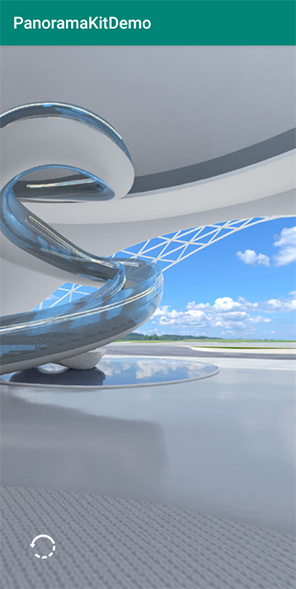
—-End
After loading a panoramic image, you can call the setImage API to replace it with another one, if necessary.
private void doDisplaySpherical() {
        Uri uri = Uri.parse("android.resource://" + getPackageName() + "/" + R.raw.pano);
        Log.i(LOG_TAG, "test uri " + uri.toString());
        int ret = mLocalInstance.setImage(uri, PanoramaInterface.IMAGE_TYPE_SPHERICAL);
        if (ret != ResultCode.SUCCEED) {
            logAndToast("doDisplaySpherical setImage failed " + ret);
            return;
        }

        addViewToLayout();
    }
If you want to load another video when viewing one video, call the getSurface API to specify the type of the new video and call the initMediaPlayer method to play the video.
private void doDisplayVideo() {
        Surface videoSurface = mLocalInstance.getSurface(PanoramaInterface.IMAGE_TYPE_SPHERICAL);
        if (videoSurface == null) {
            logAndToast("videoSurface is null");
            return;
        }

        Uri videoUri = Uri.parse("android.resource://" + getPackageName() + "/" + R.raw.sample);
        initMediaPlayer(videoUri, videoSurface);

        addViewToLayout();
}
private void initMediaPlayer(Uri videoUri, Surface surface) {
        mPlayer = new MediaPlayer();
        try {
            mPlayer.setDataSource(getApplicationContext(), videoUri);
        } catch (IOException e) {
            e.printStackTrace();
            return;
        }
        mPlayer.setLooping(true);
        mPlayer.setSurface(surface);

        try {
            mPlayer.prepare();
        } catch (IOException e) {
            Log.e(LOG_TAG, "Media Player prepare exception");
        }
        mPlayer.start();

        float ratio = mPlayer.getVideoWidth() / (float) mPlayer.getVideoHeight();
        Log.i(LOG_TAG, "ratio = " + ratio);
        mLocalInstance.setValue(PanoramaInterface.KEY_VIDEO_RATIO, String.valueOf(ratio));
}
Well done. You have successfully completed this codelab and learned how to:
For more information, please click the following links:
Development Guide