hQUIC Kit gives your apps low latency, high throughput, and secure and reliable communications capabilities. It supports the QUIC protocol and provides intelligent congestion control algorithms to avoid congestions in different network environments, giving your apps faster connection establishment, reduced packet loss, and higher throughput. You can use hQUIC Kit to improve the network communication quality in unstable mobile network environments. With the sample project and code, you will experience how to:
In this codelab, you will create an app, integrate hQUIC Kit into the app, enable Cronet, and use Cronet APIs to implement communications based on the HTTP/2 and QUIC protocols.
In this codelab, you will learn how to:
To integrate hQUIC Kit, you must complete the following preparations:
The procedure for configuring the Maven repository address in Android Studio is different for Gradle plugin earlier than 7.0, Gradle plugin 7.0, and Gradle plugin 7.1 or later. Click a relevant link below to find the configuration procedure for the specific Gradle plugin version.
Gradle plugin earlier than 7.0 | Gradle plugin 7.0 | Gradle plugin 7.1 or later |
Gradle plugin earlier than 7.0
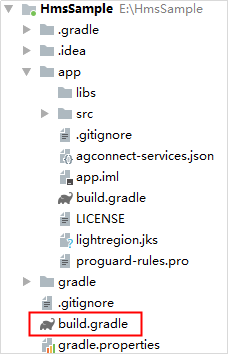
a. Open the build.gradle file in the root directory of your Android Studio project.
b. Add the AppGallery Connect plugin and the Maven repository.
buildscript {
    repositories {
        google()
        jcenter()
        // Configure the Maven repository address for the HMS Core SDK.
        maven {url 'https://developer.huawei.com/repo/'}
    }
    dependencies {
        ...
        // Add the AppGallery Connect plugin configuration. You are advised to use the latest plugin version.
        classpath 'com.huawei.agconnect:agcp:1.6.0.300'
    }
}

allprojects {
    repositories {
        google()
        jcenter()
        // Configure the Maven repository address for the HMS Core SDK.
        maven {url 'https://developer.huawei.com/repo/'}
    }
}
Gradle plugin 7.0
a. Open the build.gradle file in the root directory of your Android Studio project.

b. Add the AppGallery Connect plugin and the Maven repository.
buildscript {
    repositories {
        google()
        jcenter()
        // Configure the Maven repository address for the HMS Core SDK.
        maven {url 'https://developer.huawei.com/repo/'}
    }
    dependencies {
        ...
        // Add the AppGallery Connect plugin configuration. You are advised to use the latest plugin version.
        classpath 'com.huawei.agconnect:agcp:1.6.0.300'
    }
}
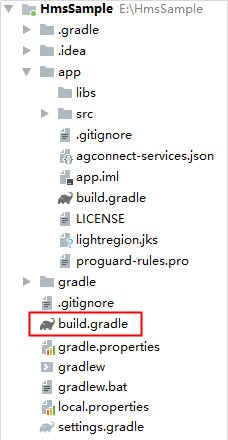
c. Open the project-level settings.gradle file and configure the Maven repository address for the HMS Core SDK.
dependencyResolutionManagement {
    ...
    repositories {
        google()
        jcenter()
        // Configure the Maven repository address for the HMS Core SDK.
        maven {url 'https://developer.huawei.com/repo/'}
    }
}
Gradle plugin 7.1 or later
a. Open the build.gradle file in the root directory of your Android Studio project.
b. If the agconnect-services.json file has been added to the app, go to buildscript > dependencies and add the AppGallery Connect plugin configuration.
buildscript {
    dependencies {
        ...
        // Add the AppGallery Connect plugin configuration. You are advised to use the latest plugin version.
        classpath 'com.huawei.agconnect:agcp:1.6.0.300'
    }
}
c. Open the project-level settings.gradle file and configure the Maven repository address for the HMS Core SDK.
pluginManagement {
    repositories {
        gradlePluginPortal()
        google()
        mavenCentral()
        // Configure the Maven repository address for the HMS Core SDK.
        maven { url 'https://developer.huawei.com/repo/' }
    }
}
dependencyResolutionManagement {
    ...
    repositories {
        google()
        mavenCentral()
        // Configure the Maven repository address for the HMS Core SDK.
        maven { url 'https://developer.huawei.com/repo/' }
    }
}
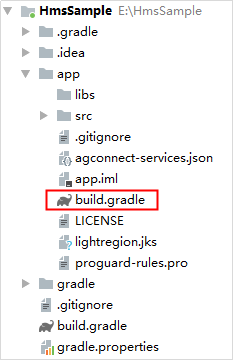
dependencies {
      implementation 'com.huawei.hms:hquic-provider:{version}'
}
Go to File > Sync Project with Gradle Files to start synchronization.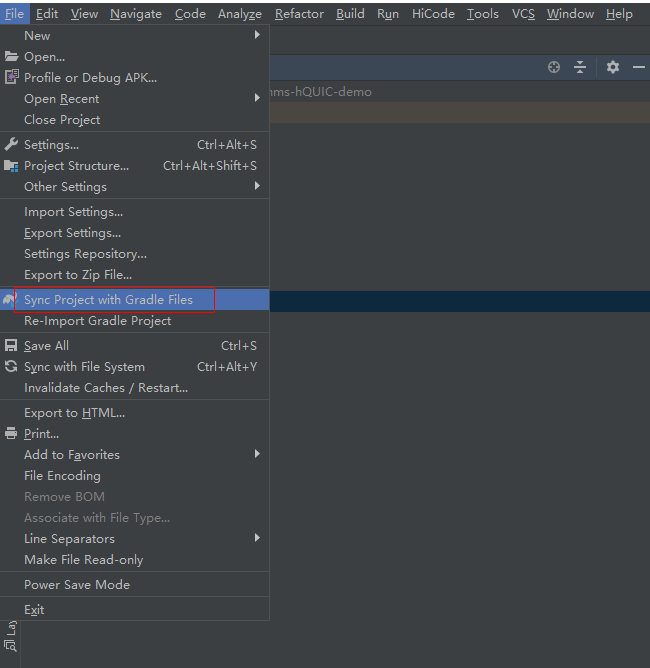
If "completed successfully" is displayed, the synchronization is successful, as shown in the screenshot below.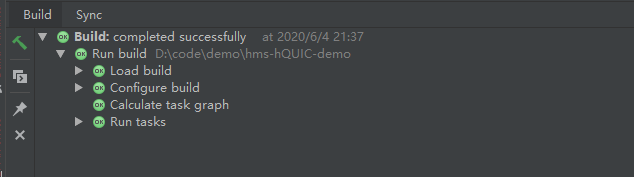
In this section, you will develop a demo app, and learn how to use APIs of the hQUIC SDK.
Right-click the src directory in the app directory of your project, and choose related shortcut menus to create an HQUICService class.
Asynchronous initialization is optional. To load the Cronet service in advance, you can use the asynchronous initialization API to preload the service.
/**
* Asynchronously initialize HQUICManager.
*/
public void init(){
    HQUICManager.asyncInit(context, new HQUICManager.HQUICInitCallback() {
        @Override
        public void onSuccess() {
            Log.i(TAG, "HQUICManager asyncInit success");
        }

        @Override
        public void onFail(Exception e) {
            Log.w(TAG, "HQUICManager asyncInit fail");
        }
    });
}
/**
* Construct a CronetEngine object.
*/
private CronetEngine createCronetEngine(String url) {
    if (cronetEngine != null) {
        return cronetEngine;
    }
    CronetEngine.Builder builder = new CronetEngine.Builder(context);
    // Set to support the QUIC protocol.
    builder.enableQuic(true);
    // Globally add domain names that support the QUIC protocol.
    builder.addQuicHint(getHost(url), DEFAULT_PORT, DEFAULT_ALTERNATEPORT);
    cronetEngine = builder.build();
    return cronetEngine;
}
/**
* Construct a request object.
*/
private UrlRequest builRequest(String url, String method) {
    CronetEngine cronetEngine = createCronetEngine(url);
    UrlRequest.Builder requestBuilder =
            cronetEngine.newUrlRequestBuilder(url, callback, executor).setHttpMethod(method);
    UrlRequest request = requestBuilder.build();
    return request;
}
/**
* Send the network request.
*/
private void sendRequest(String url, String method) {
    Log.i(TAG, "callURL: url is " + url + "and method is " + method);
    UrlRequest urlRequest = builRequest(url, method);
    if (urlRequest != null) {
        urlRequest.start();
    }
}
After adding the preceding service code, you can build your app. After the app is built, an APK file will be generated, and you can install it on the test mobile phone.
Tap hQUICTest in the demo app. Relevant information will be displayed.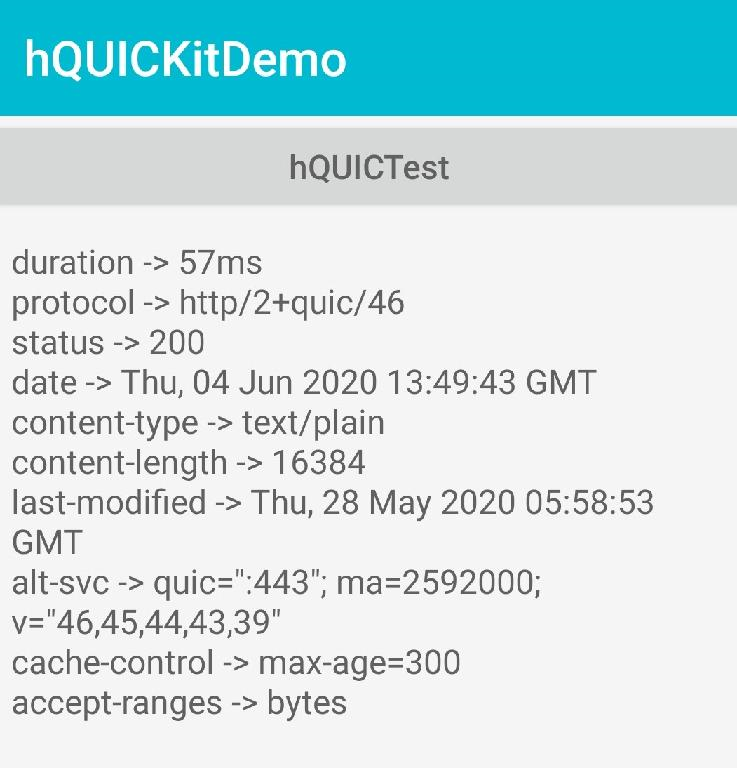
Well done. You have successfully completed this codelab and learned how to:
For more information, click the following links: