Theme Studio is a Huawei-developed editing tool that allows you to edit and create a watch face quickly after completing design and preparing sliced images. The tool has the following features:
The UI is simple and elegant, making it easy to edit widgets on your watch face.
The tool is intuitive, convenient, and efficient, with an editing area for you to set parameters, and a preview area to drag and drop widgets.
Theme Studio supports watch face development for multiple Huawei watch and band products. As these products upgrade, new functions have been constantly added to the tool, helping you design more extensive and interesting watch faces for users.
In this codelab, you will create an elegant and interesting watch face using Theme Studio, bringing your users a brand-new watch face style.
In this codelab, you will:
Learn how to make a Huawei watch face using Theme Studio.
Gain a deeper understanding of Huawei watch faces and enjoy the process of making a watch face.
Hardware Requirements
A laptop running Windows 10
A Huawei phone (with a USB cable for transmitting your watch face)
Basics about Huawei watch face creation using Theme Studio
Key Points
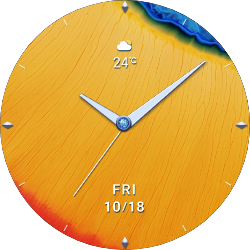
Extract watch face elements like the background video, clock hands, days of the week, month, date, and weather.
Display these elements using widgets on Theme Studio.
Development Procedure
Step 1: Create a watch face.
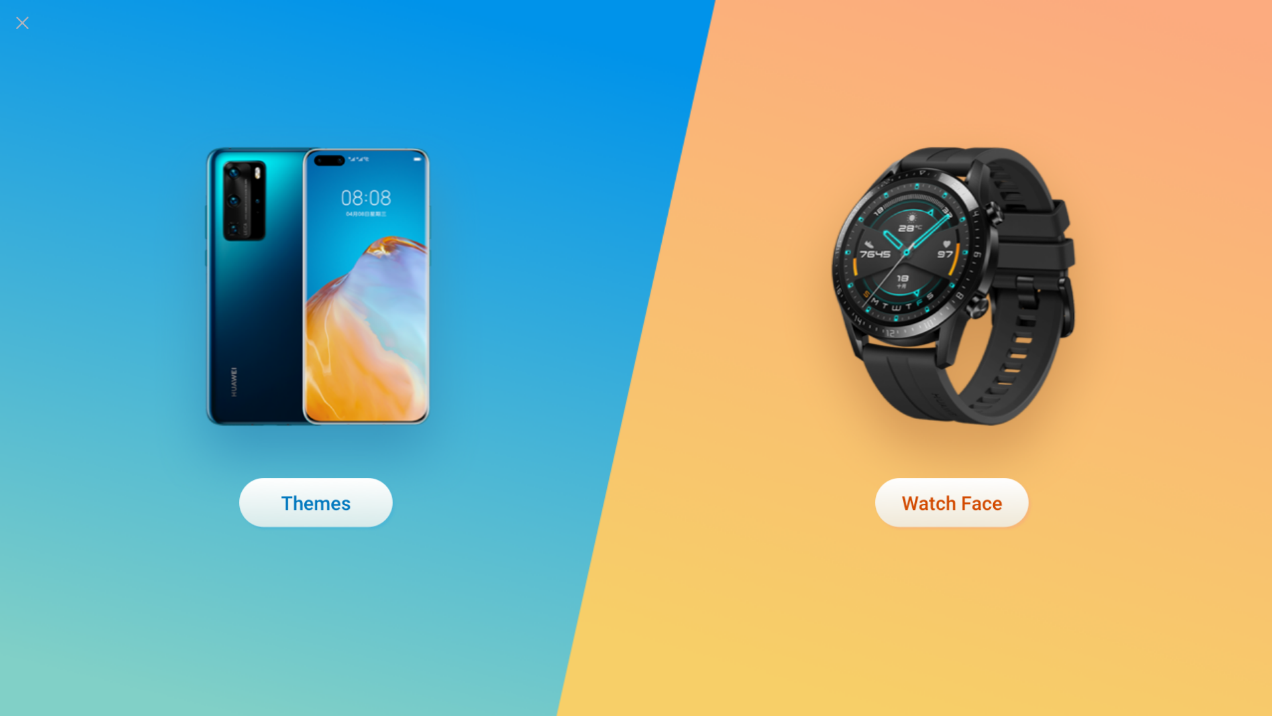
Start Theme Studio.
Click Watch Face.
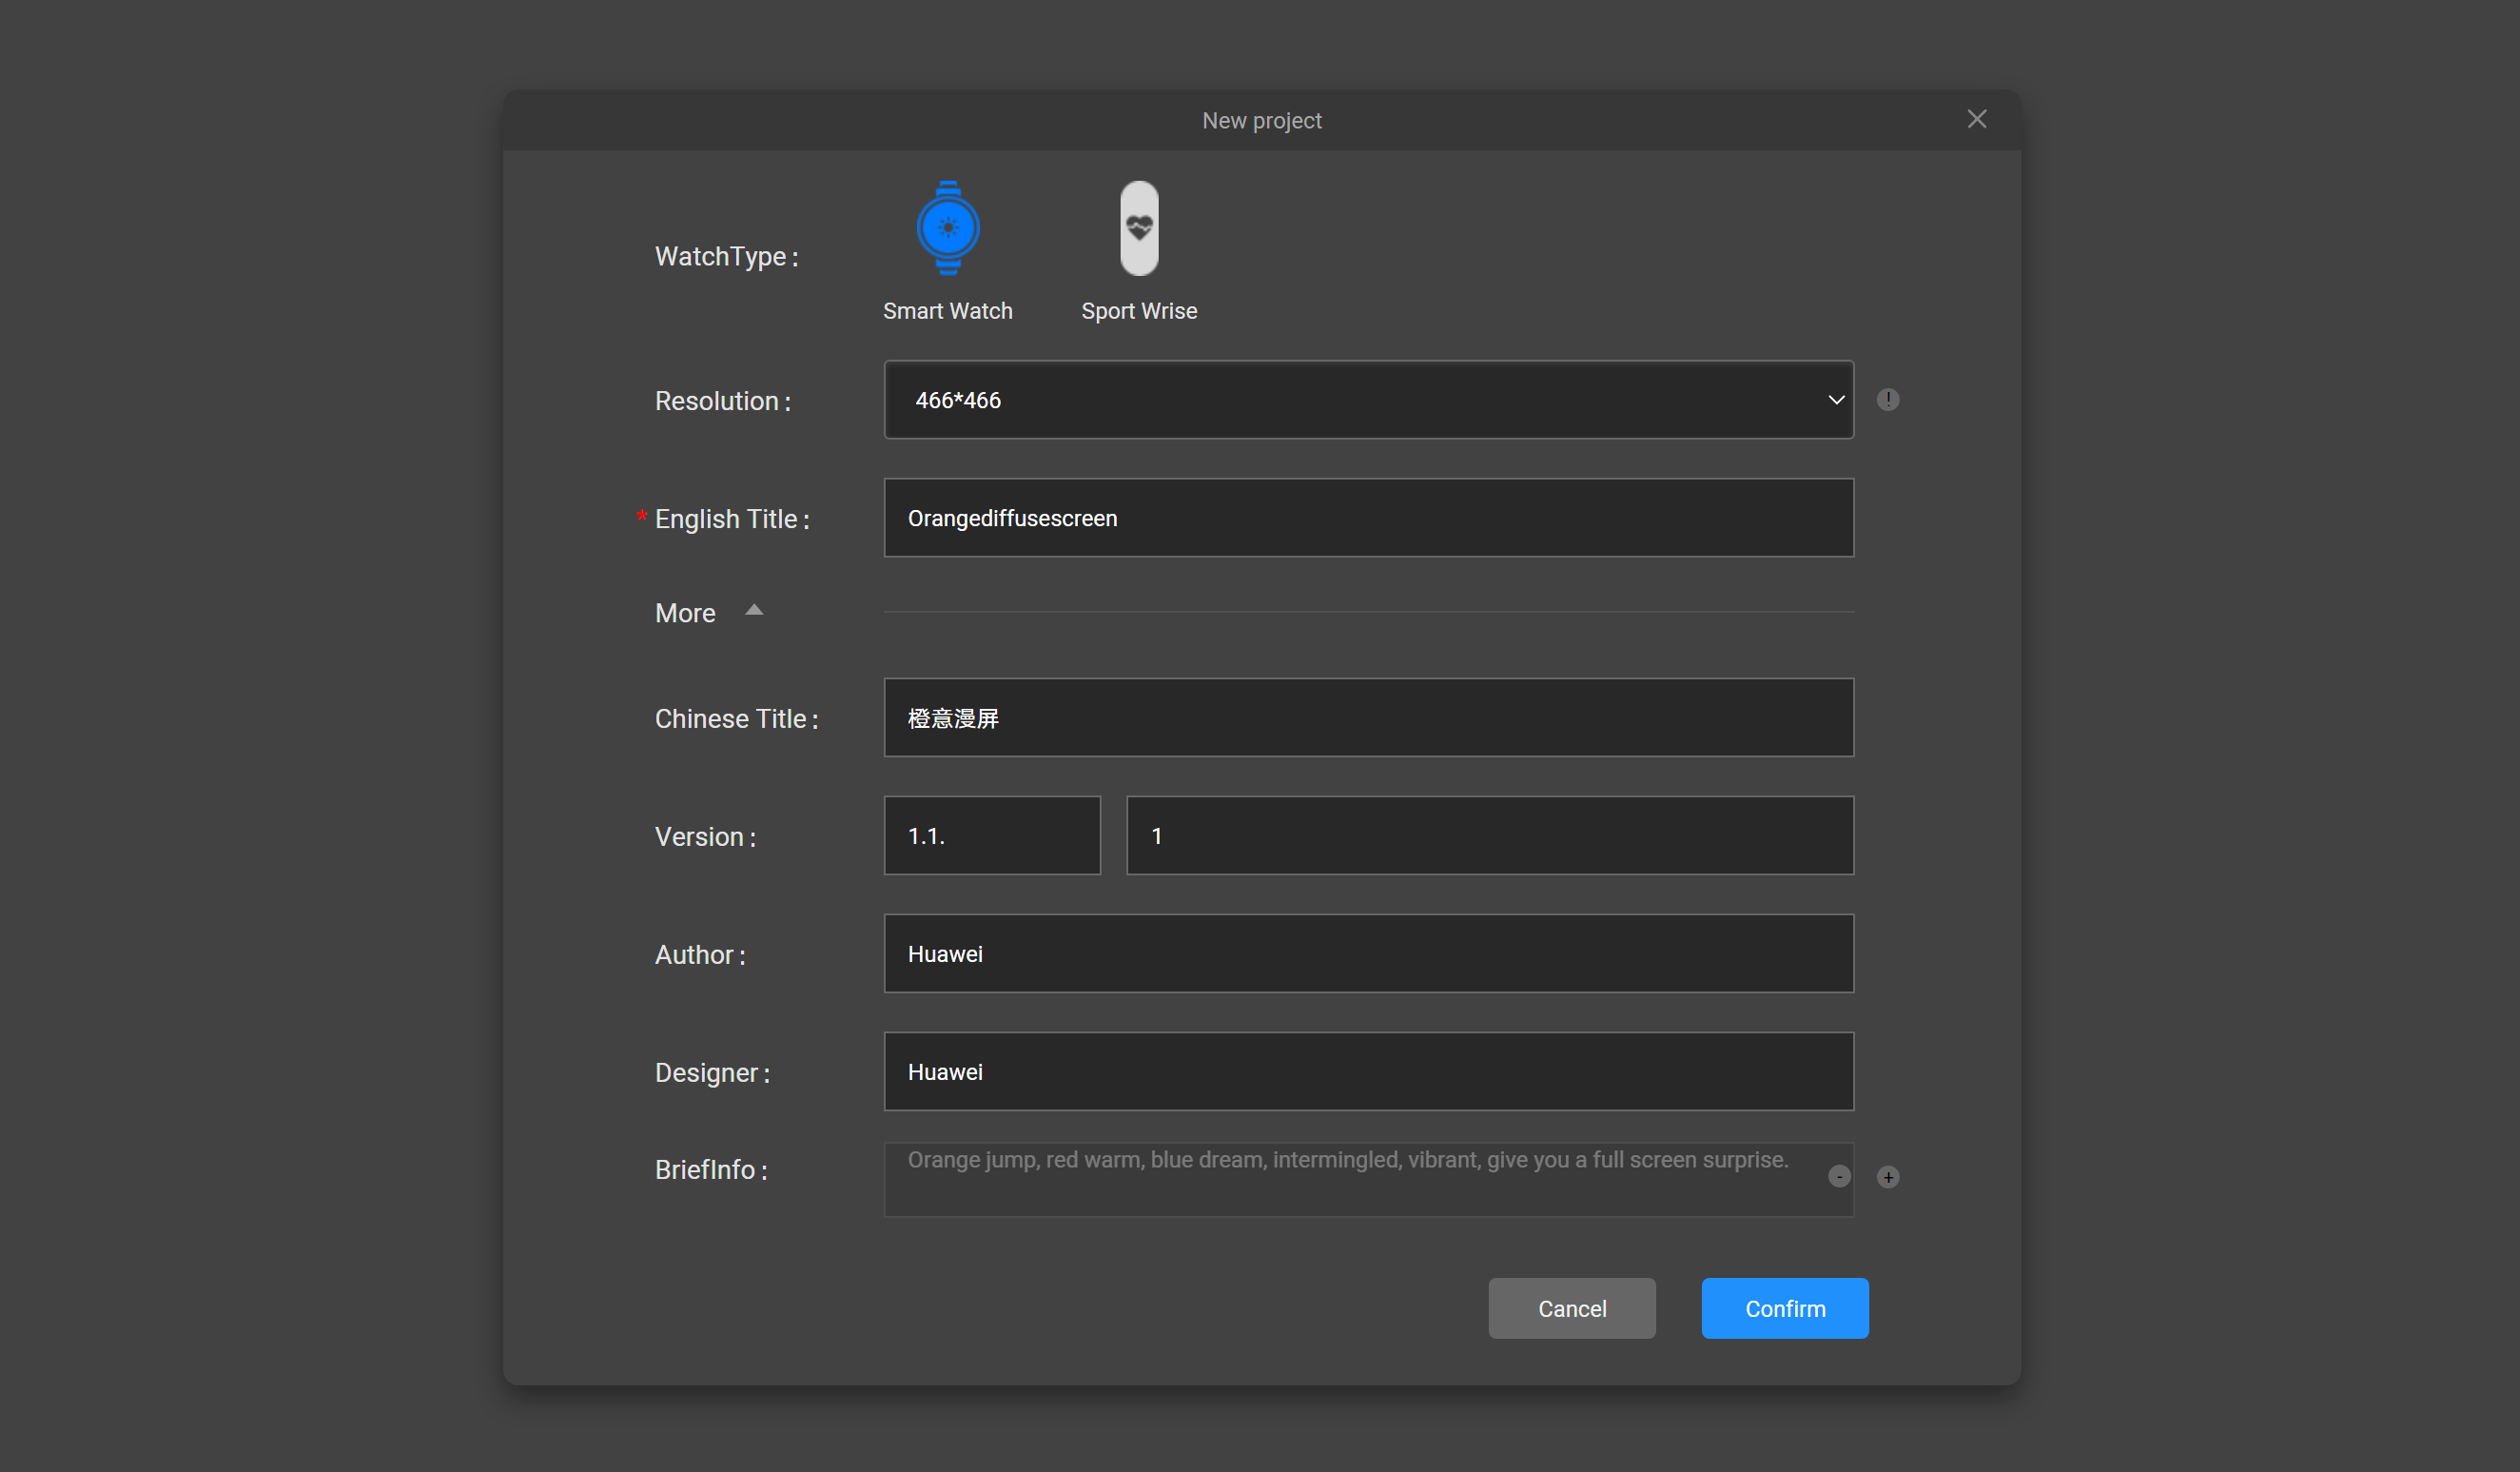
Click the add sign (+).
Select Smart Watch from WatchType.
Select 466*466 from the Resolution drop-down list box.
Enter an English name for your watch face in English Title.
Click More to set more information as required, for example, Chinese Title, Author, Designer, and BriefInfo.
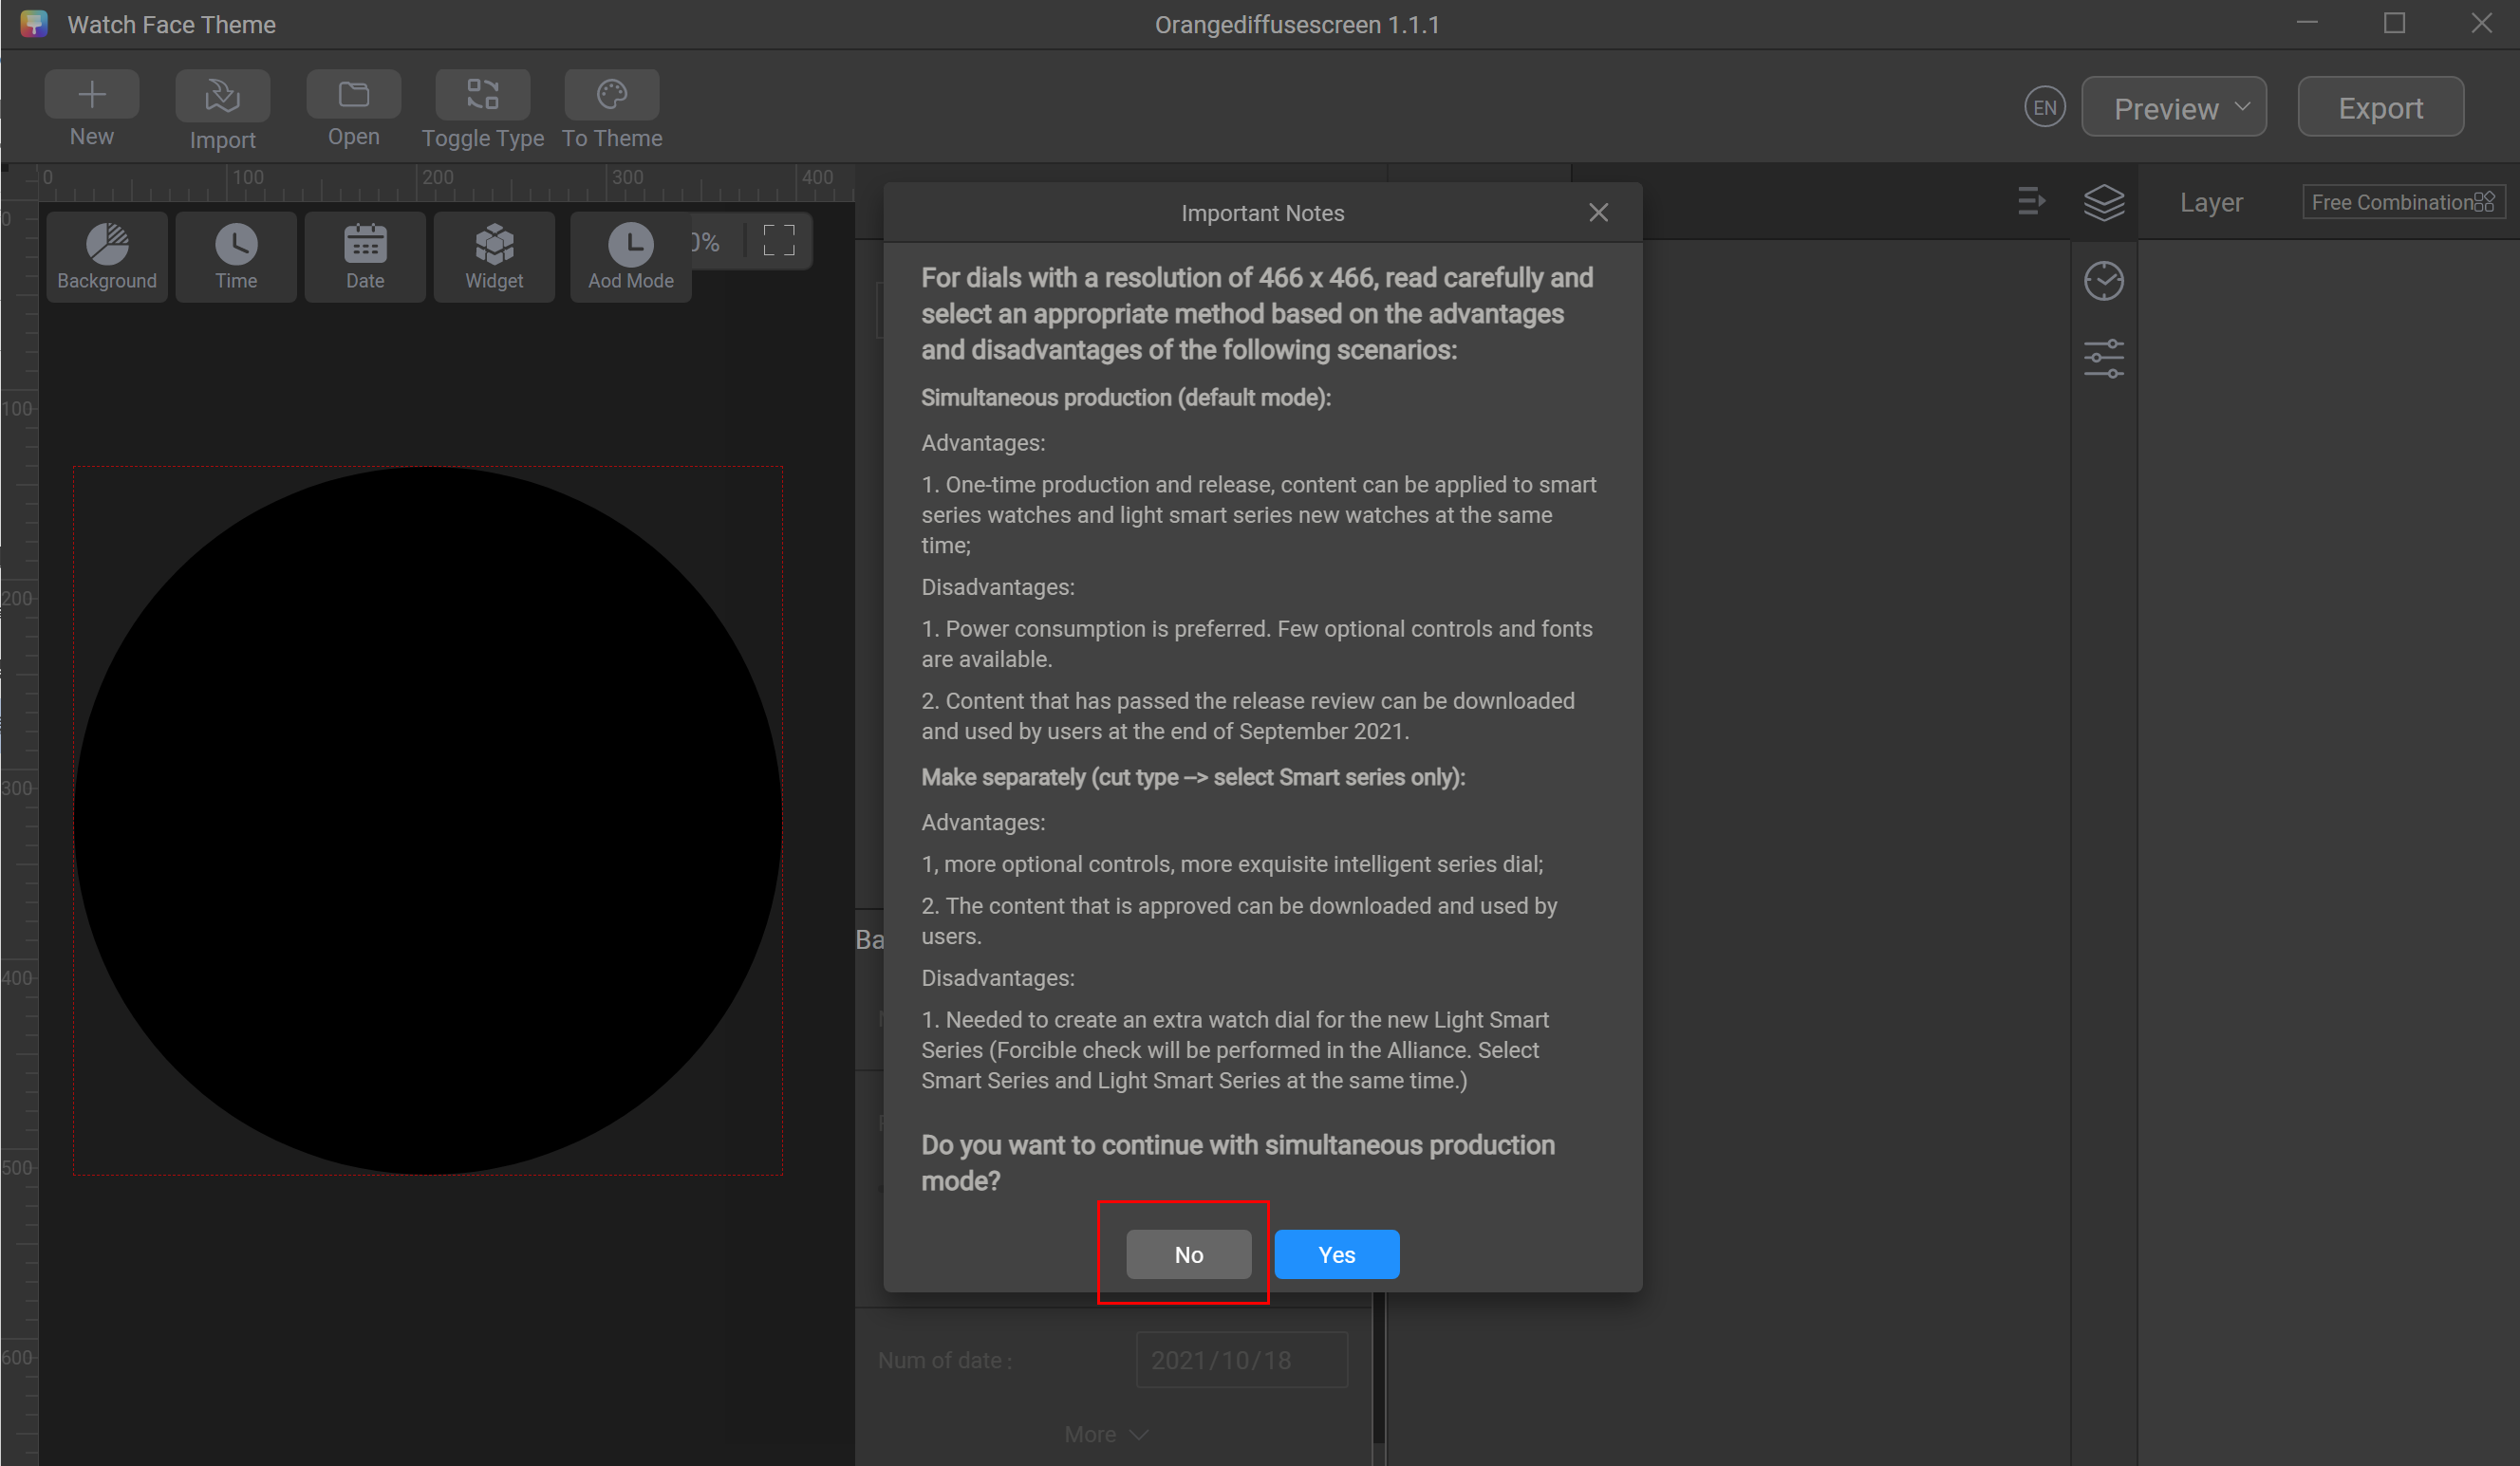
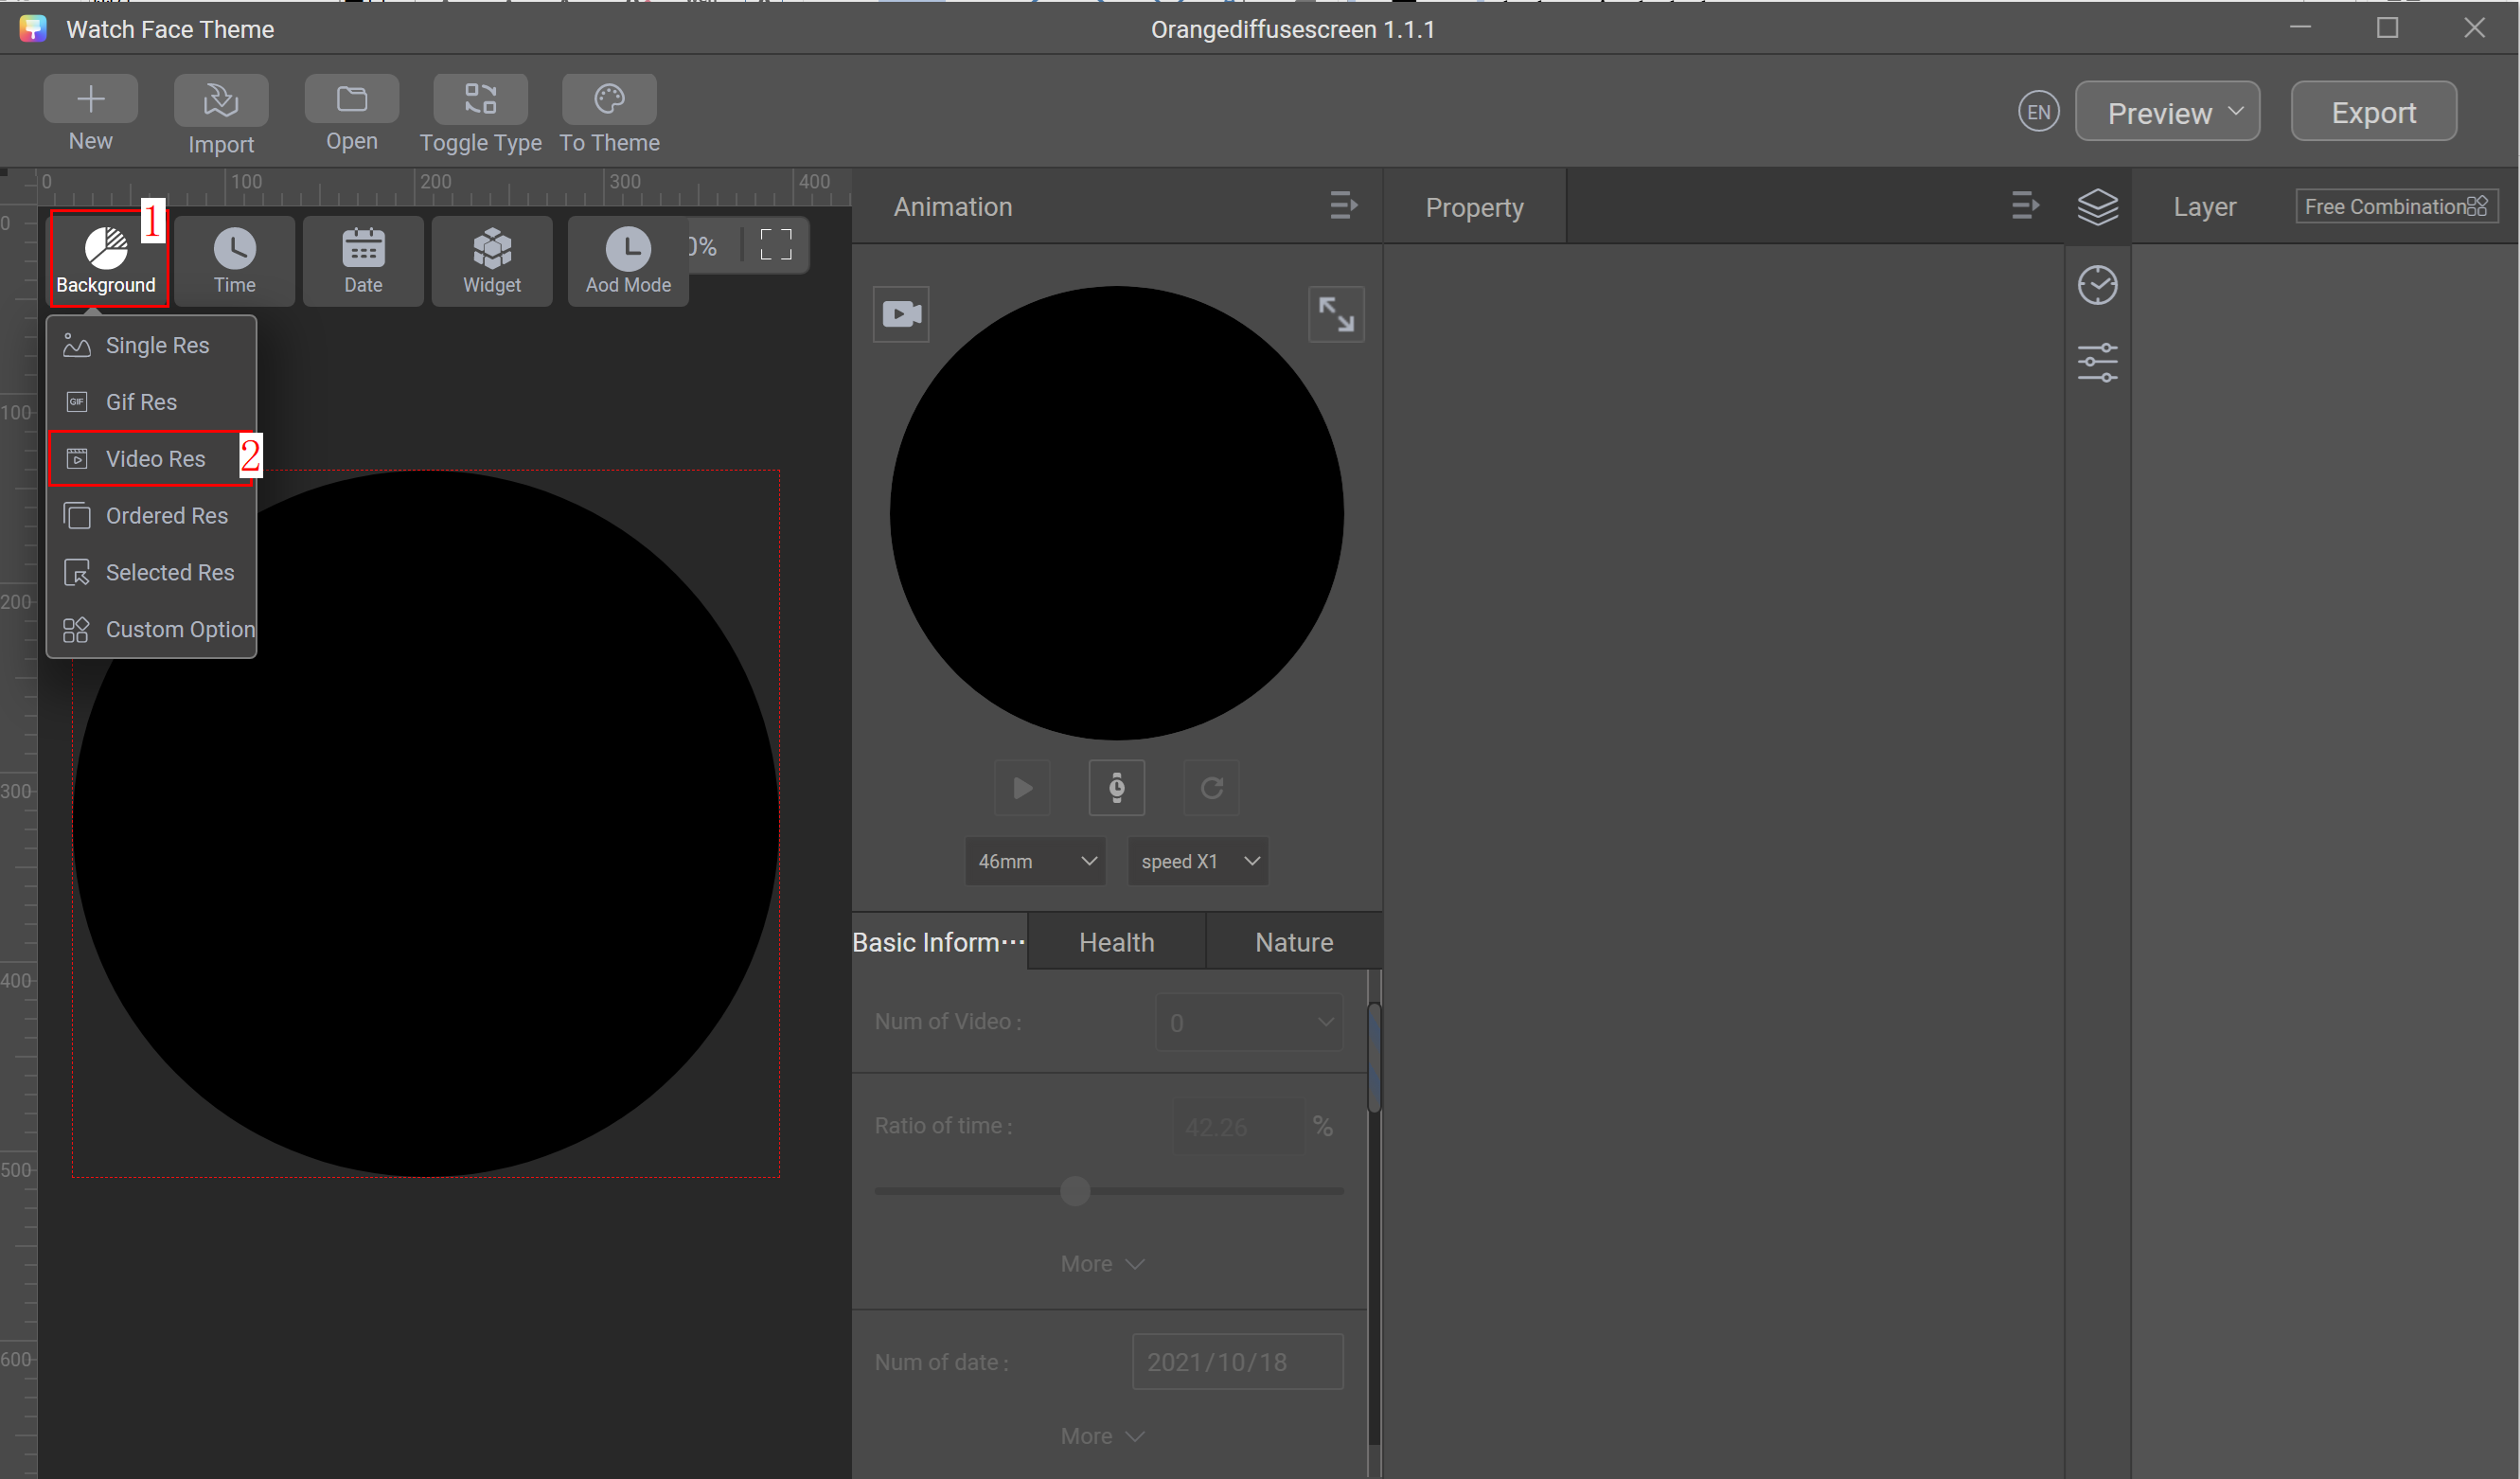
Step 2: Add a background video for your watch face.
Click No when the Important Notes dialog box is displayed.
Choose Background > Video Res.
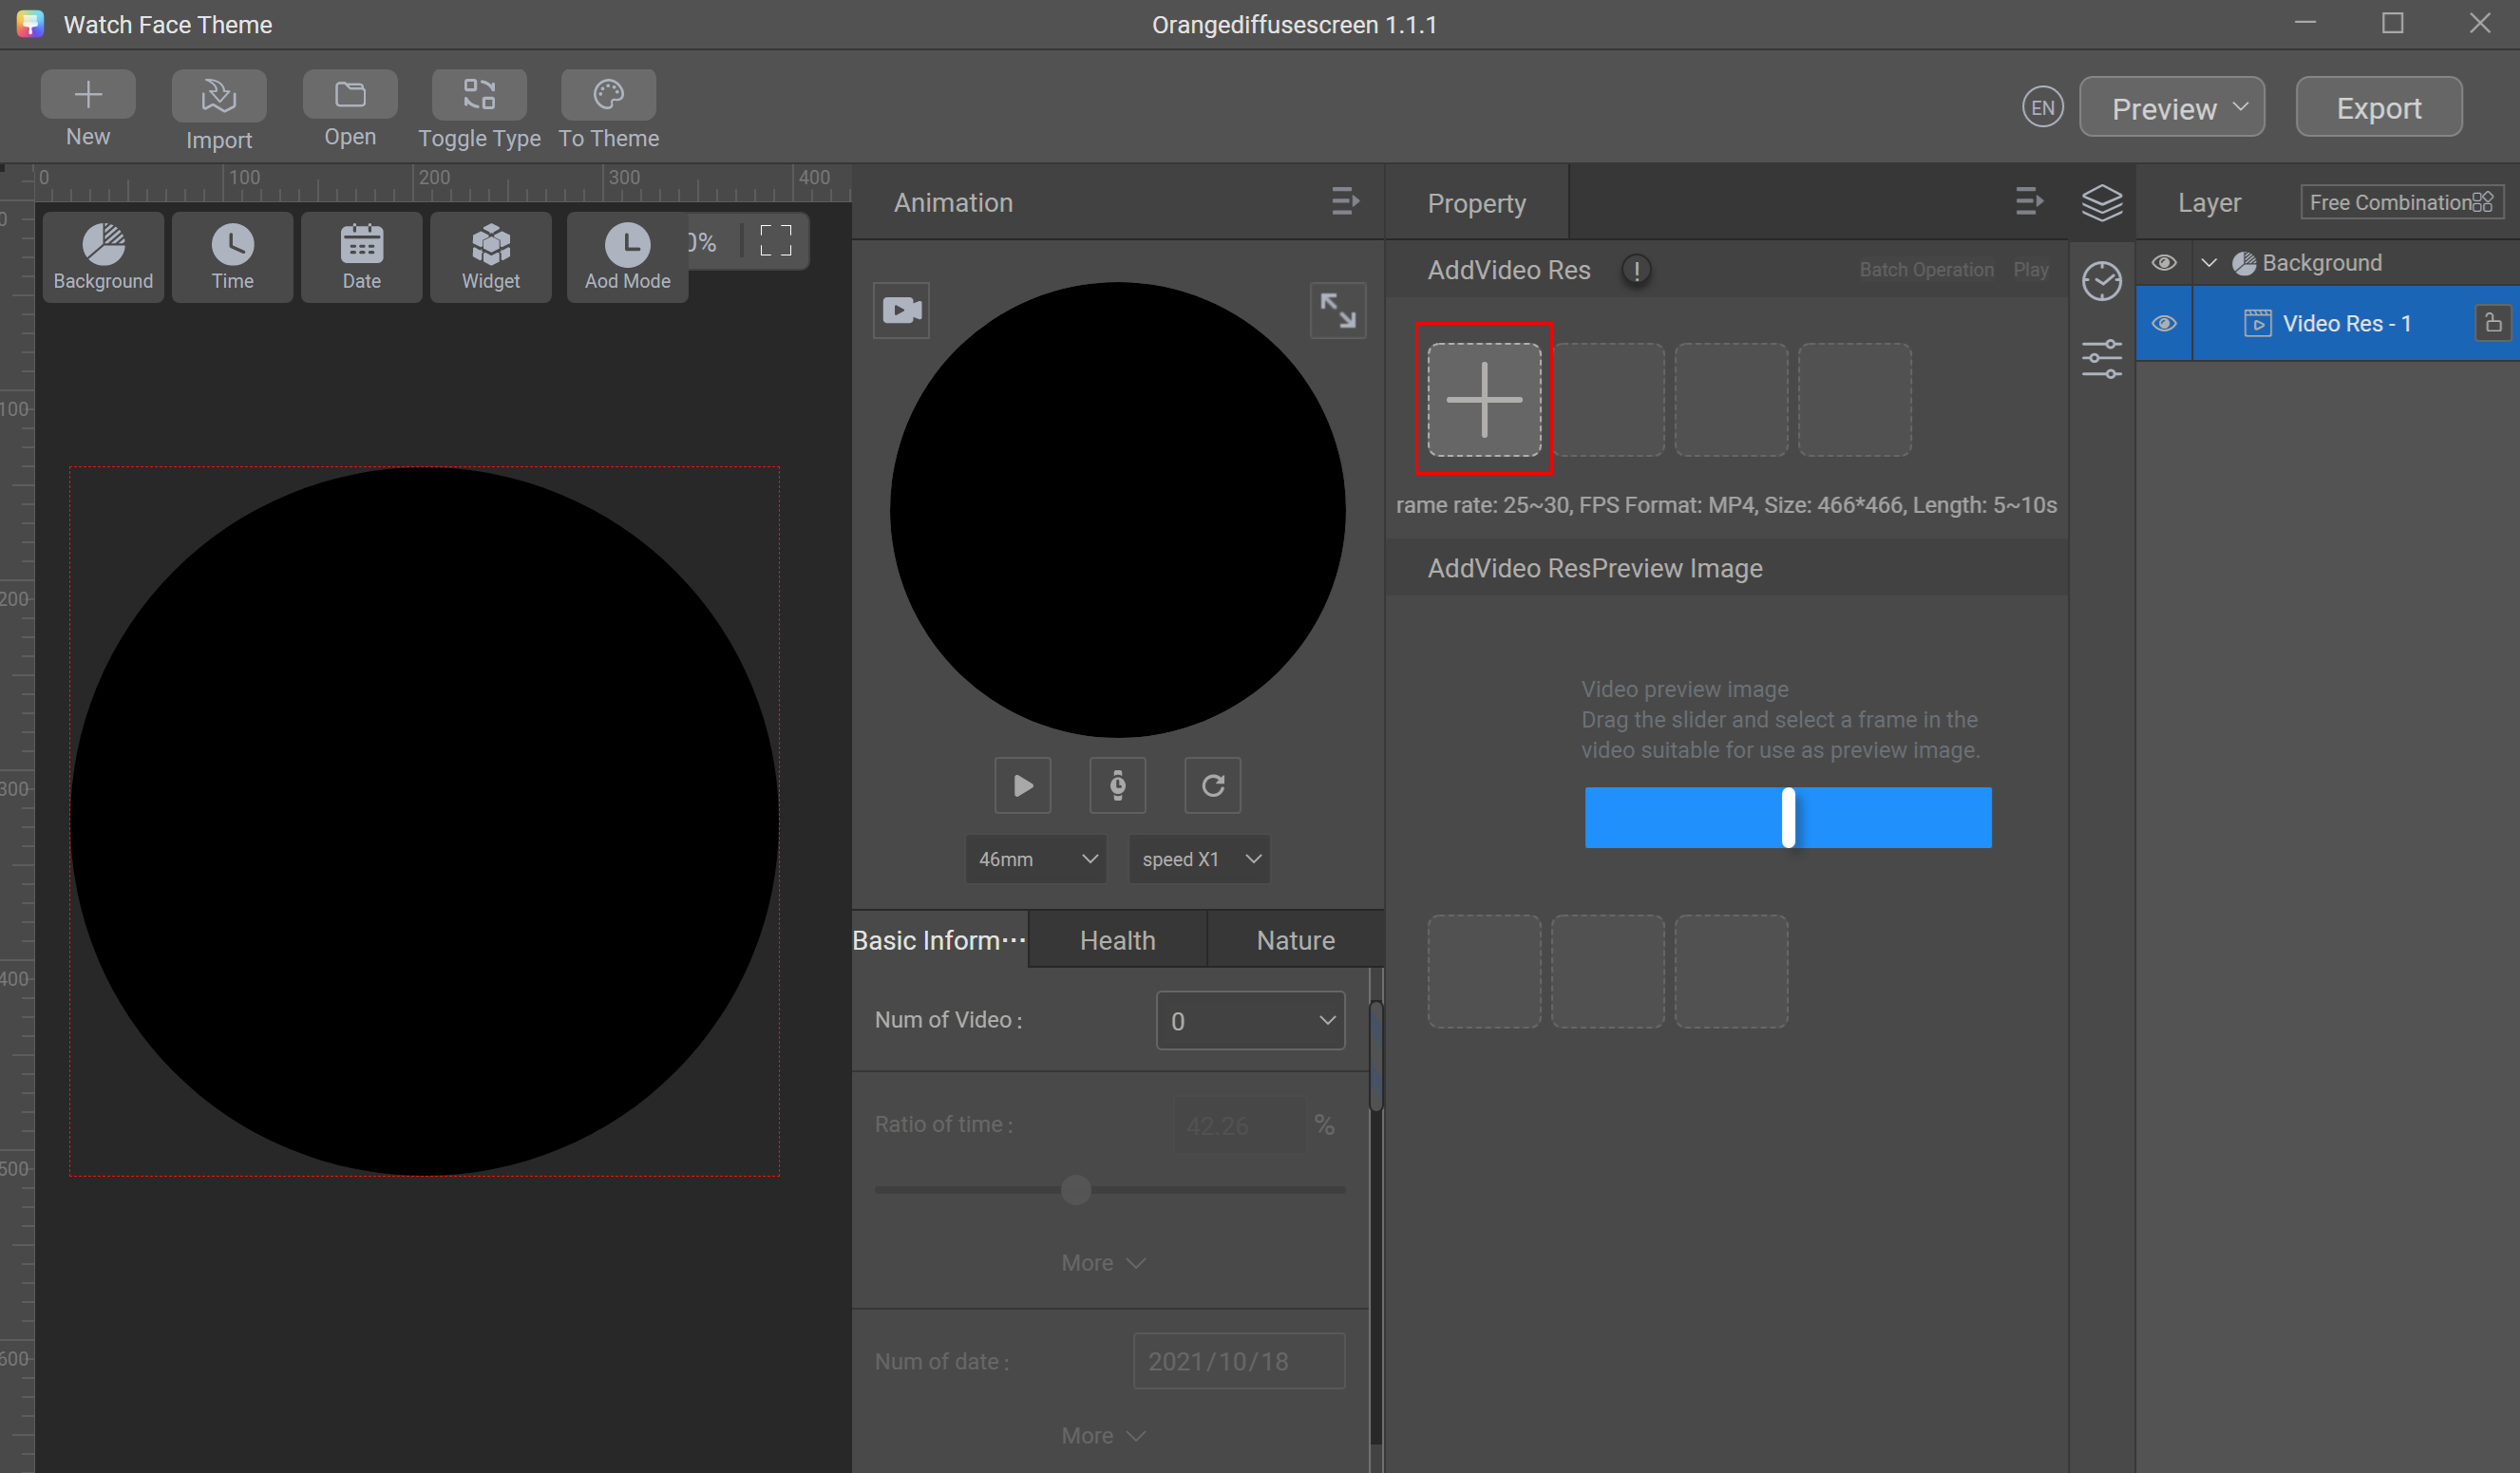
Click the add sign (+) in the AddVideoRes area to import the prepared video background resource package A100_079.mp4.
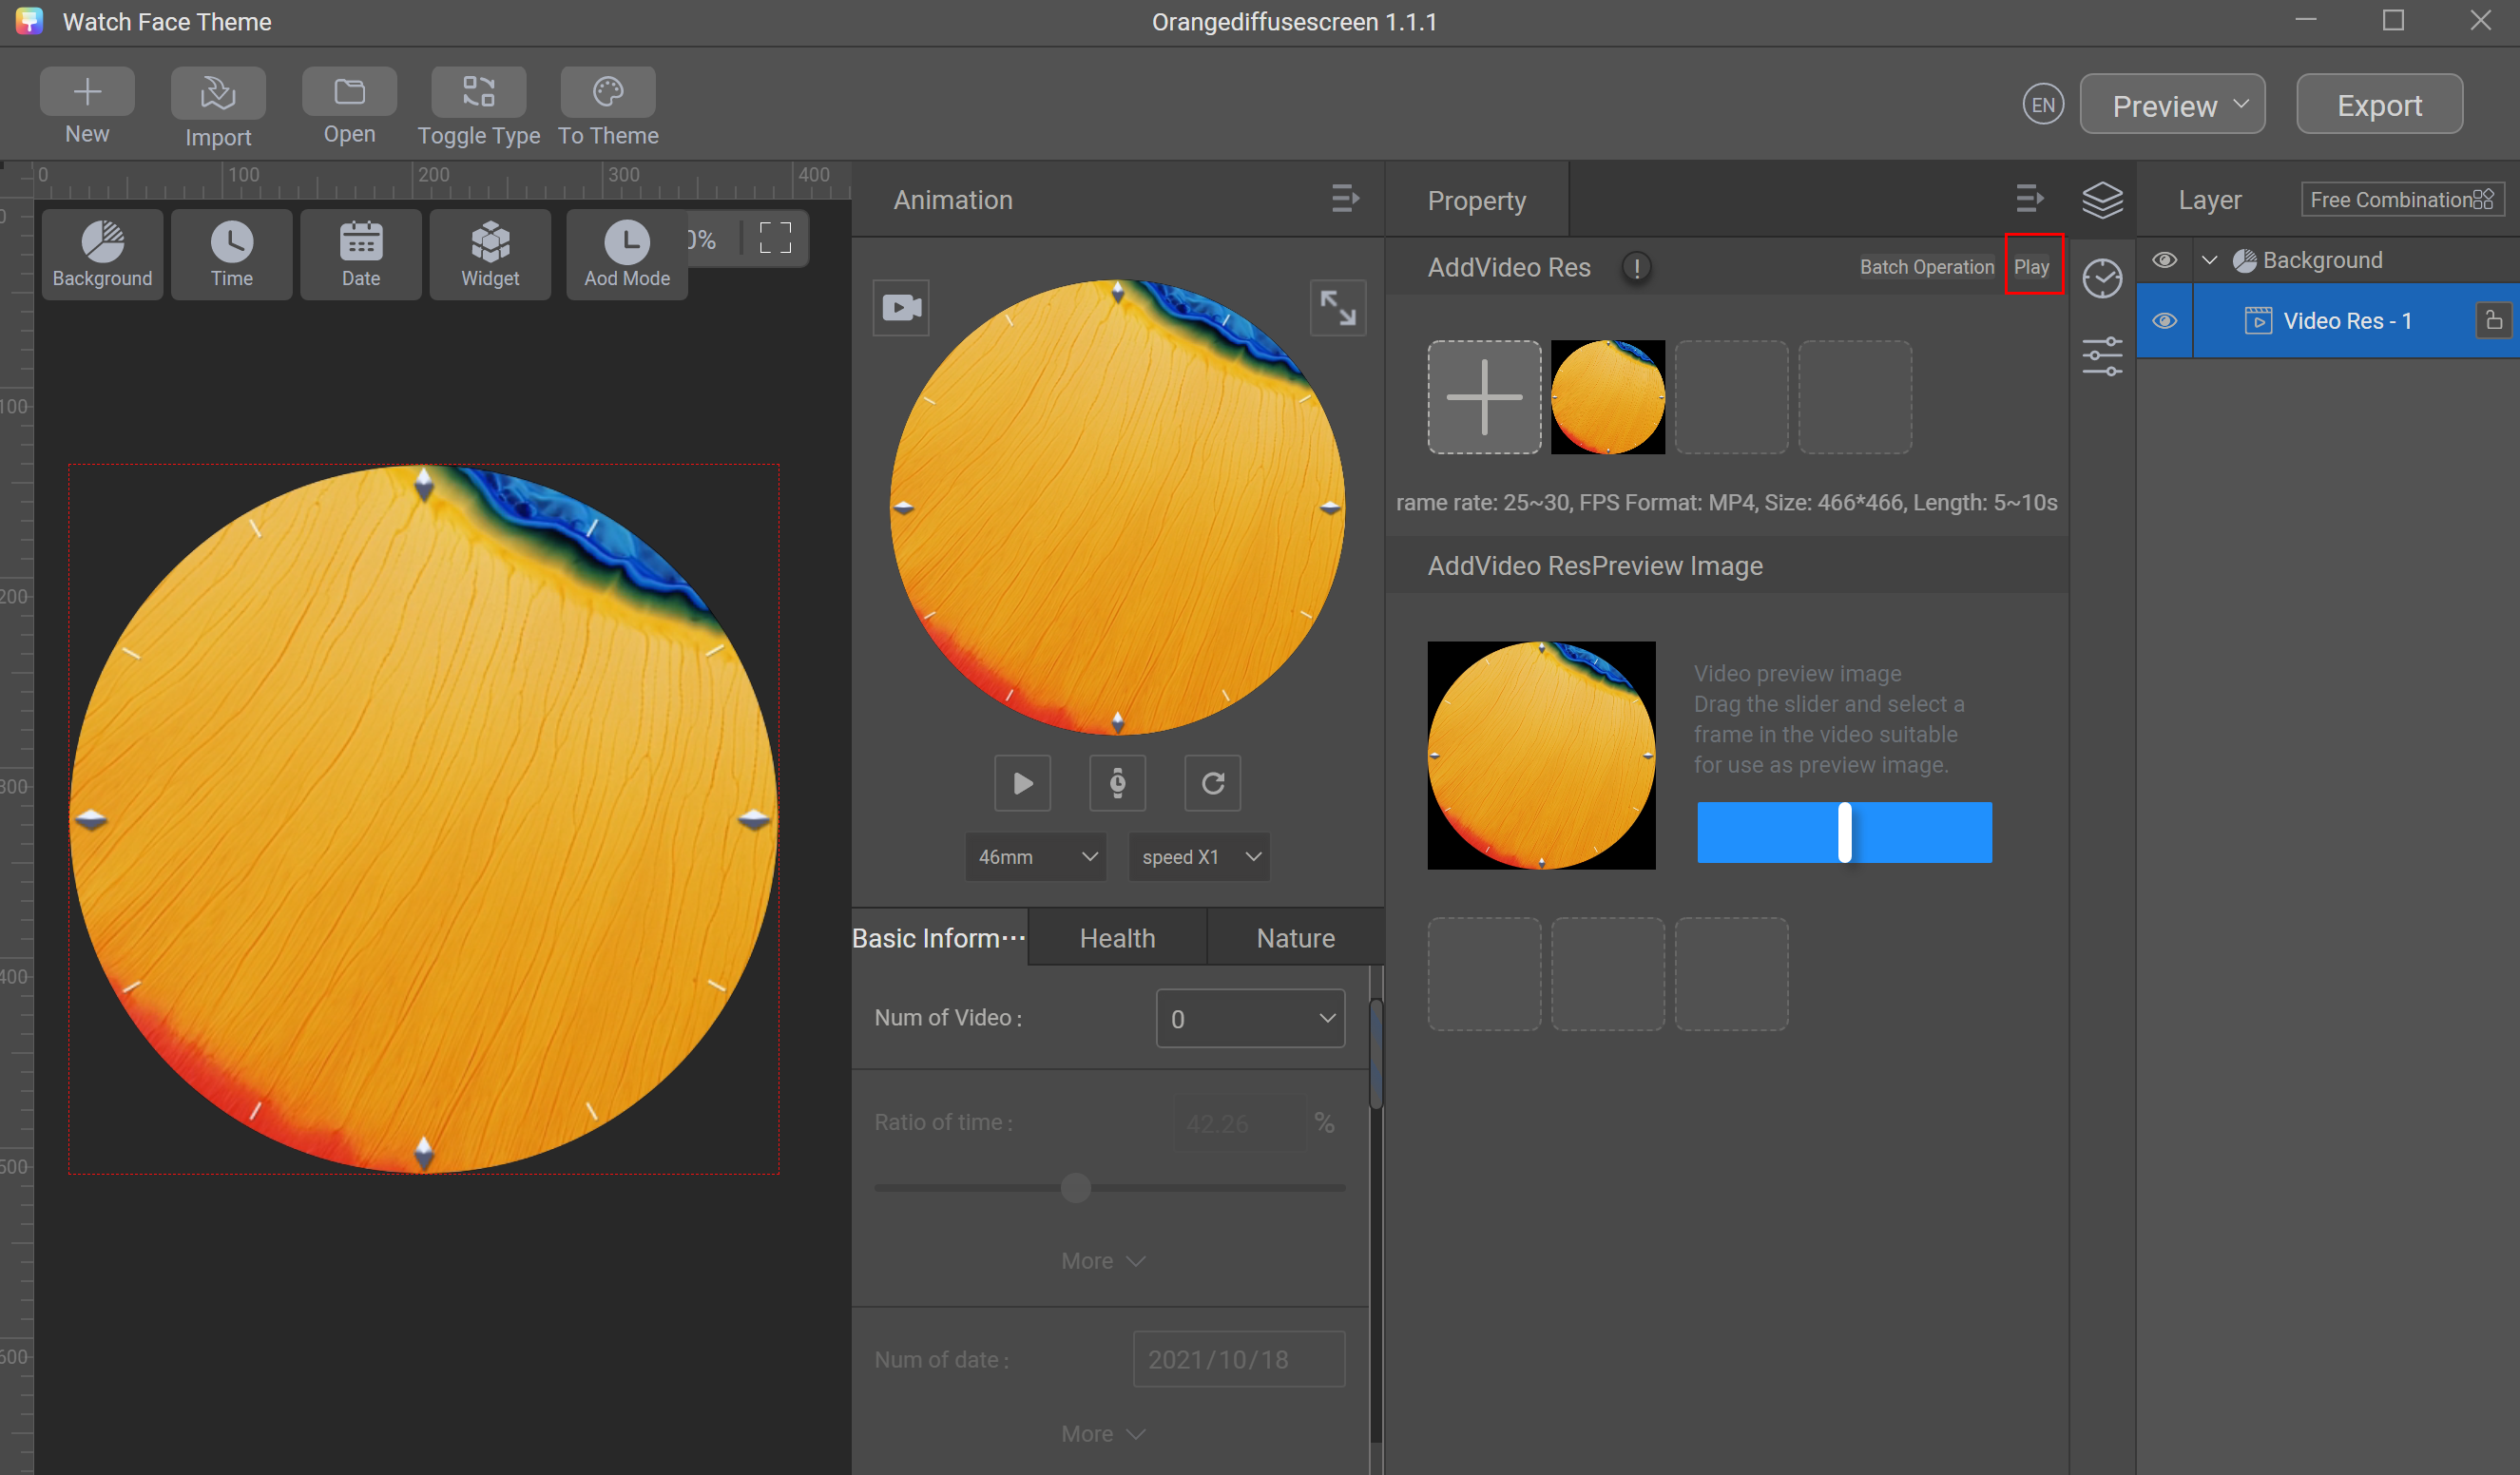
Click Play to preview the imported video.
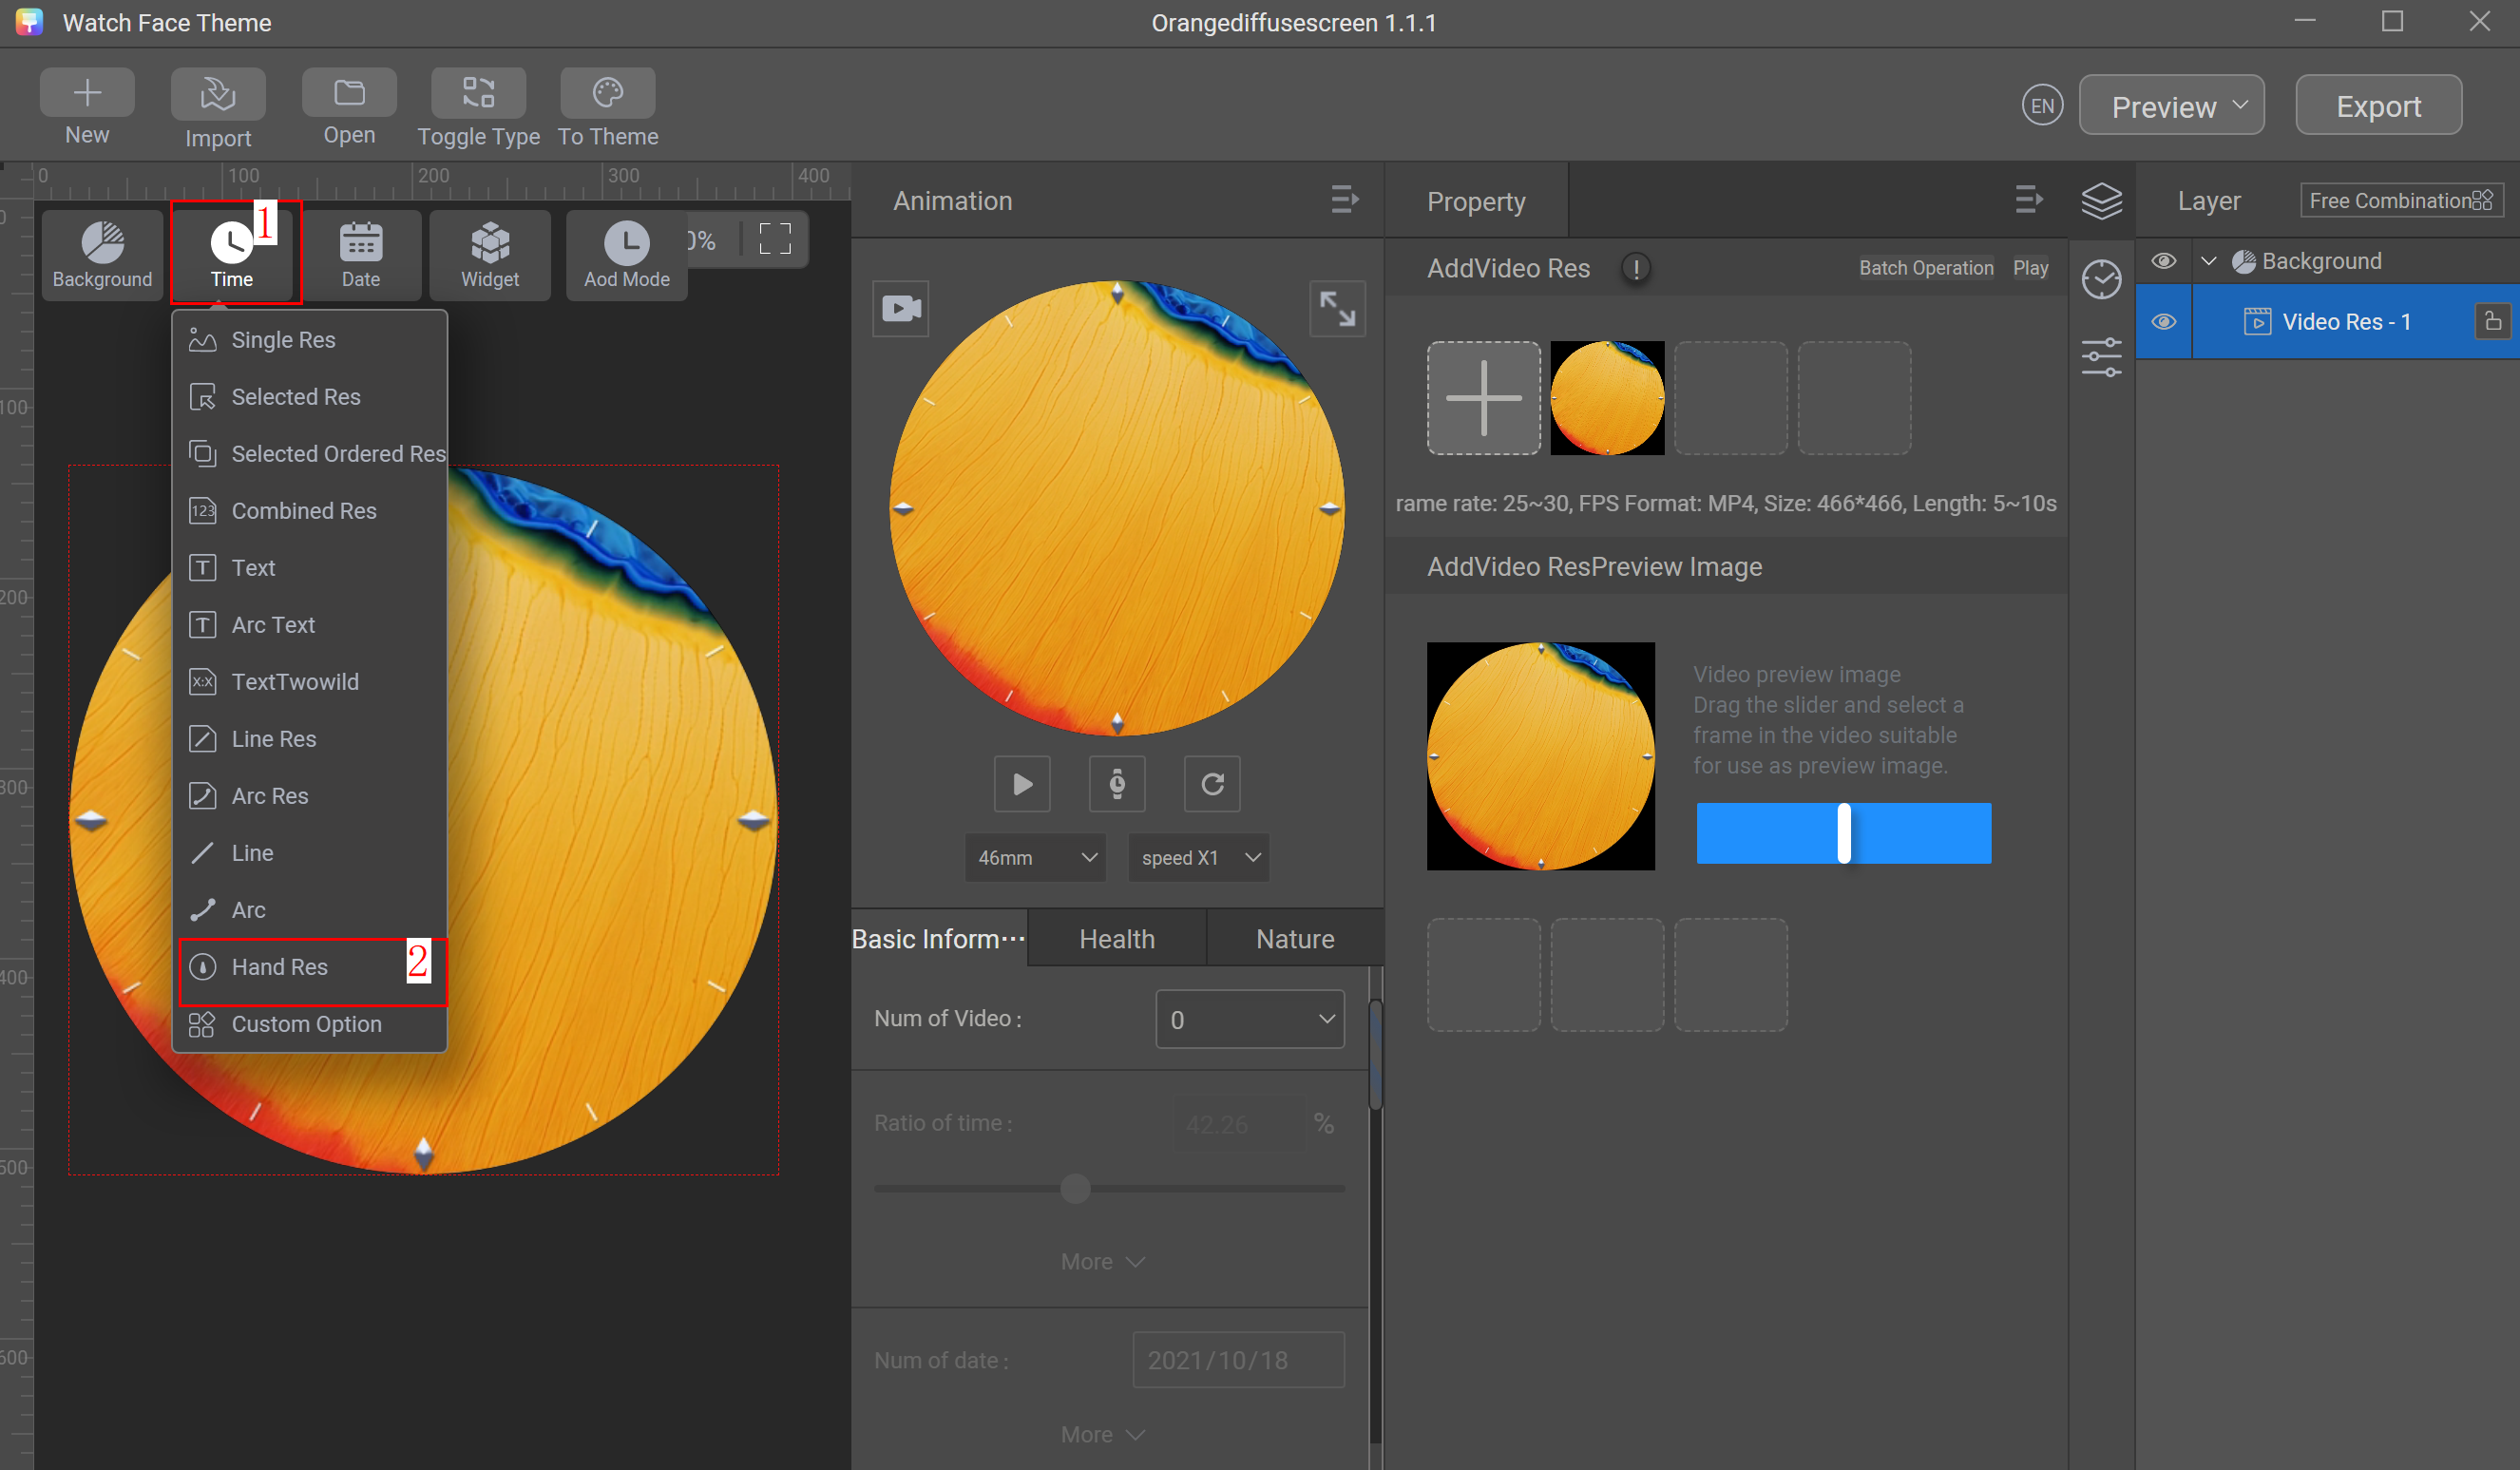
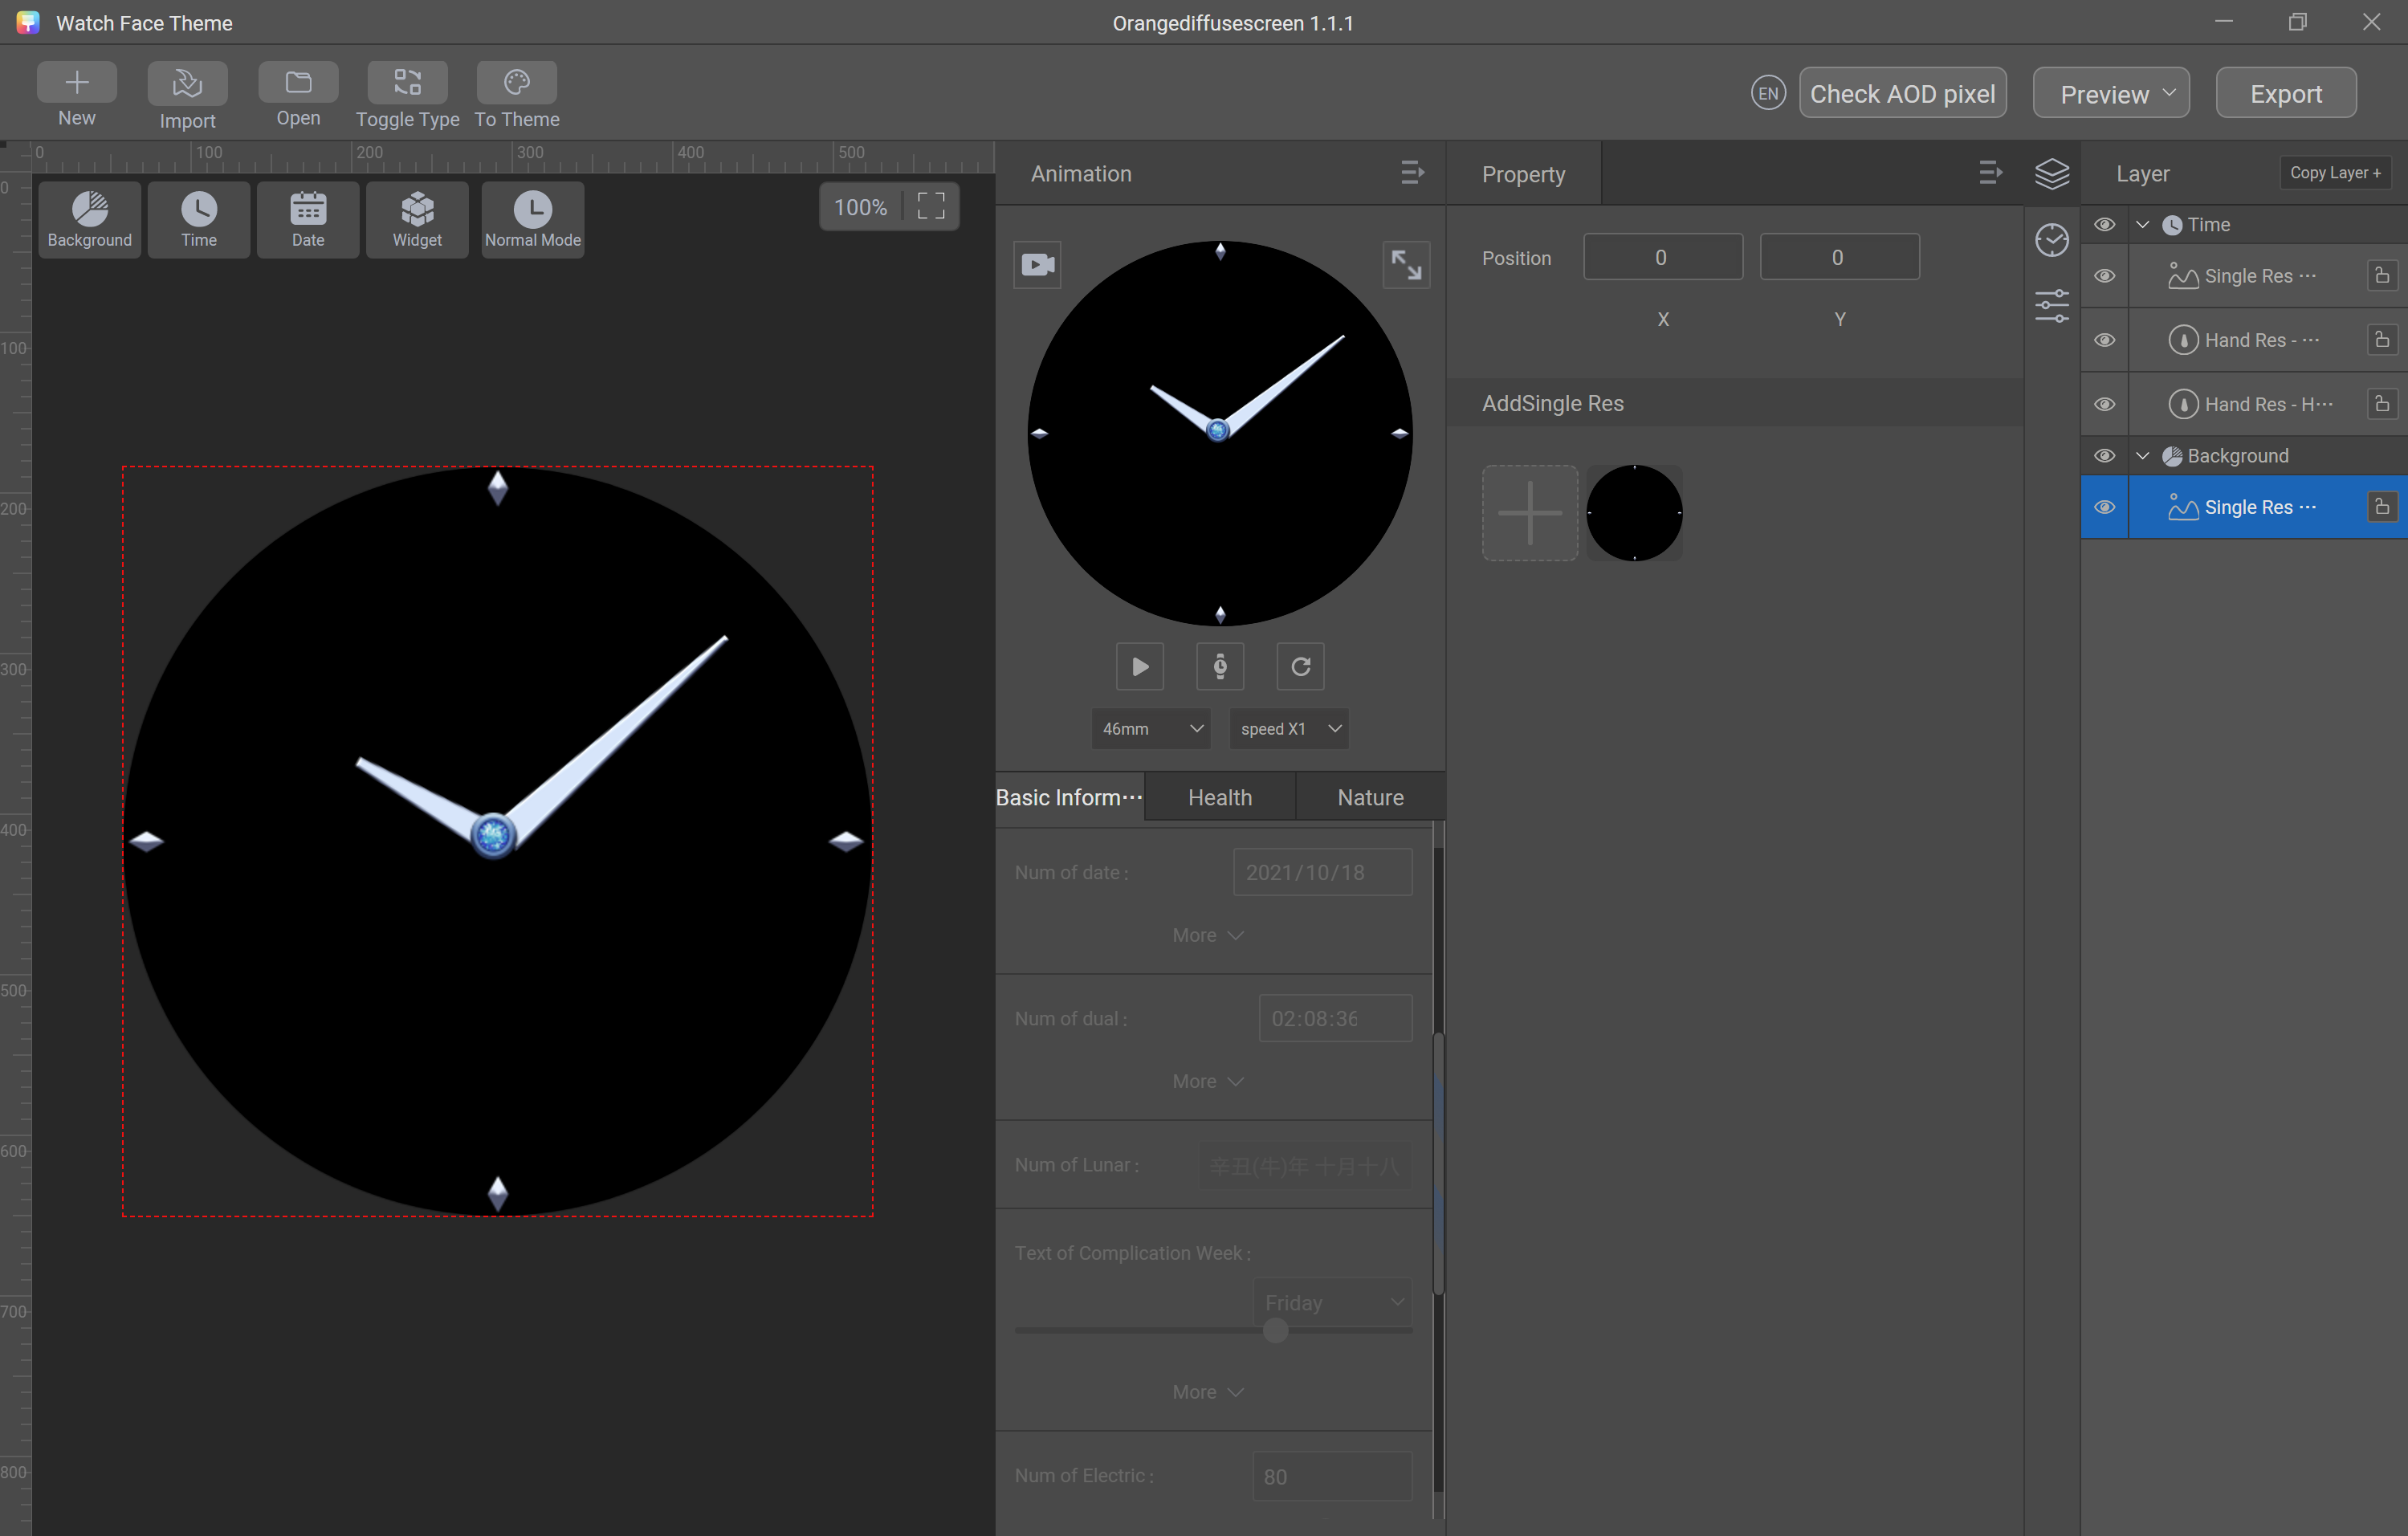
Step 3: Add clock hands.
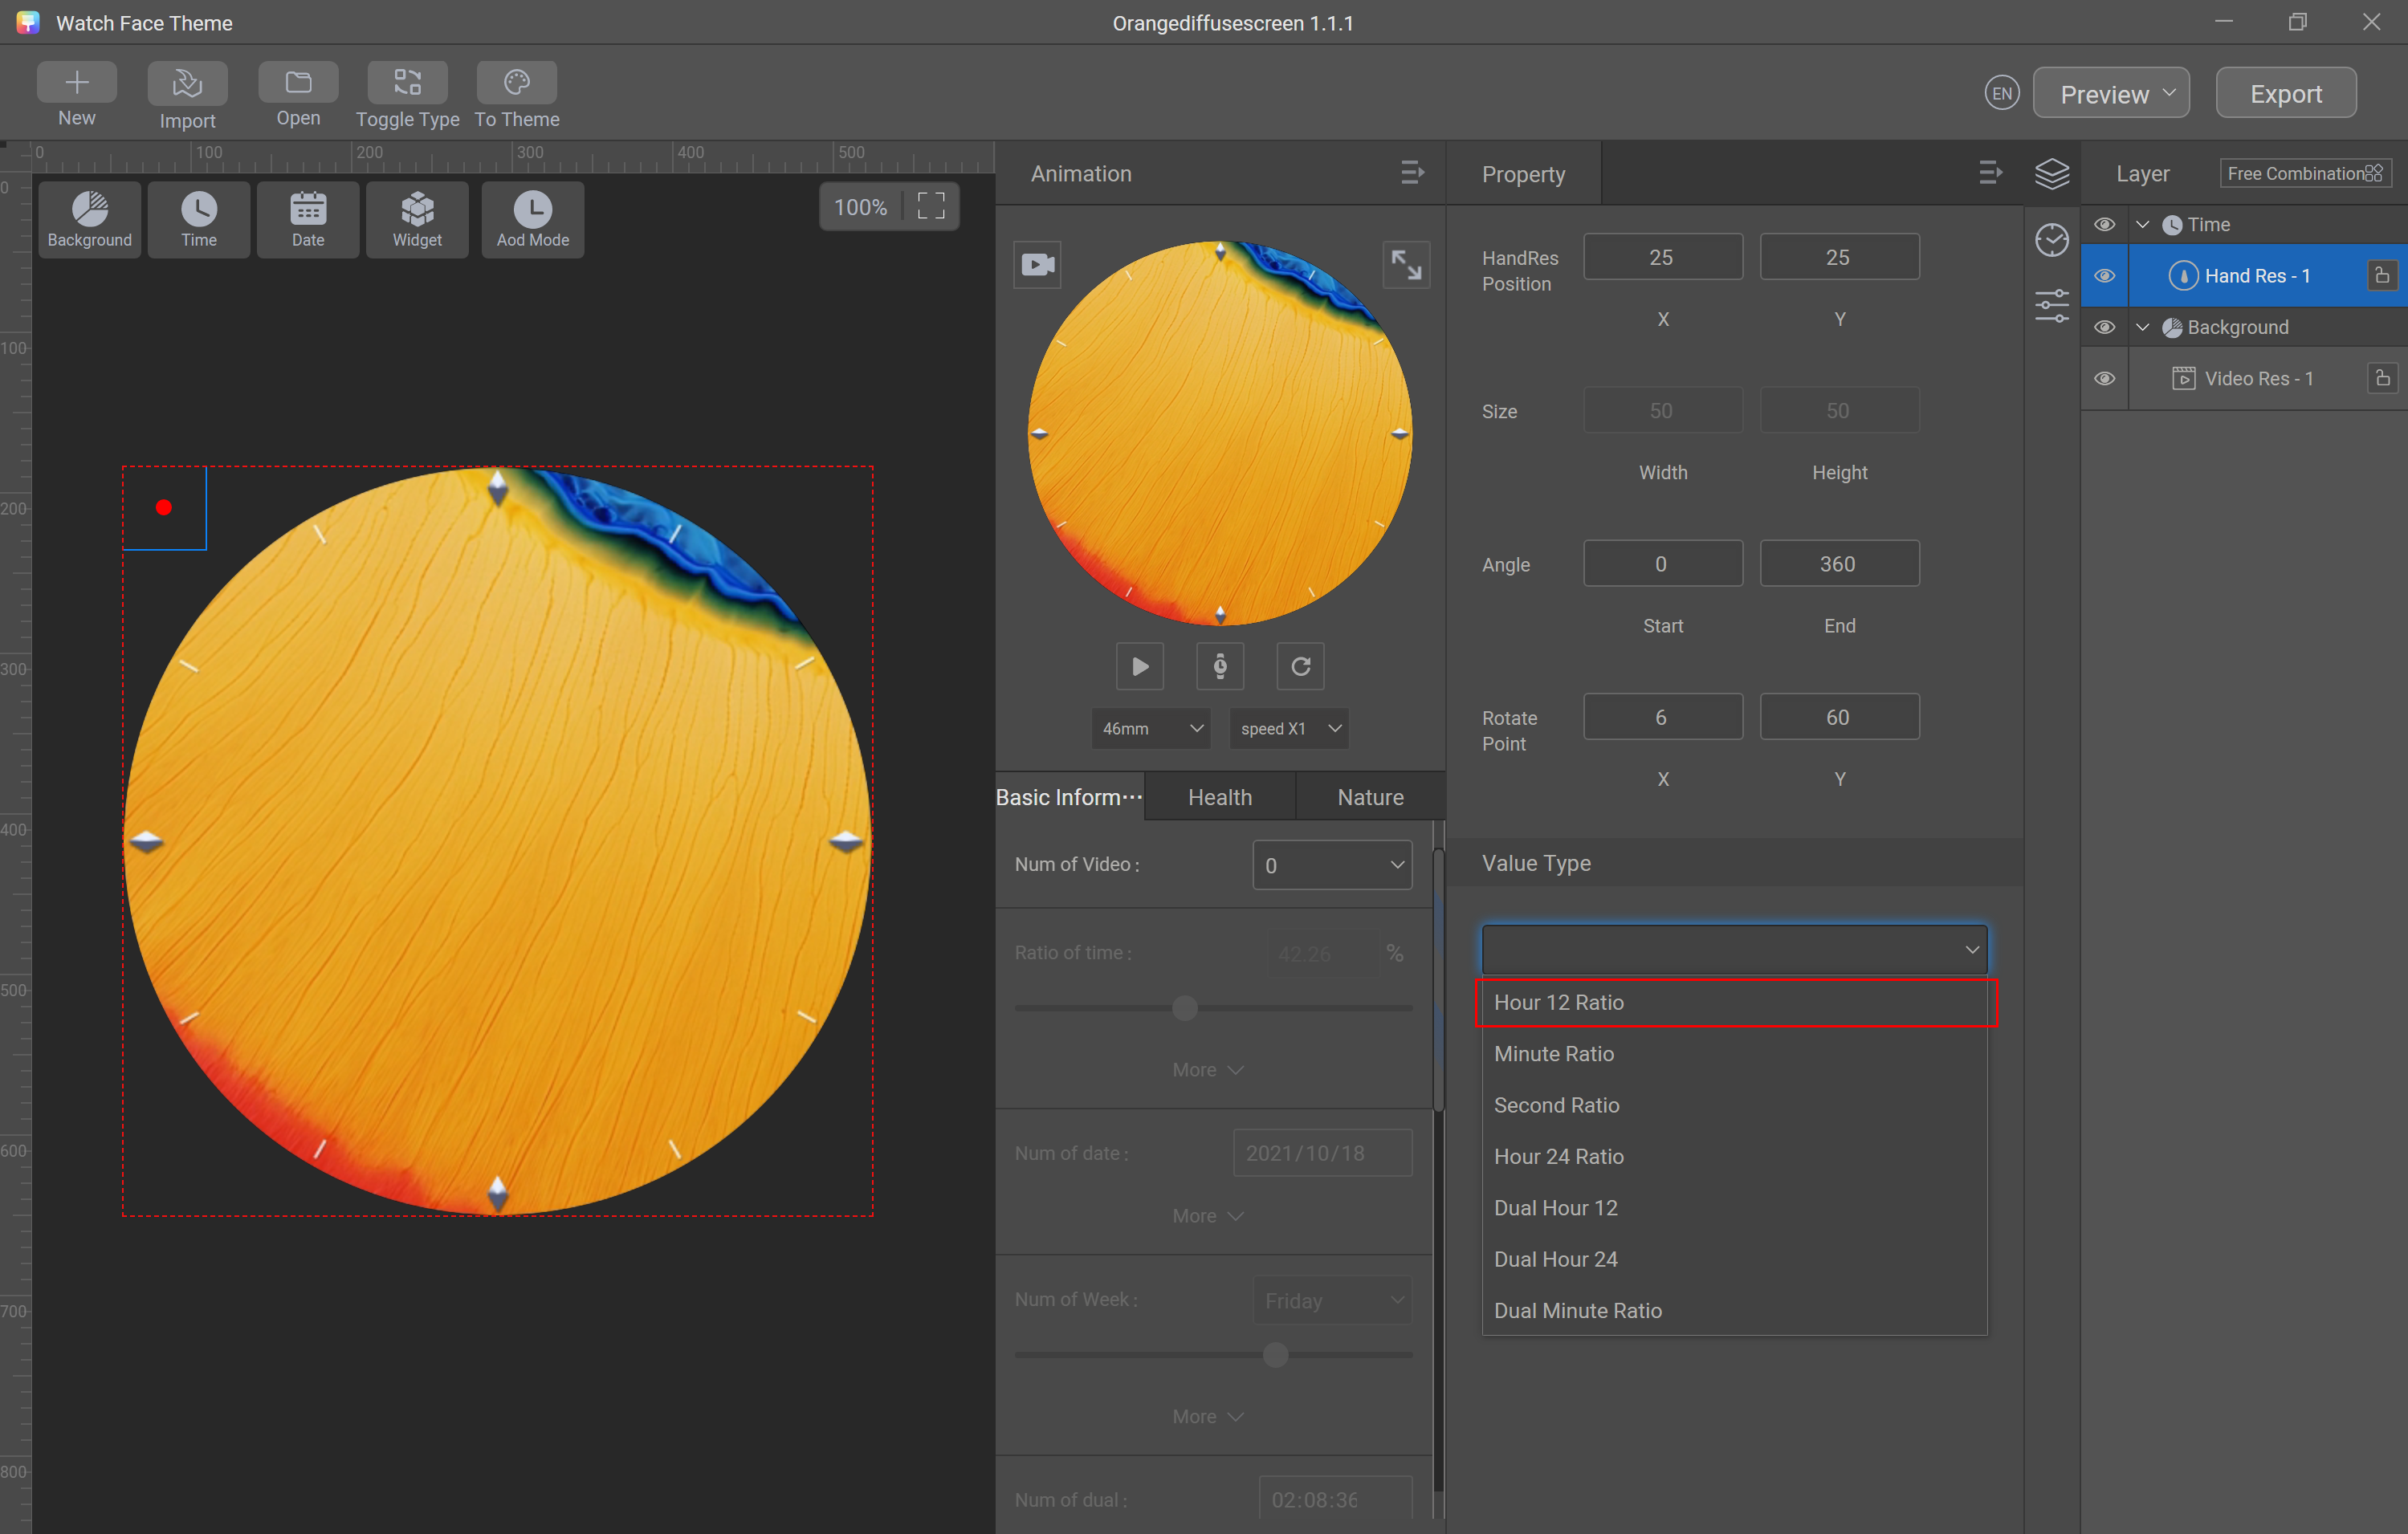
Choose Time > Hand Res.
Select Hour 12 Ratio from Value Type.
Click the add sign (+) in the AddHand Res area, import the hour hand image A100_002.png, and set HandRes Position to 233 and 233, Angle to 0 and 360, and Rotate Point to 17 and 104.
Choose Time > Hand Res, select Minute Ratio from Value Type, and click the add sign (+) in the AddHand Res area to import the minute hand image A100_003.png. Set HandRes Position to 233 and 233, Angle to 0 and 360, and Rotate Point to 17 and 196.
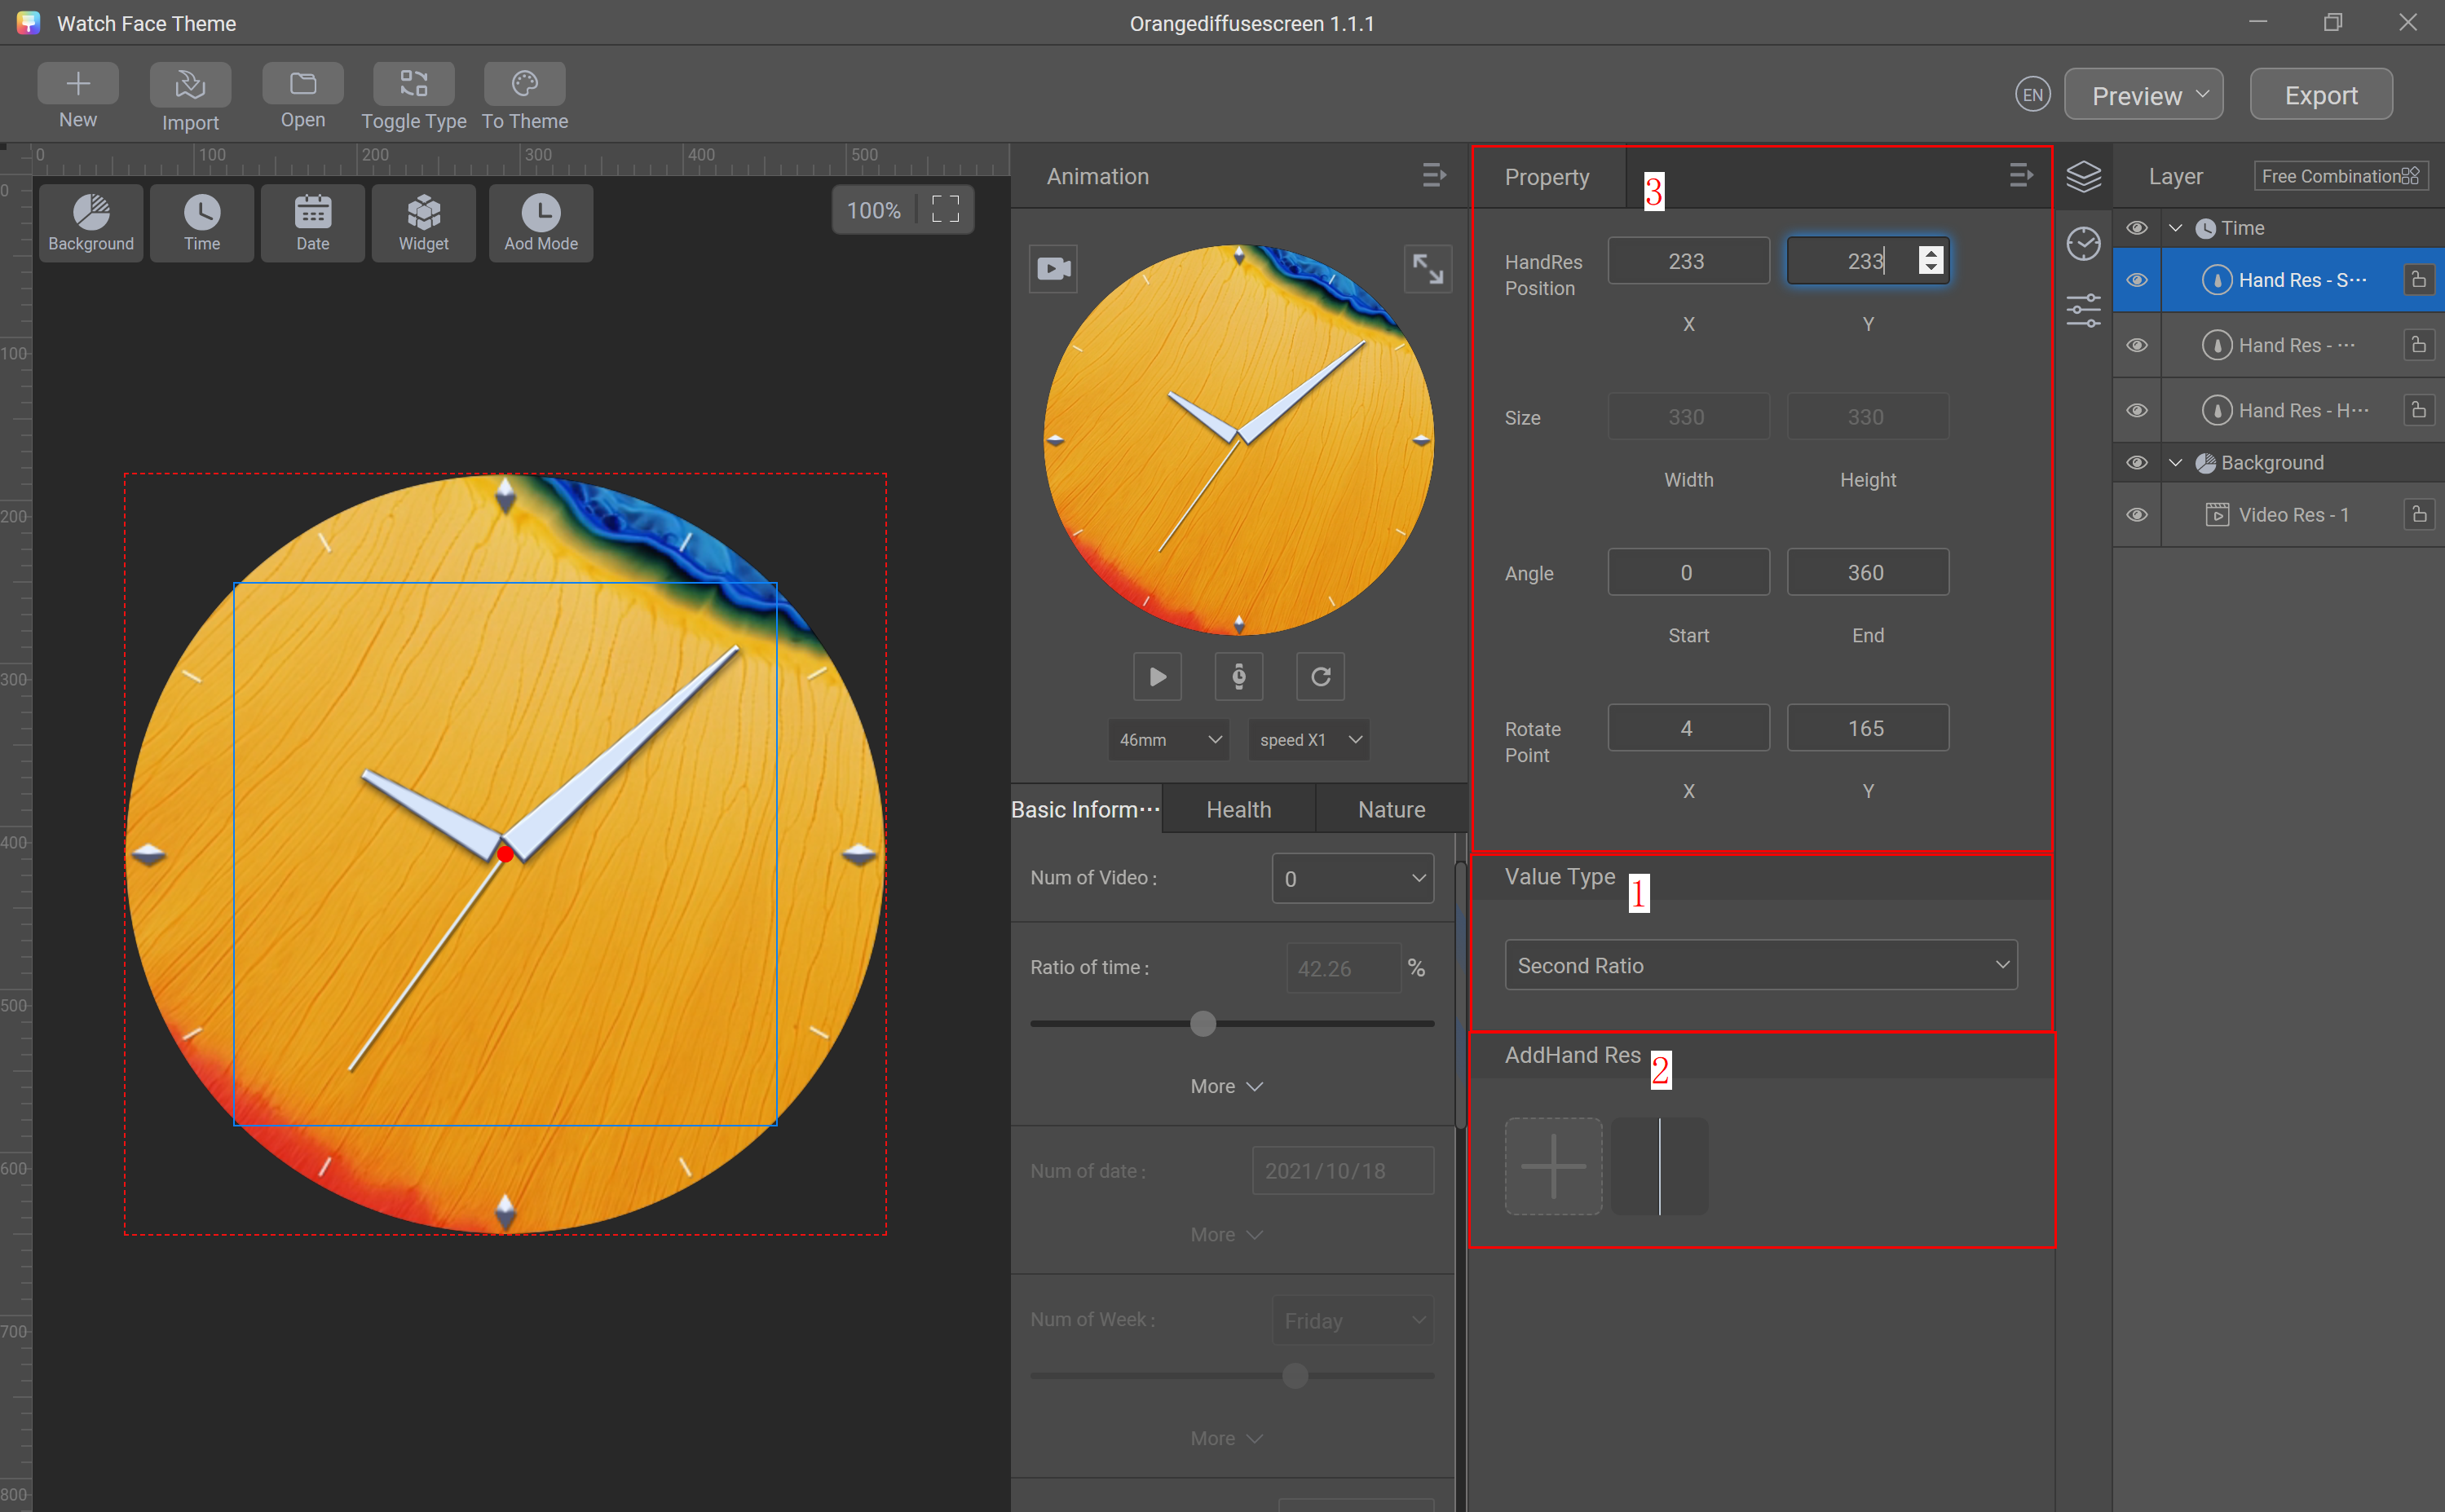
Choose Time > Hand Res, select Second Ratio from Value Type, and click the add sign (+) in the AddHand Res area to import the second hand image A100_004.png. Set HandRes Position to 233 and 233, Angle to 0 and 360, and Rotate Point to 4 and 165.
Choose Time > Single Res, and click the add sign (+) in the AddSingle Res area to import the sliced image A100_005.png. Set Position to 215 and 215.
Step 4: Configure weather and temperature data.
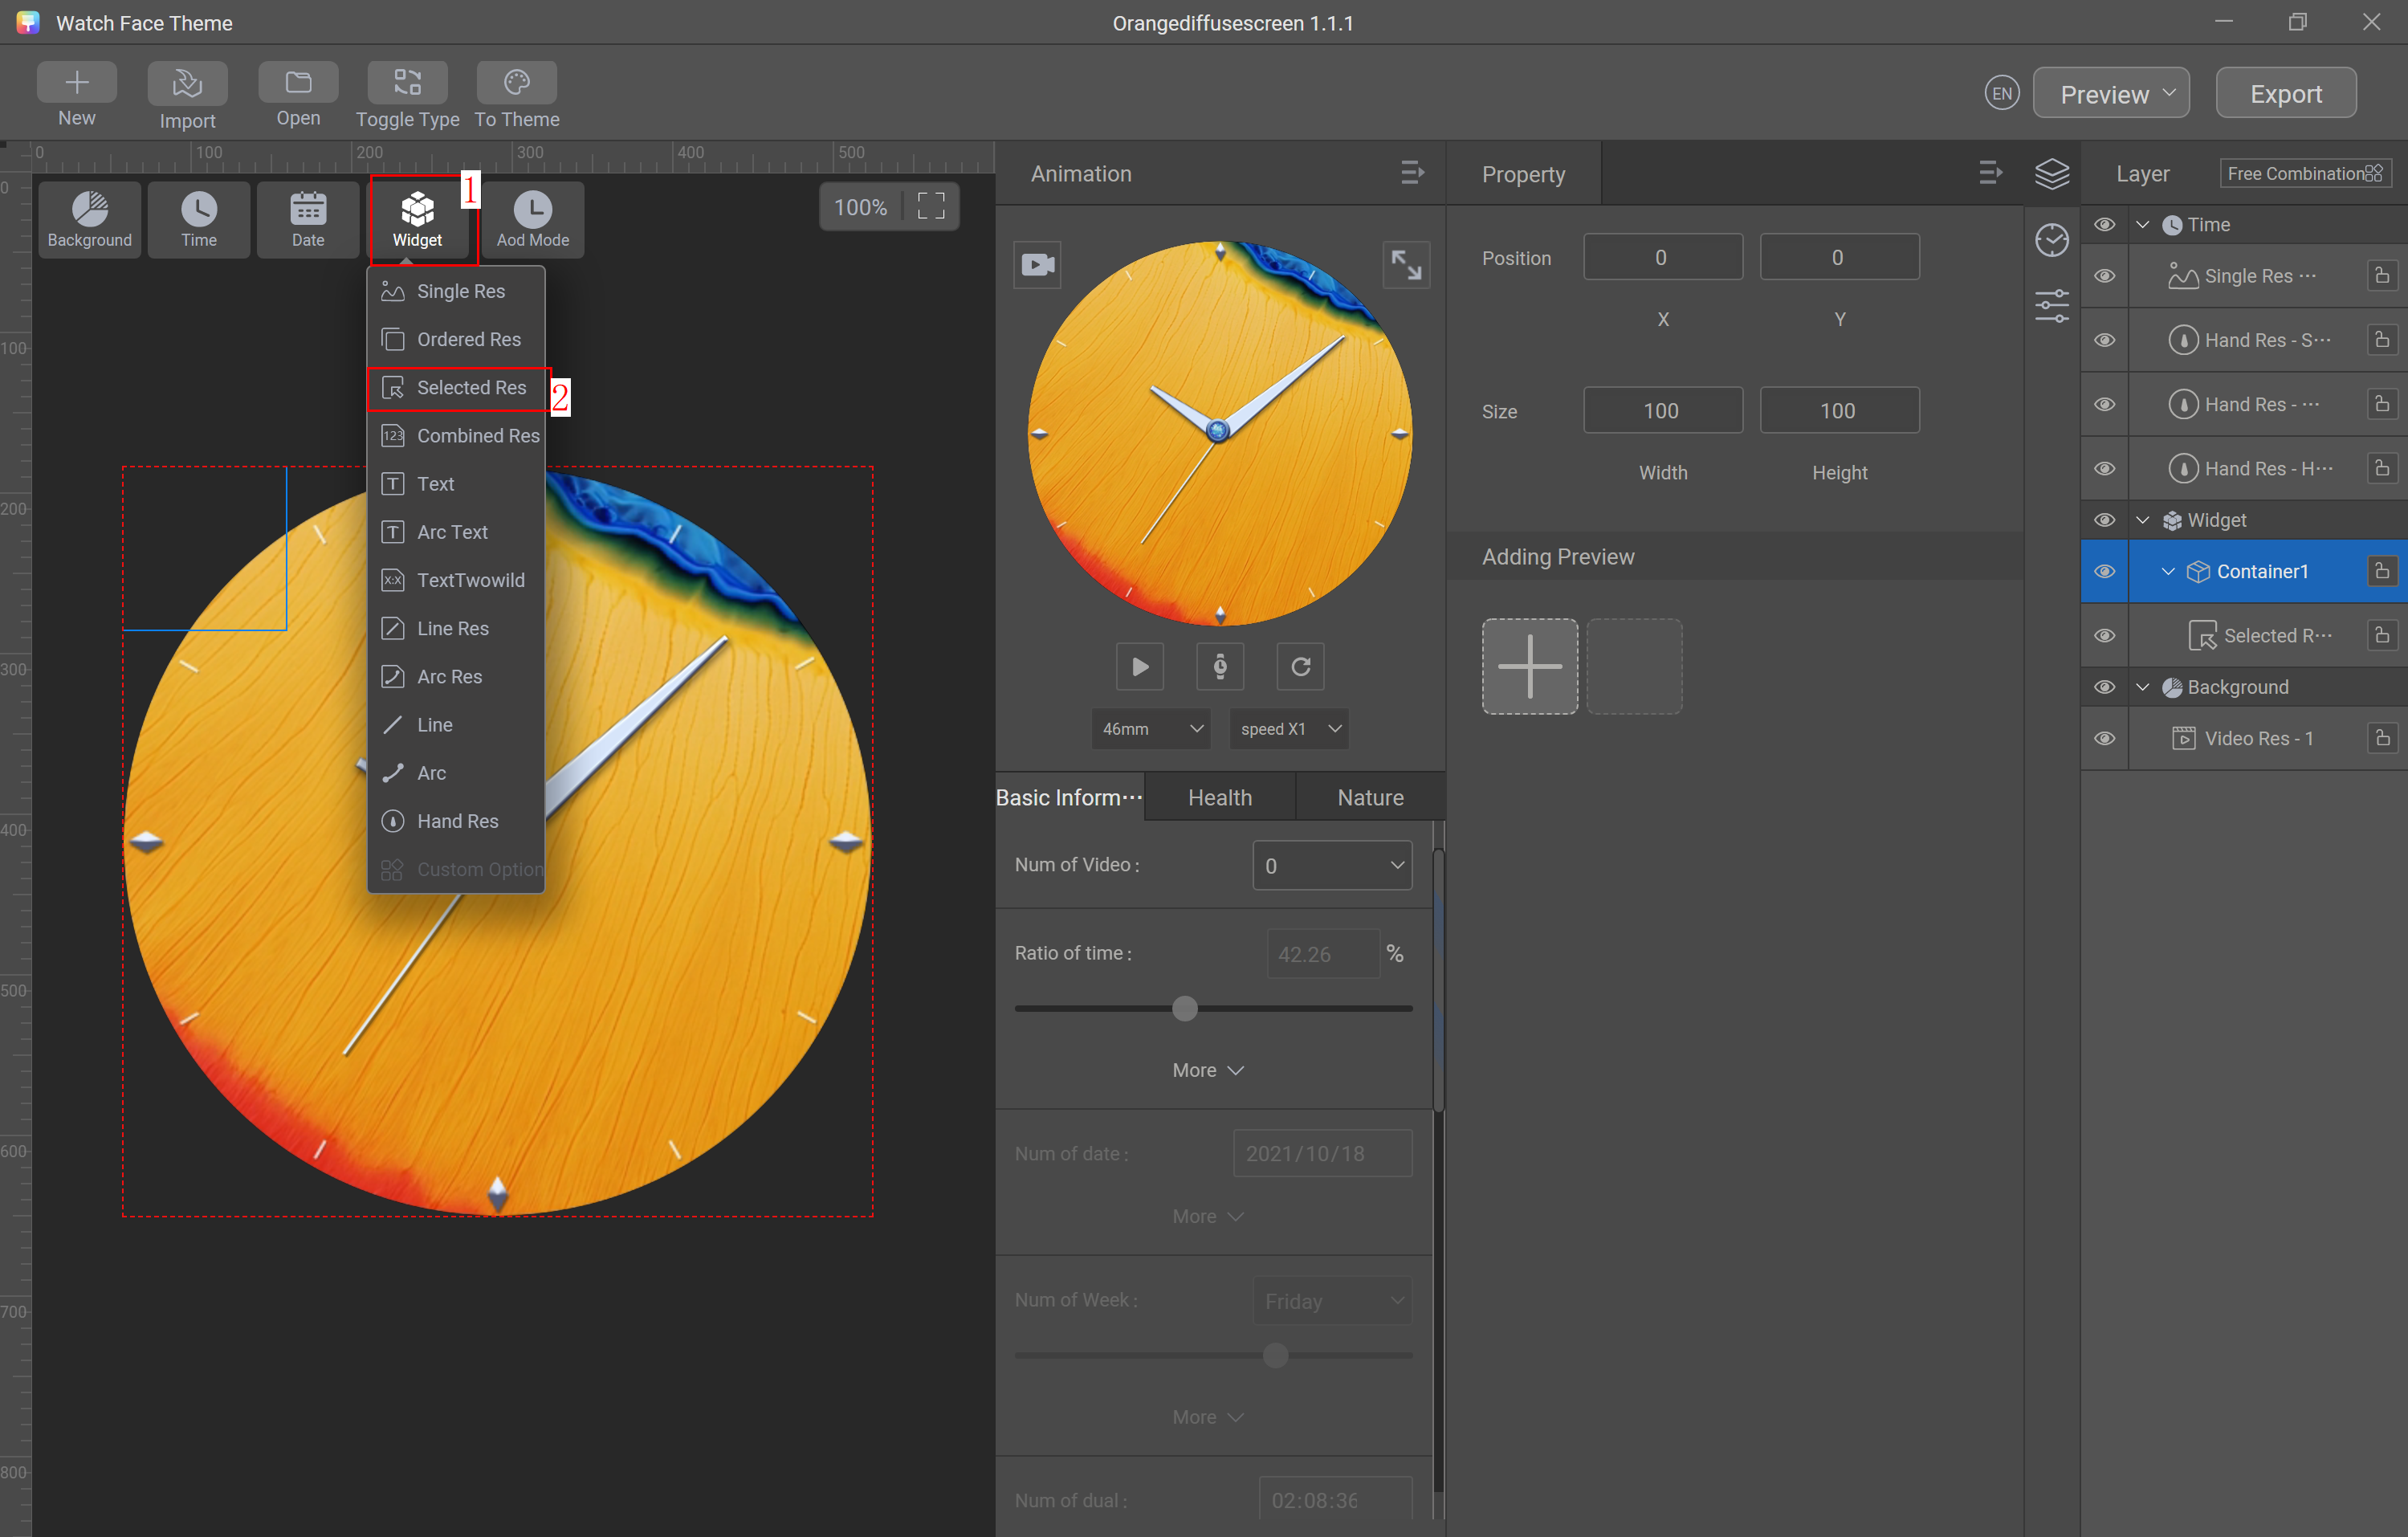
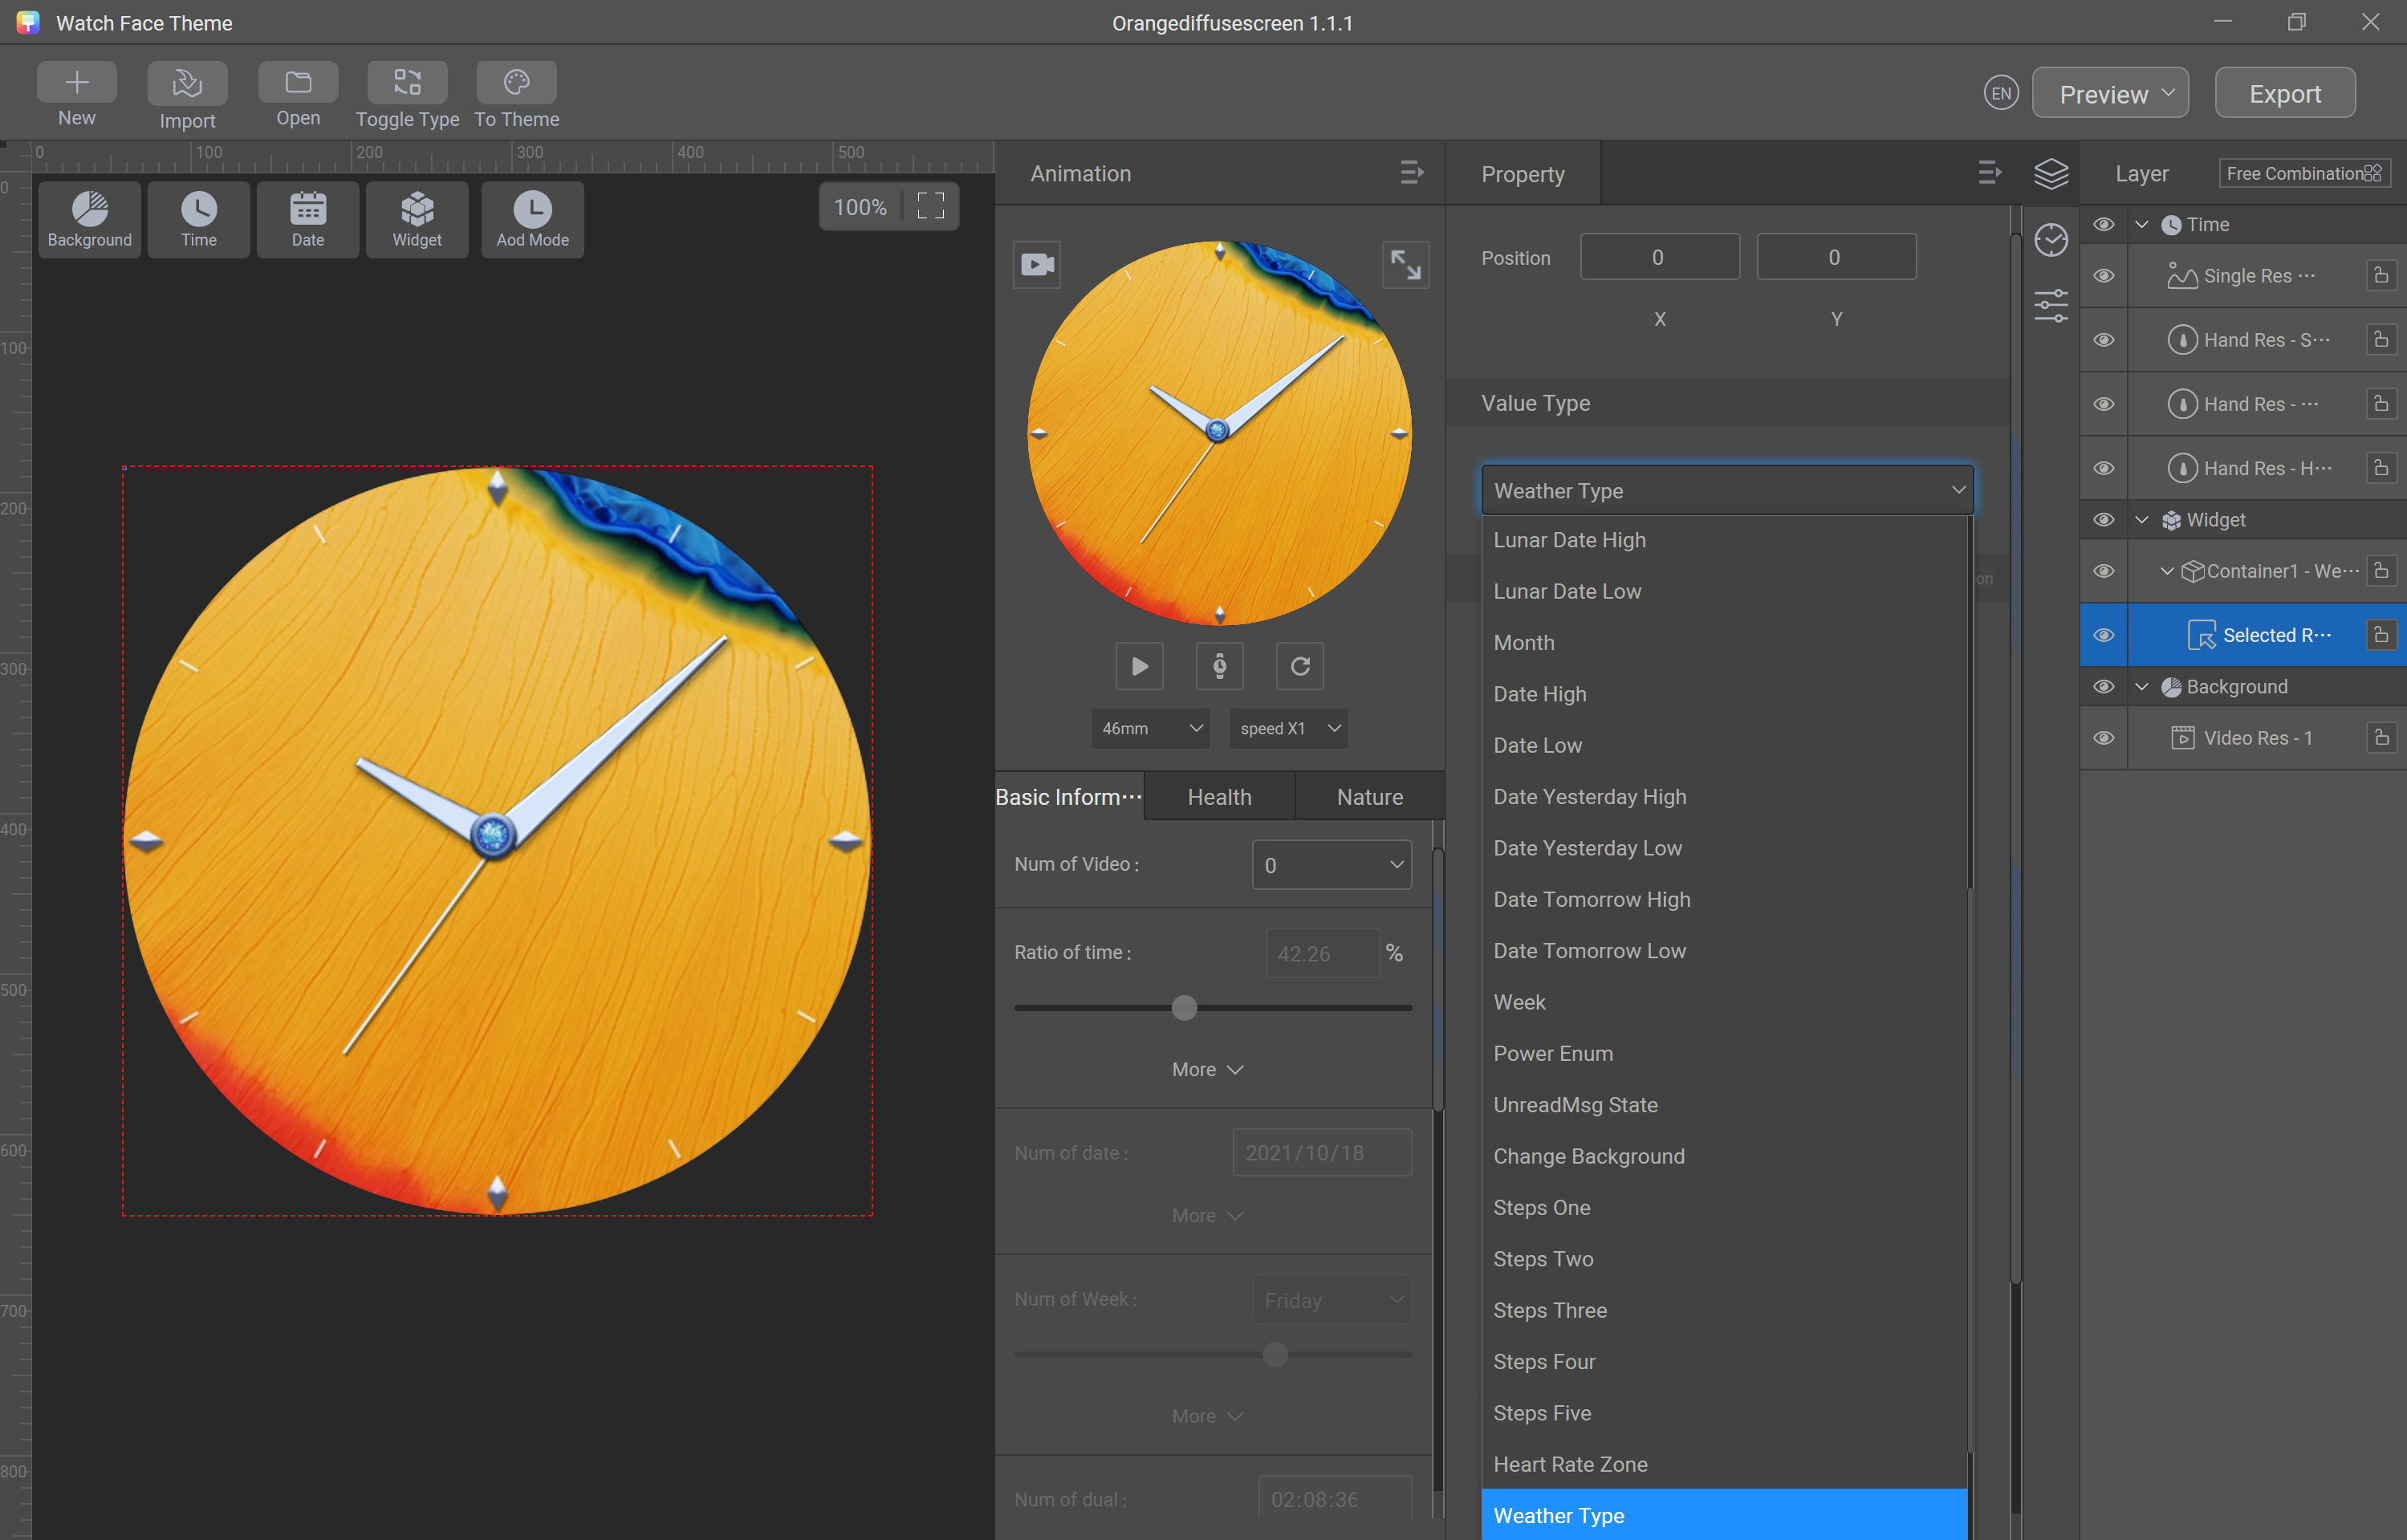
Choose Widget > Selected Res, and select Weather Type from Value Type.
Batch import sliced images for weather (from A100_036.png to A100_063.png), and set Position to 34 and 0.
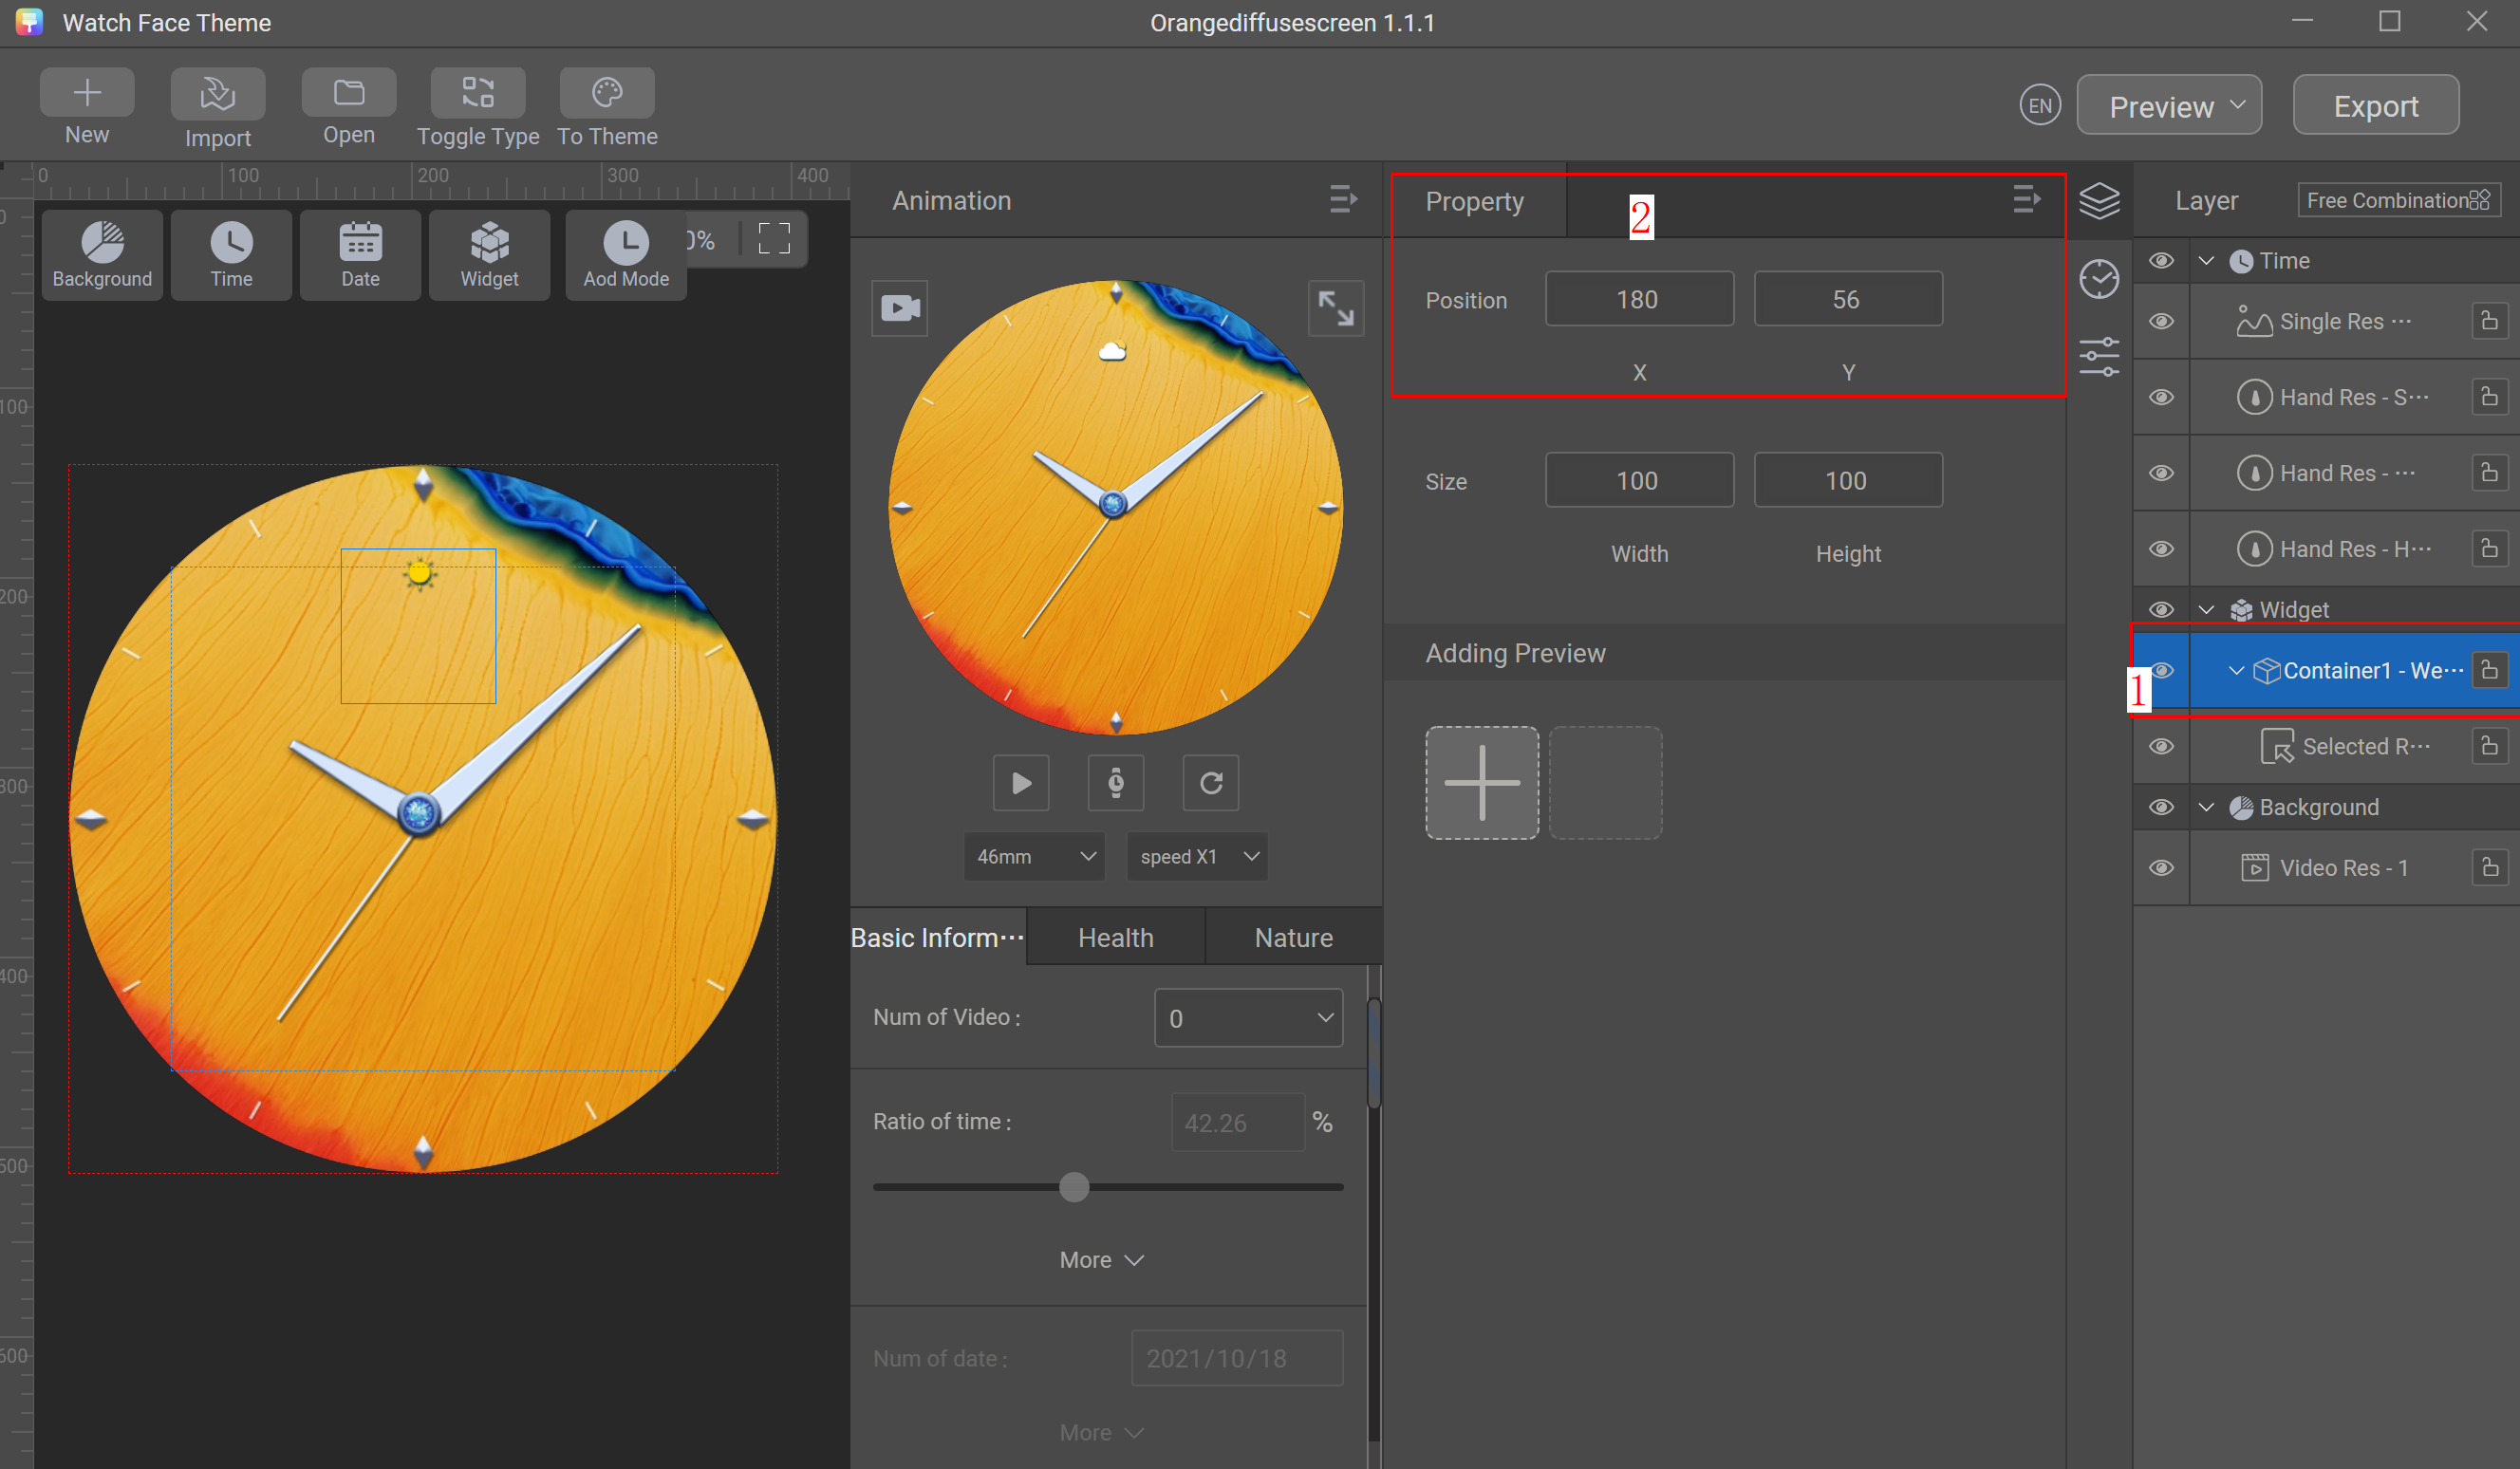
Click Container 1 in the Layer area, and change Position to 180 and 56.
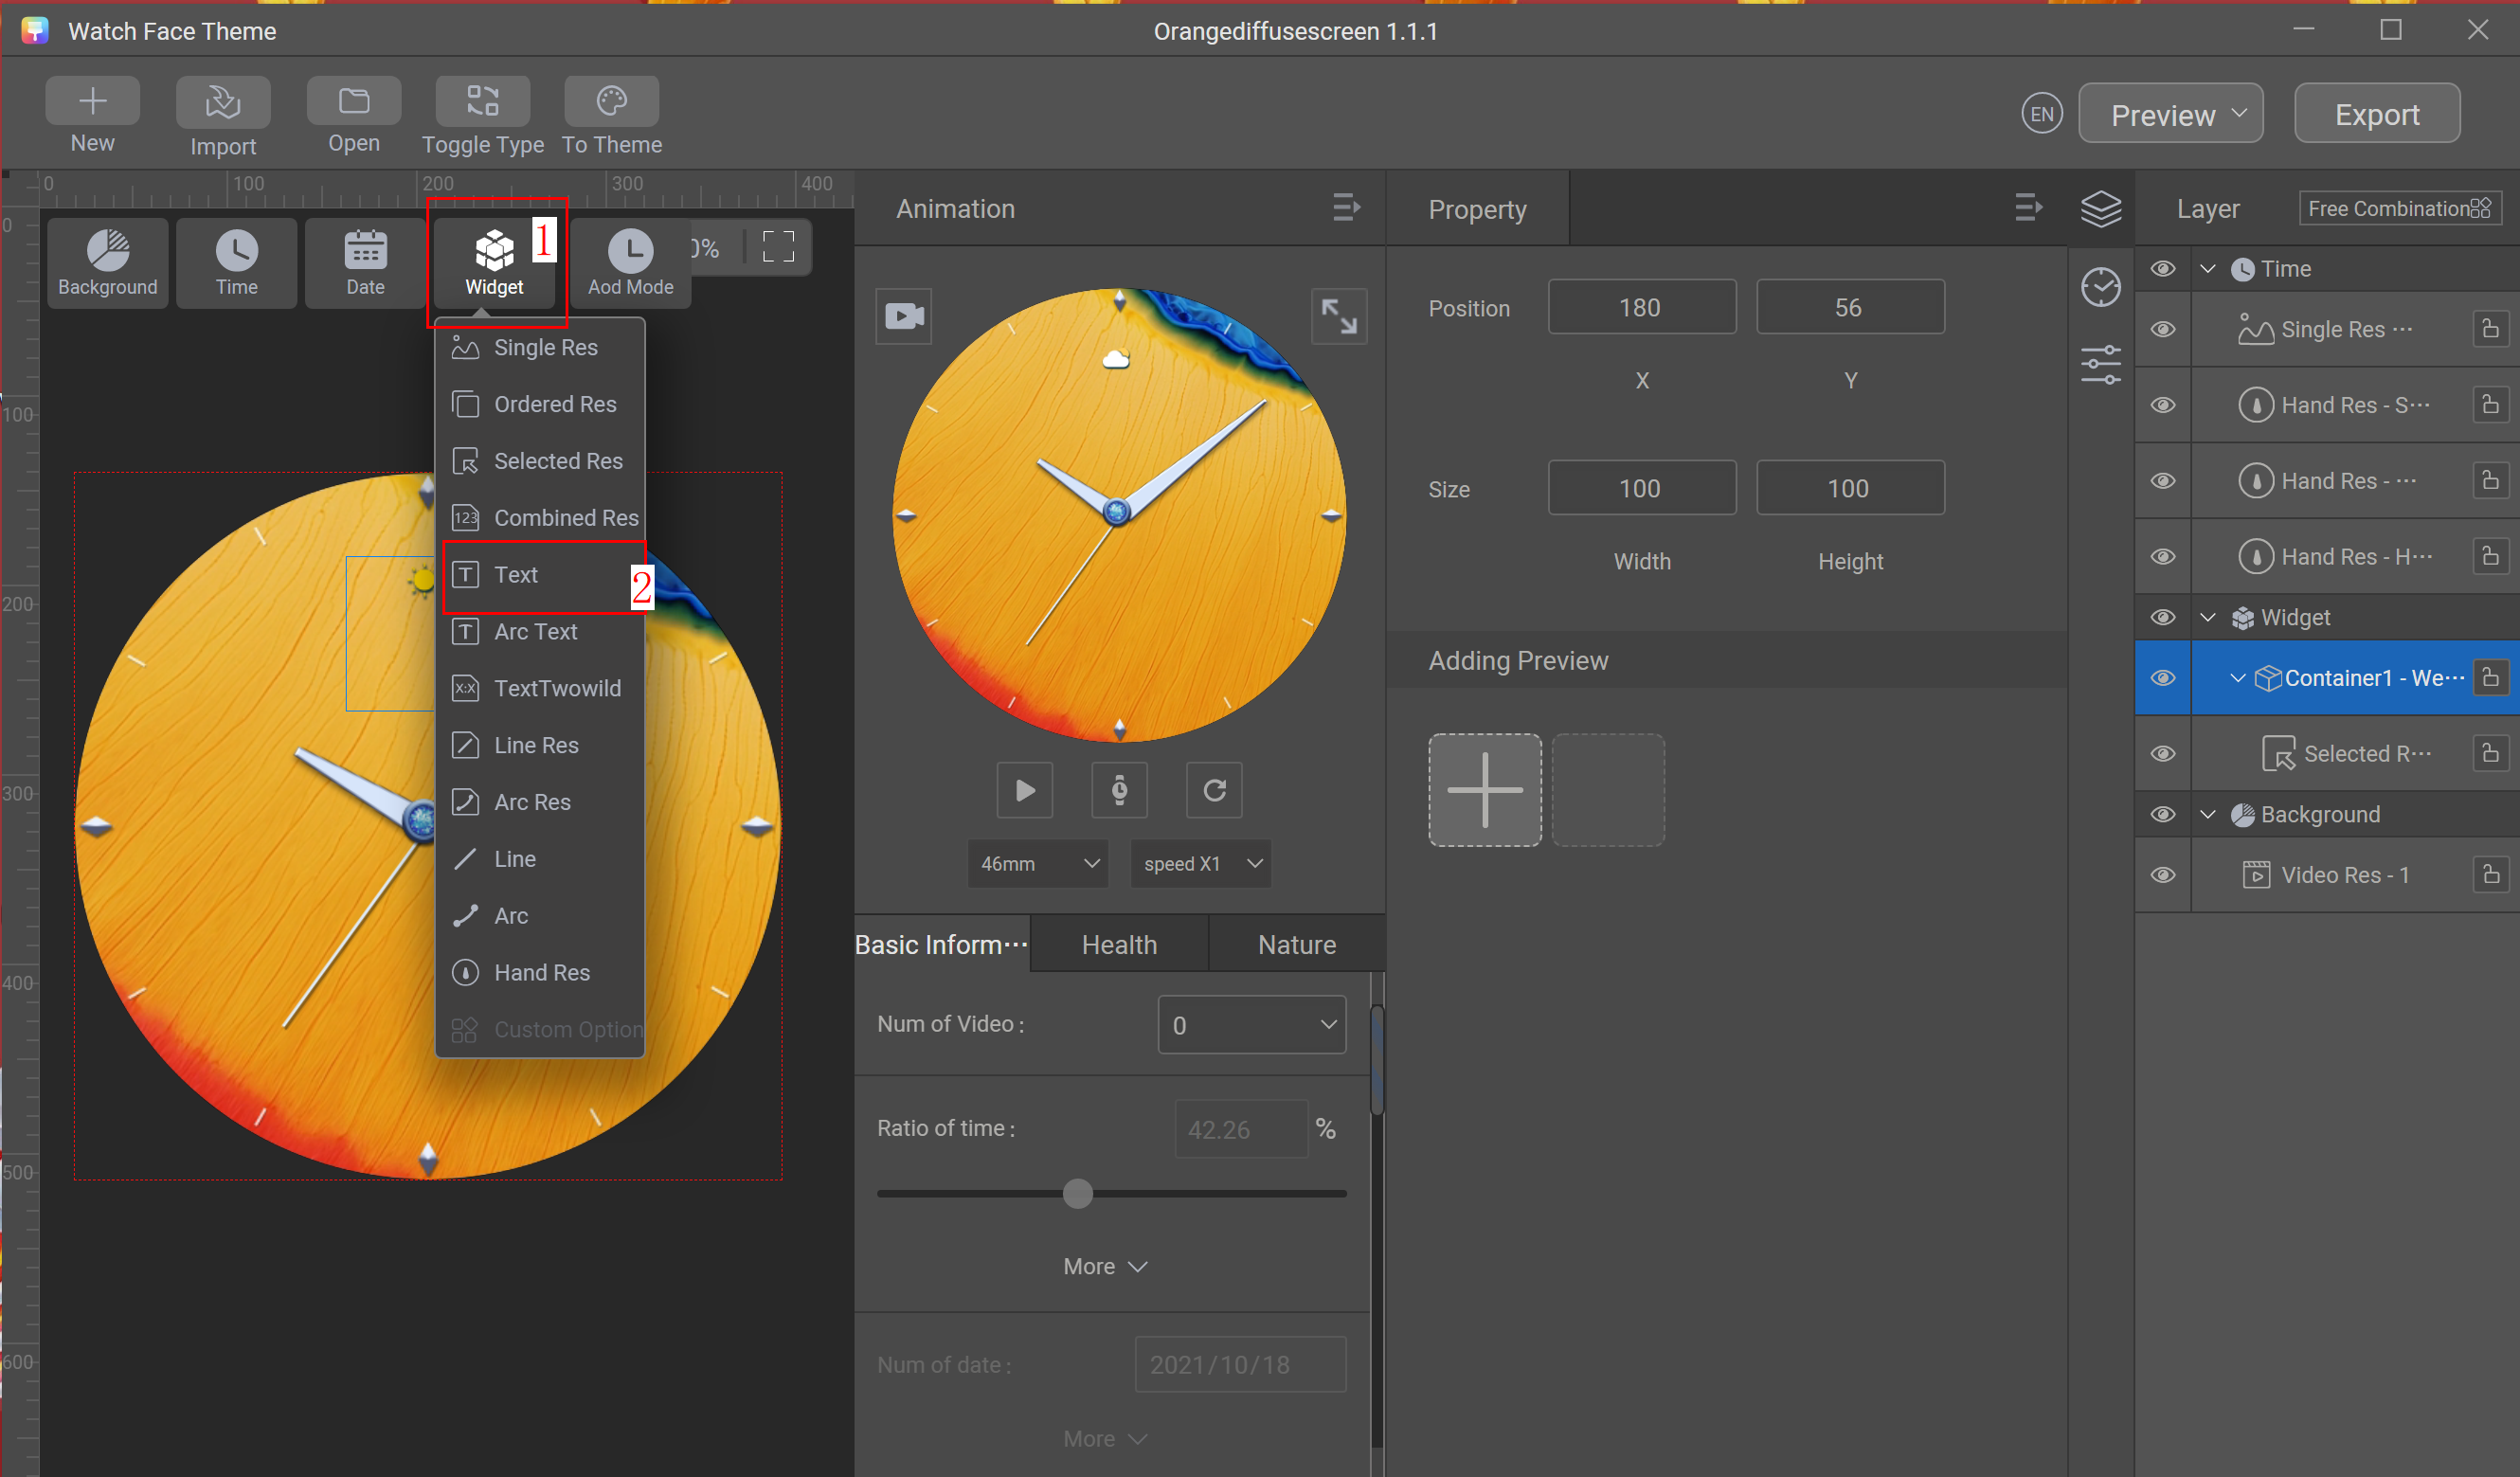
Choose Widget > Text, and select Temperature from Value Type. Set Position to 0 and 39, and Width to 50. Select the right alignment mode. Set Font to (Recom) Roboto-Medium, Font Size to 20, Color to #FFFFFF, and transparency to 100%.
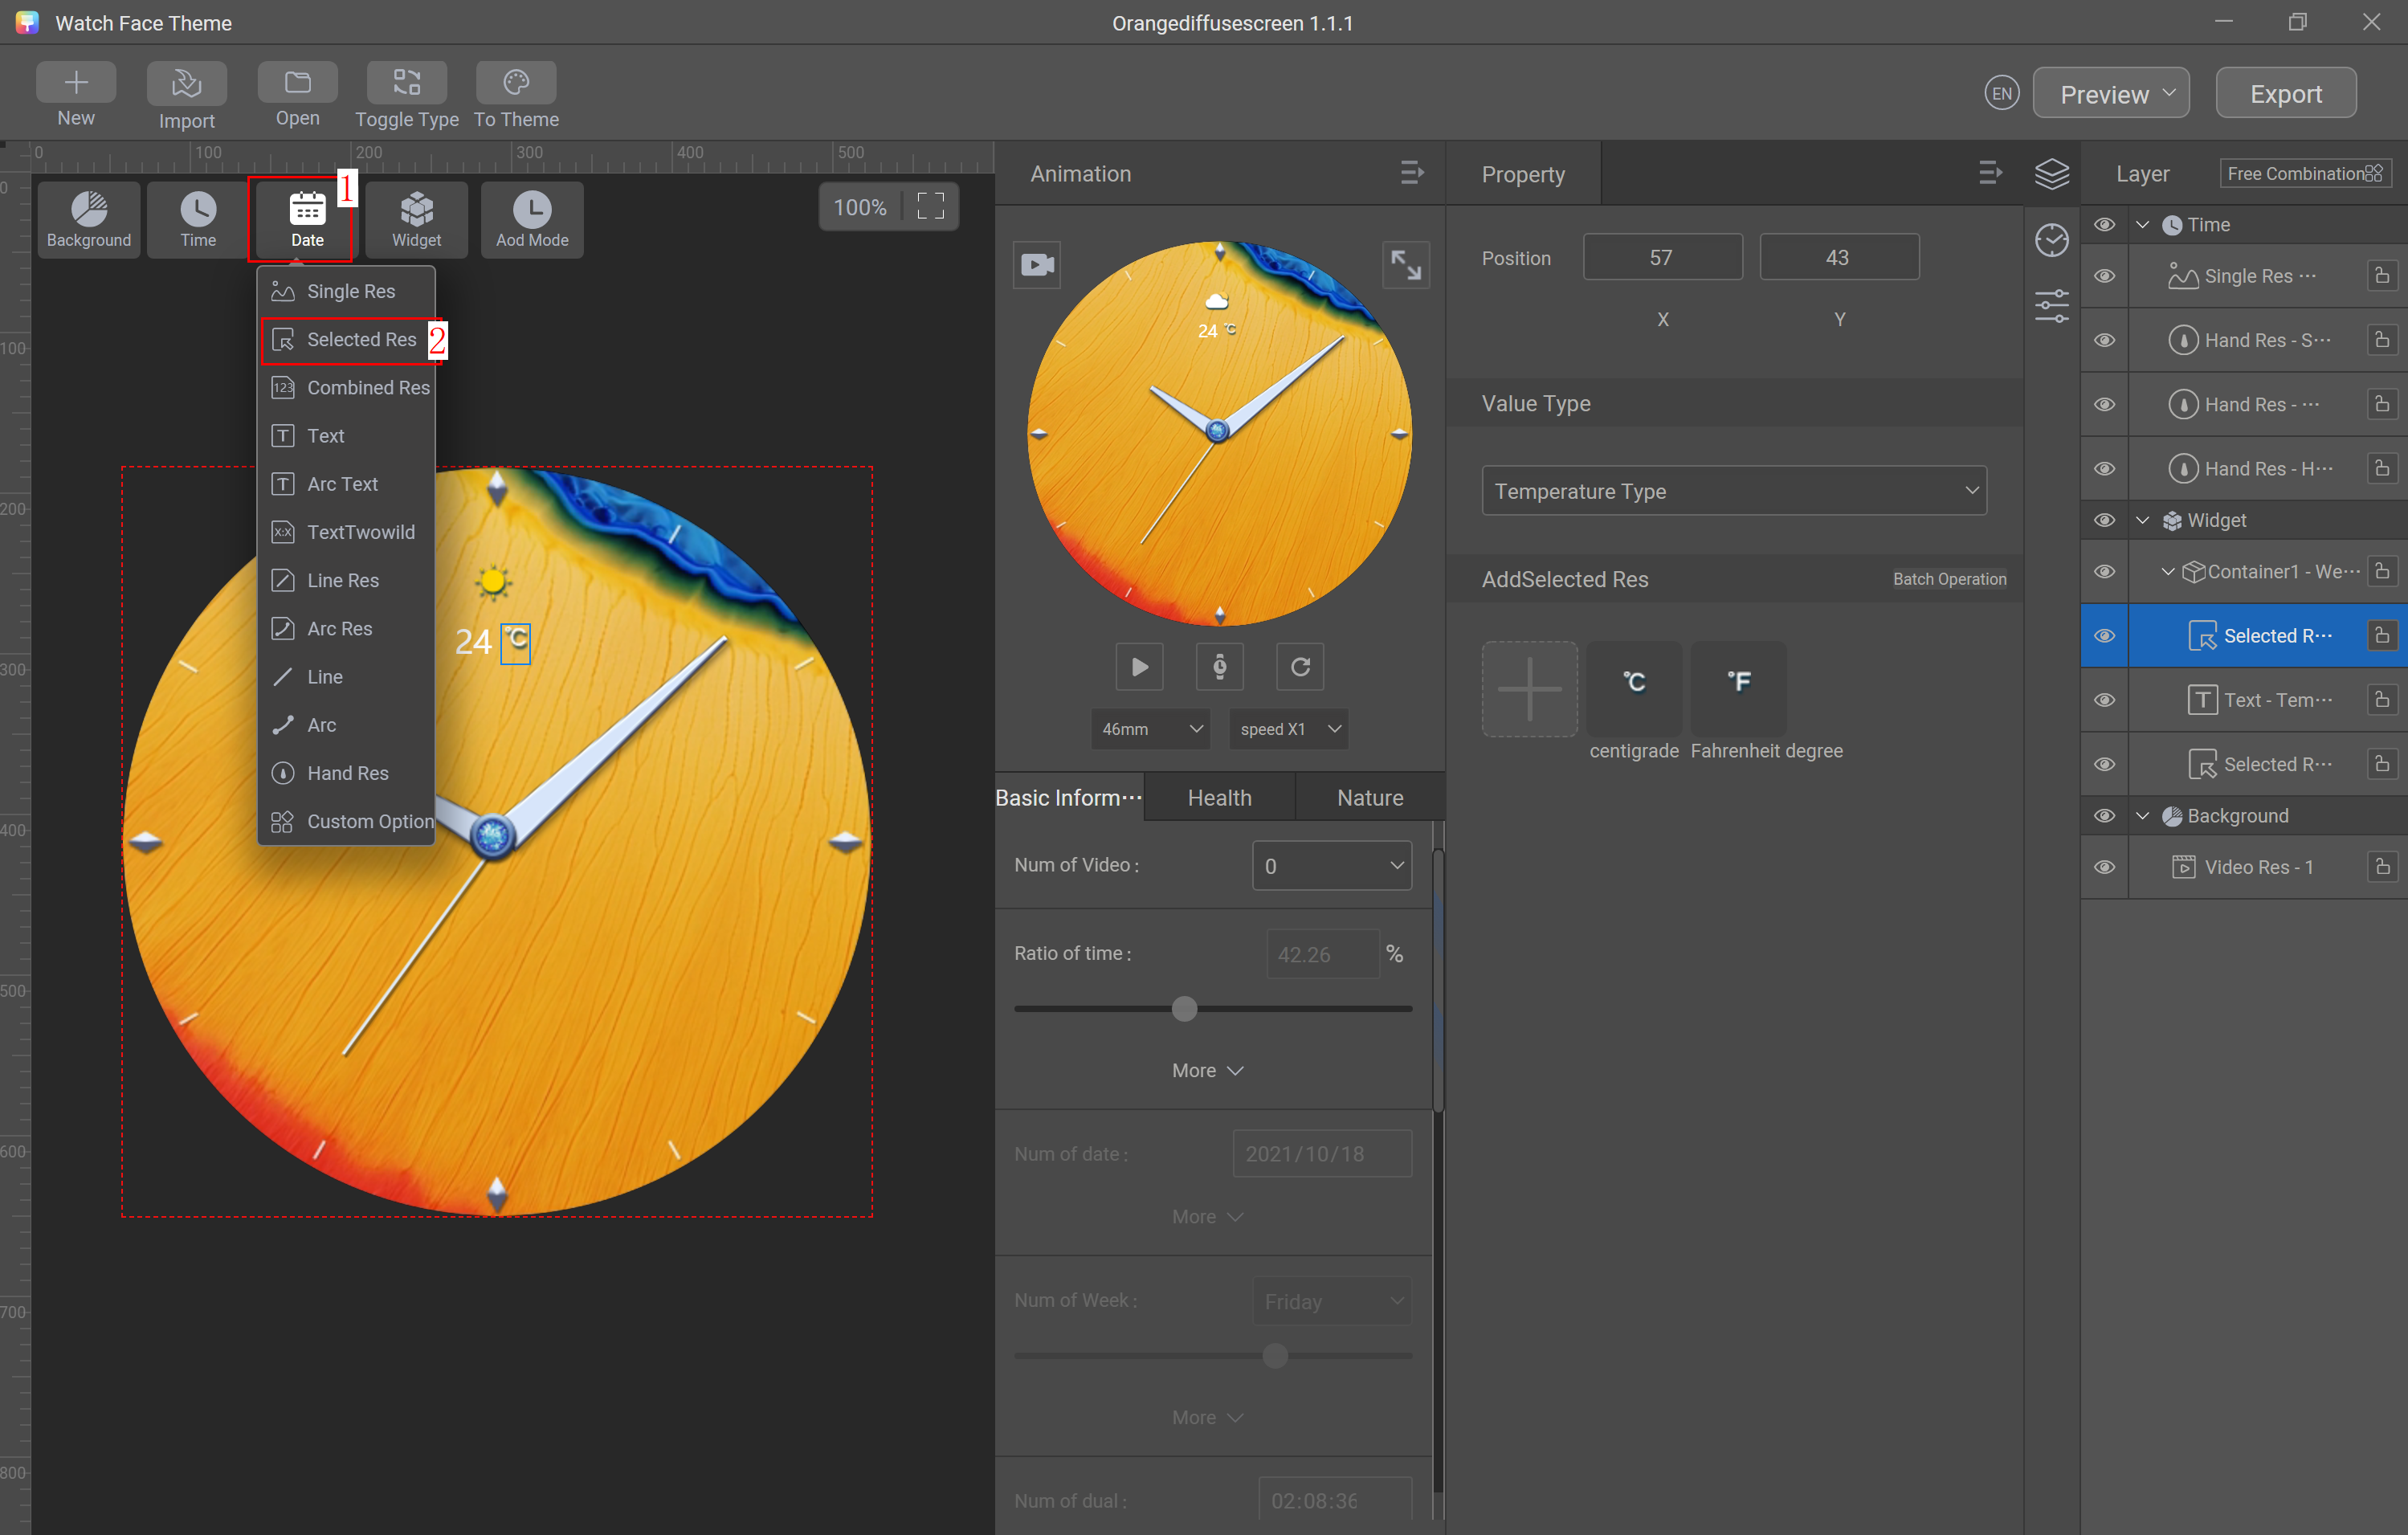
Choose Widget > Selected Res, and select Temperature Type from Value Type. In the AddSelected Res area, click the add sign (+) to import sliced images (from A100_077.png to A100_078.png), and set Position to 57 and 43.
Step 5: Configure data about days of the week and dates.
Choose Date > Selected Res.
Select Week from Value Type.
In the AddSelected Res area, click the add sign (+) to import sliced images (from A100_006.png to A100_012.png), and set Position to 205 and 343.
Choose Widget > Selected Res, and select Month from Value Type. In the AddSelected Res area, click the add sign (+) to import sliced images (from A100_013.png to A100_024.png), and set Position to 193 and 375.
Choose Widget > Selected Res, and select Date High from Value Type. In the AddSelected Res area, click the add sign (+) to import sliced images (from A100_026.png to A100_029.png), and set Position to 238 and 375.
Choose Widget > Selected Res, and select Date Low from Value Type. In the AddSelected Res area, click the add sign (+) to import sliced images (from A100_026.png to A100_035.png), and set Position to 254 and 375.
Choose Widget > Single Res. In the AddSingle Res area, click the add sign (+) to import the sliced image A100_025.png, and set Position to 226 and 375.
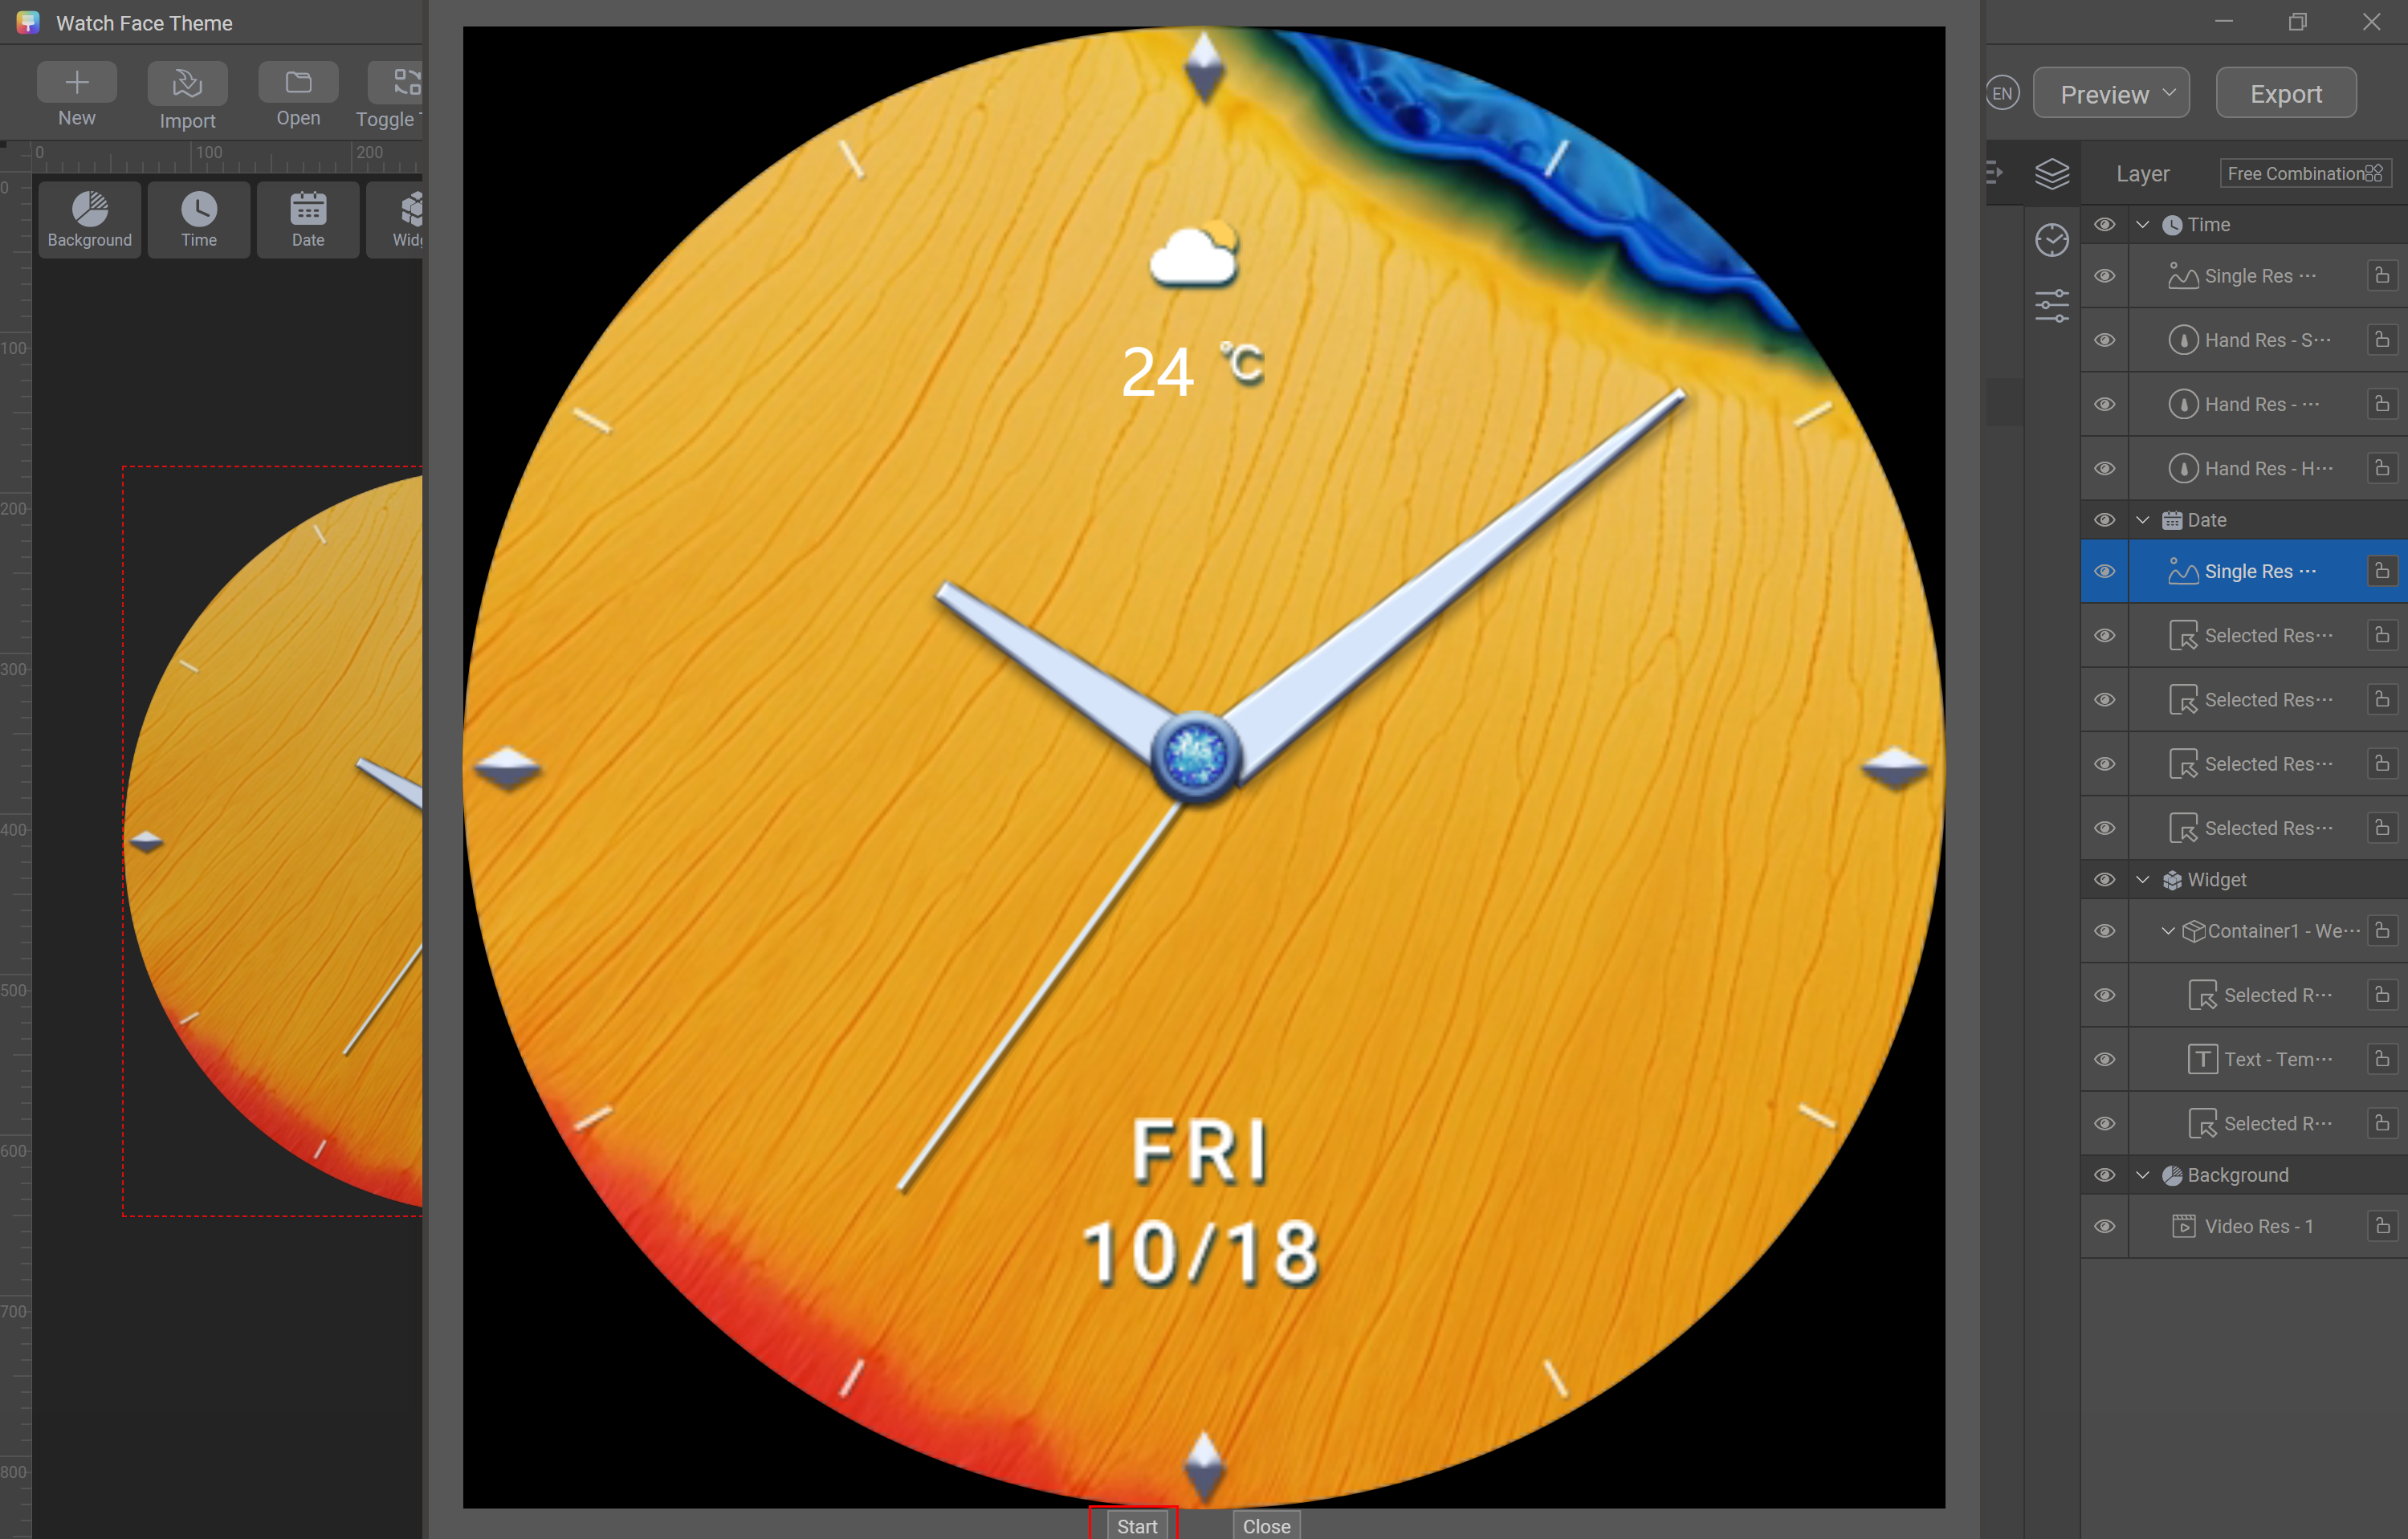
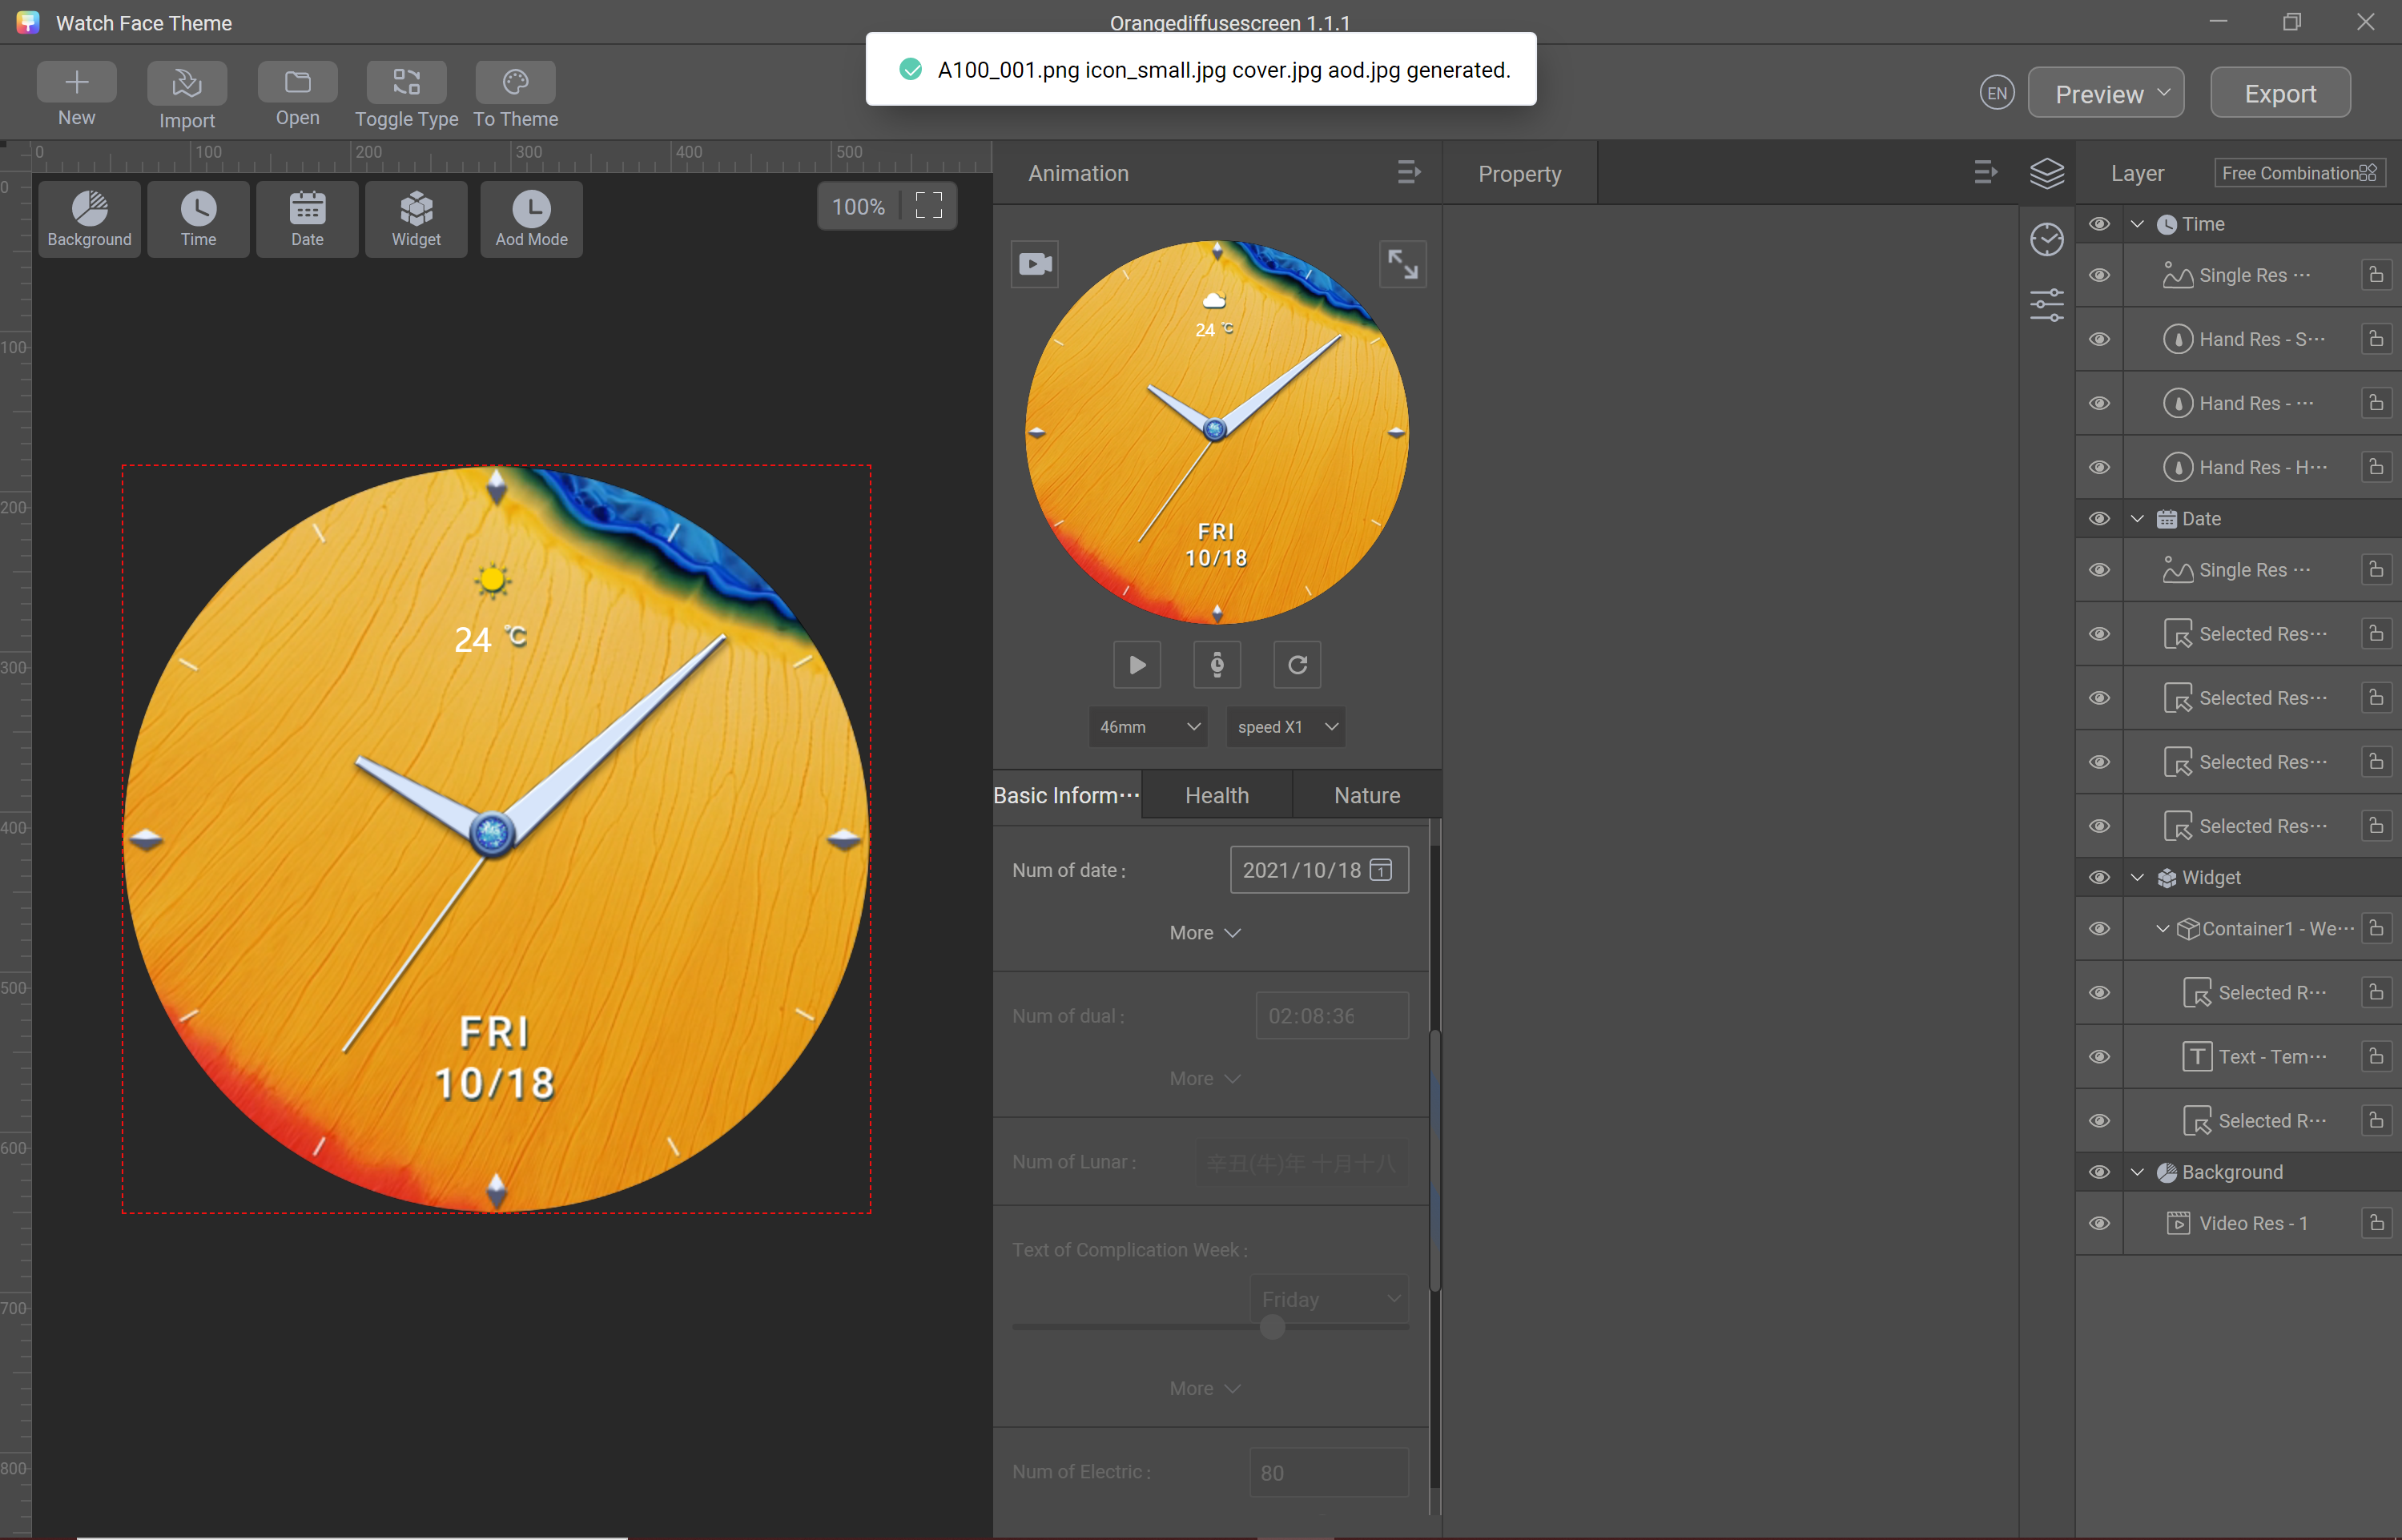
Step 6: Generate a preview video.
Click the video recording icon.
In the window displayed, click Start. When the Record Tips dialog box is displayed, click Confirm to select a path for saving the preview video.
Step 7: Create an AOD watch face.
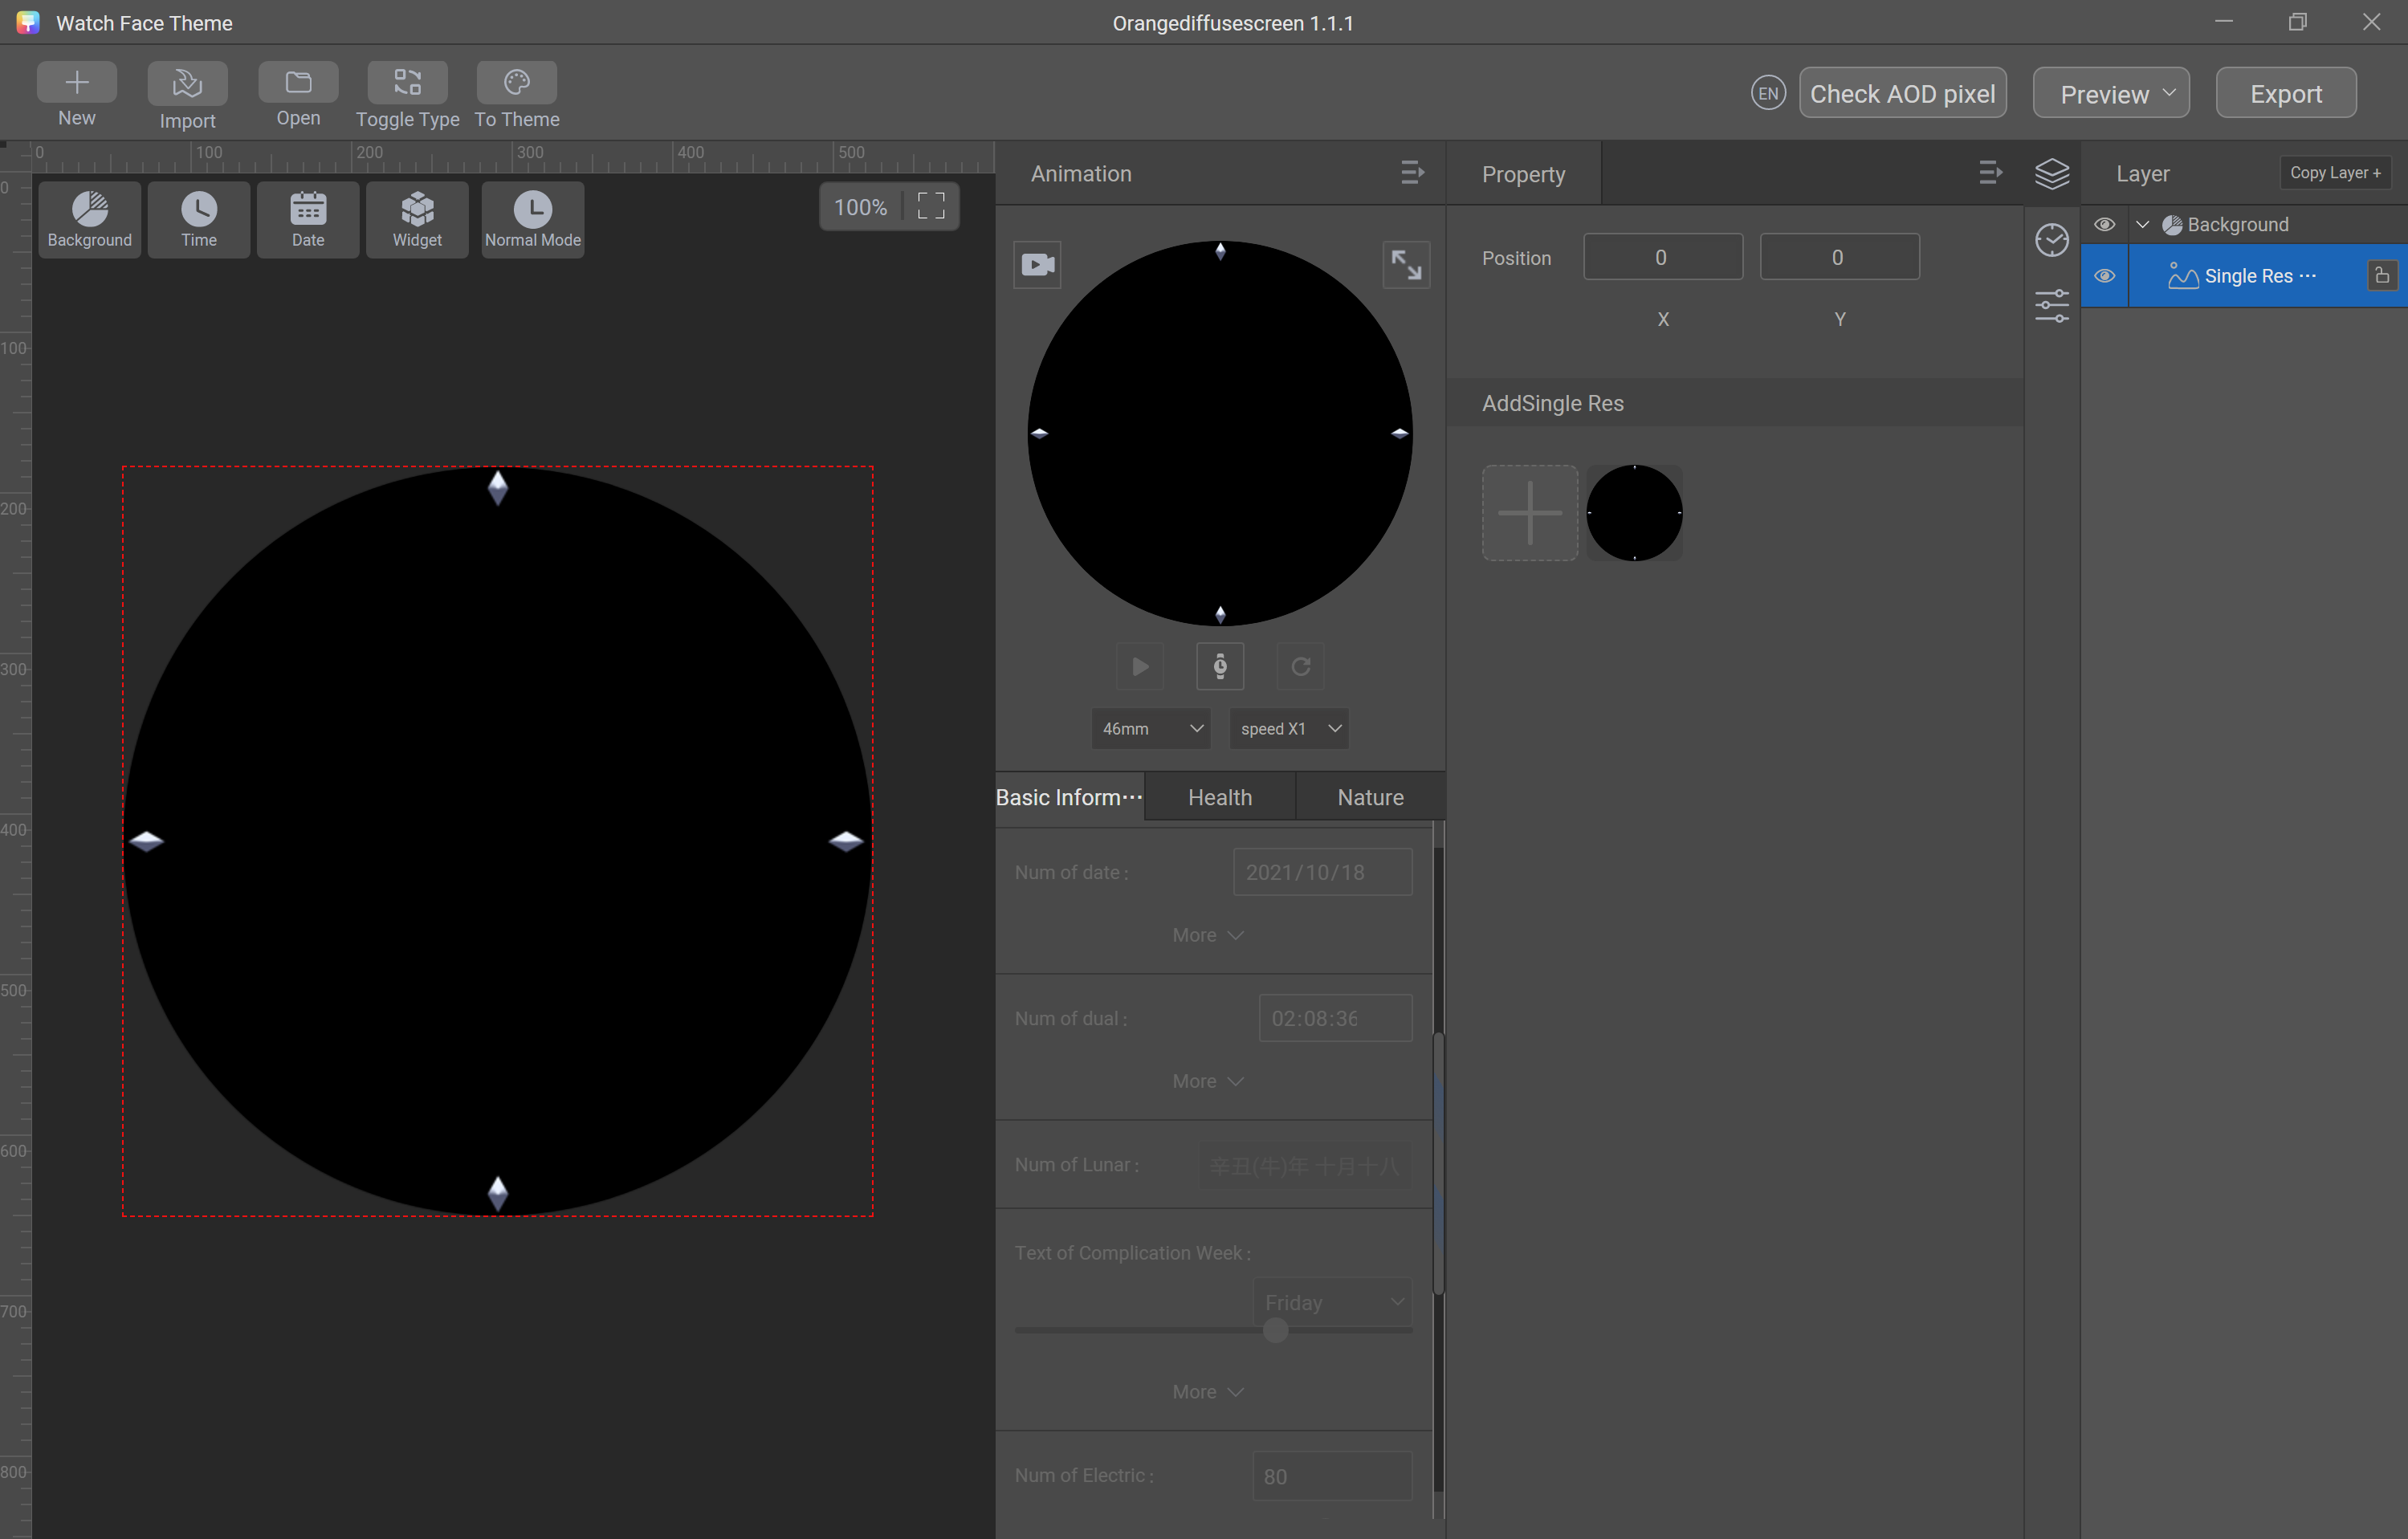
Click AoD Mode. Choose Background > Single Res. In the AddSingle Res area, click the add sign (+) to import the background sliced image A100_081.png. Remain the Position setting unchanged.
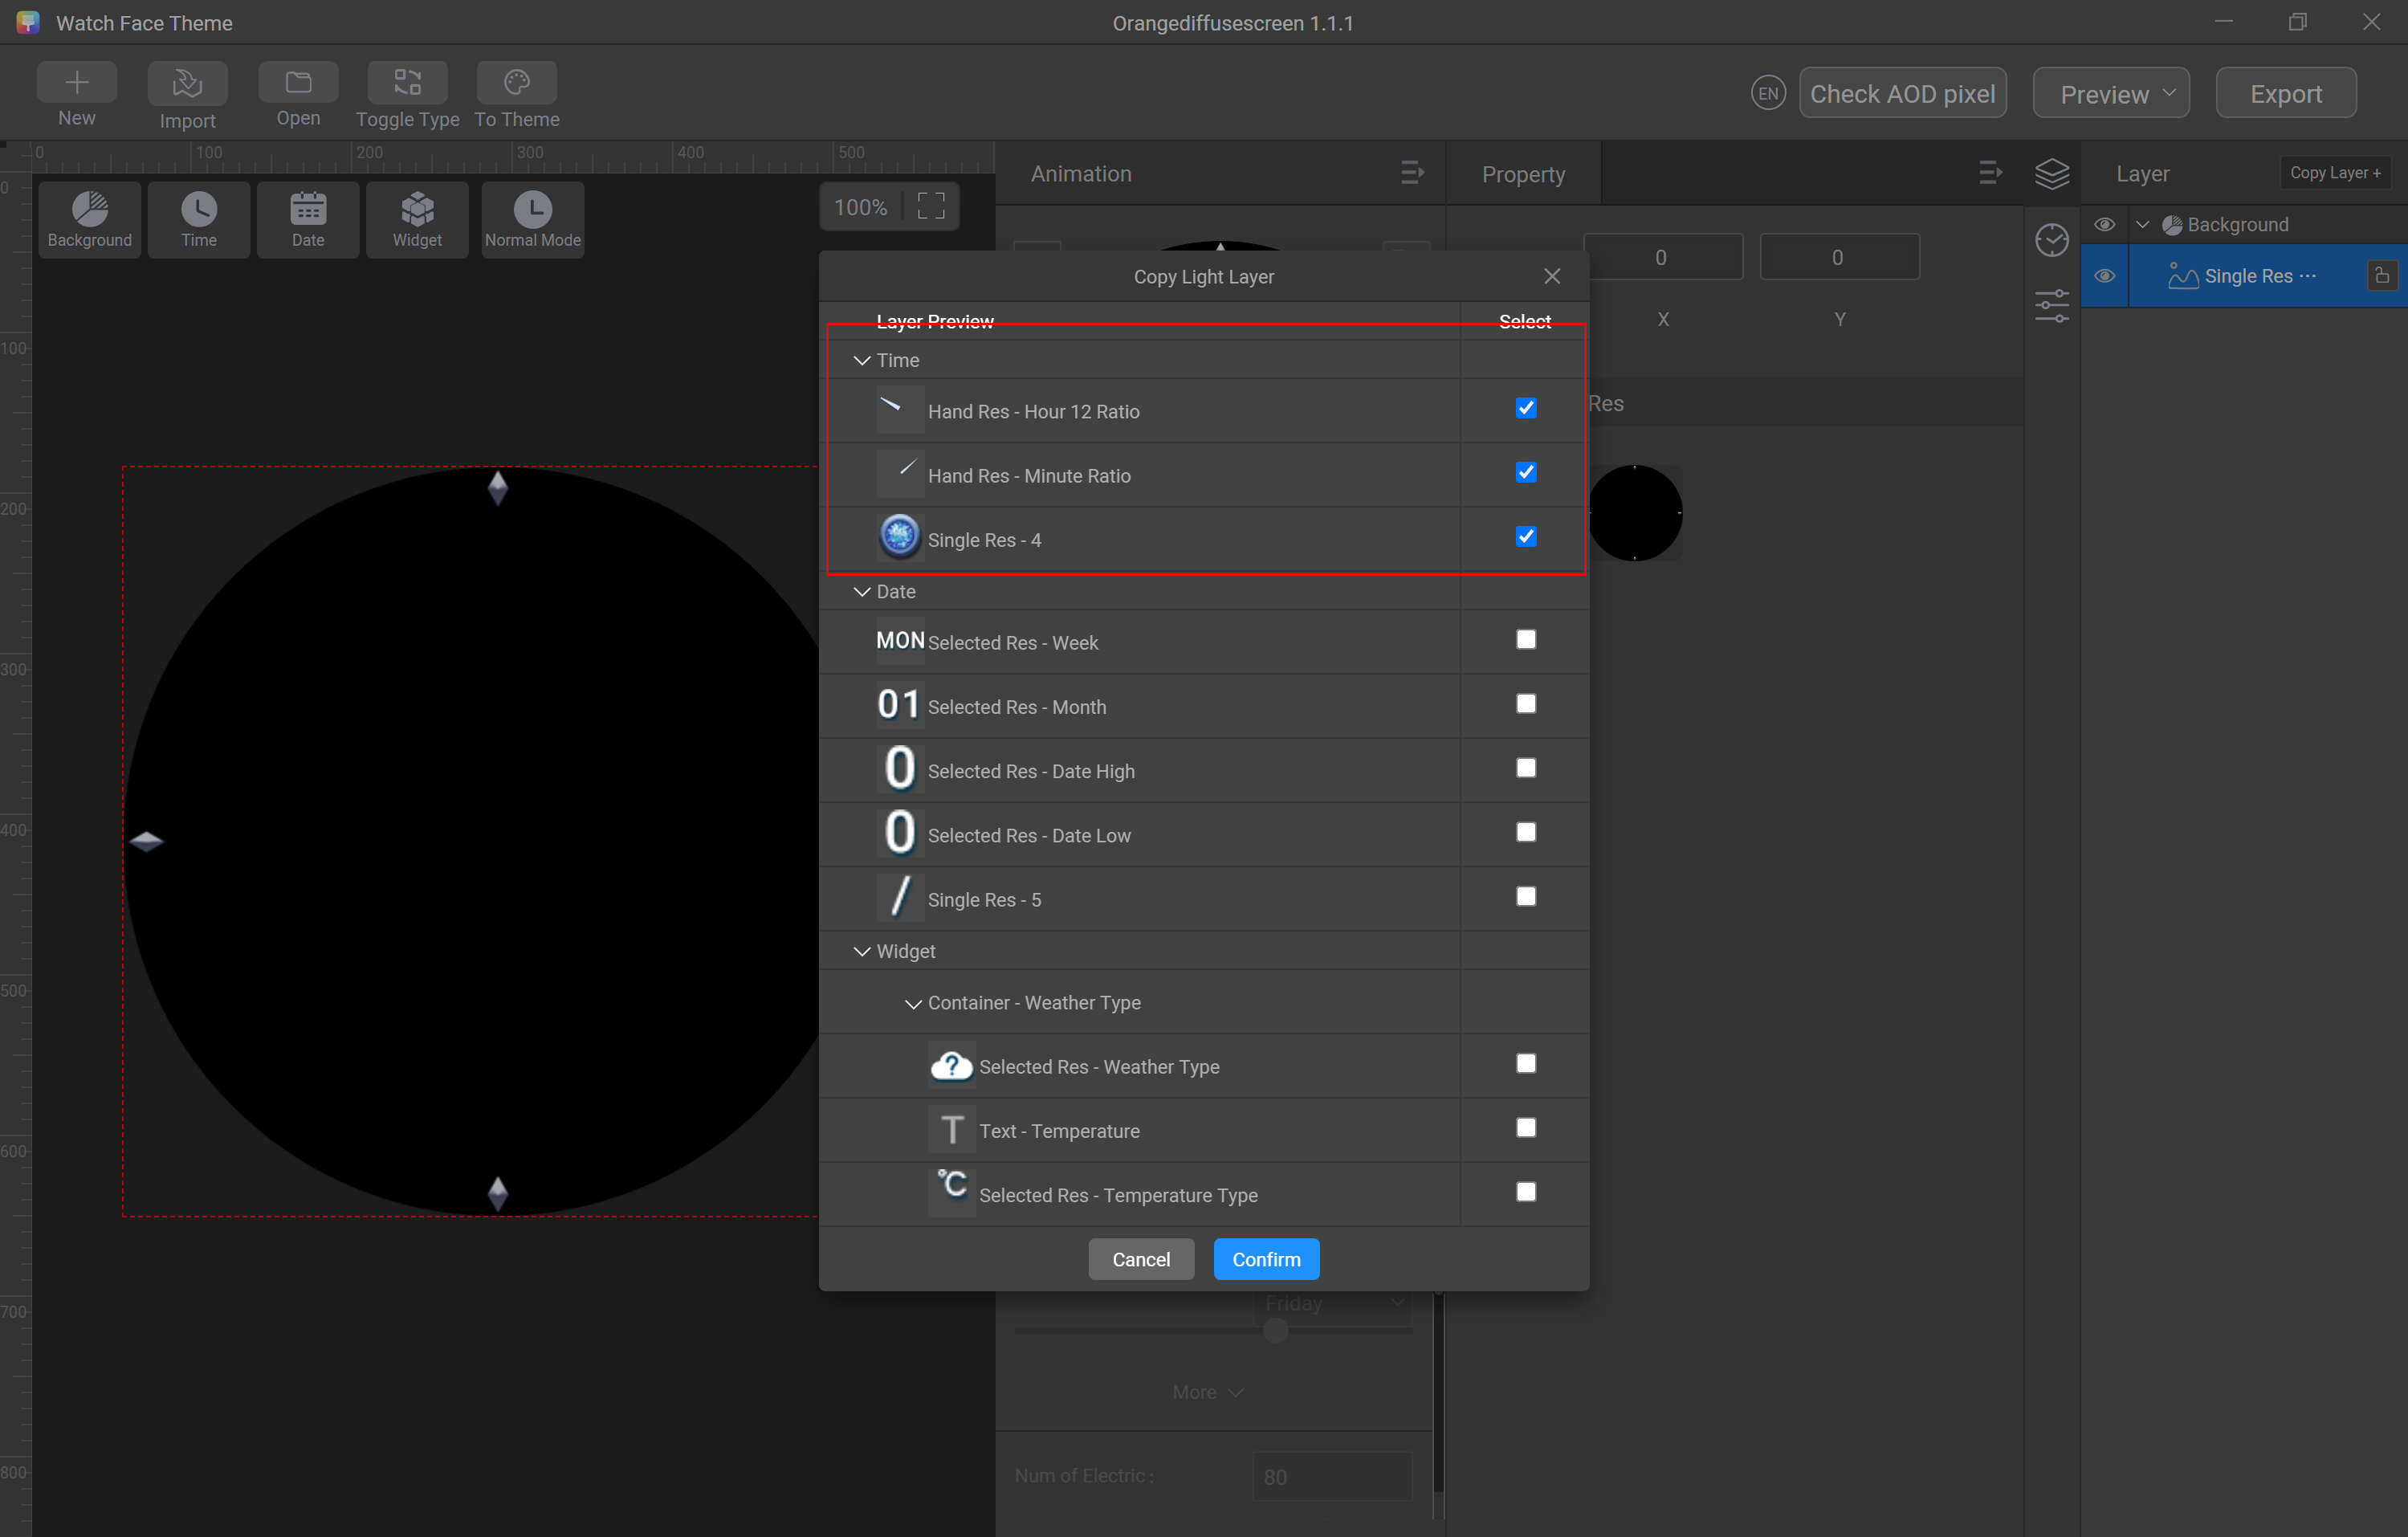
Click Copy Layer in the upper right corner of the window.
In the Copy Light Layer dialog box displayed, select Hand Res - Hour 12 Ratio, Hand Res - Minute Ratio, and Single Res - 4, and click Confirm.
Step 8: Generate a preview image.
Click Normal mode, and choose Preview > Screenshot in the upper right corner of the window.
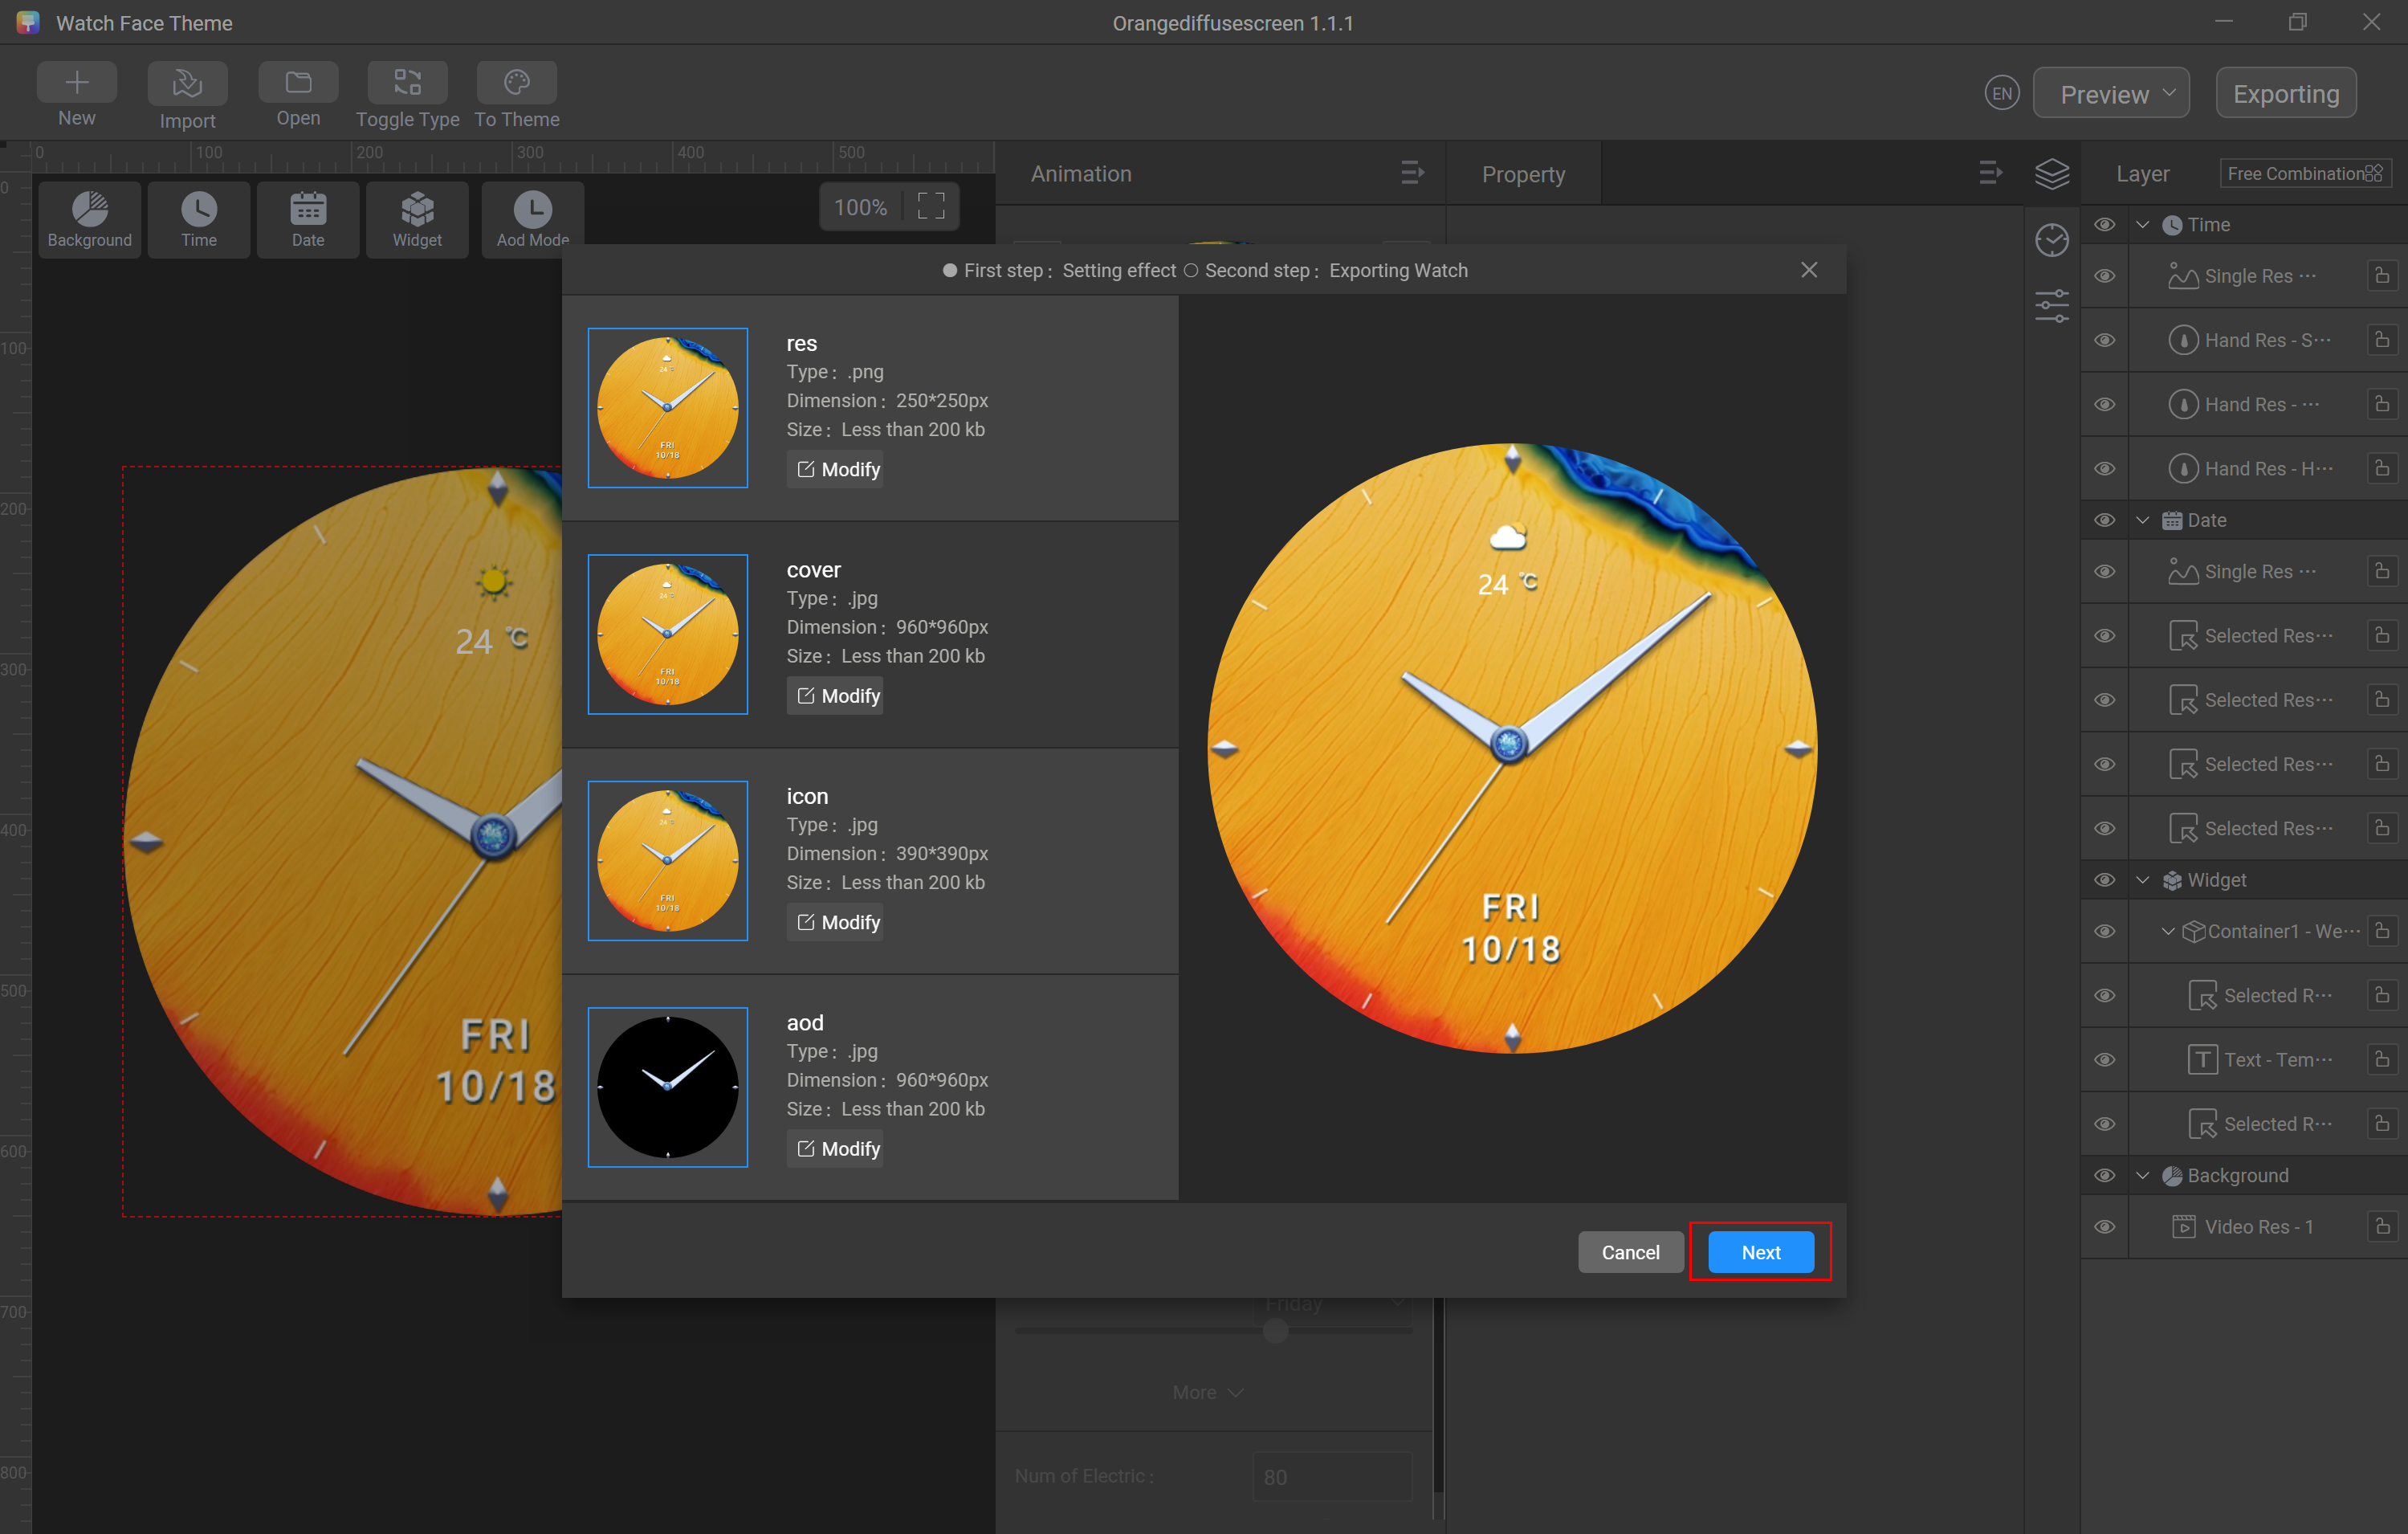
Step 9: Export the watch face files.
Click Export to export the watch face files.
Make sure that the preview image is complete.
The resource package is generated as an HWT file (Orangediffusescreen.hwt in this codelab).
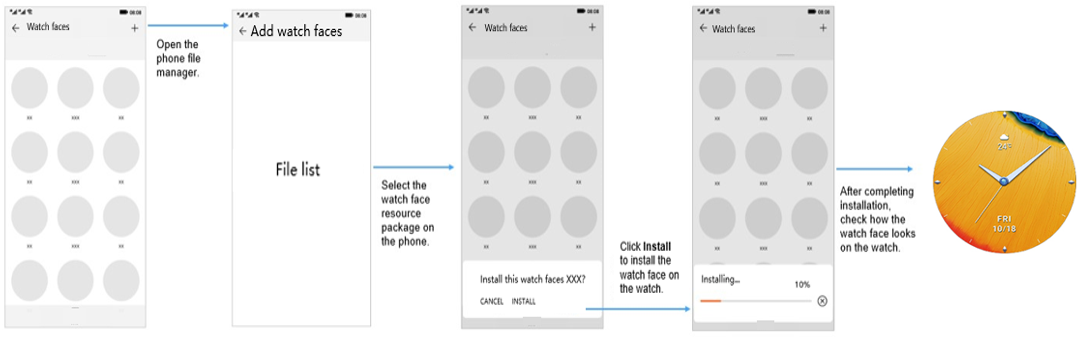
Step 10: Test the watch face on your watch.
Save the HWT file to your phone.
Sign in to the HUAWEI Health app using your HUAWEI ID registered on HUAWEI Developers.
Load the watch face resource package to Watch Faces and install it on your watch.
Preview the watch face on your watch.
Congratulations! You have successfully completed this codelab and learned how to develop a watch face using Theme Studio.
Code copied