运动健康服务(Health Kit)是为华为生态应用打造的基于华为帐号和用户授权的运动健康数据开放平台。面向消费者,支持运动健康数据存储、灵活授权分享机制;面向开发者和合作伙伴提供数据平台和运动健康开放能力。开发者和合作伙伴可以基于多种数据类型,构建运动健康领域应用与服务。Health Kit连接硬件设备与生态应用,为消费者提供健康关怀和运动指导,打造优质服务体验。
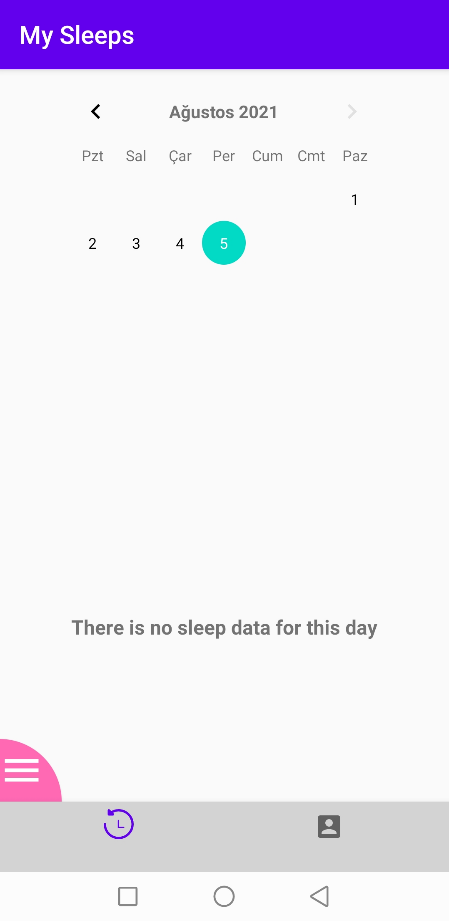
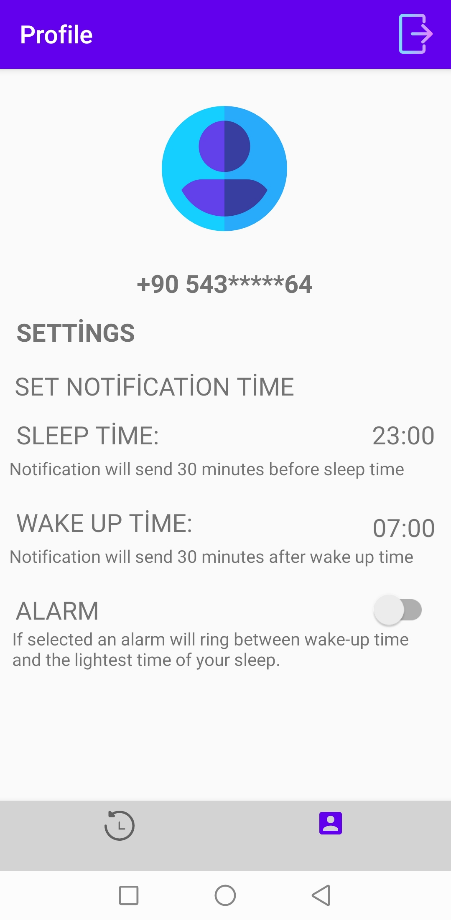
本篇codelab介绍了睡眠记录应用SleepTracker,它集成了多个HMS Core服务,可以在装有HMS Core(APK)的安卓手机上运行。该应用基于MVVM架构开发,可生动展示从华为穿戴设备(手环、智能手表等)获取的数据,提供睡眠状态记录、闹钟等功能。
要使用HMS Core服务,您需要:
在这个codelab中,您将学到如何:
集成HMS Core能力,需要完成以下准备工作:
具体操作,请按照《HUAWEI HMS Core集成准备》中的详细说明来完成。
如需下载SleepTracker示例代码,请至:GitHub。
提示:需要通过注册成为开发者才能完成集成准备中的操作。
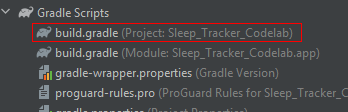
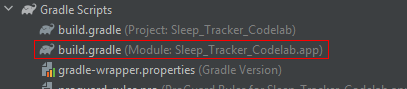
华为提供Maven仓来集成SDK。开发应用前,需要先把相关服务的SDK集成到Android Studio项目中。
repositories {
…
        maven { url 'http://developer.huawei.com/repo/' }
...
    }


dependencies {
        ...
        classpath 'com.huawei.agconnect:agcp:1.6.0.300'
        ...
}


allprojects {
    repositories {
        ...
        maven { url 'http://developer.huawei.com/repo/' }
		...
    }
}
dependencies {
    implementation 'com.huawei.hms:hwid:{version}'
    implementation 'com.huawei.hms:push:{version}''
    implementation 'com.huawei.agconnect:agconnect-core:{version}'
    implementation 'com.huawei.agconnect:agconnect-auth:{version}'
    implementation 'com.huawei.hms:health:{version}'
    implementation 'com.huawei.hms:scan:{version}'
}
具体申请过程请参见申请Health Kit服务。
接下来,我们将创建不同睡眠类型的图表、用于选择日期的日历,在睡眠详情页面,用不同颜色展示睡眠状况细节。
|
|
|
调用华为帐号服务,进行用户授权。在华为帐号授权登录界面上,用户可以授权应用获取相关数据,并且可以选择数据类型,仅授权应用获取部分数据。应用可获取的数据仅限于华为运动健康app(以下简称"运动健康app")允许获取且用户授权了的数据。
如需获取运动健康app数据,授权应用获取其数据,并引导用户完成华为帐号及运用健康app的授权工作。
首先,添加可获取的数据范围。
Kotlin:
private fun getScopes(): MutableList {
    val scopeList: MutableList = LinkedList()
    scopeList.add(HuaweiIdAuthAPIManager.HUAWEIID_BASE_SCOPE)
    scopeList.add(Scope(Scopes.HEALTHKIT_SLEEP_READ))
    return scopeList
}
Java:
private List getScopes() {
    List scopeList = new LinkedList<>();
    scopeList.add(HuaweiIdAuthAPIManager.HUAWEIID_BASE_SCOPE);
    scopeList.add(new Scope(Scopes.HEALTHKIT_SLEEP_READ));
    return scopeList;
}
初始化SettingController和HuaweiIdAuthManager。
Kotlin:
private var mHuaweiIdAuthService: HuaweiIdAuthService
private val mapper = HuaweiAccountMapper()
init {
    val params = HuaweiIdAuthParamsHelper(
        HuaweiIdAuthParams.DEFAULT_AUTH_REQUEST_PARAM
    )
        .setAccessToken()
        .setScopeList(getScopes())
        .setIdToken()
        .setEmail()
        .createParams()
 dataController = DataControllerImpl(androidContext()).dataController,
 mSettingController = settingController

    mHuaweiIdAuthService = HuaweiIdAuthManager.getService(context, params)
}
Java:
public HuaweiAccountServiceImpl(@NotNull Context context, @NotNull DataController dataController, SettingController mSettingController) {
    this.context = context;
    this.dataController = dataController;
    this.mSettingController = mSettingController;
    this.mapper = new HuaweiAccountMapper();
    HuaweiIdAuthParams params = (new HuaweiIdAuthParamsHelper(HuaweiIdAuthParams.DEFAULT_AUTH_REQUEST_PARAM))
            .setAccessToken().setScopeList(this.getScopes()).setIdToken().setEmail().createParams();
    this.mHuaweiIdAuthService = HuaweiIdAuthManager.getService(this.context, params);
}
查看授权状态。如尚未授权,引导用户完成授权。
Kotlin:
override fun checkOrAuthorizeHealth(intent: (Intent) -> Unit) {
        val healthAppSettingDataShareHealthKitActivityScheme =
            "huaweischeme://healthapp/achievement?module=kit"
        val authTask = mSettingController.healthAppAuthorization
        authTask.addOnSuccessListener { result ->
            if (Boolean.TRUE == result) {
                Log.i(Constants.loginActivityTAG, context.getString(R.string.check_authorize_success))
            } else {
                val healthKitSchemaUri: Uri =
                    Uri.parse(healthAppSettingDataShareHealthKitActivityScheme)
                val healtIntent = Intent(Intent.ACTION_VIEW, healthKitSchemaUri)
                if (healtIntent.resolveActivity(context.packageManager) != null) {
                    intent.invoke(healtIntent)
                } else {
                    Log.w(
                        Constants.loginActivityTAG,
                        context.getString(R.string.auth_not_resolve)
                    )
                }
            }
        }.addOnFailureListener { exception ->
            if (exception != null) {
                Log.i(Constants.loginActivityTAG, exception.message.toString())
            }
        }
    }
Java:
@Override
    public void checkOrAuthorizeHealth(Function1<Intent, Void> intent) {
        String healthAppSettingDataShareHealthKitActivityScheme =
                "huaweischeme://healthapp/achievement?module=kit";
        Task<Boolean> authTask = mSettingController.getHealthAppAuthorization();
        authTask.addOnSuccessListener(aBoolean -> {
            if (Boolean.TRUE.equals(aBoolean)) {
                Log.i(Constants.loginActivityTAG, context.getString(R.string.check_authorize_success));
            } else {
                Uri healthKitSchemaUri = Uri.parse(healthAppSettingDataShareHealthKitActivityScheme);
                Intent healthIntent = new Intent(Intent.ACTION_VIEW, healthKitSchemaUri);
                if (healthIntent.resolveActivity(context.getPackageManager()) != null) {
                    intent.invoke(healthIntent);
                } else {
                    Log.w(
                            Constants.loginActivityTAG,
                            context.getString(R.string.auth_not_resolve)
                    );
                }
            }
        });
        authTask.addOnFailureListener(e -> {
            if (e != null) {
                Log.i(Constants.loginActivityTAG, e.getMessage());
            }
        });
    }
通过Health Kit,用户可在应用首页查询当天睡眠数据,或查询任意一天的睡眠数据。首先,我们来开发查询当日睡眠数据的功能。
创建任务,设置日期类型为DT_CONTINUOUS_SLEEP,查询当日睡眠数据。
Kotlin:
val todaySummaryTask = dataController.readTodaySummation(DataType.DT_CONTINUOUS_SLEEP)
Java:
Task todaySummaryTask = dataController.readTodaySummation(DataType.DT_CONTINUOUS_SLEEP);
调用相关接口,查询当日某类型数据的统计数据。查询时间从当日00:00:00开始,到接口调用时系统的时间戳结束。
Kotlin:
todaySummaryTask.addOnSuccessListener { sampleSet ->
 emitter.onSuccess(sampleSet)
}
todaySummaryTask.addOnFailureListener { exception ->
 if (exception.message!!.contains("50005")) {
     emitter.onError(exception)
 }
}
Java:
todaySummaryTask.addOnSuccessListener(emitter::onSuccess);
todaySummaryTask.addOnFailureListener(e -> {
    if (Objects.requireNonNull(e.getMessage()).contains("50005")) {
        emitter.onError(e);
    }
});
最后,监听数据变化,并依此更新界面。
Kotlin:
viewModel.readToday()
private fun listenPreferencesData() {
    viewModel.dailyDataResultLiveData.observe(viewLifecycleOwner, Observer {
        when (it?.responseType) {
            Status.SUCCESSFUL -> {
                logger("Success read daily summation from HMS core")
                if (it.data!!.isEmpty) {
                    setNoDataDisplay()
                } else {
                    it.data?.let { sampleSet -> cleanSampleSet(sampleSet) }
                    setDataDisplay()
                }
                logger(splitSeparator)
            }
            Status.ERROR -> {
                viewModel.silentSignIn()
            }
        }
    })
}
Java:
viewModel.getValue().readToday();
private void listenPreferencesData() {
    viewModel.getValue().dailyDataResultLiveData.observe(getViewLifecycleOwner(), sampleSetData -> {
        switch (sampleSetData.getResponseType()) {
            case ERROR:
                viewModel.getValue().silentSignIn();
            case SUCCESSFUL:
                logger("Success read daily summation from HMS core");
                assert sampleSetData.getData() != null;
                if (sampleSetData.getData().isEmpty()) {
                    setNoDataDisplay();
                    sleepDataObj.sleepDate = Constants.defaultDate;
                } else {
                    if (sampleSetData.getData() != null) {
                        cleanSampleSet(sampleSetData.getData());
                    }
                    setDataDisplay();
                }
                logger(splitSeparator);
            case LOADING:
                Log.i(Constants.mySleepFragmentTAG, "Loading");
        }
    });
}
接下来,查询某一天的睡眠数据,需要用到startTime和endTime参数。需要注意的是,在接下来的示例中,这两个参数的值是相同的。
Kotlin:
override fun readDailyData(startTime: Int, endTime: Int): Single<SampleSet> {
    return Single.create { emitter ->
  val dailySummationTask =
          dataController.readDailySummation(
    DataType.DT_CONTINUOUS_SLEEP,
           startTime,
           endTime)
         dailySummationTask.addOnSuccessListener { sampleSet ->
          emitter.onSuccess(sampleSet)
         }
         dailySummationTask.addOnFailureListener { exception ->
          if (exception.message!!.contains("50005")) {
             emitter.onError(exception)
            }
         }
    }
}
Java:
@Override
    public Single<SampleSet> readDailyData(Integer startTime, Integer endTime) {
        return Single.create(emitter -> {
            Task<SampleSet> dailySummaryTask = dataController
                    .readDailySummation(DataType.DT_CONTINUOUS_SLEEP, startTime, endTime);
            dailySummaryTask.addOnSuccessListener(emitter::onSuccess);
            dailySummaryTask.addOnFailureListener(e -> {
                if (Objects.requireNonNull(e.getMessage()).contains("50005")) {
                    emitter.onError(e);
                }
            });
        });
    }
集成推送服务前,可以先分析本codelab中的代码。欲了解推送服务,请参见开发指南。
通过PushManager类获取access token和设备ID token,然后发送消息。
通过SharedPreferences保存access token。
Kotlin:
fun getAccessToken(sleepType: String, context: Context) {
            AccessTokenClient.getClient().create(AccessTokenInterface::class.java)
                .createAccessToken(
                    Constants.grantType,
                    Constants.appSecret,
                    Constants.appId
                ).enqueue(object : Callback<AccessToken> {
                    override fun onFailure(call: Call<AccessToken>, t: Throwable) {
                        Log.e(Constants.pushServiceTAG, "Error: ${t.message}")
                    }

                    override fun onResponse(
                        call: Call<AccessToken>,
                        response: Response<AccessToken>
                    ) {
                        if (response.isSuccessful) {
                            Log.d(
                                Constants.pushServiceTAG,
                                "Access Token: ${response.body()?.accessToken}"
                            )
                            val sharedPreferences = context.getSharedPreferences(
                                Constants.packageName,
                                Context.MODE_PRIVATE
                            )
                            val sharedPushToken = sharedPreferences.getString(Constants.pushTokenStr, pushToken)
                            accessToken = response.body()?.accessToken
                            sharedPushToken?.let { sendNotification(it, sleepType) }
                        }
                    }
                })
        }
Java:
public static void getAccessToken(String sleepType, Context context) {
        AccessTokenClient.getClient().create(AccessTokenInterface.class)
                .createAccessToken(Constants.grantType, Constants.appSecret, Constants.appId).enqueue(
                new Callback<AccessToken>() {
                    @Override
                    public void onResponse(Call<AccessToken> call, Response<AccessToken> response) {
                        if (response.isSuccessful()) {
                            if (response.body() != null) {
                                SharedPreferences sharedPreferences = context.getSharedPreferences(
                                        Constants.packageName,
                                        Context.MODE_PRIVATE
                                );
                                String sharedPushToken = sharedPreferences.getString(Constants.pushTokenStr, pushToken);
                                accessToken = response.body().getAccessToken();
                                if (sharedPushToken != null) {
                                    sendNotification(sharedPushToken, sleepType);
                                }
                            }
                        }
                    }

                    @Override
                    public void onFailure(Call<AccessToken> call, Throwable t) {
                        Log.e(Constants.pushServiceTAG, "Error: " + t.getMessage());
                    }
                }
        );
    }
获取push token。
Kotlin:
val appId: String =
                            AGConnectServicesConfig.fromContext(context).getString("client/app_id")
                        pushToken = HmsInstanceId.getInstance(context).getToken(appId, "HCM")

                        if (!TextUtils.isEmpty(pushToken)) {
                            val sharedPreferences = context.getSharedPreferences(
                                Constants.packageName,
                                Context.MODE_PRIVATE
                            )
                            sharedPreferences.edit().putString(Constants.pushTokenStr, pushToken).apply()
                            Log.i(Constants.pushServiceTAG, "get token: $pushToken")
                        }
Java:
try {
                    String appId = AGConnectServicesConfig.fromContext(context).getString("client/app_id");
                    pushToken = HmsInstanceId.getInstance(context).getToken(appId, "HCM");

                    if (!TextUtils.isEmpty(pushToken)) {
                        SharedPreferences sharedPreferences = context.getSharedPreferences(
                                Constants.packageName,
                                Context.MODE_PRIVATE
                        );
                        sharedPreferences.edit().putString(Constants.pushTokenStr, pushToken).apply();
                        Log.i(Constants.pushServiceTAG, "Get Token: " + pushToken);
                    }
                } catch (Exception e) {
                    Log.i(Constants.pushServiceTAG, "DeviceIdToken failed, " + e.getMessage());
                }
发送通知。
Kotlin:
private fun sendNotification(pushToken: String, sleepType: String) {
            NotificationClient.getClient().create(NotificationInterface::class.java)
                    .createNotification(
                            "Bearer $accessToken",
                            selectNotificationMessageBody(sleepType, pushToken)
                    ).enqueue(object : Callback<NotificationMessage> {
                        override fun onResponse(
                                call: Call<NotificationMessage>,
                                response: Response<NotificationMessage>
                        ) {
                            if (response.isSuccessful) {
                                Log.d(Constants.pushServiceTAG, "Response ${response.body()}")
                            }
                        }

                        override fun onFailure(call: Call<NotificationMessage>, t: Throwable) {
                            Log.d(Constants.pushServiceTAG, "Error: ${t.message}")
                        }
                    })
        }
Java:
private static void sendNotification(String pushToken, String sleepType) {
        NotificationClient.getClient().create(NotificationInterface.class)
                .createNotification("Bearer " + accessToken,
                        selectNotificationMessageBody(sleepType, pushToken)).enqueue(
                new Callback<NotificationMessage>() {
                    @Override
                    public void onResponse(Call<NotificationMessage> call, Response<NotificationMessage> response) {
                        if (response.isSuccessful()) {
                            Log.d(Constants.pushServiceTAG, "Response " + response.body());
                        }
                    }

                    @Override
                    public void onFailure(Call<NotificationMessage> call, Throwable t) {
                        Log.e(Constants.pushServiceTAG, "Error: " + t.getMessage());
                    }
                }
        );
    }
通过NotificationCompat,将不同睡眠类型对应的通知显示在通知栏里。
Kotlin:
when (sleepType) {
                Constants.sleepStr -> {
                    return NotificationMessageBody.Builder(
                        Constants.goodNightTitle, Constants.goodNightBody[((0..4).random())],
                        arrayOf(pushToken)
                    ).build()
                }
                Constants.wakeStr -> {
                    return NotificationMessageBody.Builder(
                        Constants.goodMorningTitle,
                        Constants.goodMorningBody[(0..5).random()],
                        arrayOf(pushToken)
                    ).build()
                }
                Constants.sleepReportStr -> {
                    return NotificationMessageBody.Builder(
                        Constants.sleepReportTitle, Constants.sleepReportBody,
                        arrayOf(pushToken)
                    ).build()
                }
                else -> {
                    return NotificationMessageBody.Builder(
                        Constants.notificationErrorTitle, Constants.notificationErrorBody,
                        arrayOf(pushToken)
                    ).build()
                }
            }
Java:
Random rand = new Random();
        switch (sleepType) {
            case Constants.sleepStr:
                return new NotificationMessageBody.Builder(
                        Constants.goodNightTitle,
                        Constants.goodNightBody.get(rand.nextInt(Constants.goodNightBody.size())),
                        Collections.singletonList(pushToken)
                ).build();
            case Constants.wakeStr:
                return new NotificationMessageBody.Builder(
                        Constants.goodMorningTitle,
                        Constants.goodMorningBody.get(rand.nextInt(Constants.goodNightBody.size())),
                        Collections.singletonList(pushToken)
                ).build();
            case Constants.sleepReportStr:
                return new NotificationMessageBody.Builder(
                        Constants.sleepReportTitle,
                        Constants.sleepReportBody,
                        Collections.singletonList(pushToken)
                ).build();
            default:
                return new NotificationMessageBody.Builder(
                        Constants.notificationErrorTitle,
                        Constants.notificationErrorBody,
                        Collections.singletonList(pushToken)
                ).build();
        }
创建并在AndroidManifest.xml中定义NOTIFICATION_SERVICE,通过NOTIFICATION_SERVICE在onStart中获取access token。
Kotlin:
val notification = NotificationCompat.Builder(this, Constants.CHANNEL_ID)
            .setContentTitle(Constants.pushTitle)
            .setContentText(Constants.pushBody)
            .build()
        startForeground(1001, notification)
        PushManager.getAccessToken(intent!!.getStringExtra(Constants.sleepTypeStr)!!, this)
        stopForeground(true)
        return super.onStartCommand(intent, flags, startId)
<service android:name=".services.PushNotificationService" />
Java:
Notification notification = new NotificationCompat.Builder(this, Constants.CHANNEL_ID)
                .setContentTitle(Constants.pushTitle)
                .setContentText(Constants.pushBody)
                .build();
        startForeground(1001, notification);
        if (intent != null) {
            PushManager.getAccessToken(intent.getStringExtra(Constants.sleepTypeStr), this);
        }
        stopForeground(true);
        return super.onStartCommand(intent, flags, startId);
创建PushService类,通过NOTIFICATION_SERVICE接收信息、获取push token。(注意:需先在AndroidManifest.xml中定义NOTIFICATION_SERVICE。)
Kotlin:
if (!TextUtils.isEmpty(token)) {
            val sharedPreferences = this.getSharedPreferences(
                Constants.packageName,
                android.content.Context.MODE_PRIVATE
            )
            sharedPreferences.edit().putString("pushToken", token).apply()
        }
        Log.i(Constants.pushServiceTAG, "Receive Token: $token")
Log.i(
            Constants.pushServiceTAG, "getCollapseKey: " + message?.collapseKey
                    + "\n getData: " + message?.data
                    + "\n getFrom: " + message?.from
                    + "\n getTo: " + message?.to
                    + "\n getMessageId: " + message?.messageId
                    + "\n getSendTime: " + message?.sentTime
                    + "\n getMessageType: " + message?.messageType
                    + "\n getTtl: " + message?.ttl
        )

        val notification: RemoteMessage.Notification = message!!.notification

        Log.i(
            Constants.pushServiceTAG, "\n getImageUrl: " + notification.imageUrl
                    + "\n getTitle: " + notification.title
                    + "\n getTitleLocalizationKey: " + notification.titleLocalizationKey
                    + "\n getTitleLocalizationArgs: " + Arrays.toString(notification.titleLocalizationArgs)
                    + "\n getBody: " + notification.body
                    + "\n getBodyLocalizationKey: " + notification.bodyLocalizationKey
                    + "\n getBodyLocalizationArgs: " + Arrays.toString(notification.bodyLocalizationArgs)
                    + "\n getIcon: " + notification.icon
                    + "\n getSound: " + notification.sound
                    + "\n getTag: " + notification.tag
                    + "\n getColor: " + notification.color
                    + "\n getClickAction: " + notification.clickAction
                    + "\n getChannelId: " + notification.channelId
                    + "\n getLink: " + notification.link
                    + "\n getNotifyId: " + notification.notifyId
        )
Java:
super.onNewToken(token);
        if (!TextUtils.isEmpty(token)) {
            SharedPreferences sharedPreferences = this.getSharedPreferences(
                    Constants.packageName,
                    Context.MODE_PRIVATE
            );
            sharedPreferences.edit().putString("pushToken", token).apply();
        }
        Log.i(Constants.pushServiceTAG, "Receive Token: " + token);
super.onMessageReceived(message);

        if (message != null) {
            Log.i(
                    Constants.pushServiceTAG, "getCollapseKey: " + message.getCollapseKey()
                            + "\n getData: " + message.getData()
                            + "\n getFrom: " + message.getFrom()
                            + "\n getTo: " + message.getTo()
                            + "\n getMessageId: " + message.getMessageId()
                            + "\n getSendTime: " + message.getSentTime()
                            + "\n getMessageType: " + message.getMessageType()
                            + "\n getTtl: " + message.getTtl());
        }
用户可以通过扫二维码关闭闹钟,其中扫码在AlarmScanActivity中实现。使用统一扫码服务中FrameLayout类里的RemoteView获取二维码。
Kotlin:
val dm = resources.displayMetrics
        val density = dm.density
        mScreenWidth = resources.displayMetrics.widthPixels
        mScreenHeight = resources.displayMetrics.heightPixels

        val scanFrameSize = (scanFrameSize * density)
        val rect = Rect()
        rect.left = (mScreenWidth / 2 - scanFrameSize / 2).toInt()
        rect.right = (mScreenWidth / 2 + scanFrameSize / 2).toInt()
        rect.top = (mScreenHeight / 2 - scanFrameSize / 2).toInt()
        rect.bottom = (mScreenHeight / 2 + scanFrameSize / 2).toInt()

        remoteView =
            RemoteView.Builder().setContext(this).setBoundingBox(rect)
                .setFormat(HmsScan.QRCODE_SCAN_TYPE).build()
        remoteView?.onCreate(savedInstanceState)
        remoteView?.setOnResultCallback { result -> //judge the result is effective

            println("QR CODE : " + result[0].getOriginalValue())
            if (result != null && result.isNotEmpty() && result[0] != null && !TextUtils.isEmpty(
                    result[0].getOriginalValue()
                ) && result[0].originalValue == Constants.alarmOffQRResult
            ) {
                    val intentService = Intent(this, AlarmClock::class.java)
                    stopService(intentService)
                    finish()
            }
        }

        val params =
            FrameLayout.LayoutParams(
                LinearLayout.LayoutParams.MATCH_PARENT,
                LinearLayout.LayoutParams.MATCH_PARENT
            )

        rim.addView(remoteView, params)
Java:
DisplayMetrics dm = getResources().getDisplayMetrics();
        float density = dm.density;
        mScreenWidth = dm.widthPixels;
        mScreenHeight = dm.heightPixels;
        float scanFrameSize = (this.scanFrameSize * density);
        Rect rect = new Rect();
        rect.left = (int) (((double)mScreenWidth / 2) - (scanFrameSize / 2));
        rect.left = (int) (((double)mScreenWidth / 2) - (scanFrameSize / 2));
        rect.right = (int) ((double)mScreenWidth / 2 + scanFrameSize / 2);
        rect.top = (int) ((double)mScreenHeight / 2 - scanFrameSize / 2);
        rect.bottom = (int) ((double)mScreenHeight / 2 + scanFrameSize / 2);

        remoteView = new RemoteView.Builder().setContext(this).setBoundingBox(rect)
                .setFormat(HmsScan.QRCODE_SCAN_TYPE).build();
        remoteView.onCreate(savedInstanceState);
        remoteView.setOnResultCallback(result -> {
            System.out.println("QR Code: " + result[0].getOriginalValue());
            if (result[0] != null && !TextUtils.isEmpty(
                    result[0].getOriginalValue()
            ) && result[0].originalValue.equals(Constants.alarmOffQRResult)
            ) {
                Intent intentService = new Intent(this, AlarmClock.class);
                stopService(intentService);
                finish();
            }
        });

        FrameLayout.LayoutParams params =
                new FrameLayout.LayoutParams(LinearLayout.LayoutParams.MATCH_PARENT,
                        LinearLayout.LayoutParams.MATCH_PARENT);

        FrameLayout rim = findViewById(R.id.rim);
        rim.addView(remoteView, params);
干得好,您已经成功完成了Codelab并学到了:
您可以阅读下面链接,了解更多相关的信息。
本Codelab中的demo源码下载地址如下:
源码下载。