Serverless架构是指大量依赖第三方服务(也叫做后端即服务,即"BaaS")的应用程序或者把代码交由托管的、短生命周期的容器中执行(也叫函数即服务,即"FaaS")。AppGallery Connect提供的serverless服务包括云存储、云数据库和云函数等,能够帮助您快速构建应用。使用这些服务之前,请先升级到付费档。
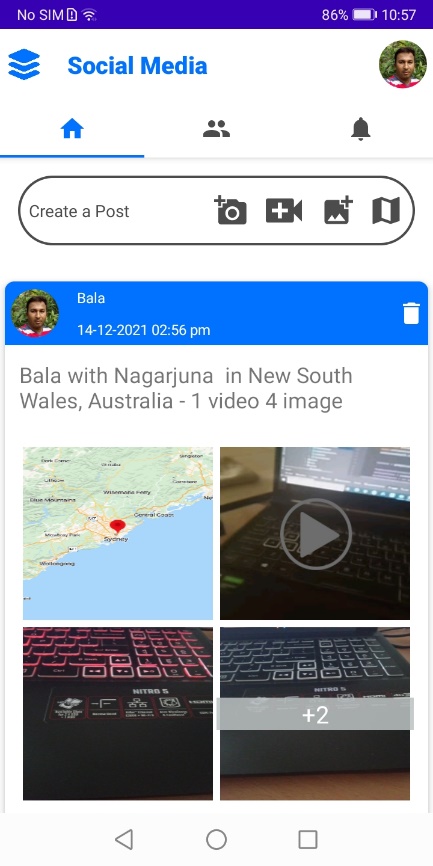
社交媒体应用为用户提供了一个线上社交平台。用户可以在应用中和好友分享照片、视频以及所思所想。用户之间可以发送"好友请求",互加好友后就可以看到对方的动态了。社交媒体应用帮助用户记录生活中的点点滴滴。
集成服务
功能 | HMS服务 |
华为ID登录 | 认证服务/华为帐号服务 |
地图定位 | 定位服务/地图服务 |
媒体元数据存储 | 云数据库 |
图片和视频存储 | 云存储 |
视频播放 | 视频服务 |
开屏广告、插屏广告、原生广告等广告展示 | 广告服务 |
好友动态推送、好友请求发送以及请求通过等消息通知 | 推送服务/云函数 |
推送消息的数据分析 | 分析服务 |
应用崩溃问题定位 | 崩溃服务 |
在这个Codelab中,您将了解如何集成云数据库、视频服务、地图服务、定位服务等HMS服务,构建应用。集成上述HMS服务后,您的应用可以:
在这个Codelab中,您将学到:
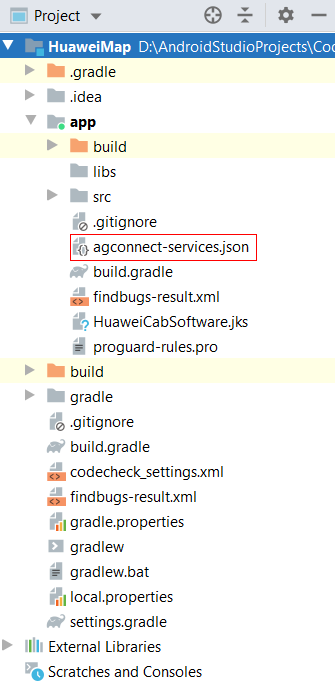
要集成相关HMS服务,需要完成以下准备工作:
根据以下链接,集成相关服务:

至此,您已成功开通所有相关服务。
buildscript {
   repositories {
     google()
     jcenter()
     maven {url 'https://developer.huawei.com/repo/'}
   }
   dependencies {
      classpath "com.android.tools.build:gradle:4.0.1"
     classpath 'com.huawei.agconnect:agcp:1.6.0.300'
  }
}

allprojects {
    repositories {
        google()
        jcenter()
        maven {url 'https://developer.huawei.com/repo/'}
    }
}
apply plugin: 'com.huawei.agconnect'
android {
    ...
    signingConfigs {
        release {
            storeFile file("xxx.jks")
            keyAlias 'xxx'
            keyPassword 'xxx'
            storePassword 'xxx'
            v1SigningEnabled true
            v2SigningEnabled true
        }
    }
    defaultConfig {...}
    buildTypes {
        debug{...}
        release{...}
    }
}

implementation "com.huawei.hms:videokit-player:1.0.7.302"
implementation 'com.huawei.hms:push:6.1.0.300'
implementation 'com.huawei.hms:ads-lite:13.4.47.302'
implementation 'com.huawei.hms:hianalytics:6.3.0.301'
implementation 'com.huawei.hms:maps:6.0.1.304'
implementation 'com.huawei.hms:location:6.0.0.302'

implementation "com.huawei.agconnect:agconnect-auth-huawei:1.6.0.300"
implementation "com.huawei.agconnect:agconnect-auth:1.6.1.300"

implementation 'com.huawei.agconnect:agconnect-core:1.6.1.300'
implementation 'com.huawei.agconnect:agconnect-function:1.6.0.300'
implementation 'com.huawei.agconnect:agconnect-cloud-database:1.4.9.300'
implementation 'com.huawei.agconnect:agconnect-storage:1.3.1.200'

implementation 'com.huawei.agconnect:agconnect-crash:1.6.0.300'
<uses-permission android:name="android.permission.INTERNET"/>
<uses-permission android:name="android.permission.CAMERA" />
<uses-permission android:name="android.permission.RECORD_AUDIO" />
<uses-permission android:name="android.permission.READ_EXTERNAL_STORAGE" />
<uses-permission android:name="android.permission.WRITE_EXTERNAL_STORAGE"
    tools:ignore="ScopedStorage" />
<!--允许程序访问网络连接-->
<uses-permission android:name="android.permission.ACCESS_NETWORK_STATE" />
<!--允许程序访问Wi-Fi状态-->
<uses-permission android:name="android.permission.ACCESS_WIFI_STATE" />

<uses-permission android:name="android.permission.READ_PHONE_STATE" />
<uses-permission android:name="com.huawei.permission.SECURITY_DIAGNOSE" />
<uses-permission android:name="android.permission.WAKE_LOCK" />

<!-- 允许程序通过Wi-Fi或是移动基站获取用户粗略的经纬度-->
<uses-permission android:name="android.permission.ACCESS_COARSE_LOCATION"/>
<!-- 允许程序通过GPS芯片接收卫星定位信息-->
<uses-permission android:name="android.permission.ACCESS_FINE_LOCATION"/>
<uses-permission android:name="android.permission.ACCESS_BACKGROUND_LOCATION" />

<!-- 允许应用读取公共数据-->
<uses-permission android:name="com.huawei.appmarket.service.commondata.permission.GET_COMMON_DATA"/>
<!-- 允许应用改变WLAN状态的开关-->
<uses-permission android:name="android.permission.CHANGE_WIFI_STATE"/>
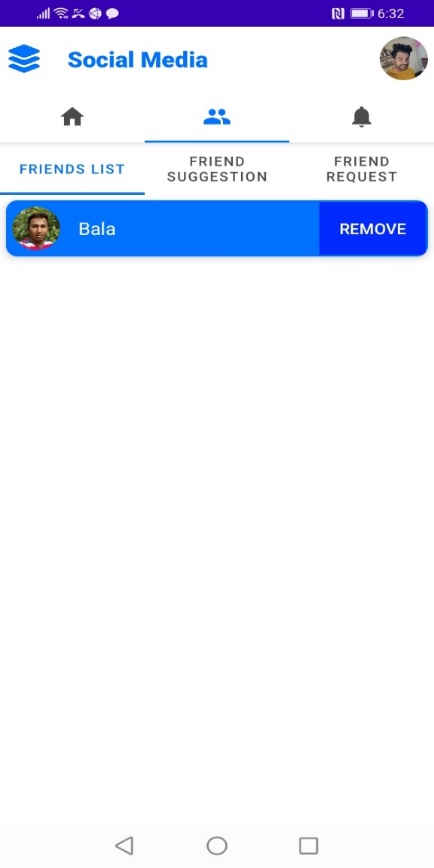
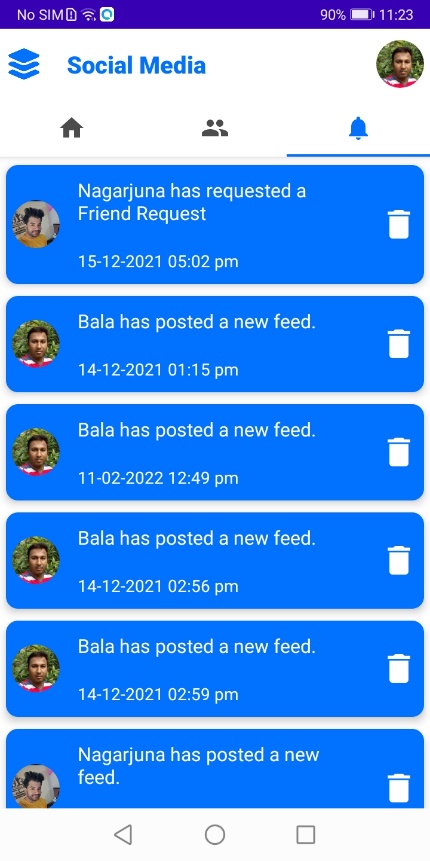
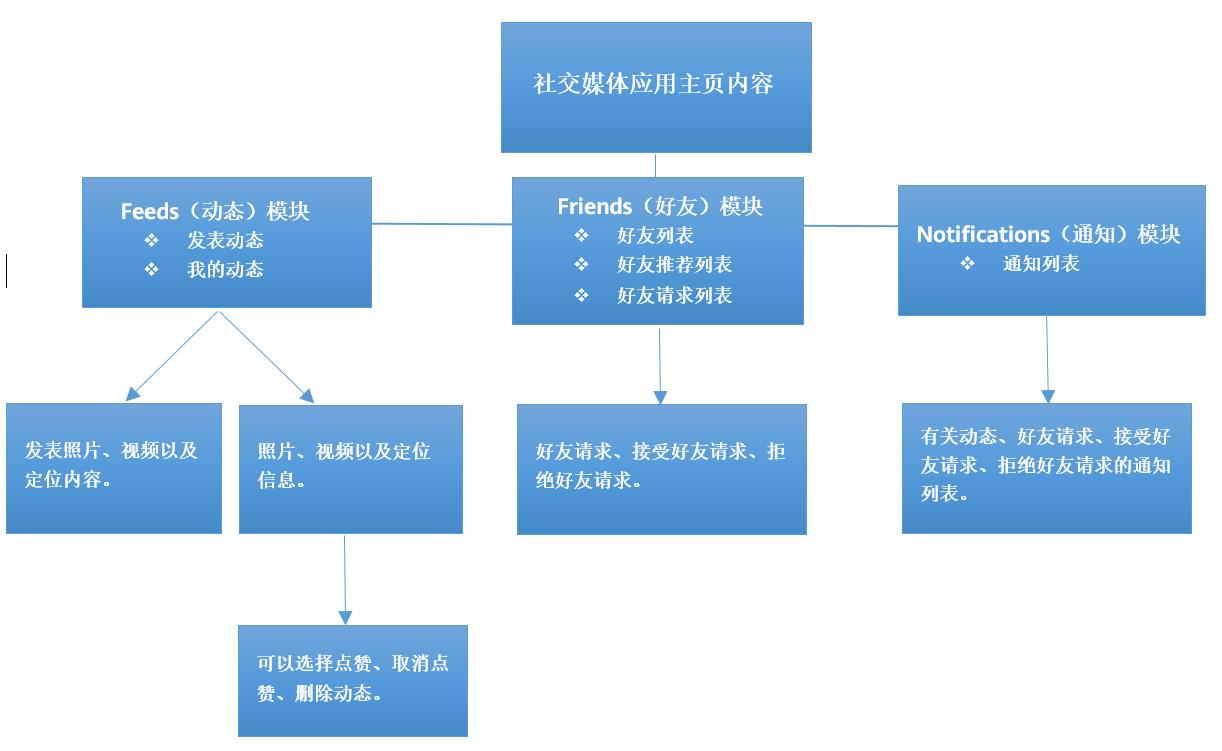
用户登录应用后,进入应用主页。如下图所示,主页内容包括Feeds(动态)、Friends(好友)以及Notifications(通知)三个模块。
|
|
|
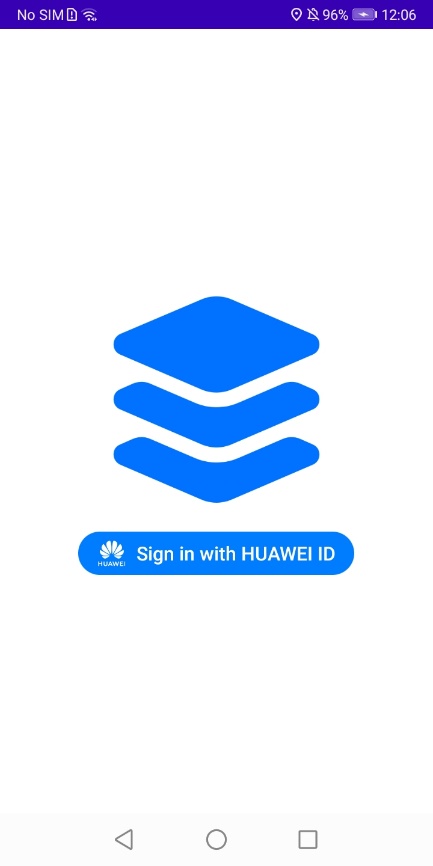
认证服务支持多种认证方式,包括手机号、微信账号、微博账号等。如下图所示,这里开通了华为账号的认证方式。我们可以在用户登录后获取用户的华为账号信息。

implementation 'com.huawei.agconnect:agconnect-auth:<auth_service_version>'
用户登录后,认证服务需要对用户身份进行验证。
将相关的类导入工程:
import com.huawei.hms.support.account.AccountAuthManager;
import com.huawei.hms.support.account.request.AccountAuthParams;
import com.huawei.hms.support.account.request.AccountAuthParamsHelper;
import com.huawei.hms.support.account.result.AuthAccount;
import com.huawei.hms.support.account.service.AccountAuthService;
import com.huawei.hms.support.hwid.ui.HuaweiIdAuthButton;
在Log inactivity中配置华为账号登录按钮。Java代码如下:
<com.huawei.hms.support.hwid.ui.HuaweiIdAuthButton
    android:id="@+id/HuaweiIdAuthButton"
    android:layout_width="wrap_content"
    android:layout_height="wrap_content"
    android:layout_gravity="center"
    android:gravity="center"
    app:hwid_color_policy="hwid_color_policy_blue"/>


HuaweiIdAuthButton huaweiIdAuthButton = findViewById(R.id.HuaweiIdAuthButton);
AppCompatButton signOutBtn = findViewById(R.id.sign_out);
AppCompatButton cancelAuthorizationBtn = findViewById(R.id.cancel_authrization);

huaweiIdAuthButton.setTheme(HuaweiIdAuthButton.THEME_FULL_TITLE);
huaweiIdAuthButton.setColorPolicy(HuaweiIdAuthButton.COLOR_POLICY_BLUE);
huaweiIdAuthButton.setCornerRadius(HuaweiIdAuthButton.CORNER_RADIUS_LARGE);
点击按钮后,触发点击事件监听器。
AccountAuthParams mAuthParam = new AccountAuthParamsHelper(AccountAuthParams.DEFAULT_AUTH_REQUEST_PARAM)
        .setEmail()
        .setProfile()
        .setMobileNumber()
        .setAccessToken()
        .createParams();
mAuthService = AccountAuthManager.getService(LoginActivity.this, mAuthParam);

huaweiIdAuthButton.setOnClickListener(v -> login());
调用getSignInIntent接口展示账号登录授权页面,并在onActivityResult中获取用户登录信息。
Java代码如下:
@Override
protected void onActivityResult(int requestCode, int resultCode, Intent data) {
    super.onActivityResult(requestCode, resultCode, data);
    if (requestCode == REQUEST_CODE_SIGN_IN) {
        Task<AuthAccount> authAccountTask = AccountAuthManager.parseAuthResultFromIntent(data);
        if (authAccountTask.isSuccessful()) {
            // 登录成功后,获取用户登录信息。
            AuthAccount authAccount = authAccountTask.getResult();
            dealWithResultOfSignIn(authAccount);

            AGConnectAuthCredential credential = HwIdAuthProvider.credentialWithToken(authAccount.getAccessToken());
            AGConnectAuth.getInstance().signIn(credential).addOnSuccessListener(signInResult -> {
                // 登录成功。
                String mToken = PreferenceHandler.getInstance(getApplicationContext()).getToken();
                Users mUsers = new Users();

                if (authAccount.getEmail() != null) {
                    mUsers.setUserEmail(authAccount.getEmail());
                } else {
                    mUsers.setUserEmail(authAccount.getUnionId());
                }

                mUsers.setUserName(authAccount.getDisplayName());
                mUsers.setNoOfFriends("0");
                mUsers.setUserId(authAccount.getUnionId());
                mUsers.setCreatedDate(getTimeStamp());
                mUsers.setToken(mToken);
                mUsers.setUserImage(authAccount.getAvatarUriString());                      upsertUsersInfos(mUsers);
                Intent intent = new Intent(getApplicationContext(), TabActivity.class);
                intent.addFlags(Intent.FLAG_ACTIVITY_CLEAR_TOP | Intent.FLAG_ACTIVITY_SINGLE_TOP);
                startActivity(intent);
            }).addOnFailureListener(e -> {
            });
        }
    }
}
处理登录结果,Java代码如下:
private void dealWithResultOfSignIn(AuthAccount authAccount) {

PreferenceHandler.getInstance(getApplicationContext()).setPhotoURL(authAccount.getAvatarUriString());
PreferenceHandler.getInstance(getApplicationContext()).setDisplayName(authAccount.getDisplayName());    PreferenceHandler.getInstance(getApplicationContext()).setUserId(authAccount.getUnionId());
    if (authAccount.getEmail() != null) {        PreferenceHandler.getInstance(getApplicationContext()).setEmailId(authAccount.getEmail());
    } else {        PreferenceHandler.getInstance(getApplicationContext()).setEmailId(authAccount.getUnionId());
    }
}
成功登录后,用户进入应用主页。
dependencies {
  implementation 'com.huawei.agconnect:agconnectdatabase:<cloud_DB_zone>'
}
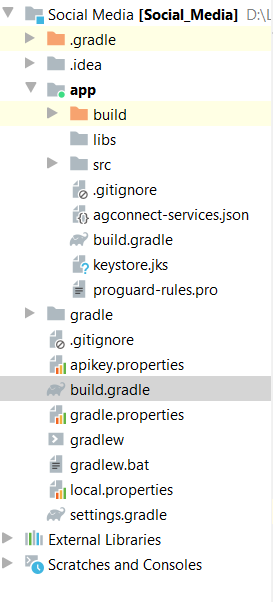
在应用的build.gradle的文件头部apply plugin: ‘com.android.application'下新增如下信息:
apply plugin: 'com.huawei.agconnect'
创建"用户"、"动态"、"好友"和"通知"对象类型。
@PrimaryKeys({"userId", "userEmail"})
public final class Users extends CloudDBZoneObject {
    private String userId;

    private String userName;

    private String userEmail;

    private String userImage;

    private String createdDate;

    private String token;

    private String noOfFriends;

    private String friendsList;

    private String friendRequestList;

    private String friendRequestedList;

    public Users() {
        super(Users.class);
    }

    public void setUserId(String userId) {
        this.userId = userId;
    }

    public String getUserId() {
        return userId;
    }

    public void setUserName(String userName) {
        this.userName = userName;
    }

    public String getUserName() {
        return userName;
    }

    public void setUserEmail(String userEmail) {
        this.userEmail = userEmail;
    }

    public String getUserEmail() {
        return userEmail;
    }

    public void setUserImage(String userImage) {
        this.userImage = userImage;
    }

    public String getUserImage() {
        return userImage;
    }

    public void setCreatedDate(String createdDate) {
        this.createdDate = createdDate;
    }

    public String getCreatedDate() {
        return createdDate;
    }

    public void setToken(String token) {
        this.token = token;
    }

    public String getToken() {
        return token;
    }

    public void setNoOfFriends(String noOfFriends) {
        this.noOfFriends = noOfFriends;
    }

    public String getNoOfFriends() {
        return noOfFriends;
    }

    public void setFriendsList(String friendsList) {
        this.friendsList = friendsList;
    }

    public String getFriendsList() {
        return friendsList;
    }

    public void setFriendRequestList(String friendRequestList) {
        this.friendRequestList = friendRequestList;
    }

    public String getFriendRequestList() {
        return friendRequestList;
    }

    public void setFriendRequestedList(String friendRequestedList) {
        this.friendRequestedList = friendRequestedList;
    }

    public String getFriendRequestedList() {
        return friendRequestedList;
    }

}
import android.content.Context;
import com.huawei.agconnect.cloud.database.AGConnectCloudDB;
import com.huawei.agconnect.cloud.database.CloudDBZone;
import com.huawei.agconnect.cloud.database.CloudDBZoneConfig;
import com.huawei.agconnect.cloud.database.exceptions.AGConnectCloudDBException;
import com.huawei.hmf.tasks.Task;
private void initiateTheCloud() {
    if (isNetworkConnected(mContext)) {
        AGConnectCloudDB.initialize(mContext);
        mCloudDB = AGConnectCloudDB.getInstance();
        try {
            mCloudDB.createObjectType(ObjectTypeInfoHelper.getObjectTypeInfo());
        } catch (AGConnectCloudDBException e) {
            LogUtil.e("Res error : ", e.getMessage());
        }
        cloudDBZoneCreation();
    } else {
        CommonMember.dismissDialog();
        networkStatusAlert(mContext);
    }
}
private static void cloudDBZoneCreation() {
    CloudDBZoneConfig mConfig = new CloudDBZoneConfig(DBNAME, CloudDBZoneConfig.CloudDBZoneSyncProperty.CLOUDDBZONE_CLOUD_CACHE, CloudDBZoneConfig.CloudDBZoneAccessProperty.CLOUDDBZONE_PUBLIC);
    mConfig.setPersistenceEnabled(true);
    Task<CloudDBZone> openDBZoneTask = mCloudDB.openCloudDBZone2(mConfig, true);
    openDBZoneTask.addOnSuccessListener(cloudDBZone -> {
        mCloudDBZone = cloudDBZone;
CloudDBZoneQuery%lt;NotificationList> mUserQuery = CloudDBZoneQuery.where(NotificationList.class).orderByDesc(NOTIFICATION_DATE);
queryNotificationList(mUserQuery);    }).addOnFailureListener(FeedFragment::onFailure);
}
private static void queryNotificationList(CloudDBZoneQuery query) {
    if (mCloudDBZone == null) {
        dismissDialog();
        return;
    }
    Task<CloudDBZoneSnapshot<NotificationList>> queryTask = mCloudDBZone.executeQuery(query, CloudDBZoneQuery.CloudDBZoneQueryPolicy.POLICY_QUERY_FROM_CLOUD_ONLY);
    queryTask.addOnSuccessListener(NotificationFragment::processQueryResult);
    queryTask.addOnFailureListener(e -> {
        dismissDialog();
        swipeContainer.setRefreshing(false);
    });
}
public void closeDb(Context context) {
    try {
        agConnectCloudDB.closeCloudDBZone(cloudDBZone);
    } catch (AGConnectCloudDBException e) {
        AppLog.logW(TAG,"close the DBZone "+e.getMessage());
    }
}
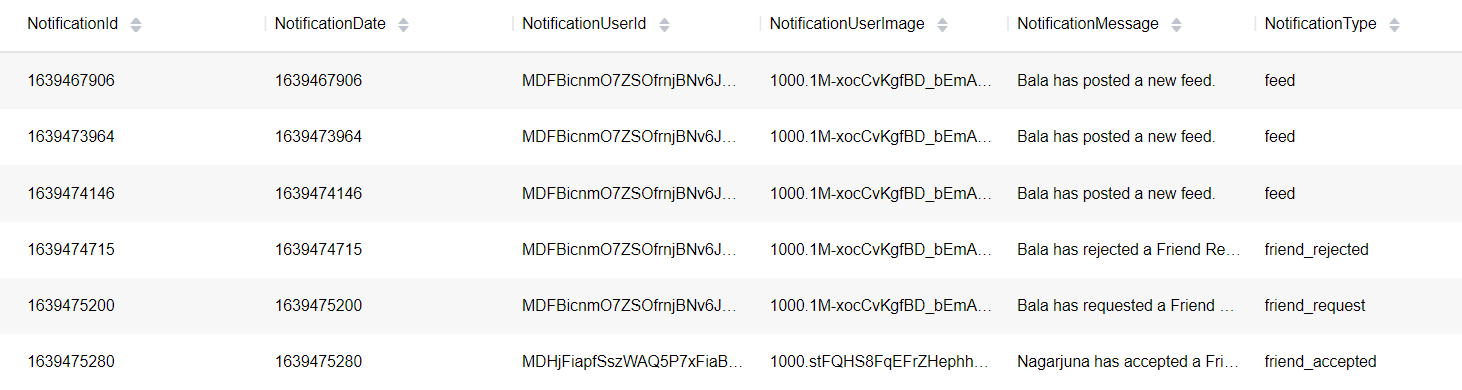
private static void processQueryResult(CloudDBZoneSnapshot<NotificationList> snapshot) {
    NOTIFICATION_ARRAYLIST.clear();
    CloudDBZoneObjectList<NotificationList> notificationInfoCursor = snapshot.getSnapshotObjects();
    try {
        while (notificationInfoCursor.hasNext()) {
            NotificationList mNotificationList = notificationInfoCursor.next();
            String notificationId = mNotificationList.getNotificationId();
            String notificationDate = mNotificationList.getNotificationDate();
            String notificationUserId = mNotificationList.getNotificationUserId();
            String notificationUserImage = mNotificationList.getNotificationUserImage();
            String notificationMessage = mNotificationList.getNotificationMessage();
            String notificationType = mNotificationList.getNotificationType();
            String notificationTo = mNotificationList.getNotificationTo();

            NOTIFICATION_ARRAYLIST.add(new NotificationModel(notificationId, notificationDate, notificationUserId, notificationUserImage, notificationMessage, notificationType, notificationTo));
        }
        dismissDialog();
        swipeContainer.setRefreshing(false);
        LinearLayoutManager layoutManager = new LinearLayoutManager(mContext);
        NotificationsListAdapter mItemAdapter = new NotificationsListAdapter(mContext, mActivity, NOTIFICATION_ARRAYLIST, mCloudDBZone);

        recyclerView.setAdapter(mItemAdapter);
        recyclerView.setLayoutManager(layoutManager);
    } catch (AGConnectCloudDBException jsonException) {
        dismissDialog();
        swipeContainer.setRefreshing(false);
        jsonException.printStackTrace();
    }
}
private void insertMediaInDB(String uri, String mMediaId) {
    String mFeedType = IMAGE;
    Media mMediaDetail = new Media();

    mMediaDetail.setMediaId(mMediaId);
    mMediaDetail.setMediaCommonId(mMediaCommonId);
    mMediaDetail.setMediaURI(uri);
    mMediaDetail.setMediaType(mFeedType);

    upsertMediaInfos(mMediaDetail);
}
private void upsertMediaInfos(Media mediaDetail) {
    if (mCloudDBZone == null) {
        return;
    }
    Task upsertTask = mCloudDBZone.executeUpsert(mediaDetail);
    upsertTask.addOnSuccessListener(cloudDBZoneResult -> {

Toast.makeText(mContext, mContext.getString(R.string.feed_upload_success), Toast.LENGTH_SHORT).show();

    }).addOnFailureListener(e -> {
        CommonMember.dismissDialog();
        Toast.makeText(mContext, e.getMessage(), Toast.LENGTH_SHORT).show();
    });
}
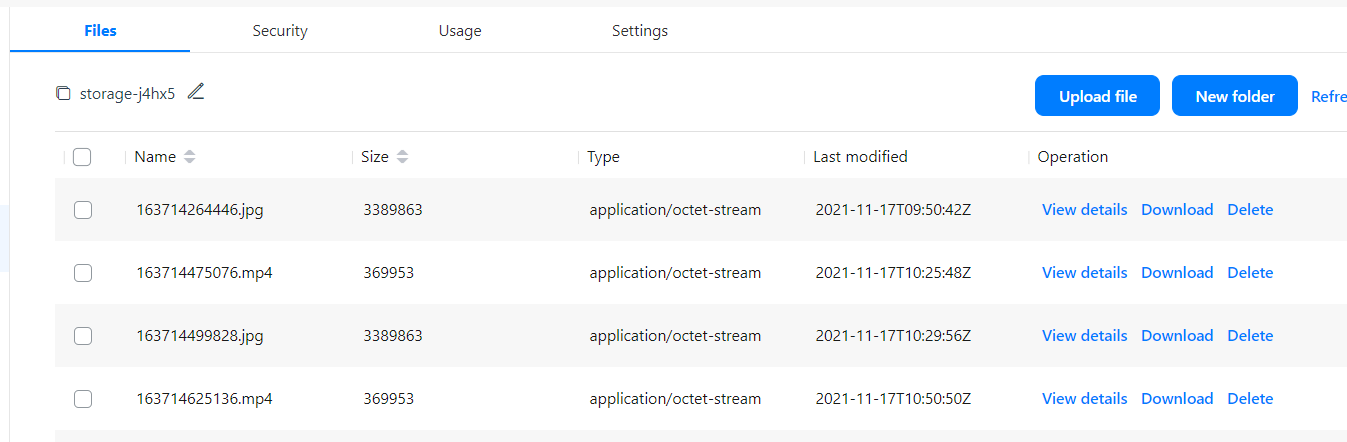
云存储服务可用于:
dependencies{
  implementation "com.huawei.agconnect:agconnect-storage:<storage_version>"
}
fileName = mMediaId+".jpg";

StorageReference reference = storageManagement.getStorageReference(fileName);
String path = getPath(mContext,uri);
assert path != null;
UploadTask task = reference.putFile(new File(path));
task.addOnFailureListener(exception -> {
    CommonMember.dismissDialog();
    exception.getCause();
}).addOnSuccessListener(uploadResult -> uploadResult.getStorage().getDownloadUrl().addOnSuccessListener(uri1 -> insertMediaInDB(uri1.toString(),mMediaId)).addOnFailureListener(e -> {
    CommonMember.dismissDialog();
    Toast.makeText(mContext, e.getMessage(), Toast.LENGTH_SHORT).show();
}));
推送服务是华为提供的消息推送平台,建立了从云端到终端的消息推送通道。您通过集成推送服务,可以向客户端应用实时推送消息,构筑良好的用户关系,提升用户的感知度和活跃度。服务的集成流程如下图所示:
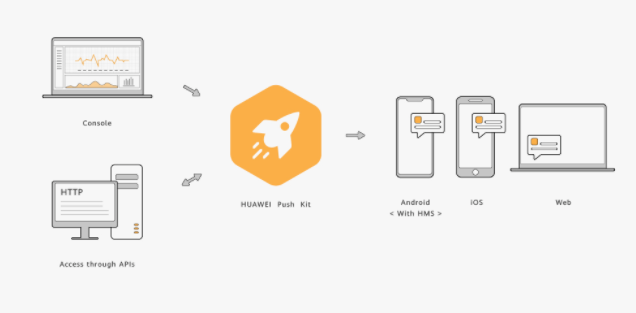
推送服务支持通知栏消息和透传消息。您可以在AppGallery Connect中创建这两种类型的消息。
dependencies {
    implementation "com.huawei.hms:push:<lastest_push_kit_version>"
}
您需要在Manifest文件的"application"标签中注册您自己的"Service",用于接收透传消息、获取token。该"Service"继承HmsMessageService类并实现其中的方法,此处以DemoHmsMessageService类为例(类名由您自定义)。"Android 11"更改了应用查询用户在设备上已安装的其他应用以及与之交互的方式。您应用的"targetSdkVersion"是30或者更高版本时,需要在"AndroidManifest.xml"中"manifest"内添加<queries>元素,使应用可以访问HMS Core(APK)。

在Manifest文件的"application"标签中新增<meta-data>元数据。
<meta-data android:name="push_kit_auto_init_enabled"
android:value="true" />
在您的Service(已继承HmsMessageService)中,覆写onNewToken(String token, Bundle bundle)方法,获取token。
如果您集成了Push SDK 5.0.4.302以下版本,覆写onNewToken(String token)方法。
public class PushService extends HmsMessageService {
    private static final String CHANNEL1 = "Push_Channel_01";
    public static HashSet<String> mMessages = new HashSet<>();

 @Override
    public void onNewToken(String s) {
        super.onNewToken(s);
    }
}
Android 10及以上版本都可以参考以下示例代码获取token:
try {
    // 从agconnect-services.json文件中读取APP_ID。
    String appId = BuildConfig.CLIENT_ID;
    // 将token标识设置为"HCM"。
    String tokenScope = "HCM";
    String token = HmsInstanceId.getInstance(SplashScreen.this).getToken(appId, tokenScope);
    // 判断token是否为空。
    if (!TextUtils.isEmpty(token)) {
        sendRegTokenToServer(token);
    }
} catch (ApiException e) {
    LogUtil.e("Res error : ", e.getMessage());
}
当您成功获取了应用token、服务器成功发送消息后,您可以部署以下代码处理信息和图片消息:
@Override
public void onMessageReceived(RemoteMessage message) {

    String msgNoteBase = message.getData();
    try {
        showNotification(msgNoteBase);
    } catch (JSONException e) {
        LogUtil.e("Res error : ", e.getMessage());
    }
}

private void showNotification(String msg) throws JSONException {

    boolean isActivityFound = false;
    // 检查消息是否发送
    ActivityManager activityManager = (ActivityManager) getApplicationContext().getSystemService(Context.ACTIVITY_SERVICE);
    if (activityManager != null) {
        List<ActivityManager.RunningAppProcessInfo> appProcesses = activityManager.getRunningAppProcesses();

        final String packageName = getApplicationContext().getPackageName();
        for (ActivityManager.RunningAppProcessInfo appProcess : appProcesses) {
            if (appProcess.importance == ActivityManager.RunningAppProcessInfo.IMPORTANCE_FOREGROUND && appProcess.processName.equals(packageName)) {
                isActivityFound = true;
                break;
            }
        }
    }

    if (isActivityFound) {
        broadcastDialogIntent(msg);
    } else {
        NotificationManager mNotificationManager = (NotificationManager) this.getSystemService(Context.NOTIFICATION_SERVICE);
        int notificationId = 1;

        String message;
        if (Build.VERSION.SDK_INT >= Build.VERSION_CODES.O) {
            int importance = NotificationManager.IMPORTANCE_HIGH;

            NotificationChannel mChannel = new NotificationChannel(
                    CHANNEL1, CHANNEL1, importance);
            if (mNotificationManager != null) {
                mNotificationManager.createNotificationChannel(mChannel);

                JSONObject mJSONObject = new JSONObject(msg);
                message = mJSONObject.getString(MESSAGE_DATA);

                Intent notificationIntent = new Intent(getApplicationContext(), TabActivity.class);
                Bundle passValue = new Bundle();
                passValue.putString("msg", msg);
                notificationIntent.setAction("android.intent.action.MAIN");
                notificationIntent.addCategory("android.intent.category.LAUNCHER");
                notificationIntent.putExtras(passValue);
                notificationIntent.addFlags(Intent.FLAG_ACTIVITY_CLEAR_TOP | Intent.FLAG_ACTIVITY_SINGLE_TOP);
                PendingIntent intent = PendingIntent.getActivity(getApplicationContext(), 0, notificationIntent, PendingIntent.FLAG_IMMUTABLE);
                NotificationCompat.Builder mBuilder;

                mBuilder = new NotificationCompat.Builder(getApplicationContext(), CHANNEL1).setSmallIcon(R.mipmap.ic_launcher).setContentTitle(getResources().getString(R.string.app_name)).setAutoCancel(true).setContentText(message);

                mBuilder.setContentIntent(intent);
                mNotificationManager.notify(notificationId, mBuilder.build());
            }

        } else {
            JSONObject mJSONObject = new JSONObject(msg);
            message = mJSONObject.getString(MESSAGE_DATA);

            Intent notificationIntent = new Intent(getApplicationContext(), TabActivity.class);
            Bundle passValue = new Bundle();
            passValue.putString("msg", msg);
            notificationIntent.setAction("android.intent.action.MAIN");
            notificationIntent.addCategory("android.intent.category.LAUNCHER");
            notificationIntent.putExtras(passValue);
            notificationIntent.addFlags(Intent.FLAG_ACTIVITY_CLEAR_TOP | Intent.FLAG_ACTIVITY_SINGLE_TOP);
            PendingIntent intent = PendingIntent.getActivity(getApplicationContext(), 0, notificationIntent, PendingIntent.FLAG_IMMUTABLE);

            NotificationCompat.Builder mBuilder = new NotificationCompat.Builder(this);
            Uri soundUri = RingtoneManager.getDefaultUri(RingtoneManager.TYPE_NOTIFICATION);

            mBuilder.setSmallIcon(R.mipmap.ic_launcher).setContentTitle(getString(R.string.app_name)).setStyle(new NotificationCompat.BigTextStyle().bigText(message)).setContentText(message).setAutoCancel(true).setSound(soundUri);

            mMessages.add(message);
            NotificationCompat.InboxStyle inBoxStyle = new NotificationCompat.InboxStyle();
            inBoxStyle.setBigContentTitle(getString(R.string.app_name));
            int total = mMessages.size();

            setBadge(this, total);

            for (String mMessage : mMessages) {
                inBoxStyle.addLine(mMessage);
            }
            for (int i = 0; i < total; i++) {
                inBoxStyle.addLine(mMessages.toString());
            }

            mBuilder.setContentIntent(intent);
            mBuilder.setStyle(inBoxStyle);
            Notification notification = mBuilder.build();
            mBuilder.setNumber(total);
            notification.flags |= Notification.FLAG_AUTO_CANCEL;
            mNotificationManager.notify(notificationId, notification);
        }
    }
}


public void broadcastDialogIntent(String msg) {
    Intent intent = new Intent();
    Bundle passValue = new Bundle();
    passValue.putString("msg", msg);
    intent.putExtras(passValue);
    intent.setAction("com.hms.pushdemo.SHOW_DIALOG");
    sendBroadcast(intent);
}
public class PushApis {

    private final Context context;

    public PushApis(Context context) {
        this.context = context;
    }

    public void sendPushNotification(String messageData, ArrayList<String> userPushTokens, String action) {
        try {
            StrictMode.ThreadPolicy policy = new StrictMode.ThreadPolicy.Builder().permitAll().build();
            StrictMode.setThreadPolicy(policy);
            StringBuilder response = new StringBuilder();
            URL url = new URL(BuildConfig.TOKEN_URL);
            HttpURLConnection connection = (HttpURLConnection) url.openConnection();
            connection.setDoOutput(true);
            connection.setInstanceFollowRedirects(false);
            connection.setRequestMethod("POST");
            connection.setRequestProperty("Content-Type", "application/x-www-form-urlencoded");
            connection.setRequestProperty("POST", "/oauth2/v3/token   HTTP/1.1");
            connection.setRequestProperty("Host", "oauth-login.cloud.huawei.com");
            HashMap<String, String> params = new HashMap<>();
            params.put("grant_type", "client_credentials");
            params.put("client_secret", BuildConfig.CLIENT_SECRET);
            params.put("client_id", BuildConfig.CLIENT_ID);
            String postDataLength = getDataString(params);
            OutputStream os = connection.getOutputStream();
            BufferedWriter writer = new BufferedWriter(
                    new OutputStreamWriter(os, StandardCharsets.UTF_8));
            writer.write(postDataLength);

            writer.flush();
            writer.close();
            os.close();
            int responseCode = connection.getResponseCode();

            if (responseCode == HttpsURLConnection.HTTP_OK) {
                String line;
                BufferedReader br = new BufferedReader(new InputStreamReader(connection.getInputStream()));
                while ((line = br.readLine()) != null) {
                    response.append(line);
                }
            } else {
                response = new StringBuilder();
            }
            Gson gson = new Gson();
            BearerRequest bearerRequest = gson.fromJson(response.toString(), BearerRequest.class);
            triggerPush(bearerRequest.getAccessToken(), messageData, userPushTokens,action);
        } catch (Exception e) {
                LogUtil.e("Res error : " , e.getMessage());
        }
    }

    private String getDataString(HashMap<String, String> params) throws UnsupportedEncodingException {
        StringBuilder result = new StringBuilder();
        boolean first = true;
        for (Map.Entry<String, String> entry : params.entrySet()) {
            if (first){
                first = false;
            }else{
                result.append("&");
            }
            result.append(URLEncoder.encode(entry.getKey(), "UTF-8"));
            result.append("=");
            result.append(URLEncoder.encode(entry.getValue(), "UTF-8"));
        }
        return result.toString();
    }

    private void triggerPush(String bearer, String messageData, ArrayList<String> userPushTokens, String action) {
        try {
            StrictMode.ThreadPolicy policy = new StrictMode.ThreadPolicy.Builder().permitAll().build();
            StrictMode.setThreadPolicy(policy);
            StringBuilder response = new StringBuilder();
            URL url = new URL("https://push-api.cloud.huawei.com/v1/" + BuildConfig.CLIENT_ID + "/messages:send");
            HttpURLConnection connection = (HttpURLConnection) url.openConnection();
            connection.setDoOutput(true);
            connection.setInstanceFollowRedirects(false);
            connection.setRequestMethod("POST");
            connection.setDoOutput(true);
            connection.setRequestProperty("Content-Type", "application/x-www-form-urlencoded");
            connection.setRequestProperty("Authorization", "Bearer " + bearer);
            connection.setRequestProperty("Host", "oauth-login.cloud.huawei.com");
            connection.setRequestProperty("POST", "/oauth2/v2/token   HTTP/1.1");
            OutputStream os = connection.getOutputStream();

            String mPhotoURL = PreferenceHandler.getInstance(context).getPhotoURL();

            Data data = new Data();
            data.message = action;
            data.sender_image = mPhotoURL;
            data.messageData = messageData;
            data.title = context.getResources().getString(R.string.app_name);

            ArrayList token = new ArrayList<>(userPushTokens);

            Message message = new Message();
            message.tokens = token;
            message.data = data.toString();

            PushMessageRequest pushMessageRequest = new PushMessageRequest();
            pushMessageRequest.message = message;
            pushMessageRequest.validate_only = false;

            BufferedWriter writer = new BufferedWriter(
                    new OutputStreamWriter(os, StandardCharsets.UTF_8));

            Gson gson = new Gson();
            JSONObject jsonObject = new JSONObject(gson.toJson(pushMessageRequest, PushMessageRequest.class));
            writer.write(jsonObject.toString());
            writer.flush();
            writer.close();
            os.close();
            String line;
            BufferedReader br = new BufferedReader(new InputStreamReader(connection.getInputStream()));
            while ((line = br.readLine()) != null) {
                response.append(line);
            }
        } catch (Exception e) {
            e.getStackTrace();
        }
    }
}
上述步骤完成后,设备会收到如下消息: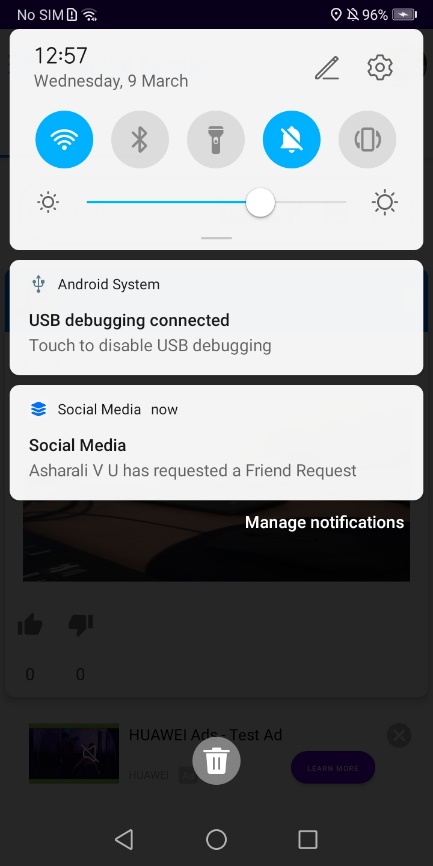
地图服务给您提供一套地图开发调用接口,地图数据覆盖海外大部分的国家和地区,并支持多种语言。地图服务采用WGS84 GPS坐标系,满足绝大多数海外地图开发的需求。
dependencies {
   implementation "com.huawei.hms:maps:<map_service>"
}
<uses-permission android:name="android.permission.ACCESS_COARSE_LOCATION"/>
<uses-permission android:name="android.permission.ACCESS_FINE_LOCATION"/>
<uses-permission android:name="android.permission.INTERNET"/>
<uses-permission android:name="android.permission.ACCESS_NETWORK_STATE"/>
<com.huawei.hms.maps.MapView xmlns:map="http://schemas.android.com/apk/res-auto"
    android:id="@+id/mapView"
    android:layout_width="match_parent"
    android:layout_height="match_parent"
    map:cameraTargetLat="51"
    map:cameraTargetLng="10"
    map:cameraZoom="8.5"
    map:mapType="normal"
    map:uiCompass="true"
    map:uiZoomControls="true" />
mMapView = findViewById(R.id.mapview_mapviewdemo);
Bundle mapViewBundle = null;
if (savedInstanceState != null) {
mapViewBundle = savedInstanceState.getBundle("MapViewBundleKey");
}
mMapView.onCreate(mapViewBundle);
mMapView.getMapAsync(this);
@Override
public void onSaveInstanceState(@NonNull Bundle outState) {
super.onSaveInstanceState(outState);
Bundle mapViewBundle = outState.getBundle(MAPVIEW_BUNDLE_KEY);
if (mapViewBundle == null) {
mapViewBundle = new Bundle();
outState.putBundle(MAPVIEW_BUNDLE_KEY, mapViewBundle);
}
mMapView.onSaveInstanceState(mapViewBundle);
}
@Override
public void onMapReady(HuaweiMap huaweiMap) {
hMap = huaweiMap;
hMap.setMapType(HuaweiMap.MAP_TYPE_NORMAL);
// 设置缩放功能是否可用。
hMap.getUiSettings().setZoomControlsEnabled(true);
// 设置偏好最小缩放级别。
hMap.setMinZoomPreference(10f);
// 设置偏好最大缩放级别。
hMap.setMaxZoomPreference(18f);
// 重置偏好最小和最大缩放级别。
hMap.resetMinMaxZoomPreference();
// 设置指南针是否可用。
hMap.getUiSettings().setCompassEnabled(false);
// 设置缩放手势是否可用。
hMap.getUiSettings().setZoomGesturesEnabled(true);
// 设置滚动手势是否可用。
hMap.getUiSettings().setScrollGesturesEnabled(true);
// 设置倾斜手势是否可用。
hMap.getUiSettings().setTiltGesturesEnabled(true);
// 添加定位按钮点击事件监听。
hMap.setOnMyLocationButtonClickListener(() -> {
if (locManager.isProviderEnabled(LocationManager.GPS_PROVIDER)) {
getDeviceLocation();
}
return false;
});
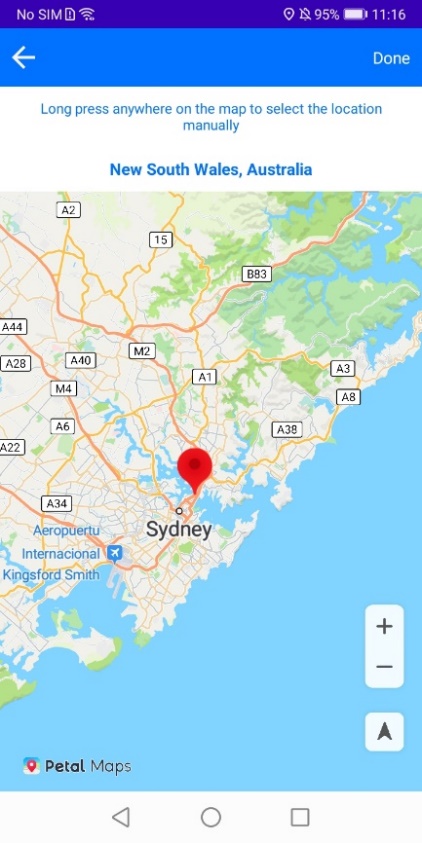
hMap.setOnMapLongClickListener(latLng -> {
PreferenceHandler.getInstance(mContext).setFeedDescription("");
PreferenceHandler.getInstance(mContext).setFeedAddress("");
PreferenceHandler.getInstance(mContext).setFeedMapLatitude("");
PreferenceHandler.getInstance(mContext).setFeedMapLongtitude("");
moveCamera(latLng);
});
if (checkPermission()) {
getLastKnownLocation();
checkLocationSettings();
hMap.setMyLocationEnabled(true);
// 启用我的位置图标。
hMap.getUiSettings().setMyLocationButtonEnabled(true);
} else {
Toast.makeText(getApplicationContext(),"Permission needed",Toast.LENGTH_LONG).show();
// 申请权限。
requestPermission();
}
}
dependencies {
    implementation "com.huawei.hms:location:<latest_version_code>"
}
<uses-permission android:name="android.permission.ACCESS_FINE_LOCATION" />
<uses-permission android:name="android.permission.ACCESS_COARSE_LOCATION" />
if (checkPermission()) {
    getLastKnownLocation();
    checkLocationSettings();
    hMap.setMyLocationEnabled(true);
    // 启用我的位置图标。
    hMap.getUiSettings().setMyLocationButtonEnabled(true);
} else {
    Toast.makeText(getApplicationContext(),"Permission needed",Toast.LENGTH_LONG).show();
    // 申请权限
    requestPermission();
}
checkLocationPermission():-
public boolean checkPermission() {
    int fineloc = ContextCompat.checkSelfPermission(mContext, Manifest.permission.ACCESS_FINE_LOCATION);
    int coarseloc = ContextCompat.checkSelfPermission(mContext, Manifest.permission.ACCESS_COARSE_LOCATION);

    if (Build.VERSION.SDK_INT <= Build.VERSION_CODES.P) {
        return fineloc == PackageManager.PERMISSION_GRANTED && coarseloc == PackageManager.PERMISSION_GRANTED;
    } else {
        int backloc = ContextCompat.checkSelfPermission(mContext, Manifest.permission.ACCESS_BACKGROUND_LOCATION);
        return fineloc == PackageManager.PERMISSION_GRANTED && coarseloc == PackageManager.PERMISSION_GRANTED && backloc == PackageManager.PERMISSION_GRANTED;
    }
}
requestPermissionForLocation():-
@TargetApi(Build.VERSION_CODES.M)
private void requestPermission() {
    if (Build.VERSION.SDK_INT <= Build.VERSION_CODES.P) {
        requestPermissions(new String[]{Manifest.permission.ACCESS_FINE_LOCATION, Manifest.permission.ACCESS_COARSE_LOCATION}, REQUEST_ACCESS_PERMISSION_CODE);
    } else {
        requestPermissions(new String[]{Manifest.permission.ACCESS_FINE_LOCATION, Manifest.permission.ACCESS_COARSE_LOCATION, Manifest.permission.ACCESS_BACKGROUND_LOCATION
        }, REQUEST_ACCESS_PERMISSION_CODE);
    }
}
@Override
public void onRequestPermissionsResult(int requestCode, @NonNull String[] permissions, @NonNull int[] grantResults) {
    super.onRequestPermissionsResult(requestCode, permissions, grantResults);
    if (requestCode == REQUEST_ACCESS_PERMISSION_CODE) {
        if (grantResults.length > 0) {
            boolean fineloc = grantResults[0] == PackageManager.PERMISSION_GRANTED;
            boolean coarseloc = grantResults[1] == PackageManager.PERMISSION_GRANTED;

            if (Build.VERSION.SDK_INT <= Build.VERSION_CODES.P) {
                if (fineloc
                        && coarseloc) {
                    getLastKnownLocation();
                    checkLocationSettings();
                    // 开启我的位置图层。
                    hMap.setMyLocationEnabled(true);
                    // 开启我的位置图标。
                    hMap.getUiSettings().setMyLocationButtonEnabled(true);
                } else {
                    Toast.makeText(mContext, getResources().getString(R.string.access_needed), Toast.LENGTH_LONG).show();
                }
            } else {
                boolean backloc = grantResults[2] == PackageManager.PERMISSION_GRANTED;

                if (fineloc
                        && coarseloc && backloc) {
                    getLastKnownLocation();
                    checkLocationSettings();
                    // 开启我的位置图层。
                    hMap.setMyLocationEnabled(true);
                    // 开启我的位置图标。
                    hMap.getUiSettings().setMyLocationButtonEnabled(true);
                } else {
                    Toast.makeText(mContext, getResources().getString(R.string.access_needed), Toast.LENGTH_LONG).show();
                }
            }
        }
    }
}
private void getDeviceLocation() throws SecurityException {
    fusedLocationProviderClient = LocationServices.getFusedLocationProviderClient(mContext);

    // 异常处理逻辑。
    fusedLocationProviderClient.getLastLocation()
            .addOnSuccessListener(location -> {
                if (location != null) {
                    moveCamera(new LatLng(location.getLatitude(), location.getLongitude()));
                }else{
                    moveCamera(defaultLocation);
                }
            })
            .addOnFailureListener(Throwable::printStackTrace);
}

图中的红色标记点展示的是设备的当前位置。
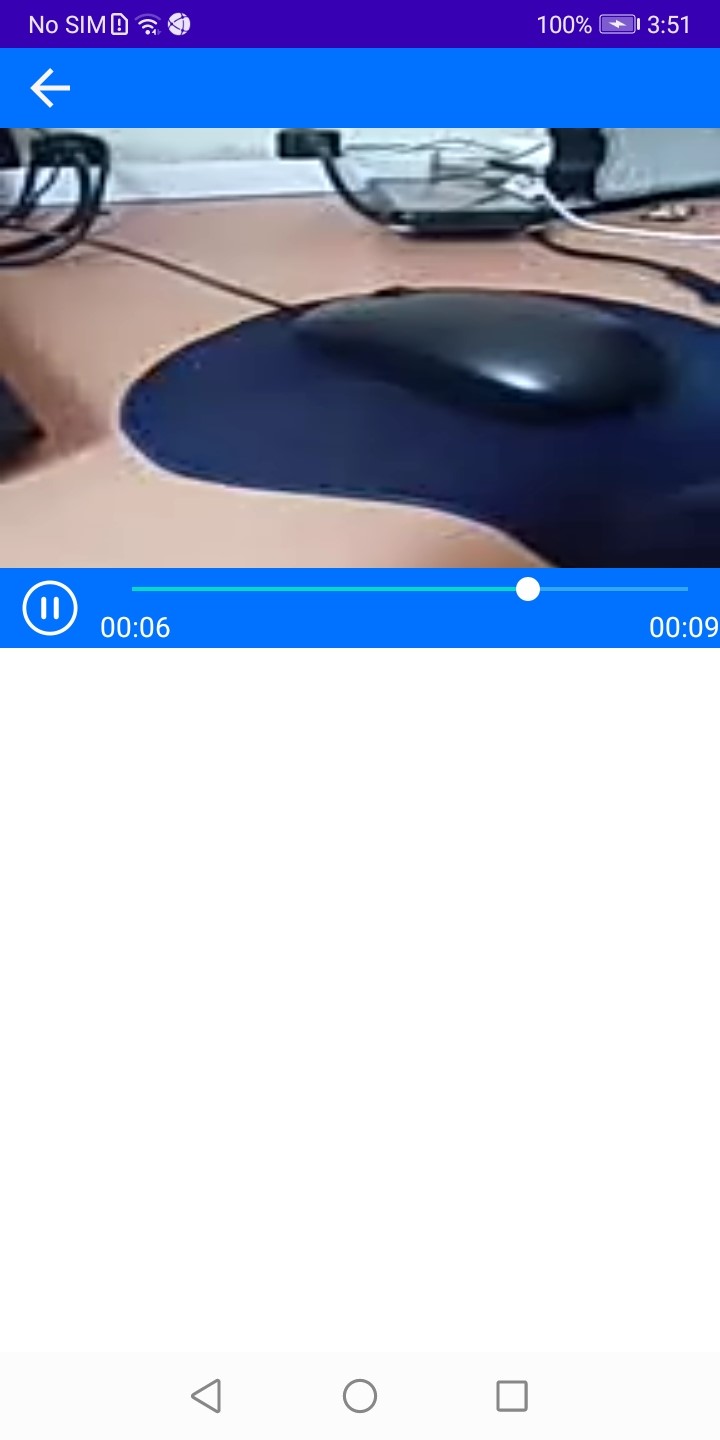
视频服务提供视频播放服务,后续将提供视频编辑和视频托管服务,助力您快速构建视频特性,为用户展现高质的视觉体验。
buildscript {
    repositories {
        google()
        jcenter()
        // 配置HMS Core SDK的Maven仓地址。
        maven {url 'https://developer.huawei.com/repo/'}
    }
}

allprojects {
    repositories {
        google()
        jcenter()
        // 配置HMS Core SDK的Maven仓地址。
        maven {url 'https://developer.huawei.com/repo/'}
    }
}
dependencies {
   implementation "com.huawei.hms:videokit-player:1.0.7.302"
}
<uses-permission android:name="android.permission.INTERNET"/>
<uses-permission android:name="android.permission.READ_EXTERNAL_STORAGE" />
<uses-permission android:name="android.permission.WRITE_EXTERNAL_STORAGE"
    tools:ignore="ScopedStorage" />
<!—检查网络权限-->
<uses-permission android:name="android.permission.ACCESS_NETWORK_STATE" />
<!—检查Wi-Fi状态-->
<uses-permission android:name="android.permission.ACCESS_WIFI_STATE" />

<uses-permission android:name="android.permission.READ_PHONE_STATE" />
<uses-permission android:name="com.huawei.permission.SECURITY_DIAGNOSE" />
<uses-permission android:name="android.permission.WAKE_LOCK" />
<SurfaceView
    android:id="@+id/surface_view"
    android:layout_width="match_parent"
    android:layout_height="300dp"
    />
/**
 * 获取URL,播放视频
 */
homePageControl = new HomePageControl(mContext);
PlayActivity.startPlayActivity(mContext, homePageControl.getInputPlay(url));

/**
 * 添加startPlayActivity
 *
 * @param context Context
 * @param playEntity Play the video data entity
 */
public static void startPlayActivity(Context context, PlayEntity playEntity) {
    Intent intent = new Intent();
    intent.setClass(context, PlayActivity.class);
    intent.putExtra(Constants.VIDEO_PLAY_DATA, playEntity);
    context.startActivity(intent);
}

/**
 * 初始化布局
 */
private void initView() {
    playView = new PlayView(this, this, this);
    setContentView(playView.getContentView());
}

/**
 * 准备播放
 */
private void ready() {
    playControl.setCurrentPlayData(getIntentExtra());
    playView.showBufferingView();
    playControl.ready();
}

@Override
public void surfaceCreated(SurfaceHolder holder) {
    LogUtil.d(TAG, "surface created");
    hasSurfaceCreated = true;
    playControl.setSurfaceView(playView.getSurfaceView());
    if (isSuspend) {
        isSuspend = false;
        playControl.playResume(ResumeType.KEEP);
        if (!updateViewHandler.hasMessages(Constants.PLAYING_WHAT)) {
            updateViewHandler.sendEmptyMessage(Constants.PLAYING_WHAT);
        }
    }
}
@Override
public void onReady(final WisePlayer wisePlayer) {
    this.wisePlayer = wisePlayer;
    LogUtil.d(TAG, "onReady");
    playControl.start();
    isPlaying = true;
    // 更新主线程。
    runOnUiThread(() -> {
        playView.updatePlayView(wisePlayer);
        if (isResume) {
            playView.setPauseView();
        }
        playView.setContentView(wisePlayer, playControl.getCurrentPlayName());
        updateViewHandler.sendEmptyMessageDelayed(Constants.PLAYING_WHAT, Constants.DELAY_MILLIS_500);
    });
}
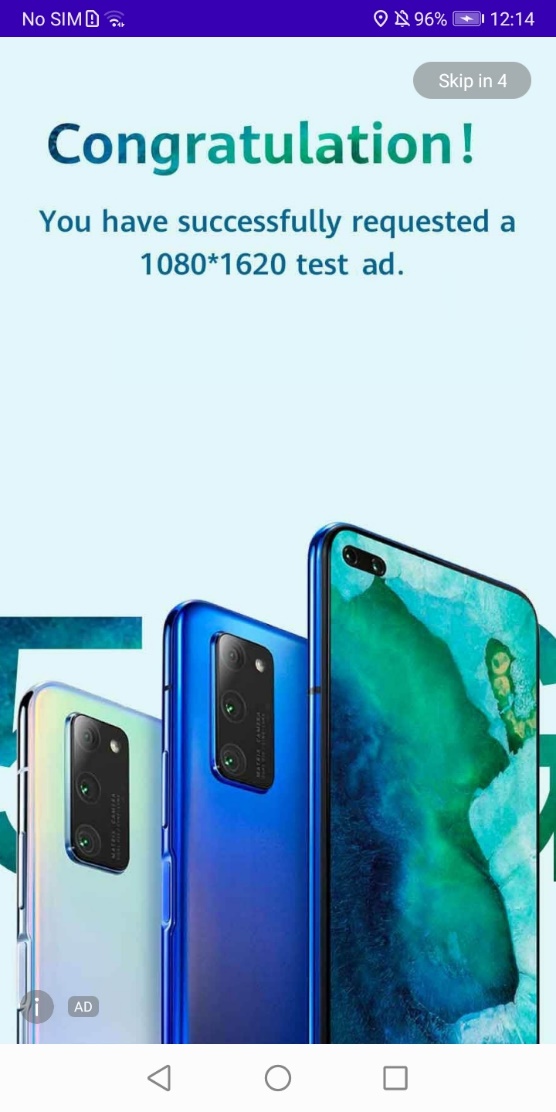
HUAWEI Ads流量变现服务是广告服务依托华为强大的数据能力为您提供流量变现服务。通过该服务,你可以向华为设备的广大用户展示高质的广告内容,并从中获得广告收益。接下来,我们来看一下如何集成开屏广告。
buildscript {
    repositories {
        google()
        jcenter()
        // 配置HMS Core SDK Maven仓地址。
        maven {url 'https://developer.huawei.com/repo/'}
    }
}
allprojects {
    repositories {
        google()
        jcenter()
        // 配置HMS Core SDK Maven仓地址。
        maven {url 'https://developer.huawei.com/repo/'}
    }
}
dependencies {
   implementation 'com.huawei.hms:ads-lite: 13.4.52.302’
}
android:usesCleartextTraffic="true"
<com.huawei.hms.ads.splash.SplashView
    android:id="@+id/splash_ad_view"
    android:layout_width="match_parent"
    android:layout_height="match_parent"
    />
public class SplashAd extends AppCompatActivity {

    @Override
    protected void onCreate(Bundle savedInstanceState) {
        super.onCreate(savedInstanceState);
        setContentView(R.layout.activity_splash_ad);

        // 获取SplashView类。
        SplashView splashView = findViewById(R.id.splash_ad_view);
        int orientation = ActivityInfo.SCREEN_ORIENTATION_PORTRAIT;
        AdParam adParam = new AdParam.Builder().build();
        // 设置logo图片。
        splashView.setLogoResId(R.mipmap.ic_launcher);
        // 设置logo描述。
        splashView.setMediaNameResId(R.string.app_name);
        // 设置视频开屏广告的音频焦点抢占策略。
        splashView.setAudioFocusType(AudioFocusType.NOT_GAIN_AUDIO_FOCUS_WHEN_MUTE);
        // 加载广告ID和广告位。
        splashView.load(getString(R.string.splash_id), orientation, adParam, splashAdLoadListener);
    }

    SplashView.SplashAdLoadListener splashAdLoadListener = new SplashView.SplashAdLoadListener() {
        @Override
        public void onAdLoaded() {
            // 广告加载成功后调用。
            FeedFragment.mAdLoad = true;
        }

        @Override
        public void onAdFailedToLoad(int errorCode) {
            // 广告加载失败后调用,然后显示应用主页。
            Toast.makeText(getApplicationContext(), getString(R.string.ad_failed_load) + " " + errorCode, Toast.LENGTH_SHORT).show();
            FeedFragment.mAdLoad = true;
            finish();
        }

        @Override
        public void onAdDismissed() {
            // 广告展示结束后调用,然后显示应用主页。
            FeedFragment.mAdLoad = true;
            finish();
        }
    };
}
基于SDK自动采集的用户事件、用户属性以及开发者上报的用户行为数据,分析服务可自动生成数据看板、留存分析报告、用户分析报告、行为分析报告、用户生命周期报告、版本分析报告、崩溃分析报告等。
dependencies {
   implementation 'com.huawei.hms:hianalytics:6.3.0.301'
}
// 自定义埋点,在工程合适位置插入埋点代码。
Bundle bundle = new Bundle();
bundle.putString("exam_difficulty", "high");
bundle.putString("exam_level", "1-1");
bundle.putString("exam_time", "20190520-08");
instance.onEvent("begin_examination", bundle);

// 预置事件埋点 。
Bundle bundle_pre = new Bundle();
bundle_pre.putString(HAParamType.PRODUCTID, "item_ID");
bundle_pre.putString(HAParamType.PRODUCTNAME, "name");
bundle_pre.putString(HAParamType.CATEGORY, "category");
bundle_pre.putLong(HAParamType.QUANTITY, 100L);
bundle_pre.putDouble(HAParamType.PRICE, 10.01);
bundle_pre.putDouble(HAParamType.REVENUE, 10);
bundle_pre.putString(HAParamType.CURRNAME, "currency");
bundle_pre.putString(HAParamType.PLACEID, "location_ID");
instance.onEvent(HAEventType.ADDPRODUCT2WISHLIST, bundle_pre);
用户分析报告
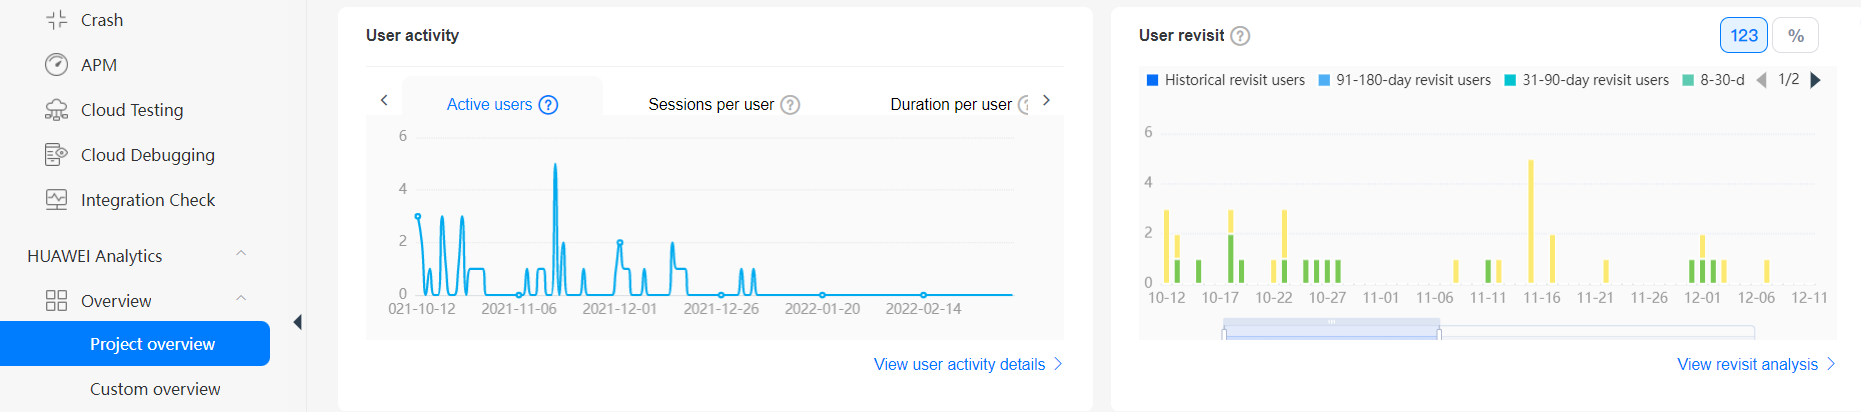
事件分析报告

干的好,您已经成功完成了Codelab并学到了:
您可以阅读以下链接,了解更多相关信息。
免责声明:本Codelab可用做单项目中集成多个HMS服务的参考。您需要验证并确认相关源码是否合法和安全。