















About This Document
Huawei HMS MLKit provides more and more services. In the last issue, we introduced the bank card identification function. A few lines of codes can recognize bank card numbers if using dedicated bank card identification interface. Some partners may ask the following questions:
I want to identify membership card rather than bank card. Can card number be identified?
The answer is yes. There is no problem. However, because the card number locations and layouts of different cards are different, the dedicated bank card identification API cannot be used like bank card identification. In this case, the general card identification capability can provide a standard general card alignment box, you only need to pull up the alignment box to obtain all the contents of the card. Then, you can extract key information based on the contents according to certain rules to obtain the desired contents such like eight consecutive digits are the card number, or the contents after some special letters are the card number.
Scenarios of General Card OCR
General card identification can identify a wide range of cards.
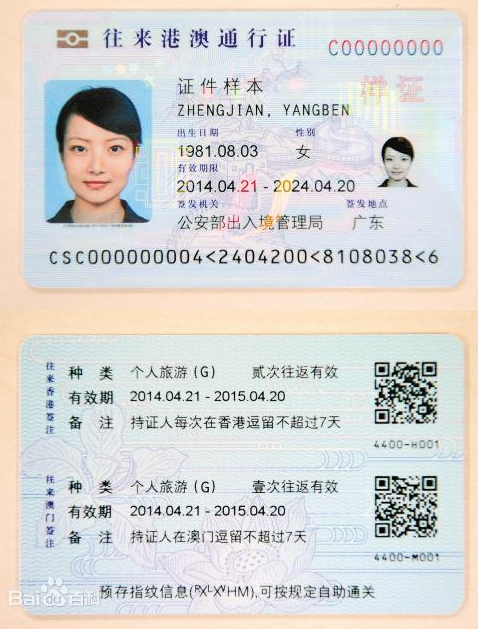
Card recognition for passenger info
Travel apps need to be bound to information such as the ID card number for ticket purchase and hotel reservation. The system automatically identifies the ID card number by taking photos, preventing manual input of the ID card number.
Shopping card binding
A shopping app that takes photos to identify membership cards, shopping cards, and discount cards.
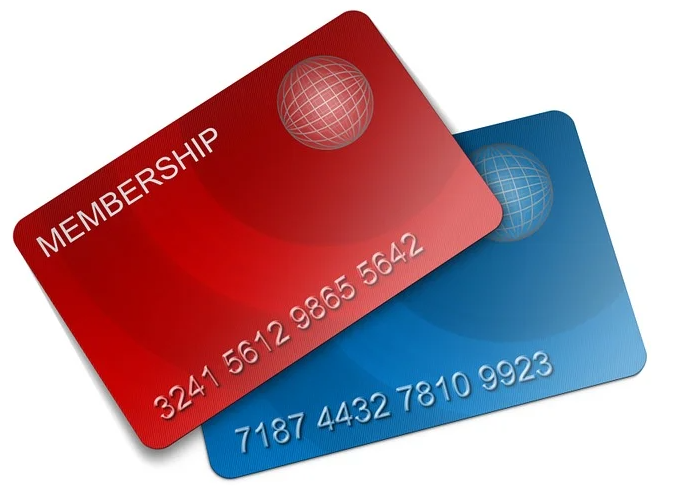
Although bank cards and China's second-generation ID cards can be recognized by general cards, it is recommended that the dedicated bank card recognition and ID card recognition APIs of Huawei ML Kit be used. Dedicated card recognition is optimized for bank cards and ID cards, and has higher accuracy, the processed card number data can be directly returned. The differences between the private card and the general card can be described in detail later.
Tips: All device capabilities are free of charge, and all android devices are covered------both for Huawei phones and Non-Huawei phones.
Development process
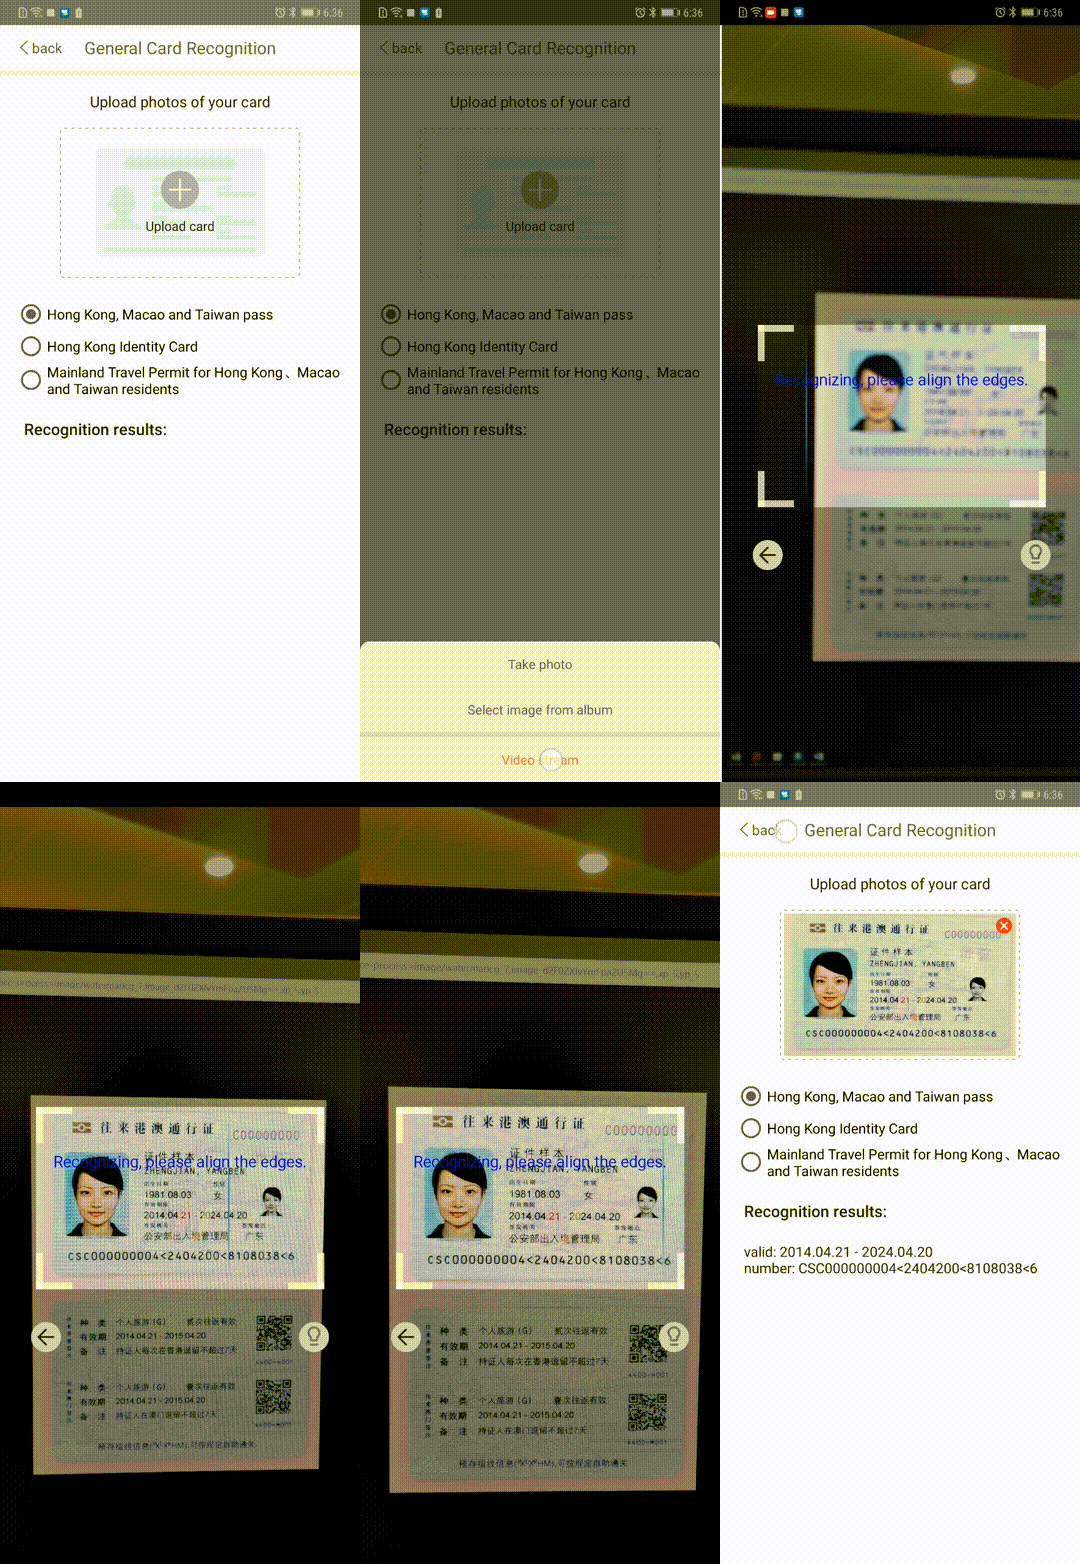
This article will introduce u how to build up card recognition capability for Hong Kong and Macao Permit, Home Visit Permit, and Hong Kong ID Card.
1.Preparation
For more details, please infer to official website:https://developer.huawei.com/consumer/en/doc/development/HMS-Guides/ml-process-4
Here is the key steps:
Step one : Adding Huawei maven in project level gradle
Open the AndroidStudio project-level build.gradle file and incrementally add the following Maven address:
buildscript {
    repositories {
        maven {url 'http://developer.huawei.com/repo/'}
    }
}
allprojects {
    repositories {
        maven { url 'http://developer.huawei.com/repo/'}
    }
}
Step two : Add the SDK dependency to build.gradle at the application level
dependencies{
  implementation 'com.huawei.hms:ml-computer-vision-icr:1.0.3.300'
  implementation 'com.huawei.hms:ml-computer-card-icr-cn-plugin:1.0.3.315'
  implementation 'com.huawei.hms:ml-computer-card-icr-cn-model:1.0.3.315'
}
Step three : Adding following sentences into AndroidManifest.xml
<manifest
    ...
    <meta-data
        android:name="com.huawei.hms.ml.DEPENDENCY"
        android:value= "icr"/>
        <!--If multiple models are required,set the parameter as follows:
        android:value="object,ocr,face,label,icr,bcr,imgseg"-->
    ...
</manifest>
<uses-permission android:name="android.permission.CAMERA" />
<uses-permission android:name="android.permission.INTERNET" />
<uses-permission android:name="android.permission.WRITE_EXTERNAL_STORAGE" />
<uses-permission android:name="android.permission.READ_EXTERNAL_STORAGE" />
2.development
Step one : card identification
@Override
public void onClick(View v) {
    switch (v.getId()) {
        // Button for detecting album pictures.
        case R.id.detect_picture:
            this.startLocalImageActivity(cardImage, null, callback);
            break;
        case R.id.detect_video:
            this.startCaptureActivity(null, callback);
            break;
        // button for detecting
       case R.id.detect_take_photo:
            this.startTakePhotoActivity(null, callback);
            break;
        default:
            break;
}}
video from camera source
private void startCaptureActivity(Object object, MLGcrCapture.Callback callback){
    MLGcrCaptureConfig cardConfig = new MLGcrCaptureConfig.Factory().create();
    MLGcrCaptureUIConfig uiConfig = new MLGcrCaptureUIConfig.Factory()
        .setScanBoxCornerColor(Color.GREEN)
        .setTipText("Recognizing, align edges")
        .setOrientation(MLGcrCaptureUIConfig.ORIENTATION_AUTO)
        .create();
    MLGcrCapture ocrManager = MLGcrCaptureFactory.getInstance().getGcrCapture(cardConfig, uiConfig);
    MLGcrCapture ocrManager = MLGcrCaptureFactory.getInstance().getGcrCapture(cardConfig);
    ocrManager.capturePreview(this, object, callback);
}
photo from camera source
private void startTakePhotoActivity(Object object, MLGcrCapture.Callback callback) {
    MLGcrCaptureConfig cardConfig = new MLGcrCaptureConfig.Factory().create();
    // Create a general card recognition configurator
    MLGcrCaptureUIConfig uiConfig = new MLGcrCaptureUIConfig.Factory()
        // Sets the color of the scan box.
        .setScanBoxCornerColor(Color.BLUE)
        // Set the text in the scan box. It is recommended that the text contain less than 30 characters.
        .setTipText("Taking picture, align edges")
        // The landscape and portrait modes are as follows:
        // MLGcrCaptureUIConfig.ORIENTATION_AUTO: Automatic mode. The display direction is determined by the physical sensor.        // MLGcrCaptureUIConfig.ORIENTATION_LANDSCAPE
        // MLGcrCaptureUIConfig.ORIENTATION_PORTRAIT
        .setOrientation(MLGcrCaptureUIConfig.ORIENTATION_AUTO)
        .create();
    // Method 1: Create a general-purpose card identification processor based on the customized card identification interface configurator.
    MLGcrCapture ocrManager = MLGcrCaptureFactory.getInstance().getGcrCapture(cardConfig, uiConfig);
    // Method 2: Use the default interface to create a general-purpose card identification processor.
    MLGcrCapture ocrManager = MLGcrCaptureFactory.getInstance().getGcrCapture(cardConfig);
    // Bind the general card identification processor and the processing result callback function.
ocrManager.capturePhoto(this, object, callback);
}
photo from local
private void startLocalImageActivity(Bitmap bitmap, Object object, MLGcrCapture.Callback callback) {
    // create general card analyzer
    MLGcrCaptureConfig config = new MLGcrCaptureConfig.Factory().create();
    MLGcrCapture ocrManager = MLGcrCaptureFactory.getInstance().getGcrCapture(config);
    // The bitmap is the bitmap image to be identified. The following image formats are supported:jpg/jpeg/png/bmp。
    ocrManager.captureImage(bitmap, object, callback);
}
Step three : Perform post-processing on the identified content and extract key information
Reload the onResult, onCanceled, onFailure, and onDenied methods. OnResult indicates that the result is returned. MLGcrCaptureResult indicates the result returned by card identification. onCanceled indicates that the user cancels the card identification. onFailure indicates that the identification fails. onDenied indicates that the camera is unavailable.
private MLGcrCapture.Callback callback = new MLGcrCapture.Callback() {
        @Override
        public int onResult(MLGcrCaptureResult result, Object object) {
            Log.i(TAG, "callback onRecSuccess");
            if (result == null) {
                Log.e(TAG, "callback onRecSuccess result is null");
                return MLGcrCaptureResult.CAPTURE_CONTINUE;
            }

            GeneralCardProcessor idCard = null;
            GeneralCardResult cardResult = null;
            if (cardTypeEnum == CardType.PASSCARD) {
                idCard = new PassCardProcessor(result.text);
            } else if (cardTypeEnum == CardType.HKIDCARD) {
                idCard = new HKIdCardProcessor(result.text);
            } else if (cardTypeEnum == CardType.COMEHOMECARD) {
                idCard = new HomeCardProcessor(result.text);
            }
            if (idCard != null) {
                cardResult = idCard.getResult();
            }

            showFrontImage(result.cardBitmap);
            displayResult(cardResult);

            // If the results don't match
            if (cardResult == null || cardResult.valid.isEmpty() || cardResult.number.isEmpty()) {
                return MLGcrCaptureResult.CAPTURE_CONTINUE;
            }

            displayResult(cardResult);
            return MLGcrCaptureResult.CAPTURE_STOP;
        }
    };}
};
The card number extraction logic can be implemented by rewriting the getResult() method in the GeneralCardProcessor class. The following uses the Hong Kong, Macao, and Taiwan passes as an example. For details, see the source code on GitHub.
public class PassCardProcessor implements GeneralCardProcessor {
    private static final String TAG = "PassCardProcessor";

    private final MLText text;

    public PassCardProcessor(MLText text) {
        this.text = text;
    }
    @Override
    public GeneralCardResult getResult() {
        List<MLText.Block> blocks = text.getBlocks();
        if (blocks.isEmpty()) {
            Log.i(TAG, "Result blocks is empty");
            return null;
        }
        ArrayList<BlockItem> originItems = getOriginItems(blocks);
        String valid = "";
        String number = "";
        boolean validFlag = false;
        boolean numberFlag = false;
        for (BlockItem item : originItems) {
            String tempStr = item.text;
            if (!validFlag) {
                String result = tryGetValidDate(tempStr);
                if (!result.isEmpty()) {
                    valid = result;
                    validFlag = true;
                }
            }
            if (!numberFlag) {
                String result = tryGetCardNumber(tempStr);
                if (!result.isEmpty()) {
                    number = result;
                    numberFlag = true;
                }
            }
        }
        return new GeneralCardResult(valid, number);
    } }
Demo
GitHub source code
The source code has been uploaded to GitHub. You can improve this function on it.
GitHub source code address: https://github.com/HMS-MLKit/HUAWEI-HMS-MLKit-Sample
Path for storing the demo code of General Card OCR: MLKit-Sample\module-text\src\main\java\com\mlkit\sample\activity\GeneralCardRecognitionActivity.java
Link to previous issues:
Phase 1: Develop a smile capture tool on Android using Huawei HMS MLKit SDK within 30 minutes.
https://developer.huawei.com/consumer/en/forum/topicview?tid=0201198419687680377&fid=18
Phase 2: Android development practice. Use Huawei HMS MLKit image segmentation SDK to develop a certificate photo DIY program.
https://developer.huawei.com/consumer/en/forum/topicview?tid=0201203408959360433&fid=18
Issue 3: Android Development Practice: Using HMS MLKit Huawei Machine Learning Service to Develop a Photographing and Translation App
https://developer.huawei.com/consumer/en/forum/topicview?tid=0201209905778120045&fid=18
Issue 4: Integrating the Huawei HMS MLKit Machine Learning Service SDK to Implement One-Click Bank Card Binding
https://developer.huawei.com/consumer/en/forum/topicview?tid=0201217390745110144&fid=18
Coming up next
Based on Huawei machine learning service, we will share a series of practical experience later. You can continue to pay attention to it.


 苏公安网备 32011402010933号