2、编写applicationContext.xml的配置文件
在resources资源文件中创建applicationContext.xml的配置文件,编写具体的配置信息
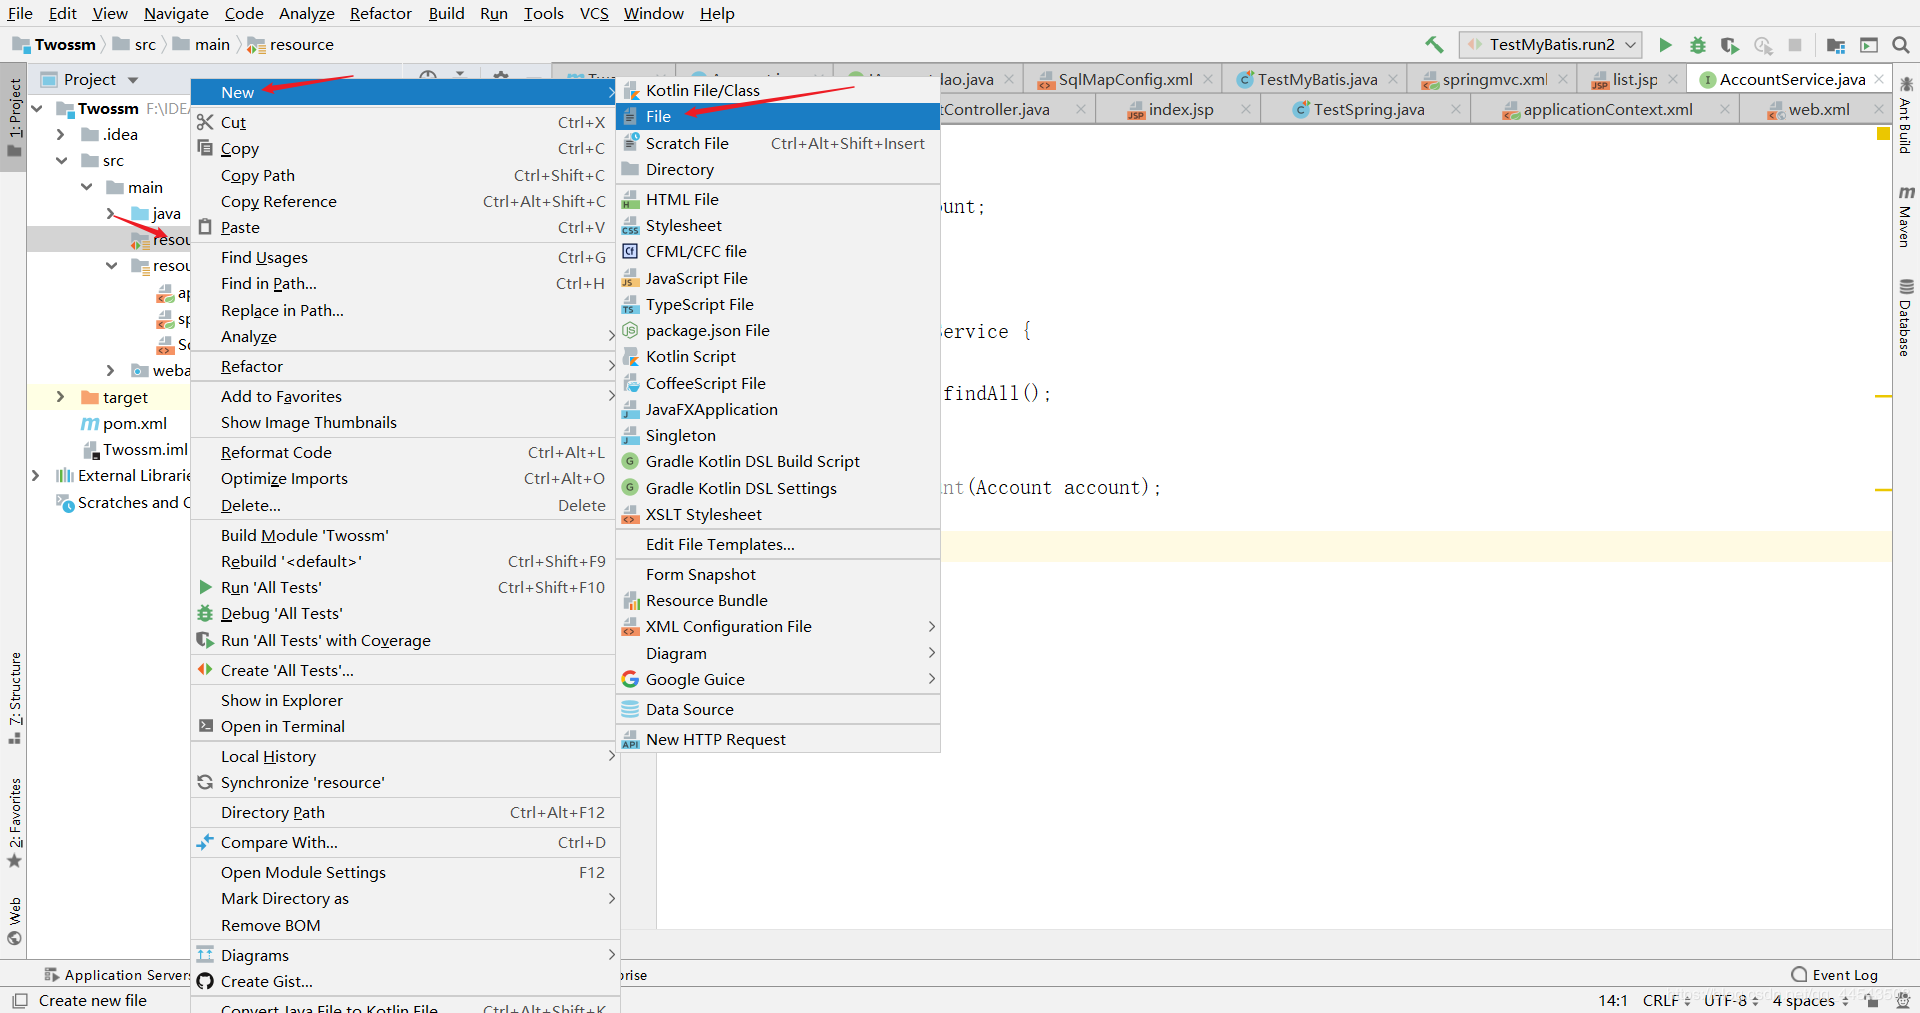
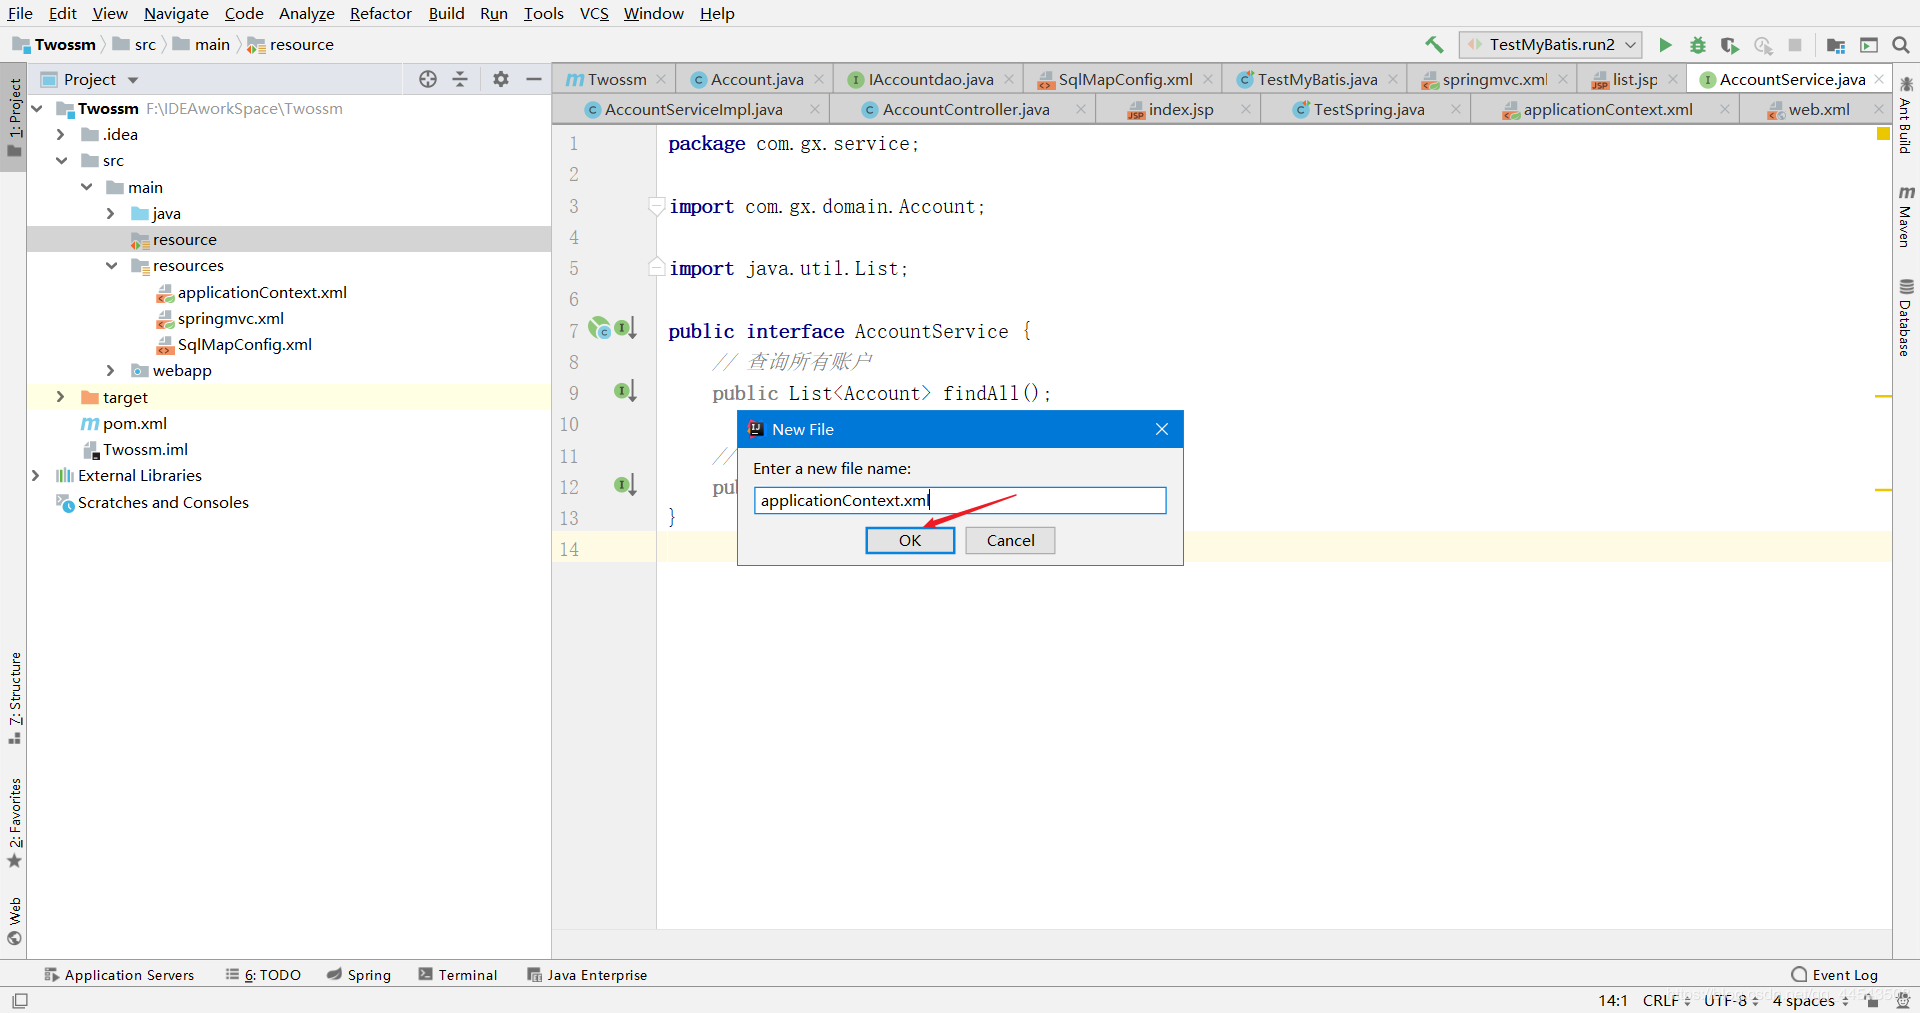
applicationContext.xml中的配置信息
<?xml version='1.0' encoding='UTF-8'?><beans xmlns='http://www.springframework.org/schema/beans'
       xmlns:xsi='http://www.w3.org/2001/XMLSchema-instance'
       xmlns:context='http://www.springframework.org/schema/context'
       xmlns:aop='http://www.springframework.org/schema/aop'
       xmlns:tx='http://www.springframework.org/schema/tx'
       xsi:schemaLocation='http://www.springframework.org/schema/beans
 http://www.springframework.org/schema/beans/spring-beans.xsd
 http://www.springframework.org/schema/context
 http://www.springframework.org/schema/context/spring-context.xsd
 http://www.springframework.org/schema/aop
 http://www.springframework.org/schema/aop/spring-aop.xsd
 http://www.springframework.org/schema/tx
 http://www.springframework.org/schema/tx/spring-tx.xsd'>

    <!--开启注解的扫描,希望处理service和dao,controller不需要Spring框架去处理-->
    <context:component-scan base-package='com.gx' >
        <!--配置哪些注解不扫描-->
        <context:exclude-filter type='annotation' expression='org.springframework.stereotype.Controller' />
    </context:component-scan>
    </beans>
- 1
- 2
- 3
- 4
- 5
- 6
- 7
- 8
- 9
- 10
- 11
- 12
- 13
- 14
- 15
- 16
- 17
- 18
- 19
- 20
- 21
- 22
3. 在项目中编写测试方法,进行测试
1、创建Test包
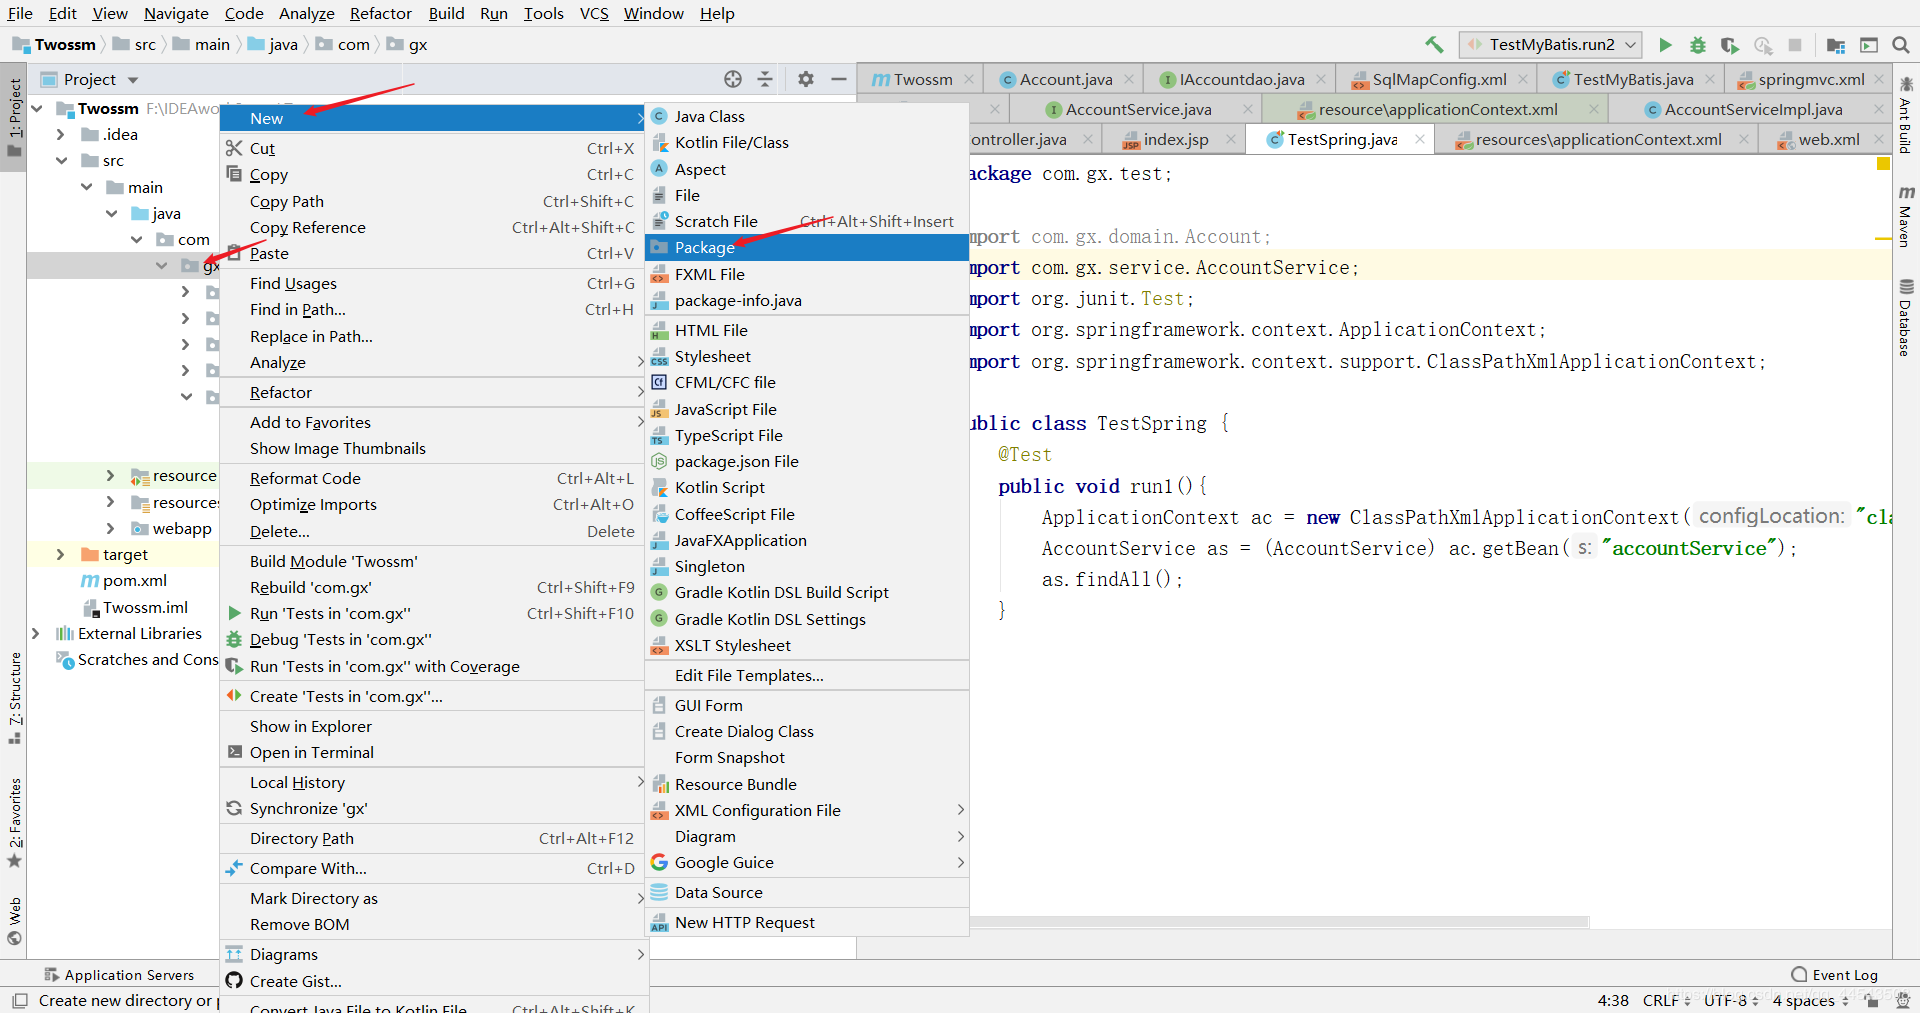
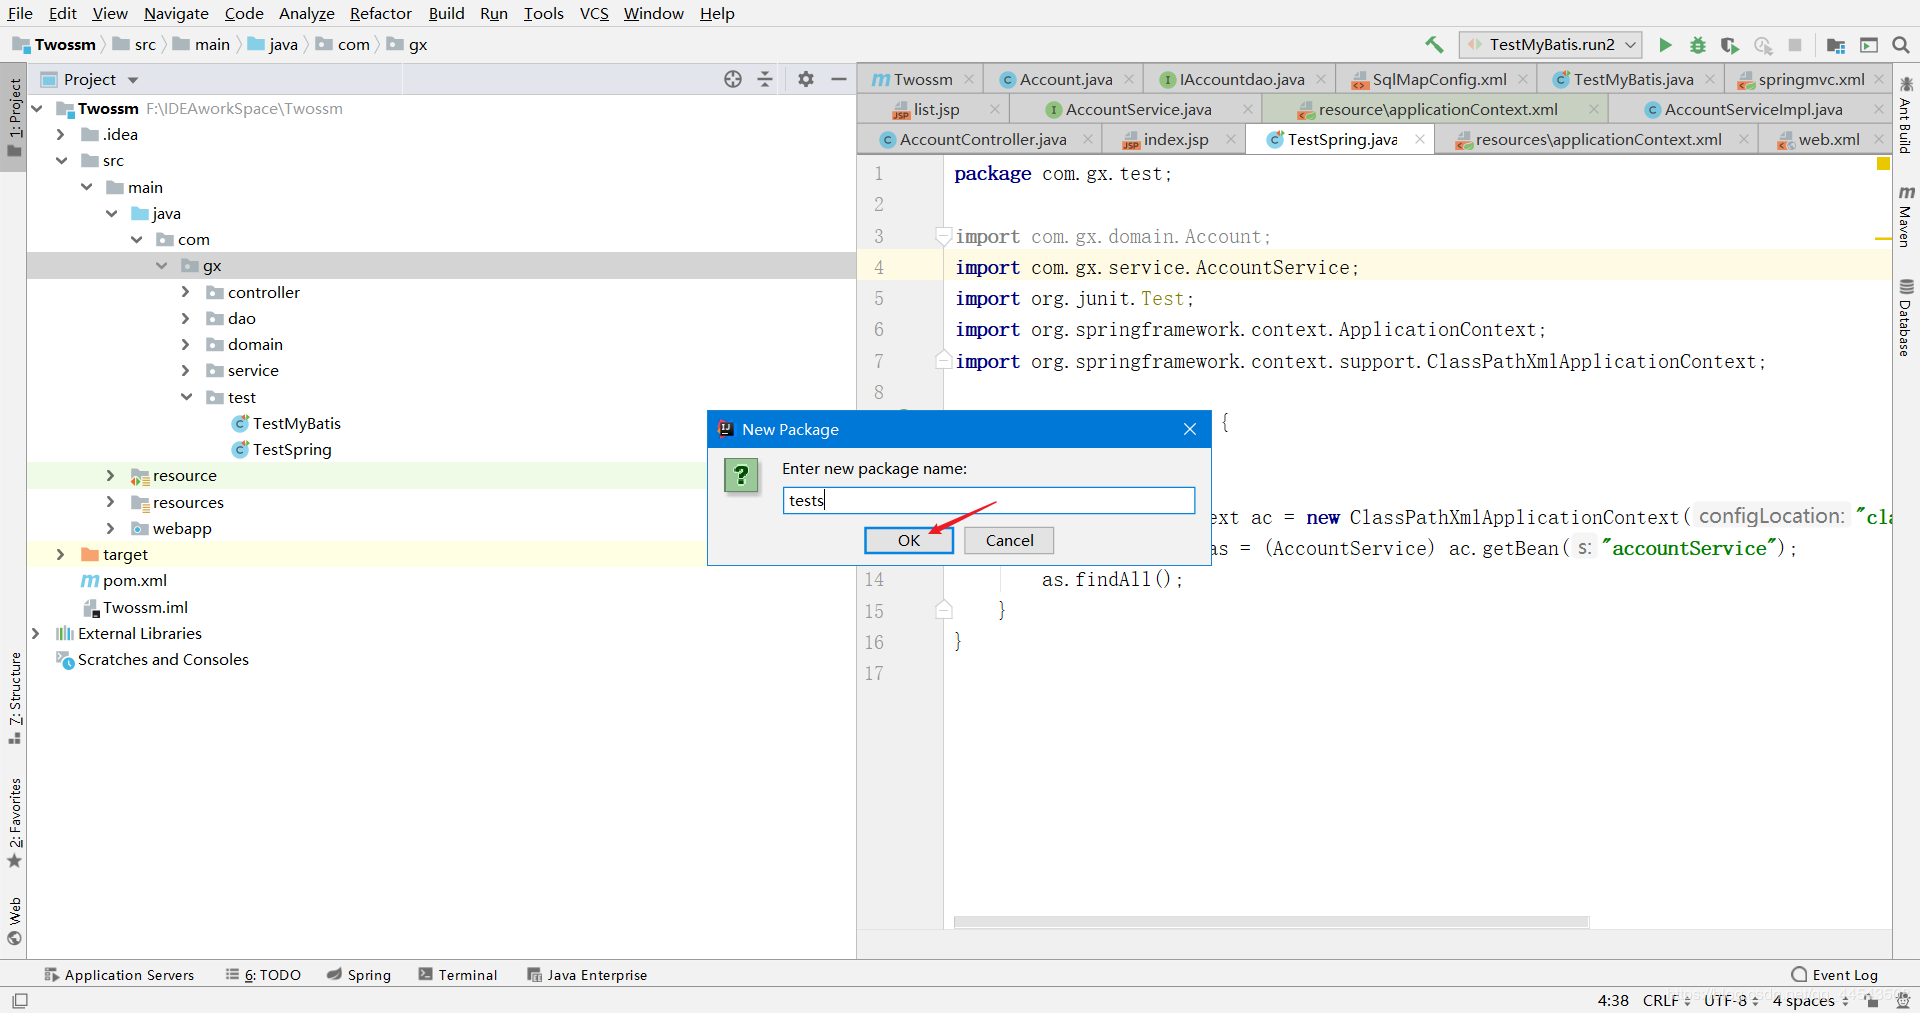
2、在test包中创建一个叫TestSpring的class类,具体的内容如下:
package com.gx.test;import com.gx.domain.Account;import com.gx.service.AccountService;import org.junit.Test;import org.springframework.context.ApplicationContext;import org.springframework.context.support.ClassPathXmlApplicationContext;public class TestSpring {
    @Test
    public void run1(){
        ApplicationContext ac = new ClassPathXmlApplicationContext('classpath:applicationContext.xml');
        AccountService as = (AccountService) ac.getBean('accountService');
        as.findAll();
    }}
- 1
- 2
- 3
- 4
- 5
- 6
- 7
- 8
- 9
- 10
- 11
- 12
- 13
- 14
- 15
- 16
- 17
运行如下效果,说明搭建Spring的开发环境成功!
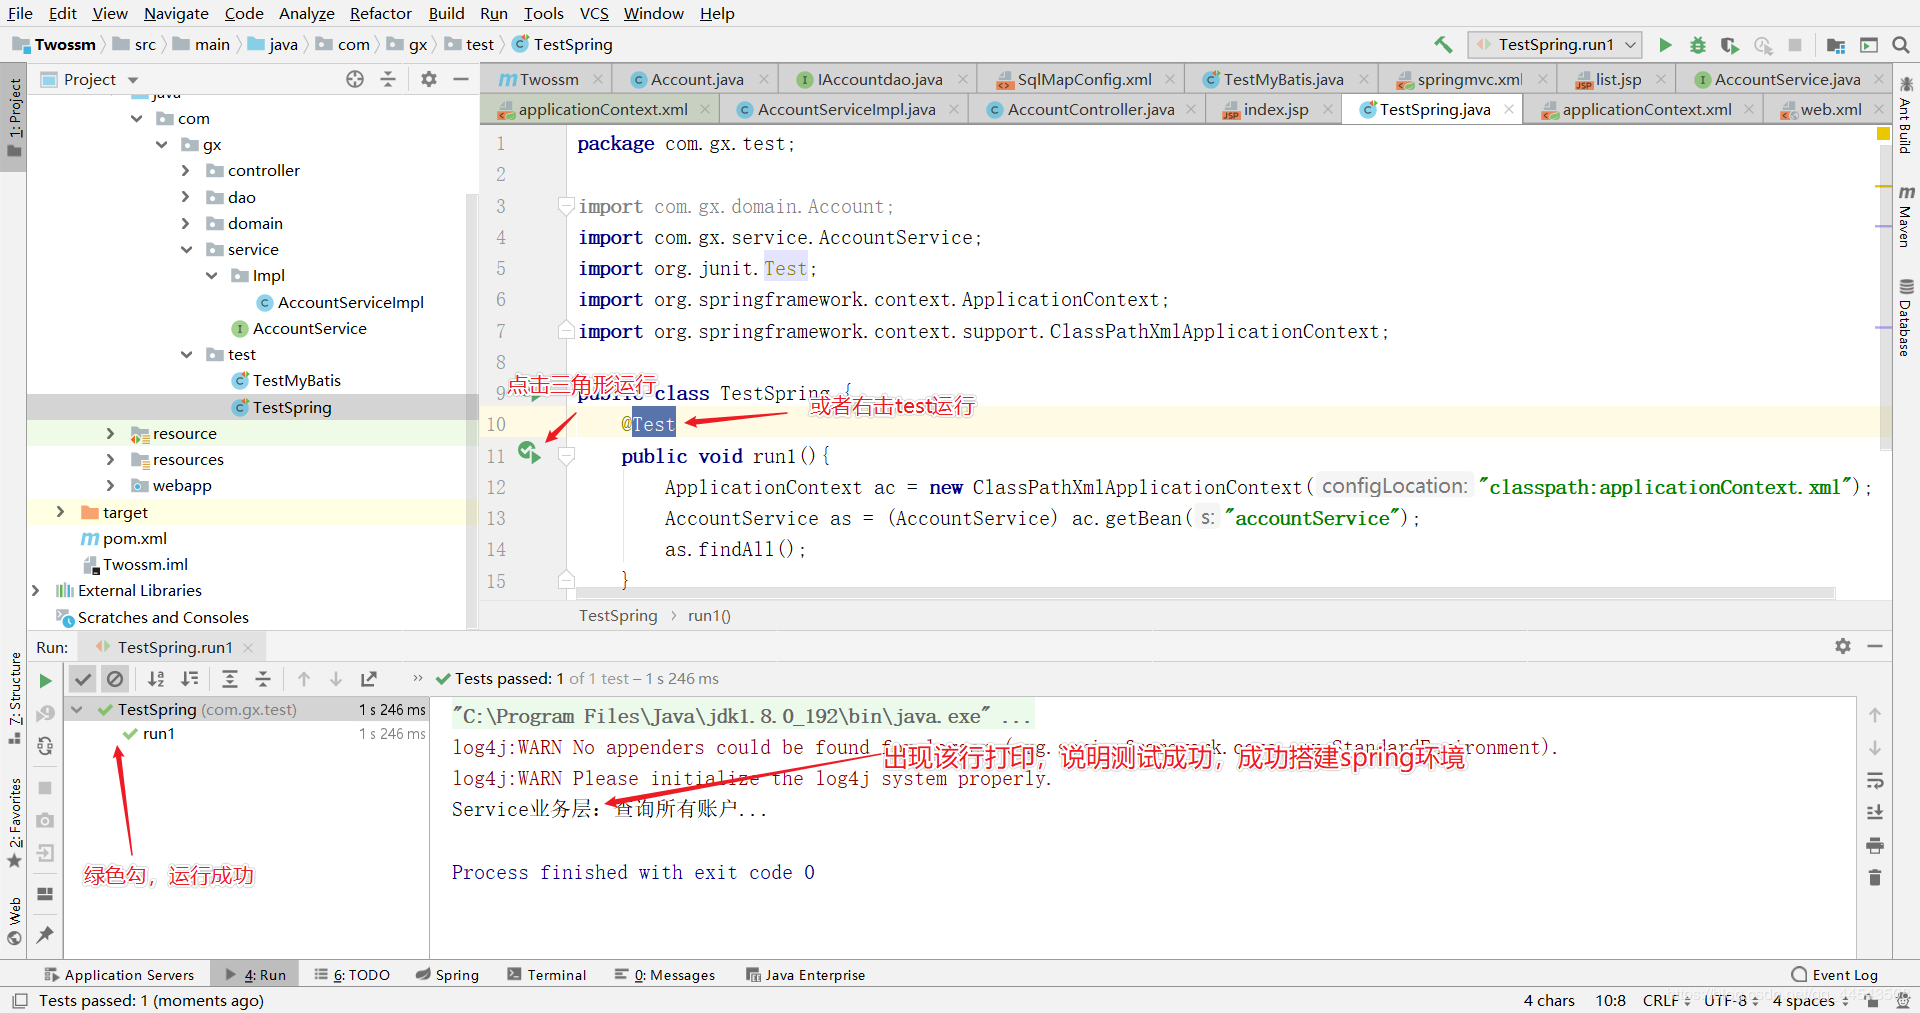
到这里,Spring的开发环境成功!接下来搭建SpringMVC框架环境。
















 苏公安网备 32011402010933号