Cloud Storage is scalable and maintenance-free. By integrating the Cloud Storage SDK, you can store high volumes of data such as images, audios, and videos generated by your users to the cloud or download these data from the cloud.
In this codelab, you will build an app that integrates Cloud Storage capabilities. Your app will allow users to upload a file to the cloud and download it to a local path by calling APIs.
To integrate Cloud Storage of AppGallery Connect, you must complete the following preparations:
For details, please refer to Configuring App Information in AppGallery Connect.
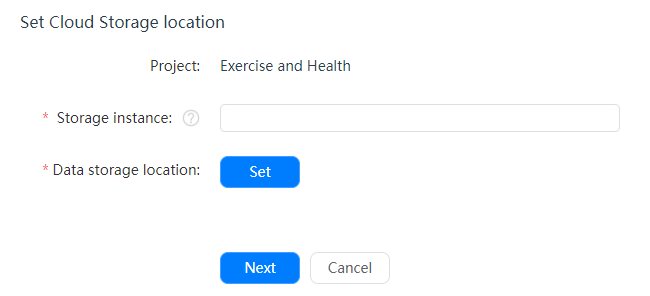
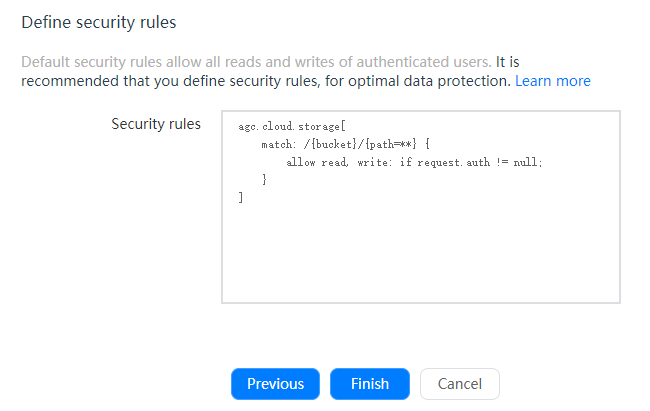
Before integrating the Cloud Storage SDK, you need to enable Cloud Storage in AppGallery Connect.
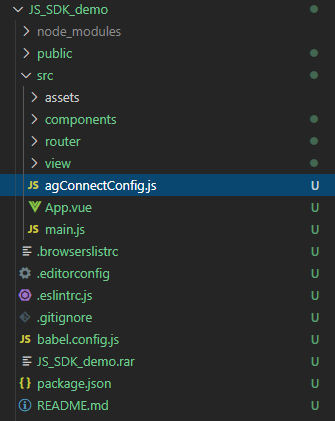
Integrate the Cloud Storage SDK into your web project before development. The following uses the web project of the Vue framework as an example to describe how to integrate the Cloud Storage SDK:
{
"name": "sdkdemo",
"version": "0.1.0",
"private": true,
"scripts": {
"serve": "vue-cli-service serve",
"build": "vue-cli-service build",
"lint": "vue-cli-service lint"
},
"dependencies": {
"@agconnect/cloudstorage": "^1.0.0-beta2",
"core-js": "^3.6.5",
"element-ui": "^2.13.2",
"vue": "^2.6.11"
},
"devDependencies": {
"@vue/cli-plugin-babel": "^4.5.0",
"@vue/cli-plugin-eslint": "^4.5.0",
"@vue/cli-service": "^4.5.0",
"babel-eslint": "^10.1.0",
"eslint": "^6.7.2",
"eslint-plugin-vue": "^6.2.2",
"vue-template-compiler": "^2.6.11"
}
}
npm install
npm install --save @agconnect/cloudstorage
1. Create a page in your web project. Sample code and UI:
<div v-show="isLogin" style="max-width:1600px;margin:auto;">
    <h1>AGCCloudStorageDemo</h1>
    <div style="display:flex;margin-bottom:30px;">
        <el-button type="primary" size="medium" @click="getFileList('')">Get FileList</el-button>
        <el-button type="primary" size="medium" @click="getFileListAll('')">
            Get FileList All
        </el-button>
        <el-button type="primary" size="medium" @click="uploadString">
            Upload String
        </el-button>
        <el-upload action :on-change="uploadFile" :auto-upload="false">
            <el-button type="primary" size="medium" style="width: 100%;margin-left:10px;">Upload File</el-button>
        </el-upload>
    </div>
    <el-table
        ref="multipleTable"
        border
        size="medium"
        :data="list">
        <el-table-column
            type="selection"
            width="55">
        </el-table-column>
        <el-table-column width="80px" label="index">
            <template v-slot="scope">
                {{ scope.$index + 1 }}
            </template>
        </el-table-column>
        <el-table-column width="100px" label="type">
            <template v-slot="scope">
                {{ scope.row.isFile ? 'file' : 'directory' }}
            </template>
        </el-table-column>
        <el-table-column
            width="150px"
            label="name"
            prop="name"
            show-overflow-tooltip>
        </el-table-column>
        <el-table-column label="operation">
            <template v-slot="scope">
                <el-button
                    v-if="!scope.row.isFile"
                    type="success"
                    size="medium"
                    @click="getFileList(scope.row)"
                >
                    Get FileList
                </el-button>
                <el-button
                    v-if="!scope.row.isFile"
                    type="success"
                    size="medium"
                    @click="getFileListAll(scope.row)"
                >
                    Get FileList All
                </el-button>
                <el-button
                    v-if="scope.row.isFile"
                    type="success"
                    size="medium"
                    @click="downloadFile(scope.row)"
                >
                    Download File
                </el-button>
                <el-button
                    v-if="scope.row.isFile"
                    type="success"
                    size="medium"
                    @click="getFileMetadata(scope.row)"
                >
                    Get FileMetadata
                </el-button>
                <el-button
                    v-if="scope.row.isFile"
                    type="success"
                    size="medium"
                    @click="updateFileMetadata(scope.row)"
                >
                    Update FileMetadata
                </el-button>
                <el-button type="danger" size="medium" @click="deleteFile(scope.row)">
                    Delete File
                </el-button>
                <el-button type="success" size="medium" @click="toString(scope.row)">
                    To String
                </el-button>
            </template>
        </el-table-column>
    </el-table>
</div>
2. Create buttons with the following functions:
Upload File and Upload String: Upload a file and character string, respectively.
1) Download File: Generate a file download URL.
2) Get FileMetadata: Obtain file metadata.
3) Update FileMetadata: Update file metadata.
4) Get FileList and Get FileList All: Obtain the list of certain files or all files, respectively.
5) Delete File: Delete a file.
6) Login: Sign in anonymously.
3. Design the page layout as follows.
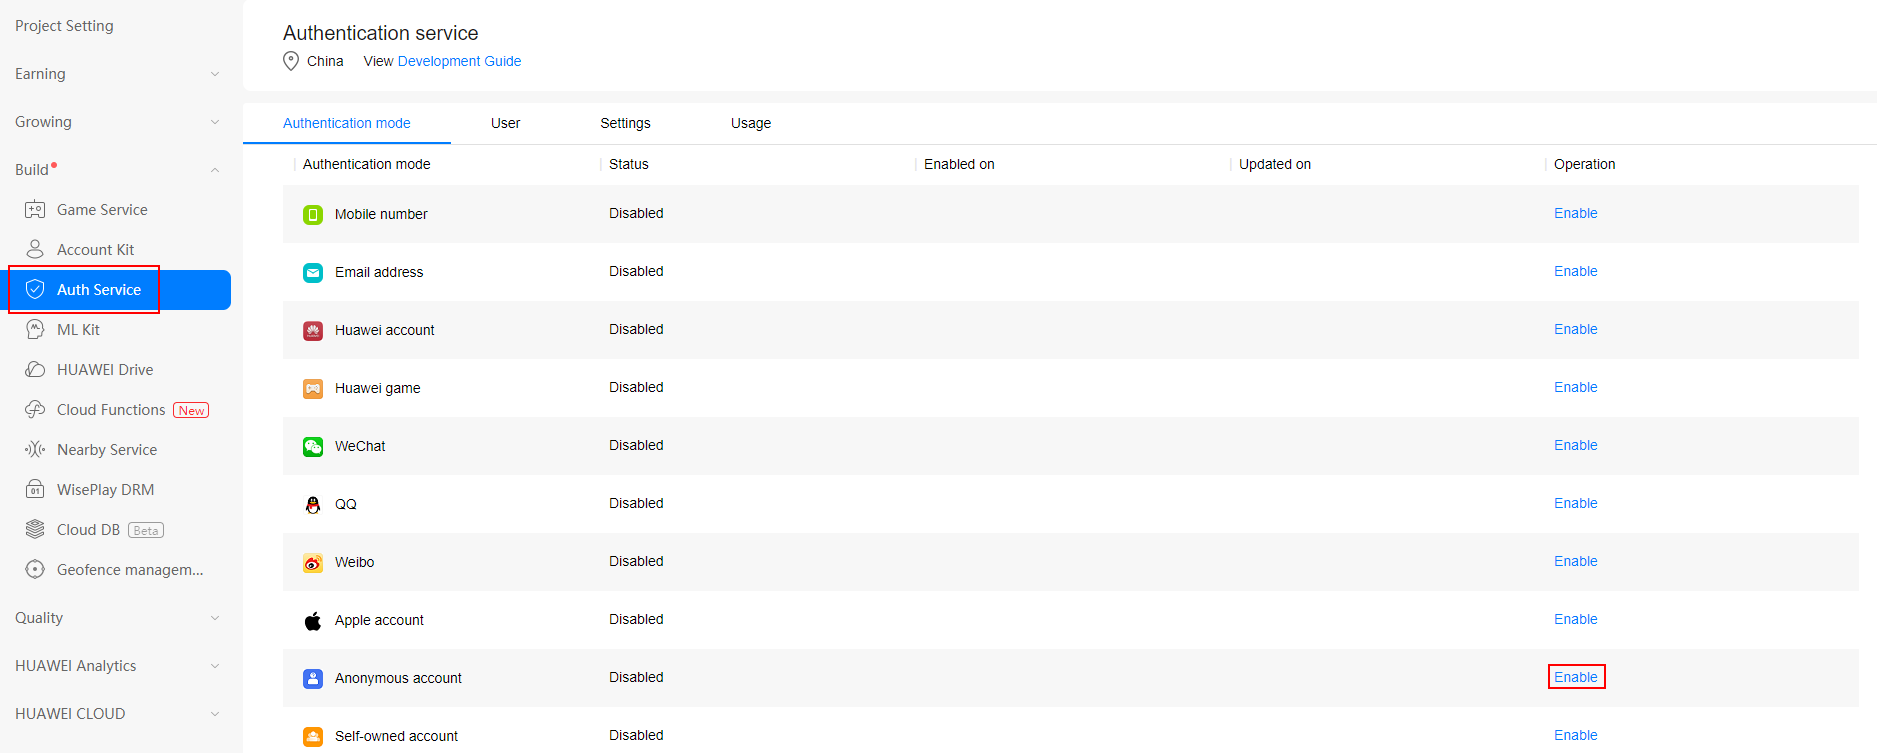
The sample code in this codelab uses the anonymous sign-in mode. Therefore, you need to enable the anonymous account authentication mode of Auth Service in AppGallery Connect. Otherwise, the sign-in fails.
import agconnect from "@agconnect/api";
import "@agconnect/instance";
import "@agconnect/auth";
import "@agconnect/cloudstorage";
import { agConnectConfig } from "../agConnectConfig"; // Import
agconnect.instance().configInstance(config) // Initialize AppGallery Connect.
async signInAnonymously () {
agconnect
    .auth()
    .signInAnonymously()
    .then(() => {
        alert('login successfully!')
        this.isLogin = true
        this.ref = agconnect.cloudStorage().storageReference()
    })
    .catch(() => {
        return Promise.reject('sign in anonymously failed')
    })

}
You can call related APIs of the Cloud Storage SDK to develop functions.
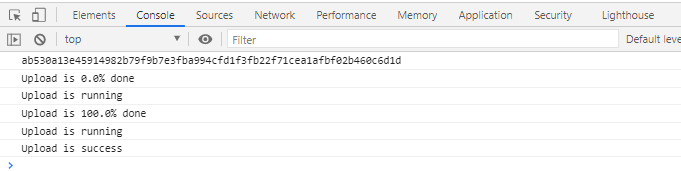
Click Upload File. The uploadFile method is called to upload a file to the cloud server.
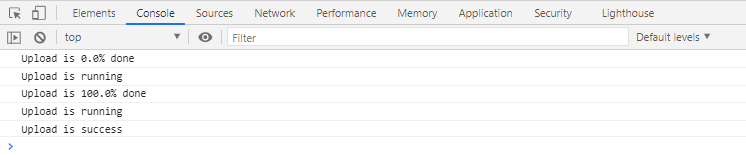
Click Upload String. The uploadString method is called to write the string to the file on the cloud.
uploadFile(file) {
    const path = 'jssdk/' + file.name
    const metadata = {
        cacheControl: 'helloworld',
        contentDisposition: 'helloworld',
        contentEncoding: 'helloworld',
        contentLanguage: 'helloworld',
        contentType: 'helloworld',
        customMetadata: {
            hello: 'kitty'
        }
    }
    var uploadTask = this.ref.child(path).put(file.raw, metadata)
    this.printUploadPercent(uploadTask)
},
uploadString(){
    const path = ' jssdk/test.txt'
    const format = 'raw'
    const uploadMessage = 'message'
    const metadata = {
        cacheControl: 'helloworld',
        contentDisposition: 'helloworld',
        contentEncoding: 'helloworld',
        contentLanguage: 'helloworld',
        contentType: 'helloworld',
        customMetadata: {
            hello: 'kitty'
        }
    }
    var uploadTask = this.ref.child(path).putString(uploadMessage, format, metadata);
    this.printUploadPercent(uploadTask)
},
printUploadPercent (uploadTask) {
    uploadTask.on('state_changed', function (snapshot) {
        if(!snapshot){
            console.log('Upload Result is null')
            return;
        }
        if(snapshot.totalByteCount == 0){
            console.log('Upload File is empty')
            return;
        }
        var progress = (snapshot.bytesTransferred / snapshot.totalByteCount) * 100
        console.log('Upload is ' + progress.toFixed(1) + '% done')
        switch (snapshot.state) {
            case 'paused':
                console.log('Upload is paused')
                break
            case 'running':
                console.log('Upload is running')
                break
            case 'success':
                console.log('Upload is success')
                break
            case 'canceled':
                console.log('Upload is canceled')
                break
            case 'error':
                console.log('Upload is error')
                break
        }
    }, function (snapshot) {
        switch (snapshot.state) {
            case 'paused':
                console.log('Upload is paused')
                break
            case 'running':
                console.log('Upload is running')
                break
            case 'success':
                console.log('Upload is success')
                break
            case 'canceled':
                console.log('Upload is canceled')
                break
            case 'error':
                console.log('Upload is error')
                break
        }
    }, function () {
        console.log('Upload is success')
    })
}
Click Download File. The downloadFile method is called to generate a file download URL. You can download the file you just uploaded to a local device by entering this URL in the browser.
downloadFile(row) {
    const child = this.ref.child(row.path)
    child.getDownloadURL().then(function (downloadURL) {
        alert(downloadURL)
        console.log(downloadURL)
    })
}
Click Get FileMetadata. The getFileMetadata method is called to obtain the file metadata.
getFileMetadata(row) {
    const child = this.ref.child(row.path)
    child.getFileMetadata().then((res) => {
        console.log(res)
    })
}
Click Update FileMetadata. The updateFileMetadata method is called to modify the file metadata.
updateFileMetadata(row) {
    const child = this.ref.child(row.path)
    child.updateFileMetadata({
        cacheControl: 'helloworld',
        contentDisposition: 'helloworld',
        contentEncoding: 'helloworld',
        contentLanguage: 'helloworld',
        contentType: 'helloworld',
        customMetadata: {
            hello: 'kitty'
        }
    }).then((res) => {
        console.log(res)
    })
}
Click Get FileList. The getFileList method is called to obtain the list of certain files from the cloud server.
Click Get FileList All. The getFileListAll method is called to obtain the list of all files from the cloud server.
getFileList(row) {
    var path = row && row.path ? row.path : '';
const child = this.ref.child(path)
    child.list({ maxResults: 5 }).then((res) => {
        this.list = [...res.dirList.map(item => { item.isFile = false; item.select = false; return item }), ...res.fileList.map(item => { item.isFile = true; item.select = false; return item })]
        this.nextMarker = res.pageMarker
        console.log(this.list)
    }).catch(err => {
        console.log(err)
    })
},
getFileListAll(row) {
    const child = this.ref.child(row && row.path ? row.path : '')
    child.listAll()
    .then((res) => {
        console.log('res', res)
        this.list = [...res.dirList.map(item => { item.isFile = false; item.select = false; return item }), ...res.fileList.map(item => { item.isFile = true; item.select = false; return item })]
    })
    .catch((err) => {
        console.log(err)
    })
},
Click Delete File. The deleteFile method is called to delete the uploaded file from the cloud.
deleteFile(row) {
    const child = this.ref.child(row.path)
    child.delete().then(() => {
        alert('delete success')
        console.log('delete success')
    }).catch(err => {
        console.log(err)
    })
}
In the project directory, run the npm run serve command to start the project and click the hyperlinks to access the project.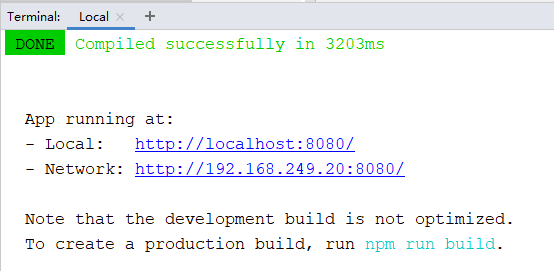
Click Login. A dialog box is displayed, indicating that the anonymous sign-in is successful. Press F12 to open the console and view the test result.
Click Download File. The file download URL is displayed. You can download the file by entering the URL in the address box of the browser.
Click Get FileMetadata. The file metadata is displayed.
Click Update FileMetadata. The updated file metadata is displayed.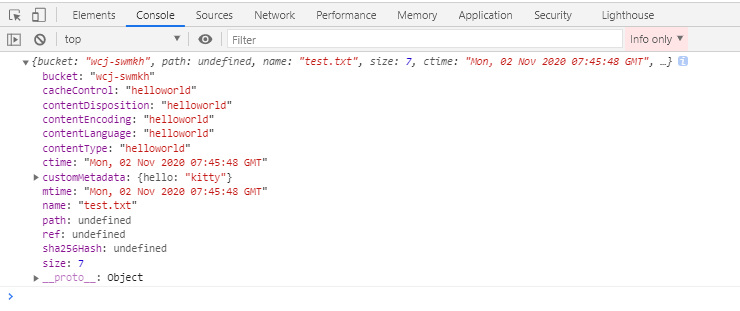
Click Get FileList. Some files in the current directory are displayed.
Click Get FileList All. All files in the current directory are displayed.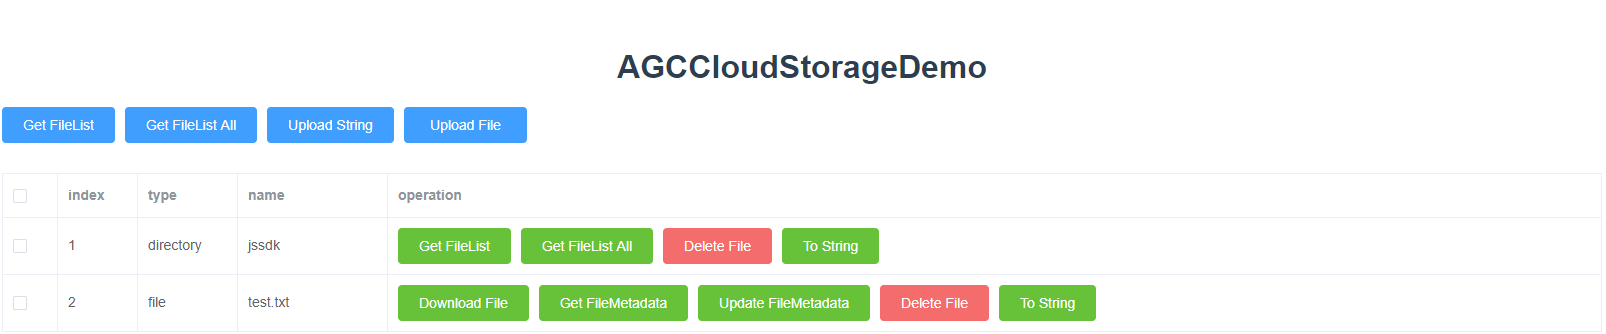
Click Delete File. A message is displayed, indicating that the file is deleted successfully.
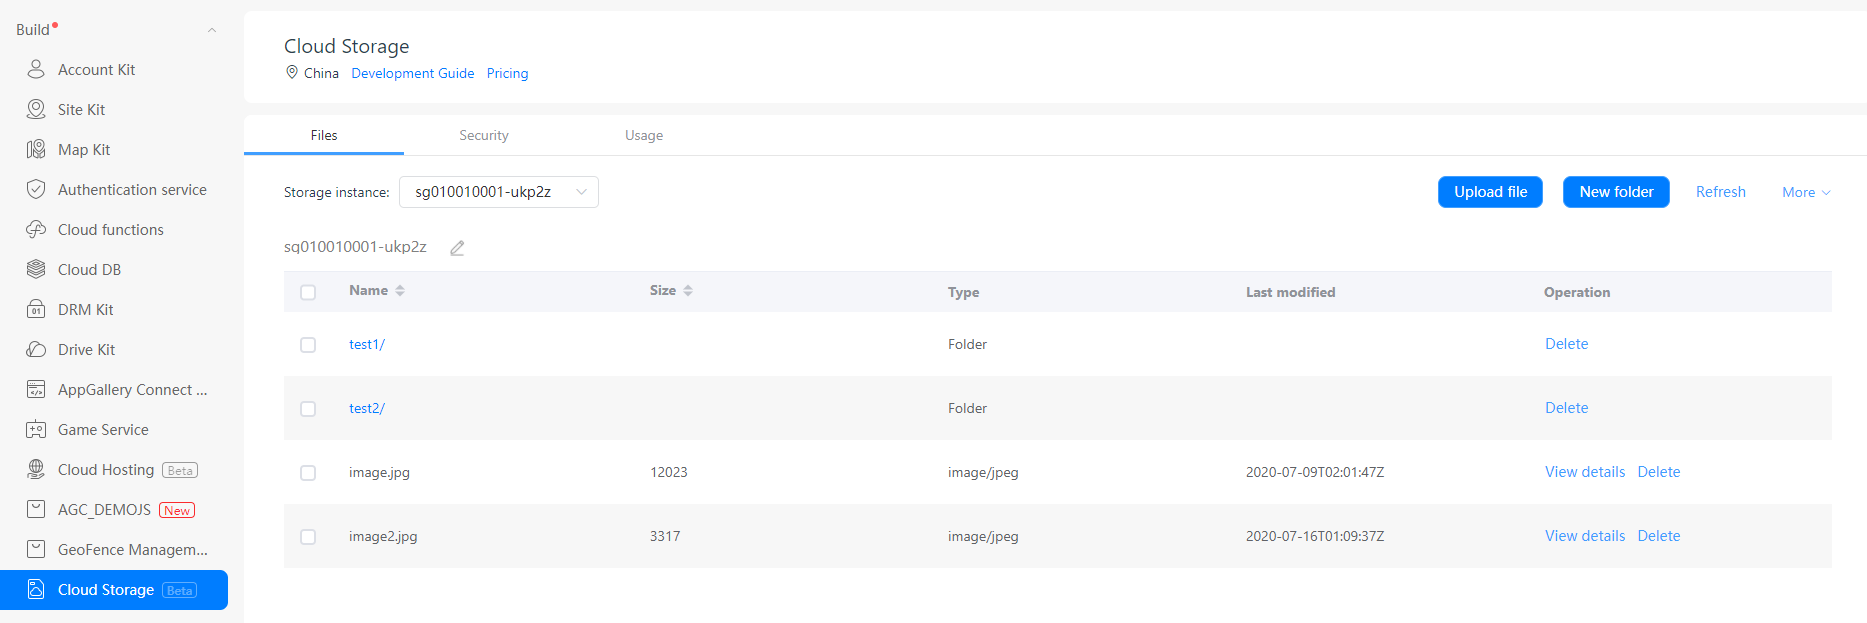
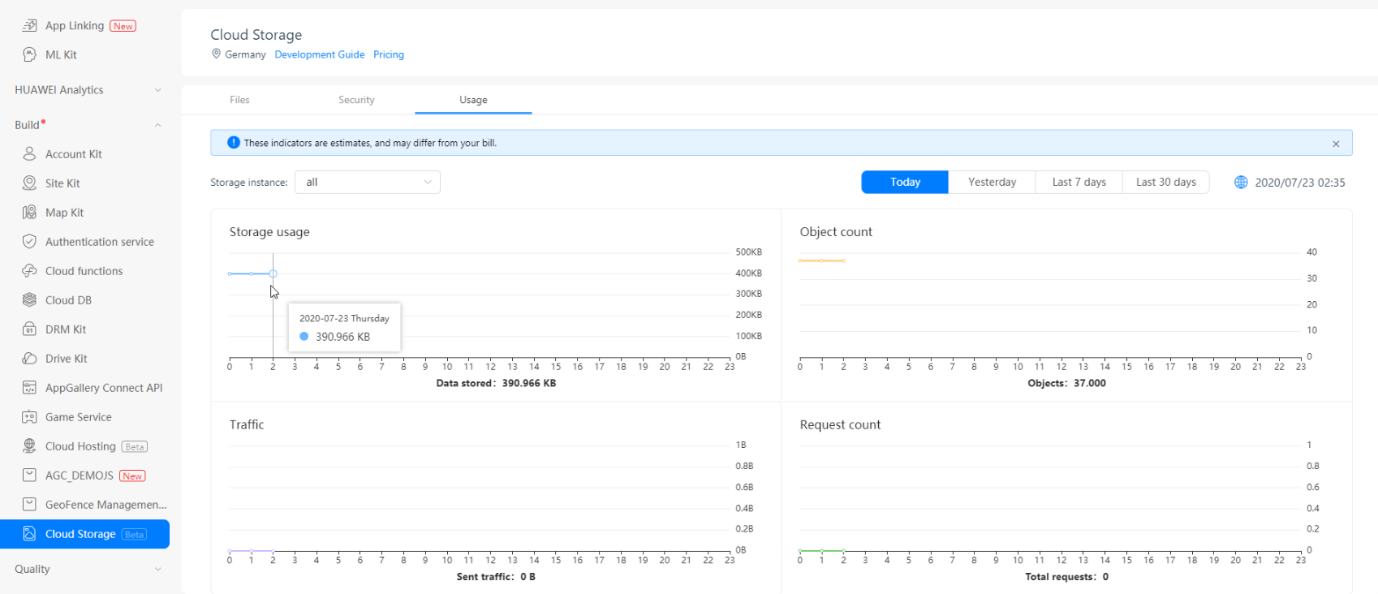
Cloud Storage of AppGallery Connect provides visualized file management and data analysis functions.
Well done. You have successfully built an app that integrates Cloud Storage of AppGallery Connect and learned how to manage Cloud Storage usage in AppGallery Connect.
For details about APIs related to Cloud Storage of AppGallery Connect, please refer to API Reference.
To download the sample code, please click the button below: