HUAWEI ML Kit provides the face detection service, which detects a user's facial features, including the face contour and angles, as well as positions of the eyebrows, eyes, nose, mouth, and ears on the face, and then returns detection results to your app.
In this codelab, you will create a demo app for face detection.
In this codelab, you will learn how to:
Click the following link to download the demo project of this codelab:
Download
Decompress the downloaded package to a local directory, for example, D:\mlkit-demo.
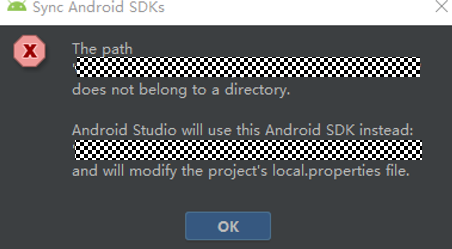

If the following information is displayed, the project is successfully synchronized.

If Unknown Device or No device is displayed, run the following commands in the CMD window to restart the ADB service:
adb kill-server
adb start-server

Add the camera permission for the app by adding the following statement to the AndroidManifest.xml file:
<!--todo step 1:  add authorization of camera -->
<uses-feature android:name="android.hardware.camera" /> <uses-permission android:name="android.permission.CAMERA"/>
Create a face analyzer for the app. To do this, add the following content to the createFaceAnalyzer method in the LiveImageDetectionActivity.java file:
// todo step 2: add on-device face analyzer
MLFaceAnalyzerSetting setting = new MLFaceAnalyzerSetting.Factory()
    .setFeatureType(MLFaceAnalyzerSetting.TYPE_FEATURES)
    .setPerformanceType(MLFaceAnalyzerSetting.TYPE_SPEED)
    .allowTracing()
    .create();
analyzer = MLAnalyzerFactory.getInstance().getFaceAnalyzer(setting);
analyzer.setTransactor(new FaceAnalyzerTransactor());
Add the function of starting the camera for the app. To do this, add the following content to the createLensEngine method in the LiveImageDetectionActivity.java file:
// todo step 3: add on-device lens engine
LensEngine mLensEngine = new LensEngine.Creator(context, analyzer)
    .setLensType(lensType)
    .applyDisplayDimension(1600, 1024)
    .applyFps(25.0f)
    .enableAutomaticFocus(true)
    .create();
// Implement other logic of the SurfaceView control by yourself.
SurfaceView mSurfaceView = findViewById(R.id.surface_view);
try {
    lensEngine.run(mSurfaceView.getHolder());
} catch (IOException e) {
    // Exception handling logic.
}
Add the function of displaying face detection results for the app. To do this, add the following content to the transactResult method in the FaceAnalyzerTransactor.java file:
// todo step 4: add on-device face graphic
public class FaceAnalyzerTransactor implements MLAnalyzer.MLTransactor<MLFace> {
    @Override
    public void transactResult(MLAnalyzer.Result<MLFace> results) {
        SparseArray<MLFace> items = results.getAnalyseList();
        // Determine detection result processing as required. Note that only the detection results are processed.
        // Other detection-related APIs provided by ML Kit cannot be called.
        MLFaceGraphic graphic = new MLFaceGraphic(mGraphicOverlay, items);
        mGraphicOverlay.add(graphic);
    }
    @Override
    public void destroy() {
        // Callback method used to release resources when the detection ends.
	}
}
Click  on the toolbar of Android Studio to run the app.
Focus the camera on the face. The face contour and facial landmarks are correctly displayed.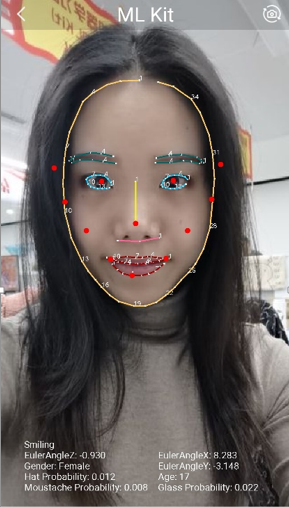
Well done. You have successfully completed this codelab and learned how to:
This project is only for demonstration. For details about the actual development process, please refer to the ML Kit Development Guide.