HUAWEI ML Kit provides the function of product visual search, which searches for the same or similar products in the pre-established product image library based on a product photo taken by a user and returns the IDs of those products and related information.
In this codelab, you will create a demo app for product visual search.
In this codelab, you will learn how to:
Click the following link to download the demo project of this codelab:
Download
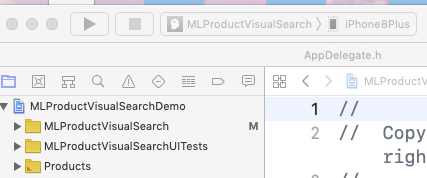
Decompress the downloaded package and use Xcode to open the demo.
A signing certificate is required for debugging on a real device. Therefore, ensure that the certificate matches the provisioning profile before debugging.
Click the demo project name under TARGETS, go to Signing & Capabilities > Debug, expand Signing, and select Automatically manage signing.
If you have a debug certificate and provisioning profile (corresponding to an enterprise account or an individual account), set Team and Bundle Identifier under Signing. If the certificate, provisioning profile, and bundle identifier do not match, an error will be displayed and you cannot debug on a real device. The following figure shows an incorrect example.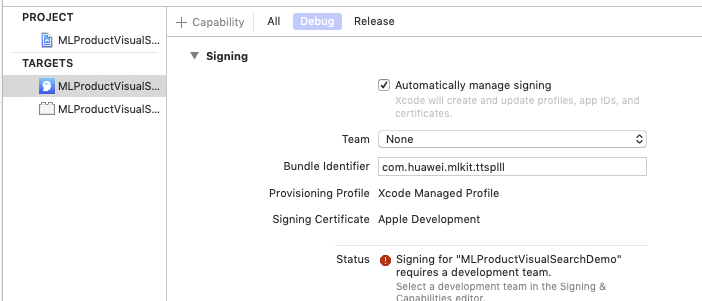
Does it mean you cannot debug without a certificate and provisioning profile? The answer is no.
As long as you have an Apple ID, you can debug for free.
Go to Xcode > Preferences. Click Accounts, then the plus sign (+) on the bottom. Select Apple ID and enter your account and password as prompted to add an Apple ID. Then you can configure the certificate under Signing.
Set Bundle Identifier (which is unique) and Team. Xcode will automatically generate a certificate and provisioning profile for you.
The following figure shows errors you may encounter.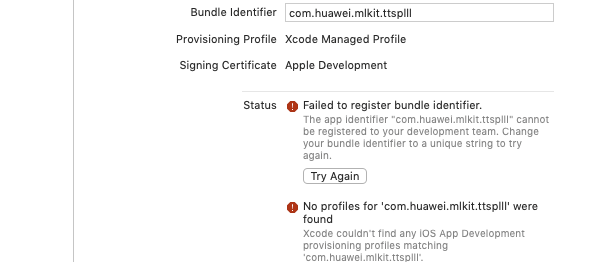
The possible cause is that the entered bundle identifier is already in use. In this case, you need to enter another bundle identifier.
Note that Apple sets an upper limit on the number of free debugging times. You can switch to another Apple ID if the current Apple ID's number of debugging times reaches the upper limit.
After the configuration, you can press Command + B to build the demo. If no error message is displayed, the build is successful.
If you have added the permissions, skip this step.
In the demo project directory, right-click the info.plist file, and choose Open As > Source Code from the shortcut menu. On the page displayed, add the following code:
<key>NSCameraUsageDescription</key>
<string>App needs your consent to access the camera</string>
<key>NSPhotoLibraryUsageDescription</key>
<string>App needs your consent to access the album</string>
Set detection parameters for the app.
These parameters are in the requestImage method in the MLDocumentViewController.m file.
MLRemoteProductVisionSearchAnalyzerSetting *setting = [[MLRemoteProductVisionSearchAnalyzerSetting alloc] init];
setting.maxResult = 20;
// setting.productSetId = @"**********";
[MLRemoteProductVisionSearchAnalyzer setRemoteProductVisionSearchAnalyzerSetting:setting];
Call the detection API and set the display of results in the requestImage method in the MLDocumentViewController.m file.
[MLRemoteProductVisionSearchAnalyzer asyncAnalyseImage:self.selectedImage addOnSuccessListener:^(MLProductVisionSearch * _Nonnull productModel) {
// Display the result after the successful detection.
            NSTimeInterval codeTime = -[startTime timeIntervalSinceNow];
            self->navView.timeShowLabel.text = [NSString stringWithFormat:@"%.4f S",codeTime];
            self->list.selectedImage = self.selectedImage;
            self->list.dataArr = productModel;
            if(productModel.productList&&productModel.productList.count>0){
                MLProductSearchView *searchView = [[MLProductSearchView alloc] initWithFrame:self.fullImageview.frame box:@[@(productModel.border.left_top_x),@(productModel.border.left_top_y),@(productModel.border.right_bottom_x),@(productModel.border.right_bottom_y)]];
                searchView.imageSize = [self calculateTextScale:self.selectedImage];
                [self.view addSubview:searchView];
                searchView.backgroundColor = [UIColor clearColor];
            }
            UIView *maskView = [[UIView alloc] initWithFrame:CGRectMake(0, 0, kMLDocumentDeviceWidth, kMLDocumentDeviceHeight)];
            maskView.backgroundColor = [UIColor colorWithWhite:0.0 alpha:0.3];
            maskView.userInteractionEnabled = YES;
            UITapGestureRecognizer *tapGesture = [[UITapGestureRecognizer alloc] initWithTarget:self action:@selector(tapClick:)];
            [maskView addGestureRecognizer:tapGesture];
            [self.view addSubview:maskView];
            [self.view addSubview:self->list];
            [self addImageView];

} addOnFailureListener:^(NSInteger errCode, NSString * _Nonnull errMsg) {
// Display the result after the successful detection.
        NSTimeInterval codeTime = -[startTime timeIntervalSinceNow];
        self->navView.timeShowLabel.text = [NSString stringWithFormat:@"%.4f S",codeTime];
    }]
Well done. You have successfully completed this codelab and learned how to:
This project is only for demonstration. For details about the actual development process, please refer to the following link: