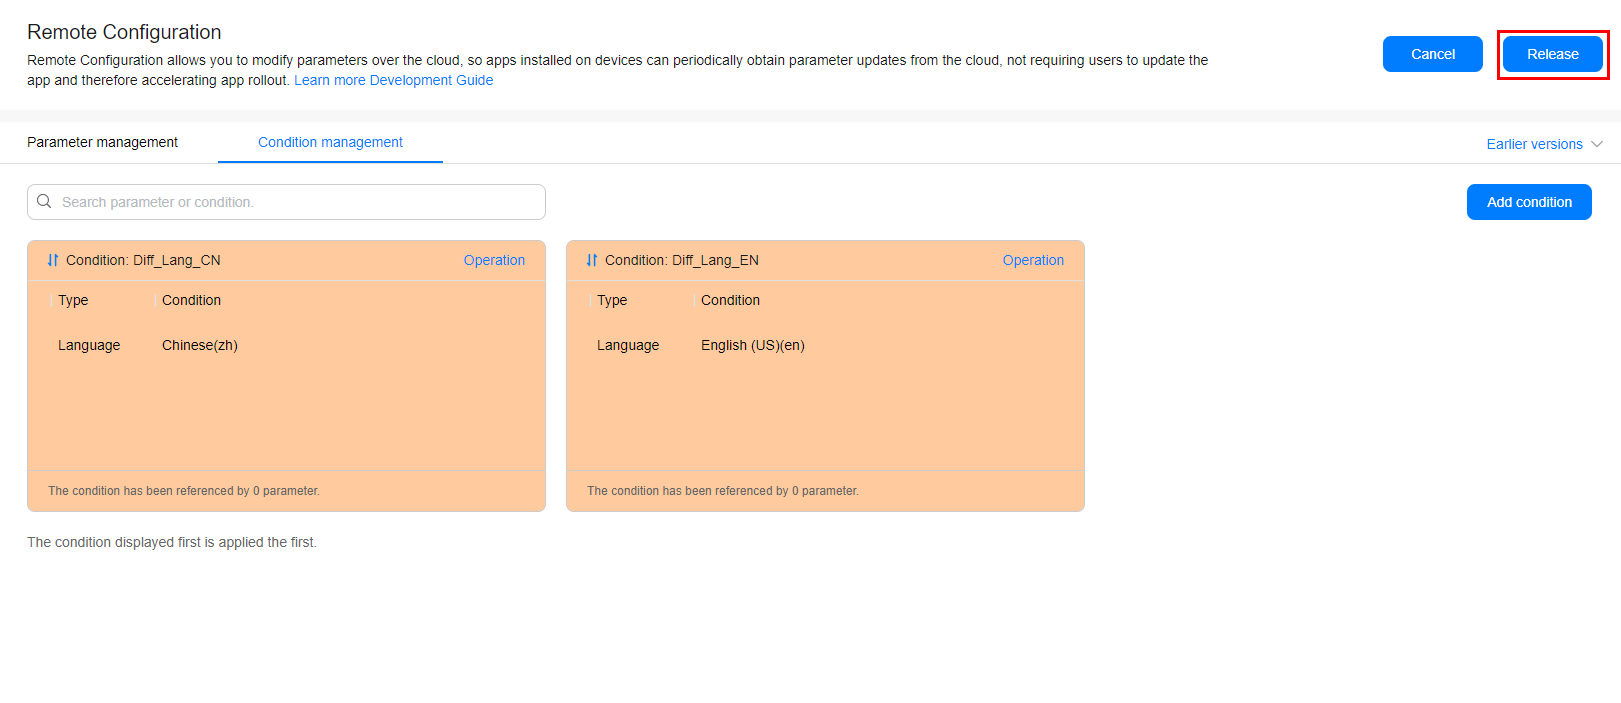
AppGallery Connect Remote Configuration allows you to manage parameters online. With the service, you can change the behavior and appearance of your app online without requiring users to update the app.
Remote Configuration provides cloud-based services, the console, and the client SDK. By integrating the client SDK, your app can periodically obtain parameter values delivered on the console to modify the app's behavior and appearance.
In this codelab, you will build an app that can use AppGallery Connect Remote Configuration to configure the app UI text. Your app will be able to:
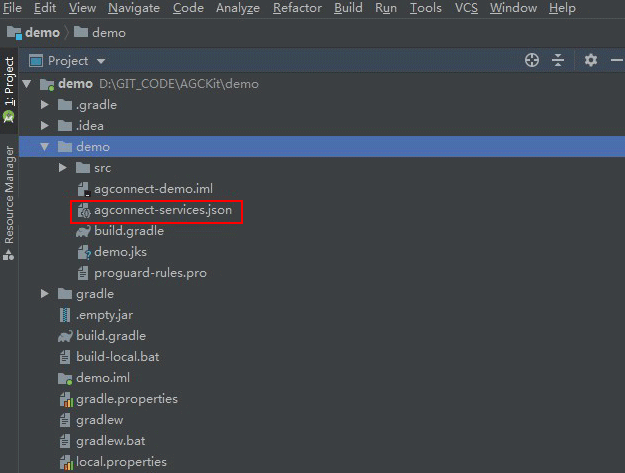
To integrate Remote Configuration of AppGallery Connect, you must complete the following preparations:
For details, please refer to Preparations for Intergration in AppGallery Connect.

If you are using Android Studio, you can integrate the Remote Configuration SDK by using the Maven repository into your Android Studio project before development.
// Configure the following address:
apply plugin: 'com.huawei.agconnect'

dependencies {
        // Configure the following address.
        implementation 'com.huawei.agconnect:agconnect-remoteconfig:1.4.1.300'
}

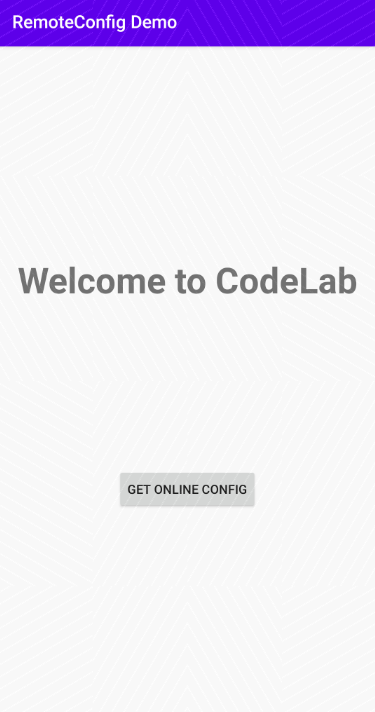
In this codelab, you can create a UI layout in the Android Studio project, design the layout based on the following figure, and add a simple text, and a button for obtaining parameters from Remote Configuration.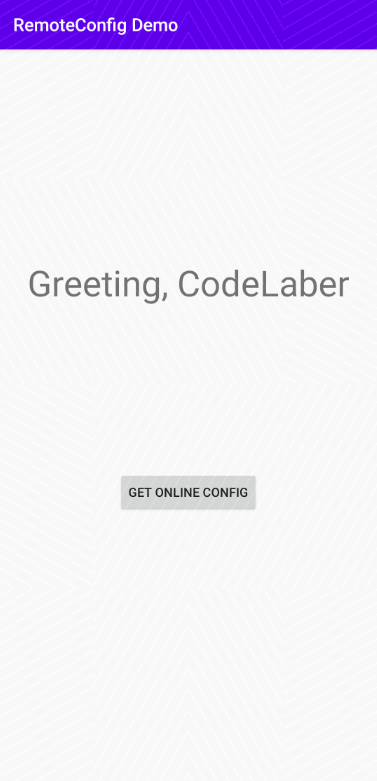
<?xml version="1.0" encoding="utf-8"?>
<androidx.constraintlayout.widget.ConstraintLayout xmlns:android="http://schemas.android.com/apk/res/android"
    xmlns:app="http://schemas.android.com/apk/res-auto"
    xmlns:tools="http://schemas.android.com/tools"
    android:layout_width="match_parent"
    android:layout_height="match_parent"
    tools:context=".MainActivity">

    <TextView
        android:id="@+id/greeting"
        android:layout_width="wrap_content"
        android:layout_height="wrap_content"
        android:text="Greeting CodeLaber"
        android:textSize="30sp"
        app:layout_constraintBottom_toBottomOf="parent"
        app:layout_constraintLeft_toLeftOf="parent"
        app:layout_constraintRight_toRightOf="parent"
        app:layout_constraintTop_toTopOf="parent"
        app:layout_constraintVertical_bias="0.3" />

    <Button
        android:id="@+id/fetch_button"
        android:layout_width="wrap_content"
        android:layout_height="wrap_content"
        android:text="Get Online config"
        app:layout_constraintBottom_toBottomOf="parent"
        app:layout_constraintHorizontal_bias="0.5"
        app:layout_constraintLeft_toLeftOf="parent"
        app:layout_constraintRight_toRightOf="parent"
        app:layout_constraintTop_toTopOf="parent"
        app:layout_constraintVertical_bias="0.6" />

</androidx.constraintlayout.widget.ConstraintLayout>
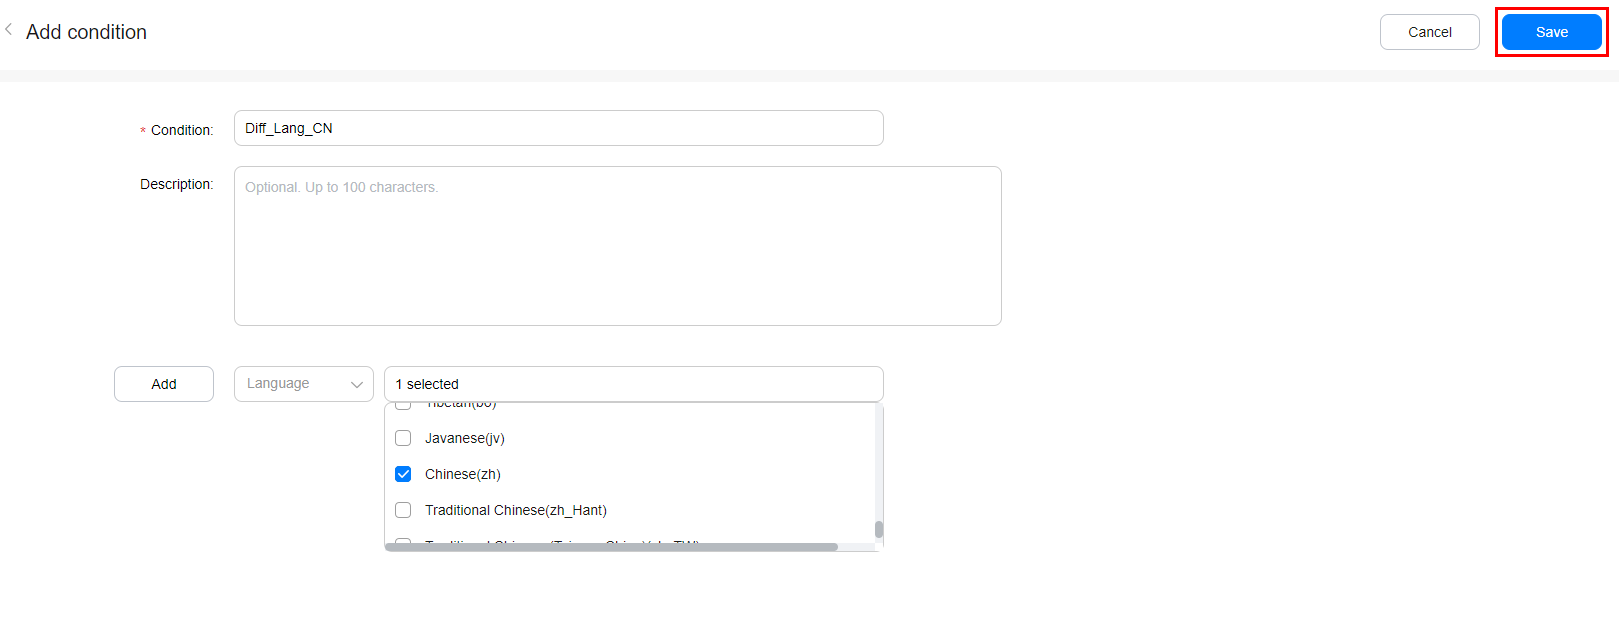
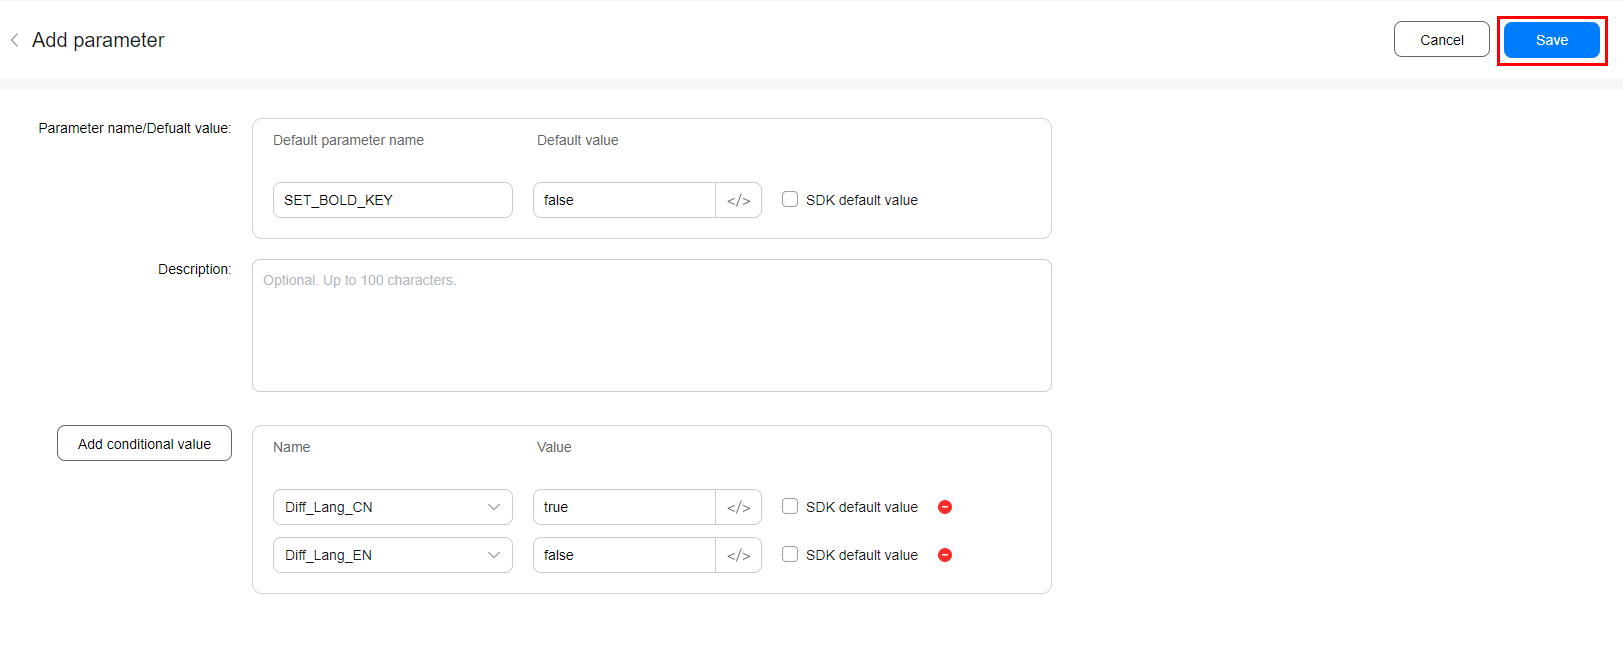
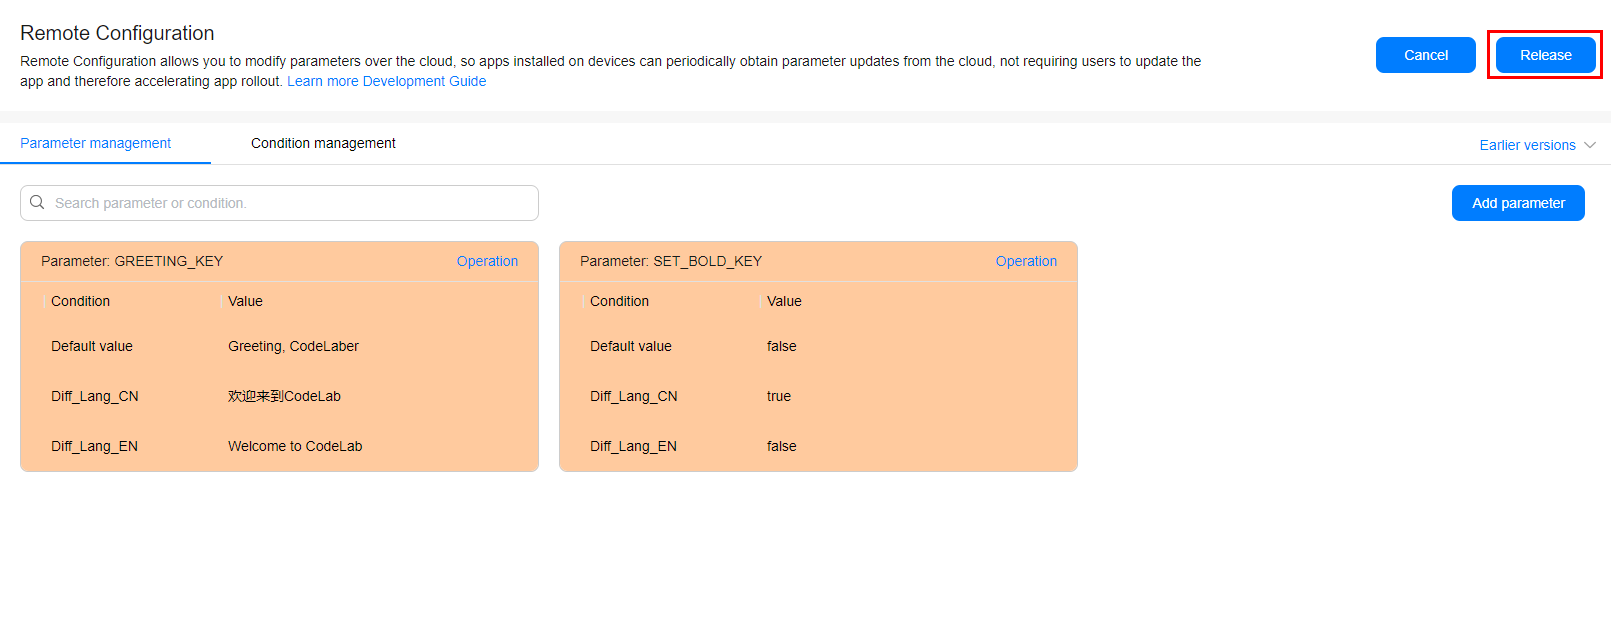
As you need to implement functions including localizing the greeting, and changing the boldfaced status, the following parameters need to be designed:
When an app is launched, it loads default parameter values. In this codelab, you will use in-app default parameter values. Create an XML file in the res/xml directory and set the default value for each parameter.
<?xml version="1.0" encoding="utf-8"?>
<remoteconfig>
    <value key="GREETING_KEY">Greeting, CodeLaber</value>
    <value key="SET_BOLD_KEY">false</value>
</remoteconfig>

import androidx.appcompat.app.AppCompatActivity;
import android.graphics.Typeface;
import android.os.Bundle;
import android.view.View;
import android.widget.Button;
import android.widget.TextView;
import com.huawei.agconnect.remoteconfig.AGConnectConfig;
import com.huawei.agconnect.remoteconfig.ConfigValues;
import com.huawei.hmf.tasks.OnFailureListener;
import com.huawei.hmf.tasks.OnSuccessListener;
private static final String GREETING_KEY = "GREETING_KEY";
private static final String SET_BOLD_KEY = "SET_BOLD_KEY";
private AGConnectConfig config;
private TextView textView;
setContentView(R.layout.activity_main);
textView = findViewById(R.id.greeting);
Button button = findViewById(R.id.fetch_button);
config = AGConnectConfig.getInstance();
config = AGConnectConfig.getInstance();
config.applyDefault(R.xml.remote_config);
textView.setText(config.getValueAsString(GREETING_KEY));
Boolean isBold = config.getValueAsBoolean(SET_BOLD_KEY);
if (isBold){
textView.setTypeface(Typeface.defaultFromStyle(Typeface.BOLD));
}
button.setOnClickListener(new View.OnClickListener() {
@Override
public void onClick(View view) {
    fetchAndApply();
}
});
The fetchAndApply method is defined as follows:
private void fetchAndApply(){
    config.fetch(0).addOnSuccessListener(new OnSuccessListener<ConfigValues>() {
        @Override
        public void onSuccess(ConfigValues configValues) {
            // Apply Network Config to Current Config
            config.apply(configValues);
            updateUI();
        }
    }).addOnFailureListener(new OnFailureListener() {
        @Override
        public void onFailure(Exception e) {
            textView.setText("fetch setting failed: " + e.getMessage());
        }
    });
}
private void updateUI(){
String text = config.getValueAsString(GREETING_KEY);
Boolean isBold = config.getValueAsBoolean(SET_BOLD_KEY);
textView.setText(text);
if (isBold){
    textView.setTypeface(Typeface.defaultFromStyle(Typeface.BOLD));
}
}
Well done. You have successfully built an app that integrates Remote Configuration of AppGallery Connect and learned how to:
Download the demo source code used in this codelab from the following address: