The App Linking service allows you to create links that work across multiple platforms including Android, iOS, and web. You can send promotion information to users with links of App Linking, or users can share links of App Linking dynamically generated in your app. Anyone who receives a link can tap it to access the linked content.
When a user taps a link of App Linking:
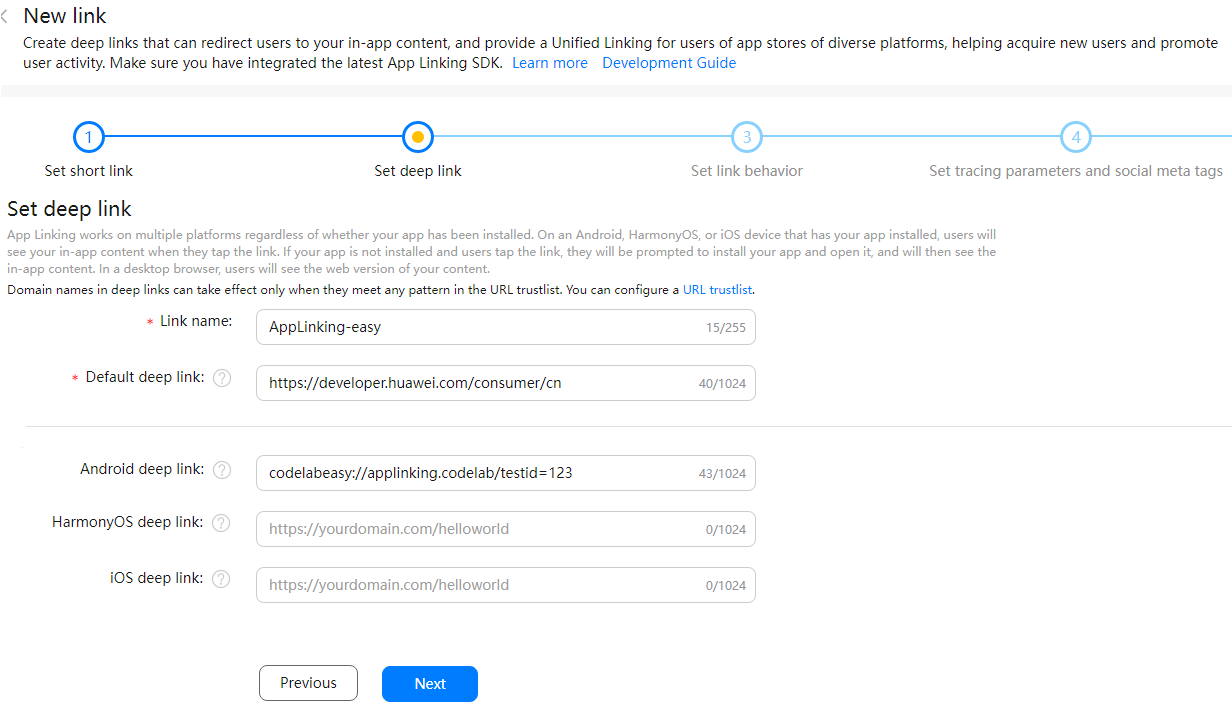
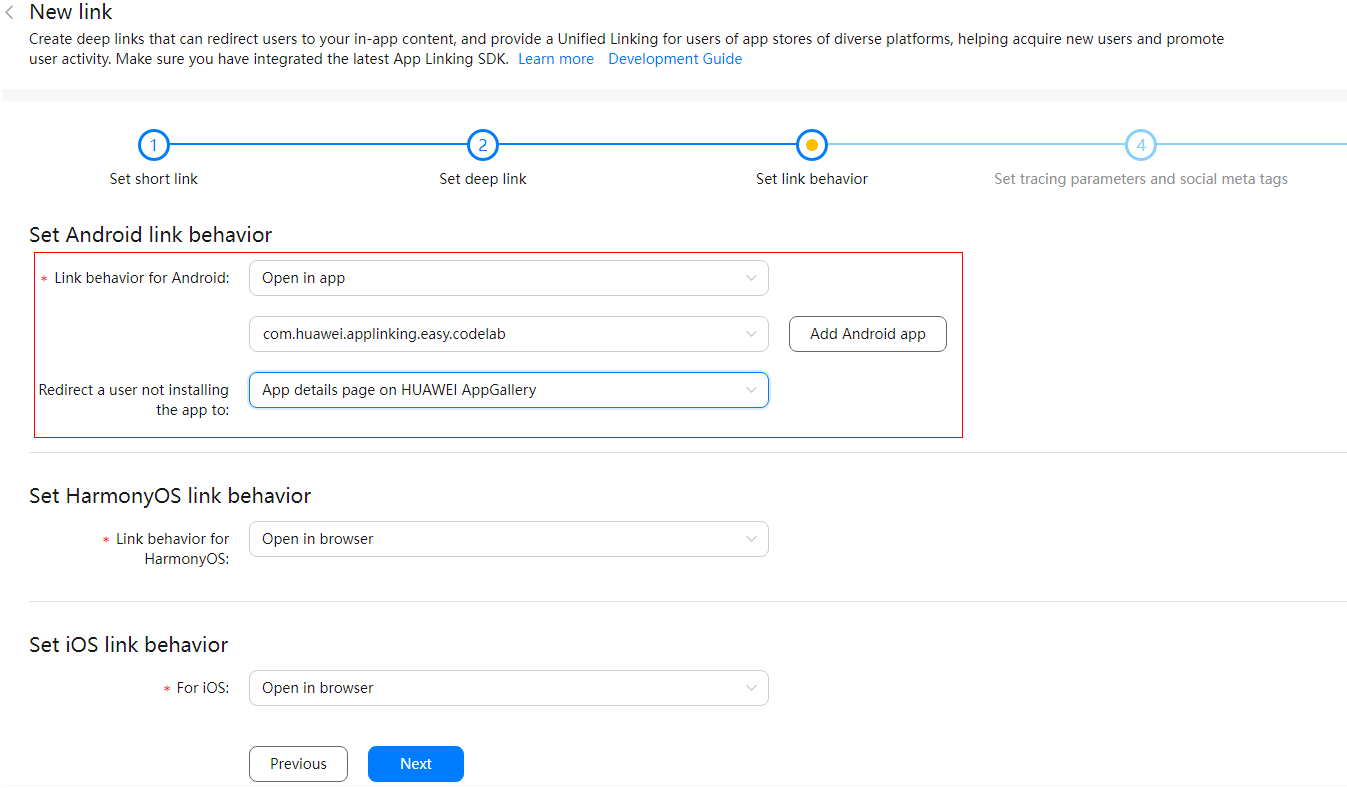
In this codelab, you will build an Android app that integrates App Linking, and create a link of App Linking in AppGallery Connect, through which your app will be launched.
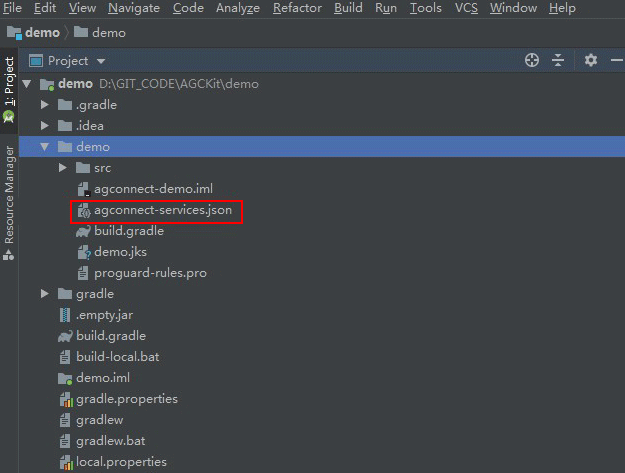
To integrate App Linking, you must complete the following preparations:

If you are using Android Studio, you can integrate SDKs by using the Maven repository into your Android Studio project before development.

// Configure the following address:
apply plugin: 'com.huawei.agconnect'

dependencies {
    // Configure the following addresses:
    implementation 'com.huawei.agconnect:agconnect-applinking:1.6.2.300'
    implementation 'com.huawei.hms:hianalytics:6.3.2.300'
}

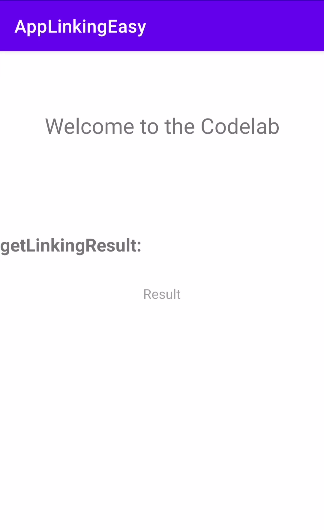
In this codelab, you can create a page in your Android Studio project and design the UI according to the following figure. On the page, a link of App Linking can be received and displayed.
<?xml version="1.0" encoding="utf-8"?>
<androidx.constraintlayout.widget.ConstraintLayout xmlns:android="http://schemas.android.com/apk/res/android"
    xmlns:app="http://schemas.android.com/apk/res-auto"
    xmlns:tools="http://schemas.android.com/tools"
    android:layout_width="match_parent"
    android:layout_height="match_parent"
    tools:context=".MainActivity">

    <TextView
        android:layout_width="wrap_content"
        android:layout_height="wrap_content"
        android:text="Welcome to the Codelab"
        android:textSize="24dp"
        android:textAlignment="center"
        app:layout_constraintBottom_toBottomOf="parent"
        app:layout_constraintLeft_toLeftOf="parent"
        app:layout_constraintRight_toRightOf="parent"
        app:layout_constraintTop_toTopOf="parent"
        app:layout_constraintVertical_bias="0.1" />

    <TextView
        android:layout_width="match_parent"
        android:layout_height="wrap_content"
        android:text="getLinkingResult:"
        android:textSize="20sp"
        android:textAllCaps="false"
        android:textStyle="bold"
        app:layout_constraintBottom_toBottomOf="parent"
        app:layout_constraintTop_toTopOf="parent"
        app:layout_constraintVertical_bias="0.3" />

    <TextView
        android:id="@+id/result_text"
        android:layout_width="match_parent"
        android:layout_height="50dp"
        android:textSize="15dp"
        android:hint="Result"
        android:textAlignment="center"
        app:layout_constraintBottom_toBottomOf="parent"
        app:layout_constraintTop_toTopOf="parent"
        app:layout_constraintVertical_bias="0.4" />

</androidx.constraintlayout.widget.ConstraintLayout>


<intent-filter>
    <action android:name="android.intent.action.VIEW" />
    <category android:name="android.intent.category.DEFAULT" />
    <category android:name="android.intent.category.BROWSABLE" />
    <data android:host="applinking.codelab" android:scheme="codelabeasy" />
</intent-filter>
AGConnectAppLinking.getInstance().getAppLinking(this).addOnSuccessListener(resolvedLinkData -> {
	Uri deepLink = null;
	if (resolvedLinkData!= null) {
		deepLink = resolvedLinkData.getDeepLink();
		Log.i("AppLinkingCodeLab", "Open From App Linking: " + deepLink.toString());
		TextView resultText = findViewById(R.id.result_text);
		resultText.setText(deepLink.toString());
                    // Perform the following processing code for the deep link.
	}
});

|
|
Well done. You have successfully built an app that integrates App Linking of AppGallery Connect and learned how to: