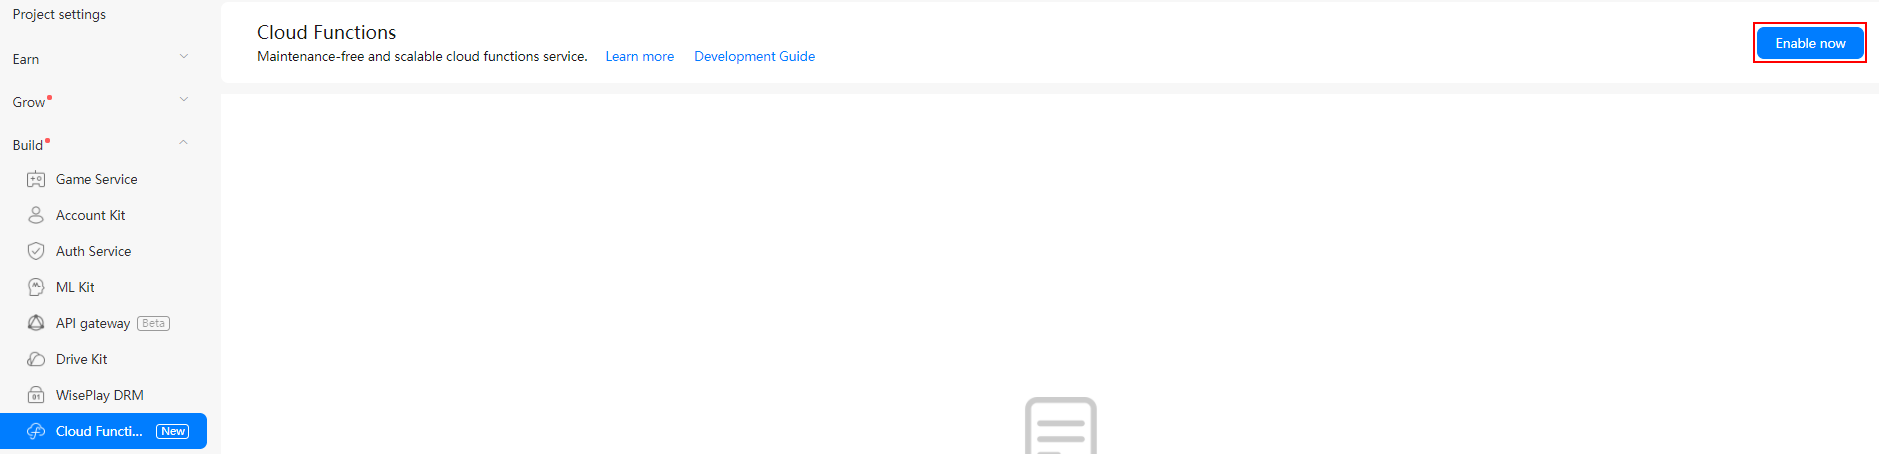
Cloud Functions enables serverless computing. It provides the Function as a Service (FaaS) capabilities to simplify app development and O&M so your functions can be implemented more easily and your service capabilities can be built more quickly.
In this codelab, you can build a function that can interact with your app using Cloud Functions. To do so, you will need to:
An iPhone or a simulator for testing
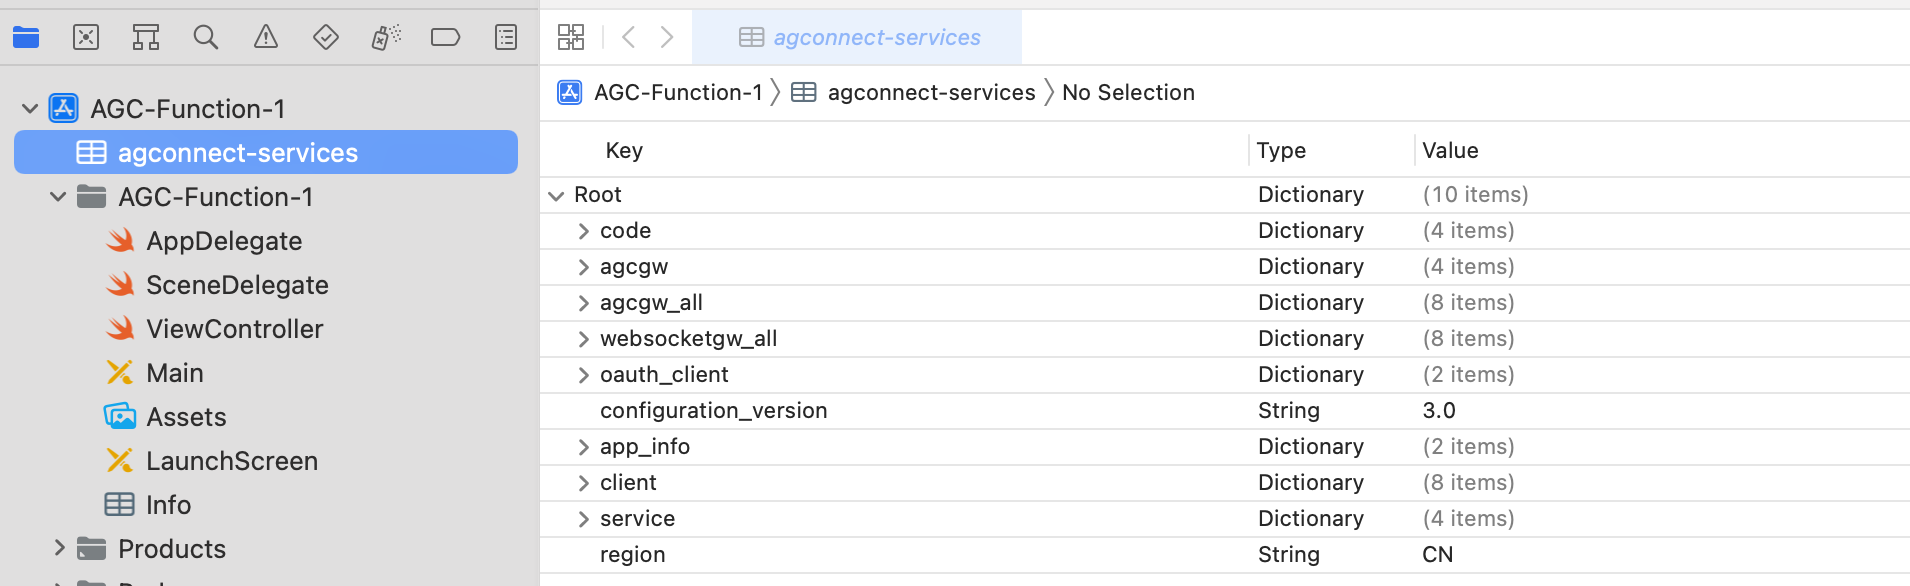
To integrate Cloud Functions of AppGallery Connect, you must complete the following preparations:
You can use CocoaPods to integrate the Cloud Functions SDK in Xcode.
cd project-directory
pod init
target 'AGC-Function-1' do
   pod 'AGConnectFunction'
end
pod install
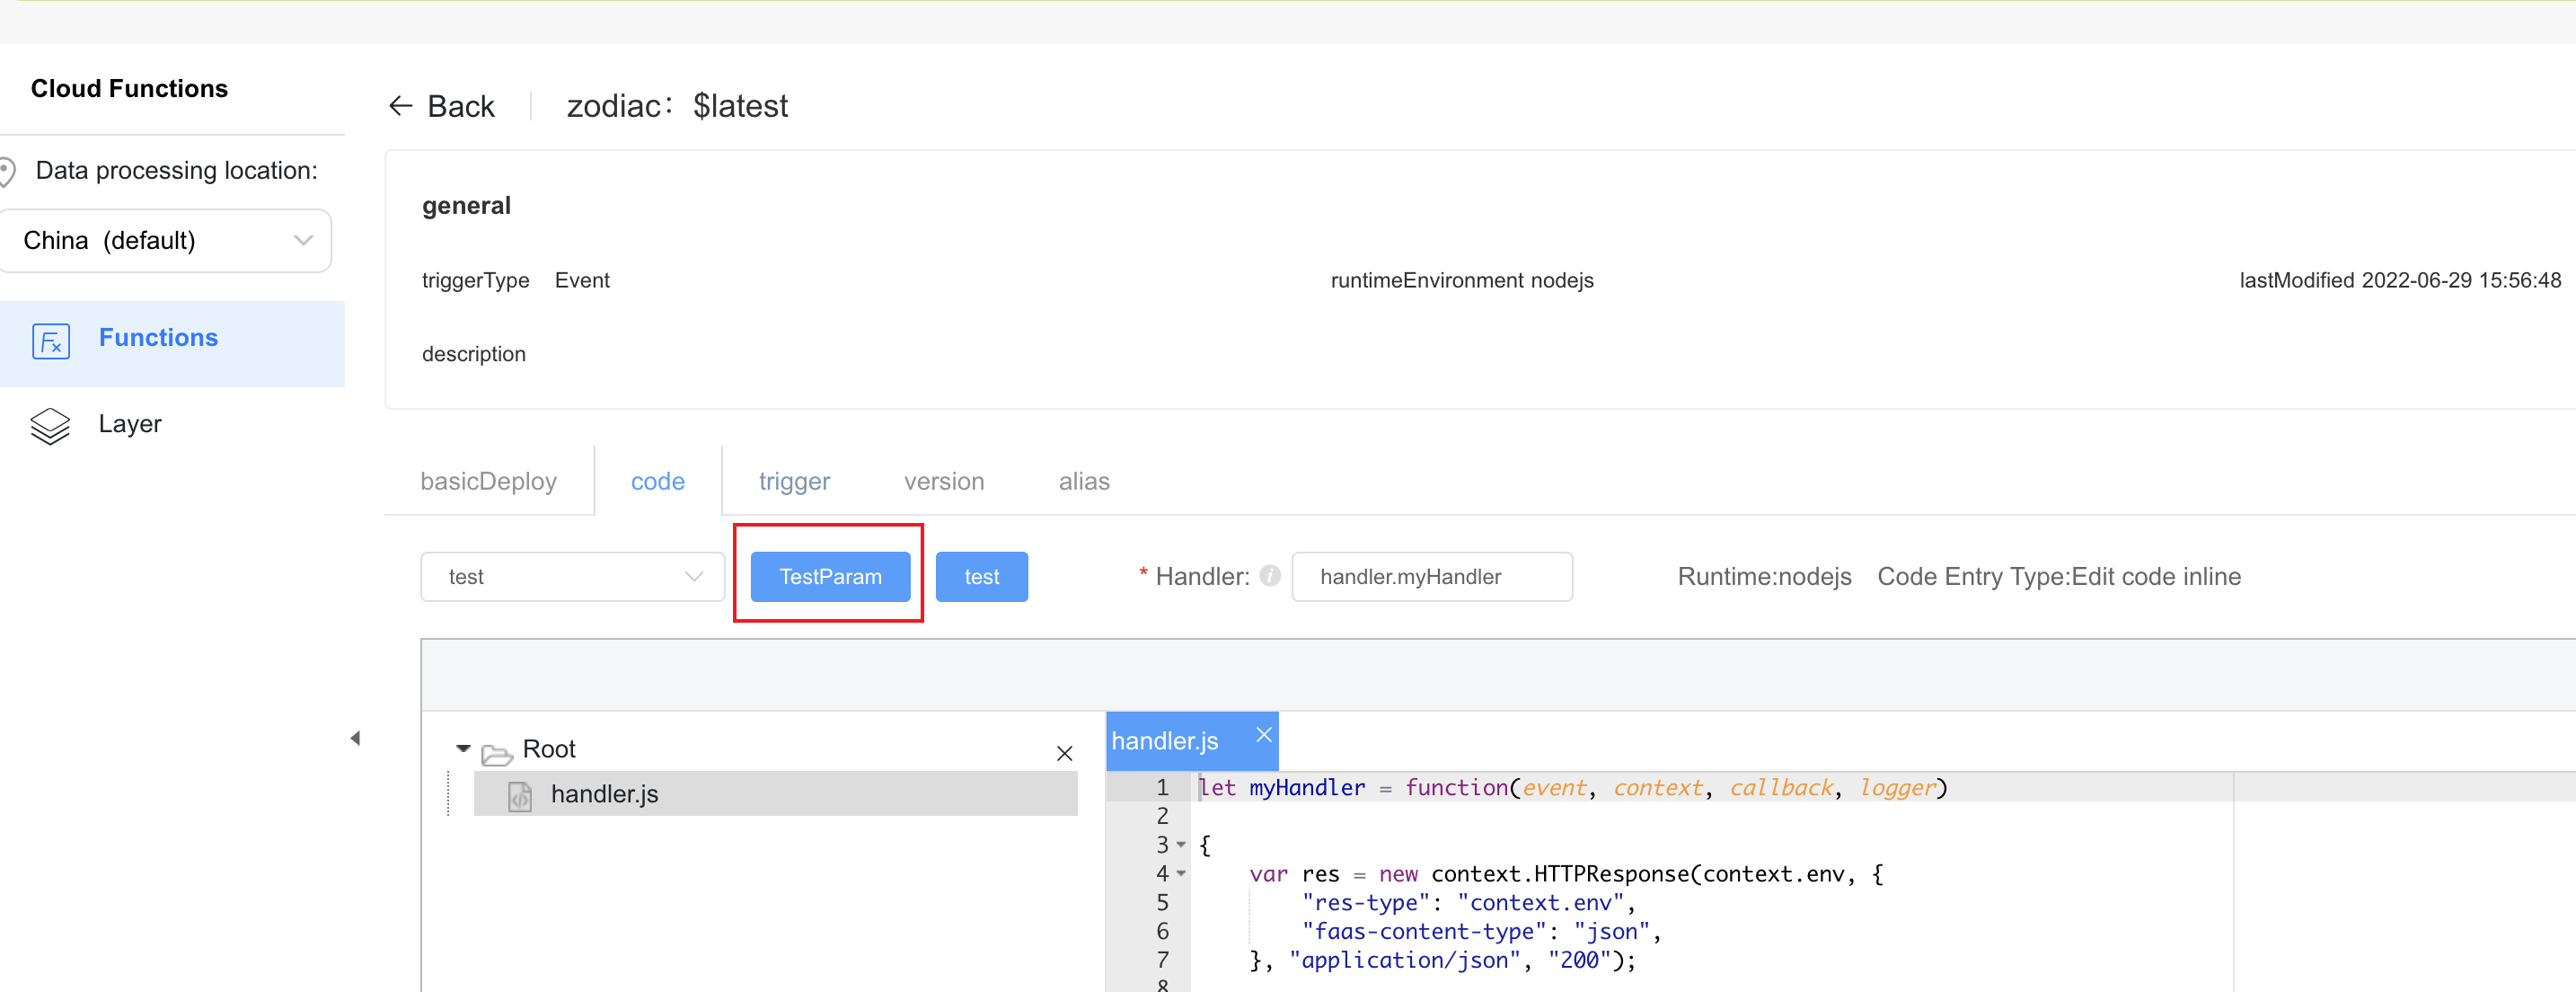
The following figure shows the result after installation.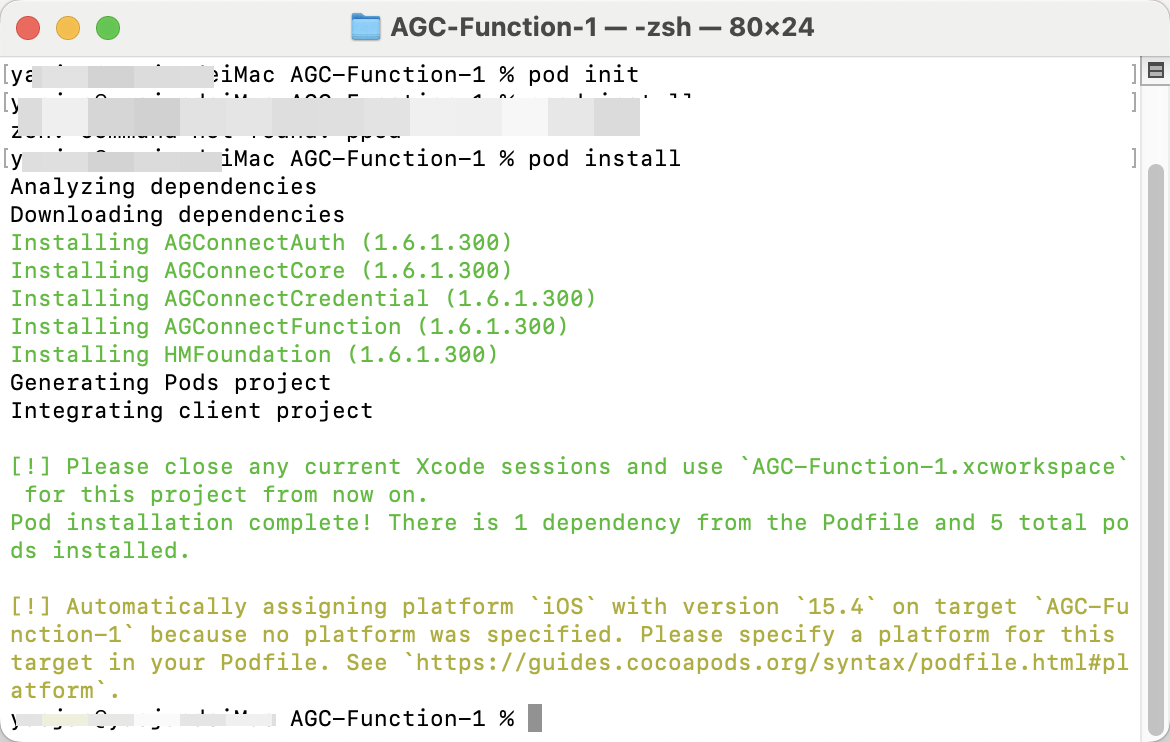

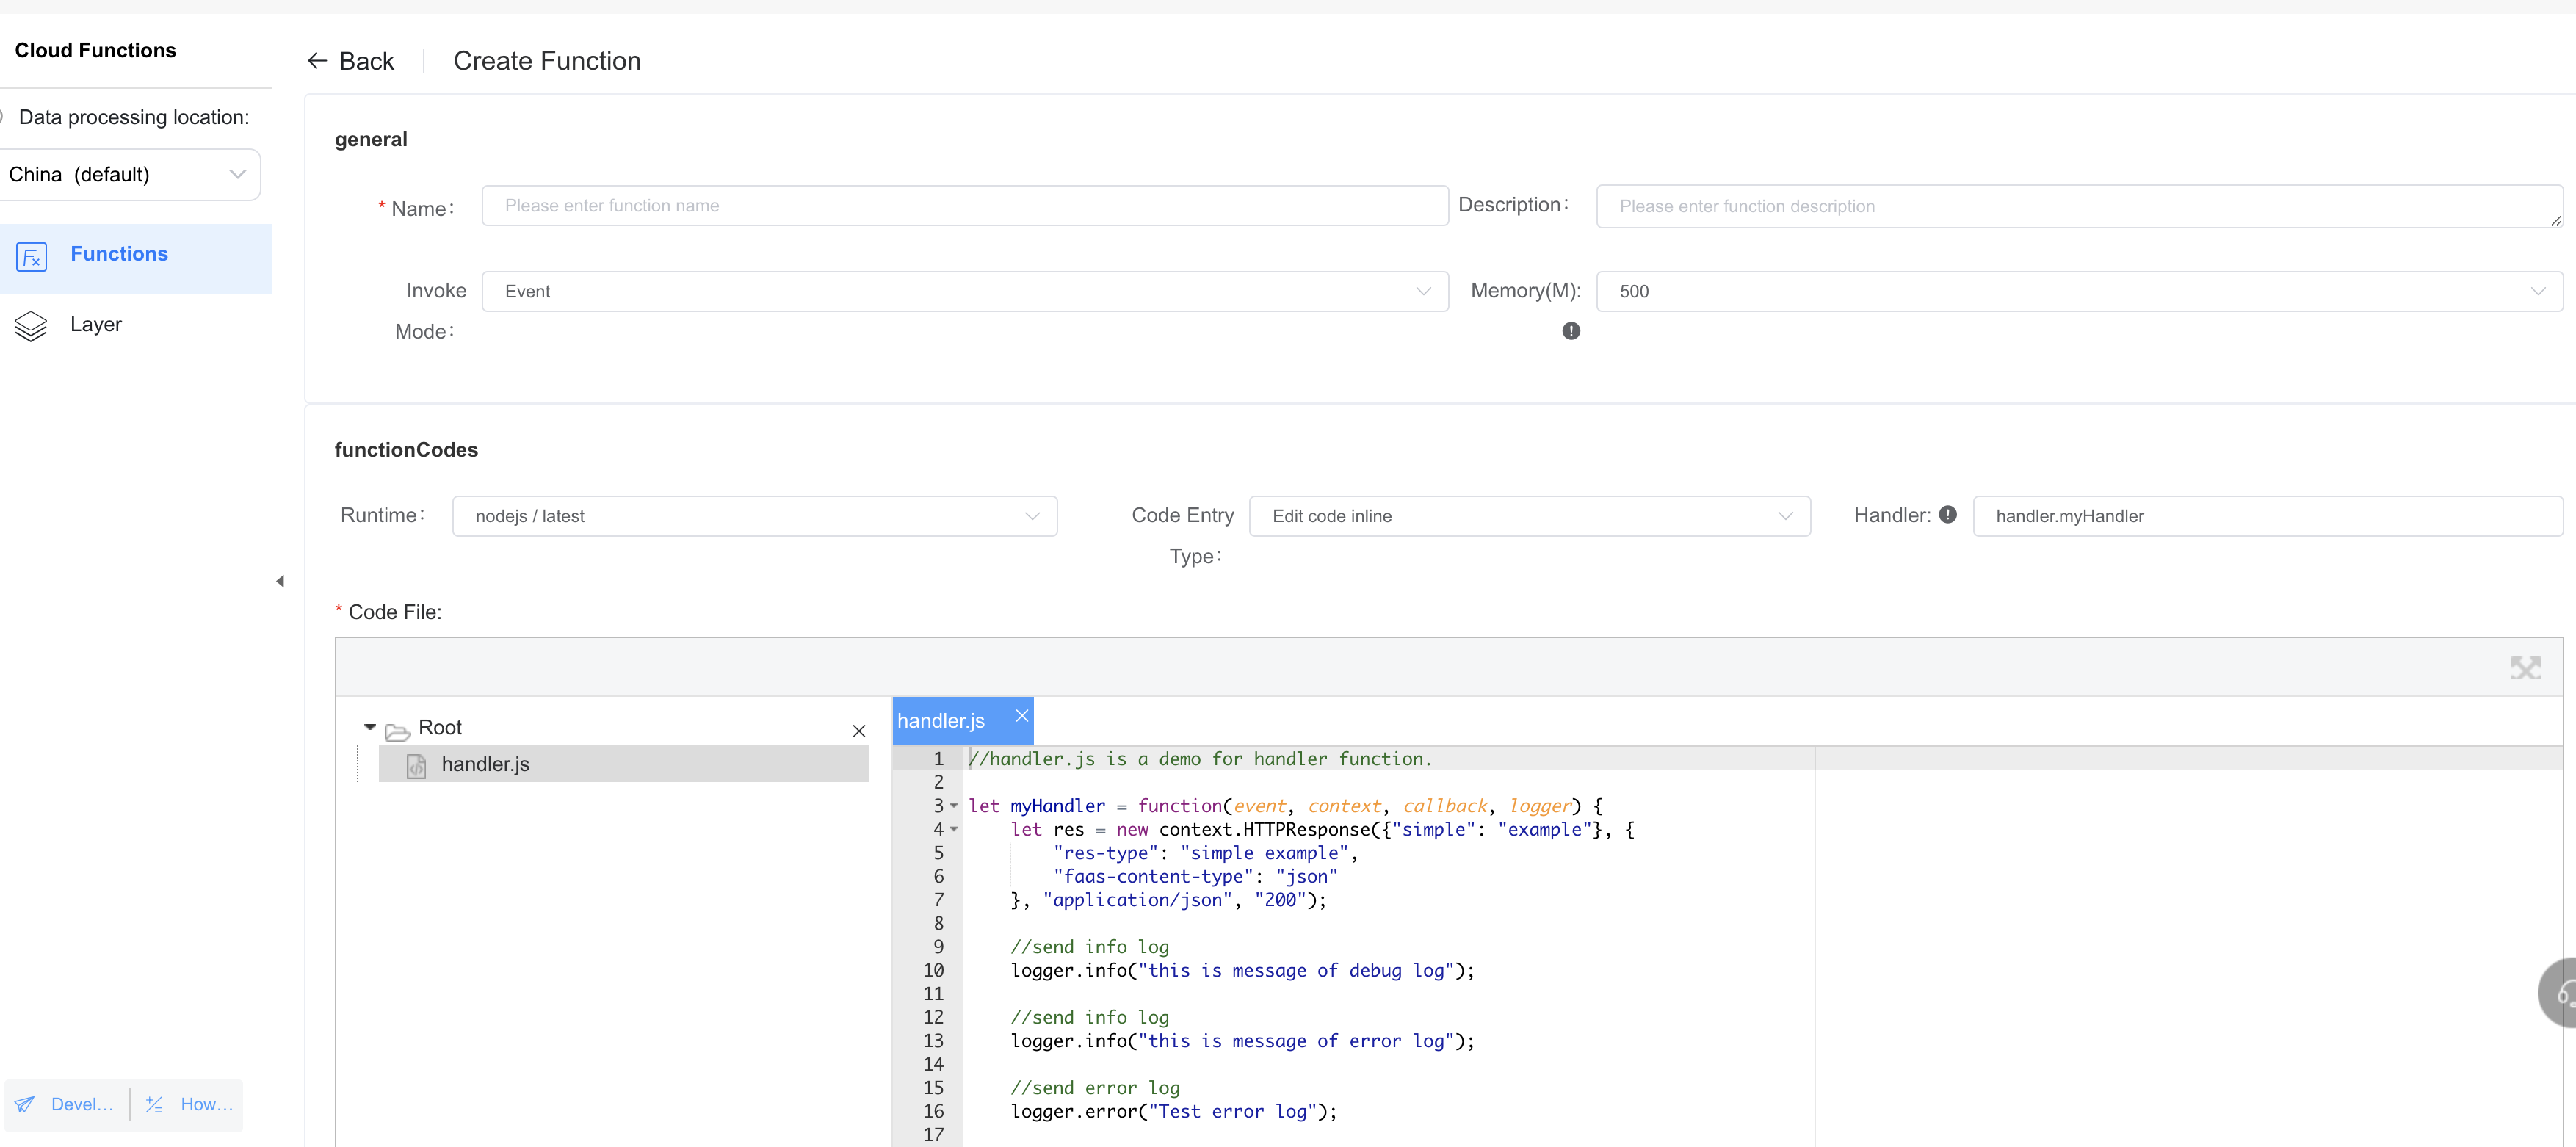
let myHandler = function(event, context, callback, logger)
{
   var res = new context.HTTPResponse(context.env, {
      "res-type": "context.env",
      "faas-content-type": "json",
   }, "application/json", "200");
   var year;
   if (event.body) {
      var _body = JSON.parse(event.body);
      year = _body.year;
   } else {
      year = event.year;
   }
   var body = {
      result: ''
   };
   body.result = animal(year);
   res.body = body;
   context.callback(res);

   function animal(inputYear) {
      var resultString;
      if (!isNumber(inputYear)) {
         resultString = "input is not a number";
      } else {
         var remainder = inputYear % 12;
         switch (remainder) {
            case 0:
               resultString = "Monkey";
               break;
            case 1:
               resultString = "Chicken";
               break;
            case 2:
               resultString = "Dog";
               break;
            case 3:
               resultString = "Pig";
               break;
            case 4:
               resultString = "Mouse";
               break;
            case 5:
               resultString = "Cow";
               break;
            case 6:
               resultString = "Tiger";
               break;
            case 7:
               resultString = "Rabbit";
            case 8:
               resultString = "Dragon";
               break;
            case 9:
               resultString = "Snake";
               break;
            case 10:
               resultString = "Horse";
               break;
            case 11:
               resultString = "Sheep";
               break;
            default:
               resultString = "No symbolic Animal";
         }
      }
      return resultString;
   }

   function isNumber(input) {
      if (parseInt(input).toString == "NaN") {
         return false;
      } else {
         return true;
      }
   }
};
module.exports.myHandler = myHandler;
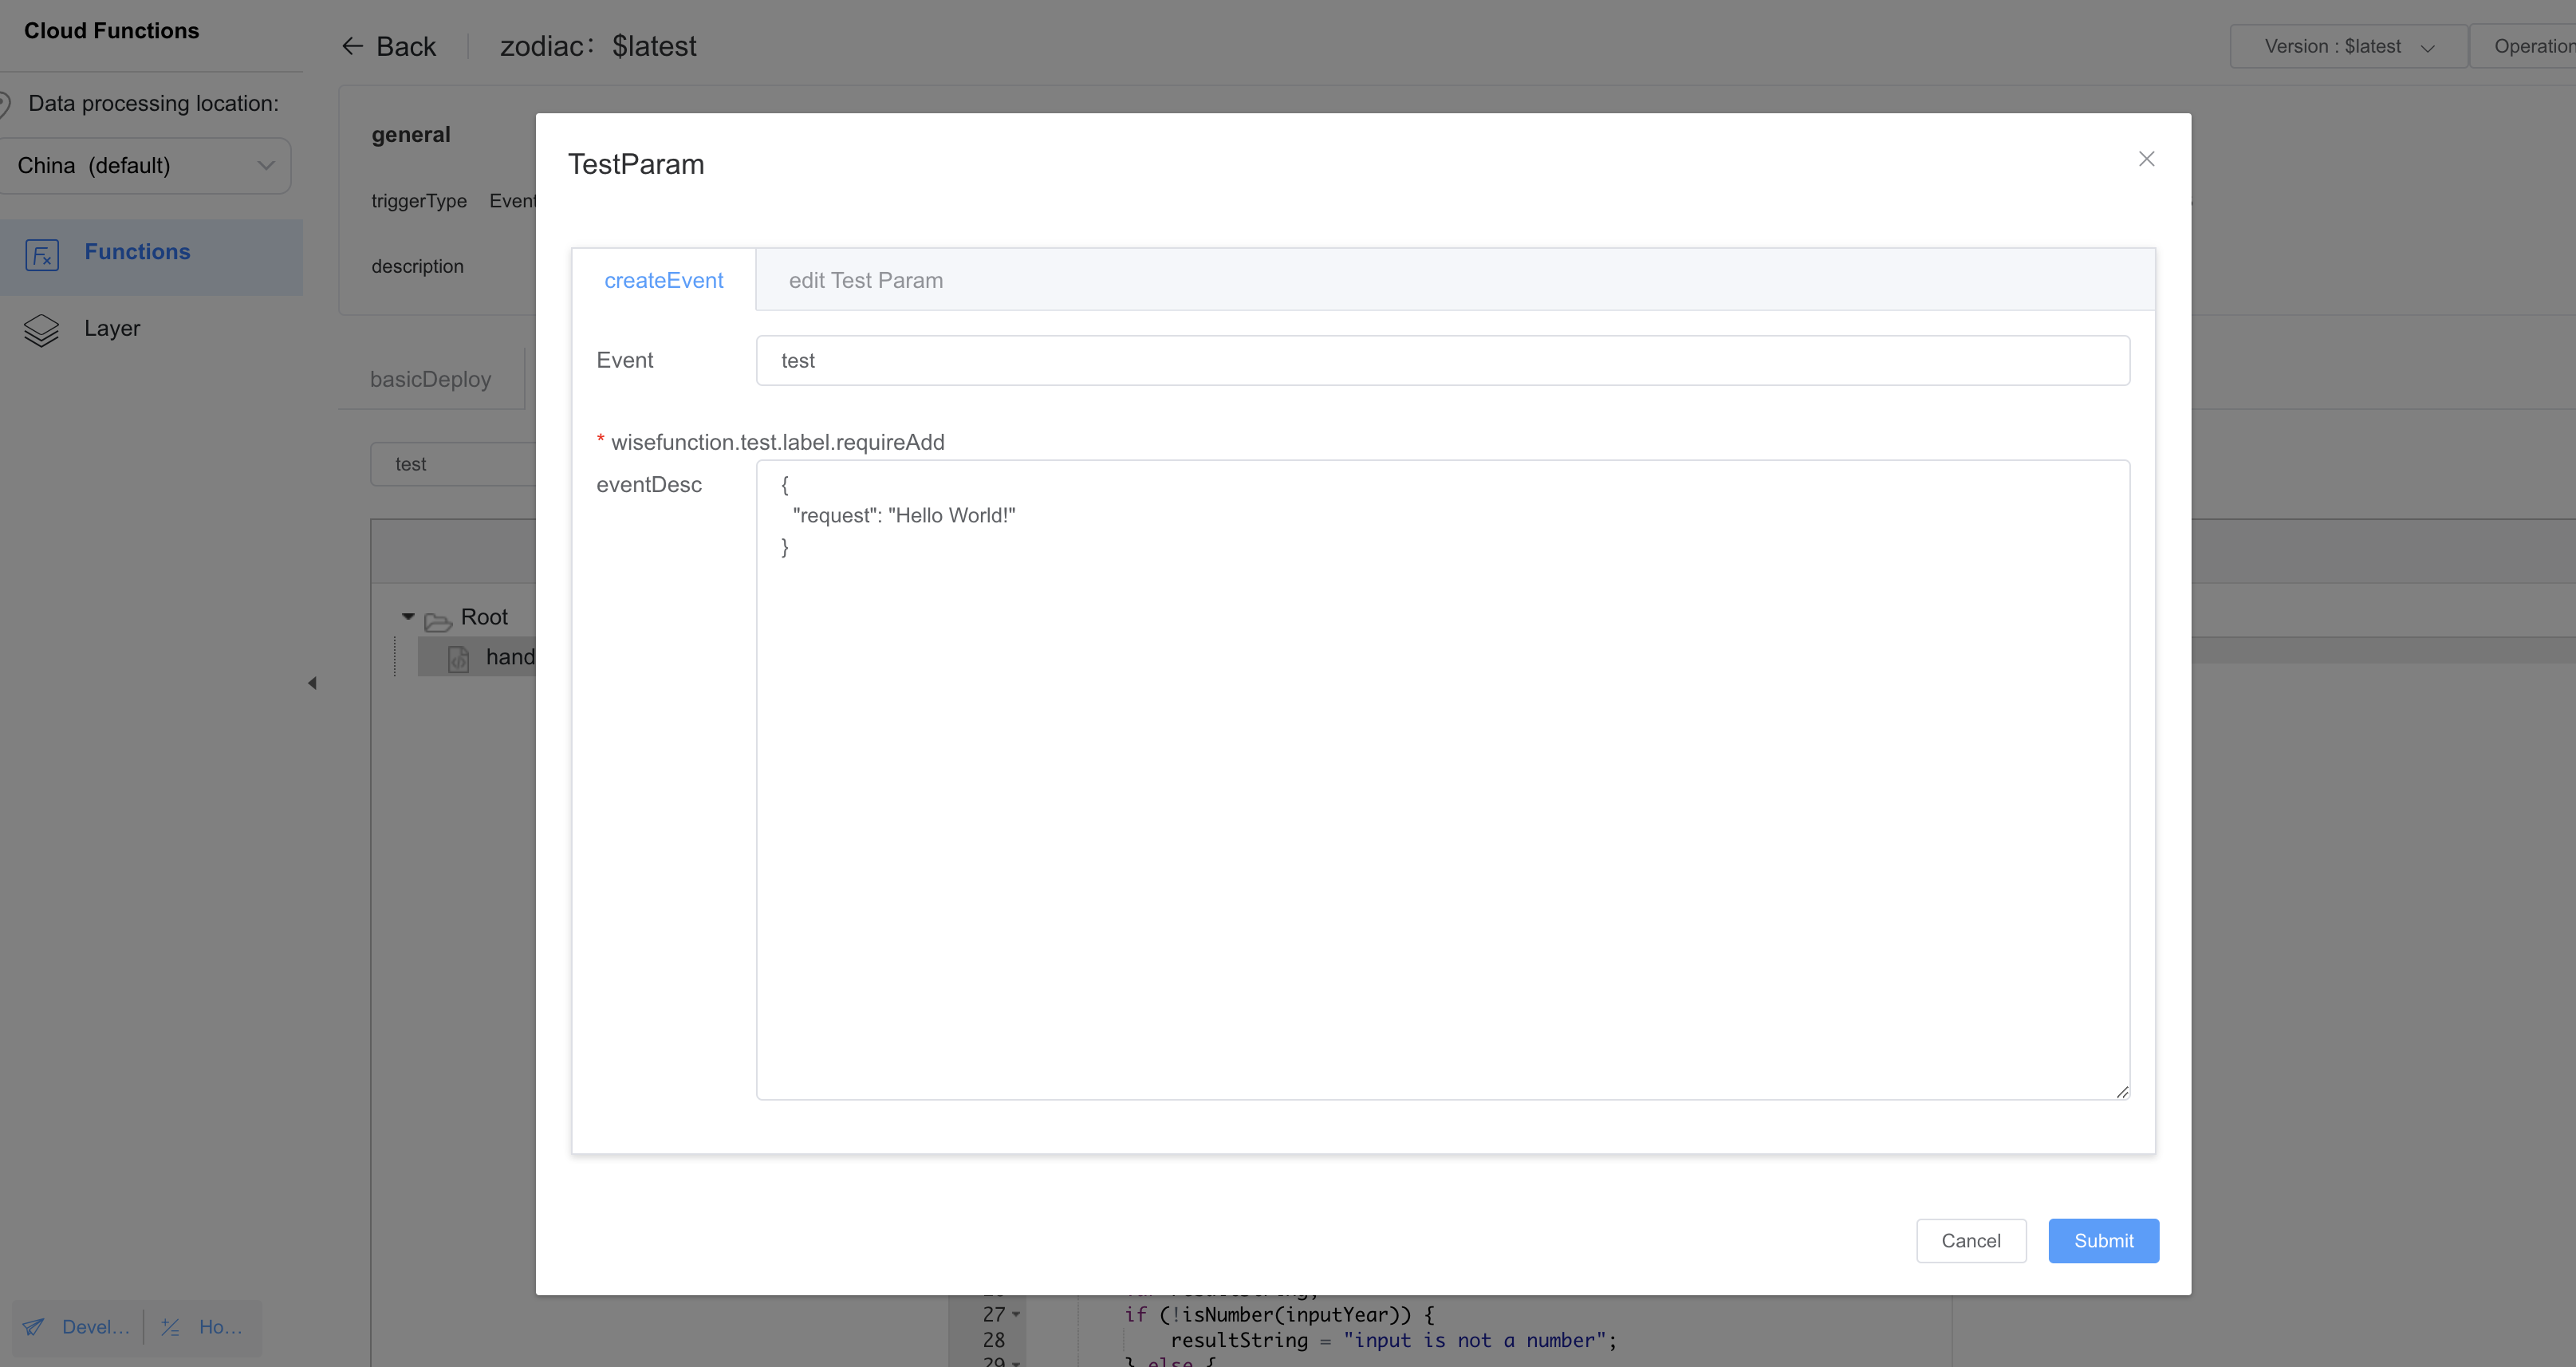
{
"year": 2020
}

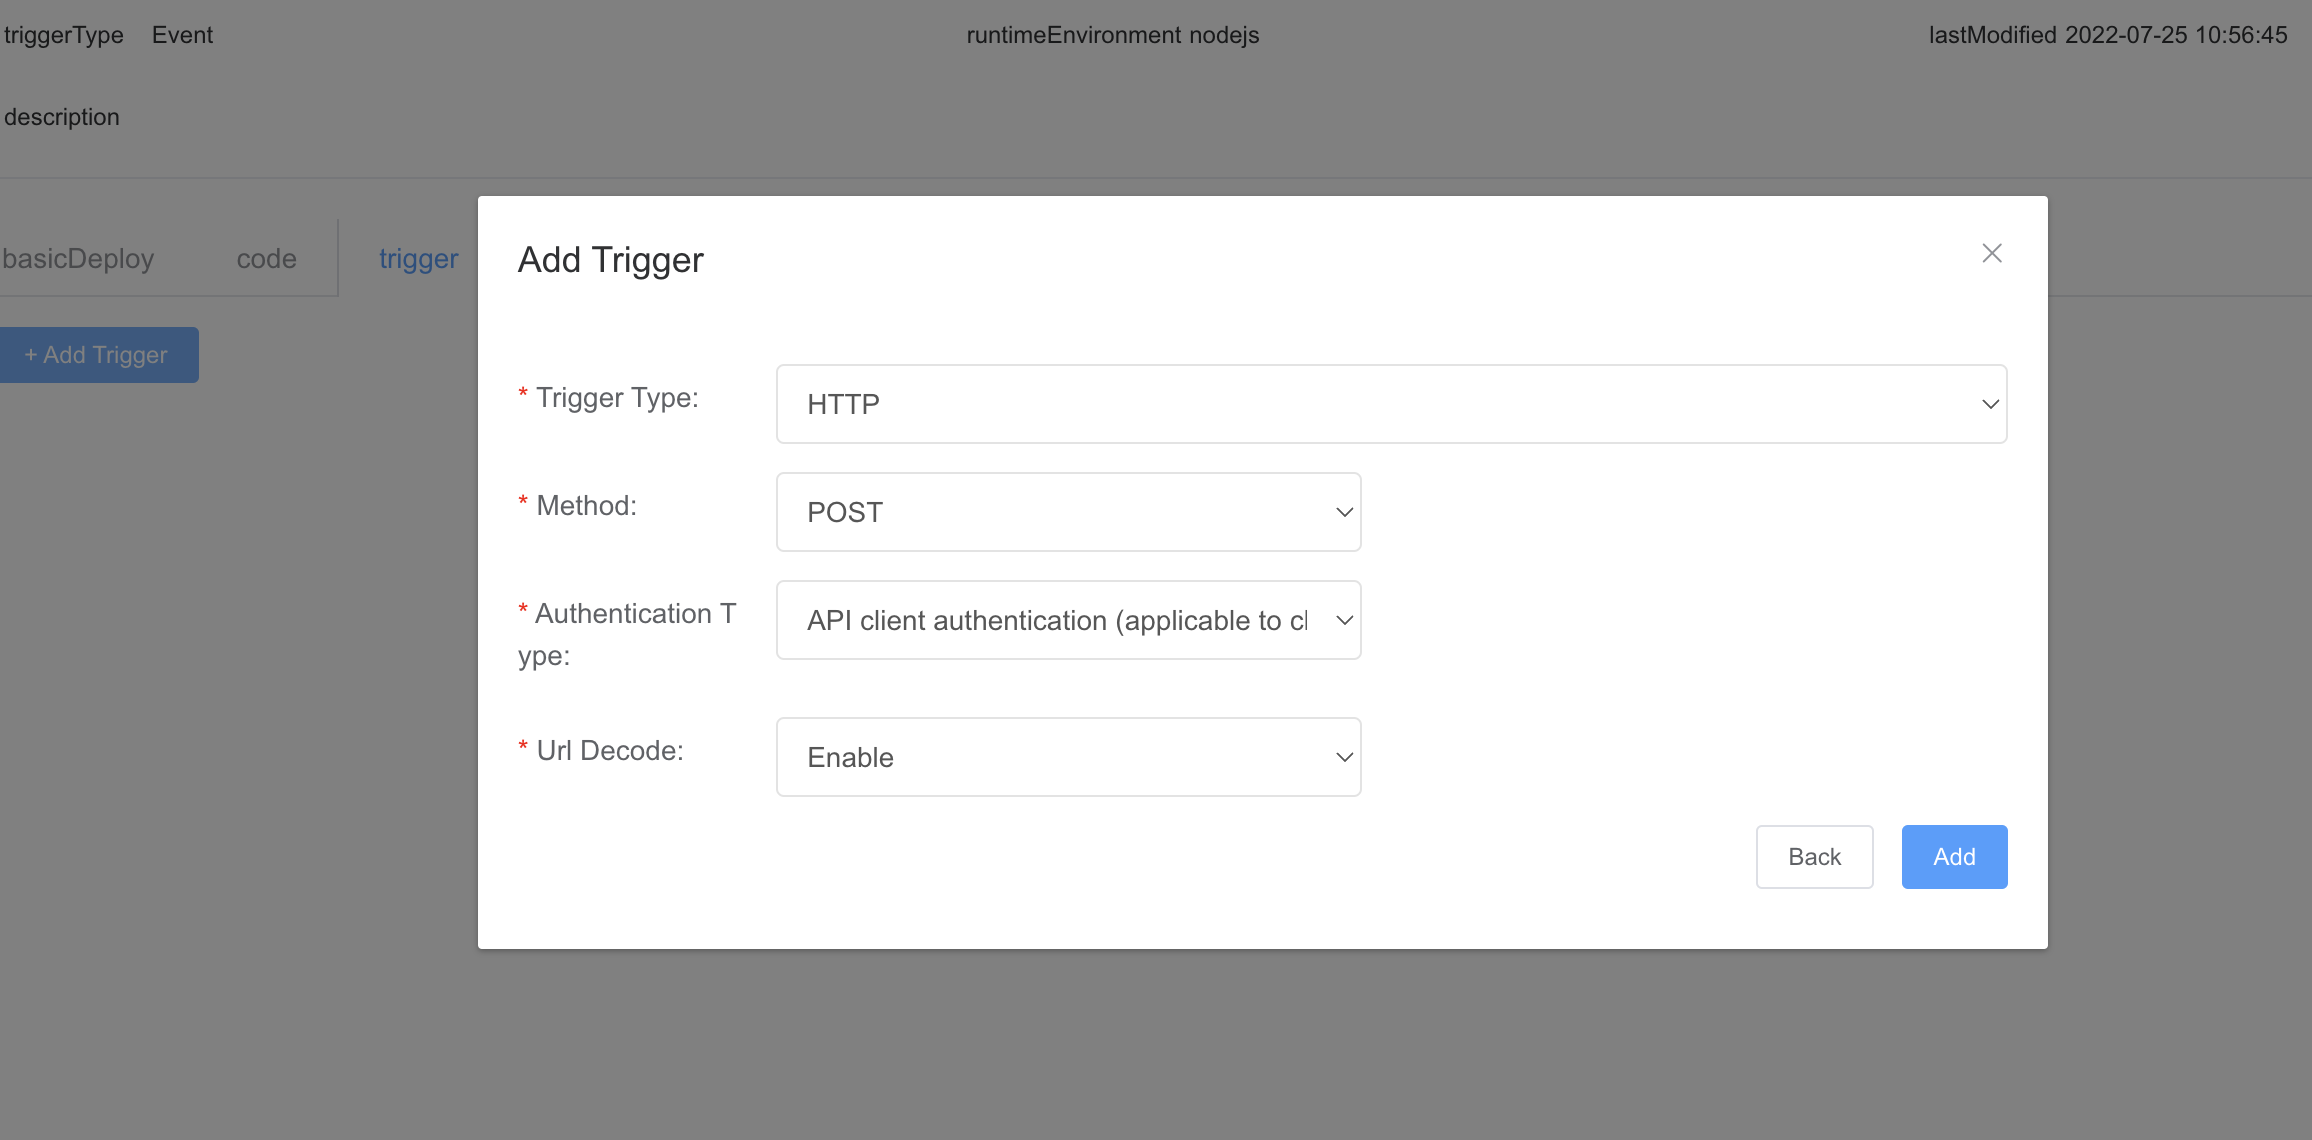
Parameter | Description |
Trigger Type | Set this parameter to HTTP. |
Method | Set this parameter to POST, which is currently the only supported method by HTTP triggers. |
Authentication Type | Authentication type of the HTTP trigger to be added.API client authentication (applicable to clients): gateway authentication on the client, which is applicable only to function calls from the app client.API client authentication (applicable to Server): gateway authentication on the cloud, which is applicable only to function calls from the app server. |
Url Decode | Indicates whether to use the URLDecoder to decode the body of an HTTP-based function trigger request whose contentType is application/x-www-form-urlencoded and forward the decoded result to the function. |

In this codelab, you can create a layout shown in the following figure in your iOS project. On the page, a result returned by a cloud function is displayed after a year is entered.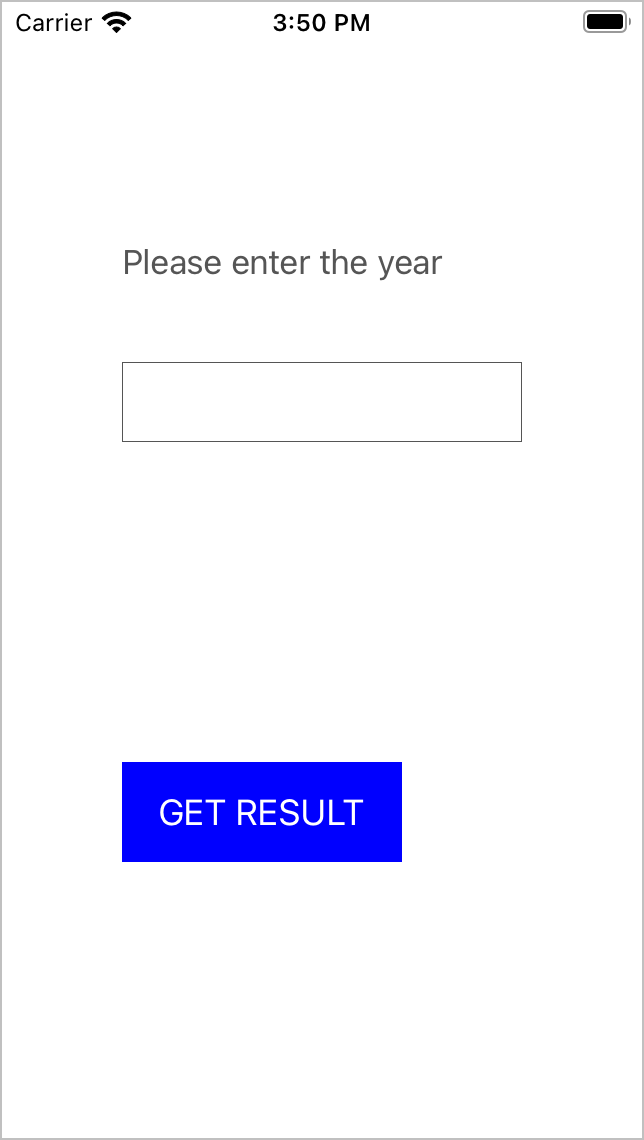
Sample code:
let yearTextField = UITextField(frame: CGRect(x: 60, y: 180, width: 200, height: 40))
let zodiacLabel = UILabel(frame: CGRect(x: 60, y: 260, width: 150, height: 60))

override func viewDidLoad() {
   super.viewDidLoad()
   let welcomeLabel = UILabel(frame: CGRect(x: 60, y: 100, width: 200, height: 60))
   welcomeLabel.textColor = UIColor.darkGray
   welcomeLabel.text = "Please enter the year"
   self.view.addSubview(welcomeLabel)

   yearTextField.layer.borderWidth = 0.5
   yearTextField.layer.borderColor = UIColor.darkGray.cgColor
   self.view.addSubview(yearTextField)

   zodiacLabel.textAlignment = .center
   zodiacLabel.textColor = UIColor.darkGray
   self.view.addSubview(zodiacLabel)

   let functionButton = UIButton(frame: CGRect(x: 60, y: 380, width: 140, height: 50))
   functionButton.backgroundColor = UIColor.blue
   functionButton.setTitle("GET RESULT", for: .normal)
   functionButton.addTarget(self, action: #selector(triggerFunction), for: .touchUpInside)
   self.view.addSubview(functionButton)
   }
import AGConnectCore

func application(_ application: UIApplication, didFinishLaunchingWithOptions launchOptions: [UIApplication.LaunchOptionsKey: Any]?) -> Bool {
   AGCInstance.startUp()
   return true
}
@objc func triggerFunction() {
   let num = yearTextField.text ?? ""
   let callable = AGCFunction.getInstance().wrap("zodiac-$latest")
   callable.call(with: ["year":num]).onSuccess { (result) in
      let response = result?.value(with: NSDictionary.self) as! NSDictionary
      let zodiac = response["result"] as! String
      self.zodiacLabel.text = zodiac
   }.onFailure { (error) in
   }
}

Well done. You have successfully built your first app that integrates Cloud Functions and learned how to: