Cloud Storage is scalable and maintenance-free. By integrating the Cloud Storage SDK, you can store high volumes of data such as image, audio, and video files generated by your users to the cloud or download these data from the cloud.
In this codelab, you will create an app that integrates Cloud Storage capabilities. Your app will allow users to:
A device running Android 4.2 or a later version
To integrate Cloud Storage of AppGallery Connect, you must complete the following preparations:
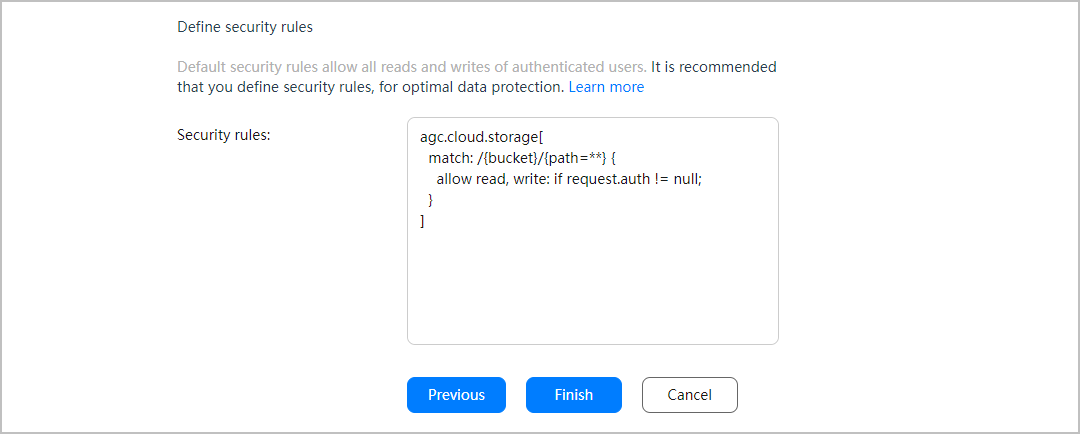
Before integrating the Cloud Storage SDK, you need to enable Cloud Storage in AppGallery Connect.

If you are using Android Studio, you need to integrate the Cloud Storage SDK into your Android Studio project before development.
// Configure an address.
apply plugin: 'com.huawei.agconnect'

dependencies {
   // Add the dependency related to the AppGallery Connect framework before adding a storage dependency.
   implementation 'com.huawei.agconnect:agconnect-storage:1.5.0.100'
}

  <?xml version="1.0" encoding="utf-8"?>
  <LinearLayout xmlns:android="http://schemas.android.com/apk/res/android"
  xmlns:tools="http://schemas.android.com/tools"
  android:orientation="vertical"
  android:layout_width="match_parent"
  android:layout_height="match_parent"
  android:gravity="center_vertical"
  tools:context=".MainActivity">

  <Button
  android:onClick="uploadFile"
  android:layout_width="match_parent"
  android:layout_height="wrap_content"
  android:textAllCaps="false"
  android:text="Upload File" />

  <Button
  android:onClick="deleteFile"
  android:layout_width="match_parent"
  android:layout_height="wrap_content"
  android:textAllCaps="false"
  android:text="Delete File" />

  <TextView
  android:id="@+id/showResult"
  android:enabled="false"
  android:hint="This will display the result of the operation"
  android:layout_width="match_parent"
  android:layout_marginTop="10dp"
  android:gravity="center"
  android:layout_height="wrap_content" />

  </LinearLayout>
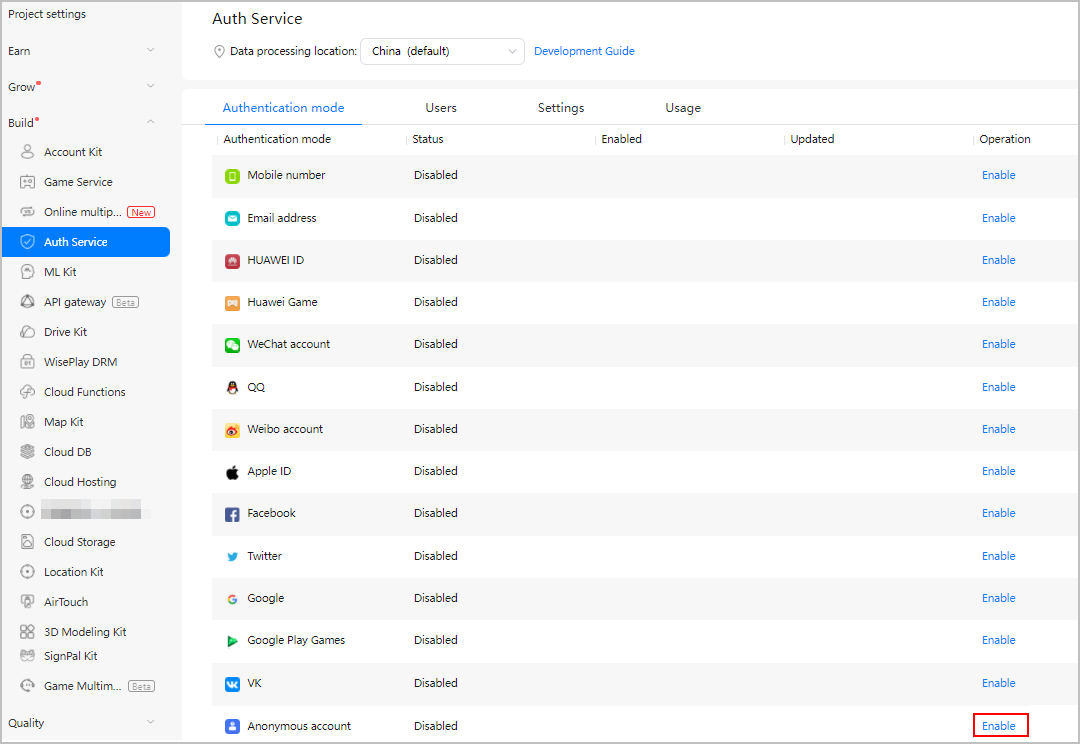
The sample code in this codelab uses the anonymous sign-in mode. Therefore, you need to enable anonymous authentication of Auth Service in AppGallery Connect. Otherwise, sign-in fails.
    implementation 'com.huawei.agconnect:agconnect-core:1.6.5.300'
    implementation 'com.huawei.agconnect:agconnect-auth:1.6.5.300'
  <uses-permission android:name="android.permission.INTERNET" />
  <uses-permission android:name="android.permission.ACCESS_NETWORK_STATE" />
  <uses-permission android:name="android.permission.WRITE_EXTERNAL_STORAGE" />
  <uses-permission android:name="android.permission.READ_EXTERNAL_STORAGE" />
  private String[] permissions = {
    Manifest.permission.WRITE_EXTERNAL_STORAGE,
    Manifest.permission.READ_EXTERNAL_STORAGE,
  };
  ActivityCompat.requestPermissions(this, permissions, 1);
  private void login() {
  if (AGConnectAuth.getInstance().getCurrentUser() != null) {
      System.out.println("already sign a user");
      return;
  }
  AGConnectAuth.getInstance().signInAnonymously().addOnSuccessListener(signInResult -> System.out.println("AGConnect OnSuccess"))
          .addOnFailureListener(e -> System.out.println("AGConnect OnFail: " + e.getMessage()));
  }
You can call related APIs of the Cloud Storage SDK to develop functions.
Call the AGCStorageManagement.getInstance method to initialize a storage instance before your app uses any Cloud Storage functions.
  private void initAGCStorageManagement() {
    mAGCStorageManagement = AGCStorageManagement.getInstance();
  }
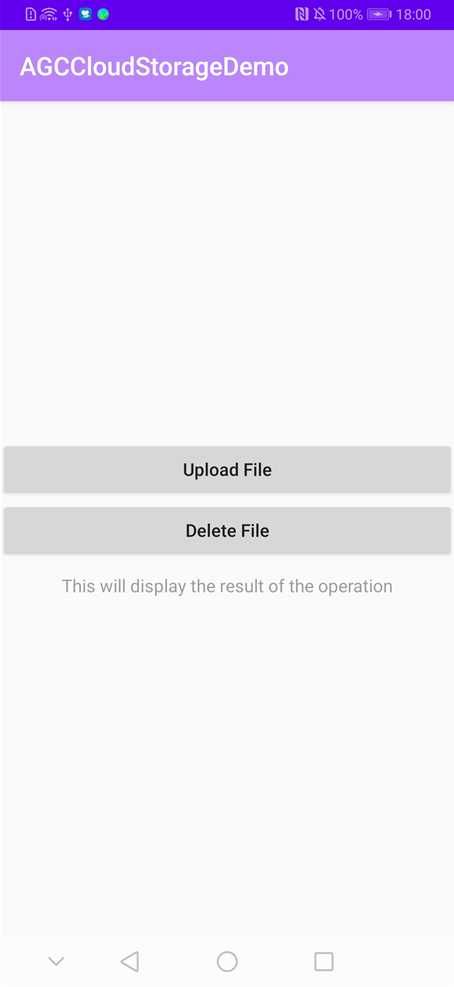
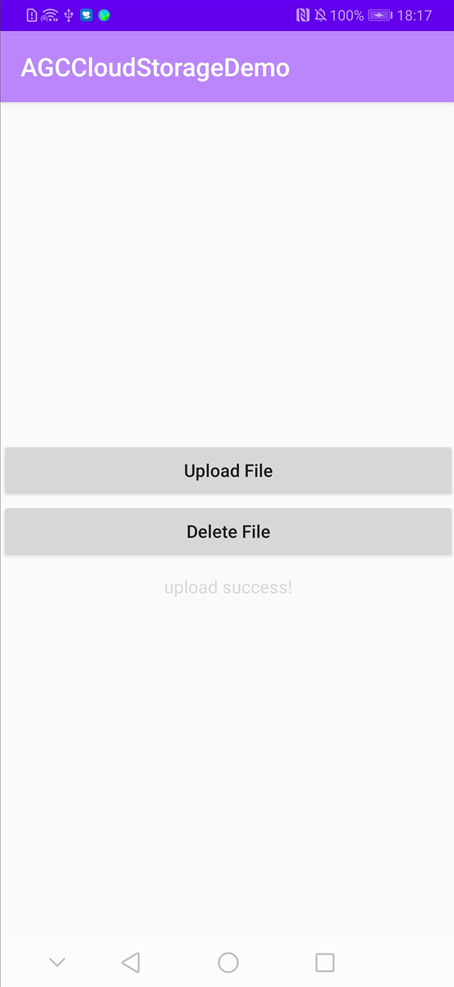
Tap Upload File. The uploadFile method is called to upload a file to the cloud server.
    public void uploadFile(View view) {
      if (mAGCStorageManagement == null) {
          initAGCStorageManagement();
      }
      uploadFile();
  }

    private void uploadFile() {
            final String path = "test.jpg";
            String fileName = "test.jpg";
            String agcSdkDirPath = getAGCSdkDirPath();
            final File file = new File(agcSdkDirPath, fileName);
            if (!file.exists()) {
                mShowResultTv.setText("file does not exist!");
                return;
            }
            new Thread(new Runnable() {
                @Override
                public void run() {
                    StorageReference storageReference = mAGCStorageManagement.getStorageReference(path);
                    UploadTask uploadTask = storageReference.putFile(file);
                    try {
                        uploadTask.addOnSuccessListener(new OnSuccessListener<UploadTask.UploadResult>() {
                            @Override
                            public void onSuccess(UploadTask.UploadResult uploadResult) {
                                mShowResultTv.setText("upload success!");
                            }
                        }).addOnFailureListener(new OnFailureListener() {
                            @Override
                            public void onFailure(Exception e) {
                                mShowResultTv.setText("upload failure!");
                            }
                        });
                    } catch (Exception e) {
                        e.printStackTrace();
                    }
                }
            }).start();
    }
The file to be uploaded is configured in the project code, that is,
the test.jpg file in the
AGCSdk directory of the mobile phone.
Tap Delete File. The deleteFile method is called to delete the uploaded file from the cloud.
public void deleteFile(View view) {
        if (mAGCStorageManagement == null) {
            initAGCStorageManagement();
        }
        deleteFile();
    }
    private void deleteFile() {
        final String path = "test.jpg";
        System.out.println(String.format("path=%s", path));
        new Thread(new Runnable() {
            @Override
            public void run() {
                StorageReference storageReference = mAGCStorageManagement.getStorageReference(path);
                Task<Void> deleteTask = storageReference.delete();
                try {
                    deleteTask.addOnSuccessListener(new OnSuccessListener<Void>() {
                        @Override
                        public void onSuccess(Void aVoid) {
                            mShowResultTv.setText("delete success!");
                        }
                    }).addOnFailureListener(new OnFailureListener() {
                        @Override
                        public void onFailure(Exception e) {
                            mShowResultTv.setText("delete failure!");
                        }
                    });
                } catch (Exception e) {
                    e.printStackTrace();
                }
            }
        }).start();
    }
  @Override
    protected void onCreate(Bundle savedInstanceState) {
    super.onCreate(savedInstanceState);
    setContentView(R.layout.activity_main);
    mShowResultTv = findViewById(R.id.showResult);
    AGConnectInstance.initialize(getApplicationContext());
    login();
    ActivityCompat.requestPermissions(this, permissions, 1);
  }
  private String getAGCSdkDirPath() {
    String path = Environment.getExternalStorageDirectory().getAbsolutePath() + "/AGCSdk/";
    System.out.println("path=" + path);
    File dir = new File(path);
    if (!dir.exists()) {
      dir.mkdirs();
    }
    return path;
  }
Well done. You have successfully built an app that integrates Cloud Storage of AppGallery Connect and learned how to manage Cloud Storage in AppGallery Connect.