获取input框输入值异常
现象描述
在input框中输入内容,点击提交按钮时,必填项校验失败,提示“xxx为空,请输入”。
问题分析
此类问题一般为获取值的方式不正确,从而导致未能获取input框内的输入值。
检查获取输入值的代码为:e.target.attr.value,this.$element('#id').attr.value。
解决方法
通过onchange事件对模型赋值来获取input框的值,具体方法如下:
- 初始化模型。
data:{ accountValue:'' } - input框绑定事件。
<input @change="getAccountValue" value="{{accountValue}}"></input> - 赋值。
getAccountValue: function(e) {
    this.accountValue = e.value // 此处为e.value, 而非e.target.attr.value
}
建议与总结
编码时尽量参考官方文档,而不是通过打印js对象的方式,js对象可能存在厂商兼容问题,而规范是统一的。
目前快应用的数据绑定方式为单向:
- 在界面上的input框中输入值不会改变data中的accountValue。
- 通过 this.accountValue = xxx 的方式修改input框的值,不会触发input的onchange事件。
- 通过 this.accountValue = xxx 的方式修改值,如果修改前和修改后accountValue的值相同,则不会触发页面重新渲染。
数组item值修改后,界面list没有刷新
现象描述
通过代码this.items[0] = newValue的方式,对数组Item值进行修改后,界面list没有刷新为新的值。
问题分析
根据数组下标修改数组的值并不会触发watch。
解决方法
需要触发对已经定义的数组重新赋值动作,例如:this.arr = this.arr.concat() // concat方法会对当前数组执行拷贝动作或者:
// Array.prototype.splice
// vm.items.splice(indexOfItem, 1, newValue)
建议与总结
更多详细内容可参考网站“https://vuejs.org/v2/guide/list.html#Caveats”。
由于JavaScript的限制,Vue不能检测如下变动的数组:
- 当你利用索引直接设置一个项时,例如:vm.items[indexOfItem] = newValue。
- 当你修改数组的长度时,例如:vm.items.length = newLength。
Cannot add property
现象描述
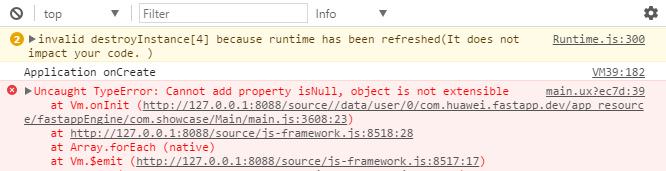
调试时,出现js错误信息:Uncaught TypeError: Cannot add property xxx, object is not extensible。
问题分析
查看对应的代码如下:
Object.isNull = function(e) {
        return null == e || void 0 == e
}
Object是根对象,不允许增加属性和方法。
解决方法
将isNull定义到utils中。
建议与总结
请不要基于全局根对象Object,global等定义变量或者方法,不推荐而且会报错。
JSON.parse异常
现象描述
界面出现错误提示框:Uncaught SyntaxError: Unexpected token xxx in JSON at position 0。
问题分析
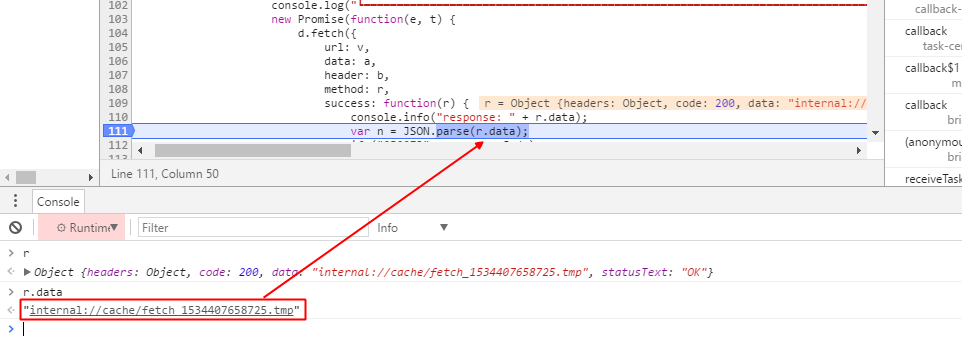
该信息表示JSON.parse异常,本案例中JSON.parse是一个字符串。
解决方法
先确保返回的数据是json格式后,再parse。或者通过try catch捕获异常。
onCreate没有执行,导致页面空白
现象描述
初始页面展示空白。
问题分析
初始化数据逻辑放在onCreate中,onCreate为应用生命周期,页面渲染时不会调用。
解决方法
将onCreate改为onReady。
建议与总结
详细使用方法请参见官方文档“Script脚本 > 生命周期接口”。
网页跳转后返回list向上滚动
现象描述
页面跳转后再返回,list向上滚动。
问题分析
list-item通过自定义组件嵌套一个子list,如果子list只展示一半,页面跳转后再返回,会触发onRequestChildFocus事件,使子list全部展示,从而导致父list向上滚动。
解决方法
请勿在list-item里再嵌套list。
建议与总结
请遵守官方规范进行开发,否则容易出现不可知的问题。
xxx is not a function
现象描述
界面出现错误提示框:execJSTYpeError: xxx.recourdCountEvent is not a function。
问题分析
出现此错误表示调用的函数不存在,一般是调用了未提供的厂商接口。查询错误提示中的recourdCountEvent接口,发现快应用官网已提供,而华为暂未提供此接口。
解决方法
开发过程中,先调用account.getProvider()确认统计接口是否支持,然后再调用其他接口,具体接口请参见“账号API”。
if(account.getProvider()){
        // some code
}
建议与总结
使用厂商服务时,请务必先通过getProvider检查接口是否支持,然后再调用具体接口。
picker组件展示异常
现象描述
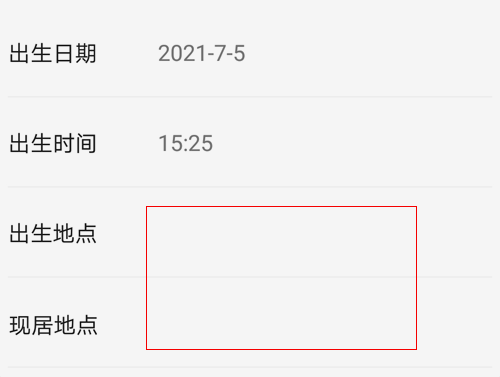
picker中设置的选项未能展示,如下图红框部分所示:
问题分析
检查异常处的代码,发现设置<picker type='multi-text' 的value时,写成value="北京 东城区"这种字符串格式,而规范格式为:value=["北京","东城区"]
解决方法
参见官方文档“picker ”中的“属性”和“样式”,value值需设置为数组样式,将value设置为 value=["北京","东城区"] 的样式即可。
建议与总结
请按照官方规范进行开发。
应用打开显示白屏
现象描述
应用打开显示白屏。
问题分析
此类问题建议从以下几点逐层分析排查:
- 路由配置是否正确,是否跳转到了希望跳转的页面
- 是否调用了数据请求接口
- 数据请求回调是否返回
- 是否给页面数据赋值,双向绑定是否正确
- 页面show和if状态是否正确
解决方法
- 页面修改后(比如修改页面名,新建页面等),排查路由表是否同步更新,路由路径是否配置正确。另外修改路由表跳转hello word,检查hello word页面是否正常显示。
- 检查是否混淆了页面的生命周期onInit和应用的生命周期onCreate,在页面中使用onCreate生命周期,在onCreate中调用数据接口,会导致数据请求接口并未真正执行,请修改在onInit中调用。
- 数据请求接口调用参数错误,从而没有数据回调;未在fail分支做处理,从而数据回调后未做处理。这两种情况会导致并未获取到数据。请在接口调用回调后,添加日志查看是否接口回调成功。
- fetch请求返回的数据是一个字符串,需要经过JSON.parse装换成JSON数据使用。开发者需要注意对返回结果先判断是否为空,否则如果数据错误会报错。另外需要注意接口调用时异步请求注意this指向,确保数据赋值成功。
- 有些开发者会使用show和if来处理页面,在请求到数据后让页面显示,未请求到数据让页面隐藏,此处需要注意show和if的状态是否设置正确。
建议与总结
出现问题建议从页面进入,按照 生命周期—>数据获取—>数据赋值 逐步排查问题。
onShow, onHide, onBackpress, onMenuPress事件监听不执行
现象描述
代码中设置的onShow, onHide, onBackpress, onMenuPress事件监听没有执行。
问题分析
此类问题一般是由于将自定义组件作为根节点导致的,错误代码示例如下:
<import name="loading" src="./loading"></import>
<template>
    <loading> </loading>
</template>
<script>
import prompt from '@system.prompt';
export default {
    onShow: function () {
        prompt.showToast({ message: 'onShow called', duration: 2000 })
    },
}
</script>
解决方法
检查添加监听的当前页的根节点是否是自定义组件,如果是,则在外层添加一个div作为根节点。
<import name="loading" src="./loading"></import>
<template>
    <div>
        <loading> </loading>
    </div>
</template>
<script>
    import prompt from '@system.prompt';
    export default {
        onShow: function () {
        prompt.showToast({ message: 'onShow called', duration: 2000 })
    },
}
</script>
Fetch接口Content-Type设置为application/json,客户端收到数据格式有误
现象描述
Fetch接口Content-Type设置为application/json,data数据被拼接在URL中传递到服务器。
例如:开发者传入data为{"keywords": "猪头肉", "page": "1", "type": "caipu"},Content-Type为application/json,method为post的请求。
服务器收到的数据为:http://xxx? keywords=猪头肉& page=1& type=caipu。
问题分析
由于快应用联盟规范早期的设计没有细化,导致application/json格式被错误地当成application/x-www-form-urlencoded的Content-Type处理,从而导致此问题。
解决方法
华为加载器在1035版本中已修改此问题,开发者在manifest.json中将minPlatformVersion设置为1035及以上版本即可。
"package": "com.huawei.message",
"name": "任务通知",
"versionName": "1.0.0",
"versionCode": 1,
"icon": "/Common/logo.png",
"minPlatformVersion": 1035,
全局消息通道报错
现象描述
将 new BroadcastChannel 写到 app.ux 作为全局消息通道使用,通过loader多次加载发送消息时报错。错误代码如下:
// app.ux
export default {
    onCreate() {
        // BroadcastChannel 为页面间消息通道,不要作为全局保存使用
        global.huaweiChannel = new BroadcastChannel("huawei");
    }
}
问题分析
BroadcastChannel 是页面间的消息通信通道,不能在app.ux中全局使用,否则发送消息时,会导致页面混乱报错。正确使用方式应该在页面内定义使用。
解决方法
将全局 BroadcastChannel 移到各个页面,在需要使用的时候去new,用完后在页面的生命周期onDestroy()中及时销毁,示例代码如下:
// index.ux
export default {
    data:{
        huaweiChannel: null
    },
    onInit() {
        // 创建消息通道
        this.huaweiChannel = new BroadcastChannel(' huawei ');
        this.huaweiChannel.onmessage = function (event) {
            console.log(event.data)
        };
    },
    onDestroy() {
        // 销毁消息通道
        this.huaweiChannel.close();
    }
}
XXX can not modify
现象描述
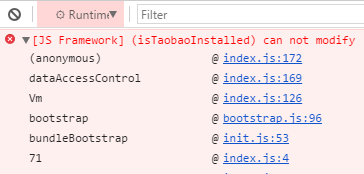
在调试功能时,出现js报错,错误信息:index.js:172 [JS Framework] (isTaobaoInstalled) can not modify。
问题分析
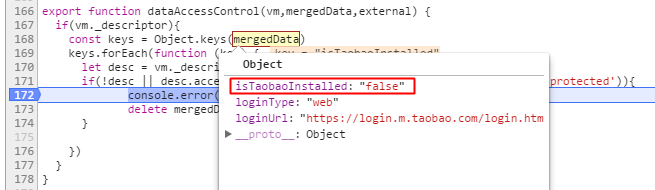
对代码进行调试,发现代码进入了未获取isTaobaoInstalled权限描述逻辑的分支。
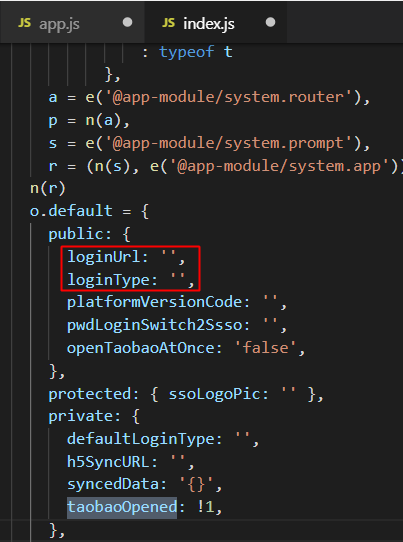
检查初始化数据定义,发现没有对isTaobaoInstalled变量定义。
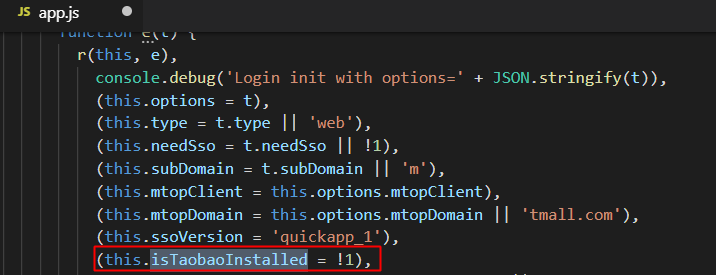
仅仅在代码语句中进行了赋值:
解决方法
在public下增加isTaobaoInstalled的初始化定义。
建议与总结
访问变量前先定义,根据错误信息自行修复问题。
消息通道页面退出再进入异常或页面间无法通信
现象描述
- 在接收消息页面的onInit中创建消息通道,打开detail页面发送消息。
- 从detail页面返回到接收消息页面,再继续返回上一层后,重复步骤1,出现 "Cannot set property 'recieveMsg' of undefined" 的错误信息。
案例代码如下:
onInit: function () {
    this.$page.setTitleBar({ text: 'messageChannel' })
    let that = this;
    channel = new BroadcastChannel('channel1');
    channel.onmessage = function (event) {
        console.log(event.data)
        that.receivedMsg = event.data;
        // prompt.showToast({message: '接受消息:' + event.data});
    };
}
问题分析
分析日志,发现既接收到消息又报undefined异常的原因是:之前的消息通道没有在页面销毁时销毁,再次进入页面时又建立了新消息通道,相当于有了2个消息通道,但是之前那个绑定的页面VM已经销毁,所以再调用已经销毁的VM方法时出现undefined错误提示。
解决方法
在页面销毁时,销毁相应的消息通道。示例代码如下:
onDestroy: function () {
    channel.close();
},
建议与总结
官方资料指出消息通道并不属于页面上下文,需要单独销毁,如果消息通道内部引用了页面对象,那么页面销毁时应主动销毁此通道。如果不销毁还可能出现其他异常,比如消息接收不到。
路由传参无法获取
现象描述
路由传参在页面中使用private数据模型无法接收到参数。
问题分析
private数据模型段下的变量仅允许当前页面内代码更改其值,所以页面跳转传递的参数无法修改private数据模型,从而导致无法接收到传递的参数。错误代码如下:
// 页面A
router.push({
    uri: 'B',
    params: {title: “我是传递的参数”}
});
// 页面B
module.exports = {
    // private 仅允许当前页面内代码更改其值,路由传递的参数无法修改其值,所以无法获取到
    private: {
        title: ' '
    }
}
解决方法
将private修改为data、public、protected,即可获取路由参数。示例代码如下:
// 页面B
module.exports = {
    //protected可以正确接受到传递的参数
    protected: {
        title: ' '
    }
}
Web组件发消息给H5页面时报错
现象描述
Web组件发消息给H5页面时,出现如下js错误:02-14 09:22:56.329 E/jsLog (18834): [H5]Uncaught TypeError: system.onmessage is not a function。
问题分析
当H5页面中定义的 system.onmessage 函数代码逻辑较多,有可能还依赖一些外部js(比如jquery)的引用。此时如果web组件在 onpagefinish 事件处理函数中触发了 this.$element('webElementId').postMessage({message:’xxx’}),则可能会由于H5页面的js没有完全加载,从而导致出现 system.onmessage is not a function 的错误。
解决方法
H5页面中 system.onmessage 函数定义要轻量,只接收快应用页面传递过来的数据即可,剩下的逻辑交给h5页面自己的生命周期函数处理,比如 onload 事件。
需要注意 onload 事件触发时,快应用的数据还没接收到,H5页面中要轮询监听数据,故请参考如下实现代码:
<!DOCTYPE html>
<html>
<head>
    <meta charset="utf-8">
    <title>接受快应用消息实践</title>
    <script>
        var recieveData;
        //轻量的system.onmessage定义,仅接受数据,保证第一时间加载完成
        system.onmessage = function (data) {
            recieveData =data;
        }
    </script>
    <script src="js/jquery-1.10.2.min.js"></script>
    <script>
        $(document).ready(() =>{
            var stopIntervalId =setInterval(function () {
                if(recievedData){
                   execBusinessLogic()
                   clearInterval(stopIntervalId)
                }
            }, 20) // 每20ms轮询一次,直到接收到快应用发送的消息数据,然后停止轮询
        })
        function execBusinessLogic() {
            //执行业务逻辑的代码
        }
    </script>
    <script src="js/html2canvas.js"></script>
</head>
建议与总结
理解快应用与H5消息发送机制,通过轮询的方式解决异步问题。
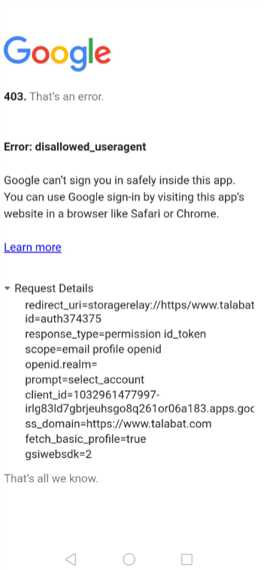
H5应用打包成快应用在加载器运行时,应用使用Google账号注册或者登录时,出现403错误,如何处理
现象描述
H5应用打包成快应用在加载器运行时,应用使用Google账号注册或者登录时,出现如下所示错误界面:
解决方法
- 定义变量model用于表示用户的手机型号,在data对象内添加model变量。
- 在页面的生命周期onInit()方法中获取手机型号为model赋值。
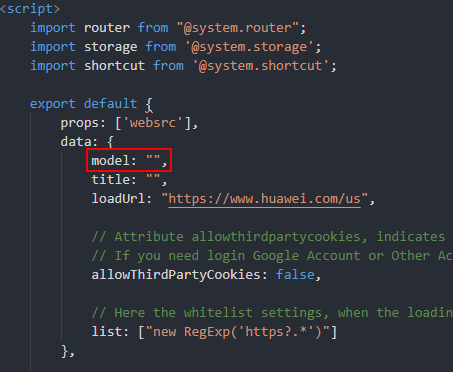
onInit: function () { const device = require("@system.device") const res = device.getInfoSync(); this.model=res.model; console.log("onInit model="+this.model); }, - 设置web组件的useragent值为 Mozilla/5.0 (Linux; Android 9; {{model}}) AppleWebKit/537.36 (KHTML, like Gecko) Chrome/79.0.3945.116 Mobile Safari/537.36)),如下图所示:

在useragent值中使用变量model是为了获取真实的手机型号,避免有些H5网页在验证useragent时因为获取的手机型号不对,而给用户带来困扰。
- 将manifest.json文件中的minPlatformVersion配置为1068。
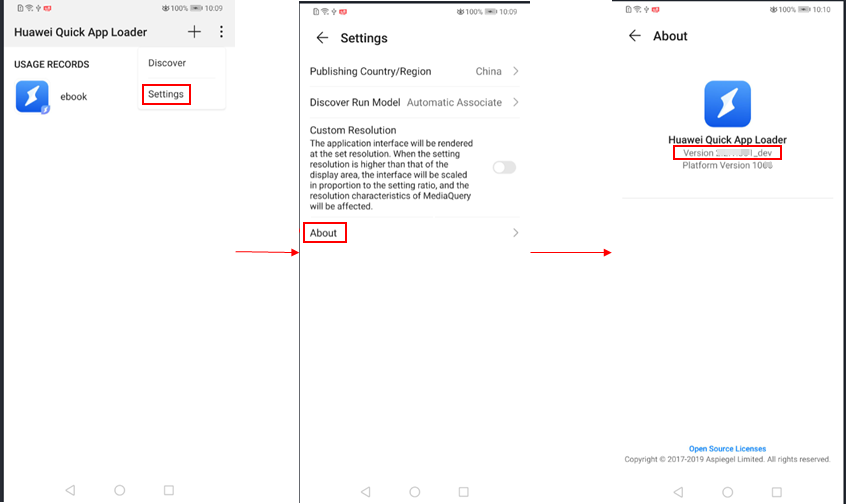
- 请确保使用的华为快应用加载器版本为2.5.2.300及以上版本。查看加载器版本的方式如下图所示:
- 如果登录仍然异常,则设置web组件的multiwindow值为true。


校验数据类型出错
现象描述
IDE控制台提示如下错误信息:
Invalid prop: type is not expected ,prop: "xxx".
问题分析
查看出现问题的源代码:<part1 class="component" header="{{header}}" footer="{{footer}}" pop3=1233。
查看编译后的代码:
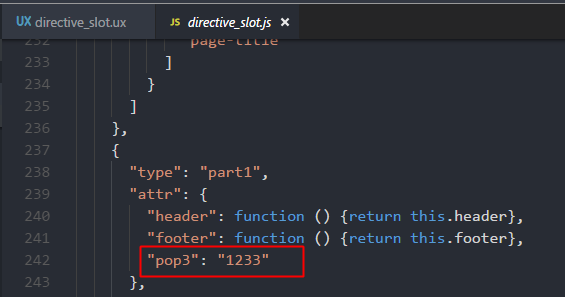
发现编译器将源码中pop3属性值编译为字符串了。
此时如果在组件中增加了非字符串类型的校验,就导致IDE控制台报错。例如该案例中校验类型为Number。
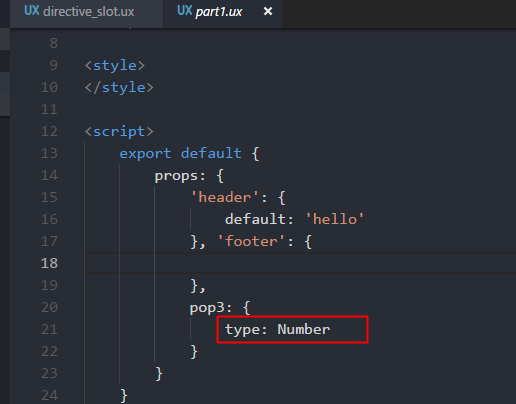
解决方法
此错误提示不会影响功能,可以不做修改。
建议与总结
如果对功能没有影响,建议不要进行类型检查。
设置延时跳转页面点击菜单进入快应用中心后仍发生跳转
现象描述
在快应用某个页面中实现延时跳转到另一个页面,点击右上角快应用菜单的闪电图标进入快应用中心,但是一会自动跳转到延时跳转的页面。
例如:在开屏广告页,点击右上角快应用菜单的闪电图标,进入快应用中心后,却自动跳转到应用首页。
问题分析
- 点击右上角的闪电图标跳转到快应用中心是在新的栈里打开快应用中心。
- 设置延时跳转到另一个页面相当于在快应用里设置了一个定时任务。
- router.push在后台依然有效,所以在执行定时任务时,会跳转到设定的目标快应用页面。
解决方法
在页面的onHide生命周期里取消设置延时跳转的定时任务。
data: {
    delayTask: {}
}
routerHome: function () {
    this.delayTask = setTimeout(() => {
    router.push({
        uri: 'xxx' // 这里是目标页面的名称
    })
    }, 3000);
},
onHide: function () {
    clearTimeout(this.delayTask);
},
Deeplink跳转快应用返回时出现2次系统添加桌面的弹框
现象描述
从应用市场打开快应用,点击返回时,系统添加桌面图标只出现一次弹窗。但是使用deeplink打开跳转页面,点击返回时,系统添加桌面图标会出现一次弹窗后再闪一次。
问题分析
现网正常通过Deeplink、网页跳转方式进入快应用时,使用系统创建桌面图标时,出现一次弹框,不会再闪一次。对Deeplink跳转的页面代码进行分析,发现页面代码里对onBackPress(监听返回按钮动作)函数进行了重写处理。
onBackPress: function () {
    this.entryDirect && this.$app.exit()
}
其中this.entryDirect为Deeplink跳转时携带的参数。
onBackPress是用户点击返回按钮时触发的,当返回true表示页面按应用自己的返回逻辑处理,返回false表示按默认的返回逻辑处理,不返回值则和返回false一样,按默认的返回逻辑处理。
在这段代码中,开发者在onBackPress中判断为Deeplink进入快应用时,调用this.app.exit()退出应用,此时会触发finish事件,而开发者没有在onBackPress返回true,所以按默认的返回逻辑处理,也触发了finish事件。快应用中心在监听到finish事件后,就会弹框引导用户创建图标,从而导致出现两次弹框。
解决方法
对界面onBackPress函数代码进行修改,调用this.app.exit()退出应用后,不再使用默认按钮返回逻辑。
onBackPress: function () {
    if (this.entryDirect) {
        this.$app.exit()
    return true
    }
    //this.entryDirect&&this.$app.exit()
}
建议与总结
当页面需要使用onBackPress(监听返回按钮动作)函数处理自己逻辑时,需要在函数最后返回true,否则处理完onBackPress代码后默认会走系统返回逻辑,容易导致异常。
在onbackpress中实现退出拦截时不生效
现象描述
在快应用中弹出一个弹窗,期望效果是该弹窗在用户确认后再退出,但是使用onbackpress控制弹窗自动退出不生效。
问题分析
快应用引擎实现机制决定了onbackpress不能有耗时的操作。当超过一段时间后,如果代码还没有处理完,就会按返回值为false处理,即默认关闭该页面。问题代码中通过$watch监听showResult的变化,若变化则执行fetch操作,而这些操作可能还没执行完,从而导致弹窗自动关闭。
问题代码如下:
onBackPress() {
  console.log("main onBackPress. status = " + this.showResult);
  if (this.showResult) {
    this.$element('textarea').focus({ focus: false });
    this.content = '';
    this.touchedIndex = -1;
    //解决因监听showResult变化后的事件处理过缓问题,导致系统返回键有时失效
    this.showResult = false;
    return true;
  }
  return false;
},
initDataWatchConfig() {
  let that = this;
  this.$watch('showResult', (newV, oldv) => {
    if (!that.showResult) {
      audio.stop();
      this.getphoto()//此处是一个比较耗时的操作,以fetch举例,只有清除数据后第一次打开可以复现
    }
  });
},
getphoto: function () {
  var that = this
  fetch.fetch({
    url: 'https://www.huawei.com/Assets/image/logo.png',
    success: function (ret) {
    },
    fail: function (msg, code) {
    }
  })
}
解决方法
给耗时比较长的操作增加延时。为this.showResult = false增加一个延时,优化后的代码如下:
onBackPress() {
  console.log("main onBackPress. status = " + this.showResult);
  if (this.showResult) {
    this.$element('textarea').focus({ focus: false });
    this.content = '';
    this.touchedIndex = -1;
    //增加延时,解决因监听showResult变化后的事件处理过缓问题,导致系统返回键有时失效
    setTimeout(() => {
        this.showResult=false;
    }, 800);
    return true;
  }
  return false;
},
使用refresh组件,无法被其包裹的子组件(div)自动撑开
现象描述
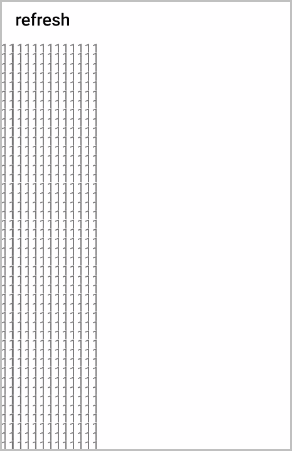
把refresh作为父组件嵌套div,当div内容超过屏幕高度时,界面被压缩到一页,无法撑开滑动。问题代码如下:
<template>
    <div class="container">
        <refresh class="refresh" onrefresh="refresh" refreshing="{{isRefreshing}}" offset=800px>
                <div style="flex-direction: column;">
                    <text class="txt">1111111111111</text>
                    <text class="txt">1111111111111</text>
                     ...
                </div>
        </refresh>
    </div>
</template>
.container{
  flex-direction: column;
}
.refresh {
    background-color: #ffffff;
    progress-color: #0faeff;
    flex-direction: column;
    flex: 1;
}
被压缩后的效果如下:
问题分析
错误代码中的根节点div没有设置高度,快应用引擎默认根节点的高度就是屏幕的高度,而refresh默认高度和根节点的div一致,从而导致包裹的内容被挤压到一起。
解决方法
将refresh组件配合list、list-item一起使用,就可以进行滑动展示,优化后的代码如下:
<refresh class="refresh" onrefresh="refresh" refreshing="{{isRefreshing}}" offset=800px>
    <!-- List -->
    <list class="list" onscrollbottom="scrollbottom" onscrolltop="scrolltop" onscroll="scroll" id="list"
        scrollpage="{{scrollPage}}">
        <list-item type="listItem" >
          <div style="flex-direction: column;">
           <!-- 要显示的布局在这里描述 -->
          </div>
        </list-item>
    </list>
</refresh>
按钮的圆角样式不生效
现象描述
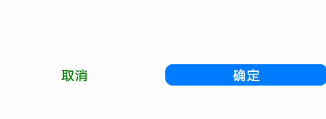
在div里包含两个input,分别定义“取消”和“确定”两个按钮,但是“取消”按钮的圆角样式不生效。
问题分析
分析如下两个按钮样式定义的代码,定义两个按钮公共样式的代码:
.button-div input {
   width: 148px;
   height: 48px;
   border-radius: 18px;
   font-size: 30px;
   flex: 1;
   margin: 10px;
}
分别定义按钮样式的代码:
.btn_cancel {
  color: #007D00;
  background-color: #FFFFFF;
}
.btn_agree {
  background-color: #007DFF;
  color: #FFFFFF;
}
发现“取消”按钮的背景色设置了白色,因和白底同色导致圆角效果无法体现(如果不设置背景色,效果和设置白色是一样的)。
解决方法
可以有两种方案解决:
【方案一】给“取消”按钮更换一个背景色。
【方案二】基于现有白色背景,设置一个边框,示例代码如下:
.btn_cancel {
  color: #007D00;
  background-color: #ffffff;
  border: 1px solid #000000;    //设置边框
}
加上边框后的效果:

初始化页面时,调用configuration.setLocale()不生效
现象描述
快应用app.ux中定义了全局方法changeLocaleConfiguration,用于设置应用显示语言,在首页生命周期onInit中调用changeLocaleConfiguration(),实际已经触发了该方法,但是应用语言并未发生改变。
app.ux中代码:
changeLocaleConfiguration() {
  this.localeObject = configuration.getLocale()
  if (this.localeObject.language === 'zh') {
    configuration.setLocale({
      language: 'en',
      countryOrRegion: 'US'
    })
  }
  else {
    configuration.setLocale({
      language: 'zh',
      countryOrRegion: 'CN'
    })
  }
}
首页的代码:
onInit() {
  this.$app.$def.changeLocaleConfiguration()
}
问题分析
页面初始化时间比较短,但设置语言耗时比较长,导致页面来不及渲染。
解决方法
在页面初始化调用设置语言接口时候加上时延,代码如下:
onInit() {
  setTimeout(() => {
    this.$app.$def.changeLocaleConfiguration()
  }, 100);
}
建议与总结
建议不要在onInit中调用耗时的操作,如果一定要调用,需要加上时延。
保存canvas绘制内容到相册,无法看到绘制内容
现象描述
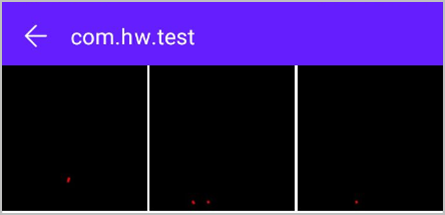
将canvas组件绘制的内容导出生成图片保存到相册,进入相册,打开该图片无法看到绘制的内容,只有黑色的背景图。
下图中绿色背景部分是canvas组件绘制的内容。
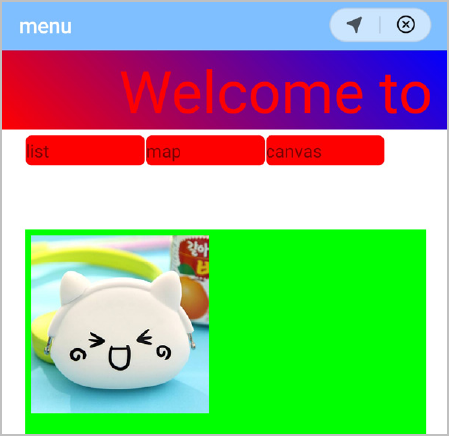
保存到相册,打开看到的效果如下。
问题分析
华为的快应用引擎会在每次调用getContext方法创建ctx,从而返回不同的ctx对象。这些ctx对象有的有内容,有的为空,随机获取ctx对象时就可能获取到空的ctx,导致保存的图片没有内容,问题代码如下。
canvas绘制代码:
pic() {
  var test = this.$element("canvas");
  var ctx = test.getContext("2d");
  var img = new Image();
  img.src = "/Common/pic3.jpg";
  img.onload = function () {
    console.log("图片加载完成");
    ctx.drawImage(img, 10, 10, 300, 300, );
  }
  img.onerror = function () {
    console.log("图片加载失败");
  }
},
保存图片的代码:
save() {
  var test = this.$element("canvas");
  test.toTempFilePath({
    fileType: "jpg",
    quality: 1.0,
    success: (data) => {
      console.log(`Canvas toTempFilePath success ${data.uri}`)
      console.log(`Canvas toTempFilePath success ${data.tempFilePath}`)
      media.saveToPhotosAlbum({
        uri: data.uri,
        success: function (ret) {
          console.log("save success: ");
        },
        fail: function (data, code) {
          console.log("handling fail, code=" + code);
        }
      })
    },
    fail: (data) => {
      console.log('Canvas toTempFilePath data =' + data);
    },
    complete: () => {
      console.log('Canvas toTempFilePath complete.');
    }
  })
}
解决方法
把ctx定义为全局变量,对ctx进行非空判断,为空时,对ctx进行初始化赋值。
优化代码如下:
var ctx; //定义一个全局的
pic() {
  if (!ctx) { //对空对象进行判断,ctx为空的时候,把“2d”赋给它
    var test = this.$element("canvas");
    var tt = test.getContext("2d");
    ctx = tt;
  }
  var img = new Image();
  img.src = "/Common/pic3.jpg";
  img.onload = function () {
    console.log("图片加载完成");
    ctx.drawImage(img, 10, 10, 300, 300, );
  }
  img.onerror = function () {
    console.log("图片加载失败");
  }
}
华为快应用中通过setInterval绘制canvas动画很卡顿
现象描述
快应用中通过setinterval周期函数来循环触发canvas绘制代码,在华为手机上绘制的动画会很卡顿,不流畅。
问题示例代码如下:
click0() {
  this.speed = 0.3
  let ctx = this.$element('canvas').getContext('2d')
  setInterval(() => {
    this.num0 += 2
    this.noise = Math.min(0.5, 1) * this.MAX
    this._draw(ctx)
    this.MAX <= 200 && (this.MAX += 4)
  }, 20)
},
_draw(ctx) {
  this.phase = (this.phase + this.speed) % (Math.PI * 64)
  ctx.clearRect(0, 0, this.width, this.height)
  this._drawLine(ctx, -2, 'rgba(0, 194, 255, 0.2)')
  this._drawLine(ctx, -6, 'rgba(0, 194, 255, 0.4)')
  this._drawLine(ctx, 4, 'rgba(0, 194, 255, 0.6)')
  this._drawLine(ctx, 2, 'rgba(0, 194, 255, 0.8)')
  this._drawLine(ctx, 1, 'rgba(0, 194, 255, 1)', 4)
},
问题分析
This._draw()方法中的canvas绘制操作时间长,最低需要100ms的绘制时间,而代码中周期时间只有20ms,华为快应用引擎会执行这个周期内的所有操作,然后才能执行下一个周期。所以设置为20ms时的效果会看起来比较慢。
解决方法
先根据设备信息接口判断引擎的提供商是否是华为,如果是则设置时间大于100ms,不是则可以设置小于100ms。优化后代码如下:
onShow: function () {
    var that = this
    device.getInfo({
        success: function (ret) {
            console.log("handling success:", JSON.stringify(ret));
            that.engineProvider = ret.engineProvider;
        },
        fail: function (erromsg, errocode) {
            console.log("message:", erromsg, errocode);
        }
    })
},
click0() {
    var that = this
    this.speed = 0.3
    console.log(that.engineProvider)
    let ctx = this.$element('canvas').getContext('2d')
    if (that.engineProvider === "huawei") {
        setInterval(() => {
            this.num0 += 2
            this.noise = Math.min(0.5, 1) * this.MAX
            this._draw(ctx)
            this.MAX <= 200 && (this.MAX += 4)
        }, 120)
    } else {
        setInterval(() => {
            this.num0 += 2
            this.noise = Math.min(0.5, 1) * this.MAX
            this._draw(ctx)
            this.MAX <= 200 && (this.MAX += 4)
        }, 20)
    }
},
_draw(ctx) {
    this.phase = (this.phase + this.speed) % (Math.PI * 64)
    ctx.clearRect(0, 0, this.width, this.height)
    this._drawLine(ctx, -2, 'rgba(0, 194, 255, 0.2)')
    this._drawLine(ctx, -6, 'rgba(0, 194, 255, 0.4)')
    this._drawLine(ctx, 4, 'rgba(0, 194, 255, 0.6)')
    this._drawLine(ctx, 2, 'rgba(0, 194, 255, 0.8)')
    this._drawLine(ctx, 1, 'rgba(0, 194, 255, 1)', 4)
},
_drawLine(ctx, attenuation, color, width) {
    ctx.save()
    ctx.moveTo(0, 0);
    ctx.beginPath();
    ctx.strokeStyle = color;
    ctx.lineWidth = width || 1;
    var x, y;
    for (var i = -this.K; i <= this.K; i += 0.01) {
        x = this.width * ((i + this.K) / (this.K * 2))
        y = this.height / 2 + this.noise * this._globalAttenuationFn(i) * (1 / attenuation) * Math.sin(this.F * i - this.phase)
        ctx.lineTo(x, y)
    }
    ctx.stroke()
    ctx.restore()
},
图片背景设置为渐变色样式不生效
现象描述
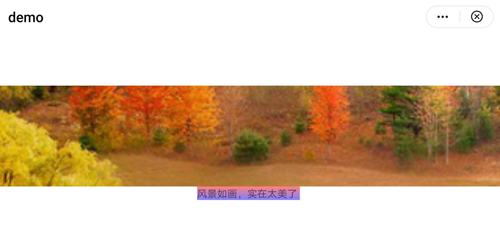
使用样式background: linear-gradient(angle, color-stop1, color-stop2)给图片添加渐变背景不生效,同样的写法,快应用text组件却是生效的。效果如下图中文字“风景如画,实在太美了”有红蓝渐变背景效果。
问题示例代码如下:
<template>
  <!-- Only one root node is allowed in template. -->
  <div class="container">
   <image src="/Common/img/compress.png"
    style="width: 100%; height: 300px;background: repeating-linear-gradient( rgba(255, 0, 0, .5),rgba(0, 0, 255, .5));">
   </image>
   <text style="background: repeating-linear-gradient( rgba(255, 0, 0, .5),rgba(0, 0, 255, .5));">风景如画,实在太美了   </text>
 </div>
</template>
问题分析
由于图片本身是不透明的,所以即使设置的渐变色背景生效,也因为被上面的图片遮挡住而看不出效果。
解决方法
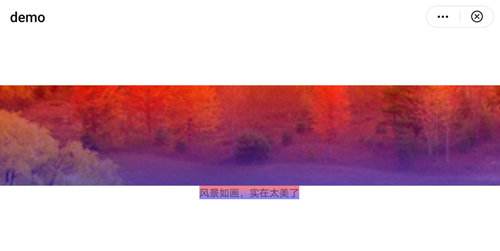
用stack组件作为image组件的父节点,然后再用div覆盖在image上,在div上设置渐变背景(image上不用设置),从而达到最终效果。
实现代码如下:
<template>
  <!-- Only one root node is allowed in template. -->
  <div class="container">
     <stack>
       <image src="/Common/img/compress.png" style="width: 100%; height: 300px"></image>
       <div style="width: 100%; height: 300px;background: repeating-linear-gradient( rgba(255, 0, 0, .5),rgba(0, 0, 255, .5));"></div>
     </stack>
    <text style="background: repeating-linear-gradient( rgba(255, 0, 0, .5),rgba(0, 0, 255, .5));">风景如画,实在太美了</text>
  </div>
</template>
最终实现效果如下图:
开发卡片时,对某个组件使用伪类,生成点击变色效果,但是松开手指后产生的变色效果无法恢复
现象描述
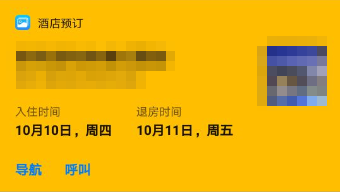
开发卡片时,对某个组件使用伪类,产生点击变色效果,例如原背景色效果如下:
点击后变色效果如下:
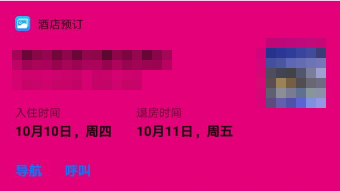
松开手指后没有变回原来的颜色。
问题分析
此问题是由于快应用引擎在支持卡片伪类不全导致,需要修改代码来规避。
解决方法
在使用伪类的组件上加个点击事件,点击事件中不需要做任何逻辑处理。
示例代码如下:
<div class="sitetype_box" widgetid="8e4bf1ca-f716-46f8-8614-16d1b35002c5" onclick="test">
</div>
css样式:
.sitetype_box {
    flex-direction: column;
    background-color:#FFBF00;
    padding: dpConvert(0) dpConvert($elementsMarginHorizontalL) dpConvert(0) dpConvert($elementsMarginHorizontalL);
}
 /**伪类 */
.sitetype_box :active{
    background-color: #E40078;
}
事件方法:
test(){
   console.log("message");
}
左右滑动误拖动video实现的视频进度条
现象描述
当tabs子组件tab-content内容由video组件组成时,左右滑动切换tabs内容时,偶尔会不切换而是拖动视频进度条。
问题代码如下:
<template>
  <div style="background-color: #00bfff;">
    <tabs index="0" >
      <tab-bar mode="fixed">
      </tab-bar>
      <tab-content>
        <div  style="flex-direction: column;">
          <text style="color: red">1</text>
          <stack class="video" >
            <video class="video1" id="111"
              src="https://ss0.bdstatic.com/-0U0bnSm1A5BphGlnYG/cae-legoup-video-target/93be3d88-9fc2-4fbd-bd14-833bca731ca7.mp4">
              </video>
          </stack>
        </div>
        <div  style="flex-direction: column;">
          <text style="color: red">2</text>
        </div>
        <div style="flex-direction: column;">
          <text style="color: red">3</text>
        </div>
      </tab-content>
    </tabs>
  </div>
</template>
问题分析
video组件是tabs的子组件,video组件和tabs组件都自带滑动能力,此问题关键在于滑动的地方在video区域上,根据事件从里层往外层的冒泡机制,系统会优先处理video的滑动,而不是tabs的切换。video的滑动效果就是我们看到的调整了视频播放进度。
解决方法
在video区域上覆盖一层div(video父节点stack增加子节点div),注意div的高度要小于video的高度,以保证video底部的进度条、播放按钮区域不被遮挡。当在video区域滑动时,实际上是在div上操作,由于div和video是兄弟节点,不会触发video的滑动事件,这样就可以完美解决以上问题。
实现代码如下:
<template>
  <div style="background-color: #00bfff;">
    <tabs index="0" >
      <tab-bar mode="fixed">
      </tab-bar>
      <tab-content>
        <div  style="flex-direction: column;">
          <text style="color: red">1</text>
          <stack class="video">
            <video class="video1" id="111"
              src="https://ss0.bdstatic.com/-0U0bnSm1A5BphGlnYG/cae-legoup-video-target/93be3d88-9fc2-4fbd-bd14-833bca731ca7.mp4"
              onstart="start" ontouchmove="move" onseeked="seeked">
              </video>
              <div style="width: 100%;height:300px;" onclick="bof">
              </div>
          </stack>
        </div>
        <div  style="flex-direction: column;">
          <text style="color: red">2</text>
        </div>
        <div style="flex-direction: column;">
          <text style="color: red">3</text>
        </div>
      </tab-content>
    </tabs>
  </div>
</template>
快应用打开后会白屏一段时间,然后才能正常显示,点击按钮没有响应
现象描述
快应用打开后会白屏一段时间后才能正常显示,正常显示后点击按钮没有响应,再过一段时间,按钮才可点击。
问题代码如下:
<template>
  <!-- Only one root node is allowed in template. -->
  <div class="container">
    <input type="button" value="write" onclick="write" />
    <input type="button" value="delete" onclick="remove" />
  </div>
</template>
<style>
  .container {
    flex-direction: column;
    justify-content: center;
    align-items: center;
    background-color: red;
  }
</style>
<script>
  import file from '@system.file'
  import prompt from '@system.prompt';
  module.exports = {
    data: {
      componentData: {},
      arr: [],
      file: '',
      fileuri: '',
    },
    onInit() {
    },
    onReady() {
      this.write()
    },
    write() {
      console.log("handling success 11222111");
      for (let i = 0; i < 10000; i++) {
        file.writeText({
          uri: 'internal://cache/test/test' + i + '.txt',
          text: 'nihaadpafsafa fsafass faf  sfsa sf',
          encoding: 'UTF-8',
          success: function () {
            console.log('success');
          },
        })
      }
      console.log("handling success 11111");
      prompt.showToast({
        message: '10000个文件写完成了',
        duration:"2000",
      })
    },
    remove() {
      file.list({
        uri: "internal://cache/test/",
        success: function (data) {
          console.log(data)
          for (let i = 0; i < 1000; i++) {
            console.log("message", data.fileList[i].uri);
            file.delete({
              uri: data.fileList[i].uri,
              success: function (data) {
                console.log("hjj handling success");
              },
              fail: function (data, code) {
                console.log("handling fail, code=" + code + data);
              }
            })
          }
        },
        fail: function (data, code) {
          console.log("handling fail, code=" + code);
        }
      })
      prompt.showToast({
        message: '10000个文件删除完成了',
        duration:"2000",
      })
    }
  }
</script>
异常现象截图如下所示:
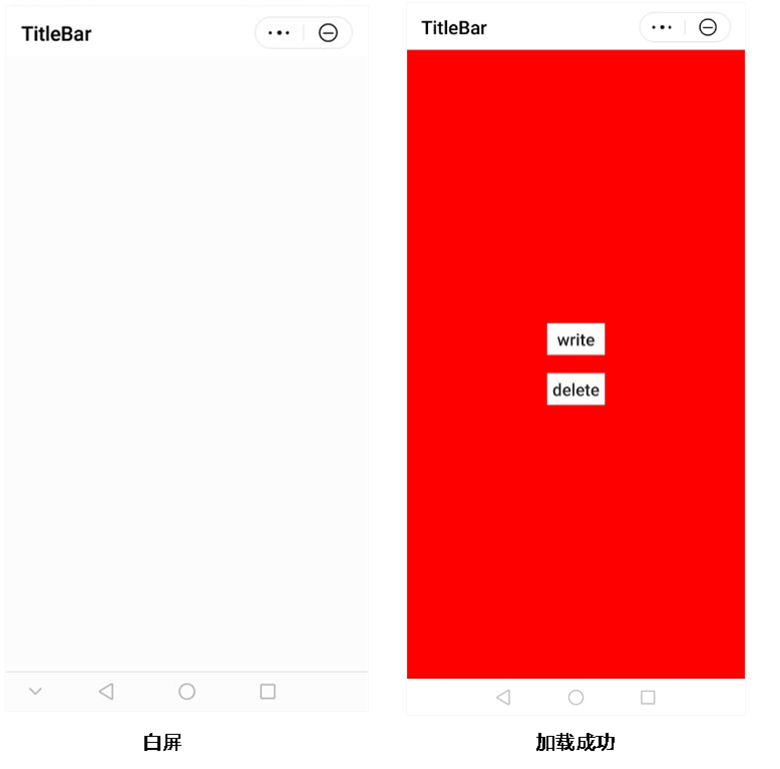
问题分析
查看该段问题代码,发现应用启动时,在页面生命周期onReady使用file接口实现了大批量创建文件的功能。
白屏是因为write方法里调用file.write接口通过for循环写了10000个文件,而这一操作是需要一段时间的,从而导致页面没有及时渲染出来,而要等文件创建完成后才能正常显示。
同理文件删除操作也是一样的,点击页面“删除”按钮,响应事件delete方法里调用file.delete接口删除所有的文件也需要一段时间,此时再去点击其他按钮是没有反应的,而要等当前操作完成才可以。
解决方法
快应用引擎的JS是单线程的,不能并发执行,函数执行和js事件交互都是排队的。所以不建议在快应用里运行耗时很长的代码,建议把write和delete方法删除或者进行优化,先创建一部分,把剩下的操作放到后面去执行。
list组件设置flex-direction:row之后,设置的高度不生效,会变的异常大
现象描述
list组件设置flex-direction:row之后,设置的高度height: 100px不生效,会变的异常大。
问题代码如下:
<template>
    <!-- Only one root node is allowed in template. -->
    <div class="container">
            <list style="background-color: red;flex-direction:row;height: 100px;">
                <list-item type="list-item" for="listdata" style="background-color: green;">
                    <image src="{{$item}}"></image>
                </list-item>
            </list>
    </div>
</template>
<style>
    .container {
        flex-direction: column;
        justify-content: center;
        align-items: center;
    }
    .title {
        font-size: 50px;
        background-color: blue;
    }
</style>
<script>
    module.exports = {
        data: {
            componentData: {},
            listdata: ['/Common/logo.png', '/Common/logo.png', '/Common/logo.png']
        },
        onInit() {
        },
    }
</script>
运行异常现象如下图所示:

问题分析
当div设置flex-direction: column,list设置flex-direction: row时,快应用引擎底层代码RecylerView onMeasure会多次执行,从而导致传进来的值与开发者设置的不一致。
解决方法
针对快应用引擎这个问题,开发者可以在list外层再包一层div来规避问题实现所要的效果。
<template>
    <!-- Only one root node is allowed in template. -->
<div class="container">
    <!-- 新增div规避引擎问题 -->
        <div>
            <list style="background-color: red;flex-direction:row;height: 100px;">
                <list-item type="list-item" for="listdata" style="background-color: green;">
                    <image src="{{$item}}"></image>
                </list-item>
            </list>
        </div>
    </div>
</template>
<style>
    .container {
        flex-direction: column;
        justify-content: center;
        align-items: center;
    }
    .title {
        font-size: 50px;
        background-color: blue;
    }
</style>
<script>
    module.exports = {
        data: {
            componentData: {},
            listdata: ['/Common/logo.png', '/Common/logo.png', '/Common/logo.png']
        },
        onInit() {
        },
    }
</script>
实现最终效果如图所示:
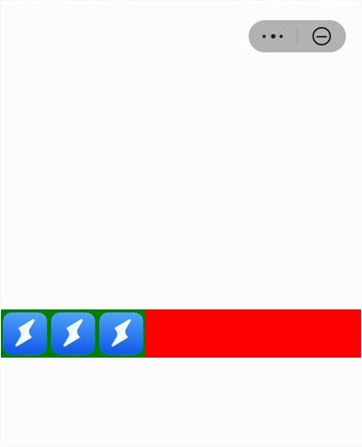
audio通知栏切换歌曲停止播放,怎么办
现象描述
播放音乐时,切换至应用其他页面,使用后台状态栏切换音乐时,音乐会出现暂停。
问题分析
华为audio接口只能在页面中使用,当audio所在的页面退出后,页面被销毁,绑定的上下文对象也随之不存在。 此时,在通知栏使用上一首、下一首切换歌曲时,引擎会自动将当前播放的歌曲暂停,并重置播放状态,但是audio接口的绑定事件找不到上下文对象,无法触发previous和next事件,从而导致上述现象。
解决方法
在应用首页监听audio事件,而不仅仅是在播放页面,这样当用户离开播放页面时,依然可以监听到audio的每个事件,从而去控制播放逻辑。

由于华为快应用引擎不支持在app.ux里调用audio接口,所以当用户退出了整个应用,虽然后台依然在播放,但是快应用却不能收到audio的事件回调。
实现代码
以下示例demo中有两个页面:首页Main和音频Audio。为了避免重复代码,可维护性,将audio的相关代码独立出来作为一个公共的js,方便每个页面调用。
- 公共utils.js代码如下:
import audio from '@system.audio'; export default{ listenAudio() { var that=this; console.info("util.js listenAudio "); audio.onplay = function () { console.log('audio onplay') } audio.onpause = function () { console.log('audio onpause') } audio.onended = function () { console.log('audio onended') } audio.ondurationchange = function () { console.log('util.js ondurationchange') var total = audio.duration console.log('util.js ondurationchange total=' + total) } audio.ontimeupdate = function () { var time = audio.currentTime // console.log('util.js ontimeupdate time=' + time) } audio.onprevious = function () { audio.cover = 'https://xx.jpg' audio.title = "钢琴曲" audio.artist = "钢琴家" // Replace with NetEase cloud music resource link audio.src = 'https://xx.mp3' console.log(' util.js on previous event from notification ') } audio.onnext = function () { audio.cover = 'xx.jpg' audio.title = '轻音乐'; audio.artist = '音乐家' // Replace with NetEase cloud music resource link audio.src = 'https://xx.mp3' console.log(' util.js on next event from notification ') } }, getAudioPlayState() { audio.getPlayState({ success: function (data) { console.log(`getAudioPlayState success: state: ${data.state},src:${data.src}, currentTime:${data.currentTime},autoplay:${data.autoplay},loop:${data.loop}, volume: ${data.volume},muted:${data.muted},notificationVisible:${data.notificationVisible}`); }, fail: function (data, code) { console.log('getAudioPlayState fail, code=' + code); } }); }, startPlay() { audio.play(); }, pausePlay() { audio.pause(); }, stopPlay() { audio.stop(); }, seekProress(len) { audio.currentTime = len; }, setVolume(value) { audio.volume = value; }, setMute(isMuted) { audio.muted = isMuted }, setLoop(isloop) { audio.loop = isloop }, setStreamType() { if (audio.streamType === 'music') { audio.streamType = 'voicecall' } else { audio.streamType = 'music' } console.error('audio.streamType =' + audio.streamType); }, setTitle(title) { console.info('setTitle=' + title); audio.title = title; }, setArtist(artist) { console.info('setArtist artist=' + artist) ; audio.artist = artist; }, setCover(src) { console.info('setCover src=' + src); audio.cover = src; } } - 在首页Main的生命周期onShow方法中添加监听audio事件,调用utils.js中的listenAudio,代码如下:
<script> import utils from '../Util/utils.js'; module.exports = { onShow(options) { utils.listenAudio(); }, } </script> - 在音频Audio页面生命周期onShow方法中添加监听audio事件,调用utils.js中的listenAudio,由于在播放页面需要显示播放进度,所以单独监听了进度回调事件,代码如下:
onShow(options) {
  var that = this;
  utils.listenAudio();
  audio.ondurationchange = function () {
    console.log('audio ondurationchange')
    that.total = audio.duration
    console.log('audio ondurationchange total=' + that.total)
  }
  audio.ontimeupdate = function () {
    that.time = audio.currentTime
    console.log('ontimeupdate time=' + that.time)
  }
},
Deeplink跳转时,提示应用下架
现象描述
使用快应用Deeplink格式的链接跳转线上快应用,无法打开快应用,提示应用可能下架或者未在应用服务区域。
问题分析
出现此情况可能有以下两种原因:
- 包名不对
- 发布区域问题
包名填写正确,但是快应用在用户所在的服务地没有发布,例如开发者发布了快应用A,在发布区域时选择德国,而用户的华为账号服务地设置的是英国,那么该用户使用deeplink测试拉起快应用场景就会出现此问题。
解决方法
richtext组件背景色填充问题
现象描述
使用richtext组件包含网页内容时,网页内容会出现白色边框,影响整体显示效果。
问题代码如下:
<template>
  <div class="doc-page">
    <div class="page-title-wrap">
      <text class="page-title ">richtext</text>
    </div>
    <div class="item-container">
      <text class="item-hint">type=html</text>
      <richtext type="html" class="rich-text">{{content}}</richtext>
    </div>
  </div>
</template>
<script>
  export default {
    private: {
      content: `<div class="item-content"  style="background-color: #006000";>
        <style>h1{color: yellow;}</style>
        <p class="item-title">h1</p>
        <h1>Text test</h1>
        <p class="item-title">h2</p>
        <h2>Text test</h2>
      </div>`
    },
    onInit () {
      this.$page.setTitleBar({text: 'richtext'})
    }
  }
</script>
<style>
  /* @import '../../../common/css/common.css'; */
  .doc-page{
    background-color: #000000;
  }
  .item-container {
    margin-bottom: 30px;
    margin-right: 30px;
    margin-left: 30px;
    flex-direction: column;
  /* background-color:#808000; */
  }
  .item-content {
    flex-direction: column;
  }
  .item-title {
    background-color:#1e90ff;
  }
  .item-hint {
    background-color:#308000;
  }
  .rich-text {
  }
</style>
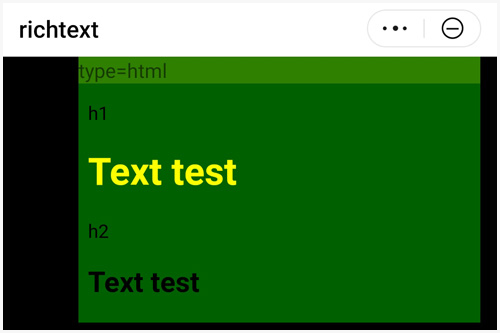
异常效果如下:
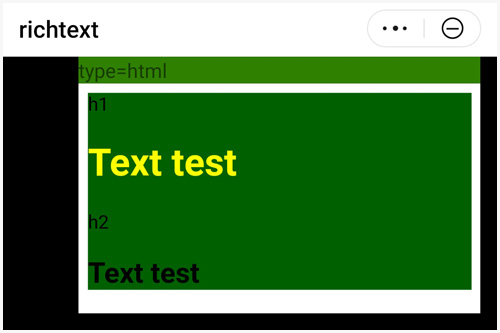
问题分析
使用richtext组件包含html内容后,在快应用里通过class设置background-color是不生效的。如果richtext包含的内容只含网页的body部分,即使在body上设置了背景色,在展示富文本时周围也会出现白色边框。需要在richtext里写完整的html,且在其html标签上设置背景色,背景色在展示时能覆盖边框,从而不会出现白色的边框。
解决方法
在richtext包含一个完整的html格式的网页,在html标签中设置需要覆盖白框的背景色。
修改后的代码如下:
<template>
  <div class="doc-page">
    <div class="page-title-wrap">
      <text class="page-title ">richtext</text>
    </div>
    <div class="item-container">
      <text class="item-hint">type=html</text>
      <richtext type="html" class="rich-text">{{content}}</richtext>
    </div>
  </div>
</template>
<script>
  export default {
    private: {
      content: `<!DOCTYPE html>
                <html lang="en" style="background-color: #006000;">
                    <head>
                    <meta charset="UTF-8" />
                    <meta name="viewport" content="width=device-width, initial-scale=1.0" />
                    <title>Document</title>
                    </head>
      <div class="item-content"  style="background-color: #006000";>
        <style>h1{color: yellow;}</style>
        <p class="item-title">h1</p>
        <h1>Text test</h1>
        <p class="item-title">h2</p>
        <h2>Text test</h2>
      </div>
      </body>
      </html>`
    },
    onInit () {
      this.$page.setTitleBar({text: 'richtext'})
    }
  }
</script>
<style>
  /* @import '../../../common/css/common.css'; */
  .doc-page{
    background-color: #000000;
  }
  .item-container {
    margin-bottom: 30px;
    margin-right: 30px;
    margin-left: 30px;
    flex-direction: column;
  /* background-color:#808000; */
  }
  .item-content {
    flex-direction: column;
  }
  .item-title {
    background-color:#1e90ff;
  }
  .item-hint {
    background-color:#308000;
  }
  .rich-text {
  }
</style>
优化后的显示效果如下:
如何全局监听网络状态的变化
现象描述
快应用提供了网络状态的接口,可用于监听当前用户手机的网络情况,比如是否有网、网络类型是wifi还是移动网络。开发者可以根据网络类型和自身应用流量消耗情况,给出不同的界面设计。但是如果在每个页面都去监听网络状态,会导致重复代码过多,且容易遗漏。那么,是否有办法做到全局监听?有,可以通过在快应用app.ux中调用网络状态接口,在每个页面使用watch监听获取当前网络状态。
实现方法
- 在app.ux中定义全局对象,见如下示例代码中的localeData对象,该对象中定义了属性currentType,用于保存网络状态接口返回的结果。

不能直接定义currentType,否则步骤3中的监听无法获取实时结果,currentType需要作为对象的属性去监听。
- 在app.ux生命周期onCreate()中调用网络状态接口。
- 具体页面调用$watch()函数监听步骤1中的currentType,实时获取结果。
详细示例代码如下。
app.ux代码:
<script>
  import network from '@system.network';
  module.exports = {
    onCreate() {
      console.info('Application onCreate');
      this.listenNetwork();
    },
    onDestroy() {
      console.info('Application onDestroy');
      network.unsubscribe();
    },
    listenNetwork: function () {
      console.info("listenNetwork START ");
      var that = this
      network.subscribe({
        callback: function (ret) {
          that.data.localeData.currentType = ret.type;
          console.info("listenNetwork CALLBACK :" + that.data.localeData.currentType);
        },
        fail: function (erromsg, errocode) {
          console.log('network.subscribe----------' + errocode + ': ' + erromsg)
        }
      })
    },
    data: {
      localeData: {
        currentType: '',
      }
    }
  }
</script>
页面hello.ux代码:
<template>
  <!-- Only one root node is allowed in template. -->
  <div class="container">
    <text class="title">网络类型:{{currentType.currentType}}</text>
  </div>
</template>
<style>
  .container {
    flex-direction: column;
    justify-content: center;
    align-items: center;
  }
  .title {
    font-size: 100px;
  }
</style>
<script>
  module.exports = {
    data: {
      componentData: {},
      currentType: {},
    },
    onInit() {
      this.$page.setTitleBar({
        text: 'menu',
        textColor: '#ffffff',
        backgroundColor: '#007DFF',
        backgroundOpacity: 0.5,
        menu: true
      });
      this.currentType=this.$app.$def.data.localeData;
      this.$watch('currentType.currentType', 'listenNetType');
    },
    listenNetType: function (newValue, oldValue) {
      console.info("listenNetType newValue= " + newValue + ", oldValue=" + oldValue);
      if(newValue==='wifi'){
      }else{
      }
    },
  }
</script>
Deeplink跳转快应用后获取参数异常
现象描述
Deeplink链接携带参数跳转快应用首页,首页启动模式配置为singleTask值,当快应用首页接收参数,遇到如下情况:
- 如果快应用没打开过,可以正常接收到参数。
- 第一次跳转到目标页面之后,按home键把快应用切换到后台,此时另一个Deeplink跳转首页携带的是不同参数,首页接收不到。跟踪日志发现首页触发了onRefresh生命周期,但是onRefresh生命周期日志打印的参数仍是上一个Deeplink的参数。
问题代码如下:
第一次打开的Deeplink链接:hap://app/com.huawei.text?test=first
第二次打开的Deeplink链接:hap://app/com.huawei.text?test=second
跳转快应用的首页代码:
<template>
  <div style="flex-direction: column;align-items: center;justify-content: center;">
    <div>
      <text style="width:300px;height:100px;color:red">Quick app not opened</text>
      <text style="background-color: blue;width:100px;height:100px;color:red">{{ceshi}}</text>
    </div>
    <div>
      <text style="width:300px;height:100px;color:red">Quick app opened</text>
      <text style="background-color: black;width:100px;height:100px;color:red">{{ceshii}}</text>
    </div>
  </div>
</template>
<style>
</style>
<script>
  module.exports = {
    data: {
      ceshi: '',
      ceshii: '',
    },
    onInit() {
      this.ceshi = this.test
      console.log("message", this.test, "===========");
    },
    onShow() {
    },
    onRefresh() {
      this.ceshii = this.test
      console.log("message111111111", this.test, "===========", this.ceshii);
    }
  }
</script>
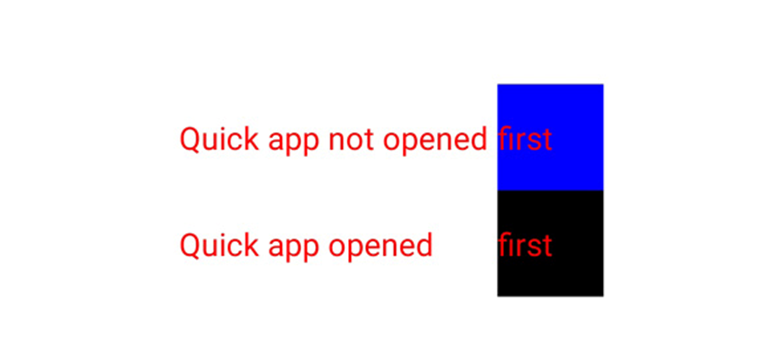
两次Deeplink打开快应用首页,获取的参数值如下图所示:
问题分析
当快应用打开的情形下,再次通过Deeplink链接跳转过来时,触发了页面onRefresh生命周期,在onRefresh中接收参数,但是误以为在onRefresh里接收参数与第一次打开的时候接收参数一样,都是通过this.xxx形式来接收的。其实不是的,onRefresh生命周期是携带参数的,需要从生命周期方法中的参数获取。
解决方法
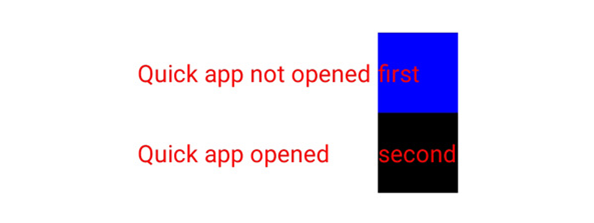
onRefresh生命周期的参数在onRefresh(data)的data里,需要通过data.xxx的形式去获取。修改后的示例代码如下:
<template>
  <div style="flex-direction: column;align-items: center;justify-content: center;">
    <div>
      <text style="width:300px;height:100px;color:red">Quick app not opened</text>
      <text style="background-color: blue;width:100px;height:100px;color:red">{{ceshi}}</text>
    </div>
    <div>
      <text style="width:300px;height:100px;color:red">Quick app opened</text>
      <text style="background-color: black;width:100px;height:100px;color:red">{{ceshii}}</text>
    </div>
  </div>
</template>
<style>
</style>
<script>
  module.exports = {
    data: {
      ceshi: '',
      ceshii: '',
    },
    onInit() {
      this.ceshi = this.test
      console.log("message", this.test, "===========");
    },
    onShow() {
    },
    onRefresh(e) {
      this.ceshii = e.test
      console.log("message111111111", e.test, "===========", this.ceshii);
    }
  }
</script>
修改后参数值获取情况如下图所示:
如何在一段文字的开始位置设置背景色
现象描述
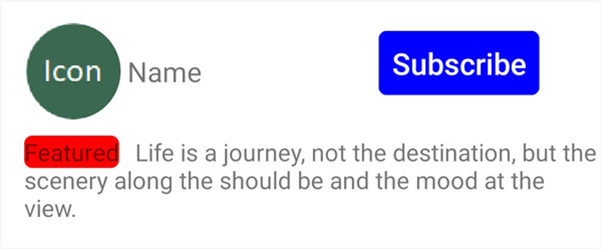
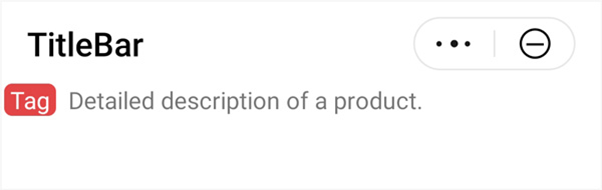
电商应用在展示某个产品时,往往需要在产品介绍前面加上标签,如下图中的Featured,通过背景色来实现标签分类效果,从而让消费者直观看到,增加点击率和购买率。
尝试使用快应用a组件和span组件,但是两个组件均不支持设置背景色;使用两个text组件来实现,但是第二个text文字无法正常换行,换行时前面会留有空隙。那么如何才能达到如下图所示的效果呢?
实现方法
通过给第一个text组件设置position:absolute,第二个text组件设置文本首行缩进属性text-indent,预留出对应的宽度。
示例代码如下:
<template>
  <div style="flex-direction: column;">
    <div>
      <text id="11" style="background-color: #E34547;color:#FFFFFF;position: absolute;border-radius: 10px;margin-left: 5px">{{value}}</text>
      <text style="text-indent:{{kuan}};">Detailed description of a product.</text>
    </div>
  </div>
</template>
<style>
</style>
<script>
  module.exports = {
    data: {
      kuan: '',
      value: '精选'
    },
    onInit() {
      this.$page.setTitleBar({ text: '' })
      this.value=" Tag "
    },
    onShow() {
      '// Do something when show.'
      var that = this
      this.$element('11').getBoundingClientRect({
        success: function (data) {
          that.kuan = data.width + 20 + 'px'
          console.log("message", that.kuan);
          console.log('getBoundingClientRect succeeded, result data =' + JSON.stringify(data));
          console.log('getBoundingClientRect succeeded, result data =' + data.width,'hou',that.kuan);
        },
      });
    },
  }
</script>
运行效果图如下所示:
list-item组件宽度设置无效
现象描述
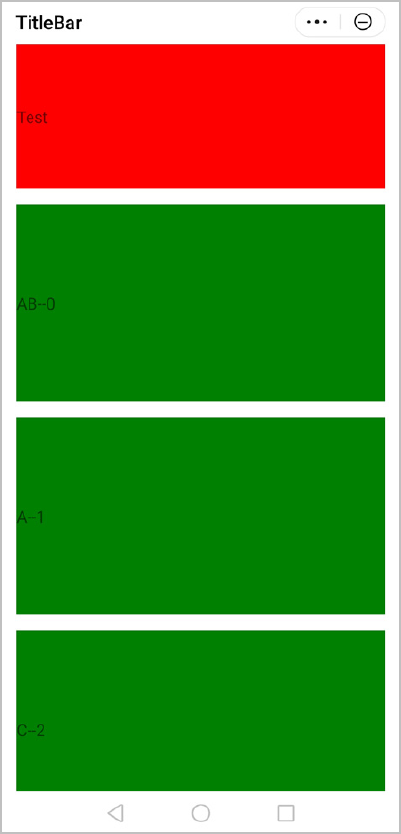
list组件设置layout-type:stagger后,list-item无法改变宽度,设置的宽度不生效,每个list-item的宽度都一样。
问题代码如下:
<template>
    <div style="padding-left:30px;padding-right: 30px;">
        <list style="flex-direction:row-reverse;width: 690px;">
            <list-item type="zxc">
                <list style="width: 690px;layout-type:stagger;display: flex;">
                    <list-item type="qqq" style="width: 100px;height: 300px;margin-bottom:30px;background-color: red">
                        <text class="font-big">Test</text>
                    </list-item>
                    <block for="{{listData}}">
                        <list-item type="qqq" style="width: 300px;height: 400px;margin-bottom:30px;background-color: green">
                            <text class="font-big">{{$item}}--{{$idx}}</text>
                        </list-item>
                    </block>
                </list>
            </list-item>
        </list>
    </div>
</template>
<style>
</style>
<script>
    module.exports = {
        data: {
            listData:['AB','A','C','D','E']
        },
        onInit() {
            this.$page.setTitleBar({ text: '' })
            this.accept = this.body;
            console.debug("message debug");
            console.log("message normal");
        },
    }
</script>
运行效果如下:
问题分析
当list组件的layout-type 为stagger时只能自定义各个 list-item 的高度,不能自定义宽度,宽度取决于list组件设置的宽度和columns值,每列的宽度是均分list组件的宽度。
解决方法
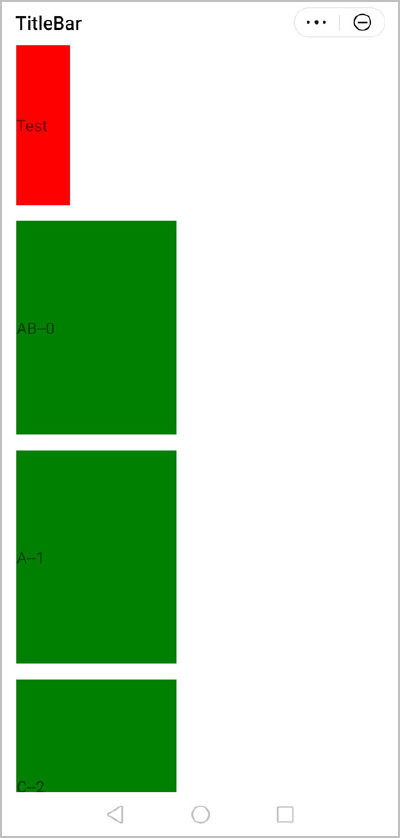
将layout-type:stagger代码删除,按照默认的grid布局方式,即可自定义list-item的宽度。
<template>
    <div style="padding-left:30px;padding-right: 30px;">
        <list style="flex-direction:row-reverse;width: 690px;">
            <list-item type="zxc">
                <list style="width: 690px;display: flex;">
                    <list-item type="qqq" style="width: 100px;height: 300px;margin-bottom:30px;background-color: red">
                        <text class="font-big">Test</text>
                    </list-item>
                    <block for="{{listData}}">
                        <list-item type="qqq" style="width: 300px;height: 400px;margin-bottom:30px;background-color: green">
                            <text class="font-big">{{$item}}--{{$idx}}</text>
                        </list-item>
                    </block>
                </list>
            </list-item>
        </list>
    </div>
</template>
<style>
</style>
<script>
    module.exports = {
        data: {
            listData:['AB','A','C','D','E']
        },
        onInit() {
            this.$page.setTitleBar({ text: '' })
            this.accept = this.body;
            console.debug("message debug");
            console.log("message normal");
        },
    }
</script>
修改后运行效果如下:
如何获取微信分享链接中携带的数据
实现方法
第三方分享链接实际上是deeplink格式的URL,参数可以拼接在URL后面,因为第三方平台如微信等大多对外屏蔽外部链接,例如微信对外链限制严格,如果发现你的链接不是http或者https开头,都会默认给你加上http的开头,因此建议采用如下https格式的URL作为分享链接,不建议使用hap和hwfastapp格式。
https://hapjs.org/app/<package>/[path][?key=value]
- package: 应用包名,必选。
- path: 应用内页面的path,可选,默认为首页。
- key=value: 需要传给页面的参数,可选,可以有多个。传递的参数值有可能被其他应用获取,建议不要传递安全敏感度较高的数据。
这样,快应用的目标跳转页面中就可通过获取deeplink链接中参数的方式,获取分享链接中的数据。
详细代码如下:
<template>
  <div class="container">
    <text>以下示例为分享链接到微信好友,点击微信的分享链接拉起快应用,快应用获取链接中的数据</text>
    <input type="button" class="btn" value="{{$t('getProvider')}}" onclick="getProvider" />
    <input type="button" class="btn" value="{{$t('getAvailablePlatforms')}}" onclick="getAvailablePlatforms" />
    <input type="button" class="btn" value="{{$t('wxFriendShare')}}" onclick="wxFriendShare" />
  </div>
</template>
<style>
  .container {
    flex-direction: column;
    align-content: center;
    justify-content: center;
  }
  text {
    margin-bottom: 50px;
  }
  input {
    margin-bottom: 50px;
    margin-right: 60px;
    margin-left: 60px;
    justify-content: center;
  }
</style>
<script>
  import share from '@service.share'
  import prompt from '@system.prompt'
  export default {
    data: {
      // The default is the local app internal image
      photoUri: '/Common/logo.png'
    },
    onInit() {
      this.$page.setTitleBar({ text: '第三方分享-微信' })
    },
    getProvider: function () {
      prompt.showToast({
        message: 'message provider :' + share.getProvider(),
        duration: 0
      })
    },
    getAvailablePlatforms: function () {
      share.getAvailablePlatforms({
        success: function (data) {
          for (const i in data.platforms) {
            console.log('share platforms: ' + data.platforms[i])
          }
        },
        fail: function (data, code) {
          console.log('handling fail, code = ' + code)
        }
      })
    },
    wxFriendShare: function () {
      share.share({
        shareType: 0,
        title: "测试消息",
        summary: "测试消息",
        imagePath: this.photoUri,
        targetUrl: "https://hapjs.org/app/com.huawei.hello1/Test?par=im_message_from_wexin",
        platforms: ['WEIXIN'],
        fail: function (data, code) {
          prompt.showToast({
            message: 'message fail message :' + data + ' code ' + code,
            duration: 0
          })
        },
        cancel: function () {
          prompt.showToast({
            message: 'message cancel :',
            duration: 0
          })
        }
      })
    }
  }
</script>
分享链接跳转的目标页获取数据代码如下:
<template>
  <div class="container">
    <!-- list component method -->
    <div class="btn-wrap-column ">
      <text>获取微信分享链接中的数据如下:par=</text>
      <text>{{result}}</text>
    </div>
  </div>
</template>
<style>
  .container {
    flex-direction: column;
    align-content: center;
    justify-content: center;
  }
  .btn-wrap-column {
    margin-left: 60px;
    flex-direction: column;
  }
</style>
<script>
  export default {
    data: {
      par: '',
      result: ''
    },
    onInit() {
      this.$page.setTitleBar({ text: '获取微信分享链接中的数据' })
      var that=this;
      that.result = this.par;
    }
  }
</script>
建议与总结
- 建议采用https格式的URL格式,不建议使用hap和hwfastapp格式。
- 样例为分享给微信好友,目前华为快应用也支持分享给微信朋友圈和系统分享。
通过卡片跳转快应用指定页面,点返回无法直接返回卡片
现象描述
在打开快应用A页面的情况下,通过卡片跳转至该快应用的B页面,点击返回键后,先退回A页面,然后再退回卡片,无法直接退出快应用,返回卡片。
问题分析
该问题是因为页面采用了默认启动模式standard。standard模式时会每次打开新的目标页面(多次打开目标页面地址时会存在多个相同页面),导致页面栈中会依次缓存页面A、页面B,退出时页面会依次出栈,无法一键返回。所以建议当用户从卡片跳转至快应用时,使用动态声明的方式指定页面B的启动模式为clearTask即可。指定clearTask时,会直接清除原先的页面A,打开页面B,如此页面栈中只有页面B存在,返回时即可直接退出快应用。
解决方法
卡片跳转快应用示例代码(采用deeplink链接):
<!DOCTYPE html>
<html lang="en">
<head>
  <meta charset="UTF-8">
  <meta name="viewport" content="width=device-width, initial-scale=1.0">
  <meta http-equiv="X-UA-Compatible" content="ie=edge">
  <title>快应用测试</title>
</head>
<body>
  <a href="hwfastapp://com.huawei.hello1/Test?___PARAM_LAUNCH_FLAG___=clearTask">使用hwfastapp打开</a>
  <br>
  <br>
  <a href="hap://app/com.huawei.hello1/Test?___PARAM_LAUNCH_FLAG___=clearTask">使用hap打开</a>
</body>
</html>
卡片跳转的快应用目标页面(根据当前页面栈的数量可以发现始终只有一个页面):
<template>
  <div class="container">
    <text>___PARAM_LAUNCH_FLAG___=</text>
    <text>{{taskflag}}</text>
    <text>当前页面栈的数量</text>
    <text>{{length}}</text>
  </div>
</template>
<style>
  .container {
    flex-direction: column;
    align-content: center;
    align-items: center;
    justify-content: center;
  }
  text {
    margin-bottom: 50px;
  }
</style>
<script>
import router from '@system.router';
  export default {
    data: {
      // The default is the local app internal image
      photoUri: '/Common/logo.png',
      taskflag:'',
      PARAM_LAUNCH_FLAG:'',
      length:''
    },
    onInit() {
      this.$page.setTitleBar({ text: 'deepLink' })
      var that=this;
      that.taskflag=this.PARAM_LAUNCH_FLAG;
      // 调用getPages方法
      let pages = router.getPages()
      // 由于获得的值是一个JSON数组,所以直接打印是打印不出来的,可以使用下面的方法来打印
      console.log("tag", this.printJSONArray(router.getPages()));
      that.length= router.getLength();
      console.log("pages' length = "+that.length);
    },
    printJSONArray(array) {
      let result = ""
      const suffix = ", "
      Array.isArray(array) && array.forEach((element, index) => {
        result = result + JSON.stringify(element) + (index === array.length-1 ? "" : ", ")
        })
      return result
    }
  }
</script>
建议与总结
页面启动模式有两种配置方式,一种是在manifest文件中静态声明,一种是动态传参声明,建议使用动态模式,根据需要进行配置,静态声明的方式适用于单一固定场景,无法灵活调整。
快应用中如何避免读取undefined变量的属性时导致的报错
现象描述
在JS开发过程中,经常出现一种错误:即读取一个值为null或者undefined变量的属性时,出现错误提示。例如app.ux中有如下错误代码:
<!-- a = {}; -->
<text>{{ a.b.c }}</text>
<!-- Error: Cannot read property 'c' of undefined -->
解决方法
可以通过如下两种方案进行处理:
【方案一】使用&&,通过逻辑运算的执行顺序来规避错误。修改的代码如下:
<text>{{ a && a.b && a.b.c }}</text> 【方案二】推荐使用此方案。在ViewModel上增加函数方法,例如增加一个checkEmpty的函数,示例代码如下:
export default {
  checkEmpty(...args) {
    let ret
    if (args.length > 0) {
      ret = args.shift()
      let tmp
      while (ret && args.length > 0) {
        tmp = args.shift()
        ret = ret[tmp]
      }
    }
    return ret || false
  }
}
这样在获取属性的地方就可以方便的调用此方法,修改后代码如下:
<text>{{checkEmpty(a, 'b', 'c')}}</text> 快应用中如何避免JSON.parse()解析出错
现象描述
在代码中执行fetch请求,请求返回的数据默认为JSON化的字符串,开发者可以对JSON对象进行解析。但是一旦遇到服务端权限校验失败等问题,就会返回类似503错误的HTML页面,此时进行JSON解析就会失败。
解决方法
可以通过如下两种方案进行处理:
【方案一】在每个执行JSON.parse()代码的地方加上try-catch,捕捉并处理错误情况。
【方案二】推荐使用此方案。在快应用app.ux文件中提前处理JSON.parse(),使用try-catch,待异常出现时埋点数据,或者返回默认正常数据替代。示例代码如下:
export function parseProxy () {
  const rawParse = JSON.parse
  JSON.parse = function (str, defaults) {
    try {
      return rawParse(str)
    }
    catch (err) {
      console.error(`JSON解析失败:${str}, ${err.stack}`)
      return defaults
    }
  }
}
list组件如何实现吸顶效果
实现方法
吸顶是传统 web 页面中的一种比较老的交互方式:
- 吸顶元素的初始位置一般靠近页面顶部,但与顶部有一定的距离。
- 当手指向上滑动超过吸顶元素的初始位置时,把吸顶元素固定在顶部。
- 当手指向下滑动到达吸顶元素的初始位置时,取消吸顶元素在顶部的固定吸顶。
在传统 web 页面中的实现思路是监听scroll事件,当页面滚动到一定位置时,做一些处理来改变吸顶元素在窗口中的位置。
快应用与传统 web 页面不同,在框架中,scroll事件仅适用于list组件,且获取的值是滚动的相对坐标值,在使用时,需要通过累加来获取当前滚动位置的绝对坐标。此外,scroll事件在列表滚动时被高频触发,会存在潜在性能问题。
因此,在快应用框架中,推荐开发者使用appear事件和disappear事件来实现吸顶效果,appear事件在组件出现时触发,disappear事件在组件消失时触发。
appear事件和disappear事件是组件的通用事件,文档中标有支持通用事件的组件都支持这两个事件,包括div组件、list-item组件等,灵活使用appear事件和disappear事件,就能实现大部分需要判断滚动位置的需求。
详细代码如下:
<template>
  <!-- 利用stack组件,使"列表中的吸顶元素对应的Mask"覆盖列表 -->
  <stack class="tutorial-page">
    <list class="list">
      <!-- 通过监听"列表中的顶部元素"的元素的appear和disappear事件,控制"列表中的吸顶元素对应的Mask"的显示 -->
      <list-item type="top" ondisappear="showMask" onappear="hideMask">
        <div class="height-300 bg-blue">
          <text>列表中的顶部元素</text>
        </div>
      </list-item>
      <!-- 列表中的吸顶元素 -->
      <list-item type="ceiling">
        <div class="height-300 bg-red">
          <text>列表中的吸顶元素</text>
        </div>
      </list-item>
      <!-- 普通列表元素 -->
      <list-item for="list" type="common" class="list-item">
        <text class="text">{{$item}}</text>
      </list-item>
    </list>
    <!-- 列表中的吸顶元素对应的Mask -->
    <div show="{{maskShow}}">
      <div class="height-300 bg-red">
        <text>列表中的吸顶元素</text>
      </div>
    </div>
  </stack>
</template>
<style lang="less">
  .tutorial-page {
    flex-direction: column;
    .list {
      width: 750px;
      flex-grow: 1;
      .list-item {
        height: 150px;
        border-bottom-width: 1px;
        border-bottom-color: #0faeff;
        .text {
          flex: 1;
          text-align: center;
        }
      }
    }
    .height-300 {
      height: 300px;
    }
    .bg-red {
      flex-grow: 1;
      justify-content: center;
      background-color: #f76160;
    }
    .bg-blue {
      flex-grow: 1;
      justify-content: center;
      background-color: #0faeff;
    }
  }
</style>
<script>
  export default {
    private: {
      maskShow: false,
      appearCount: 0,
      list: ['A', 'B', 'C', 'D', 'E', 'F', 'G', 'H', 'I', 'J', 'K', 'L', 'M', 'N']
    },
    onInit(){
      this.$page.setTitleBar({ text: '效果展示:吸顶' })
    },
    showMask () {
      this.maskShow = true
    },
    hideMask () {
      // 加载页面时,所有元素的appear事件都会被触发一次。因此,需要过滤第一次的appear事件
      if (this.appearCount) {
        this.maskShow = false
      } else {
        ++this.appearCount
      }
    }
  }
</script>
在上述代码中,列表中的顶部元素:type属性为top的list-item,列表中的吸顶元素:type属性为ceiling的list-item。实现吸顶效果的思路如下:
- 使用stack组件做为整个页面的容器,stack组件的特性为:每个直接子组件按照先后顺序依次堆叠,覆盖前一个子组件。
- 在stack组件中增加一个排在最后的子组件,作为mask遮挡之前的子组件,显示效果为一直固定在顶部,这个mask与吸顶元素渲染效果完全一致。
- 当吸顶元素需要吸顶时,显示对应的mask,实现吸顶的效果;当吸顶元素不需要吸顶时,隐藏对应的mask。
判断吸顶条件如下:
- 当页面向上滚动到顶部元素消失在视野时,吸顶元素需要固定在顶部,因此,监听顶部元素的disappear事件,显示mask。
- 当页面向下滚动到顶部元素出现在视野时,吸顶元素需要取消固定,因此,监听顶部元素的appear事件,隐藏mask。
map组件如何实现物体的移动动画
在map组件中,可以用marker实现目标物体的动态移动。假设marker图标为一辆汽车,在起点位置没有任何的旋转,点击地图,触发汽车向目标地点移动,并且在移动过程中,汽车的图标自动进行旋转,始终保持车头朝向目标地点。效果截图如下:
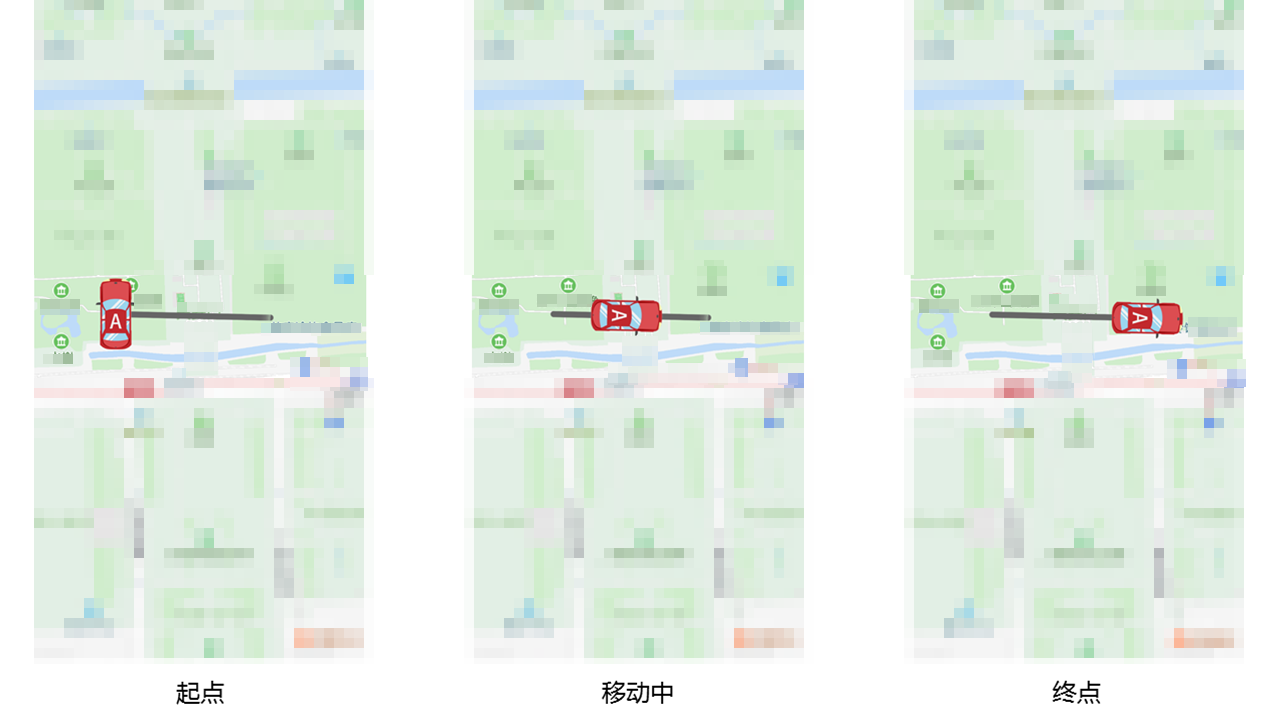
实现效果的示例代码如下:
<template>
  <div>
    <map
      style="width:{{width}}; height:{{height}}"
      id="map"
      scale="{{scale}}"
      markers="{{markers}}"
      polylines="{{polylines}}"
      @tap="tap"
    >
    </map>
  </div>
</template>
<script>
  const POINT1 = { latitude: 39.9090371069, longitude: 116.3953853161 }
  const POINT2 = { latitude: 39.9089550115, longitude: 116.3992842749 }
  export default {
    private: {
      width: '100%',
      height: '50%',
      scale: 17,
      markers: [
        {
          id: 1,
          latitude: POINT1.latitude,
          longitude: POINT1.longitude,
          anchor: { x: 0.5, y: 0.5 },
          iconPath: '../Common/carA.png',
          width: '100px'
        }
      ],
      polylines: [{ points: [POINT1, POINT2] }]
    },
    tap() {
      this.$element('map').translateMarker({
        markerId: 1,
        destination: POINT2,
        autoRotate: true,
        duration: 5000
      })
    }
  }
</script>
如何实现tabs组件页签内容的懒加载
一个内容丰富的选项卡,通常会包含许多页签内容。如新闻类应用中,可能会包括:推荐、热点、视频、段子、汽车、社会、娱乐等。
直接使用tabs默认会加载所有页签内容,导致 JS 线程持续忙于渲染每个页签,无法响应用户点击事件等,造成体验困扰。
为了解决这类问题,开发者可以让页签内容在用户点击时延迟渲染,而不是整个页面初始化时渲染。这个功能可以通过if指令完成。
实现功能的示例代码如下:
<template>
  <div class="tutorial-page">
    <tabs onchange="onChangeTabIndex">
      <tab-bar class="tab-bar" mode="scrollable">
        <text for="{{tabHeadList}}" class="{{currentIndex === $idx ? 'active' : ''}}">{{$item.title}}</text>
      </tab-bar>
      <tab-content class="tab-content">
        <div class="tab-content-section" for="{{tabHeadList}}">
          <!-- 初始化时,if为false,默认不渲染;页签被首次点击时,对应页签内容的if由false改为true -->
          <text if="{{$item.render}}">{{$item.title}}</text>
        </div>
      </tab-content>
    </tabs>
  </div>
</template>
<style lang="less">
  .tutorial-page {
    flex-direction: column;
    justify-content: center;
    align-items: center;
    .tab-bar text{
      padding: 0 25px;
      text-align: center;
      font-size: 34px;
    }
    .tab-bar .active {
      color: #FF0000;
    }
    .tab-content {
      flex: 1;
      background-color: #eeeeee;
      .tab-content-section {
        flex: 1;
        margin: 10px;
        background-color: #ffffff;
        justify-content: center;
        text {
          text-align: center;
          color: #FF0000;
        }
      }
    }
  }
</style>
<script>
  export default {
    private: {
      tabHeadList: [
        { title: '推荐', render: false },
        { title: '热门', render: false },
        { title: '视频', render: false },
        { title: '段子', render: false },
        { title: '汽车', render: false },
        { title: '社会', render: false },
        { title: '娱乐', render: false },
        { title: '军事', render: false },
        { title: '体育', render: false },
        { title: '财经', render: false }
      ],
      currentIndex: 0
    },
    onInit () {
      this.$page.setTitleBar({ text: '页签内容懒加载' })
    },
    /**
     * 修改列表中对应索引的数据项
     * @param index
     */
    modifyListItemData (index) {
      this.tabHeadList[index].render = true
    },
    /**
     * 监听tabs组件index的改变,index默认为0
     * @param evt
     */
    onChangeTabIndex (evt) {
      this.currentIndex = evt.index
      this.modifyListItemData(evt.index)
    }
  }
</script>
text内容较多时,相邻的div样式异常
现象描述
界面上text组件的内容比较多,且显示多行,此时与text组件相邻的div的样式显示异常,例如下图中圆形被挤压成椭圆。
问题代码如下:
<template>
  <div class="container">
    <div style="align-items: center;">
       <div class="typscolor" style="background-color: blue; opacity: 0.26; margin-left: 16px;">
</div>
      <text>{{text}}</text>
       <div class="typscolor" style="background-color: blue; opacity: 0.26; margin-left: 16px;">
</div>
      <text>{{text}}</text>
       <div class="typscolor" style="background-color: blue; opacity: 0.26; margin-left: 16px;">
</div>
      <text>{{text}}</text>
    </div>
  </div>
</template>
<style>
  .container {
    flex-direction: column;
    justify-content: center;
    height: 100%;
  }
   text {
    font-size: 24px;
  }
  .typscolor {
      border-radius: 50%;
      width: 30px;
      height: 30px;
      background-color: red;
      margin-right: 8px;
  }
</style>
<script>
  module.exports = {
    data: {
      text:'The circle on the left is displayed abnormally when there are too many texts.'
    },
    onInit() {
    },
  }
</script>
异常效果如下:
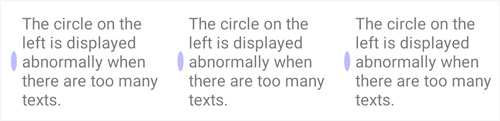
问题分析
当text组件内容过多时,text组件宽度增加,相邻div宽度不够,flex布局会自动压缩,从而导致div标签被压缩了。
解决方法
给div标签设置flex-shrink: 0属性,显示指定不压缩,即可解决该问题。
修改后代码如下:
<template>
  <div class="container">
    <div style="align-items: center;">
       <div class="typscolor" style="background-color: blue; opacity: 0.26; margin-left: 16px;"></div>
      <text>{{text}}</text>
       <div class="typscolor" style="background-color: blue; opacity: 0.26; margin-left: 16px;"></div>
      <text>{{text}}</text>
       <div class="typscolor" style="background-color: blue; opacity: 0.26; margin-left: 16px;"></div>
      <text>{{text}}</text>
    </div>
  </div>
</template>
<style>
  .container {
    flex-direction: column;
    justify-content: center;
    height: 100%;
  }
   text {
    font-size: 24px;
  }
  .typscolor {
      border-radius: 50%;
      width: 30px;
      height: 30px;
      background-color: red;
      margin-right: 8px;
      flex-shrink: 0;   /*加上该属性即可解决问题*/
  }
</style>
<script>
  module.exports = {
    data: {
      text:'The circle on the left is displayed abnormally when there are too many texts.'
    },
    onInit() {
    },
  }
</script>
正常显示效果如下:
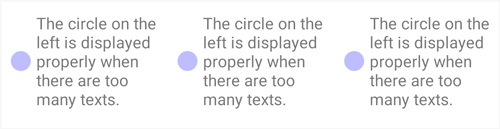
跳转目标页面的onShow生命周期没有触发
现象描述
通过router.push接口跳转到快应用的B页面,当B页面只是引用一个自定义组件XX的时候,B页面的onShow生命周期无法触发。如下图所示:
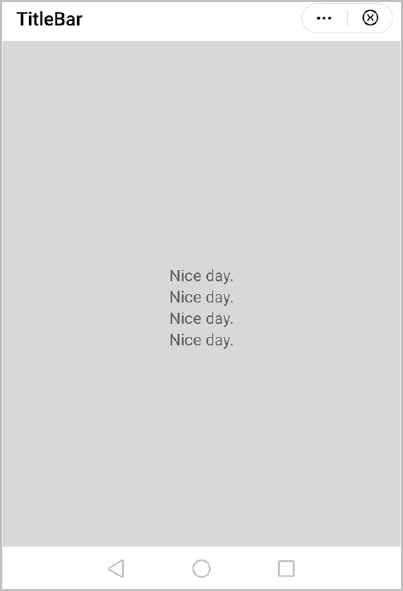
问题代码如下。
B页面代码:
<import name="listone" src="./aa.ux"></import>
<template>
<listone></listone>
</template>
<script>
  import prompt from '@system.prompt'
  export default {
    private: {
    },
    onInit: function () {
    },
    onShow() {
      console.log('The onShow event triggers');
      prompt.showToast({
        message: 'The onShow event triggers'
      })
    }, //无法触发
  }
</script>
<style>
  .demo-page {
    flex-direction: column;
    justify-content: center;
    align-items: center;
  }
  .title {
    font-size: 40px;
    text-align: center;
  }
</style>
自定义组件aa.ux代码:
<template>
  <div class="container">
    <text>Nice day.</text>
    <text>Nice day.</text>
    <text>Nice day.</text>
    <text>Nice day.</text>
  </div>
</template>
<style>
 .container {
    flex-direction: column;
    justify-content: center;
align-items: center;
background-color: #D8D8D8;
  }
</style>
<script>
  module.exports = {
    data: {
    },
    onInit() {
    },
  }
</script>
问题分析
快应用引擎框架对于自定义组件作为B页面的根节点时,B页面的onShow生命周期是无法触发的,但是子组件自身的onShow可以触发。
解决方法
在B页面的子组件外面加个div组件作为根节点,而不是把自定义组件作为根节点,这样B页面的onShow生命周期就可以触发了。
B页面修改后的代码:
<import name="listone" src="./aa.ux"></import>
<template>
  <!-- template里只能有一个根节点 -->
  <div><!-- 新增div作为根节点 -->
    <listone></listone>
  </div>
</template>
<script>
  import prompt from '@system.prompt'
  export default {
    private: {
    },
    onInit: function () {
    },
    onShow() {
      console.log('The onShow event triggers');
      prompt.showToast({
        message: 'The onShow event triggers'
      })
    },
  }
</script>
<style>
  .demo-page {
    flex-direction: column;
    justify-content: center;
    align-items: center;
  }
  .title {
    font-size: 40px;
    text-align: center;
  }
</style>
修改后运行效果如下:
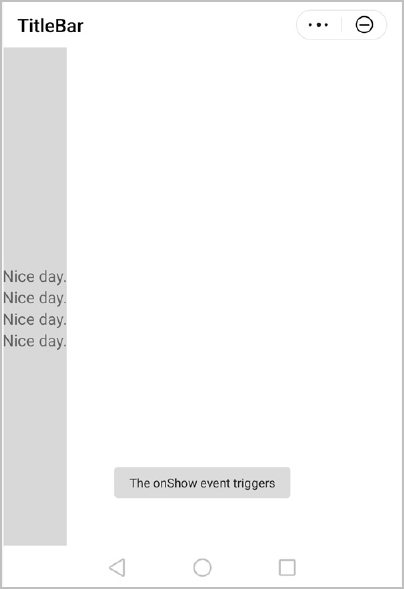
如何实现密码明文和密文的切换显示
现象描述
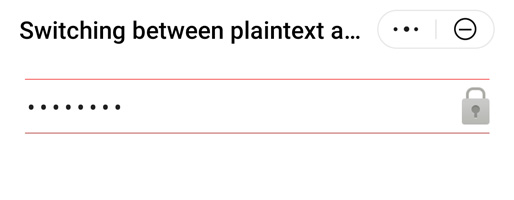
很多应用提供了账号登录、注册功能,在输入密码时,开发者为了安全性,当用户输入密码时,一般都显示……的密文。但是,这个体验也给用户造成了不便,比如用户不知道当前输入的字符是否是自己期望的,也无法知道当前输入到哪个字符。针对这个问题,开发者可以在输入框旁边提供个小图标,点击可切换显示明文和密文。
实现方法
- 密码输入框使用input组件。input组件提供了多种type值,密文使用type类型为password,明文类型可使用text类型,type字段需要绑定动态变量。
- 在明文和密文切换时,需要显示设置光标位置在末尾,否则切换后光标会显示在开始位置。设置光标位置可以通过setSelectionRange()方法,方法中的start和end参数都设置成当前输入的文字长度。
详细示例代码如下:
<template>
  <div class="container">
    <stack class="input-item">
      <input class="input-text" type="{{inputtype}}" id="inputpsdID" placeholder="please enter password" onchange="showChangePrompt"></input>
      <image src="../Common/lock.png"  class="lock" onclick="switchpassandshow"></image>
    </stack>
  </div>
</template>
<style>
  .container {
    flex: 1;
    padding: 20px;
    flex-direction: column;
    align-items: center;
  }
  .input-item {
    margin-bottom: 80px;
    margin-top: 10px;
    margin-left: 16px;
    margin-right: 16px;
     align-items: center;
     justify-content: flex-end;
  }
  .lock{
     width: 40px;
     height:54px;
  }
  .input-text {
    height: 80px;
    width: 100%;
    line-height: 80px;
    border-top-width: 1px;
    border-bottom-width: 1px;
    border-color: #999999;
    font-size: 30px;
    background-color: #ffffff;
    padding-right: 42px;
  }
  .input-text:focus {
    border-color: #f76160;
  }
</style>
<script>
  export default {
    data: {
      inputtype: 'password',
      lenth: 0
    },
    onInit() {
      this.$page.setTitleBar({ text: 'Switching between plaintext and ciphertext' });
    },
    showChangePrompt(e) {
      this.lenth = e.value.length;
      console.info("showChangePrompt   this.lenth= " + this.lenth);
    },
    switchpassandshow: function () {
      var com = this.$element('inputpsdID');
      if (this.inputtype === 'password') {
        this.inputtype = 'text';
      } else {
        this.inputtype = 'password';
      }
       com.setSelectionRange({ start: this.lenth, end: this.lenth});
    }
  }
</script>
实现的效果如下:
如何实现长按图片保存到相册
现象描述
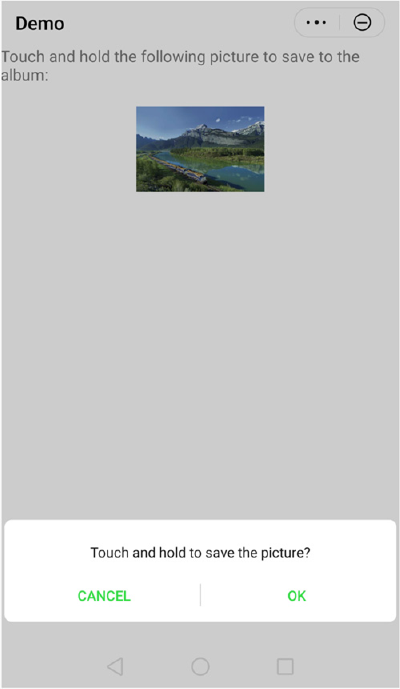
长按图片保存到相册是一个常用的功能,目前华为快应用还没有现成的接口可以实现,但可以通过通用事件longpress来实现。
实现方法
使用image组件渲染图片,然后在image组件上实现longpress事件,从而触发将图片保存到手机相机的功能。
详细示例代码如下:
<template>
  <div class="doc-page">
    <div class="page-title-wrap">
      <text class="page-title">{{componentName}}</text>
    </div>
    <div class="item-container">
      <div class="item-content">
        <image src="https://tse1-mm.cn.bing.net/th/id/OIP.QFyNrABM6FhaY_0TCuUZqgHaFj?pid=Api&rs=1" id="image" style="object-fit:cover" onlongpress="onImageLongpress"></image>
      </div>
    </div>
  </div>
</template>
<style>
  .doc-page {
    flex: 1;
    flex-direction: column;
  }
  .item-container {
    margin-top: 40px;
    margin-bottom: 40px;
    flex-direction: column;
  }
  .item-title {
    padding-left: 30px;
    padding-bottom: 20px;
    color: #aaaaaa;
  }
  .item-content {
    height: 200px;
    justify-content: center;
  }
  #image {
    width: 240px;
    height: 160px;
    object-fit: contain;
  }
</style>
<script>
import prompt from'@system.prompt'
import media from '@system.media'
export default{
  private: {
        componentName:"Touch and hold the following picture to save to the album:",
    inputImageURL: 'https: //tse1-mm.cn.bing.net/th/id/OIP.QFyNrABM6FhaY_0TCuUZqgHaFj?pid=Api&rs=1'
  },
  onInit(){
        this.$page.setTitleBar({text: 'Demo'});
  },
  onImageLongpress(){
        var that=this;
    prompt.showDialog({
      message: 'Touch and hold to save the picture?',
      buttons: [{
        text: 'OK',
        color: '#33dd44'
      },
      {
        text: 'Cancel',
        color: '#33dd44'
      }],
      success: function(data){
                console.log("handling callback",data);
                if(data.index===0)
                {
                    that.$element("image").toTempFilePath({
                        fileType: 'jpg',
                        quality: 1.0,
                        success: function (ret) {
                            console.log('toTempFilePath success:tempFilePath=' + ret.tempFilePath)
                            media.saveToPhotosAlbum ({
                                uri: ret.tempFilePath,
                                success:function(data)
                                {
                                    console.log("save picture success");
                                },
                                fail: function(data, code) {
                                    console.log("handling fail, code=" + code);
                                }
                            })
                        },
                        fail: function (msg, code) {
                            console.log('toTempFilePath failed:code=' + code + '; msg=' + msg);
                        }, complete: function (ret) {
                            console.log('toTempFilePath complete');
                        }
                    })
                }
      },
      cancel: function(){
        console.log("cancel");
      }
    })
  }
}
</script>
实现效果如下:
map组件如何使用markers的callout属性实现弹框
现象描述
markers可以用于标识地图上的点,通过点击该点显示,或者在点上固定显示一段文本,从而描述对应marker的信息。常用于标识一个位置,效果如下图所示:
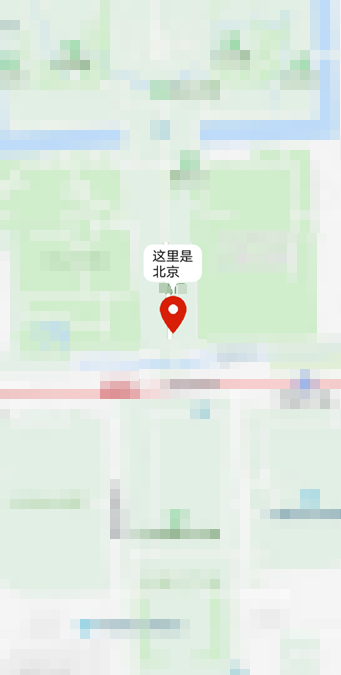
实现方法
实现效果的示例代码如下:
<template>
  <div>
    <map
      style="width:{{width}}; height:{{height}}"
      scale="{{scale}}"
      markers="{{markers}}"
    >
    </map>
  </div>
</template>
<script>
  const COORDTYPE = 'wgs84'
  const MARKER_PATH = '/Common/marker.png'
  const BEI_JING_WGS = {
    latitude: 39.9073728469,
    longitude: 116.3913445961,
    coordType: COORDTYPE
  }
  export default {
    private: {
      scale: 17,
      markers: [
        {
          width: '100%',
          height: '50%',
          latitude: BEI_JING_WGS.latitude,
          longitude: BEI_JING_WGS.longitude,
          coordType: BEI_JING_WGS.coordType,
          iconPath: MARKER_PATH,
          width: '100px',
          callout: {
            content: '这里是\n北京',
            padding: '20px 5px 20px 5px',
            borderRadius: '20px',
            textAlign: 'left',
            display: 'always'
          }
        }
      ]
    }
  }
</script>
快应用赋值时出现堆栈溢出
现象描述
将通过 $element('id') 获取到内容,赋值给成员变量,引发堆栈溢出(RangeError: Maximum call stack size exceeded),从而导致程序的崩溃。页面成员变量stateText发生变化时,也引发堆栈溢出的报错。错误示例代码如下:
<template>
  <div id="content">
    <input type="button" class="button" @click="onTestClick" value="会引发堆栈溢出"/>
    <text>{{ stateText }}</text>
  </div>
</template>
<script>
  export default {
    private: {
      mContentNode: null,
      stateText: 'init state'
    },
    onReady() {
      /* 将 $element('id')获取的内容,赋值给成员变量,则可能引发堆栈溢出 */
      this.mContentNode = this.$element('content')
    },
    onTestClick() {
      /* 页面 DOM 存在成员变量的引用,当成员变量发生变化时,则必然引发堆栈溢出问题 */
      this.stateText = 'new state'
    }
  }
</script>
问题分析
由于赋值属于VM属性,会触发大规模的数据驱动变化,导致内部出现异常循环,从而引发堆栈溢出的错误。
解决方法
请勿对成员变量进行赋值,如果需要赋值,可以赋值给局部变量或者页面的全局变量。正确的示例代码如下:
<script>
  let $gContentNode = null
  export default {
    private: {
      stateText: 'init state'
    },
    onReady() {
      /* 如将 $element('id')获取到内容,赋值给局部变量,或页面全局变量,则可规避堆栈溢出问题 */
      const cContentNode = this.$element('content')
      $gContentNode = this.$element('content')
    },
    onTestClick() {
      this.stateText = 'new state'
    }
  }
</script>
使用微信分享大图报错
现象描述
如下两张图片,第一个可以进行微信分享,第二个微信分享报错“wxShareAPI.sendReq return false”
// 可以微信分享的图片:https://tws.oss.cnweisou.com/images/23068/2020/12/aq998Lb8W94ixL8142z6677WvIg19x.png
// 不可以微信分享的图片:https://tws.oss.cnweisou.com/images/23068/2020/12/j280VVZaXnrjJAJvRSjV8JzSvHV11N.png
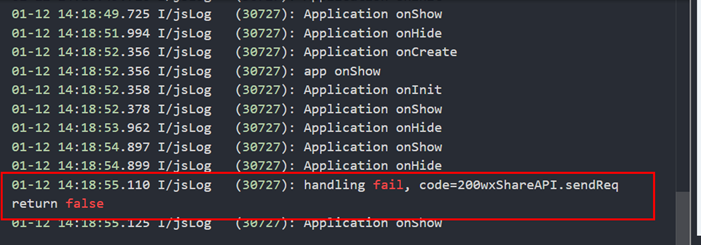
问题分析
对比两个图片的大小,可以分享的图片为243kb,不可分享的图片为268kb,而微信对分享图片大小的上限为250kb,图片过大就会报错。
解决方法
对大图压缩后再分享。

当前图片压缩接口仅支持对本地图片进行压缩,如果要压缩网络图片,建议先保存到本地然后再压缩。
实现的示例代码如下:
share: function () {
    image.compressImage({
        uri: "/Common/2.png",  //需要压缩的图片,只支持本地图片
        quality: 80,
        ratio: 2,
        format: "PNG",
        success: function (data) {
            console.log(data.uri)
            share.share({
                shareType: 0,
                title: "我是标题",
                summary: "我是摘要",
                imagePath: data.uri,
                targetUrl: "https://www.huawei.com",
                success: function () {
                    console.log("share success");
                },
                fail: function (data, code) {
                    console.log("handling fail, code=" + code + ", data=" + data);
                }
            })
        },
        fail: function (data, code) {
            console.log("handling fail, code=" + code);
        }
    })
}
image组件实现图片切换动画效果异常
现象描述
stack组件下使用两个image组件堆叠,一个image组件通过动画样式设置透明度从1-0隐藏起来,另一张显示出来,从而来实现图片切换效果,但是,前一张图片会概率性地闪现,然后消失。问题代码如下:
<template>
  <div class="page-wrapper">
    <input type="button" class="button" onclick="onCallAnimationClick" value="Animation 动画" />
    <stack style="width: 400px; height: 400px">
      <image class="img" id="img1" src="{{imgUrl}}" oncomplete="imgcomplete"></image>
      <image class="img" id="img2" if="{{ximg}}" src="{{preUrl}}" oncomplete="imgcomplete2" style="{{'opacity:' + preop + ';'}}"></image>
    </stack>
  </div>
</template>
<script>
  export default {
    data: {
      imgsrc: ["../Common/logo.png",
        "../Common/image2.png",
        "../Common/image3.png",
        "../Common/image4.png",
        "../Common/image5.png",
      ],
      imgUrl: '',
      preUrl: '',
      ximg: true,
      preop: 0,
      i: 0
    },
    onInit: function () {
      this.imgUrl = this.imgsrc[0]
    },
    onCallAnimationClick() {
      if (this.i > 3) {
        this.i = 0;
        this.imgUrl = this.imgsrc[this.i]
      } else {
        this.i++
        this.imgUrl = this.imgsrc[this.i]
      }
      console.log('imgcomplete=', this.i)
    },
    imgcomplete() {
      console.log('imgcomplete 1')
      this.preop = 1
      var options = {
        duration: 500,
        easing: 'linear',
        delay: 0,
        fill: 'forwards',
        iterations: 1
      }
      var frames = [{
        opacity: 1
      },
      {
        opacity: 0
      }];
      var animation = this.$element('img2').animate(frames, options);
      animation.play();
      var self = this
      animation.onfinish = function () {
        console.log("imgcomplete animation  onfinish");
        self.ximg = false
        self.preop = 0
        setTimeout(() => {
          self.ximg = true
          self.preUrl = self.$element("img1").attr.src
        }, 30);
      }
    },
    imgcomplete2() {
      console.log('imgcomplete 2')
      setTimeout(() => {
        this.preop = 1
      }, 50);
    },
  }
</script>
<style>
  .page-wrapper {
    flex-direction: column;
    justify-content: center;
    align-items: center;
  }
  .img {
    width: 100%;
    height: 100%;
  }
  .button {
    color: #20a0ff;
    background-color: #ffffff;
    padding: 10px 20px;
    border: 1px solid #20a0ff;
    border-radius: 40px;
  }
</style>
问题分析
上述代码用两个image组件实现了图片切换时淡入淡出的动画效果,主要是通过透明度实现的。第二个image的css中设置了透明度,但是imgcomplete()方法中又对该image组件做了透明度动画,透明度值从1到0,同时代码中又将css中绑定的透明度变量preop设置为1。
当动画方法完成时间早于css实现的时间,就会出现这个情况。
解决方法
将template中第二个image组件的style="{{'opacity:' + preop + ';'}}"去掉,改为通过动画样式来调用,从0-1变化。
优化后的代码如下:
<template>
  <div class="page-wrapper">
    <input type="button" class="button" onclick="onCallAnimationClick" value="Animation 动画" />
    <stack style="width:400px;height:400px">
    <image class="img" id="img1" src="{{imgUrl}}" oncomplete="imgcomplete"></image>
    <image class="img" id="img2" if="{{ximg}}" src="{{preUrl}}" oncomplete="imgcomplete2" ></image>
    </stack>
  </div>
</template>
<script>
export default {
  data: {
    imgsrc: ["../Common/logo.png",
        "../Common/image2.png",
        "../Common/image3.png",
        "../Common/image4.png",
        "../Common/image5.png",
      ],
    imgUrl:'',
    preUrl:'',
    ximg:true,
    preop:0,
    i:0
  },
  onInit: function () {
      this.imgUrl = this.imgsrc[0]
  },
      ...     //省略
  imgcomplete2() {
      console.log('imgcomplete 2')
      var options = {
        duration: 10,
        easing: 'linear',
        delay: 0,
        fill: 'forwards',
        iterations: 1
      }
      var frames = [{
        opacity: 0
      },
      {
        opacity: 1
      }];
      var animation = this.$element('img2').animate(frames, options);
      animation.play();
    },
}
</script>
input组件实现的按钮,点击无效果
现象描述
将input组件type设为button,并设置圆角border-radius属性后,点击该按钮没有点击效果。删除border-radius属性后,点击效果正常。
问题代码如下:
<template>
  <div class="page-wrapper">
    <input type="button" class="button"  value="Animation 动画" />
  </div>
</template>
<script>
</script>
<style>
.page-wrapper {
  flex-direction: column;
  justify-content: center;
  align-items: center;
}
.button {
  color: #20a0ff;
  background-color: red;
  padding: 10px 20px;
  border-radius: 40px;
}
</style>
问题分析
设置圆角属性后,快应用引擎底层受限,从而不能自动实现点击的效果。
解决方法
可以通过快应用的伪类来实现按钮点击效果。
优化后的代码如下:
<template>
  <div class="page-wrapper">
    <input type="button" class="button"  value="Animation 动画" />
  </div>
</template>
<script>
</script>
<style>
.page-wrapper {
  flex-direction: column;
  justify-content: center;
  align-items: center;
}
.button {
  color: #20a0ff;
  background-color: red;
  padding: 10px 20px;
  border-radius: 40px;
}
.button:active{
  background-color: green;
}
</style>
如何通过对话框控制Switch组件开关
现象描述
当我们在打开或关闭switch开关时,有时需要弹出对话框让用户确认是否打开或关闭,避免误操作。
例如switch开关默认处于打开状态,在用户关闭开关时,弹出对话框供用户确认。如果用户点击取消,则开关重新置于打开状态;如果用户点击确认,则开关关闭。
实现方法
switch组件的change事件可以用于响应用户打开或关闭开关的操作,通过改变switch组件的checked属性可以实现对开关的控制。
详细示例代码如下:
<template>
  <div class="container">
    <div class="page-title-wrap">
      <text class="page-title">{{componentName}}</text>
    </div>
    <div class="item-container">
      <text class="item-title">Default Style</text>
      <stack>
        <switch checked={{checkedValue}} id="switch" class="switch"></switch>
        <div class="item-content" style="opacity:0" onclick="switchTouch"></div>
      </stack>
    </div>
  </div>
</template>
<script>
  import prompt from '@system.prompt';
  export default {
    data: {
      componentName: 'switch',
      checkedValue: true,
    },
    onInit() {
      this.$page.setTitleBar({ text: 'switch' })
    },
    switchTouch: function () {
      if (this.checkedValue === false) {
        this.checkedValue = true;
      }
      else if (this.checkedValue === true) {
        console.log(this.checkedValue);
        var that = this
        prompt.showDialog({
          title: '',
          message: 'Are you sure you want to disable the switch?',
          buttons: [
            {
              text: 'OK',
              color: '#33dd44'
            },
            {
              text: 'cancel',
              color: '#33dd44'
            }
          ],
          success: function (data) {
            console.log("handling callback", data);
            if (data.index === 0) {
              that.checkedValue = false;
              console.log(that.checkedValue);
            }
            else {
              console.log(that.checkedValue);
            }
          },
          cancel: function () {
            console.log("cancel");
          }
        })
      }
    }
  }
</script>
<style>
  .container {
    flex: 1;
    flex-direction: column;
  }
  .page-title-wrap {
    padding-top: 50px;
    padding-bottom: 80px;
    justify-content: center;
  }
  .page-title {
    padding-top: 30px;
    padding-bottom: 30px;
    padding-left: 40px;
    padding-right: 40px;
    border-color: #bbbbbb;
    color: #bbbbbb;
    border-bottom-width: 2px;
  }
  .item-container {
    margin-top: 20px;
    margin-bottom: 30px;
    flex-direction: column;
  }
  .item-title {
    padding-left: 30px;
    padding-bottom: 30px;
    padding-top: 30px;
    border-bottom-width: 1px;
    border-color: #bbbbbb;
    color: #aaaaaa;
  }
  .item-content {
    background-color: #0000cd;
    border-bottom-width: 1px;
    border-color: #0000cd;
    margin-top: 10px;
    width: 130px;
    height: 60px;
  }
</style>
实现的效果如下:
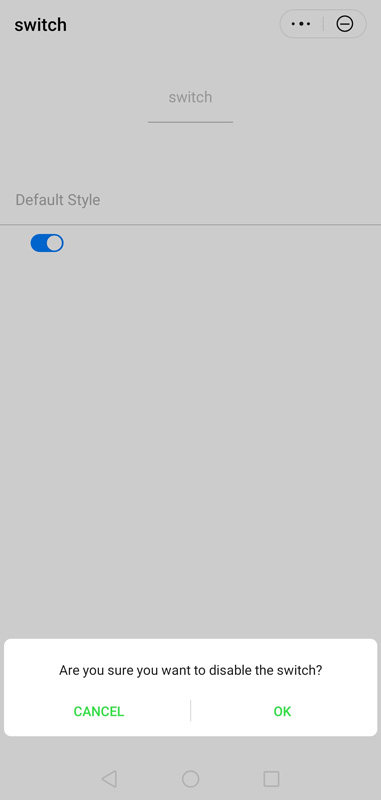
快应用页面滑动时卡顿
现象描述
当页面一次加载100条数据时,滑动页面出现卡顿。
问题代码如下:
<template>
  <div class="container">
    <div class="nav">
      <text class="nav-item">list</text>
    </div>
    <!-- List -->
    <list class="list" onclick="listClick" onlongpress="listLongPress"
      onscrollbottom="scrollbottom"  id="list" scrollpage="{{scrollPage}}">
      <list-item type="listItem" class="item"  onclick="listItemClick"
        if="{{listData.length>0}}">
           <div for="{{listData}}" style="flex-direction:column;">
                <text  class="txt">{{$item}}--{{$idx}}</text>
           </div>
      </list-item>
      <!-- Loading More  -->
      <list-item type="loadMore" class="load-more" if="{{loadMore}}">
        <progress type="circular"></progress>
        <text>More</text>
      </list-item>
    </list>
  </div>
</template>
<style>
  .container{
     flex-direction: column;
  }
  .list {
    padding-left: 10px;
    padding-right: 10px;
    columns: 1;
    flex-direction: column;
    border-color: #FF0000;
    border-width: 5px;
  }
  .item {
    flex-direction: column;
    align-items: flex-start;
    margin-bottom: 15px;
    border-color: #9400D3;
    border-width: 5px;
    margin-right: 20px;
    background-color: #f76160;
  }
  .load-more {
    justify-content: center;
    align-items: center;
    height: 100px;
    border-color: #bbbbbb;
    border-bottom-width: 1px;
  }
  .btn-little {
    flex: 1;
    height: 80px;
    margin-left: 15px;
    border-radius: 5px;
    color: #ffffff;
    font-size: 30px;
    text-align: center;
    background-color: #0faeff;
  }
  .nav {
    padding-left: 60px;
    padding-right: 60px;
    padding-bottom: 30px;
  }
  .nav-item {
    flex: 1;
    padding-bottom: 30px;
    border-bottom-width: 5px;
    border-color: #fbf9fe;
    font-size: 35px;
    color: #666666;
    text-align: center;
  }
</style>
<script>
  import prompt from '@system.prompt'
  export default {
    data: {
      componentName: 'list',
      loadMore: true,
      listAdd: ['A', 'B', 'C', 'D', 'E', 'F', 'G', 'H', 'I', 'J', 'K', 'L', 'M', 'N', 'O', 'P', 'Q', 'R', 'S', 'T', 'U', 'V', 'W', 'X', 'Y', 'Z'],
      listData: [],
      scrollPage: false,
    },
    onInit: function () {
      this.$page.setTitleBar({ text: 'list' })
      for(var index = 0;index < 100;index++){
          this.listData[index] = 'A';
     }
    },
    scrollbottom: function () {
      prompt.showToast({
        message: 'The list slides to the bottom and starts loading other data.'
      })
      // Load next page
      var that = this
      var renderData = [].concat(that.listData, that.listAdd)
      setTimeout(function () {
        that.listData = renderData
      }, 1000)
    },
    // monitoring during sliding
    scroll: function (e) {
      let msg = 'scroll' + '.scrollX:' + e.scrollX
        + ' .scrollY:' + e.scrollY
        + ' .scrollState:' + e.scrollState
      console.info(msg)
    },
    listItemClick: function (e) {
      e.stopPropagation()
      console.info('List Item is clicked.')
      prompt.showToast({
        message: 'List Item is clicked.'
      })
    },
    listClick: function (e) {
      e.stopPropagation()
      console.info('List is clicked.')
      prompt.showToast({
        message: 'List is clicked.'
      })
    },
    listLongPress: function (e) {
      e.stopPropagation()
      console.info('List is long pressed.')
      prompt.showToast({
        message: 'List is long pressed.'
      })
    },
  }
</script>
问题分析
以上代码使用list、list-item来加载大规模数据,但是使用方法不当,导致list-item的视图没有被复用。
list、list-item的实现最终都是通过ListView、BaseAdapter等实现的,了解这些后就知道列表界面上超过屏幕显示的区域不会重新创建view,而是复用第一次在界面上可见区域的那些view,把数据刷新一下即可。每一行的视图其实就是list-item。
以上代码虽然看起来是列表,但是只有1个list-item。开发者在list-item内部使用了for循环,每循环一次,都会创建一个新的view。当数据量很大时,内存占用增多,不断地做申请、释放内存的操作,使应用性能受到严重影响,导致滑动卡顿。
解决方法
基于list组件的特点,在list-item内部需谨慎使用if指令或for指令。根据列表每行数据特点,在list-item上设置不同的type,尽可能复用list-item,在list-item上使用for语句。修改后代码如下:
<template>
  <div class="container">
    <div class="nav">
      <text class="nav-item">list</text>
    </div>
    <!-- List -->
    <list class="list" onclick="listClick" onlongpress="listLongPress"
      onscrollbottom="scrollbottom"  id="list" scrollpage="{{scrollPage}}">
      <!-- 修改优化的内容 -->
      <list-item type="listItem" class="item item-color"  onclick="listItemClick"
        for="{{listData}}">
        <text  class="txt">{{$item}}--{{$idx}}</text>
      </list-item>
      <!-- Loading More  -->
      <list-item type="loadMore" class="load-more" if="{{loadMore}}">
        <progress type="circular"></progress>
        <text>More</text>
      </list-item>
    </list>
  </div>
</template>
代码优化前后效果对比如下:
|
|
|
| 图1 优化后效果 | 图2 优化前效果 |
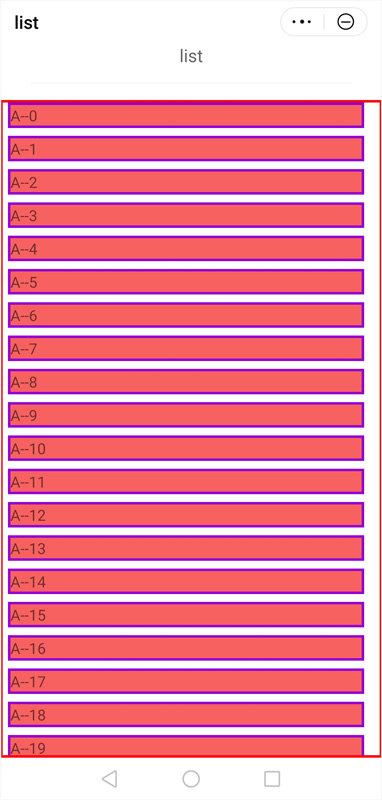
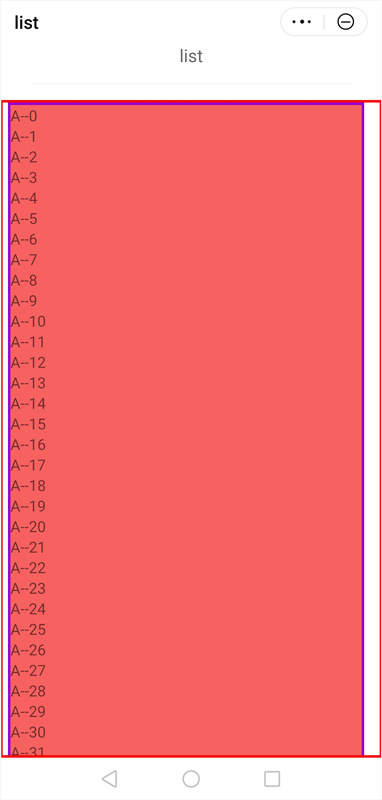
从上面效果图我们看到,虽然都是列表数据,图1每一行都是一个list-item(list-item的css中背景色设置的是红色),而且type值都一样,能很好地复用list-item,但是图2中只有1个list-item,里面列表数据都是作为list-item的子节点。图2的效果和使用普通的div加载大量列表数据是一样的。
卡片使用hap链接格式跳转快应用报错
现象描述
在负一屏卡片场景使用如下deeplink的hap链接跳转到快应用时会出现如下错误信息,但是在网页中使用该链接可以正常跳转。
跳转链接如下:
hap://app/com.huawei.egcityservice?searchKey=防疫健康码
错误信息如下:

问题分析
该问题是链接格式不标准导致的,负一屏跳至快应用的hap链接需要使用标准格式。
标准格式如下:
hap://app/<package>/[path][?key=value]
案例中的链接只有包名,没有指定跳转的具体页面,默认跳转快应用的首页,所以需要在<package>后加上/,然后再加上参数信息。
解决方法
在原有hap链接中携带的参数信息前面加上 / ,即可解决该问题,修改后的链接如下:
hap://app/com.huawei.egcityservice/?searchKey=防疫健康码
常见跳转链接添加启动参数的方式:
- 跳转链接无具体页面,只有包名,如:
hap://app/com.freecharge.android.quickapp
加上/?后添加启动参数:
hap://app/com.freecharge.android.quickapp/?___PARAM_LAUNCH_FLAG___=clearTask

/?都不可缺少
- 跳转链接有指定跳转页面,但无跳转参数,如:
hap://app/org.hap.govaffairs/views/HealthQrcode/Result
加上?后添加启动参数:
hap://app/org.hap.govaffairs/views/HealthQrcode/Result?___PARAM_LAUNCH_FLAG___=clearTask

?不可缺少
- 跳转链接有指定跳转页面和跳转参数,如:
hap://app/com.wifi.quickapp.reader.free/Page/Go?path=read&bookid=70317&chapterid=15688960
加上&后添加启动参数:
hap://app/com.wifi.quickapp.reader.free/Page/Go?path=read&bookid=70317&chapterid=15688960&___PARAM_LAUNCH_FLAG___=clearTask

&不可缺少
快应用router接口参数截取不完整
现象描述
快应用A通过router.push方式跳转快应用B时,携带的H5地址参数在快应用B里无法完整获取。
问题代码如下。
快应用A跳转代码:
     router.push({
                uri: "hap://app/com.huawei.text/Hello?srcurl=https://timgsa.baidu.com/timg?image&quality=80&size=b9999_10000&sec=1571113692640&di=9ed87b0302d9b8ce9ca66f6ab7e18394&imgtype=jpg&src=http%3A%2F%2Fimg0.imgtn.bdimg.com%2Fit%2Fu%3D2161827460%2C376403171%26fm%3D214%26gp%3D0.jpg",
            })
快应用B代码:
<template>
  <div class="container">
    <text class="txt">{{src}}</text>
  </div>
</template>
<script>
  export default {
    data: {
      src: '测试',
    },
    onInit() {
      this.$page.setTitleBar({ text: 'switch' })
    },
    onShow: function () {
      this.src = this.srcurl
      console.log("@@@@@@@@@@@@@@*********", this.src)
    },
  }
</script>
<style>
  .container {
    flex: 1;
    flex-direction: column;
    align-items: center;
    justify-content: center;
  }
  .txt {
    width: 100%;
    height: 300px;
    font-size: 50px;
    color: red;
  }
</style>
快应用B获取到的参数信息为https://timgsa.baidu.com/timg?image,如下图所示:

问题分析
对router.push接口跳转的代码进行分析。
快应用A使用router.push接口跳转快应用B的Hello页面时,并携带参数srcurl,该接口的参数uri使用的是快应用deeplink的hap链接格式:
hap://app/<package>/[path][?key=value&key1=value1]
跳转代码中srcurl对应hap格式中的key,而它的value值是一个H5地址,但H5地址中又携带了&quality=80&size=b9999_10000&sec=1571113692640等参数,快应用引擎会认为后面的&参数都是hap链接中的参数,而不是H5中的,所以导致H5地址中的参数被截断了。
解决方法
快应用的router.push接口格式是支持携带参数的,其格式为:
router.push({uri: 'hap链接', params: { key:’value '}}); 可以把hap链接里的参数放到params中。
快应用A修改后代码如下:
router.push({
                uri: "hap://app/com.huawei.text/Hello",
                params: {
                    srcurl: 'https://timgsa.baidu.com/timg?image&quality=80&size=b9999_10000&sec=1571113692640&di=9ed87b0302d9b8ce9ca66f6ab7e18394&imgtype=jpg&src=http%3A%2F%2Fimg0.imgtn.bdimg.com%2Fit%2Fu%3D2161827460%2C376403171%26fm%3D214%26gp%3D0.jpg'
                }
            })
快应用B获取效果如下:
如何解决richtext加载富文本时设置width不生效
现象描述
利用richtext组件加载某些超宽超高清大图时,如果不控制宽度,那么大图将横向铺满甚至超出整个屏幕,影响视觉体验。但发现如果按照如下方式对richtext组件进行宽度设置是无效的,图片宽度仍然完全展开。
问题代码如下:
<richtext type="html" style="width: 100%;">{{htmlText}}</richtext>> 问题分析
目前快应用对richtext组件无法直接设置宽度,只能对加载的html网页里面的元素实现宽度控制,即针对richtext组件加载的html中的img元素设置width即可。
解决方法
示例代码如下:
<template>
    <div class="item-container">
      <richtext type="html">{{htmlText}}</richtext>>
    </div>
</template>
<style>
    @import "../Common/css/common1.css" screen and (orientation: portrait);
    @import "../Common/css/common2.css" screen and (orientation: landscape);
</style>
<script>
    export default {
        data: {
            htmlText:
                `<!DOCTYPE html>
            <html lang="en" style="background-color: transparent">
            <head>
              <meta charset="UTF-8" />
              <meta name="viewport" content="width=device-width, initial-scale=1.0" />
              <title>Document</title>
            </head>
            <body>
              <div>
                <h1>Huawei</h1>
                <div>
                <img src='base64字符串'  //支持网络图片或者base64字符串
                style="width: 100%"
                />
                </div>
              </div>
            </body>
          </html>
        `
        },
        onInit: function () {
            console.info('Application onInit');
        },
        onShow(options) {
            console.info('Application onShow');
        },
        onHide(options) {
            console.info('Application onHide');
        }
    }
</script>
快应用tab-content页面和dom行为不一致
现象描述
在使用tabs、tab-content组件时,当绑定的数组数量减少时即点击页面上的delete按钮时, dom上存在的数据和手机上渲染出的数据不一致, 具体表现为: dom上存在2个for动态渲染的节点(如图2所示), 但是实际可以看到多于2页(如图1所示)。 点击add按钮增加页面的时候,不存在问题。
|
|
|
| 图1 手机上效果 | 图2 IDE dom显示效果 |
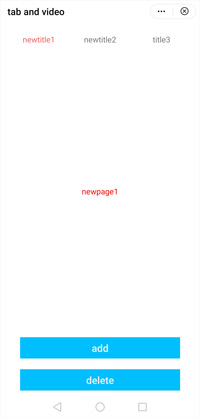
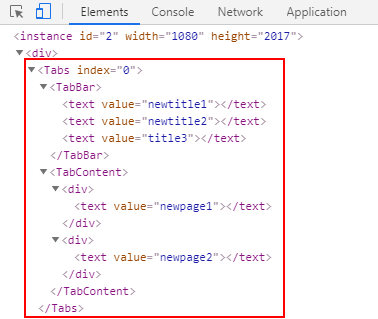
问题代码如下:
<template>
  <div style="flex-direction: column;">
    <tabs class="tabs" index="0">
      <tab-bar>
        <block for="{{tabdata}}">
          <text class="tab-text">{{ $item.title }}</text>
        </block>
      </tab-bar>
      <tab-content class="tab-content">
        <block for="{{tabdata}}">
          <div style="flex-direction: column; align-items: center;justify-content: center;">
            <text style="color: red">{{ $item.content }}</text>
          </div>
        </block>
      </tab-content>
    </tabs>
    <input type="button" class="btn" value="add" onclick="addpage" />
    <input type="button" class="btn" value="delete" onclick="delpage" />
  </div>
</template>
<style>
  .tabs {
    flex: 1;
    margin-top: 20px;
    margin-right: 30px;
    margin-left: 30px;
    background-color: #ffffff;
  }
  .tab-content {
    flex: 1;
  }
  .tab-bar {
    height: 100px;
    border-color: #bbbbbb;
    color: #bbbbbb;
    border-bottom-width: 1px;
  }
  .tab-text {
    width: 300px;
    text-align: center;
  }
  .tab-text:active {
    color: #f76160;
  }
  .btn {
    background-color: #00bfff;
    color: #f3f2f2;
    width: 80%;
    height: 80px;
    margin-top: 20px;
    margin-bottom: 20px;
    align-self: center;
  }
</style>
<script>
  module.exports = {
    data: {
      tabdata: [{ title: "title1", content: "page1" }, { title: "title2", content: "page2" }, { title: "title3", content: "page3" }]
    },
    onInit() {
      this.$page.setTitleBar({ text: "tab and video" });
    },
    refresh: function () { },
    addpage: function () {
      let len= this.tabdata.length+1;
      console.info("addpage len= "+len)
      let add = { title: "title"+len, content: "page"+len };
      this.tabdata.push(add);
    },
    delpage: function () {
       this.tabdata= [{ title: "newtitle1", content: "newpage1" }, { title: "newtitle2", content: "newpage2" }];
       let len= this.tabdata.length;
      console.info("delpage len= "+len);
    }
  };
</script>
问题分析
尝试使用网上的一些处理方式,比如使用Object.assign({}, this.XXX, arr)都没有效果,最终确认到:tab-content组件不支持动态减少页面,如果要减少页面,需要先销毁掉组件,重新用新的实例展示数据。快应用提供了if命令,if为false时,页面不显示,并且dom节点也会移除。
解决方法
- 在页面上使用两个tabs+tab-content组件,通过if控制交替使用,达到页面销毁、创建的效果。
- 定义一个控制if的布尔变量refreshpage,当页面绑定的数组大小减少,更新refreshpage值。
优化后的示例代码如下:
<template>
  <div style="flex-direction: column;">
    <tabs class="tabs" index="0" if="{{!refreshpage}}">
      <tab-bar>
        <block for="{{tabdata}}">
          <text class="tab-text">{{ $item.title }}</text>
        </block>
      </tab-bar>
      <tab-content class="tab-content">
        <block for="{{tabdata}}">
          <div style="flex-direction: column; align-items: center;justify-content: center;" >
            <text style="color: red">{{ $item.content }}</text>
          </div>
        </block>
      </tab-content>
    </tabs>
     <!--数据变化后需要销毁,界面才会和dom表现一致 -->
     <tabs class="tabs" index="0" if="{{refreshpage}}">
      <tab-bar>
        <block for="{{tabdata}}">
          <text class="tab-text">{{ $item.title }}</text>
        </block>
      </tab-bar>
      <tab-content class="tab-content">
        <block for="{{tabdata}}">
          <div style="flex-direction: column; align-items: center;justify-content: center;" >
            <text style="color: red">{{ $item.content }}</text>
          </div>
        </block>
      </tab-content>
    </tabs>
    <input type="button" class="btn" value="add" onclick="addpage" />
    <input type="button" class="btn" value="delete" onclick="delpage" />
  </div>
</template>
    <!—此处省略了style代码,因为不涉及修改-->
<script>
  module.exports = {
    data: {
      refreshpage:false,
      tabdata: [{ title: "title1", content: "page1" }, { title: "title2", content: "page2" }, { title: "title3", content: "page3" }]
    },
    delpage: function () {
       this.tabdata=[{title: "newtitle1", content: "newpage1"},{title: "newtitle2", content: "newpage2"}];
        var r=!this.refreshpage;
        this.refreshpage=r;
      let len= this.tabdata.length;
      console.info("delpage len= "+len);
    }
  };
</script>
实现页面及时感知app.ux文件中接口获取的数据
现象描述
部分开发者会在快应用的app.ux中实现一些通用能力,然后方便给快应用各个页面调用。但是当页面启动时,获取一些基础数据时,会发现接口返回值大概率返回为空。
比如,某快应用A在应用启动的时候,需要判断用户是否已经登录了账号,如果已经登录,就显示登录账号,未登录就显示登录页面。首次登录后会使用快应用storage接口将账号存储在本地,下次进入应用会优先从缓存中读取账号,如果缓存数据不为空,表明用户已经登录,无需再登录。但是,实际会出现已经登录账号,再次进来依然提示要登录的情况。
问题分析
出现问题的示例代码如下。
app.ux代码:
<script>
  import storage from '@system.storage';
  module.exports = {

    onCreate() {
      console.info('Application onCreate');
      //应用启动时,立即从缓存中获取账号登录信息
        this.getLoginName();
    },

      /**
       * 从缓存中获取账号登录信息,将结果保存在全局对象userinfo
       */
      getLoginName:function() {
        var that=this;
           storage.get({
             key: 'username',
             success: function (data) {
               console.log("app.ux getLoginName handling success data="+data);
               that.dataApp.userinfo.name=data;
               console.info("app.ux getLoginName that.dataApp.userinfo.name="+that.dataApp.userinfo.name);
             },
             fail: function (data, code) {
               console.log("handling fail, code = " + code);
             }
           })
      },
    onDestroy() {
      console.info('Application onDestroy');
    },
    dataApp: {
      //用户账号信息对象,全局使用
      userinfo: {
        name:''
      }
    }
  }
</script>
页面hello.ux代码:
<template>
  <!-- Only one root node is allowed in template. -->
  <div class="container">
    <text class="title" if="{{userinfo.name}}">欢迎您:{{ userinfo.name }}</text>
    <input type="button" value="login" class="btn" if="{{!userinfo.name}}" onclick="dologin" />
  </div>
</template>
<style>
  .container {
    flex-direction: column;
    justify-content: center;
    align-items: center;
  }
  .title {
    font-size: 40px;
  }
  .btn{
     width: 160px;
     height: 60px;
     border-radius: 8px;
     background-color: #00bfff;
  }
  .btn:active{
     background-color: #00ced1;
  }
</style>
<script>
  import storage from "@system.storage";
  module.exports = {
    data: {
      userinfo: {}
    },
    onInit() {
      this.$page.setTitleBar({
        text: "menu",
        textColor: "#ffffff",
        backgroundColor: "#007DFF",
        backgroundOpacity: 0.5,
        menu: true
      });
      //页面启动时从app.ux获取账号信息
       this.userinfo = this.$app.$def.dataApp.userinfo;
       if(this.userinfo.name){
         //处理登录后的业务逻辑
         //todo
       }

    },
    onReady(options) {
      console.info("onready");
},
    /**登录账号,并将账号保存在本地缓存 */
    dologin: function () {
      this.userinfo.name = "wwz";
      storage.set({
        key: "username",
        value: this.userinfo.name,
        success: function (data) {
          console.log("handling success");
        },
        fail: function (data, code) {
          console.log("handling fail, code = " + code);
        }
      });
    }
  };
</script>
快应用的接口都是异步返回数据,当页面的生命周期onInit执行时,app.ux中接口的数据不一定立即返回,这个时候this.userinfo.name的结果是空的,从而导致页面显示“登录”按钮,需要用户去重新输入账号、密码进行登录。而用户可能会拒绝登录退出,这样就流失了一个用户。
解决方法
【方案一】在页面获取登录账号信息的地方,延时几百毫秒调用。关注如下代码中setTimeout的内容:
onInit() {
  this.$page.setTitleBar({
    text: "menu",
    textColor: "#ffffff",
    backgroundColor: "#007DFF",
    backgroundOpacity: 0.5,
    menu: true
  });
  //页面启动时从app.ux获取账号信息
  setTimeout(() => {
    this.userinfo = this.$app.$def.dataApp.userinfo;
    console.info("oninit this.userinfo= " + JSON.stringify(this.userinfo));
    if (this.userinfo.name) {
      //处理登录后的业务逻辑
      //todo
    }
  }, 200);
  // this.$watch("userinfo.name", "listenLogin");
},
此方案的缺点:延时时间不易设置,如果设置长了会影响页面体验,设置短了可能有问题。
【方案二】推荐使用此方案。使用快应用$watch()函数监听页面的对象属性userinfo.name,在监听事件中实时获取结果。

$watch()无法直接监听app.ux中dataApp下定义的对象属性userinfo.name。
示例代码如下:
onInit() {
  this.$page.setTitleBar({
    text: "menu",
    textColor: "#ffffff",
    backgroundColor: "#007DFF",
    backgroundOpacity: 0.5,
    menu: true
  });
  //页面启动时从app.ux获取账号信息
  this.userinfo = this.$app.$def.dataApp.userinfo;
   this.$watch("userinfo.name", "listenLogin");
},
响应事件listenLogin()代码如下:
listenLogin: function (newValue, oldValue) {
  console.info("listenLogin newValue= " + newValue + ", oldValue=" + oldValue);
  if(newValue){
    //获取到账号登录信息,处理登录后的业务逻辑
  }
},
优化后运行效果如下:
|
|
tab-content中的list嵌套list时,实现滑动子list不触发tab-bar切换
现象描述
在部分复杂布局场景下,应用页面会被多个tab分隔,单个tab中会有list嵌套list的场景(比如一个竖直方向的list嵌套一个水平方向的list),此时若tab-content组件的scrollable属性设置为true,且滑动子list(水平方向)到末尾,就会自动触发tab-bar的切换。
如果不想子list滑动到结尾时,自动触发tab-bar的切换,需要对触摸事件进行控制。
实现方法
对子list组件的scrollbottom事件进行控制,当子list组件滑动至末尾时,将tab-content组件的scrollable属性设置为false,使得tab-bar无法滑动。
同时,为了保证用户触摸子list之外其他区域时,可以正常滑动tab-bar,需要在子list之外其他区域的组件上对touchstart事件进行控制,将tab-content组件的scrollable属性设置为true。
详细示例代码如下:
<template>
  <div class="item-container">
    <tabs class="tabs" index="2">
      <tab-bar class="tab-bar">
        <text class="tab-text">tab1</text>
        <text class="tab-text">tab2</text>
      </tab-bar>
      <tab-content class="tab-content" scrollable="{{scrollable}}">
        <div class="item-container">
          <list class="list">
            <list-item type="columnlist">
              <list class="list" style="flex-direction: row; height: 800px" onscroll="scroll" onscrollbottom="scrollbottom" id="list" scrollpage="{{scrollPage}}">
                <list-item type="listItem" class="swiper-container" for="{{ bannerList }}">
                  <block>
                    <div class="banner_wrap">
                      <text class="banner_text">{{ $item }}</text>
                      <image class="banner_image" style="object-fit: fill;" src="../Common/niu.jpg"></image>
                    </div>
                  </block>
                </list-item>
              </list>
            </list-item>
            <list-item type="textlist" ontouchstart="touchstart">
              <text style="text-align: center; width: 100%; height: 300px;background-color: #00bfff;">滑动我切换tab页</text>
            </list-item>
          </list>
        </div>
        <div class="item-container">
          <div class="item-content">
            <text class="item-title">tab2 page</text>
          </div>
        </div>
      </tab-content>
    </tabs>
  </div>
</template>
<script>
  export default {
    data: {
      scrollPage: true,
      scrollable: true,
      bannerList: ["A", "B", "C", "D", "E"]
    },
    onInit() {
      this.$page.setTitleBar({ text: "list嵌套list示例" });
    },
    scrollbottom(e) {
      this.scrollable = false;
    },
    scroll(e) {
      if (e.scrollState === 1 || e.scrollState === 2) {
        this.scrollable = true;
      }
    },
    touchstart(e) {
      this.scrollable = true;
    }
  };
</script>
<style>
  @import "../Common/css/common.css";
  .tabs {
    flex: 1;
    background-color: #ffffff;
  }
  .tab-content {
    flex: 1;
  }
  .tab-bar {
    display: flex;
    flex-direction: row;
    height: 90px;
    flex-wrap: nowrap;
    border-bottom-color: #bbbbbb;
    border-bottom-width: 1px;
  }
  .tab-text {
    flex: 1;
    position: relative;
    padding: 15px 40px 20px;
    text-align: center;
  }
  .item-container {
    flex-direction: column;
  }
  .item-content {
    flex-direction: column;
    padding-bottom: 30px;
  }
  .list {
    flex: 1;
  }
  div {
    display: flex;
    flex-direction: column;
  }
  .swiper-container {
    flex-direction: column;
    margin-bottom: 10px;
  }
  .banner_wrap {
    width: 100%;
    height: 500px;
    flex-direction: column;
  }
  .banner_text {
    color: #000;
  }
  .banner_image {
    width: 750px;
    flex: 1;
  }
</style>
实现效果如下视频所示:
|
|
控制swiper自动和手动滑动的切换
现象描述
在某些场景下,需要swiper在用户不触摸的情况下,可以自动切换,但当用户触摸滑动swiper时,需要改为由用户手动控制切换,而在用户取消触摸后,重新恢复自动切换。
实现方法
可以借助通用事件swipe识别手势的上下左右滑动,当识别到左右滑动时,切换为手动控制;当识别到上下滑动时或者没有滑动操作时,则继续保持自动切换。但是在实际使用时,在swiper组件上应用swipe事件时,对左右滑动的识别不太灵敏,偶尔会发生没有识别到的情况。所以如果需要精准识别手势的上下左右滑动,可以考虑用block组件在swiper组件之上堆叠一个div组件,在div组件上面添加swipe事件即可。
详细示例代码如下:
<template>
  <div class="container">
    <block>
      <div class="swiper" onswipe="swipe">
        <swiper class="swiper" vertical="{{vertical}}" id="swiper" autoplay="{{autoPlay}}" interval="2000" indicator="{{indicator}}" loop="{{isLoop}}" onchange="change" duration="{{sliderValueForDuration}}" style="height:{{heightSwiper}};indicator-size:{{iSize}}">
          <text class="item color-1">A</text>
          <text class="item color-2">B</text>
          <text class="item color-3">C</text>
          <text class="item color-4">D</text>
          <text class="item color-5">E</text>
          <text class="item color-6">F</text>
        </swiper>
        <div class="swipercover">
          <text>swiper之上添加透明遮罩,以识别滑动事件</text>
        </div>
      </div>
    </block>
  </div>
</template>
<style>
  @import "../Common/css/common.css";
  .item-container {
    margin-bottom: 50px;
    margin-right: 60px;
    margin-left: 60px;
    flex-direction: column;
  }
  .swiper {
    flex-direction: column;
    indicator-color: #800080;
    indicator-selected-color: #000000;
    height: 250px;
    position: fixed;
  }
  .swipercover {
    flex-direction: column;
    height: 250px;
    background-color: transparent;
    position: fixed;
    border-style: solid;
  }
  .item {
    height: 250px;
    text-align: center;
    color: #ffffff;
  }
  .color-1 {
    background-color: #09ba07;
  }
  .color-2 {
    background-color: #f76160;
  }
  .color-3 {
    background-color: #0faeff;
  }
  .color-4 {
    background-color: #9acd32;
  }
  .color-5 {
    background-color: #000000;
  }
  .color-6 {
    background-color: #8a2be2;
  }
</style>
<script>
  import prompt from "@system.prompt";
  export default {
    data: {
      heightSwiper: "250px",
      componentName: "swiper",
      autoPlay: true,
      indicator: true,
      sliderValue: 1500,
      sliderValueForDuration: 500,
      isLoop: true,
      vertical: false,
      iSize: "20px",
      index: 0
    },
    onInit() {
      this.$page.setTitleBar({ text: "swiper" });
    },
    change: function (e) {
      this.index = e.index;
    },
    swipe: function (e) {
      console.info("e.direction==" + e.direction);
      if (e.direction === "left") {
        prompt.showToast({
          message: "切换为手动控制"
        });
        if (this.index === 5) {
          this.$element("swiper").swipeTo({ index: 0 });
        } else {
          this.$element("swiper").swipeTo({ index: this.index + 1 });
        }
        this.autoPlay = false;
        setTimeout(() => {
          this.autoPlay = true;
          prompt.showToast({
            message: "切换为自动控制"
          });
        }, 4000);
      }
      if (e.direction === "right") {
        prompt.showToast({
          message: "切换为手动控制"
        });
        if (this.index === 0) {
          this.$element("swiper").swipeTo({ index: 5 });
        } else {
          this.$element("swiper").swipeTo({ index: this.index - 1 });
        }
        this.autoPlay = false;
        setTimeout(() => {
          this.autoPlay = true;
          prompt.showToast({
            message: "切换为自动控制"
          });
        }, 4000);
      }
    }
  };
</script>
实现效果如下视频所示:
|
|
华为快应用Banner广告在手机底部显示
在华为快应用中展示Banner广告,需要使用ad.createBannerAd(OBJECT)接口,该接口有个top参数,这个值决定了广告的展示位置,当top设置为0时,Banner广告显示在状态栏处,如下图所示。由此可见,top的值是从手机的最顶部开始计算的。所以当计算底部位置的时候,需要考虑标题栏、状态栏。
不同手机的分辨率、屏幕密度都是不一样的,如果想Banner广告在不同大小手机上都可以显示在底部,最基本的前提是能获取到设备的分辨率和像素密度信息。
页面设置的值最终由快应用引擎等比换算成在该设备上的大小,保证在各种分辨率下显示效果。换算公式如下:
RealPX/windowWidth = 页面设置的值/ windowLogicWidth
- RealPX:快应用引擎转换后的结果。
- windowWidth:设备宽度,可以通过设备信息接口获得。
- 页面设置的值:ux代码中设置的值。
- windowLogicWidth:页面基准宽度值,可以通过设备信息接口获得。
系统的dp和px的介绍请额外学习了解,此处只给出换算公式:
px值= dp值*设备屏幕密度
设备屏幕密度:可以通过设备信息接口获得。
通过上面两个公式,就可以计算底部坐标了。由于设备信息接口返回的windowHeight是界面可用的窗口高度,当快应用页面有标题栏和无标题栏时,计算规则也会不一样。
页面显示标题栏场景
核心代码如下:
data: {
  bannerAD: {
    adUnitId: "testw6vs28auh3",
    adIntervals: 30,
    style: {
      left: 20,
      top: 20,
      width: 360,
      height: 57
    }
  }
},
calBannerPostion1: function () {
var d = device.getInfoSync();
console.info("calBannerPostion1 d= "+JSON.stringify(d));
//获取页面内可见窗口的高度和宽度,此值不包括标题栏和状态栏高度
let windowWidth = d.windowWidth;
let windowHeight=d.windowHeight;
//logicWidth对应manifest.json文件设置的designWidth值,默认是750
let logicWidth = d.windowLogicWidth;
//广告自身大小单位是dp,需要转换成px单位
let realAdHeighPX = this.bannerAD.style.height * d.screenDensity;
//标题栏高度一般是42dp左右,此处也需要转换成px单位
let titleBarHeight=42*d.screenDensity;
//此处计算很关键,需要将状态栏高度、标题栏高度加上
let realToppx= windowHeight-realAdHeighPX+d.statusBarHeight+titleBarHeight;
//转换成页面基准值下的逻辑单位
let logicWebTop = (realToppx * logicWidth) / windowWidth;
//此对象请自己在data下定义
this.bannerAD.style.top = logicWebTop;
console.info("calBannerPostion1 top=" + this.bannerAD.style.top+", logicWebTop= "+logicWebTop);
}, 效果图如下:
页面不显示标题栏场景
核心代码如下:
calBannerPostionWithNoTitle: function () {
  var d = device.getInfoSync();
  console.info("calBannerPostion1 d= "+JSON.stringify(d));

  //获取页面内可见窗口的高度和宽度,此值不包括标题栏和状态栏高度
  let windowWidth = d.windowWidth;
  let windowHeight=d.windowHeight;
  //logicWidth对应manifest.json文件设置的designWidth值,默认是750
  let logicWidth = d.windowLogicWidth;
  //广告自身大小单位是dp,需要转换成px单位
  let realAdHeighPX = this.bannerAD.style.height * d.screenDensity;

  //此处计算很关键,需要将状态栏高度、标题栏高度加上
  let realToppx= windowHeight-realAdHeighPX+d.statusBarHeight;
  //转换成页面基准值下的逻辑单位
  let logicWebTop = (realToppx * logicWidth) / windowWidth;
  this.bannerAD.style.top = logicWebTop;
  console.info("calBannerPostionWithNoTitle top=" + this.bannerAD.style.top+", logicWebTop= "+logicWebTop);
},
效果图如下:
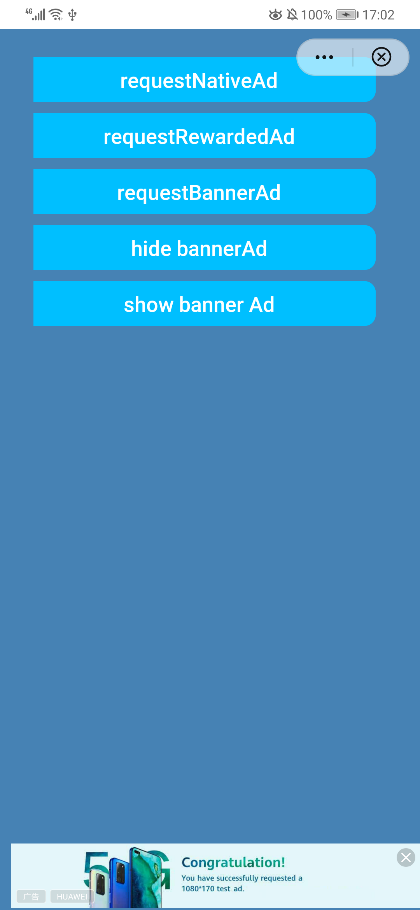
建议与总结
由于快应用引擎未提供获取标题栏高度的方法,结合华为手机的EMUI规范,此处标题栏高度取了一个近似值42dp。通过此案例,可以了解快应用中尺寸大小换算原理以及学会简单的数学计算。本案例只是提供了显示在底部的计算规则,如果希望显示在屏幕其他地方,都可以借鉴其中的原理。
Deeplink跳转快应用时,提示访问的页面不存在
现象描述
通过Deeplink在加载器中打开快应用时,提示快应用页面不存在。
问题分析
查看问题代码,Deeplink需要打开的是main.ux页面,跳转的链接为:hap://app/com.huawei.hwkyy/pages/main/main。
项目结构如下:
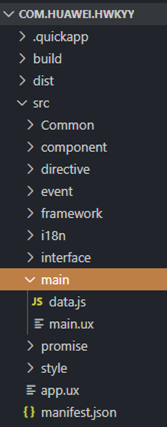
manifest文件配置router信息如下:
Deeplink的hap标准格式为 hap://app/<package>/[path][?key=value],其中package是快应用的包名,path是manifest文件中router配置的路径,即项目结构中src目录往下到对应ux文档的目录。而开发者却错误地把路径配置为manifest文件中配置的层级关系,从而导致跳转快应用时提示页面不存在。
另外如果页面路径携带参数,但是未按快应用deeplink的要求设置,也会导致错误。
解决方法
调整链接不需要写到ux文件,将跳转链接 hap://app/com.huawei.hwkyy/pages/main/main 修改为 hap://app/com.huawei.hwkyy/main。
当携带参数时,页面路径和参数间需要使用?连接。
【错误示例】
hap://app/com.huawei.hwkyy/main&source=sa0001458&outerid=ou0001035&cid=HW001
【正确示例】
hap://app/com.huawei.hwkyy/main?source=sa0001458&outerid=ou0001035&cid=HW001
H5快应用如何屏蔽Google内容
现象描述
某H5应用打包成快应用后在加载器中运行,应用页面有GooglePlay的图标,点击图标拉起Google应用商店某原生app。在HMS手机上因为没有Google系列的东西,所以点击该图标没有反应,影响用户体验。
问题分析
为了使快应用中不存在影响用户体验的无关内容,需要屏蔽这些内容,然而,H5应用的功能都是开发者在自己的html中实现的,快应用引擎使用webview去加载H5的url,无法感知网页中的内容。所以,快应用引擎无法解决这个问题。
但是快应用web规范提供了userAgent属性(简称ua),即用户代理,使得开发者服务器能够识别客户使用的操作系统及版本、CPU类型、浏览器及版本等信息。基于ua,开发者可以识别出是快应用在访问应用,这样就可以屏蔽掉不想显示的内容。
解决方法
- 快应用内定义变量ua, 并初始化值为default,则会使用快应用引擎默认的值,默认值中含有hap字符串。
- 绑定ua变量,示例代码如下:
<web class="web-page" src="{{loadUrl}}" trustedurl="{{list}}" onpagestart="onPageStart" onpagefinish="onPageFinish" onmessage="onMessage" ontitlereceive="onTitleReceive" onerror="onError" id="web" supportzoom="{{supportZoom}}" wideviewport="{{wideViewport}}" overviewmodeinload="{{overViewModeLoad}}" useragent="{{ua}}" allowthirdpartycookies="{{allowThirdPartyCookies}}"> </web> - 给ua赋值,在GMS手机上设置“gms quickappua”,示例代码中的ua值只是一个样例,可根据业务自行设置。 通过快应用package接口可以判断GMS服务是否安装,从而判断是否为GMS手机。
- H5页面根据ua屏蔽不想显示的内容,示例代码如下:
var ua = window.navigator.userAgent;
console.info("ua=" + ua);
var index = ua.indexOf("hap");
console.info("ua hap index=" + index);
if (index >= 0) {
    // request from quickapp on hms phone
    console.info("request from quickapp on hms phone");
    document.getElementById("googleimg").style.display = "none";
    document.getElementById("tip").innerHTML = "request from quickapp on HMS phone";
} else if (ua == "gms quickappua") {
    document.getElementById("tip").innerHTML = "request from quickapp on GMS phone";
}
完整的示例代码如下。
hello.ux代码:
<template>
  <div class="doc-page">
    <!-- Replace the link to the HTML5 app -->
    <web class="web-page" src="{{loadUrl}}" trustedurl="{{list}}" onpagestart="onPageStart" onpagefinish="onPageFinish"
      onmessage="onMessage" ontitlereceive="onTitleReceive" onerror="onError" id="web" supportzoom="{{supportZoom}}"
      wideviewport="{{wideViewport}}" overviewmodeinload="{{overViewModeLoad}}"
      useragent="{{ua}}"
      allowthirdpartycookies="{{allowThirdPartyCookies}}">
    </web>

  </div>
</template>
<style>
  .doc-page {
    flex-direction: column;
    justify-content: center;
    align-content: center;
    align-items: center;
    width: 100%;
    height: 100%;
    position: fixed;

  }
  .web-page {
    width: 100%;
    height: 100%;
    border-top-left-radius: 100%;
  }
  .btn{
    position: fixed;
    left: 10px;
    bottom: 100px;
    width: 100%;
    height: 110px;
    background-color: #00bfff;

  }
</style>
<script>
  import router from "@system.router";
  import pkg from '@system.package';
  export default {
    props: ['websrc'],
    data: {
      title: "",
      model:"",
      // TODO Replace the link to the H5 app
      loadUrl: "https://xxx/h5_demo.html",
      // Attribute allowthirdpartycookies, indicates whether cookies can be delivered in cross-domain mode.
      // If you need login Google Account or Other Account, Please set TRUE.
      allowThirdPartyCookies: true,
      //Attribute supportzoom, indicates whether the H5 page can be zoomed with gestures.
      supportZoom: true,
      wideViewport: true,
      overViewModeLoad: true,
      ua: "default",
      // Here the allowlist settings, when the loading page has multiple addresses, such as the successful loading of the login address and the inconsistent entry address, it needs to set the allowlist to do so.
      list: ["new RegExp('https?.*')"]
    },
    onInit() {
      console.info('onInit: ');
    },
    onPageStart(e) {
      console.info('pagestart: ' + e.url)
    },

    setUA:function(uaValue){
      this.ua=uaValue;
    },

    onReady(options) {
       var that=this;
        pkg.hasInstalled({
        package: 'com.google.gms',
        success: function (data) {
          console.log('handling success hasInstalled gms: ' + data.result);
          if(data.result){
            that.setUA("gms quickappua");
          }
        },
        fail: function (data, code) {
          console.log('handling fail, code = ' + code);
        }
      })
    },
    // Each page switch triggers
    onPageFinish(e) {
      console.info('pagefinish: ' + e.url, e.canBack, e.canForward);
    },
    onTitleReceive(e) {
      this.title = e.title;
    },
    onError(e) {
      console.info('pageError : ' + e.errorMsg)
    },
    onMessage(e) {
      console.info('onmessage e = ' + e.message + ", url = " + e.url);
    },
    onShow: function () {
      console.info(" onshow");
    },
    onHide: function () {
      console.info("  onHide");
    },
    onBackPress() {
      console.log('onBackPress')
      this.$element('web').canBack({
        callback: function (e) {
          if (e) {
            console.log('web back')
            this.$element('web').back()
          } else {
            console.log('router back')
            router.back()
          }
        }.bind(this)
      })
      return true
    },
  }
</script>
h5_demo.html代码:
<html>
<head>
    <title>H5 Demo</title>
    <meta http-equiv="Content-Type" content="text/html; charset=utf-8" />
    <meta name="viewport" content="width=device-width, initial-scale=1">
    <style>
    </style>
    <script language="javascript">
        window.onload = function () {
            var ua = window.navigator.userAgent;
            console.info("ua=" + ua);
            var index = ua.indexOf("hap");
            console.info("ua hap index=" + index);
            if (index >= 0) {
                // request from quickapp on hms phone
                console.info("request from quickapp on hms phone");
                document.getElementById("googleimg").style.display = "none";
                document.getElementById("tip").innerHTML = "request from quickapp on HMS phone";
            } else if (ua == "gms quickappua") {
                document.getElementById("tip").innerHTML = "request from quickapp on GMS phone";
            }
        };
    </script>
</head>
<body>
    <p style="text-align:center">
        this is a demo
    </p>
    <hr style="height:3px;border:none;border-top:3px double red;" />
    <p style="text-align:center">
        Welcome to you!
    </p>
    <p style="text-align:left">
        This is
        <br/>
        <span id="tip" style="height:50px;">(unknown)</span>
    </p>
    <p style="text-align:center;display:">
        <a id="googleimg" href="xxxxx">
            <img border="0" src="google.png" alt="google" width="90" height="40">
        </a>
    </p>
</body>
</html>
如何实现快应用页面退出时弹框确认
现象描述
很多产品在设计时,希望按返回键退出的时候弹出一个对话框来确认是否退出,从而留住用户。快应用提供了这样的功能,和原生App一样,都是在页面的回调函数中处理的。
实现方法
快应用提供了页面生命周期回调函数onBackPress。开发者可重写onBackPress生命周期,在里面自定义返回逻辑,并且返回值必须为true,否则快应用引擎会按照false处理,页面直接退出。以下示例代码中调用了prompt接口实现弹框,点击“确定”后退出,点击“取消”则停留在当前页面。
onBackPress() {
    console.log("quit!!!")
    var that = this
    prompt.showDialog({
    title: 'title',
    message: '确认不再继续浏览了,要退出吗?',
    buttons: [
        {
        text: '确定',
        color: '#33dd44',
        },
        {
        text: '取消',
        color: '#33dd44'
        }
    ],
    success: function (data) {
        console.log("handling callback", data); //返回选中按钮在buttons数组中的序号。
        if (data.index === 0) { //点击确定按钮后的行为
        that.$app.exit()
        }else if(data.index === 1){  //点击取消按钮后的行为
            console.log("cancel button is clicked");
        }
    },
    cancel: function () {
        console.log("cancel");
    }
    })
    return true
},
代码运行效果如下图所示:
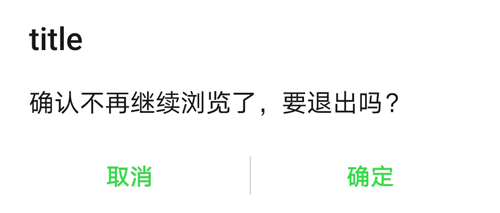
快应用动画接口报错,提示“Cannot read property 'animate' of undefined”
现象描述
快应用动画接口报错,问题代码如下:
onInit() {
    var options = {
    duration: 15000,
    easing: 'linear',
    delay: 0,
    fill: 'forwards',
    iterations: 1
    }
    var frames = [
    {
        transform: {
        scaleX: "0.1",
        scaleY: "0.1",
        }
    },
    {
        transform: {
        scaleX: "1",
        scaleY: "1",
        }
    }];
    var animation = this.$element('ceshi').animate(frames, options);
    animation.play();
    animation.onfinish = function () {
    console.log("animation onfinish");
    }
    animation.oncancel = function () {
    console.log("animation oncancel");
    }
},
报错信息如下图所示:

问题分析
这是在onInit生命周期里调用动画接口导致的。onInit是监听页面初始化的,此时dom还未能获取,this.$element("xx")返回的是undefined。如果再调用动画接口,就会出现这样的报错。建议把动画放到onReady(当页面完成创建可以显示时触发)或者onShow(当进入页面时触发)生命周期里调用。这两个生命周期中dom已经可以获取。
解决方法
在onReady或者onShow中调用动画接口,示例代码如下:
onInit() {
    this.$page.setTitleBar({
    text: "menu",
    textColor: "#ffffff",
    backgroundColor: "#007DFF",
    backgroundOpacity: 0.5,
    menu: true
    });
},
onReady() {         //或者换成onShow
    var options = {
    duration: 15000,
    easing: 'linear',
    delay: 0,
    fill: 'forwards',
    iterations: 1
    }
    var frames = [
    {
        transform: {
        scaleX: "0.1",
        scaleY: "0.1",
        }
    },
    {
        transform: {
        scaleX: "1",
        scaleY: "1",
        }
    }];
    var animation = this.$element('ceshi').animate(frames, options);
    animation.play();
    animation.onfinish = function () {
    console.log("animation onfinish");
    }
    animation.oncancel = function () {
    console.log("animation oncancel");
    }
},
数组元素发生变化,界面未更新
现象描述
快应用在接入应用内支付3.0服务时,应用商品列表界面每个商品都提供了购买入口,当用户购买成功后,界面提示已购买。界面效果图如下:
|
|
|
| 图1 未购买界面 | 图2 已购买界面 |
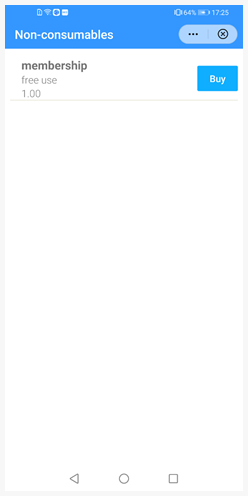
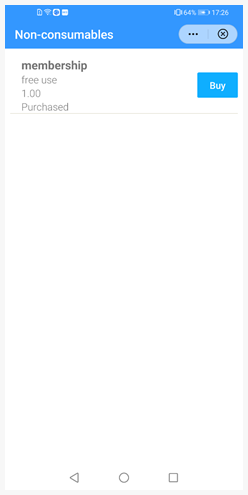
上图中界面是使用快应用list组件渲染出来的效果,list数据源是商品对象数组,记录了商品的各个属性。当点击图1中的“Buy”时,将对象的属性owned值设置为true,期望变成图2的效果。但是实际调试中,发现数组中的值确实发生了变化,但是界面并没有刷新成图2,依然还是图1效果。
相关代码如下:
<template>
  <div class="container">
    <list class="list">
      <block for="{{nonConsumeData}}">
        <list-item class="listItem" type="item">
          <div class="productinfo">
            <text class="productName">{{ $item.productName }}</text>
            <text class="productDesc">{{ $item.productDesc }}</text>
            <text class="productDesc">{{ $item.price }}</text>
            <text class="productDesc" if="{{$item.owned}}">{{ $item.purchaseStateDesc }}</text>
            <input type="button" class="btn" value="Buy" onclick="payForNonConsable($item.productId,$item.priceType)" />
          </div>
        </list-item>
      </block>
    </list>
  </div>
</template>

<style>
  .container {
    flex: 1;
    flex-direction: column;
    padding: 16px;
  }

  .btn {
    height: 80px;
    text-align: center;
    border-radius: 5px;
    color: #ffffff;
    font-size: 30px;
    position: absolute;
    align-self: flex-end;
    background-color: #0faeff;
  }

  .productinfo {
    flex-direction: column;
    align-items: center;
    justify-content: center;
    align-content: space-between;
    width: 100%;
  }
  .productName {
    font-size: 37px;
    font-weight: bold;
    width: 90%;
  }

  .productDesc {
    font-size: 32px;
    font-weight: 300;
    width: 90%;
  }

  .list {
    margin-top: 10px;
    height: 100%;
  }

  .listItem {
    flex-direction: column;
    border-bottom: 1px solid #d9d6c3;
    margin-bottom: 10px;
  }
</style>

<script>
  import device from "@system.device";
  module.exports = {
    data: {
      nonConsumeData: []
    },

    onInit() {
      this.$page.setTitleBar({
        text: "Non-consumables",
        textColor: "#ffffff",
        backgroundColor: "#007DFF",
        backgroundOpacity: 0.8,
        menu: true
      });
    },
    onReady(options) {
      this.getProductList();
    },

    getProductList: function () {
      var that = this;
      device.getInfo({
        success: function (ret) {
          console.log("handling success,screenDensity=" + ret.screenDensity);
          let data = [{ productName: "membership", productId: "non01", productDesc: "free use", price: "1.00" }];
            that.nonConsumeData = data;
          that.initProductPurchase(that.nonConsumeData);
        }
      });
    },

    initProductPurchase: function (dataArray) {
      if (dataArray) {
        let size = dataArray.length;
        if (size > 0) {
          dataArray.forEach((item, index, array) => {
            item.owned = false;
            item.purchaseStateDesc = "Available for purchase";
          });
        }
      }
    },

    updateProductPurchaseState: function (productNo) {
      console.info("updateProductPurchaseState productNo=" + productNo);
      if (this.nonConsumeData) {
        let size = this.nonConsumeData.length;
        if (size > 0) {
          this.nonConsumeData.forEach((item, index, array) => {
            let itemId = item.productId;
            if (productNo == itemId) {
              item.owned = true;
              item.purchaseStateDesc = "Purchased";
              console.info("updateProductPurchaseState after item=" + JSON.stringify(item));
            }
          });
        }

        this.nonConsumeData.forEach((item, index, array) => {
          console.info("updateProductPurchaseState concat item=" + JSON.stringify(item));
        });
      }
    },

    payForNonConsable: function (productNo, productType) {
      this.updateProductPurchaseState(productNo);
    }
  };
</script>
问题分析
以上代码实现了页面启动、获取商品列表数据和始化商品为可购买的功能。

本示例代码中具体的方法不是真实的支付代码,采用静态数据模拟场景,方便大家理解和实际运行。
- getProductList():取商品列表,在页面onReady生命周期中调用。
- initProductPurchase():初始化商品状态,添加属性owned 和purchaseStateDesc,并分别初始化为false和Available for purchase。该方法在返回商品列表数据后调用。
- nonConsumeData:list组件的数据源,是一个商品数组,初始值为空数组,当getProductList方法返回了商品信息,商品信息如下:
{productName: "membership", productId: "non01", productDesc: "free use", price: "1.00"} - updateProductPurchaseState():点击某商品购买成功后,更新该商品的购买状态,将owned 设置为true,将purchaseStateDesc设置为Purchased。
根据代码逐层分析原因:
- 商品数组nonConsumeData中的商品元素刚开始没有owned 和purchaseStateDesc属性,这两个属性是在initProductPurchase()方法中添加的,之后在updateProductPurchaseState()方法中更新了属性值。更新后,界面没有刷新。
- 尝试使用数组的concat、splice等方法,但是界面依然不刷新。
- 不调用updateProductPurchaseState()方法,直接在initProductPurchase中将owned设置为true,界面依然不刷新,那就排除了updateProductPurchaseState()中的问题。
- 参见“Vue响应式原理”,了解到Vue无法检测属性的增加或者移除,属性必须一开始就存在才可以将它转换为响应式的。而上述代码在给nonConsumeData赋值的时候,数组元素中没有owned 和purchaseStateDesc 这两个属性,所以后面的添加都无法响应。
解决方法
既然JavaScript中无法检测对象属性的增加或者移除,而且快应用也没有提供Vue类似的方法Vue.set(object, propertyName, value) 向嵌套对象添加响应式 property,那就只能确保初始化数组的时候,数组元素中的每个属性都添加进去。修改代码如下:
getProductList: function () {
  var that = this;
  device.getInfo({
    success: function (ret) {
      console.log("handling success,screenDensity=" + ret.screenDensity);
      let data = [{ productName: "membership", productId: "non01", productDesc: "free use", price: "1.00" }];

        // 原实现,不能更新界面
        // that.nonConsumeData = data;
        // that.initProductPurchase(that.nonConsumeData);

        that.initProductPurchase(data);
        that.nonConsumeData = data;
    }
  });
},
微信H5 referer支付未拉起微信收银台
现象描述
快应用使用微信H5 referer方式支付, wxpay.pay调用后回调success得到url,但并未拉起微信收银台,无法支付。但是微信H5支付是通的,在浏览器端可以直接支付成功。
问题分析
微信H5支付问题,一般排查以下两点:
- 微信App是否安装,微信H5支付实际上是拉起微信App的收银台界面。
- 在微信平台上申请H5时,是否提交了授权域名,授权域名不能为空。在使用快应用H5 referer方式支付时,wxpay.pay接口refer字段值需填写这个授权域名。

测试网络不能使用代理,如果使用了代理,会导致微信侧校验referer不通过。
若都满足,再回到接口本身的调用实现,代码如下:
pay:function(){
  wxpay.pay({
    prepayid: 'wx20170101abcdef1234567890',
    referer: 'https://www.xx.com',
    extra: {
      mweb_url: 'https://wx.tenpay.com/cgi-bin/mmpayweb-bin/checkmweb'
    },
    fail: function (data, code) {
      console.log('WX PAY failed, code = ' + code);
    },
    cancel: function (data) {
      console.log('WX PAY cancelled by user');
    },
    success: function (data) {
      console.log('WX PAY success');
      let finalurl= data.final_url;
    }
  })
},
经过定位分析,最终原因与mweb_url值有关系。华为快应用加载器在使用H5 referer方式支付时,不会将pay接口中传入的prepayid、extra其他参数拼接在mweb_url后面,success回调中拿到的final_url就是mweb_url,引擎侧直接使用这个final_url发起支付,不满足微信H5支付的url要求。
解决方法
只需要按照微信官方文档上的要求,mweb_url参数值参考上图中示例值填写即可。修改后的代码如下:
pay:function(){
  wxpay.pay({
    prepayid: 'wx20170101abcdef1234567890',
    referer: 'https://www.xx.com',
    extra: {
      mweb_url: 'https://wx.tenpay.com/cgi-bin/mmpayweb-bin/checkmweb ?prepay_id=wx20170101abcdef1234567890&trade_type=MWEB '
    },
    fail: function (data, code) {
      console.log('WX PAY failed, code = ' + code);
    },
    cancel: function (data) {
      console.log('WX PAY cancelled by user');
    },
    success: function (data) {
      console.log('WX PAY success');
      let finalurl= data.final_url;
    }
  })
},
异步调用方法报错,提示“regeneratorRuntime is not defined”
现象描述
使用异步调用await方法,客户端提示“regeneratorRuntime is not defined”,具体错误信息如下图所示:
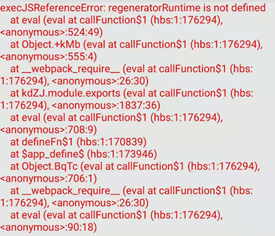
对于await的方式调用需要开发者引入@babel/runtime/regenerator,示例代码如下:
<script>
  const injectRef = Object.getPrototypeOf(global) || global;
  // injection regeneratorRuntime
  injectRef.regeneratorRuntime = require('@babel/runtime/regenerator');
  module.exports = {

  }
</script>
解决方法
在app.ux文件中起始位置加入上述代码声明即可,具体代码如下:
<script>
  import push from "@service.push";
  import device from '@system.device';
  const injectRef = Object.getPrototypeOf(global) || global;
  // injection regeneratorRuntime
  injectRef.regeneratorRuntime = require('@babel/runtime/regenerator');
  module.exports = {
    data: {
      hasSaved: "no"
    },
    onCreate() {
      console.info("Application onCreate");
      console.info("PUSH服务提供商:" + push.getProvider());
      this.hasSaved = "yes";
      push.subscribe({
        success: function (data) {
          console.log("push.subscribe succeeded, regid=" + JSON.stringify(data));
        },
        fail: function (data, code) {
          console.log("push.subscribe failed, result data=" + JSON.stringify(data) + ", code=" + code);
        },
        complete: function () {
          console.log("push.subscribe completed");
        }
      });
      this.testAsync();
    },
    async testAsync() {
      try {
        let res = await device.getDeviceId();
        console.info("get device id " + JSON.stringify(res.data));
      } catch (e) {
        console.log("get device id error " + e.code);
      }
    },
    onShow(options) {
      //console.info("manifest全局数据:" + this.$app.$data.baseUrl);
    },
    onDestroy() {
      console.info("Application onDestroy");
    },
    dataApp: {
      localeData: {}
    }
  };
</script>
refresh组件作为父组件时,子组件宽度显示异常
现象描述
refresh组件作为父组件时,子组件宽度显示异常。
问题代码如下:
<template>
  <div class="container">
    <refresh class="refresh">
        <input value="1111111" class="input-test" type="button" />
        <input value="2222222" class="input-test1" type="button" />
    </refresh>
  </div>
</template>
<style>
  .container {
    flex-direction: column;
    display: flex;
  }
  .refresh {
    width: 80%;
    height: 800px;
    background-image: url(../Common/logo.png);
    position: absolute;
  }
  .input-test {
    width: 500px;
    height: 200px;
    background-color: #ff0000;
  }
  .input-test1 {
    width: 500px;
    height: 200px;
    background-color: #006400;
  }
</style>
异常效果如下:
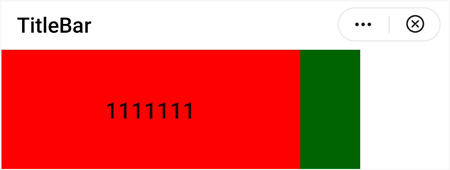
问题分析
refresh组件的布局显示有问题,需要在refresh组件中添加div标签来规避。
解决方法
根据问题分析,修改代码如下:
<template>
  <div class="container">
    <refresh class="refresh">
      <div>
        <input value="1111111" class="input-test" type="button" />
        <input value="2222222" class="input-test1" type="button" />
      </div>
    </refresh>
  </div>
</template>

<style>
  .container {
    flex-direction: column;
    display: flex;
  }
  .refresh {
    width: 80%;
    height: 800px;
    background-image: url(../Common/logo.png);
    position: absolute;
  }
  .input-test {
    width: 500px;
    height: 200px;
    background-color: #ff0000;
  }
  .input-test1 {
    width: 500px;
    height: 200px;
    background-color: #006400;
  }
</style>
修改后运行效果如下:
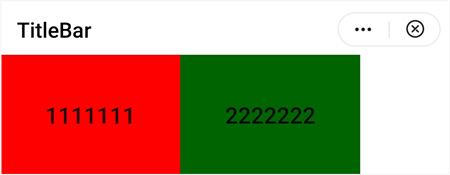
如何实现map地图上点的文本弹框跟随点的位置变化
现象描述
快应用map组件中,地图上点的文本弹框不能跟随点的位置变化。
如下图所示,地图上点的位置坐标已发生变化,但是文本弹框还显示在原位置,并没有显示在新位置。
问题分析
需要对地图上点的文本弹框做显示设置(把markers-callout子属性的display设置为always),并对坐标位置变化做回调弹出文本显示处理。
解决方法
具体步骤如下:
- 将markers第一个点的值赋给一个临时变量。
- 对临时变量进行需要的修改。
- 将修改后的临时变量重新赋值给markers。
- 通过数据绑定实现文本弹框跟随显示。
解决代码如下:
<template>
  <div>
    <map style="width:{{width}}; height:{{height}}" scale="{{scale}}" markers="{{markers}}" ontap="tap"></map>
  </div>
</template>
<script>
  const COORDTYPE = 'wgs84'
  const MARKER_PATH = '/Common/logo.png'
  const TIANANMEN_WGS = {
    latitude: 39.9073728469,
    longitude: 116.3913445961,
    coordType: COORDTYPE
  }
  const QIANMEN_WGS = {
    latitude: 39.898899,
    longitude: 116.39196216700361,
    coordType: COORDTYPE
  }
  export default {
    private: {
      scale: 17,
      markers: [
        {
          id: 1,
          width: '50%',
          height: '50%',
          latitude: TIANANMEN_WGS.latitude,
          longitude: TIANANMEN_WGS.longitude,
          coordType: TIANANMEN_WGS.coordType,
          iconPath: MARKER_PATH,
          width: '50px',
          callout: {
            content: '景点',
            padding: '5px 5px 5px 5px',
            borderRadius: '20px',
            textAlign: 'left',
            display: 'always'
          }
        }
      ]
    },
    tap: function () {
      //地图中显示点位的callout跟随位置变换和相应信息的变化而显示
      let marker = this.markers[0];
      marker.latitude = QIANMEN_WGS.latitude;
      marker.longitude = QIANMEN_WGS.longitude;
      marker.callout.content = '前门';
      this.markers = [marker];
    }
  }
</script>
视频如何根据网络状态播放和暂停
现象描述
如今丰富的流媒体时代需要消耗大量的流量,因此需要实现的功能是:
在wifi环境下,可以实现视频的自动播放;切换到移动网络时,需要暂停视频播放,必须用户手动操作才能继续播放。
实现方法
- 可以通过network.subscribe接口全局监听网络状态的变化,获取网络状态的回调。
- 获取回调信息后,判断当前环境是wifi还是移动网络,从而对video组件进行播放/暂停控制。
详细示例代码如下。
app.ux代码:
<script>
  import network from '@system.network';
  module.exports = {
    onCreate() {
      console.info('Application onCreate');
      this.listenNetwork();
    },
    onDestroy() {
      console.info('Application onDestroy');
      network.unsubscribe();
    },
    listenNetwork: function () {
      console.info("listenNetwork START ");
      var that = this
      network.subscribe({
        callback: function (ret) {
          that.data.localeData.currentType = ret.type;
          console.info("listenNetwork CALLBACK :" + that.data.localeData.currentType);
        },
        fail: function (erromsg, errocode) {
          console.log('network.subscribe----------' + errocode + ': ' + erromsg)
        }
      })
    },
    data: {
      localeData: {
        currentType: '',
      }
    }
  }
</script>
hello.ux代码:
<template>
  <div class="container">
    <text class="title">Network Type:{{currentType.currentType}}</text>
    <video id="video" style="height: 50%;width: 100%;" src="../Common/demo.mp4"></video>
  </div>
</template>
<style>
  .container {
    flex-direction: column;
    justify-content: center;
    align-items: center;
  }
  .title {
    font-size: 40px;
  }
</style>
<script>
  import prompt from '@system.prompt';
  module.exports = {
    data: {
      componentData: {},
      currentType: {},
    },
    onInit() {
      this.$page.setTitleBar({
        text: 'menu',
        textColor: '#ffffff',
        backgroundColor: '#007DFF',
        backgroundOpacity: 0.5,
        menu: true
      });
      this.currentType = this.$app.$def.data.localeData;
      this.$watch('currentType.currentType', 'listenNetType');
    },
    listenNetType: function (newValue, oldValue) {
      console.info("listenNetType newValue= " + newValue + ", oldValue=" + oldValue);
      if (newValue === 'wifi') {
        this.$element("video").start();
        prompt.showToast({
          message: 'Wi-Fi, start.',
          duration: 3000,
          gravity: 'center'
        })
      } else {
        this.$element("video").pause();
        prompt.showToast({
          message: 'non Wi-Fi, pause.',
          duration: 3000,
          gravity: 'center'
        })
      }
    },
  }
</script>
实现效果如下视频所示:
|
|
addEventListener()方法无法监听动画事件
现象描述
Style中设置动画样式,然后在onshow生命周期中调用addEventListener()方法去监听动画事件,无法监听到,该方法无任何回调返回。
问题代码如下:
<template>
  <!-- Only one root node is allowed in template. -->
  <div class="container" id="ani">
    <text class="title" >Hello World</text>
  </div>
</template>
<style>
  .container {
    flex-direction: column;
    justify-content: center;
    align-items: center;
    animation-name: translateX;
    animation-duration: 1000ms;
  }
  .title {
    font-size: 100px;
  }
  @keyframes translateX {
    from {
      transform: translateX(20px);
    }
    to {
      transform: translateX(200px);
    }
  }
</style>
<script>
  import prompt from '@system.prompt';
  module.exports = {
    data: {
      componentData: {},
    },
    onInit() {
      this.$page.setTitleBar({
        text: 'menu',
        textColor: '#ffffff',
        backgroundColor: '#007DFF',
        backgroundOpacity: 0.5,
        menu: true
      });
    },
    onShow(options) {
      '// Do something .'
      console.log("111111111111111111111111111111111");
      var element = this.$element("ani")
      element.addEventListener("animationend", (event) => {
        console.log("22222222222222")
        prompt.showToast({
          message: 'type: ' + event.type + ', animationName: ' + event.animationName + ', elapsedTime: ' + event.elapsedTime
        })
      })
    },
  }
</script>
回调结果如下图所示:

问题分析
这是华为与联盟的底层实现差异导致的,华为是需要在动画效果触发前去调用监听方法才能拿到回调结果。而在onshow中调用时,动画效果已经触发,是无法监听到的。如果要获取callback结果,必须先调用addEventListener,然后再动态修改class,触发CSS动画样式效果。
解决方法
在动画样式触发之前调用addEventListener监听方法,动画效果的触发可以通过动态改变class来实现,具体代码如下:
<template>
  <!-- Only one root node is allowed in template. -->
  <div class="container {{name}}" id="ani">
    <text class="title">Hello World</text>
  </div>
</template>
<style>
  .container {
    flex-direction: column;
    justify-content: center;
    align-items: center;
  }
  .animation {
    animation-name: translateX;
    animation-duration: 1000ms;
  }
  .title {
    font-size: 100px;
  }
  @keyframes translateX {
    from {
      transform: translateX(20px);
    }
    to {
      transform: translateX(200px);
    }
  }
</style>
<script>
  import prompt from '@system.prompt';
  module.exports = {
    data: {
      componentData: {},
      name: ''
    },
    onInit() {
      this.$page.setTitleBar({
        text: 'menu',
        textColor: '#ffffff',
        backgroundColor: '#007DFF',
        backgroundOpacity: 0.5,
        menu: true
      });
    },
    onShow(options) {
      '// Do something .'
      console.log("111111111111111111111111111111111");
      var element = this.$element("ani")
      element.addEventListener("animationend", (event) => {
        console.log('type: ' + event.type + ', animationName: ' + event.animationName + ', elapsedTime: ' + event.elapsedTime)
        prompt.showToast({
          message: 'type: ' + event.type + ', animationName: ' + event.animationName + ', elapsedTime: ' + event.elapsedTime
        })
      })
      this.name = "animation"
    },
  }
</script>
回调结果如下图所示:

快应用推送成功返回80000,但通知栏没有展示
现象描述
快应用在接入华为推送服务时,使用服务器接口进行推送,接口响应返回80000成功码,但是手机通知栏上并没有展示。
问题分析
华为快应用推送服务器接口成功,不表示客户端一定会展示。客户端接收PUSH是有一些条件的,比如快应用是否添加到桌面或收藏中,是否触发了频控导致消息被丢弃。
解决方法
建议从如下几点排查处理:
- 客户端是否将快应用添加到桌面或收藏,这个是硬性要求。添加途径:快应用统一菜单中有相关菜单项,如下图所示:
- 建议在配置推送服务信息的时候配置回调地址,回调地址可以获取真正的消息送达端测状态。
由于快应用有频控策略,同一款快应用每天只能向同一用户推送5条PUSH消息。当触发频控时,华为PUSH服务器会发送102状态码给您的回调地址。

一旦触发了频控,华为PUSH服务器是不会下发消息到手机端的。
- 检查消息体的fast_app_target字段是否填写正确。
- 开发调试阶段,若需要给华为快应用加载器发送PUSH消息,请将此值设置为1。
- 提交正式上架前,若需要给华为应用市场发送PUSH消息,请将此值设置为2。
- 检查消息体validate_only设置的值,正确应该设为false。为true表示测试消息只做格式合法性校验,不会推送给用户设备。
- 检查消息体params参数值,当Pushtype=0时,即使不需要携带参数,params参数也必须写入pushbody体中,示例如下:
"params":{ } - 检查是否使用设备最新的regId发送。
regId一般情况下不会发生变化,不需要每次获取后都上报到服务器。但是有些开发者为了方便,每次都上报,而且服务器也没有更新,而是全部存储,导致同一个手机有多个regId。
当开发者推送所有的regId,老的regId先推送成功时,新的regId会因为频控导致消息被丢弃,不会下发到手机端。而且,快应用引擎会检测当前快应用的regId,如果不是最新的,引擎也不会显示消息。所以regId上报的时候,业务服务器必须对老的regId做更新处理。
激励视频广告调用show方法返回错误码1001
现象描述
在激励视频广告展示过程中,如果点击关闭激励视频广告,然后直接调用show方法展示广告会报错:{"errCode":1001,"errMsg":"Parameter error."}。
问题代码如下:
<template>
  <div class="item-container">
    <text class="alert">This is a rewarded ad demo.</text>
    <text class="alert">Score:{{ score }}</text>
    <input type="button" class="btn" value="Play" onclick="play" />
    <input type="button" class="btn" value="Watch Video" onclick="rewardAdShow" />
  </div>
</template>
<style>
  .alert {
    font-size: 40px;
    margin-top: 20px;
    margin-bottom: 20px;
  }
  .item-container {
    margin-top: 50px;
    padding: 20px;
    flex-direction: column;
    align-items: center;
    align-content: center;
  }
  .btn {
    height: 80px;
    width: 60%;
    background-color: #00bfff;
    color: #ffffff;
    border-radius: 20px;
    margin-bottom: 20px;
  }
  .btn:active {
    background-color: #058fbd;
  }
</style>
<script>
  import ad from "@service.ad";
  import prompt from "@system.prompt";
  let rewardedVideoAd;
  export default {
    data: {
      provider: "",
      score: 0,
      rewarded: {
        adUnitId: "testx9dtjwj8hp",
        errStr: ""
      }
    },
    onInit() {
      this.$page.setTitleBar({ text: "Rewarded Ad" });
    },
    onReady(options) {
      this.loadRewardAd();
    },
    getAdProvider: function () {
      this.provider = ad.getProvider();
      prompt.showToast({
        message: "getProvider : " + this.provider,
        duration: 2000,
        gravity: "center"
      });
    },
    loadRewardAd() {
      this.getAdProvider();
      if (this.provider !== "huawei") {
        console.info("the device does not support ad.");
        return;
      }
      rewardedVideoAd = ad.createRewardedVideoAd({
        adUnitId: this.rewarded.adUnitId
      });
      rewardedVideoAd.onLoad(() => {
        this.rewarded.errStr = "";
        prompt.showToast({
          message: "onRewardedLoaded",
          duration: 2000,
          gravity: "center"
        });
      });
      rewardedVideoAd.onError(e => {
        console.error("load rewarded video ad error:" + JSON.stringify(e));
        this.rewarded.errStr = JSON.stringify(e);
      });
      rewardedVideoAd.onClose(res => {
        console.log("rewarded ad onClose is watch end: " + res.isEnded);
        if (res.isEnded) {
          prompt.showToast({
            message: "Watch video show finished , add 5 scores",
            duration: 2000,
            gravity: "center"
          });
          this.score += 5;
        }
      });
      rewardedVideoAd.load();
    },
    onDestroy() {
      rewardedVideoAd && rewardedVideoAd.destroy();
    },
    rewardAdShow: function () {
      rewardedVideoAd.show();
    },
    play: function () {
      if (this.score === 0) {
        prompt.showToast({
          message: "Watch video ad to add score",
          duration: 2000,
          gravity: "center"
        });
        return;
      }
      let randomNum = parseInt(Math.random(), 1);
      console.info("play randomNum= " + randomNum);
      if (randomNum === 1) {
        this.score += 1;
        prompt.showToast({
          message: 'you win!',
          duration: 2000,
          gravity: 'center'
        })
      } else {
        this.score -= 2;
        if (this.score < 0) {
          this.score = 0;
          prompt.showToast({
            message: 'you lose!',
            duration: 2000,
            gravity: 'center'
          })
        }
      }
    },
  };
</script>
问题分析
激励视频广告调用show展示前,需要先完成预加载操作,否则无法请求到对应的广告资源,也就无法展示广告。
解决方法
在onClose监听激励视频关闭方法中加入load方法,代码如下。这样在关闭激励视频广告时,就能够预先加载下次需要的广告资源,需要展示时直接调用show方法即可。
rewardedVideoAd.onClose(res => {
  console.log("rewarded ad onClose is watch end: " + res.isEnded);
  if (res.isEnded) {
    prompt.showToast({
      message: "Watch video show finished , add 5 scores",
      duration: 2000,
      gravity: "center"
    });
    this.score += 5;
  }
  //下一次广告预加载
  rewardedVideoAd.load(); //此处添加预加载代码
});
rewardedVideoAd.load();
},
具体ux文件代码如下:
<template>
  <div class="item-container">
    <text class="alert">This is a rewarded ad demo.</text>
    <text class="alert">Score:{{ score }}</text>
    <input type="button" class="btn" value="Play" onclick="play" />
    <input type="button" class="btn" value="Watch Video" onclick="rewardAdShow" />
  </div>
</template>
<style>
  .alert {
    font-size: 40px;
    margin-top: 20px;
    margin-bottom: 20px;
  }
  .item-container {
    margin-top: 50px;
    padding: 20px;
    flex-direction: column;
    align-items: center;
    align-content: center;
  }
  .btn {
    height: 80px;
    width: 60%;
    background-color: #00bfff;
    color: #ffffff;
    border-radius: 20px;
    margin-bottom: 20px;
  }
  .btn:active {
    background-color: #058fbd;
  }
</style>
<script>
  import ad from "@service.ad";
  import prompt from "@system.prompt";
  let rewardedVideoAd;
  export default {
    data: {
      provider: "",
      score: 0,
      rewarded: {
        adUnitId: "testx9dtjwj8hp",
        errStr: ""
      }
    },
    onInit() {
      this.$page.setTitleBar({ text: "Rewarded Ad" });
    },
    onReady(options) {
      this.loadRewardAd();
    },
    getAdProvider: function () {
      this.provider = ad.getProvider();
      prompt.showToast({
        message: "getProvider : " + this.provider,
        duration: 2000,
        gravity: "center"
      });
    },
    loadRewardAd() {
      this.getAdProvider();
      if (this.provider !== "huawei") {
        console.info("the device does not support ad.");
        return;
      }
      rewardedVideoAd = ad.createRewardedVideoAd({
        adUnitId: this.rewarded.adUnitId
      });
      rewardedVideoAd.onLoad(() => {
        this.rewarded.errStr = "";
        prompt.showToast({
          message: "onRewardedLoaded",
          duration: 2000,
          gravity: "center"
        });
      });
      rewardedVideoAd.onError(e => {
        console.error("load rewarded video ad error:" + JSON.stringify(e));
        this.rewarded.errStr = JSON.stringify(e);
      });
      rewardedVideoAd.onClose(res => {
        console.log("rewarded ad onClose is watch end: " + res.isEnded);
        if (res.isEnded) {
          prompt.showToast({
            message: "Watch video show finished , add 5 scores",
            duration: 2000,
            gravity: "center"
          });
          this.score += 5;
        }
        // rewardedVideoAd.offError(() => { console.log('offError'); })
        // rewardedVideoAd.offLoad(() => { console.log('offLoad'); })
        // rewardedVideoAd.destroy();
        //下一次广告预加载
        rewardedVideoAd.load();
      });
      rewardedVideoAd.load();
    },
    onDestroy() {
      rewardedVideoAd && rewardedVideoAd.destroy();
    },
    rewardAdShow: function () {
      rewardedVideoAd.show();
    },
    play: function () {
      if (this.score === 0) {
        prompt.showToast({
          message: "Watch video ad to add score",
          duration: 2000,
          gravity: "center"
        });
        return;
      }
      let randomNum = parseInt(Math.random(), 1);
      console.info("play randomNum= " + randomNum);
      if (randomNum === 1) {
        this.score += 1;
        prompt.showToast({
          message: 'you win!',
          duration: 2000,
          gravity: 'center'
        })
      } else {
        this.score -= 2;
        if (this.score < 0) {
          this.score = 0;
          prompt.showToast({
            message: 'you lose!',
            duration: 2000,
            gravity: 'center'
          })
        }
      }
    },
  };
</script>
如何在快应用图标的右上角添加角标
场景描述
很多应用图标的右上角部分可以覆盖一小段文字,用来吸引顾客,如下图。
华为快应用提供了丰富的组件和API,也是可以实现的。
实现方法
【方法一】使用stack组件的堆叠效果层层堆叠实现。
用一张图片作为最底层,然后在上面用text组件覆盖实现,控制text的margin属性即可。
详细示例代码如下:
<template>
  <!-- Only one root node is allowed in template. -->
  <div class="container">
    <stack class="stack">
      <div style="flex-direction: column;">
        <image class="img" src="/Common/3.jpg"></image>
        <text style="height: 60px;font-size: 40px;text-align: center;color: #000000;">快应用</text>
      </div>
      <text class="txt">立减4元</text>
    </stack>
  </div>
</template>
<style>
  .container {
    flex-direction: column;
    justify-content: center;
    align-items: center;
  }
  .stack {
    width: 100%;
    height: 400px;
    margin-left: 30px;
  }
  .img {
    width: 300px;
    height: 300px;
    margin-top: 5px;
  }
  .txt {
    color: white;
    width: 150px;
    height: 40px;
    text-align: center;
    margin-left: 200px;
    background-color: red;
    border-radius: 20px;
    font-size: 35px;
  }
</style>
<script>
  module.exports = {
    data: {
      componentData: {},
      value: '',
      display: true
    },
    onInit() {
      this.$page.setTitleBar({
        text: 'menu',
        textColor: '#ffffff',
        backgroundColor: '#007DFF',
        backgroundOpacity: 0.5,
        menu: true
      });
    },
  }
</script>
实现效果如下:
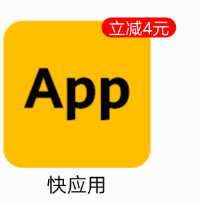
【方法二】用canvas来绘制实现。
- 调用canvas的image和drawImage来绘制App图片。
- 准备另一个canvas,调用fillText()方法在画布上绘制右上角的文字,通过toTempFilePath()方法生成图片,拿到返回的图片的uri。
- 在第一个canvas中调用image和drawImage方法,把文字覆盖上去。
<template>
  <!-- Only one root node is allowed in template. -->
  <div class="container">
    <canvas class="canvas" id="canvas"></canvas>
    <canvas show="{{display}}" class="canvas1" id="canvas1"></canvas>
  </div>
</template>
<style>
  .container {
    flex-direction: column;
    justify-content: center;
    align-items: center;
  }
  .txt {
    color: white;
    width: 150px;
    height: 40px;
    text-align: center;
    margin-left: 200px;
    background-color: red;
    border-radius: 20px;
    font-size: 35px;
  }
  .canvas {
    width: 100%;
    height: 400px;
    margin-left: 30px;
  }
  .canvas1 {
    width: 150px;
    height: 40px;
    border-radius: 20px;
    background-color: red;
  }
</style>
<script>
  module.exports = {
    data: {
      componentData: {},
      value: '',
      display: true
    },
    onInit() {
      this.$page.setTitleBar({
        text: 'menu',
        textColor: '#ffffff',
        backgroundColor: '#007DFF',
        backgroundOpacity: 0.5,
        menu: true
      });
    },
    onShow(options) {
      '// Do something when show.'
      this.drawSmallPic();
      setTimeout(() => {
        this.drawBigPic()
        this.display = false
      }, 50);
},
//绘制大图
    drawBigPic() {
      var test = this.$element("canvas");
      var ctx = test.getContext("2d");
      var img = new Image();
      img.src = "/Common/3.jpg";
      img.onload = function () {
        console.log("图片加载完成");
        ctx.drawImage(img, 10, 10, 300, 300);
      }
      this.draw()
},
//绘制角标
    draw() {
      var test = this.$element("canvas");
      var ctx = test.getContext("2d");
      var img = new Image();
      img.src = this.src;
      img.onload = function () {
        console.log("图片加载完成");
        ctx.drawImage(img, 200, 0);
      }
},
//绘制角标上的文字,并转换成图片,返回图片的uri赋值给变量src
    drawSmallPic() {
      this.message = "drawfillStyleforcreatePattern";
      var test = this.$element("canvas1");
      var ctx = test.getContext("2d");
      ctx.font = "35px";
      ctx.fillText(" 立减4元", 0, 30);
      test.toTempFilePath({
        x: 0,
        y: 0,
        width: 150,
        height: 40,
        fileType: "png",
        quality: 1.0,
        success: (data) => {
          this.src = data.uri;
          console.log(`Canvas toTempFilePath success ${data.uri}`)
          console.log(`Canvas toTempFilePath success ${data.tempFilePath}`)
        },
        fail: (data) => {
          console.log('Canvas toTempFilePath data =' + data);
        },
        complete: () => {
          console.log('Canvas toTempFilePath complete.');
        }
      })
    }
  }
</script>
实现效果如下:
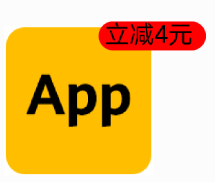
调用文件下载接口下载的图片无法显示
现象描述
调用快应用的文件下载接口下载图片,从如下日志看,触发了成功回调,但是返回值里没有文件路径,无法拿到图片路径。

问题代码如下:
download() {
      var that = this
      // download file, store locally
      request.download({
        url: "https://developer.huawei.com/dev_index/img/logo_ch.png"
        description: 'This is description.',
        filename: 'HuaweiLogo.png',
        success: function (ret) {
          that.fileDownloadData = ret.token
          console.log('file_download_data--------' + JSON.stringify(ret.token))
        },
        fail: function (errmsg, errcode) {
          console.log('file_download_data--------' + errcode + ': ' + errmsg)
        }
      })
    },
问题分析
调用request.download接口下载图片,下载成功后返回的是一个token,并没有返回图片的地址。需要调用request.onDownloadComplete监听下载任务接口,将返回的token作为参数传入该监听接口才能返回下载文件的uri,此时才是真正地拿到了下载图片的地址。
解决方法
在调用request.download接口成功拿到返回的token后,调用request.onDownloadComplete接口,并将token作为参数传入,触发成功回调后就可以拿到下载文件的uri。
完整实现代码如下:
<template>
  <div class="container">
    <image if="{{display}}" style="width:400px;height: 400px;object-fit: contain;" src="{{imgSrc}}"></image>
    <input type="button" class="btn" value="下载" onclick="download" />
  </div>
</template>
<style>
  .container {
    flex-direction: column;
    align-content: center;
    align-items: center;
justify-content: center;
background-color: grey;
  }
  text {
    margin-bottom: 50px;
  }
  input {
    margin-bottom: 50px;
    margin-right: 60px;
    margin-left: 60px;
    justify-content: center;
  }
</style>
<script>
  import request from '@system.request';
  export default {
    data: {
      display: false,
      imgSrc: '',
      fileDownloadData: ''
    },
    onInit() {
    },
    download() {
      var that = this
      // download file, store locally
      request.download({
        url: "https://developer.huawei.com/dev_index/img/logo_ch.png",
        description: 'This is description.',
        filename: 'HuaweiLogo.png',
        success: function (ret) {
          that.fileDownloadData = ret.token
          console.log('file_download_data--------' + JSON.stringify(ret.token))
          request.onDownloadComplete({
            token: that.fileDownloadData,
            success: function (ret) {
              that.imgSrc = ret.uri
              that.display = true
              console.log('fileDownloadUri--------' + JSON.stringify(ret.uri))
            },
            fail: function (errmsg, errcode) {
              console.log('fileDownloadUri failed--------' + errcode + ': ' + errmsg)
            }
          })
        },
        fail: function (errmsg, errcode) {
          console.log('file_download_data--------' + errcode + ': ' + errmsg)
        }
      })
    },
  }
</script>
日志如下:

一个页面中存在多个广告时,只有最后一个广告点击能跳转落地页
现象描述
一个页面存在多个原生广告子组件时,只有最后一个原生广告点击能跳转落地页。
问题代码如下。
广告子组件nativeAd.ux代码:
<template>
  <div>
  <div class="item-container">
    <image class="img" src="{{native.adImgSrc}}" @click="reportNativeClick"></image>
    <div class="container" if="isShow">
      <div class="container-left">
        <text class="title" if="isShowTitle">{{native.title}}</text>
        <div class="source">
          <text if="isShowSource">{{native.source}}</text>
          <text>广告</text>
        </div>
      </div>
      <div if="native.creativeType === 3" class="known-more-btn" @click="reportNativeClick">
        <image src="../../assets/img/Public_qus.png"></image>
        <text>{{native.btnTxt}}</text>
      </div>
      <div if="native.creativeType > 100" class="ad-btn">
        <input type="button" class="btn" />
        <div class="progress" style="{{progress}}"></div>
        <text class="btn-text">{{native.btnTxt}}</text>
      </div>
    </div>
  </div>
  </div>
</template>
<style lang="less">
  .item-container {
    width: 100%;
    padding: 0 16px;
    flex-direction: column;
    align-items: center;
    align-content: center;
  }
  .img{
    width: 100%;
    background-size: cover;
    border-top-left-radius: 16px;
    border-top-right-radius: 16px;
  }
  .container {
    width: 100%;
    padding: 8px 12px;
    flex-direction: row;
    justify-content: center;
    align-items: center;
    border-bottom-left-radius: 16px;
    border-bottom-right-radius: 16px;
    background-color: #fff;
  }
  .container-left {
    flex-direction: column;
    flex: 1;
  }
  .title {
    font-size: 16px;
    line-height: 21px;
    color: #000000;
    lines: 1;
    text-overflow: ellipsis;
  }
  .source {
    text {
      font-size: 12px;
      color: #999;
    }
  }
  .known-more-btn {
    flex-direction: row;
    align-content: center;
    text-align: center;
    height: 28px;
    line-height: 28px;
    border-radius: 14px;
    background-color: rgba(#FF7500, 0.1);
    padding: 6px 10px;
    margin-right: 8px;
    text {
      color: #FF7500;
      font-size: 12px;
    }
    image {
      margin-right: 5px;
    }
  }
  .ad-btn {
    width: 60px;
    height: 28px;
    line-height: 28px;
    border-radius: 14px;
    margin-right: 8px;
  }
  .btn {
    width: 100%;
    height: 100%;
    font-size: 12px;
    color: #FF7500;
    border-radius: 14px;
    background-color: rgba(#FF7500, 0.2);
  }
  .btn-text {
    font-size: 12px;
    color: #FF7500;
    position: absolute;
    top: 5px;
    left: 0;
    right: 0;
    text-align: center;
  }
  .progress {
    position: absolute;
    top: 0;
    right: 0;
    bottom: 0;
    background-color: rgba(#fff, 0.3);
  }
  .more {
    width: 24px;
    height: 24px;
    background-size: contain;
    opacity: 0.6;
    transform:rotate(90deg);
  }
  .not-like {
    width: 80px;
    height: 30px;
    line-height: 30px;
    border-radius: 5px;
    position: absolute;
    bottom: 50px;
    right: 16px;
    font-size: 12px;
    text-align: center;
    font-weight: 700;
    background-color: #fff;
    border: 1px solid #ddd;
  }
</style>
<script>
  import ad from "@service.ad";
  let TAG = "nativeAd";
  let nativeAd;
  export default {
    data: {
      componentName: "ad",
      provider: "",
      isShow: false,
      isShowAd: true,
      style: {},
      isShowLike: false,
      isShowTitle: false,
      isShowSource: false,
      progress: {},
      native: {
        adId: "",
        title: "",
        source: "",
        adImgSrc: "",
        btnTxt: "",
        creativeType: null,
        adData: {},
        adUnitId: "testb65czjivt9", //大图文广告类型 testu7m3hc4gvm; 大图文带下载按钮 testb65czjivt9
      }
    },
    props: {
      advertId: String, //@default: ''  description: 广告ID
    },
    onInit() {
      this.$page.setTitleBar({ text: "Native Ad" });
    },
    onReady() {
      this.showNativeAd();
    },
    showNativeAd() {
      //获取服务提供商 如果获取到的 不是“huawei”,则表示不支持广告。
      this.provider = ad.getProvider();
      if (this.provider !== "huawei") {
        return;
      }
      //创建广告组件
      nativeAd = ad.createNativeAd({ adUnitId: this.advertId });
      nativeAd.onLoad(data => {
        //成功回调
        this.native.adData = data.adList[0];
        if (this.native.adData) {
          if (this.native.adData.imgUrlList && this.native.adData.imgUrlList.length > 0) {
            this.native.adImgSrc = this.native.adData.imgUrlList[0];
          } else {
            this.native.adImgSrc = "";
            this.isShowAd = false;
          }
          this.native.creativeType = this.native.adData.creativeType || null;
          this.native.title = this.native.adData.title || "";
          this.native.adId = this.native.adData.adId || "";
          if (!this.native.title) {
            //标题为空时不显示
            this.isShowTitle = false;
          }
          if (!this.native.adData.source) {
            //来源为空时不显示 “广告”两个字就顶格显示
            this.isShowSource = false;
          } else {
            this.native.source = this.native.adData.source + ' '
          }
          if (this.native.creativeType === 3) {
            //大图文广告类型
            if (this.native.adData.clickBtnTxt) {
              this.native.btnTxt = this.native.adData.clickBtnTxt;
            } else {
              this.native.btnTxt = "了解详情";
            }
          }
          if (this.native.creativeType === 103) {
            //大图文带下载按钮
            if (this.native.adData.clickBtnTxt) {
              this.native.btnTxt = this.native.adData.clickBtnTxt;
            } else {
              this.native.btnTxt = "下载";
            }
          }
          this.isShowTitle = true;
          this.isShowSource = true;
          this.reportNativeShow();
        }
      });
      nativeAd.onError(e => {
        console.error(TAG," load ad fail:" + JSON.stringify(e));
        //失败回调
        this.isShowAd = false;
      });
      //获取广告数据
      nativeAd.load();
    },
    reportNativeShow() {
      if (nativeAd) {
        console.log(TAG,"nativeAd reportAdShow");
        nativeAd.reportAdShow({ adId: this.native.adId });
      }
    },
    reportNativeClick() {
      console.log(TAG,"nativeAd reportAdClick");
      nativeAd.reportAdClick({
        adId: this.native.adId
      });
    },
    onDestroy() {
      if (nativeAd) {
        //销毁广告组件 取消下载
        nativeAd.destroy();
        nativeAd.cancelDownload({
          adId: this.native.adId
        });
      }
    },
  };
</script>
页面hello.ux代码:
<import name="native-ad" src="../compoment/nativeAd.ux"></import>
<template>
  <!-- Only one root node is allowed in template. -->
  <div class="container">
    <native-ad advert-id="testu7m3hc4gvm"></native-ad>
    <native-ad advert-id="testu7m3hc4gvm"></native-ad>
  </div>
</template>
<style>
  .container {
    flex-direction: column;
    justify-content: center;
    align-items: center;
  }
  .title {
    font-size: 100px;
  }
</style>
<script>
  module.exports = {
    data: {
      componentData: {},
    },
    onInit() {
      this.$page.setTitleBar({
        text: 'menu',
        textColor: '#ffffff',
        backgroundColor: '#007DFF',
        backgroundOpacity: 0.5,
        menu: true
      });
    }
  }
</script>
问题分析
此问题与广告对象nativeAd定义有关,该对象定义为页面全局对象,导致ad.createNativeAd接口创建的对象被最新的创建结果覆盖。由于每个广告组件返回的adId值不一样,当点击上一个广告时,引擎内部获取不到对应的对象,导致无法响应。
解决方法
在子组件中将广告对象nativeAd绑定到this对象上,即可实现独立的对象,不会被覆盖。修改nativeAd.ux代码如下:
<script>
  import ad from "@service.ad";
  let TAG = "nativeAd";
 // let nativeAd;
  export default {
    data: {
      componentName: "ad",
      provider: "",
      isShow: false,
      isShowAd: true,
      style: {},
      isShowLike: false,
      isShowTitle: false,
      isShowSource: false,
      progress: {},
      native: {
        adId: "",
        title: "",
        source: "",
        adImgSrc: "",
        btnTxt: "",
        creativeType: null,
        adData: {},
        adUnitId: "testb65czjivt9", //大图文广告类型 testu7m3hc4gvm; 大图文带下载按钮 testb65czjivt9
      }
    },
    props: {
      advertId: String, //@default: ''  description: 广告ID
    },
    onInit() {
      this.$page.setTitleBar({ text: "Native Ad" });
    },
    onReady() {
      this.showNativeAd();
    },
    showNativeAd() {
      //获取服务提供商 如果获取到的 不是“huawei”,则表示不支持广告。
      this.provider = ad.getProvider();
      if (this.provider !== "huawei") {
        return;
      }
      //创建广告组件
     this.nativeAd = ad.createNativeAd({ adUnitId: this.advertId });
      this.nativeAd.onLoad(data => {
        //成功回调
        this.native.adData = data.adList[0];
        if (this.native.adData) {
          if (this.native.adData.imgUrlList && this.native.adData.imgUrlList.length > 0) {
            this.native.adImgSrc = this.native.adData.imgUrlList[0];
          } else {
            this.native.adImgSrc = "";
            this.isShowAd = false;
          }
          this.native.creativeType = this.native.adData.creativeType || null;
          this.native.title = this.native.adData.title || "";
          this.native.adId = this.native.adData.adId || "";
          if (!this.native.title) {
            //标题为空时不显示
            this.isShowTitle = false;
          }
          if (!this.native.adData.source) {
            //来源为空时不显示 “广告”两个字就顶格显示
            this.isShowSource = false;
          } else {
            this.native.source = this.native.adData.source + ' '
          }
          if (this.native.creativeType === 3) {
            //大图文广告类型
            if (this.native.adData.clickBtnTxt) {
              this.native.btnTxt = this.native.adData.clickBtnTxt;
            } else {
              this.native.btnTxt = "了解详情";
            }
          }
          if (this.native.creativeType === 103) {
            //大图文带下载按钮
            if (this.native.adData.clickBtnTxt) {
              this.native.btnTxt = this.native.adData.clickBtnTxt;
            } else {
              this.native.btnTxt = "下载";
            }
          }
          this.isShowTitle = true;
          this.isShowSource = true;
          this.reportNativeShow();
        }
      });
      this.nativeAd.onError(e => {
        console.error(TAG," load ad fail:" + JSON.stringify(e));
        //失败回调
        this.isShowAd = false;
      });
      //获取广告数据
      this.nativeAd.load();
    },
    reportNativeShow() {
      if (this.nativeAd) {
        console.log(TAG,"nativeAd reportAdShow");
        this.nativeAd.reportAdShow({ adId: this.native.adId });
      }
    },
    reportNativeClick() {
      console.log(TAG,"nativeAd reportAdClick");
      this.nativeAd.reportAdClick({
        adId: this.native.adId
      });
    },
    onDestroy() {
      if (this.nativeAd) {
        //销毁广告组件 取消下载
        this.nativeAd.destroy();
        this.nativeAd.cancelDownload({
          adId: this.native.adId
        });
      }
    },
  };
</script>
快应用list组件无法监听到scrollbottom事件
现象描述
list组件滑动到页面最底部时,无法监听到scrollbottom事件。
问题代码如下:
<template>
  <!-- Only one root node is allowed in template. -->
  <div class="container">
    <list onscrollbottom="handleScrollbottom">
      <list-item type="1" style="height:700px;width:100%;background-color:black"></list-item>
      <list-item type="2" style="height:700px;width:100%;background-color:red" >
      </list-item>
      <list-item type="3" style="height:700px;width:100%;background-color:yellow"></list-item>
       <list-item type="4"></list-item>
    </list>
  </div>
</template>
<style>
  .container {
    flex-direction: column;
    justify-content: center;
    align-items: center;
  }
  }
</style>
<script>
  import prompt from '@system.prompt';
  module.exports = {
    data: {
      componentData: {},
      show:false
    },
    onInit() {
      this.$page.setTitleBar({
        text: 'list',
        textColor: '#ffffff',
        backgroundColor: '#007DFF',
        backgroundOpacity: 0.5,
        menu: true
      });
    },
    handleScrollbottom(){
      console.error('2222');
      prompt.showToast({
        message: 'slide to the bottom',
        duration: 2000,
        gravity: 'center'
      })
    }
  }
</script>
问题分析
快应用引擎判断是否滑动到底部,需要比较lastIndex(最后一个可见list-item的索引位置)和total(总的list-item个数)的大小。当lastIndex+1>=total时,才会判定为滑动到底部,进而触发scrollbottom事件。
上述代码中有4个不同type的list-item组件,即total=4。前面3个list-item都设置了height,唯独最后1个list-item没有设置height、padding-top/bottom、margin-top/bottom属性,以致整个区域高度为0,在界面是不可见的。当滑动到底部时,lastIndex值是2,2+1<4,所以无法触发scrollbottom事件。
解决方法
确保最后一个list-item的区域高度不为0,即CSS样式中属性值满足如下条件:
height + padding-top + padding-bottom + margin-top + margin-bottom>=1
由于list-item是容器组件,为防止无法将子节点的内容撑开,height值一般不会固定。所以我们只需要设置其他4个属性值为1即可,也不会影响最终的布局效果。
修改后核心代码如下:
<template>
  <!-- Only one root node is allowed in template. -->
  <div class="container">
    <list onscrollbottom="handleScrollbottom">
      <list-item type="1" style="height:700px;width:100%;background-color:black"></list-item>
      <list-item type="2" style="height:700px;width:100%;background-color:red" >
      </list-item>
      <list-item type="3" style="height:700px;width:100%;background-color:yellow"></list-item>
      <list-item type="4" class="lastItemstyle"></list-item>
    </list>
  </div>
</template>
<style>
  .container {
    flex-direction: column;
    justify-content: center;
    align-items: center;
  }
   .lastItemstyle{
      /* height: 1px;
      margin-bottom: 1px;
      padding-top: 1px;
      padding-top: 1px; */
      padding-bottom: 1px;
   }
  }
</style>
scroll-view组件中设置“scrollTop: 0”使页面回到顶部,仅第一次生效
现象描述
在小程序转快应用中使用scroll-view组件实现可滚动的页面,页面滑动后,通过setdata设置“scrollTop: 0”使页面回到顶部,仅第一次生效,之后再次设置始终无法回到顶部。
问题代码如下。
scroll-view.qxml文件代码:
<view class="container">
    <template is="head" data="{{title: 'scroll-view'}}" />
    <view class="page-body">
        <view class="page-section">
            <view class="page-section-title">
                <text bindtap="tap1">Vertical Scroll\n</text>
            </view>
            <view class="page-section-spacing">
                <scroll-view scroll-y="true" style="height: 500rpx;" scroll-y="true" bindscrolltolower="lower"
                    bindscroll="scroll" scroll-into-view="{{toView}}" scroll-top="{{scrollTop}}">
                    <view id="demo1" class="scroll-view-item demo-text-1"></view>
                    <view id="demo2" class="scroll-view-item demo-text-2"></view>
                    <view id="demo3" class="scroll-view-item demo-text-3"></view>
                </scroll-view>
            </view>
        </view>
        <view class="page-section">
            <view class="page-section-title">
                <text>Horizontal Scroll\n</text>
            </view>
            <view class="page-section-spacing">
                <scroll-view class="scroll-view_H" scroll-x="true" bindscroll="scroll" style="width: 100%">
                    <view id="demo1" class="scroll-view-item_H demo-text-1"></view>
                    <view id="demo2" class="scroll-view-item_H demo-text-2"></view>
                    <view id="demo3" class="scroll-view-item_H demo-text-3"></view>
                </scroll-view>
            </view>
        </view>
    </view>
    <template is="foot" />
</view>
scroll-view.js文件代码:
tap1() {
    console.log('log level message .')
    this.setData({
      scrollTop: 0
  })
},
问题分析
根据数据绑定机制,数据发生变化才会触发布局更新。setData方法里设置一样的值只有第一次会生效,后续因为底层监听没有变化,所以不会通知布局更新。
解决方法
可以在setData时设置0和0.1两个值来回切换,这两个值很接近,都可以达到回到顶部的效果。
修改代码如下:
tap1() {
  console.log('log level message .')
  if (this.data.scrollTop === 0) {
    this.setData({
      scrollTop: 0.1
    })
  } else {
    this.setData({
      scrollTop: 0
    })
  }
},
同时传递事件对象和自定义参数 ,无法正确接收事件对象
现象描述
在快应用中采用如下方式绑定组件的事件方法,同时传递事件对象和自定义参数,发现回调方法中没有正确接收到事件对象。
问题代码如下:
<template>
  <!-- Only one root node is allowed in template. -->
  <div class="container">
    <input id="input1" type="button" value="跳转" onclick="jump(event,1)"/>
  </div>
</template>
<script>
  module.exports = {
    jump: function (event, v) {
      console.info("e = " + JSON.stringify(event));
      console.info("v = " + v);
    },
  }
</script>
日志如下:
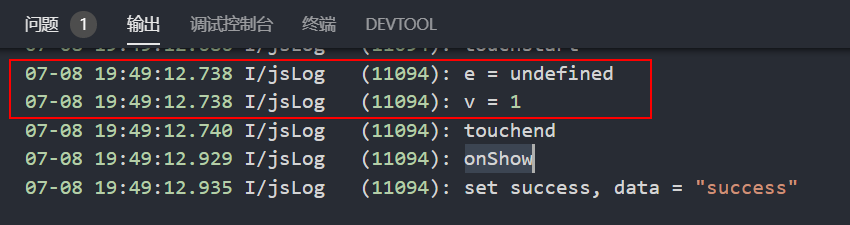
问题分析
上述代码中jump(event,1)不需要带上event事件对象,因为回调函数被调用时,会在参数列表末尾自动添加一个evt参数,通过evt参数访问回调事件相关上下文数据。
解决方法
修改代码如下:
<template>
  <!-- Only one root node is allowed in template. -->
  <div class="container">
    <!—把问题代码中jump(event,1)修改为jump(1)-->
    <input id="input1" type="button" value="跳转" onclick="jump(1)" />
  </div>
</template>
<script>
  module.exports = {
    jump: function (v, evt) {
      console.info("e = " + JSON.stringify(evt));
      console.info("v = " + v);
    }
  }
</script>
修改后运行日志如下:

切换class样式实现动画播放,出现动画闪烁
现象描述
通过切换class的样式来实现动画播放会导致动画闪烁,如录屏所示,点击“点我旋转”,“获取播放状态”的文字会左右旋转,但在旋转过程中出现闪烁。
|
|
问题代码如下:
<template>
  <!-- template里只能有一个根节点 -->
  <div class="wrapper">
    <text @click="rotate">点我旋转</text>
    <text
      class="title {{ isRotate ? 'title_play' : 'title_pause' }}"
      @click="getCurrentTIme"
    >
      {{ title }}
    </text>
    <input
      class="btn"
      type="button"
      value="跳转到播放器"
      onclick="onDetailBtnClick"
    />
  </div>
</template>

<script>
  import router from '@system.router'
  import prompt from '@system.prompt';
  export default {
    // 页面级组件的数据模型,影响传入数据的覆盖机制:private内定义的属性不允许被覆盖
    private: {
      title: '获取播放状态',
      player: null,
      duration: 269,
      player: null,
      isRotate: false
    },
    onInit() {
    },
    getCurrentTIme() {
      this.player = $Player.getInstance()
      if (this.player) {
        this.player.getStatus().then(res => {
          console.log(res)

          prompt.showToast({
            message: res,
            duration: 2000,
            gravity: 'center'
          })
        })
      }
    },
    onDetailBtnClick() {
      router.push({
        uri: '/pages/DemoDetail'
      })
    },
    rotate() {
      this.isRotate = !this.isRotate
    }
  }
</script>
<style lang="scss">
  @import './../../assets/styles/style.scss';
  .wrapper {
    @include flex-box-mixins(column, center, center);
    .title {
      font-size: 8 * $size-factor;
      text-align: center;
      color: $black;
    }
    .btn {
      width: 90 * $size-factor;
      height: 16 * $size-factor;
      border-radius: 8 * $size-factor;
      background-color: $brand;
      color: $white;
      font-size: 30px;
      margin-top: 16 * $size-factor;
    }
  }
  .slider-wrapper {
    margin: 30px 50px 0;
    width: 100%;
    flex-direction: column;
  }
  .title {
    margin-top: 50px;
    transform-origin: 0 0;
    animation-duration: 0.3s;
    animation-iteration-count: 1;
    animation-timing-function: ease-in-out;
    &_play {
      transform: rotate(24deg);
      animation-name: playAni;
    }
    &_pause {
      transform: rotate(0deg);
      animation-name: pauseAni;
    }
  }
  @keyframes playAni {
    from {
      transform: rotate(0deg);
    }
    to {
      transform: rotate(24deg);
    }
  }
  @keyframes pauseAni {
    from {
      transform: rotate(24deg);
    }
    to {
      transform: rotate(0deg);
    }
  }
</style>
问题分析
问题出在如下样式切换代码中:
.title {
  margin-top: 50px;
  transform-origin: 0 0;
  animation-duration: 0.3s;
  animation-iteration-count: 1;
  animation-timing-function: ease-in-out;
  &_play {
    transform: rotate(24deg);
    animation-name: playAni;
  }
  &_pause {
    transform: rotate(0deg);
    animation-name: pauseAni;
  }
}
transform和animation-name属性不能同时设置,否则会导致动画重复执行。
解决方法
需要删除上述代码中的transform字段,只保留animation-name,并添加“animation-fill-mode: forwards;”,解决代码如下:
<template>
  <!-- template里只能有一个根节点 -->
  <div class="wrapper">
    <text @click="rotate">点我旋转</text>
    <text
      class="title {{ isRotate ? 'title_play' : 'title_pause' }}"
      @click="getCurrentTIme"
    >
      {{ title }}
    </text>
    <input
      class="btn"
      type="button"
      value="跳转到播放器"
      onclick="onDetailBtnClick"
    />
  </div>
</template>

<script>
  import router from '@system.router'
  import prompt from '@system.prompt';
  export default {
    // 页面级组件的数据模型,影响传入数据的覆盖机制:private内定义的属性不允许被覆盖
    private: {
      title: '获取播放状态',
      player: null,
      duration: 269,
      player: null,
      isRotate: false
    },
    onInit() {
    },
    getCurrentTIme() {
      this.player = $Player.getInstance()
      if (this.player) {
        this.player.getStatus().then(res => {
          console.log(res)

          prompt.showToast({
            message: res,
            duration: 2000,
            gravity: 'center'
          })
        })
      }
    },
    onDetailBtnClick() {
      router.push({
        uri: '/pages/DemoDetail'
      })
    },
    rotate() {
      this.isRotate = !this.isRotate
    }
  }
</script>
<style lang="scss">
  @import './../../assets/styles/style.scss';
  .wrapper {
    @include flex-box-mixins(column, center, center);
    .title {
      font-size: 8 * $size-factor;
      text-align: center;
      color: $black;
    }
    .btn {
      width: 90 * $size-factor;
      height: 16 * $size-factor;
      border-radius: 8 * $size-factor;
      background-color: $brand;
      color: $white;
      font-size: 30px;
      margin-top: 16 * $size-factor;
    }
  }
  .slider-wrapper {
    margin: 30px 50px 0;
    width: 100%;
    flex-direction: column;
  }
  .title {
    margin-top: 50px;
    transform-origin: 0 0;
    animation-duration: 0.3s;
    animation-iteration-count: 1;
    animation-timing-function: ease-in-out;
    animation-fill-mode: forwards;//当动画完成后,保持最后一个属性值(在最后一个关键帧中定义)
    &_play {
      animation-name: playAni;
    }
    &_pause {
      animation-name: pauseAni;
    }
  }
  @keyframes playAni {
    from {
      transform: rotate(0deg);
    }
    to {
      transform: rotate(24deg);
    }
  }
  @keyframes pauseAni {
    from {
      transform: rotate(24deg);
    }
    to {
      transform: rotate(0deg);
    }
  }
</style>
快应用中如何实现titlebar居中显示
现象描述
快应用中系统自带的titleBar默认在左边,且无法进行自定义,而开发者在开发过程中可能需要titleBar显示在顶部的正中间。
本案例旨在帮助开发者实现自定义titleBar。
实现方法
- 在manifest.json文件里设置titleBar属性为false,隐藏系统自带的titleBar。
"display": { "titleBar": false, "pages": { "Hello": { "statusBarBackgroundColor": "#0faeff" } } } - 使用一个text组件实现自定义titleBar,并使其居中显示即可。
<template>
  <!-- Only one root node is allowed in template. -->
  <div class="container">
    <text class="txt">titlebar</text>
    <div class="label">
      <text style="font-size: 60px">this is test page</text>
    </div>
  </div>
</template>
<style>
  .container {
    flex-direction: column;
    align-items: center;
  }
  .txt {
    font-size: 60px;
    color: #00ced1;
    margin-top: 15px;
  }
  .label {
    flex-direction: column;
    justify-content: center;
    width: 100%;
    height: 100%;
  }
</style>
<script>
  module.exports = {
    data: {
      status: 1
    },
    onInit() {
    },
    onShow(options) {
      '// Do something when show.'
    },
  }
</script>
实现效果如下:
编写嵌套样式,编译报错
现象描述
如下嵌套样式的写法会导致IDE编译报错:
<style>
  .item-container {
    margin-bottom: 50px;
    flex-direction: column;
    .image {
      border-radius: 100px;
    }
  }
</style>
报错内容如下:

问题分析
在style中定义嵌套样式,如果没有指定预编译器,会导致IDE编译无法识别。
解决方法
修改代码如下:
<style lang="less">
  .item-container {
    margin-bottom: 50px;
    flex-direction: column;
    .image {
      border-radius: 100px;
    }
  }
</style>
file.delete接口删除文件失败,返回错误码300
现象描述
快应用中下载任务接口downloadtask.downloadFile下载的Bin文件使用file.delete接口删除,无法删除,出现报错提示“code= 300”。
问题代码如下:
click() {
  this.download_task = downloadtask.downloadFile({
    header: {
      "host": "windspeed-drcn.dbankcdn.com"
    },
    url: "https://640aa0d6fddbf8651e2232aaf3162e67.cc.cdnhwc5.com/download/random2000.bin?auth_key=1627344862-6B5A47E8B8FF40E38021DEAA14E2C5FD-0-519320d987b2717bd7b35a84ad193125",/*非真实地址*/
    success(res) {
      console.log("Download success. resp = " + JSON.stringify(res))
    },
    fail(res) {
      console.log("Download fail. resp = " + JSON.stringify(res))
    }
  })
  this.download_task.onProgressUpdate(res => {
    console.log("Download onProgressUpdate = " + JSON.stringify(res))
  })
},
find() {
  var that = this
  file.list({
    uri: "internal://mass/Download/",
    success: function (data) {
      console.log(JSON.stringify(data.fileList))
      console.log(data.fileList[0].uri)
      that.path = data.fileList[0].uri
    },
    fail: function (data, code) {
      console.log("handling fail, code=" + code);
    }
  })
},
delete() {
  file.delete({
    uri: this.path,
    success: function (data) {
      console.log('handling success');
    },
    fail: function (data, code) {
      console.log('handling fail, code = ' + code);
    }
  })
}
错误日志如下:
08-04 08:36:57.084 I/jsLog   (13195): Download onProgressUpdate = {"progress":100,"totalBytesWritten":2250,"totalBytesExpectedToWrite":2250}
08-04 08:36:57.091 I/jsLog   (13195): Download success. resp = {"filePath":"internal://mass/Download/4316495718641443.bin?auth_key=1627344862-6B5A47E8B8FF40E38021DEAA14E2C5FD-0-519320d987b2717bd7b35a84ad193125","header":{"X-Frame-Options":"SAMEORIGIN","Connection":"keep-alive","Set-Cookie":"AUTHSESSID=c42c5e68901b; HttpOnly;Secure;","Content-Length":"2250","Date":"Wed, 04 Aug 2021 00:36:54 GMT","Content-Type":"text/html"},"statusCode":200}
08-04 08:36:59.238 I/jsLog   (13195): [{"lastModifiedTime":1628037417000,"length":2250,"type":"file","uri":"internal://mass/Download/4316495718641443.bin?auth_key=1627344862-6B5A47E8B8FF40E38021DEAA14E2C5FD-0-519320d987b2717bd7b35a84ad193125"}]
08-04 08:36:59.238 I/jsLog   (13195): internal://mass/Download/4316495718641443.bin?auth_key=1627344862-6B5A47E8B8FF40E38021DEAA14E2C5FD-0-519320d987b2717bd7b35a84ad193125
08-04 08:37:01.205 I/jsLog   (13195): handling fail, code=300
问题分析
上述代码实现了文件下载、查询、删除的能力。
- click():实现文件下载能力,下载后的文件存在mass分区。
- find():在mass分区查找文件,并将某文件路径赋值给页面变量path。
- delete():删除path路径的文件。
代码中downloadtask.downloadFile()没有填写fileName字段,快应用引擎会默认从网络请求或url中获取文件名。
此时在success回调中返回的字段filePath中文件名为“random2000.bin?auth_key=1627344862-6B5A47E8B8FF40E38021DEAA14E2C5FD-0-519320d987b2717bd7b35a84ad193125”,可以看出文件名中含有多个特殊字符。而项目中所有文件需按照规范进行命名:文件名只能包含字母、数字、点、下划线、中划线、小括号,不能包含".."、"./"等字符,文件名长度不能超过300个字符。
file.delete接口删除文件时需要填入文件路径,很明显,上述下载的文件名中有“?”和“=”不符合要求,所以引擎校验不通过,会返回300错误码。
解决方法
在downloadtask.downloadFile接口下载时加上filename参数,对下载文件重命名。
代码如下:
click() {
  this.download_task = downloadtask.downloadFile({
    header: {
      "host": "windspeed-drcn.dbankcdn.com"
    },
    url: "https://640aa0d6fddbf8651e2232aaf3162e67.cc.cdnhwc5.com/download/random2000.bin?auth_key=1627344862-6B5A47E8B8FF40E38021DEAA14E2C5FD-0-519320d987b2717bd7b35a84ad193125",/*非真实地址*/
    filename: "test.bin", //对下载文件进行重命名
    success(res) {
      console.log("Download success. resp = " + JSON.stringify(res))
    },
    fail(res) {
      console.log("Download fail. resp = " + JSON.stringify(res))
    }
  })
  this.download_task.onProgressUpdate(res => {
    console.log("Download onProgressUpdate = " + JSON.stringify(res))
  })
},
正确日志如下:
08-04 08:37:52.823 I/jsLog   (12036): Download onProgressUpdate = {"progress":100,"totalBytesWritten":2250,"totalBytesExpectedToWrite":2250}
08-04 08:37:52.829 I/jsLog   (12036): Download success. resp = {"filePath":"internal://mass/Download/test.bin","header":{"X-Frame-Options":"SAMEORIGIN","Connection":"keep-alive","Set-Cookie":"AUTHSESSID=e347f58b1572; HttpOnly;Secure;","Content-Length":"2250","Date":"Wed, 04 Aug 2021 00:37:50 GMT","Content-Type":"text/html"},"statusCode":200}
08-04 08:37:54.638 I/jsLog   (12036): [{"lastModifiedTime":1628037472000,"length":2250,"type":"file","uri":"internal://mass/Download/test.bin"}]
08-04 08:37:54.638 I/jsLog   (12036): internal://mass/Download/test.bin
08-04 08:37:56.023 I/jsLog   (12036): handling success
H5网页弹出软键盘后页面没有上移
现象描述
使用快应用web组件加载某H5网页时,比如账号登录、账号注册等带有输入框的页面,当输入框获取焦点,弹出的软键盘挡住了H5网页的部分内容。
问题代码如下:
<template>
 <web  src="{{loadUrl}}" trustedurl="{{list}}" onpagestart="onPageStart" onpagefinish="onPageFinish"
      onmessage="onMessage" ontitlereceive="onTitleReceive" onerror="onError" id="web" supportzoom="true"
      wideviewport="true" overviewmodeinload="true"
      multiwindow="true"
      allowthirdpartycookies="true">
 </web>
</template>
问题分析
- 该问题和web组件的页面布局有关系。
- 另外,需要确认manifest.json文件中windowSoftInputMode的值。
如果不为adjustPan,也会导致页面没有上移。
解决方法
- 在web组件外套一层div,将div作为根节点。 修改后代码如下:
<template> <div class="doc-page "> <web class="web-page" src="{{loadUrl}}" trustedurl="{{list}}" onpagestart="onPageStart" onpagefinish="onPageFinish" onmessage="onMessage" ontitlereceive="onTitleReceive" onerror="onError" id="web" supportzoom="true" wideviewport="true" overviewmodeinload="true" multiwindow="true" allowthirdpartycookies="true"> </web> </div> </template> <style> .doc-page { flex-direction: column; justify-content: center; align-content: center; align-items: center; width: 100%; height: 100%; position:fixed; } .web-page { width: 100%; height: 100%; } </style> - 设置manifest.json文件中windowSoftInputMode的值为adjustPan。
less升级到4.0后,快应用IDE编译报错
现象描述
当在快应用IDE中配置less版本为4.0,或者配置fa-toolkit为11.4.1版本时,编译时出现如下错误信息:
Module build failed (from ./node_modules/fa-toolkit/node_modules/less-loader/dist/cjs.js):
Operation on an invalid type
问题分析
这是由于less版本升级导致的问题,需要对除法表达式做适配更新,详细内容请参见官方升级说明。
解决方法
根据报错信息,修改错误处的代码,为除法表达式添加上括号。
报错的代码:
@adapt: 36/75;
修改后正确的代码:
@adapt: (36/75);
根节点使用if、show命令编译报错
现象描述
在子组件ux文件中,根节点使用if、show命令控制布局显示与否时,编译失败。
错误日志如下:
ERROR: Root node 'div' cannot use the attribute 'if'.
子组件代码如下:
<template>
  <!-- Only one root node is allowed in template. -->
  <div if="{{showlayout}}" class="container">
    <image class="img"  src="./Images/close.png" onclick="close"></image>
    <div id="box" class="box">
      <text id="txt1" class="elliptxt">{{ text }}</text>
    </div>
  </div>
</template>

<style>
  .container {
    width: 100%;
    flex-direction: row;
    align-items: center;
    padding-left: 16px;
    padding-right: 16px;
  }

  .img {
    width: 28px;
    height: 28px;
    align-self: center;
    margin-right: 8px;
    resize-mode: contain;
    flex-shrink: 0;
  }
  .box {
    flex-direction: column;
    align-items: flex-start;
  }

  .elliptxt {
    text-overflow: ellipsis;
    lines: 1;
  }
</style>

<script>
  module.exports = {
    props: {
      text: {
        type: String,
        default: ''
      },
      backgroundColor: {
        type: String,
        default: '#fffbe8'
      },
      color: {
        type: String,
        default: '#de8c17'
      },
      showClose: {
        // 是否显示左侧关闭按钮
        type: Boolean,
        default: false
      }
},
   data() {
      return {
        showlayout:true
      }
    },
    onInit() {
    },
    onDestroy: function () {
      console.log("ondestroy");
       this.showClose =false;
    },
    close: function () {
      console.log("close=");
      this.showlayout=false;
    },
  }
</script>
问题分析
以上代码是一个子组件的布局,根节点上通过绑定变量showlayout控制布局展示,点击关闭图标时,会触发close方法,将showlayout变量设置为false。子组件UI效果图如下所示(浅黄色背景部分):
然而,快应用ux规范中只允许一个根节点,根节点使用if、show命令时,会控制整个页面的显示与否,导致页面异常,应用上架后一片空白的现象。
解决方法
根节点不能使用if、show命令。
可以通过css的display属性控制布局展示,该属性支持flex和none两个值。设置为flex时,界面显示;设置为none时,界面不显示。
修改后代码如下:
<template>
  <!-- Only one root node is allowed in template. -->
  <div class="container" style="background-color: {{backgroundColor}};display:{{displaynotice}}" >
    <image class="img" src="./Images/close.png" onclick="close"></image>
    <div id="box" class="box" >
      <text id="txt1" class="elliptxt">{{ text }}</text>
    </div>
  </div>
</template>

<style>
  .container {
    width: 100%;
    flex-direction: row;
    align-items: center;
    padding-left: 16px;
    padding-right: 16px;
  }

  .img {
    width: 28px;
    height: 28px;
    align-self: center;
    margin-right: 8px;
    resize-mode: contain;
    flex-shrink: 0;
  }

  .box {
    flex-direction: column;
    align-items: flex-start;
  }

  .elliptxt {
    text-overflow: ellipsis;
    lines: 1;
  }
</style>

<script>
  module.exports = {
    props: {
      text: {
        type: String,
        default: ''
      },
      backgroundColor: {
        type: String,
        default: '#fffbe8'
      },
      color: {
        type: String,
        default: '#de8c17'
      },
      showClose: {
        // 是否显示左侧关闭按钮
        type: Boolean,
        default: false
      }
    },
    data() {
      return {
        displaynotice: "flex"
      }
    },
    onInit() {

    },
    onDestroy: function () {
      console.log("notice bar ondestroy");
    },
    close: function () {
      console.log("close=");
       this.displaynotice = "none";
    },
  }
</script>
建议与总结
除了本文介绍的解决方法外,还可以在父组件引用子组件的地方,使用if、show命令来控制子组件的显示。
下载多个下载类广告,后下载广告的下载进度与先下载的广告一样
现象描述
一个页面里出现两个不同的下载类广告,先后点击下载,后下载的广告获取的下载进度与先下载的广告一样。
问题代码如下:
//监听下载进度变化
this.nativeAd.onDownloadProgress(data => {
  console.error(this.native.adUnitId, 'and', data.uniqueId, ' onDownloadProgress data.progress = ', data.progress);
  this.progress = data.progress + '%';
});
运行效果如下:
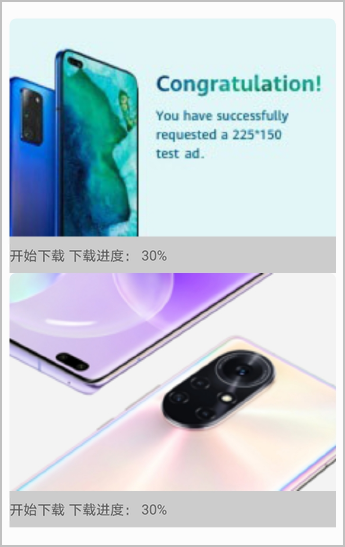
问题分析
快应用引擎向封装的广告对象注册下载进度和监听状态回调是单任务的。依次点击“开始下载”,onDownloadProgress方法的回调参数uniqueId返回的是第一个广告的id,直到第一个广告下载到100%,第二个广告才会开始下载。如果不判断uniqueId,还是获取的是第一个广告的下载进度,从而出现第二个广告下载进度和第一个广告一样。
解决方法
在第二个下载类广告点击下载时,比较onDownloadProgress的回调参数uniqueId和onLoad的回调参数的adId,一致即为当前广告,就展示进度条。
修改代码如下:
//监听下载进度变化
this.nativeAd.onDownloadProgress(data => {
  console.error(this.native.adUnitId, 'and', data.uniqueId, ' onDownloadProgress data.progress = ', data.progress);
  if (this.adIdd === data.uniqueId) {
    this.progress = data.progress + '%';
  }
});
最终运行效果如下:
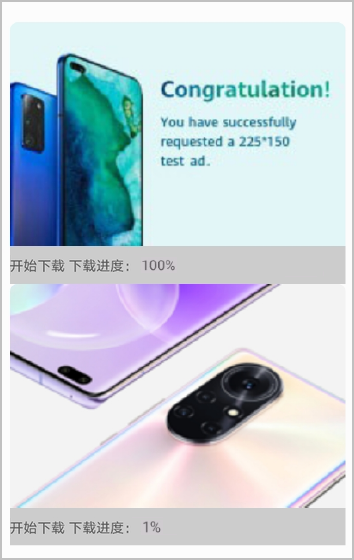
完整示例代码如下。
子组件nativeAd.ux代码:
<template>
<div>
<div class="item-container">
<image class="img" src="{{native.adImgSrc}}" @click="reportNativeClick"></image>
<div style="background-color: #ccc;width: 100%;height: 80px;">
<div class="flex-direction: column;">
<text onclick="dealdownload()">开始下载</text>
<text onclick="dealdownload()">下载进度: {{ progress }}</text>
</div>
</div>
</div>
</div>
</template>
<style lang="less">
.item-container {
width: 100%;
padding: 0 16px;
flex-direction: column;
align-items: center;
align-content: center;
}
.img {
width: 100%;
background-size: cover;
border-top-left-radius: 16px;
border-top-right-radius: 16px;
}
.container {
width: 100%;
padding: 8px 12px;
flex-direction: row;
justify-content: center;
align-items: center;
border-bottom-left-radius: 16px;
border-bottom-right-radius: 16px;
background-color: #fff;
}
.container-left {
flex-direction: column;
flex: 1;
}
.title {
font-size: 16px;
line-height: 21px;
color: #000000;
lines: 1;
text-overflow: ellipsis;
}
.source {
text {
font-size: 12px;
color: #999;
}
}
.known-more-btn {
flex-direction: row;
align-content: center;
text-align: center;
height: 28px;
line-height: 28px;
border-radius: 14px;
background-color: rgba(#FF7500, 0.1);
padding: 6px 10px;
margin-right: 8px;
text {
color: #FF7500;
font-size: 12px;
}
image {
margin-right: 5px;
}
}
.ad-btn {
line-height: 28px;
border-radius: 14px;
margin-right: 8px;
}
.btn {
width: 100%;
height: 100%;
color: #FF7500;
border-radius: 14px;
background-color: rgba(#FF7500, 0.2);
}
.btn-text {
color: #FF7500;
position: absolute;
top: 5px;
left: 0;
right: 0;
text-align: center;
}
.progress {
position: absolute;
top: 0;
right: 0;
bottom: 0;
background-color: rgba(#fff, 0.3);
}
.more {
width: 24px;
height: 24px;
background-size: contain;
opacity: 0.6;
transform: rotate(90deg);
}
.not-like {
width: 80px;
height: 30px;
line-height: 30px;
border-radius: 5px;
position: absolute;
bottom: 50px;
right: 16px;
font-size: 12px;
text-align: center;
font-weight: 700;
background-color: #fff;
border: 1px solid #ddd;
}
</style>
<script>
import ad from "@service.ad";
let TAG = "nativeAd";
export default {
data: {
componentName: "ad",
provider: "",
progress: '',
native: {
adId: "",
title: "",
source: "",
adImgSrc: "",
btnTxt: "",
creativeType: null,
adData: {},
adUnitId: "testb65czjivt9",
adIdd: ''
}
},
props: {
advertId: String, //@default: '' description: 广告ID
},
onInit() {
this.$page.setTitleBar({ text: "Native Ad" });
},
onReady() {
this.showNativeAd();
},
dealdownload(evt) {
evt.stopPropagation();
//获取下载状态
let downloadstatus = this.nativeAd.getAppStatus({
adId: this.native.adId
});
// console.error('downloadstatus = ',downloadstatus);
if (downloadstatus === "DOWNLOAD") {
//下载未开始,开始下载。
this.nativeAd.startDownload({
adId: this.native.adId
});
//监听下载进度变化
this.nativeAd.onDownloadProgress(data => {
console.error(this.native.adUnitId, 'and', data.uniqueId, ' onDownloadProgress data.progress = ', data.progress);
if (this.adIdd === data.uniqueId) {
this.progress = data.progress + '%';
}
});
//监听下载状态变化
this.nativeAd.onStatusChanged(data => {
// console.log("onStatusChanged data = ", data);
let status = data.status;
});
} else if (downloadstatus === "DOWNLOADING") {
//正在下载时,暂停下载
this.native.btnTxt = "继续";
this.nativeAd.pauseDownload({
adId: this.native.adId
});
} else if (downloadstatus === "PAUSE") {
//暂停状态,继续下载
this.nativeAd.resumeDownload({
adId: this.native.adId
});
} else if (downloadstatus === "INSTALL") {
//等待安装
this.native.btnTxt = "等待安装";
} else if (downloadstatus === "INSTALLING") {
//安装中
this.native.btnTxt = "正在安装";
} else if (downloadstatus === "DOWNLOADFAILED") {
//下载失败
this.native.btnTxt = "下载失败";
} else if (downloadstatus === "WAITING") {
//等待下载
this.native.btnTxt = "等待下载";
} else if (downloadstatus === "INSTALLED") {
this.native.btnTxt = "打开";
}
},
showNativeAd() {
//获取服务提供商 如果获取到的 不是“huawei”,则表示不支持广告。
this.provider = ad.getProvider();
if (this.provider !== "huawei") {
return;
}
//创建广告组件
this.nativeAd = ad.createNativeAd({ adUnitId: this.advertId });
this.nativeAd.onLoad(data => {
//成功回调
this.native.adData = data.adList[0];
if (this.native.adData) {
if (this.native.adData.imgUrlList && this.native.adData.imgUrlList.length > 0) {
this.native.adImgSrc = this.native.adData.imgUrlList[0];
}
this.native.creativeType = this.native.adData.creativeType || null;
this.native.title = this.native.adData.title || "";
this.native.adId = this.native.adData.adId || "";
if (this.native.creativeType === 3) {
//大图文广告类型
if (this.native.adData.clickBtnTxt) {
this.native.btnTxt = this.native.adData.clickBtnTxt;
} else {
this.native.btnTxt = "了解详情";
}
}
if (this.native.creativeType === 103) {
//大图文带下载按钮
if (this.native.adData.clickBtnTxt) {
this.native.btnTxt = this.native.adData.clickBtnTxt;
} else {
this.native.btnTxt = "下载";
}
}
this.isShowTitle = true;
this.isShowSource = true;
this.reportNativeShow();
this.adIdd = data.adList[0].adId
console.log(this.adIdd, "test", data.adList[0].adId)
}
});
this.nativeAd.onError(e => {
console.error(TAG, " load ad fail:" + JSON.stringify(e));
//失败回调
this.isShowAd = false;
});
//获取广告数据
this.nativeAd.load();
},
reportNativeShow() {
if (this.nativeAd) {
console.log(TAG, "nativeAd reportAdShow");
this.nativeAd.reportAdShow({ adId: this.native.adId });
}
},
reportNativeClick() {
console.log(TAG, "nativeAd reportAdClick");
this.nativeAd.reportAdClick({
adId: this.native.adId
});
},
onDestroy() {
if (this.nativeAd) {
//销毁广告组件 取消下载
this.nativeAd.destroy();
this.nativeAd.cancelDownload({
adId: this.native.adId
});
}
},
};
</script> 页面hello.ux代码:
<import name="native-ad" src="../compoment/nativeAd.ux"></import>

<template>
  <!-- Only one root node is allowed in template. -->
  <div class="container">
  <!-- 以下为广告测试id,实际操作中请使用广告正式id -->
    <native-ad advert-id="testb65czjivt9"></native-ad>
    <native-ad advert-id="testr6w14o0hqz"></native-ad>
  </div>
</template>

<style>
  .container {
    flex-direction: column;
    justify-content: center;
    align-items: center;
  }

  .title {
    font-size: 100px;
  }
</style>

<script>
  module.exports = {
    data: {
      componentData: {},
    },
    onInit() {
      this.$page.setTitleBar({
        text: 'menu',
        textColor: '#ffffff',
        backgroundColor: '#007DFF',
        backgroundOpacity: 0.5,
        menu: true
      });
    }
  }
</script>
快应用中如何实现播放本地音频
场景描述
快应用中实现播放本地音频的方式有:使用项目中的相对路径或绝对路径,使用手机上的文件路径和使用mass分区的文件路径。
本案例主要指导开发者在实现播放本地音频时,如何填写audio的src值。
实现方法
【场景一】播放快应用项目下的music.mp3文件,结构如下:
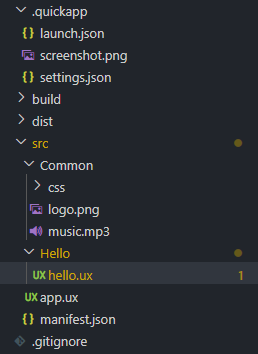
- 使用文件的相对路径,实现代码如下:
autoPlay: function () { var that = this; var srcUri ='../Common/music.mp3'; audio.src = srcUri; audio.volume = 0.2; var isshow = that.notify; audio.notificationVisible = isshow; audio.autoplay = true; audio.loop = true; audio.onplay = function () { console.log("audio onplay"); }; audio.onpause = function () { console.log("audio onpause"); }; audio.onended = function () { console.log("audio onended"); }; audio.ondurationchange = function () { console.log("audio ondurationchange"); that.total = audio.duration; console.log("audio ondurationchange total=" + that.total); }; audio.ontimeupdate = function () { that.time = audio.currentTime; console.log("audio ontimeupdate time=" + that.time); }; }, - 使用文件的绝对路径,实现代码如下:
manualPlay: function () {
    var that = this;
    var s =  '/Common/music.mp3';
    audio.src = s;
    audio.play();
    audio.onplay = function () {
        console.log("audio onplay");
    };
    audio.onpause = function () {
        console.log("audio onpause");
    };
    audio.onended = function () {
        console.log("audio onended");
    };
    audio.ondurationchange = function () {
        console.log("audio ondurationchange");
        that.total = audio.duration;
    };
    audio.ontimeupdate = function () {
        console.log("audio ontimeupdate");
        that.time = audio.currentTime;
    };
},
【场景二】播放手机中的音频文件
pickFiles(){
    var that = this;
    media. pickFile ({
        success: function (data) {
            console.log(`handling success: ${data.uri}`)
            that.url = data.uri;
            console.log("autoPlay url: " + that.url)
            var srcUri = that.url;
            audio.src = srcUri;
            audio.volume = 0.2;
            var isshow = that.notify;
            audio.notificationVisible = isshow;
            audio.autoplay = true;
            audio.loop = true;
            audio.onplay = function () {
                console.log("audio onplay");
            };
            audio.onpause = function () {
                console.log("audio onpause");
            };
            audio.onended = function () {
                console.log("audio onended");
            };
            audio.ondurationchange = function () {
                console.log("audio ondurationchange");
                that.total = audio.duration;
                console.log("audio ondurationchange total=" + that.total);
            };
            audio.ontimeupdate = function () {
                that.time = audio.currentTime;
                console.log("audio ontimeupdate time=" + that.time);
            };
        },
        fail: function (data, code) {
            console.log(`handling fail, code = ${code}`)
        }
    })
}, 【场景三】播放下载到mass分区的音频文件
下载后的文件会存储到mass分区,通过request.download接口和request.onDownloadComplete接口获取文件的uri,假设uri是internal://mass/music.mp3,实现代码如下:
autoPlay: function () {
    var that = this;
    var srcUri ='internal://mass/music.mp3';
    audio.src = srcUri;
    audio.volume = 0.2;
    var isshow = that.notify;
    audio.notificationVisible = isshow;
    audio.autoplay = true;
    audio.loop = true;
    audio.onplay = function () {
        console.log("audio onplay");
    };
    audio.onpause = function () {
        console.log("audio onpause");
    };
    audio.onended = function () {
        console.log("audio onended");
    };
    audio.ondurationchange = function () {
        console.log("audio ondurationchange");
        that.total = audio.duration;
        console.log("audio ondurationchange total=" + that.total);
    };
    audio.ontimeupdate = function () {
        that.time = audio.currentTime;
        console.log("audio ontimeupdate time=" + that.time);
    };
},
props属性传值undefined时无法获取默认值
现象描述
子组件的props定义属性和默认值,当父组件引用子组件,属性传值undefined时出错。
问题代码如下。
页面hello.ux代码:
<import name="t-item" src="./t-item.ux"></import>
<template>
  <div class="" style="width: 100%">
    <list style="flex-direction: row;">
      <list-item type="test" class="" for="{{list}}">
        <t-item class="t-item" item="{{$item}}" width="{{undefined}}" height="{{undefined}}"></t-item>
      </list-item>
    </list>
  </div>
</template>

<script>
  export default {
    name: '',
    data() {
      return {
        list: [
          { image: 'https://alliance-communityfile-drcn.dbankcdn.com/FileServer/getFile/cmtyPub/011/111/111/0000000000011111111.20210630171132.81169860478879908890618042853305:50520630022739:2800:D3E5E8BBA99AD39913C9F08F1C865209C652B1C2A3556248FDF8733FDED5CD22.jpg?needInitFileName=true', name: 'HDR MODE' },
          { image: 'https://alliance-communityfile-drcn.dbankcdn.com/FileServer/getFile/cmtyPub/011/111/111/0000000000011111111.20191017101406.43002136489534577410716813748735:50520630055230:2800:F07FFE50062BA6A23739EF5E759133CEF55FAC951000963245A8C1C7C120BAF8.png?needInitFileName=true?needInitFileName=true?needInitFileName=true', name: 'Night Mode' },
        ],
      };
    },

    async onInit() {
    },
  };
</script>

<style lang="less">
</style>
子组件t-item.ux代码:
<template>
  <div class="col" style="width: {{width}}px">
    <div class="size" style="height: {{height}}px">
      <image class="image" src="{{item.image}}" />
    </div>
    <div class="name">
      <text style="lines: 2">{{ item.name }}</text>
    </div>
  </div>
</template>

<script>
    export default {
        data() {
            return {}
        },
        props: {
            item: {
                type: Object,
                required: true,
            },
            width: {
                type: Number | String,
                default: 298,
            },
            height: {
                type: Number | String,
                default: 325,
            },
        },
    onInit() {
      console.log("this.width:"+this.width);
      console.log("this.height:"+this.height);
    },
    }
</script>

<style
    lang="less" >
    .image {
      width: 100%;
      height: 100%;
      border-radius: 8px;
      object-fit: fill;
    }

    .name {
      margin-top: 10px;
    }
    .col {
      flex-direction: column;
    }
</style>
运行效果如下,华为快应用加载器没有正确显示图片。
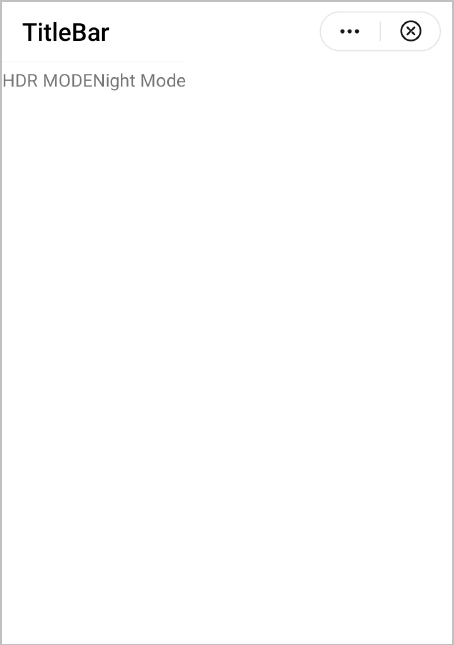
问题分析
分析如下日志,华为快应用引擎把props传的值“undefined”当做正常的赋值,因此传给图片的宽高不是正确的值,是“undefinedpx”,导致图片无法显示。
08-26 17:14:03.557 I/jsLog   (20859): this.width:undefined
08-26 17:14:03.557 I/jsLog   (20859): this.height:undefined
解决方法
如果希望子组件props属性取值为默认值,父组件中可直接不传值,无需进行其他处理,修改代码如下:
<import name="t-item" src="./t-item.ux"></import>
<template>
  <div class="" style="width: 100%">
    <list style="flex-direction: row;">
      <list-item type="test" class="" for="{{list}}">
        <t-item class="t-item" item="{{$item}}"></t-item>
      </list-item>
    </list>
  </div>
</template>
子组件作为页面根节点时,页面生命周期onShow未执行
现象描述
子组件作为页面根节点时,页面的生命周期onShow未执行,问题代码如下。
页面布局代码:
<import name="steps" src="../Steps/stepscanvas1.ux"></import>
<template>
  <!-- Only one root node is allowed in template. -->
    <!--steps是子组件,作为页面的根节点-->
    <steps  class="stepcss" options="{{list2}}" active-color="#007AFF" active="{{active}}" direction="column" >
    </steps>
</template>
生命周期代码:
onInit() {
    console.info("hello onInit ");
    this.$page.setTitleBar({
    text: 'Steps',
    textColor: '#ffffff',
    backgroundColor: '#007DFF',
    backgroundOpacity: 0.5,
    menu: true
    });
},
onShow(options) {
    console.info("hello onShow ");
},
问题分析
该问题在华为快应用加载器上会出现,联盟加载器是不存在的,属于兼容性问题。
解决方法
只需要在外层包裹一个div,用div作为根节点即可。
修改后代码如下:
<import name="steps" src="../Steps/stepscanvas1.ux"></import>
<template>
  <!-- Only one root node is allowed in template. -->
   <div class="container">
     <steps  class="stepcss" options="{{list2}}" active-color="#007AFF" active="{{active}}" direction="column" >
    </steps>
   </div>
  </template>
日志输出如下:
09-08 09:31:52.672 I/jsLog   ( 4552): Application onCreate
09-08 09:31:52.686 I/jsLog   ( 4552): hello onInit
09-08 09:31:52.747 I/jsLog   ( 4552): hello onShow
progress组件设置width宽度不生效
现象描述
progress组件直接设置width或者给其父组件div设置width,宽度均不生效,如下图所示:
问题代码如下:
<template>
  <div class="item-container">
    <div class="container">
      <progress class="progress" type="horizontal" percent="30"></progress>
    </div>
  </div>
</template>
<style>
  .item-container {
    flex-direction: column;
  }
  .container {
    width: 50%;
  }
  .progress {
    width: 50%;
  }
</style>
<script>
  export default {
    data: {
    },
    onInit() {
    },
  };
</script>
问题分析
上述代码中未显式指定父组件div为纵向布局。
解决方法
在父组件div上设置“flex-direction: column; ”即可,修改代码如下:
.container {
    flex-direction: column;
    width: 50%;
  }
运行效果如下:
调用buffer接口报错,提示“Buffer is not defined”
现象描述
快应用中调用buffer接口报错,提示“Buffer is not defined”,相关代码如下:
onShow: function () {
  var text = Buffer.from("hello world").toString('base64').replace(/\+/g, '-').replace(/\//g, '_')
  console.log("text: " + text);
},
错误日志如下:
09-10 09:38:36.003 I/jsLog   ( 6507): Application onCreate
09-10 09:38:36.104 E/jsLog   ( 6507): event callback with exception, ReferenceError: Buffer is not defined
问题分析
快应用IDE的编译器从11.4.1版本开始,升级webpack到webpack 5,该版本移除了部分模块,其中包括buffer模块。
解决方法
- 在项目根目录下新增quickapp.config.js文件并添加如下代码:
module.exports = {
    resolve: {
        mainFields: ['browser', 'quickapp', 'main', 'module'],
        fallback: {
            "zlib": require.resolve("browserify-zlib"),
            "crypto": require.resolve("crypto-browserify"),
            "assert": require.resolve("assert"),
            "stream": require.resolve("stream-browserify"),
            "util": require.resolve("util"),
            "buffer": require.resolve("buffer")
        }
    }
}
quickapp.config.js的配置生效需要确保package.json中配置的编译器fa-toolkit版本大于等于3.1.2版本。
- 切换至控制台的“终端”页签,输入以下命令安装依赖:
npm i browserify-zlib crypto-browserify assert stream-browserify util buffer - 在代码文件中增加依赖的引用:
import {Buffer} from 'buffer' - 如果使用的是HAService.js文件,还需要在package.json中指定uuid的版本号为 3.4.0并重新安装依赖:
{
  "name": "com.huawei.shop",
  "version": "1.0.0",
  "description": "",
  "scripts": {
    "fa-build": "node node_modules/webpack/bin/webpack.js --progress --config ./node_modules/fa-toolkit/webpack.config.js",
    "fa-watch": "node node_modules/webpack/bin/webpack.js --watch --progress --config ./node_modules/fa-toolkit/webpack.config.js",
    "fa-release": "node ./node_modules/cross-env/src/bin/cross-env.js uglifyjs=true sign=release node_modules/webpack/bin/webpack.js --progress --config ./node_modules/fa-toolkit/webpack.config.js"
  },
  "devDependencies": {
    "fa-toolkit": "file:fa-toolkit-3.1.2-Stable.300.tgz",
    "cross-env": "^7.0.2"
    "uuid": "3.4.0"
  }
}
正确日志如下图:

fixed布局高度铺满全屏
现象描述
fixed布局中,显示的高度铺满全屏,效果如下:
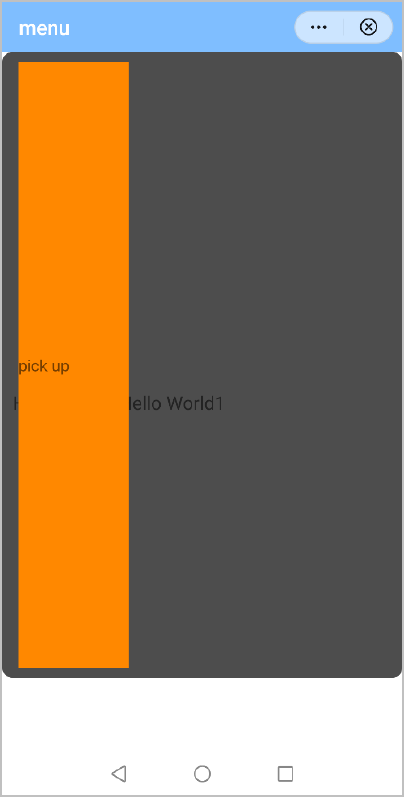
问题代码如下:
<template>
  <div class="container">
    <text class="title">Hello World</text>
    <text class="title">Hello World1</text>
    <div class="fixed">
      <text class="desc">pick up</text>
    </div>
  </div>
</template>

<style lang="less">
  .container {
    width: 100%;
    height: 100%;
  }
  .title {
    font-size: 35px;
    margin-left: 20px;
  }
  .desc{
    background-color: #ff8800;
    width: 30%;
  }
  .fixed {
    justify-content: center;
    width: 100%;
    background-color: rgba(0, 0, 0, 0.7);
    flex-direction: row;
    padding: 20px 30px;
    border-radius: 20px;
    justify-content: space-between;
    bottom: 140px;
    position: fixed;
  }
</style>

<script>
  module.exports = {
    data: {
      componentData: {},
    },
    onInit() {
      this.$page.setTitleBar({
        text: 'menu',
        textColor: '#ffffff',
        backgroundColor: '#007DFF',
        backgroundOpacity: 0.5,
        menu: true
      });
    }
  }
</script>
问题分析
该问题在华为快应用加载器上会出现,联盟加载器是不存在的。
上述代码中根节点div的css样式container中没有设置方向,快应用规范中默认div是横向。当fixed布局的子元素没有设置高度时,快应用加载器是按照屏幕高度来计算fixed元素高度的,导致显示高度铺满全屏。

如果根节点div的方向设置的是column,上述fixed布局的代码运行后显示的是正常高度。
解决方法
在fixed布局的css样式中,指定组件的高度。
修改代码如下:
.fixed {
    justify-content: center;
    width: 100%;
    height: 100px;
    background-color: rgba(0, 0, 0, 0.7);
    flex-direction: row;
    padding: 20px 30px;
    border-radius: 20px;
    justify-content: space-between;
    bottom: 140px;
    position: fixed;
}
修改后运行效果如下:
调用media.saveToPhotosAlbum接口返回错误码202
现象描述
调用media.saveToPhotosAlbum接口保存网络路径的图片,出现错误提示“code = 202”。
问题代码如下:
<script>
  import prompt from '@system.prompt';
  import media from '@system.media';
  module.exports = {
    data: {
      componentData: {},
      imgurl: "https://ywopen-1252317822.image.myqcloud.com/openwx/recommendimg/20210908/6138797a4e3b3.jpg"
    },
    save() {
      media.saveToPhotosAlbum({
        uri: this.imgurl,
        success: function () {
          console.log('save success');
        },
        fail: function (data, code) {
          console.log('handling fail, code = ' + code);
        }
      })
    }
  }
</script>
错误日志如下:
09-16 14:12:01.511 E/jsLog   (19071): saveToPhotosAlbum: input err: invalid param.
09-16 14:12:01.519 I/jsLog   (19071): handling fail, code = 202
问题分析
快应用中的saveToPhotosAlbum接口目前仅支持本地图片路径保存到相册,暂不支持网络路径。
解决方法
如需保存网络图片或者视频,请先调用request.download接口把图片或者视频下载到本地,再调用saveToPhotosAlbum接口保存到相册。
修改后完整代码如下:
<template>
  <!-- Only one root node is allowed in template. -->
  <div class="container">
    <text class="txt" onclick="download">download</text>
    <text class="txt" onclick="save">savetoPhotosAlbum</text>
  </div>
</template>

<style>
  .container {
    flex-direction: column;
    align-items: center;
    justify-content: center;
  }
  .txt {
    font-size: 30px;
    text-align: center;
    width: 50%;
    height: 70px;
    margin-top: 5px;
    border: 1px solid #000000;
  }
</style>

<script>
  import prompt from '@system.prompt';
  import request from '@system.request';
  import media from '@system.media';
  module.exports = {
    data: {
      componentData: {},
      imgurl: "https://ywopen-1252317822.image.myqcloud.com/openwx/recommendimg/20210908/6138797a4e3b3.jpg",
      downloadtoken: '',
      downloadurl: ''
    },
    save() {
      media.saveToPhotosAlbum({
        uri: this.downloadurl,
        success: function () {
          console.log('save success');
          prompt.showToast({
            message: 'save success',
          })
        },
        fail: function (data, code) {
          prompt.showToast({
            message: 'handling fail, code = ' + code,
          })
          console.log('handling fail, code = ' + code);
        }
      })
    },
    download() {
      var that = this
      request.download({
        "url": this.imgurl,
        success: function (data) {
          console.log(data.token);
          that.downloadtoken = data.token
        },
        fail: function (data, code) {
          console.log("handling fail, code = " + code);
        },
        complete() {
          that.ondownloadcomplete()
        }
      })
    },
    ondownloadcomplete() {
      var that = this
      request.onDownloadComplete({
        "token": this.downloadtoken,
        success: function (data) {
          console.log(data.uri);
          that.downloadurl = data.uri
        },
        fail: function (data, code) {
          console.log("handling fail, code = " + code);
        }
      })
    }
  }
</script>
正确日志如下:
09-16 14:28:03.468 I/jsLog   (19152): 341
09-16 14:28:03.843 I/jsLog   (19152): internal://mass/Download/6138797a4e3b3-2.jpg
09-16 14:28:05.479 I/jsLog   (19152): save success
09-16 14:29:04.878 I/jsLog   (19152): save success
list组件调用scrollTo方法滚动时,获取的滚动点有问题
现象描述
list组件调用scrollTo方法滚动时,获取的滚动点有问题,日志如下:
09-27 09:43:05.694 I/jsLog ( 1471): scroll.scrollX:0 .scrollY:0 .scrollState:0
问题代码如下:
<template>
  <div class="container">
    <div class="nav">
      <text class="nav-item">list</text>
      <input type="button" value="jump" onclick="jump" />
    </div>
    <!-- List -->
    <list class="list" onclick="listClick" onlongpress="listLongPress" onscrollbottom="scrollbottom" id="list" scrollpage="{{scrollPage}}" onscroll="scroll">
      <list-item type="listItem" class="item item-color" onclick="listItemClick" for="{{listData}}">
        <text class="txt">{{$item}}--{{$idx}}</text>
      </list-item>
      <!-- Loading More  -->
      <list-item type="loadMore" class="load-more" if="{{loadMore}}">
        <progress type="circular"></progress>
        <text>More</text>
      </list-item>
    </list>
  </div>
</template>
<style>
  .container {
    flex-direction: column;
  }
  .list {
    padding-left: 10px;
    padding-right: 10px;
    columns: 1;
    flex-direction: column;
    border-color: #FF0000;
    border-width: 5px;
  }
  .item {
    flex-direction: column;
    align-items: flex-start;
    margin-bottom: 15px;
    border-color: #9400D3;
    border-width: 5px;
    margin-right: 20px;
    background-color: #f76160;
  }
  .load-more {
    justify-content: center;
    align-items: center;
    height: 100px;
    border-color: #bbbbbb;
    border-bottom-width: 1px;
  }
  .btn-little {
    flex: 1;
    height: 80px;
    margin-left: 15px;
    border-radius: 5px;
    color: #ffffff;
    font-size: 30px;
    text-align: center;
    background-color: #0faeff;
  }
  .nav {
    padding-left: 60px;
    padding-right: 60px;
    padding-bottom: 30px;
  }
  .nav-item {
    flex: 1;
    padding-bottom: 30px;
    border-bottom-width: 5px;
    border-color: #fbf9fe;
    font-size: 35px;
    color: #666666;
    text-align: center;
  }
</style>
<script>
  import prompt from '@system.prompt'
  export default {
    data: {
      componentName: 'list',
      loadMore: true,
      listAdd: ['A', 'B', 'C', 'D', 'E', 'F', 'G', 'H', 'I', 'J', 'K', 'L', 'M', 'N', 'O', 'P', 'Q', 'R', 'S', 'T', 'U', 'V', 'W', 'X', 'Y', 'Z'],
      listData: [],
      scrollPage: false,
    },
    onInit: function () {
      this.$page.setTitleBar({ text: 'list' })
      for (var index = 0; index < 100; index++) {
        this.listData[index] = 'A';
      }
    },
    scrollbottom: function () {
      prompt.showToast({
        message: 'The list slides to the bottom and starts loading other data.'
      })
      // Load next page
      var that = this
      var renderData = [].concat(that.listData, that.listAdd)
      setTimeout(function () {
        that.listData = renderData
      }, 1000)
    },
    // monitoring during sliding
    scroll: function (e) {
      let msg = 'scroll' + '.scrollX:' + e.scrollX
        + ' .scrollY:' + e.scrollY
        + ' .scrollState:' + e.scrollState
      console.info(msg)
    },
    listItemClick: function (e) {
      e.stopPropagation()
      console.info('List Item is clicked.')
      prompt.showToast({
        message: 'List Item is clicked.'
      })
    },
    listClick: function (e) {
      e.stopPropagation()
      console.info('List is clicked.')
      prompt.showToast({
        message: 'List is clicked.'
      })
    },
    listLongPress: function (e) {
      e.stopPropagation()
      console.info('List is long pressed.')
      prompt.showToast({
        message: 'List is long pressed.'
      })
    },
    jump: function (e) {
      this.$element('list').scrollTo({ index: 30, smooth: false })
    }
  }
</script>
问题分析
scrollTo方法中smooth参数设置为false,表示瞬间滑动至指定位置,导致onScroll事件只能获取最终的结果,无法获取中间过程。
解决方法
将smooth参数设置为true即可,修改后代码如下:
jump: function (e) {
  this.$element('list').scrollTo({ index: 30, smooth: true })
}
父组件的props数据如何传递给子组件
现象描述
父子间数据传输时,父组件的props数据更新,子组件的数据会刷新为最新值。
实现方法
父组件代码如下:
<import name="t-item" src="../Test/t-item.ux"></import>
<template>
  <div class="container">
    <text class="title" onclick="handleclick">Hello World</text>
    <t-item class="title" say="{{say1}}" prop-object="{{count:111}}">{{say}}</t-item>
  </div>
</template>
<style>
  .container {
    flex-direction: column;
    justify-content: center;
    align-items: center;
  }
  .title {
    font-size: 100px;
  }
</style>
<script>
  module.exports = {
    data: {
      say1:"hello",
      componentData: {},
      count:{
      }
    },
    onInit() {
      this.$page.setTitleBar({
        text: 'menu',
        textColor: '#ffffff',
        backgroundColor: '#007DFF',
        backgroundOpacity: 0.5,
        menu: true
      });
    },
    handleclick(){
      console.log("点击了");
      this.say1="change "
    }
  }
</script>
子组件有三种常见的接收数据的方法:
- 将props传入的值作为初始值,用 data 接收。
<script>
  export default {
    props: ['say', 'propObject'],
    data() {
      return {
        obj: this.propObject.count
      }
    },
    onInit() {
      console.info(`外部传递的数据:`, this.say, this.propObject)
    }
  }
</script>
如果您想用 data 直接接收 propObject 对象,可以采用JSON.parse(JSON.stringify(propObject)),将 propObject 深度克隆。
- 通过$watch 监听数据变化。
如果是监听对象中的属性,参数请使用 . 分隔,如:$watch(xxx.xxx.xxx, methodName) 。
<script> module.exports = { props: ['say', 'propObject'], data() { return { propSay: this.say } }, onInit() { // 监听数据变化 console.log(this.say); this.$watch('say', 'watchPropsChange') this.$watch('propObject.count', 'watchPropsChange') }, /** * 监听数据变化,你可以对数据处理后,设置值到data上 * @param newV * @param oldV */ watchPropsChange(newV, oldV) { console.log(`监听数据变化:`, newV, oldV) this.propSay = newV && newV.toUpperCase() } } </script> - 使用computed(1050+)属性。
具体请参见计算属性。
<script>
    module.exports = {
        props: ['say', 'propObject'],
       computed: {
            obj() {
                console.log("say:" + this.say);
                console.log("propObject.count:" + this.propObject.count);
                return this.say.toUpperCase()
            }
        },
        onReady() {
            console.log(this.obj)
        }
    }
</script>
webview接口打开网页,网页会被自动放大
现象描述
通过webview接口打开网页,网页会被自动放大,问题代码如下:
webview.loadUrl({
  url: 'https://cdn.langqing.club/jQuery/index.html',
  allowthirdpartycookies: true
})
问题分析
原因在于快应用加载器没有对网页的比例和屏幕的宽度做适配,默认显示网页实际的宽度,没有将网页内容全部显示在屏幕宽度内。
解决方法
可以通过web组件加载网页,并设置overviewmodeinload属性为true规避此问题。代码如下:
<template>
  <div class="container">
    <web src="https://cdn.langqing.club/jQuery/index.html" overviewmodeinload="true"></web>
  </div>
</template>
<style>
  .container {
    flex-direction: column;
  }
</style>
<script>
  module.exports = {
    data: {
    },
    onInit() {
      this.$page.setTitleBar({
        text: 'menu',
        textColor: '#ffffff',
        backgroundColor: '#007DFF',
        backgroundOpacity: 0.5,
        menu: true
      });
    },
  }
</script>
在IDE中登录无反应
现象描述
在IDE欢迎页或主界面点击登录按钮没有反应。
开发者工具里有报错信息 “Error: spawn explorer.exe ENOENT”。
问题分析
由于系统环境变量缺少explorer.exe,导致IDE无法找到指定的程序。
解决方法
在系统环境变量里添加变量:变量名“windir” ,变量值“C:\Windows”。
如何给快应用创建桌面图标
现象描述
为了提升快应用的留存率,很多应用希望在页面添加创建桌面图标的入口,当桌面有该应用的图标时,就不显示入口,反之则显示。
实现方法
为了方便在各页面实现添加入口,而不需要每个页面重复大量代码,可以采用定义子组件的方式实现。
- 在子组件中定义变量hasshortcut,并在onReady()生命周期中调用桌面图标接口,判断应用是否已经创建桌面图标,如果没有,则显示,反之不显示。
由于快应用根节点限制了不能使用if、show,此处布局的显示与否通过css的display属性值flex和none去控制。
- 实现子组件布局:
- 使用css的position:fixed属性,并设置响应的透明度,将子组件固定在页面底部。
- 页面中设置“创建桌面图标”的按钮,点击按钮,调用桌面图标接口创建桌面图标,收到成功回调后,隐藏布局。
示例代码
子组件shortcutcmp.ux代码如下:
<template>
  <div class="{{hasshortcut ? 'nodisplay':'container'}}">
    <image class="img" src="/Common/logo.png"></image>
    <text class="txt">Add Ebay to your home screen</text>
    <input type="button" class="btn" value="Add" onclick="add"></input>
  </div>
</template>

<style>
    .container {
      display: flex;
      flex-direction: row;
      background-color: #000000;
      opacity: 0.7;
      align-items: center;
      position: fixed;
      height: 64px;
      bottom: 10px;
      left: 16px;
      right: 16px;
      padding-left: 12px;
      padding-right: 12px;
      border-radius: 10px;
    }

    .nodisplay{
      display: none;
      flex-direction: row;
      background-color: #000000;
      opacity: 0.8;
      align-items: center;
      position: fixed;
      height: 64px;
      bottom: 10px;
      left: 16px;
      right: 16px;
      padding-left: 12px;
      padding-right: 12px;
      border-radius: 10px;
    }

    .txt {
      color: #ffffff;
      font-size: 16px;
      width: 100%;
      margin-right: 8px;
      margin-left: 8px;
      text-overflow: ellipsis;
    }

    .img {
      width: 40px;
      height: 40px;
      flex-shrink: 0;
    }

    .btn {
      width: 86px;
      height: 40px;
      background-color: red;
      color: #ffffff;
      border-radius: 16px;
      flex-shrink: 0;
    }
    .btn:active{
       background-color: red;
       opacity: 0.9
    }
</style>
<script>
    import shortcut from '@system.shortcut';
    import prompt from '@system.prompt';
    export default {
        props: ['websrc'],
        data: {
            hasshortcut:false

        },
        onInit() {
            console.info('onInit: ');
        },

        onReady(options) {
            var that=this;
            shortcut.hasInstalled({
                success: function (ret) {
                    console.log(' onReady hasInstalled success ret---' + ret);
                    if (ret) {
                        that.hasshortcut=true;
                    } else {
                        that.hasshortcut=false;
                    }
                }.bind(this),
                fail: function (erromsg, errocode) {
                    console.log('hasInstalled fail ret---' + erromsg);
                },
                complete: function () {
                }
            })
        },

        alertSucess:function(){
            prompt.showToast({
                      message: 'Let\'s Ebay on your home screen',
                      duration: 2000,
                      gravity: 'center'
                  })
        },
        alertShortcut: function () {
            var that=this;
            shortcut.install({
                message: 'Adds the Ebay shortcut to the desktop for convenient use next time.',
                success: function (ret) {
                    console.log('handling createShortCut success');
                 that.hasshortcut=true;

                },
                fail: function (erromsg, errocode) {
                    console.log('handling createShortCut fail');
                      that.hasshortcut=false;
                },
            })
        },
        add: function () {
            var that = this;
             this.alertShortcut();
        },

    }
</script>
页面hello.ux代码如下:
<import name="shortcmp" src="../Shortcut/shortcutcmp.ux"></import>
<template>
    <div class="doc-page">
        <shortcmp></shortcmp>
    </div>
</template>
滑动浏览视频时,控制只有完整显示的视频才能自动播放
现象描述
用户在视频应用中滑动浏览视频,只有在视频完整显示时才能自动播放,其他未完整显示的视频不播放。
实现方法
快应用中可以通过onappear和ondisappear事件来实现上述功能。
- 页面布局使用list和list-item,每个list-item都有一个视频组件video,并在video上方和下方各添加一个text组件。
- list的数据源videoadd是一个数组,给每个数组对象添加布尔变量footervalue和headrvalue,用于控制当前视频是否完整显示。
- 给视频组件video上方和下方的两个text组件都添加onappear和ondisappear事件,用于控制视频是否播放。
- 页面滑动过程中,若video上方和下方的text组件同时出现,则会同时触发onappear事件,将对应的布尔变量footervalue和headrvalue都设置为true,此时会自动播放视频。
- 页面滑动过程中,若video上方或下方的text组件任意消失一个,则会触发ondisappear事件,将对应的布尔变量footervalue或者headrvalue设置为false,就可以停止播放视频。
示例代码
<template>
  <!-- Only one root node is allowed in template. -->
  <div class="container">
    <list class="list">
      <list-item class="list-item" type="video" for="{{videoadd}}">
        <div class="videocss">
          <text class="header" onappear="headerappear($idx)" ondisappear="headerdisappear($idx)">这是第{{ $idx + 1 }}个视频开始</text>
          <video id="video{{$idx}}" class="video" src="{{$item.videosrc}}"></video>
          <text class="header" onappear="footerappear($idx)" ondisappear="footerdisappear($idx)">这是第{{ $idx + 1 }}个视频结束</text>
        </div>
      </list-item>
    </list>
  </div>
</template>

<style>
  .container {
    flex-direction: column;
    justify-content: center;
    align-items: center;
  }
  .list {
    width: 100%;
    height: 100%;
    display: flex;
  }
  .list-item {
    width: 700px;
    height: 800px;
  }
  .videocss {
    flex-direction: column;
    margin-left: 50px;
    margin-bottom: 50px;
  }
  .header {
    font-size: 40px;
    height: 50px;
    width: 700px;
    background-color: #00ced1;
    text-align: center;
  }
  .video {
    width: 700px;
    height: 600px;
  }
</style>

<script>
  module.exports = {
    data: {
      videoadd: [
        {
          footervalue: false,
          headrvalue: false,
          videosrc: "https://ss0.bdstatic.com/-0U0bnSm1A5BphGlnYG/cae-legoup-video-target/93be3d88-9fc2-4fbd-bd14-833bca731ca7.mp4"
        },
        {
          footervalue: false,
          headrvalue: false,
          videosrc: "https://ss0.bdstatic.com/-0U0bnSm1A5BphGlnYG/cae-legoup-video-target/93be3d88-9fc2-4fbd-bd14-833bca731ca7.mp4",
        },
        {
          footervalue: false,
          headrvalue: false,
          videosrc: "https://ss0.bdstatic.com/-0U0bnSm1A5BphGlnYG/cae-legoup-video-target/93be3d88-9fc2-4fbd-bd14-833bca731ca7.mp4",
        },
      ],
      test: "",
    },
    onInit() {
    },
    headerappear(index) {
      this.videoadd[index].headrvalue = true
      //上滑时判断是否触发播放
      if (this.videoadd[index].footervalue === true) {
        this.test = "video" + index
        this.$element(this.test).start()
      }
      console.log("headerappear", index, this.videoadd[index].headrvalue);
    },
    headerdisappear(index) {
      this.videoadd[index].headrvalue = false
      console.log("headerdisappear", index, this.videoadd[index].headrvalue);
    },
    footerappear(index) {
      this.videoadd[index].footervalue = true
      console.log("footerappear", index, this.videoadd[index].footervalue);
      //下滑时判断是否触发播放
      if (this.videoadd[index].headrvalue === true) {
        this.test = "video" + index
        this.$element(this.test).start()
      }
    },
    footerdisappear(index) {
      this.videoadd[index].footervalue = false
      console.log("footerdisappear", index, this.videoadd[index].footervalue);
    }
  }
</script>
快应用中如何实现启动欢迎页
现象描述
当移动设备上的应用启动时,会涉及到耗时操作如网络请求、数据库操作等,为了防止用户在功能页等待太久,可以加个全屏欢迎页面,约停留1秒后,自动跳转到功能页面。
实现方法
- 在manifest.json文件中将欢迎页Home设置为首页,且全屏显示,不显示标题栏。
"router": { "entry": "Home", "pages": { "Hello": { "component": "hello" }, "Home": { "component": "home" } } }, "display": { "pages": { "Hello": { "titleBarText": "TitleBar" }, "Home": { "fullScreen": true, "titleBar": false } } } - 实现欢迎页Home页面home.ux布局:
- 使用css的position:fixed属性实现底部布局。
- 在onReady()生命周期中使用setTimeout()方法实现页面停留和跳转至功能页面。
- 如果需要提前加载资源,可以在app.ux中做处理。
示例代码
页面home.ux完整代码如下:
<template>
  <div class="doc-page">
    <div class="logo_image">
      <image src="/Common/logo.png"></image>
      <text class="alert">Welcome to you</text>
    </div>
    <div class="bottom">
      <div class="firstRow">
        <image class="small_logo" src="/Common/logo.png"></image>
        <text class="app_name">your app name</text>
      </div>
      <text class="secondTxt">huawei</text>
    </div>
  </div>
</template>
<style>
  .doc-page {
    flex-direction: column;
    flex-direction: column;
    justify-content: center;
    align-content: center;
    align-items: center;
    width: 100%;
    height: 100%;
    border-top-left-radius: 100%;
  }
  .logo_image {
    flex-direction: column;
    align-items: center;
    justify-content: center;
  }
  .alert {
    margin-top: 30px;
    font-size: 35px;
  }
  .app_name {
    font-size: 36px;
    font-weight: 800;
  }
  .bottom {
    position: fixed;
    flex-direction: column;
    align-items: center;
    justify-content: center;
    width: 100%;
    bottom: 20px;
  }
   .firstRow {
    flex-direction: row;
    align-items: center;
    justify-content: center;
  }
  .small_logo {
    width: 36px;
    height: 36px;
    margin-right: 10px;
  }
  .secondTxt {
     font-size: 26px;
      color: #808080;
  }
</style>
<script>
  import router from '@system.router';
  export default {
    data: {
      openPage: ""
    },
    onInit() {
      console.info('onInit: ');
    },
    onReady(options) {
      const that = this;
      this.openPage = this.page;
      console.info("onReady this.openPage:" + this.openPage);
      setTimeout(function () {
        that.jump();
          that.$page.finish();
      }, 1000)
    },
    jump: function () {
      router.push({
        uri: '/Hello',
        params: { body: " test send message" }
      });
    },
    onError(e) {
      console.info('pageError : ' + e.errorMsg)
    },
    onMessage(e) {
      console.info('onmessage e = ' + e.message + ", url = " + e.url);
    },
    onShow: function () {
      console.info(" onshow");
    },
    onHide: function () {
      console.info("  onHide");
    }
  }
</script>
快应用中如何实现沉浸式页面
现象描述
沉浸式页面是指应用程序的界面占据整个屏幕,自动隐藏系统的状态栏和导航栏,需要时可从屏幕边缘滑动呼出,一般用于阅读类应用,如下图。
|
|
|
| 自动隐藏系统的状态栏和导航栏 | 从屏幕边缘滑动呼出状态栏和导航栏 |
实现方法
- 在manifest.json文件中设置titleBar属性为false,隐藏系统自带的titleBar。
"display": { "pages": { "Hello": { "titleBar":false, } } } - 在script脚本中设置导航栏的visible属性为false,隐藏系统的状态栏和导航栏。
this.$page.setNavigationBar({visible:false});
微信小程序转换快应用后,input组件type为password不生效
现象描述
微信小程序转换快应用后,input组件type为password不生效,效果如下:
|
|
|
| 图1 原微信小程序效果 | 图2 转换快应用后效果 |
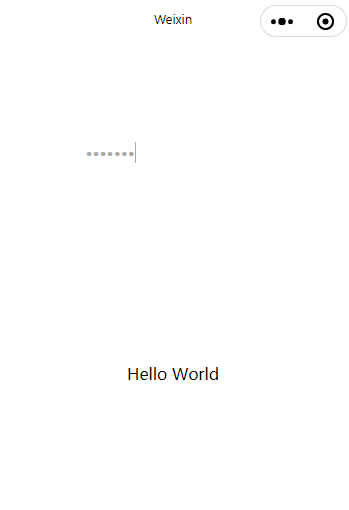
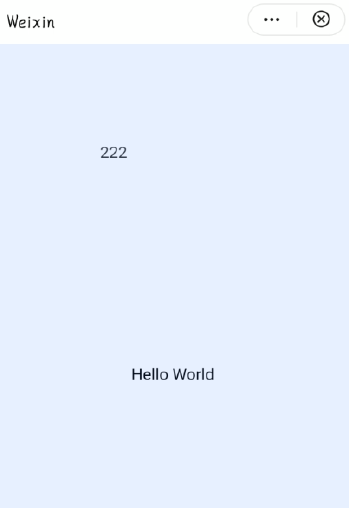
index.qxml问题代码如下:
<view class="container">
  <view class="userinfo">
    <input class="weui-input" type="password" placeholder="这是一个密码输入框" />
  </view>
  <view class="usermotto">
    <text class="user-motto">{{motto}}</text>
  </view>
</view>
问题分析
小程序转换快应用中,input组件的类型仅支持text、number、idcard和digit四种,密码格式是通过布尔类型的password参数控制的。
解决方法
把转换后的快应用中input组件type设置为text,password设置为true。
index.qxml修改代码如下:
<view class="container">
  <view class="userinfo">
    <input class="weui-input" type="text" password='true' placeholder="这是一个密码输入框" />
  </view>
  <view class="usermotto">
    <text class="user-motto">{{motto}}</text>
  </view>
</view>
智慧屏运行快应用提示:当前加载器支持1038规范版本,无法运行XXXX。
现象描述
在智慧屏上运行快应用时,提示:当前加载器支持1038规范版本,无法运行XXXX。
效果如下:
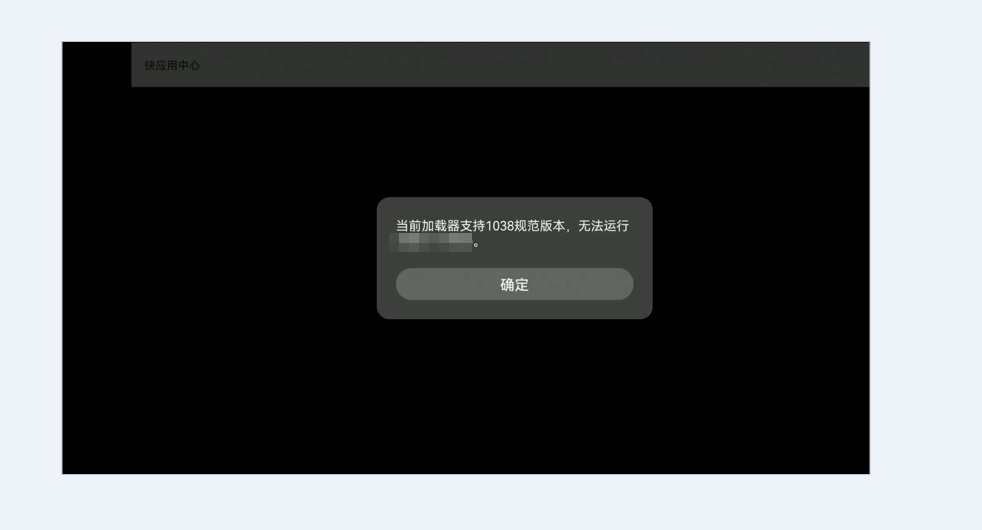
问题分析
智慧屏加载器当前最高支持1038版本,manifest文件中minPlatformVersion值高于1038就无法运行。
解决方法
设置manifest文件中minPlatformVersion值不高于当前智慧屏支持的最高平台版本号即可。
查看智慧屏支持的最高平台版本号方法:
打开华为快应用IDE,在快捷运行区的下拉窗口选择“编辑配置”进入配置界面,在“运行平台”查看最新规范版本号。
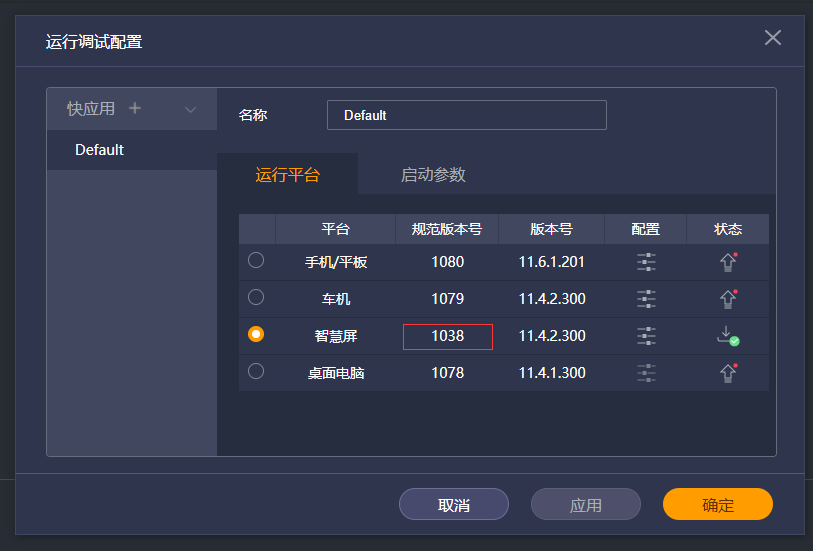
快应用联盟项目导入到华为快应用IDE编译报错
快应用官方IDE创建的项目,在华为快应用IDE中打开后编译报错,无法运行。
一般来说,正常的样式、语法错误都会在IDE底部的problems标签下显示,您根据提示修改即可解决;还有一类错误是和npm依赖相关的error,以下是几种常见的问题和解决方法。
问题1:缺少cross-env
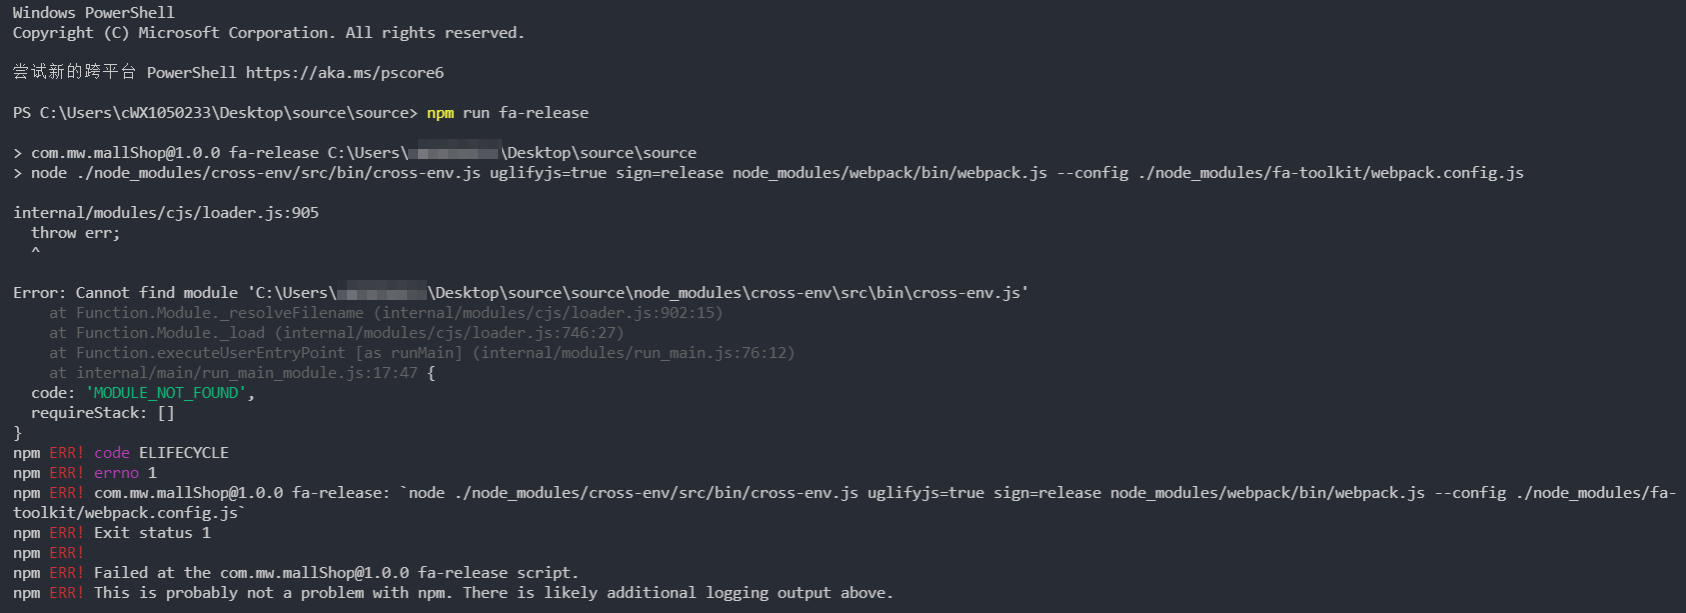
【问题分析】联盟的编译器和华为的启动编译的方式不一样,联盟的工程里没有这个依赖,而华为需要cross-env传参,所以需要用到这个依赖。
【解决方法】执行 npm i cross-env 安装对应依赖。
问题2:缺少hap
【问题分析】hap-tookit是联盟的编译工具,华为快应用IDE有自己的编译工具fa-toolkit。当在华为快应用IDE终端命令下执行 npm run build | release 打包联盟rpk包时,编译过程相当于使用了联盟的编译工具,由于没有安装hap-tookit依赖,导致编译报错。
【解决方法】安装hap依赖,可以先执行 npm cache clean –force,再执行 npm install hap-toolkit 。
问题3:webpack-cli
【问题分析】此错误一般是node_modules下的webpack版本和华为编译器的不一致导致,可能是单独安装过某些依赖。
【解决方法】按照下列步骤排查:
- 检查 package.json 中是否存在依赖 webpack、webpack-cli、hap-toolkit。
- 修改 package.json 文件,删除 webpack、webpack-cli 以及 hap-toolkit。
- 删除文件 package-lock.json 和文件夹 node_modules。
- 执行 npm install --legacy-peer-deps 安装所有依赖。
- 若编译仍然报错,请检查 npm 版本。
- 执行 npm -v 查看 npm 版本,如果高于 6.x 版本,需降级到 6.x。
- 执行 npm install npm@6.14.15 -g 可降级到 6.x 最终版本。
- 成功降级到6.14.15后,删除文件 package-lock.json 和文件夹 node_modules。
- 重新执行 npm install 安装所有依赖。
问题4:sass-loader

【解决方法】按照错误提示,执行 npm install node-sass sass-loader 安装依赖。
问题5:Cannot read property 'replace'
【解决方法】以下两种方法任选其一:
- 确保使用的 node 版本为 14,或者使用 IDE 集成的 node 环境。
- 可以启动第三方 NPM 库,根据提示安装依赖,最后再单独执行 npm install node-sass sass-loader 安装相关依赖。
其他问题
【解决方法】参考问题3的解决方法,本质上都是将所有依赖都删掉,在华为快应用IDE中重新下载所有依赖,使之与华为编译器版本匹配。
原生广告没有广告标识
现象描述
广告开发完成后,提交给鲸鸿动能团队验收不通过,驳回原因为:原生广告没有广告标识。
问题分析
原生广告内容是本地渲染的,一般和“非广告内容”融合在一起展示,如果不做区分,用户会把广告误以为是应用自身的内容,容易引起反感。
所以,您需要在广告展示部分添加“广告标识”,告诉用户这部分内容是广告,标识可以是“广告”文字、“广告”图标等。
解决方法
在广告布局部分,添加“AD”文字标识。
示例代码如下,具体UI效果以各自产品设计为主。
<template>
  <div class="item-container">
    <text class="alert">This is native ad demo</text>
    <div if="native.isShow" class="container" onappear="dealAppear">
      <text style="margin-bottom: 8px;">ad title :{{native.adData.title}}</text>
      <video id="video" if="native.isShowVideo" src="{{native.adVideoSrc}}" autoplay="true" onclick="reportNativeClick()" class="ad-video"></video>
      <stack class="stackstyle " onclick="reportNativeClick()">
        <image if="native.isShowImg" class="img" src="{{native.adImgSrc}}"></image>
        <input if="native.isShowBtn" type="button" class="adbtn" value="{{native.btnTxt}}" onclick="clickAdBtn()" />
      </stack>
      <div style="flex-direction: row; width: 100%;align-items: center;align-content: center;">
        <text class="adidenty">AD</text>
        <text style="width: 100%;">ad source:{{native.adData.source}}</text>
        <image class="closeImg" src="/Common/close.png" onclick="closeAd"></image>
      </div>
    </div>

    <text if="native.isShowData">{{ native.adData }}</text>
    <text if="native.errStr">{{ native.errStr }}</text>
  </div>
</template>
<style>
  .container {
    flex-direction: column;
    margin-top: 20px;
    width: 100%;
    margin-bottom: 50px;
    border: 2px solid #e90707;
    padding: 12px;
  }
  .stackstyle {
    width: 100%;
    height: 300px;
  }

   .adidenty{
   background-color: #fffafa;
   border: 1px solid #dad7d7;
    border-radius: 6px;
    width: 100px;
    height: 40px;
    text-align: center;
    margin-right: 20px;
  }
  .img {
    width: 100%;
    resize-mode: contain;
  }
  .closeImg {
    width: 48px;
    height: 48px;
    flex-shrink: 0;
  }
  .alert {
    font-size: 40px;
    margin-top: 20px;
    margin-bottom: 20px;
  }
  .item-container {
    margin-top: 50px;
    padding: 20px;
    width: 100%;
    flex-direction: column;
    align-items: center;
    align-content: center;
  }
  .ad-video {
    object-fit: contain;
    width: 100%;
    height: 415px;
  }
  .btn {
    height: 80px;
    width: 60%;
    background-color: #00bfff;
    color: #ffffff;
    border-radius: 20px;
    margin-bottom: 20px;
  }
  .btn:active {
    background-color: #058fbd;
  }
  .adbtn {
    width: 150px;
    height: 60px;
    color: #ffffff;
    background-color: #00bfff;
    border-radius: 8px;
    position: absolute;
    align-self: flex-end;
    bottom: 20px;
    right: 20px;
  }
  .adbtn:active {
    background-color: #058fbd;
  }
</style>
<script>
  import ad from "@service.ad";
  import router from '@system.router';
  import prompt from "@system.prompt";
  export default {
    data: {
      componentName: "ad",
      provider: "",
      native: {
        adUnitId: "u7m3hc4gvm",
        isShow: false,
        adData: {},
        isShowImg: true,
        isShowVideo: true,
        isShowData: true,
        isShowBtn: true,
        errStr: "",
        btnTxt: "",
        adImgSrc: "https://cs02-pps-drcn.dbankcdn.com/cc/creative/upload/20191226/b750592e-04be-4132-9971-52494b1e5b43.jpg",
        adVideoSrc: ""
      }
    },
    onInit() {
      this.$page.setTitleBar({ text: "page Native Ad" });
    },
    onReady(options) {
      console.info("native ad onReady");
      this.showNativeAd();
    },
    onShow(options) {
      console.info("native onshow");
      if (this.native.isShow) {
        this.reportNativeShow();
      }
    },
    getAdProvider: function () {
      this.provider = ad.getProvider();
      prompt.showToast({
        message: "getProvider : " + this.provider,
        duration: 2000,
        gravity: "center"
      });
    },
    isDownloadAd(creativeType) {
      let downloadTypes = [103, 106, 107, 108, 101, 102, 110];
      return downloadTypes.includes(creativeType);
    },
    showNativeAd() {
      var that = this;
      this.getAdProvider();
      if (this.provider !== "huawei") {
        console.info("the device  does not support ad.");
        return;
      }
      this.nativeAd = ad.createNativeAd({ adUnitId: this.native.adUnitId });
       this.nativeAd.onLoad(data => {
        console.info("ad data loaded: " + JSON.stringify(data));
        this.native.adData = data.adList[0];
        if (this.native.adData) {
          if (this.native.adData.imgUrlList) {
            this.native.adImgSrc = this.native.adData.imgUrlList[0];
            console.info(" this.native.adImgSrc =" + this.native.adImgSrc);
            this.native.isShowImg = true;
          } else {
            this.native.isShowImg = false;
            this.native.adImgSrc = "";
          }
          if (this.native.adData.clickBtnTxt) {
            this.native.btnTxt = this.native.adData.clickBtnTxt;
            this.native.isShowBtn = true;
          } else {
            this.native.isShowBtn = false;
            this.native.btnTxt = "";
          }
          if (this.native.adData.videoUrlList && this.native.adData.videoUrlList[0]) {
            this.native.adVideoSrc = this.native.adData.videoUrlList[0];
            this.native.isShowVideo = true;
          } else {
            this.native.isShowVideo = false;
            this.native.adVideoSrc = "";
          }
          this.native.isShow = true;
          this.native.errStr = "";
          this.reportNativeShow();
        }
      });
       this.nativeAd.onError(e => {
        console.error("load ad error:" + JSON.stringify(e));
        this.native.isShowImg = false;
        this.native.isShowVideo = false;
        this.native.isShow = false;
        this.native.errStr = JSON.stringify(e);
      });
       this.nativeAd.load();
    },
    reportNativeShow() {
      if ( this.nativeAd) {
        console.info("native reportAdShow");
         this.nativeAd.reportAdShow({ adId: this.native.adData.adId });
      }
    },
    reportNativeClick() {
       this.nativeAd.reportAdClick({
        adId: this.native.adData.adId
      });
    },
    listenNativeAdDownloadStatus(downloadstatus) {
      if (downloadstatus === "INSTALLED") {
        this.native.btnTxt = "OPEN";
      }
    },
    clickAdBtn(evt) {
      evt.stopPropagation();
      // 判断是否带下载按钮
      let createType = this.native.adData.creativeType;
      let ans = this.isDownloadAd(createType);
      console.info("clickAdBtn dealdownload ans=" + ans);
      if (ans) {
        this.dealdownload();
      } else {
        this.reportNativeClick();
      }
    },
    dealdownload: function () {
      let downloadstatus =  this.nativeAd.getAppStatus({
        adId: this.native.adData.adId
      });
      console.log("downloadstatus downloadstatus = " + downloadstatus);
      if (downloadstatus === "DOWNLOAD") {
        //下载未开始,应用初始状态。
        const resultCode =  this.nativeAd.startDownload({
          adId: this.native.adData.adId
        });
        console.log("dealdownload startDownload  resultCode= " + resultCode);
        const progress =  this.nativeAd.getDownloadProgress({
          adId: this.native.adData.adId
        });
        console.log("getDownloadProgress progress = " + progress);
         this.nativeAd.onDownloadProgress(data => {
          console.log("onDownloadProgress data = ", data);
          this.native.btnTxt = data.progress + "%";
        });
         this.nativeAd.onStatusChanged(data => {
          console.log("onStatusChanged data = ", data);
          let status = data.status;
          this.listenNativeAdDownloadStatus(status);
        });
      } else if (downloadstatus === "DOWNLOADING") {
        this.native.btnTxt = "pause";
         this.nativeAd.pauseDownload({
          adId: this.native.adData.adId
        });
      } else if (downloadstatus === "PAUSE") {
        this.native.btnTxt = "resume download";
         this.nativeAd.resumeDownload({
          adId: this.native.adData.adId
        });
      } else {
        this.reportNativeClick();
      }
    },
    removeAdListen: function () {
      if ( this.nativeAd) {
         this.nativeAd.offDownloadProgress();
         this.nativeAd.offError(() => {
          console.log("nativeAd offError");
        });
         this.nativeAd.offLoad(() => {
          console.log("nativeAd offLoad");
        });
         this.nativeAd.offStatusChanged();
      }
    },
    onDestroy() {
      if ( this.nativeAd) {
         this.nativeAd.cancelDownload({
          adId: this.native.adData.adId
        });
         this.nativeAd.destroy();
      }
    },
    closeAd: function () {
      this.native.isShow = false;
    },
    dealAppear: function () {
      console.info("native Appear");
    }
  };
</script>
效果图如下:

华为快应用IDE报错,提示:adb server version (40) doesn't match this client (41)
现象描述
使用华为快应用IDE打开快应用联盟创建的项目,运行快应用时,IDE报错,提示:
adb server version (40) doesn't match this client (41); killing... * daemon started successfully
问题分析
adb是一个调试工具,用于电脑和手机或者模拟器之间的交互。
IDE报错根本原因是adb版本不匹配华为快应用IDE,电脑上启动的adb版本是40,华为快应用IDE要求的adb版本是41。
adb版本为40一般是以下2种情况:
- 联盟创建的快应用工程有adb依赖。
- 本地电脑单独下载了adb版本,并配置了环境变量。
通过在命令行中输入“where adb”来查看本地安装的adb。

以上截图中本地D盘单独安装了adb并配置了系统环境变量。最后一个adb是在华为快应用IDE安装路径中的,如果你的电脑没有安装过adb,IDE运行快应用就会启动这个adb。
不管是上述哪种情况导致的报错,都需要关闭或者删除原来的adb,让快应用IDE启动自身集成的adb工具。
解决方法
- 关闭联盟IDE。
- 删除独立安装的adb环境变量,或者将华为安装路径下的adb开头的有关文件复制到独立安装的adb目录进行替换,这样两个路径下的adb版本就是一样的。
- 重启华为快应用IDE。
快应用中如何动态设置渐变色样式
现象描述
快应用中在<template>动态设置渐变色样式不生效,问题代码如下:
<div class="wrapper" style="background:linear-gradient({{gradient}});"></div> 问题分析
快应用中渐变色样式不支持在style中绑定变量来动态修改。
解决方法
可以通过动态改变class类名的方式来设置渐变色样式。
示例代码
<template>
  <!-- Only one root node is allowed in template. -->
  <div class="container">
    <div class="{{gradient}}">
      <text class="title">{{ gradient }}</text>
    </div>
    <input class="button" type="button" onclick="click($idx)" value="{{$item}}" for="{{list}}" />
  </div>
</template>

<style>
  .container {
    flex-direction: column;
    justify-content: center;
    align-items: center;
  }
  .button {
    width: 250px;
    margin-top: 10px;
    background-color: #00ced1;
    border-radius: 10px;
  }
  .redtoblue {
    background: linear-gradient(red, blue);
  }
  .redtogreen {
    background: linear-gradient(red, green);
  }
  .bluetogreen {
    background: linear-gradient(blue, green);
  }
  .redtoyellow {
    background: linear-gradient(red, yellow);
  }
  .yellowtogreen {
    background: linear-gradient(yellow, green);
  }
  .bluetoyellow {
    background: linear-gradient(blue, yellow);
  }
  .title {
    font-size: 100px;
  }
</style>

<script>
  module.exports = {
    data: {
      gradient: 'redtoblue',
      list: ["redtogreen", "bluetogreen", "redtoyellow", "yellowtogreen", "bluetoyellow", "redtoblue"]
    },
    onInit() {
      this.$page.setTitleBar({
        text: 'menu',
        textColor: '#ffffff',
        backgroundColor: '#007DFF',
        backgroundOpacity: 0.5,
        menu: true
      });
    },
    click(index) {
      this.gradient = this.list[index]
    }
  }
</script>
实现效果如下:
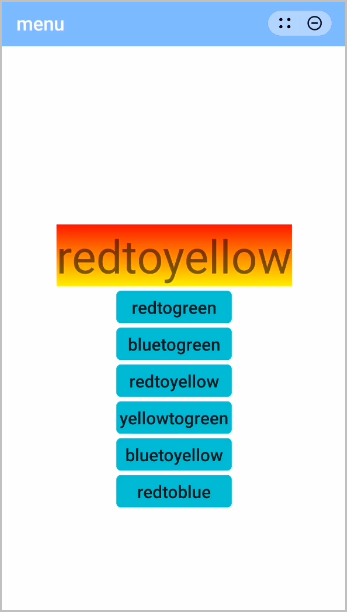
Win7系统使用华为快应用IDE无法运行和调试项目
现象描述
使用Win7系统安装华为快应用IDE实现快应用开发工作,打开快应用项目后点击运行和调试按钮无反应,新建模板项目也无法编译运行。
问题分析
当前IDE版本集成的node不支持Win7系统。
解决方法
目前规避方法是:下载12版本的node.exe替换华为IDE安装路径下的/resources/app/extensions/deveco-debug/lib/toolkit/nodeTool的node.exe。
px和vp单位如何换算
场景描述
在快应用页面布局设计时,需要知道每个组件的样式及位置,这时就需要了解长度单位及相互转换的方法。
解决方法
- px是长度单位像素,是显示屏中的一个个小方格。
- vp是虚拟像素,vp=(px*160)/PPI。
- PPI是屏幕像素点密度(Pixels Per Inch),PPI=对角线像素点个数/屏幕尺寸,即每英寸中有多少个像素点。
下表是快捷换算方式。
| 代表的分辨率 | 屏幕密度 | 换算(px/vp) |
|---|---|---|
| 240*320 | 120 | 1vp=0.75px |
| 320*480 | 160 | 1vp=1px |
| 480*800 | 240 | 1vp=1.5px |
| 720*1280 | 320 | 1vp=2px |
| 1920*1280 | 480 | 1vp=3px |
例如:当分辨率为1080*2340时,该分辨率与1920*1080相近,可以按三倍来粗略估计,将200px转换成67vp。
因为是粗略计算,并不是非常准确,但是像素丢失或多出几个并没有太大影响。如果想要精确,需要用上面的公式计算。
快应用用户协议和隐私政策内容中,点击链接经多次跳转后点击返回,未能返回上一级链接页面
现象描述
用户协议和隐私政策内容中有链接跳转,多次跳转后,点击左上角返回,不会返回到上一级链接页面,而是返回到用户协议和隐私政策页面。
问题分析
是在同一个页面实现的跳转,没有对返回键进行事件处理。
解决方法
需要处理返回键事件,以实现点击返回键返回上一页面。
onBackPress() {
  this.$element('web').canBack({
      callback: function (e) {
          if (e) {
              this.$element('web').back();
          } else {
              router.back();
          }
      }.bind(this)
  });
  return true;
},
具体代码如下。
service.ux代码:
<template>
<web id="web" src="{{openUrl}}"></web>
</template>
<script>
import router from '@system.router'
export default {
public: {
openUrl: '',
menuTitle: ''
},
onInit() {
let { openUrl, menuTitle } = this
this.openUrl = openUrl
this.$page.setTitleBar({ text: menuTitle, textColor: '#000', backgroundColor: '#FFFFFF', backgroundOpacity: 0.5, menu: true })
},
onBackPress() {
this.$element('web').canBack({
callback: function (e) {
if (e) {
this.$element('web').back();
} else {
router.back();
}
}.bind(this)
});
return true;
},
}
</script> userAgreement.ux代码:
<template>
<div class="label">
<div class="content">
<div class="title"><text>用户协议和隐私政策</text></div>
<list class="content-warp">
<list-item class="first-line" type="list-item">
<text>欢迎使用快应用:</text>
</list-item>
<list-item class="primary-line" type="list-item-content">
<text>我们郑重承诺重视并保护用户的个人信息。我们秉承“一切以用户价值为依归”的理念,增强您对信息管理的便捷性,保障您的信息及通信安全。我们严格遵守法律法规,遵循以下隐私保护原则,为您提供更加安全、可靠的服务。</text>
<text>
点击“同意”,即表示您同意上述内容及
<a @click="openPage(1)" class="service">《用户协议》</a>
与
<a @click="openPage(2)" class="service">《隐私政策》</a>
</text>
</list-item>
</list>
<div @click="agree" class="handle-btn">
<text>同意</text>
</div>
<div @click="cancel" class="disagree-btn">
<text>不同意</text>
</div>
</div>
</div>
</template>
<script>
export default {
onInit() {
},
openPage(flag) {
this.$emit('openServicePage', { flag })
},
agree() {
this.$dispatch("dispatchEvent", {
display: false,
isagree: "agree"
});
},
cancel() {
this.$app.exit();
}
}
</script>
<style lang="less">
.content {
padding: 30px;
border-radius: 12px;
width: 600px;
flex-direction: column;
align-items: center;
background-color: #fff;
.title {
text {
font-weight: bold;
color: #000000;
font-size: 36px;
}
}
.content-warp {
height: 500px;
flex-direction: column;
.service {
color: #007aff;
text-decoration: underline;
}
.first-line {
flex-direction: column;
text {
font-weight: bold;
color: #000000;
font-size: 32px;
}
}
.primary-line {
flex-direction: column;
text {
text-indent: 40px;
}
}
}
.handle-btn {
width: 474px;
height: 82px;
border-radius: 41px;
justify-content: center;
align-items: center;
background-color: #d63016;
margin-top: 30px;
text {
font-weight: 600;
color: #fff;
font-size: 34px;
}
}
.disagree-btn {
margin-top: 30px;
text {
font-weight: 600;
font-size: 34px;
}
}
}
.label {
position: fixed;
top: 0;
right: 0;
left: 0;
bottom: 0;
background-color: rgba(0, 0, 0, 0.8);
flex-direction: column;
justify-content: center;
align-items: center;
}
</style> hello.ux代码:
<import name="userAgreement" src="./UserAgreement/userAgreement.ux"></import>
<template>
<!-- Only one root node is allowed in template. -->
<div class="container">
<stack>
<text class="title" onclick="save">Hello World</text>
<block if="{{ display }}">
<userAgreement onopen-service-page="openServicePage"></userAgreement>
</block>
</stack>
</div>
</template>
<style>
.container {
flex-direction: column;
justify-content: center;
align-items: center;
background-color: #d39b75;
}
.title {
font-size: 100px;
}
</style>
<script>
import storage from "@system.storage";
import router from '@system.router'
module.exports = {
private: {
display: false,
isagree: "disagree"
},
onInit() {
this.$page.setTitleBar({
text: "hello",
textColor: "#ffffff",
backgroundColor: "#007DFF",
backgroundOpacity: 0.5,
menu: true
});
},
openServicePage({ detail: { flag } }) {
let openUrl, menuTitle
switch (flag) {
case 1:
openUrl = '*'
menuTitle = '用户协议'
break;
case 2:
openUrl = '*'
menuTitle = '隐私政策'
break;
default:
break;
}
router.push({
uri: 'Hello/Service',
params: {
openUrl,
menuTitle
}
})
},
onShow(options) {
var that = this;
that.get()
setTimeout(() => {
if (that.isagree === "agree") {
that.display = false;
} else {
setTimeout(() => {
that.display = true;
}, 100);
}
}, 500);
console.log("message:", that.isagree);
this.$on("dispatchEvent", this.dispatchEvent);
},
dispatchEvent(evt) {
this.display = evt.detail.display;
this.isagree = evt.detail.isagree;
this.save(this.isagree);
},
save(params) {
storage.set({
key: "agreeFlag",
value: params,
success: function (data) {
console.log("handling success");
},
fail: function (data, code) {
console.log("handling fail, code = " + code);
}
});
},
get() {
var that = this;
storage.get({
key: "agreeFlag",
success: function (data) {
that.isagree = data;
console.log("handling success", data);
},
fail: function (data, code) {
console.log("handling fail, code = " + code);
}
});
}
};
</script> 如何获取异步回调方法中返回的值
现象描述
通过异步回调或者异步promise的方式调用给参数deviceInfo赋值,再通过console日志输出,打印的参数的值为空。
问题代码如下:
<script>
import push from "@service.push";
import device from '@system.device';
const injectRef = Object.getPrototypeOf(global) || global;
// injection regeneratorRuntime
injectRef.regeneratorRuntime = require('@babel/runtime/regenerator');
module.exports = {
data: {
deviceInfo: ''
},
onCreate() {
this.testAsync();
console.log("this.$def.data:", this.$def.data);
},
async testAsync() {
try {
let res = await device.getInfo();
console.info("get device id " + JSON.stringify(res.data));
this.$def.data.deviceInfo = res.data
} catch (e) {
console.log("get device id error " + e.code);
}
},
onDestroy() {
console.info("Application onDestroy");
},
dataApp: {
localeData: {}
}
};
</script> 运行效果如下:
06-27 15:03:12.460 I/jsLog ( 8661): Application onDestroy
06-27 15:03:13.509 I/jsLog ( 8661): this.$def.data:{"deviceInfo":""}
06-27 15:03:13.520 I/jsLog ( 8661): get device id {"brand":"HUAWEI","manufacturer":"HUAWEI","model":"ELE-AL00","product":"ELE-AL00","osType":"android","osVersionName":"9","osVersionCode":28,"platformVersionName":"1.10","platformVersionCode":1100,"language":"zh","region":"CN","screenWidth":1080,"screenHeight":2139,"screenRefreshRate":60.000003814697266,"timeZone":"GMT+08:00","deviceType":"phone","emuiApiLevel":"19","emuiVer":"9.1.0","vendorOsName":"emui","vendorOsVersion":"9.1.0","fontScale":1,"characteristics":"default","windowWidth":0,"windowHeight":0,"cutout":[],"statusBarHeight":75,"pixelRatio":3,"engineProvider":"huawei","screenDensity":3,"screenLogicWidth":750,"screenLogicHeight":1485,"windowLogicWidth":0,"windowLogicHeight":0,"marketingName":"HUAWEI P30","harmonyOSVer":""} 问题分析
异步方法的回调方法是异步返回的,调用该方法后会立即打印该方法中的值,此时异步方法还未执行完成,就会导致后面打印的值为空。
解决方法
可以加50ms的延时待异步方法返回结果后再去执行后面的代码。
实现代码如下:
<script>
import push from "@service.push";
import device from '@system.device';
const injectRef = Object.getPrototypeOf(global) || global;
// injection regeneratorRuntime
injectRef.regeneratorRuntime = require('@babel/runtime/regenerator');
module.exports = {
data: {
deviceInfo: ''
},
onCreate() {
this.testAsync();
setTimeout(() => {
console.log("this.$def.data:", this.$def.data);
}, 50);
},
async testAsync() {
try {
let res = await device.getInfo();
console.info("get device id " + JSON.stringify(res.data));
this.$def.data.deviceInfo = res.data
} catch (e) {
console.log("get device id error " + e.code);
}
},
onDestroy() {
console.info("Application onDestroy");
},
dataApp: {
localeData: {}
}
};
</script> 运行效果如下:
06-27 15:11:44.123 I/jsLog ( 8661): Application onDestroy
06-27 15:11:45.444 I/jsLog ( 8661): get device id {"brand":"HUAWEI","manufacturer":"HUAWEI","model":"ELE-AL00","product":"ELE-AL00","osType":"android","osVersionName":"9","osVersionCode":28,"platformVersionName":"1.10","platformVersionCode":1100,"language":"zh","region":"CN","screenWidth":1080,"screenHeight":2139,"screenRefreshRate":60.000003814697266,"timeZone":"GMT+08:00","deviceType":"phone","emuiApiLevel":"19","emuiVer":"9.1.0","vendorOsName":"emui","vendorOsVersion":"9.1.0","fontScale":1,"characteristics":"default","windowWidth":0,"windowHeight":0,"cutout":[],"statusBarHeight":75,"pixelRatio":3,"engineProvider":"huawei","screenDensity":3,"screenLogicWidth":750,"screenLogicHeight":1485,"windowLogicWidth":0,"windowLogicHeight":0,"marketingName":"HUAWEI P30","harmonyOSVer":""}
06-27 15:11:45.480 I/jsLog ( 8661): this.$def.data:{"deviceInfo":{"brand":"HUAWEI","manufacturer":"HUAWEI","model":"ELE-AL00","product":"ELE-AL00","osType":"android","osVersionName":"9","osVersionCode":28,"platformVersionName":"1.10","platformVersionCode":1100,"language":"zh","region":"CN","screenWidth":1080,"screenHeight":2139,"screenRefreshRate":60.000003814697266,"timeZone":"GMT+08:00","deviceType":"phone","emuiApiLevel":"19","emuiVer":"9.1.0","vendorOsName":"emui","vendorOsVersion":"9.1.0","fontScale":1,"characteristics":"default","windowWidth":0,"windowHeight":0,"cutout":[],"statusBarHeight":75,"pixelRatio":3,"engineProvider":"huawei","screenDensity":3,"screenLogicWidth":750,"screenLogicHeight":1485,"windowLogicWidth":0,"windowLogicHeight":0,"marketingName":"HUAWEI P30","harmonyOSVer":""}} 如何配置快应用图标
实现方法
快应用和普通的手机应用一样,可以定义一个名称和一个图标用来标识快应用。
{
"package": "com.test.testIcon",
"name": "One Bird",
"icon": "/Common/advertLogo.png",
"versionName": "1.0.0",
"versionCode": 1,
"minPlatformVersion": 1060
} 该配置需要注意以下约束:
- 约束一:配置的内容需要与应用市场上架的应用名称和应用图标一致(下图所示),否则将导致审核不通过。
- 约束二:图片需要是正方形,尺寸:216*216px。如果图片格式是png,图片大小不能超过2M;如果图片格式是WEBP,图片大小不能超过100KB。
- 约束三:图片需要配置在项目工程目录的src下,引用时URI需要写绝对路径:"/Common/advertLogo.png"。
【常见错误案例】
以下几类配置都将导致图片配置不生效,甚至导致发布体验版本失败。
- 错误一:配置成在线地址。
{ "package": "com.test.testIcon", "name": "One Bird", "versionName": "1.0.0", "versionCode": 1, "icon": "https://developer.huawei.com/dev_index/img/logo_ch.png", "minPlatformVersion": 1060, "features": [], "config": {} } - 错误二:配置为项目工程外的地址。
{ "package": "com.test.testIcon", "name": "One Bird", "versionName": "1.0.0", "versionCode": 1, "icon": "../ICON/advertLogo.png", "minPlatformVersion": 1060, "features": [], "config": {} } - 错误三:配置为手机文件地址。
{ "package": "com.test.testIcon", "name": "One Bird", "versionName": "1.0.0", "versionCode": 1, "icon": "internal://files/test/advertLogo.png", "minPlatformVersion": 1060, "features": [], "config": {} }
- 错误一:配置成在线地址。
如何获取全局参数
现象描述
全局参数通常用于全局配置,例如位置信息、步数、弹幕模式等。由于JS是单线程的,获取全局参数可以保证变量的线性安全。
实现方法
【方法一】在manifest.json的config.data中定义用户全局变量helloDemo。
"config": {
"data":{
"helloDemo":"This is a demo"
}
}, <template>
<div style="flex-direction: column">
<text>{{title}}</text>
<input type="button" onclick="addnum" value="add" />
</div>
</template>
<script>
export default {
private: {
title: ""
},
onShow(options) {
this.title = this.$app.$data.helloDemo;
},
addnum() {
this.$app.$data.helloDemo = this.$app.$data.helloDemo === "This is a demo"? "This is not a demo" : "This is a demo";
this.title = this.$app.$data.helloDemo;
}
}
</script> 【方法二】在app.ux的data中定义index:XX 。
<script>
module.exports = {
onCreate() {
console.info('Application onCreate');
},
onDestroy() {
console.info('Application onDestroy');
},
//此处定义全局变量index
data: {
index:0
}
}
</script> 其他页面通过this.$app.$def.data.index获取使用变量。
<template>
<div style="flex-direction: column">
<text>{{count}}</text>
<input type="button" onclick="addnum" value="add" />
</div>
</template>
<script>
export default {
private: {
title: ""
},
onShow(options) {
this.count = this.$app.$def.data.index;
},
addnum() {
this.$app.$def.data.index += 10;
this.count = this.$app.$def.data.index;
}
}
</script> 如何实现通知消息定时提醒
现象描述
当用户离开应用时,有时需要去桌面找该快应用的图标或者去快应用中心寻找该应用。
该情况下可添加定时器,当用户离开应用时定时发送通知消息提醒用户。
问题分析
在onHide中添加定时器,点击快应用图标进入时,会触发生命周期onShow方法关闭定时器,然而从通知消息进入应用不会触发onShow,仍然会发送通知消息。
解决方法
声明当前页面的启动模式,标识为"singleTask"模式,每次打开目标页面都会回调onRefresh生命周期函数,关闭定时器。
manifest.json代码如下:
"router": {
"entry": "Hello",
"pages": {
"Hello": {
"launchMode": "singleTask",
"component": "hello"
}
}
}, hello.ux代码如下:
onHide: function () {
this.notificationShow = setInterval(() => {
this.show()
}, 1000)
}, onShow: function () {
clearInterval(this.notificationShow);
},
onRefresh() {
clearInterval(this.notificationShow);
}, 完整实现代码如下:
<template>
<div class="container">
<div class="item-container">
<div class="item-content">
<div class="item-content-detail">
<text class="txt">Title:</text>
<input class="input" placeholder="Please input title" onchange="titleFn" />
</div>
<div class="item-content-detail">
<text class="txt">Content:</text>
<input class="input" placeholder="Please input content" onchange="contentFn" />
</div>
</div>
<input type="button" class="btn" value="Send a notification" onclick="show" />
</div>
</div>
</template>
<style>
.container {
flex: 1;
flex-direction: column;
}
.item-container {
margin-top: 50px;
margin-right: 60px;
margin-left: 60px;
flex-direction: column;
}
.item-content {
flex-direction: column;
background-color: #ffffff;
padding-left: 30px;
padding-right: 30px;
padding-top: 15px;
padding-bottom: 15px;
margin-bottom: 100px;
}
.item-content-detail {
align-items: center;
}
.input {
flex: 1;
font-size: 30px;
padding-left: 20px;
}
.txt {
width: 150px;
padding-top: 15px;
padding-bottom: 15px;
text-align: right;
}
.btn {
height: 80px;
text-align: center;
border-radius: 5px;
margin-right: 60px;
margin-left: 60px;
margin-bottom: 50px;
color: #ffffff;
font-size: 30px;
background-color: #0faeff;
}
</style>
<script>
import prompt from '@system.prompt'
import notification from '@system.notification'
export default {
data: {
componentData: {},
inputTitle: 'title',
inputContent: 'content',
num: '',
},
onInit: function () {
this.$page.setTitleBar({ text: 'notification' })
},
onHide: function () {
this.notificationShow = setInterval(() => {
this.show()
}, 1000)
},
onShow: function () {
clearInterval(this.notificationShow);
},
onRefresh() {
clearInterval(this.notificationShow);
},
show: function () {
var that = this
that.num++;
prompt.showToast({
message: '标题为: ' + that.inputTitle + ' "的消息已发送,请查看消息通知栏 ' + ',No:' + that.num,
})
notification.show({
contentTitle: that.inputTitle,
contentText: that.inputContent + ',No:' + that.num,
clickAction: {
uri: '/Hello'
},
})
},
titleFn: function (e) {
this.inputTitle = e.text
},
contentFn: function (e) {
this.inputContent = e.text
},
}
</script> 销毁自定义组件时,组件事件被多次触发
现象描述
销毁自定义组件时,会多次触发自定义组件的事件,问题截图如下:
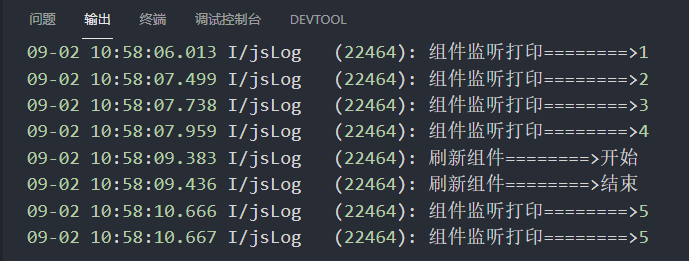
问题分析
自定义组件的上层组件上如果有if,当值变为false时,自定义组件不会被销毁,导致自定义组件里的事件都可以被触发。
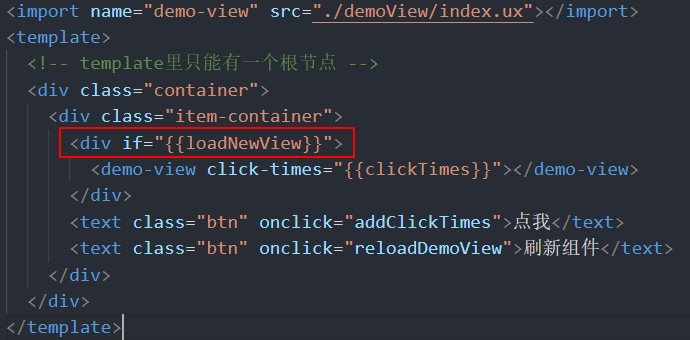
解决方法
销毁自定义组件时,if不要写在自定义组件的父节点上,请写在自定义组件上。
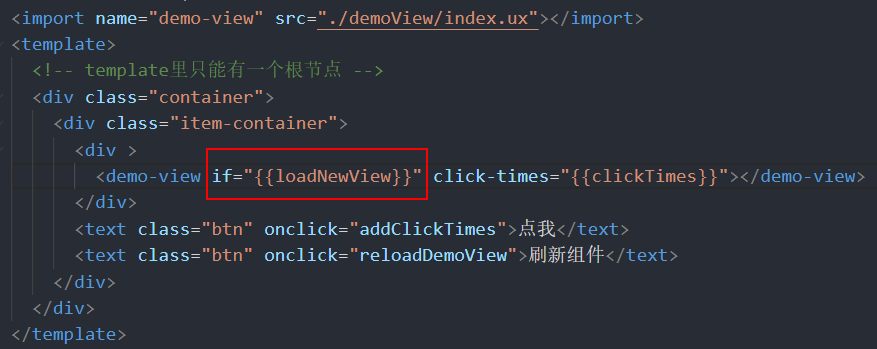
list的两个子组件,其中一个高度固定的情况下,另一个如何铺满list剩余高度
实现方法
可以通过getBoundingClientRect方法分别获取list和第一个子组件的高度,然后相减得到剩余的高度,再设置给第二个子组件,这样即可将list组件剩余的高度都铺满。
示例代码如下:
<template>
<!-- Only one root node is allowed in template. -->
<div class="container">
<list id="main" class="list">
<list-item id="item" class="listitem" type="text">
<text class="title">first listitem content</text>
</list-item>
<list-item type="list-item" style="height: {{seconditemheight}}px;background-color:green">
<text class="title">second listitem content</text>
</list-item>
</list>
<text class="title" onclick="custom">set height</text>
</div>
</template>
<style>
.container {
flex-direction: column;
justify-content: center;
align-items: center;
}
.list {
height: 80%;
border: 1px solid #000000;
}
.title {
font-size: 50px;
}
.listitem {
height: 200px;
background-color: #00ced1;
}
</style>
<script>
module.exports = {
data: {
componentData: {},
seconditemheight: 0,
listheight: 0,
firstitemheight: 0,
},
onInit() {
this.$page.setTitleBar({
text: 'menu',
textColor: '#ffffff',
backgroundColor: '#007DFF',
backgroundOpacity: 0.5,
menu: true
});
},
custom() {
var that = this
that.$element('main').getBoundingClientRect({
success: function (data) {
that.listheight = data.height;
},
});
that.$element('item').getBoundingClientRect({
success: function (data) {
that.firstitemheight = data.height;
},
});
setTimeout(() => {
that.seconditemheight = that.listheight - that.firstitemheight
console.log("this.seconditemheight ", that.seconditemheight)
}, 50);
}
}
</script> 调用device.getOAID获取的是空值
现象描述
快应用中接入广告服务,想要获取oaid来定制化广告服务,但是调用device.getOAID获取时,接口调用成功,但是返回空值。
问题代码如下:
device.getOAID({
success: function (ret) {
that.OAID = JSON.stringify(ret);
console.log("that.OAID", that.OAID);
prompt.showToast({
message: 'message' + that.OAID,
duration: 2000,
gravity: 'center'
})
},
fail: function (erromsg, errocode) {
that.OAID = errocode + ': ' + erromsg
},
}) 问题分析
此问题一般是由以下两种情形导致的:
- 当前设备不支持oaid。
- 使用的是联盟的预览版和调试器。
解决方法
- 打开手机,在“设置”中搜索“广告与隐私”,点击“更多信息”查看是否有值,没有则是不支持,需要更换手机设备。
- 使用华为快应用加载器。
快应用如何适配展开或折叠
现象描述
快应用在折叠屏手机上使用时,当展开或者折叠时,快应用的样式如果是固定的,在展开后会变得异常。
解决方法
快应用提供了onConfigurationChanged来监听应用配置的改变,其中的foldScreenMode属性就是在屏幕的物理大小改变(如折叠屏折叠/展开)时触发。
当这个参数返回时,可以调用device.getInfoSync()接口根据返回的screenWidth来判断是展开还是折叠,并以此来设置不同的样式属性。
示例代码如下:
<template>
<!-- Only one root node is allowed in template. -->
<div class="container" style="flex-direction: column">
<input type="button" value="hello" />
</div>
</template>
<style lang="sass" >
</style>
<script>
import device from '@system.device';
module.exports = {
data: {
width: 0
},
onShow(options) {
const res = device.getInfoSync();
//先获取折叠屏折叠的宽度
this.width = res.screenWidth
console.log("width:", this.width);
},
onConfigurationChanged(e) {
if (e.type === "foldScreenMode") {
try {
//判断宽度的大小决定是展开还是折叠
const res = device.getInfoSync();
console.log("res.screenwidth:", res.screenWidth);
//返回的宽度与折叠的宽度对比
if (res.screenWidth === this.width) {
//设置折叠时的样式
console.log("当前是折叠态");
} else {
//设置展开时样式
console.log("当前是展开态");
}
} catch (e) {
console.log(e.code + e.message);
}
}
}
}
</script> 在style标签中使用align-self属性报错
现象描述
华为快应用IDE中,在text和image组件的style标签中使用align-self属性,出现报错,提示:'<text>' does not support 'align-self' style 和 '<image>' does not support 'align-self' style。
问题代码如下:
<template>
<!-- Only one root node is allowed in template. -->
<div class="container">
<text class="title" style="align-self: center">Hello World</text>
<image class="img" style="align-self: center" src="/Common/logo.png"></image>
</div>
</template> 问题分析
这是华为与联盟IDE的差异导致的,华为快应用IDE支持这个属性,但是不能写在style标签中,需要写在class伪类里。
解决方法
示例代码如下:
<template>
<!-- Only one root node is allowed in template. -->
<div class="container">
<text class="title">Hello World</text>
<image class="img" src="/Common/logo.png"></image>
</div>
</template>
<style>
.container {
flex-direction: column;
justify-content: center;
align-items: center;
}
.title {
font-size: 100px;
align-self: center;
}
.img {
align-self: center;
}
</style> $set方法设置数据不生效
现象描述
快应用中使用$set方法来动态设置数据,数据设置不生效,页面显示的是undefined而不是设置的数据。
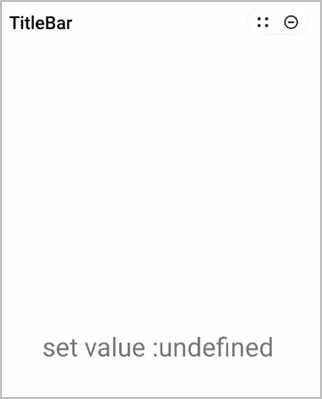
问题代码如下:
<template>
<!-- Only one root node is allowed in template. -->
<div class="container">
<text class="title" id="txt">{{value}}</text>
</div>
</template>
<style>
.container {
flex-direction: column;
justify-content: center;
align-items: center;
}
.title {
font-size: 60px;
align-self: center;
}
</style>
<script>
module.exports = {
data: {
componentData: {},
},
onShow(options) {
// Do something
this.$set('value', "Hello ")
this.$vm('txt').$set('value', "Hello ")
},
}
</script> 问题分析
$set方法在onshow生命周期里设置,但是在data数据里没有定义相应变量,导致在<template>中数据绑定无法生效。
解决方法
- 【方法一】在onInit里设置:
<script> module.exports = { data: { componentData: {}, }, onInit() { // Do something this.$set('value', "Hello ") this.$vm('txt').$set('value', "Hello ") }, } </script> - 【方法二】在onshow里设置,并且在data里定义变量:
<script> module.exports = { data: { componentData: {}, value: '' }, onShow() { // Do something this.$set('value', "Hello ") this.$vm('txt').$set('value', "Hello ") }, } </script>
效果如下图所示: