Failed to Obtain an Input Value
Symptom
When I entered a value in the input box and submitted it, the mandatory item verification failed, and the system displayed a message indicating that a parameter was empty and asked me to enter a value.
Cause Analysis
The possible cause is that the code for obtaining the value is incorrect. As a result, the value in the input box cannot be obtained.
The code for obtaining the input value should not be e.target.attr.value or this.$element('#id').attr.value.
Solution
Use the onchange event to assign a value to the model and obtain the value from the input box. The procedure is as follows:
- Initialize the model.
data:{ accountValue:'' } - Bind an event to the input box.
<input @change="getAccountValue" value="{{accountValue}}"></input> - Assign a value.
getAccountValue: function(e) {
    this.accountValue = e.value // Here, e.value instead of e.target.attr.value is used.
}
Suggestions and Summary
Refer to the official documents instead of generating a JavaScript object for coding. A JavaScript object may lead to compatibility issues.
Currently, the data binding mode of a quick app is unidirectional.
- The value entered in the input box does not change the value of accountValue in data.
- If the input value is changed by setting this.accountValue, the onchange event of the input will not be triggered.
- If the value of accountValue before and after the value change through this.accountValue = xxx remains the same, the page will not be re-rendered.
Failed to Update a List When Items Are Changed
Symptom
After items are changed by setting this.items[0] to newValue, the list is not updated.
Cause Analysis
Changing array values based on the array subscript does not trigger watch.
Solution
Trigger the action of re-assigning a value to the defined array, for example, through this.arr = this.arr.concat(). The concat method will copy the current array. The following is another solution:
// Array.prototype.splice
// vm.items.splice(indexOfItem, 1, newValue)
Suggestions and Summary
For more information, visit https://vuejs.org/v2/guide/list.html#Caveats.
Due to JavaScript restrictions, the Vue framework cannot detect changes:
- When you use an index to set an item directly, for example, vm.items[indexOfItem] = newValue.
- When you change the length of an array, for example, vm.items.length = newLength.
Failed to Add Attributes
Symptom
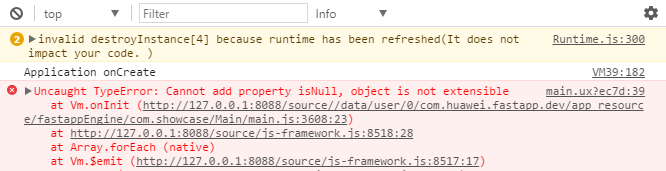
During debugging, the error message similar to "Uncaught TypeError: Cannot add property xxx, object is not extensible" is displayed.
Cause Analysis
The corresponding code is as follows:
Object.isNull = function(e) {
        return null == e || void 0 == e
}
Object is a root object, and you are not allowed to add attributes or methods to it.
Solution
Define isNull in utils.
Suggestions and Summary
Do not define variables or methods in the root object Object or global. Otherwise, an error will be reported.
JSON.parse Error
Symptom
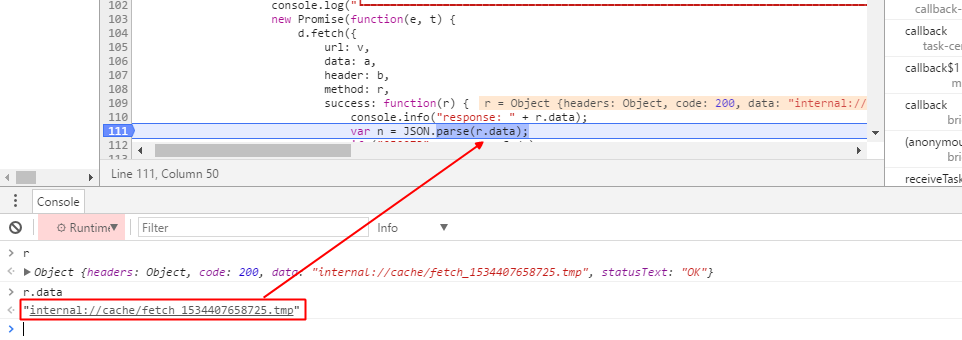
The error message "Uncaught SyntaxError: Unexpected token xxx in JSON at position 0" is displayed.
Cause Analysis
The preceding message indicates a JSON.parse error. In this example, JSON.parse is to parse a character string.
Solution
Ensure that the returned data is in JSON format and then parse the data. You can also run the try catch command to capture exceptions.
Blank Page Displayed Because onCreate Is Not Executed
Symptom
The initial page is blank.
Cause Analysis
The data initialization logic is stored in onCreate, which is an app lifecycle function and is not called during page rendering.
Solution
Call onReady instead of onCreate.
Suggestions and Summary
For details, please refer to Lifecycle APIs.
List Scrolling Up on the Page Returned After Page Redirection
Symptom
After a user goes to another page and then goes back, the list scrolls up.
Cause Analysis
A sublist is nested in the list-item element. If a user goes to another page and then goes back when only a part of the sublist is displayed, the onRequestChildFocus event is triggered to show all items in the sublist. As a result, the parent list scrolls up.
Solution
Do not nest a list in list-item.
Suggestions and Summary
Comply with the specifications in the official development. Otherwise, unknown problems may occur.
Error Similar to "xxx is not a function" Is Reported
Symptom
The error message "execJSTYpeError: xxx.recourdCountEvent is not a function" is displayed.
Cause Analysis
This error indicates that the called function does not exist. The possible cause is that a vendor API that is not provided is called. It is found that the official website of Quick App Alliance provides the recourdCountEvent API mentioned in the message, but Huawei does not provide it.
Solution
During the development, call account.getProvider() to check whether some APIs are supported. If so, you may call them. For details, please refer to Account API.
if(account.getProvider()){
        // some code
}
Suggestions and Summary
When using a vendor service, use getProvider to check whether the service is supported and then call the specific API.
picker Element Is Displayed Abnormally
Symptom
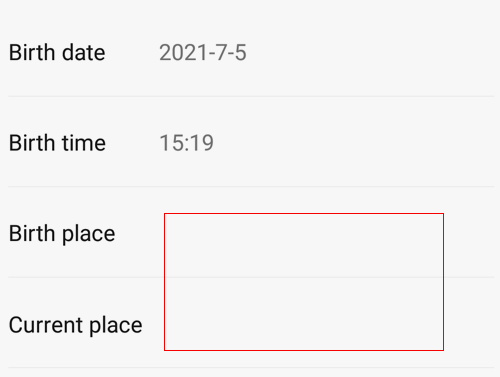
The options set in picker are not displayed, as shown in the red box in the following figure.
Cause Analysis
Check the code where the exception occurs. It is found that the value format is incorrect for <picker type='multi-text'. A positive example is value=["London","Southwark"], and a negative example is value="London Southwark".
Solution
For details, please refer to "Attributes" and "Styles" in picker. The value must be set to an array in the format ["London","Southwark"].
Suggestions and Summary
Comply with official specifications to perform development.
White Screen Is Displayed When a User Launches an App
Symptom
A white screen is displayed when a user launches an app.
Cause Analysis
You are advised to analyze the problem from the following aspects:
- Check whether the routing configuration is correct and whether the user is redirected to the expected target page.
- Check whether the data request API is called.
- Check whether the callback returns data.
- Check whether values are assigned to page data and whether bidirectional binding is correct.
- Check whether the result of the show and if statements is correct.
Solution
- After a page is modified (for example, the page name is changed or a page is created), check whether the route table is updated synchronously and whether the routes are correctly configured. In addition, modify the route table, switch to the hello word page, and check whether the hello word page is displayed properly.
- Check whether the page lifecycle function onInit is confused with the app lifecycle function onCreate. If onCreate is used on the page and the data request API is called in onCreate, the API will not be actually executed. To solve this problem, call the API in onInit instead.
- The parameters passed in the data request API are incorrect, leading to no data callback. Or the fail branch is not processed, leading to no processing of callback data. In both scenarios, no data is obtained. To locate the cause, record logs for subsequent queries after the API is called back.
- The data returned for the fetch request is a character string, which needs to be converted into JSON data through JSON.parse. You need to check whether the returned result is empty. Otherwise, an error will be reported. In addition, pay attention to this in the asynchronous request during an API call to ensure that the value is successfully assigned.
- You may use show and if to display the page if data is requested and hide the page if no data is requested. In this case, ensure that show and if are correctly set.
Suggestions and Summary
If a problem occurs, you are advised to go to the page, and then check the lifecycle, data obtaining, and value assignment in sequence to locate the problem.
onShow, onHide, onBackPress, and onMenuPress Not Executed
Symptom
onShow, onHide, onBackPress, and onMenuPress configured in the code are not executed.
Cause Analysis
Generally, this problem occurs when a custom element is used as the root node. The negative sample code is as follows:
<import name="loading" src="./loading"></import>
<template>
    <loading> </loading>
</template>
<script>
import prompt from '@system.prompt';
export default {
    onShow: function () {
        prompt.showToast({ message: 'onShow called', duration: 2000 })
    },
}
</script>
Solution
Check whether the root node of the current page to be listened to is a custom element. If so, add div as the root node.
<import name="loading" src="./loading"></import>
<template>
    <div>
        <loading> </loading>
    </div>
</template>
<script>
    import prompt from '@system.prompt';
    export default {
        onShow: function () {
        prompt.showToast({ message: 'onShow called', duration: 2000 })
    },
}
</script>
Data Received Is in an Incorrect Format When Content-Type of the fetch API Is Set to application/json
Symptom
Content-Type of the fetch API is set to application/json, and data in data is concatenated in the URL and passed to the server.
For example, a developer sends a request with data set to {"keywords": "Fried rice", "page": "1", "type": "caipu"}, Content-Type set to application/json, and method set to post.
The data received by the server is http://xxx? keywords=Fried rice& page=1& type=caipu.
Cause Analysis
The Quick App Alliance specifications in the early stage were not refined. As a result, the application/json format is incorrectly processed as the value of Content-Type set to application/x-www-form-urlencoded.
Solution
This problem has been resolved in Huawei Quick App Loader 1035. To avoid this problem, you only need to set minPlatformVersion to 1035 or later in the manifest.json file.
"package": "com.huawei.message",
"name": "Task notification",
"versionName": "1.0.0",
"versionCode": 1,
"icon": "/Common/logo.png",
"minPlatformVersion": 1035,
Global Message Channel Reports an Error
Symptom
When new BroadcastChannel is written to app.ux as a global message channel, an error is reported when Huawei Quick App Loader is used to load and send messages multiple times. The negative sample code is as follows:
// app.ux
export default {
    onCreate() {
        // BroadcastChannel is a message channel between pages. Do not use it globally.
        global.huaweiChannel = new BroadcastChannel("huawei");
    }
}
Cause Analysis
BroadcastChannel is a message channel between pages and cannot be used globally in app.ux. Otherwise, an error message will be displayed when messages are sent. Use this channel on a page.
Solution
Move the global BroadcastChannel logic to each page. Create it only when needed and destroy it in the lifecycle function onDestroy() of the page when the messaging is complete. The sample code is as follows:
// index.ux
export default {
    data:{
        huaweiChannel: null
    },
    onInit() {
// Create a message channel.
        this.huaweiChannel = new BroadcastChannel(' huawei ');
        this.huaweiChannel.onmessage = function (event) {
            console.log(event.data)
        };
    },
    onDestroy() {
        // Destroy the message channel.
        this.huaweiChannel.close();
    }
}
Error Similar to "XXX can not modify" Is Reported
Symptom
During function debugging, the error message "index.js:172 [JS Framework] (isTaobaoInstalled) can not modify" is displayed.
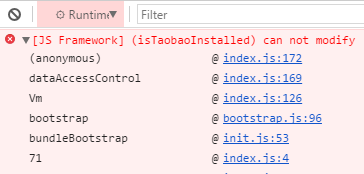
Cause Analysis
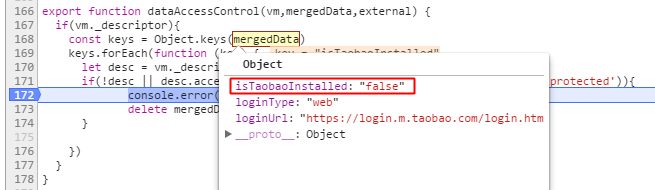
Debug the code. It is found that the code enters the branch where the isTaobaoInstalled permission description logic is not obtained.
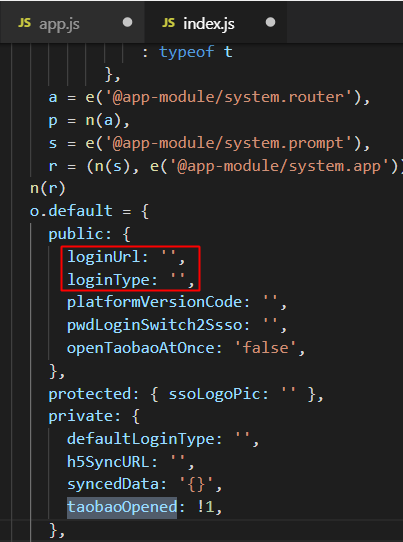
Check the definition of the initialization data. It is found that the isTaobaoInstalled variable is not defined.
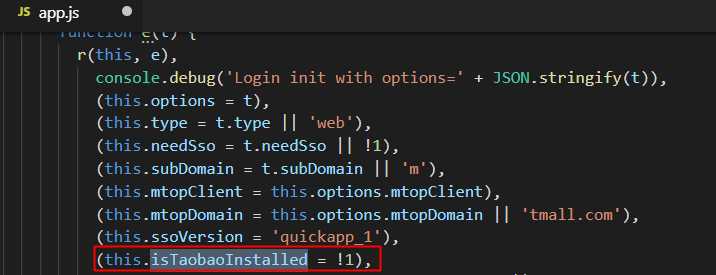
Values are assigned only in code.
Solution
Add the initialization definition of isTaobaoInstalled to public.
Suggestions and Summary
Define variables before accessing them and rectify the fault based on the error information.
An Exception Occurs When a User Exits the Message Channel Page and Then Accesses the Message Channel Page Again, or Pages Cannot Communicate with Each Other
Symptom
- Create a message channel using onInit on the page for receiving messages and open the detail page to send messages.
- Go back from the detail page to the page for receiving messages, then to the previous page, and repeat step 1. The "Cannot set property 'recieveMsg' of undefined" error message is displayed.
The sample code is as follows:
onInit: function () {
    this.$page.setTitleBar({ text: 'messageChannel' })
    let that = this;
    channel = new BroadcastChannel('channel1');
    channel.onmessage = function (event) {
        console.log(event.data)
        that.receivedMsg = event.data;
        // prompt.showToast({message: 'Receive a message:' + event.data});
    };
}
Cause Analysis
Log analysis shows that the message channel is not destroyed when the page is destroyed but another message channel is created when the page is accessed again. That is, there are two message channels. However, the VM bound to the previous page has been destroyed. Therefore, the undefined error message is displayed when the destroyed VM method is called again.
Solution
Destroy the corresponding message channel when destroying a page. The sample code is as follows:
onDestroy: function () {
    channel.close();
},
Suggestions and Summary
According to the official documentation, message channels do not belong to the page context and need to be destroyed independently. If a page object is referenced in a message channel, the channel needs to be destroyed when the page is destroyed. If you do not destroy the channel, other exceptions may occur, for example, messages cannot be received.
Failed to Obtain the Routing Parameters
Symptom
The private data model is used, and the routing parameters cannot be received.
Cause Analysis
The variables in the private data model can be modified only in the code of the current page. Therefore, the parameters passed during page redirection cannot be used to modify the private data model. As a result, the passed parameters cannot be received. The negative sample code is as follows:
// Page A
router.push({
    uri: 'B',
    params: {title: "I am a parameter to be passed."}
});
// Page B
module.exports = {
    // The variables in the private data model can be modified only in the code of the current page and cannot be modified by parameters passed during page redirection. As a result, the passed parameters cannot be received.
    private: {
        title: ' '
    }
}
Solution
Change private to data, public, and protected to obtain routing parameters. The sample code is as follows:
// Page B
module.exports = {
    // When the value is protected, the passed parameters can be received correctly.
    protected: {
        title: ' '
    }
}
An Error Occurs When the Web Element Sends a Message to an HTML5 Page
Symptom
When the web element sends a message to an HTML5 page, the following error is reported: 02-14 09:22:56.329 E/jsLog (18834): [H5]Uncaught TypeError: system.onmessage is not a function
Cause Analysis
If the system.onmessage function defined in an HTML5 page involves a large amount of logic, the function may reference external JavaScript libraries, for example, jQuery. In this case, if the web element triggers this.$element('webElementId').postMessage({message:'xxx'}) in the onPageFinish event processing function, the "system.onmessage is not a function" error may occur because the JavaScript of the HTML5 page is not completely loaded.
Solution
The definition of the system.onmessage function on the HTML5 page needs to be lightweight. This function receives only the data passed from the quick app. The remaining logic is processed by the lifecycle functions of the HTML5 page, for example, the onload event.
Note that data from the quick app is not received when the onload event is triggered. In this case, the HTML5 page needs to listen to data receiving in polling mode. To achieve this, refer to the following sample code.
<!DOCTYPE html>
<html>
<head>
    <meta charset="utf-8">
    <title>Practice for Receiving Quick App Messages</title>
    <script>
        var recieveData;
        // Lightweight definition of system.onmessage. Only data is received to ensure that the loading is complete as quickly as possible.
        system.onmessage = function (data) {
            recieveData =data;
        }
    </script>
    <script src="js/jquery-1.10.2.min.js"></script>
    <script>
        $(document).ready(() =>{
            var stopIntervalId =setInterval(function () {
                if(recievedData){
                   execBusinessLogic()
                   clearInterval(stopIntervalId)
                }
            }, 20) // Polling is performed every 20 ms until messages from a quick app is received.
        })
        function execBusinessLogic() {
             // Code for executing the service logic.
        }
    </script>
    <script src="js/html2canvas.js"></script>
</head>
Suggestions and Summary
You should understand the mechanism for sending messages between a quick app and an HTML5 page. Then use the polling mode to solve the asynchronous data transmission problem.
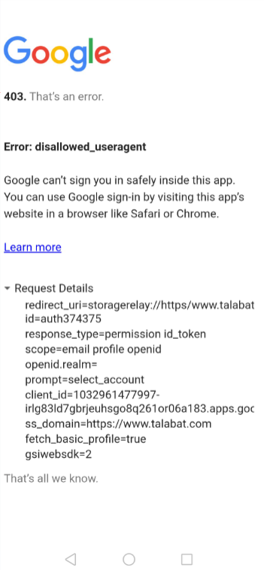
Error 403 Reported When I Use a Google Account to Register or Sign In to an HTML5 App That Is Packaged as a Quick App and Runs on Quick App Loader
Symptom
The error page is as follows.
Solution
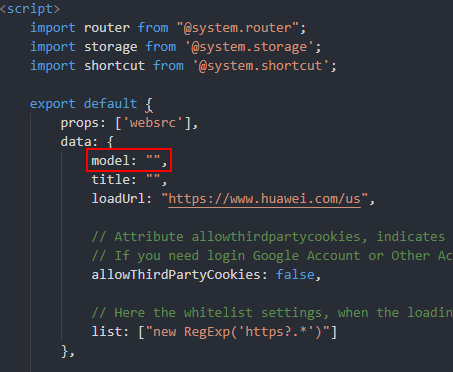
- Define the model variable to indicate the device model of a user. Add the variable to the data object.
- In the page lifecycle method onInit(), obtain the device model and assign a value to model.
onInit: function () { const device = require("@system.device") const res = device.getInfoSync(); this.model=res.model; console.log("onInit model="+this.model); }, - Set the useragent attribute of the web element to Mozilla/5.0 (Linux; Android 9; {{model}}) AppleWebKit/537.36 (KHTML, like Gecko) Chrome/79.0.3945.116 Mobile Safari/537.36)), as shown in the following figure.


The model variable is used in useragent to obtain the actual device model. This prevents users from being confused by an incorrect model obtained during the verification of useragent on some HTML5 web pages.
- Set minPlatformVersion in the manifest.json file to 1068.
- Load the quick app using Huawei Quick App Loader 2.5.2.300 or later. The following figure shows where to find the Quick App Loader version.
- If the sign-in still fails, set multiwindow of the web element to true.


Data Type Verification Failure
Symptom
IDE displays the following error information:
Invalid prop: type is not expected ,prop: "xxx".
Cause Analysis
Check the source code <part1 class="component" header="{{header}}" footer="{{footer}}" pop3=1233 where the problem occurs.
View the compiled code.
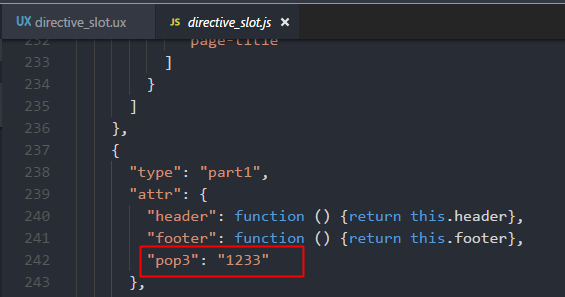
It is found that the compiler compiles the pop3 attribute value in the source code into a character string.
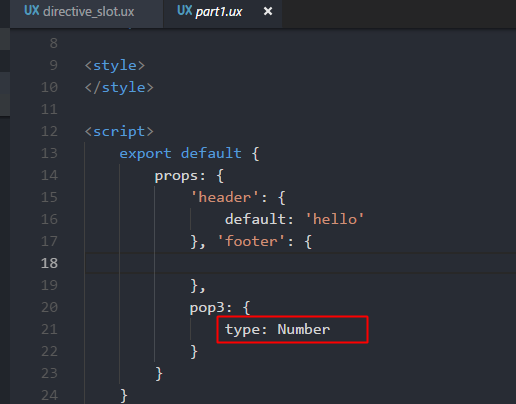
If non-character string verification is added to the element, IDE reports an error. For example, the verification type in this case is Number.
Solution
This error message does not affect the function and you can ignore it.
Suggestions and Summary
If the error does not affect the function, you are advised not to check the type.
After a User Accesses Quick App Center, the Page Configured with Delayed Redirection Is Displayed
Symptom
Delayed redirection is enabled for a page. After a user taps the lightning icon in the upper right corner of the quick app menu to enter Quick App Center, the user is automatically redirected to the page configured with delayed redirection.
For example, when a user taps the lightning icon on the quick app menu in the upper right corner of the splash ad page, the home page of the app is automatically displayed after the user enters Quick App Center.
Cause Analysis
- When a user taps the lightning icon in the upper right corner, Quick App Center is displayed in a new stack.
- Setting redirection delay is equivalent to setting a scheduled task in the quick app.
- router.push is still valid in the background. Therefore, when the scheduled task is executed, the page configured in delayed redirection is displayed.
Solution
Cancel the scheduled task for delayed redirection in the page lifecycle function onHide.
data: {
    delayTask: {}
}
routerHome: function () {
    this.delayTask = setTimeout(() => {
    router.push({
        uri: 'xxx' // Name of the target page.
    })
    }, 3000);
},
onHide: function () {
    clearTimeout(this.delayTask);
},
The System Displays a Pop-up Twice, Asking a User to Add the App Icon to the Home Screen When the User Returns from a Quick App Opened Through a Deep Link
Symptom
When a user opens a quick app from AppGallery and returns, a pop-up is displayed only once to ask the user to add the app icon to the home screen. However, the pop-up will be displayed twice when the user opens the quick app through a deep link and then returns.
Cause Analysis
On the live network, when a user is deep linked or redirected to a quick app and creates a home screen icon, a pop-up is displayed only once. Based on the analysis of the page code, it is found that the onBackPress function (for listening to the back button) is overridden.
onBackPress: function () {
    this.entryDirect && this.$app.exit()
}
this.entryDirect is carried during deep link redirection.
onBackPress is triggered when a user taps the back button. If the value true is returned, the return logic of the app is used; if the value false or no value is returned, the default return logic is used.
If the system determines that the quick app is opened through a deep link, this.app.exit() is called to exit the app, and the finish event is triggered. However, the value true is not returned in onBackPress. Then, the finish event is triggered based on the default return logic. After Quick App Center detects the finish event, a pop-up is displayed to instruct the user to add the app icon to the home screen. As a result, the pop-up is displayed twice.
Solution
Modify code of the onBackPress function to ensure that the default return logic is not used after this.app.exit() is called to exit the app.
onBackPress: function () {
    if (this.entryDirect) {
        this.$app.exit()
    return true
    }
    //this.entryDirect&&this.$app.exit()
}
Suggestions and Summary
When a page needs to use the onBackPress function, true must be returned at the end of the function to call the return logic of the app. Otherwise, the default return logic is used, which may cause exceptions.
onBackPress Does Not Take Effect
Symptom
In my quick app, I configured a pop-up and expected it to close after a user taps to close it. However, the onBackPress method that implements this function failed to take effect.
Cause Analysis
Huawei Quick App Engine requires that the onBackPress method not perform any time-consuming operations. If the code processing is not complete after a period of time, false will be returned. That is, the pop-up will be closed. In the code where the problem occurs, $watch is a listener for showResult. If the value of showResult has changed, the fetch API is called. These operations take a certain period of time. As a result, the pop-up may be automatically closed before the operations are completed.
The code where the exception occurs is as follows:
onBackPress() {
  console.log("main onBackPress. status = " + this.showResult);
  if (this.showResult) {
    this.$element('textarea').focus({ focus: false });
    this.content = '';
    this.touchedIndex = -1;
    // After the value of showResult has changed, if an event is processed too slowly, the pop-up may be closed before a user taps it.
    this.showResult = false;
    return true;
  }
  return false;
},
initDataWatchConfig() {
  let that = this;
  this.$watch('showResult', (newV, oldv) => {
    if (!that.showResult) {
      audio.stop();
      this.getphoto()// This is a time-consuming operation. In this example, you need to clear the cache before calling the fetch API. Otherwise, the problem will not reoccur.
    }
  });
},
getphoto: function () {
  var that = this
  fetch.fetch({
    url: 'https://www.huawei.com/Assets/image/logo.png',
    success: function (ret) {
    },
    fail: function (msg, code) {
    }
  })
}
Solution
You can add a delay for a time-consuming operation. In this example, add a delay to this.showResult = false. The modified code is as follows:
onBackPress() {
  console.log("main onBackPress. status = " + this.showResult);
  if (this.showResult) {
    this.$element('textarea').focus({ focus: false });
    this.content = '';
    this.touchedIndex = -1;
    // Add a delay to solve the problem.
    setTimeout(() => {
        this.showResult=false;
    }, 800);
    return true;
  }
  return false;
},
Failure to Automatically Expand a div Subelement in the refresh Element
Symptom
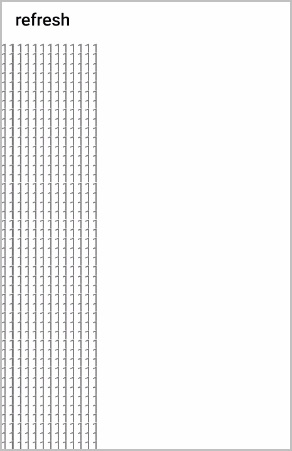
The refresh element is used as the parent element of the div element. When the content configured in div exceeds the screen height, the page is compressed to one page, and users cannot expand the page and scroll up or down this page. The code where the exception occurs is as follows:
<template>
    <div class="container">
        <refresh class="refresh" onrefresh="refresh" refreshing="{{isRefreshing}}" offset=800px>
                <div style="flex-direction: column;">
                    <text class="txt">1111111111111</text>
                    <text class="txt">1111111111111</text>
                     ...
                </div>
        </refresh>
    </div>
</template>
.container{
  flex-direction: column;
}
.refresh {
    background-color: #ffffff;
    progress-color: #0faeff;
    flex-direction: column;
    flex: 1;
}
Compression effect
Cause Analysis
In the error code, the height of the root node div is not set. Quick App Loader considers the default height of the root node as the screen height. However, the default height of refresh is the same as that of div. As a result, the content is squeezed together.
Solution
The refresh element can be used together with the list and list-item elements to implement the sliding effect. The optimized code is as follows:
<refresh class="refresh" onrefresh="refresh" refreshing="{{isRefreshing}}" offset=800px>
    <!-- List -->
    <list class="list" onscrollbottom="scrollbottom" onscrolltop="scrolltop" onscroll="scroll" id="list"
        scrollpage="{{scrollPage}}">
        <list-item type="listItem" >
          <div style="flex-direction: column;">
           <!-- The layout to be displayed is described here.-->
          </div>
        </list-item>
    </list>
</refresh>
Rounded Corner Style of a Button Does Not Take Effect
Symptom
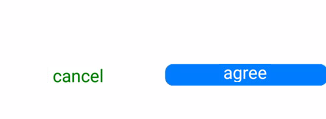
The div element contains two input elements, which define the Cancel and OK buttons respectively. However, the rounded corner style of the Cancel button does not take effect.
Cause Analysis
Analyze the following code for defining the common styles of the two buttons:
.button-div input {
   width: 148px;
   height: 48px;
   border-radius: 18px;
   font-size: 30px;
   flex: 1;
   margin: 10px;
}
The code for defining the button style is as follows:
.btn_cancel {
  color: #007D00;
  background-color: #FFFFFF;
}
.btn_agree {
  background-color: #007DFF;
  color: #FFFFFF;
}
It is found that the color of the Cancel button is set to white, which is the same as the background color. As a result, the rounded corner effect cannot be displayed. If the button color is not set, the effect is the same as that of the white color.
Solution
You can use either of the following solutions to solve the problem:
[Solution 1] Change the color of the Cancel button.
[Solution 2] Set a border for the button. The sample code is as follows:
.btn_cancel {
  color: #007D00;
  background-color: #ffffff;
  border: 1px solid #000000;    // Set the border.
}
Effect of solution 2:

Failed to Call configuration.setLocale() During Page Initialization
Symptom
The global method changeLocaleConfiguration is defined in the app.ux file of a quick app to set the app language. When the changeLocaleConfiguration() method is called in the home page lifecycle function onInit, configuration.setLocale() is triggered, but the app language does not change.
Code in app.ux:
changeLocaleConfiguration() {
  this.localeObject = configuration.getLocale()
  if (this.localeObject.language === 'zh') {
    configuration.setLocale({
      language: 'en',
      countryOrRegion: 'US'
    })
  }
  else {
    configuration.setLocale({
      language: 'zh',
      countryOrRegion: 'CN'
    })
  }
}
Code of the home page:
onInit() {
  this.$app.$def.changeLocaleConfiguration()
}
Cause Analysis
Page initialization takes a short time, but language setting takes a long time. As a result, the page cannot be rendered in time.
Solution
Add a delay when calling the language setting API during page initialization. The code is as follows:
onInit() {
  setTimeout(() => {
    this.$app.$def.changeLocaleConfiguration()
  }, 100);
}
Suggestions and Summary
You are advised not to call time-consuming operations in onInit. If you must call one, add a delay.
Images Drawn in the canvas Element Cannot Be Displayed in the Album
Symptom
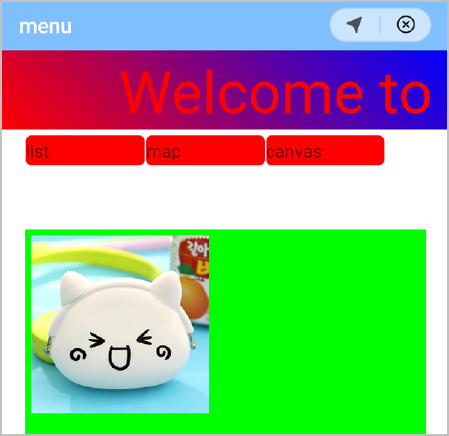
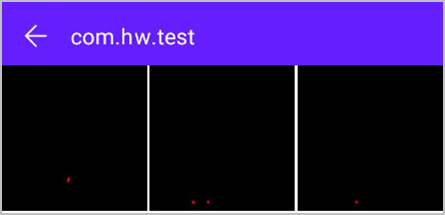
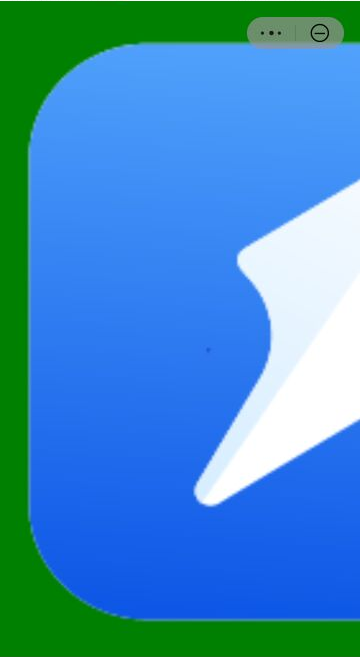
After an image drawn in the canvas element is saved to the album, the image cannot be displayed in the album. Only a black background is displayed.
The image with the green background in the following figure is drawn in the canvas element.
After the image is saved to the album, the display result is shown in the following figure.
Cause Analysis
Huawei Quick App Center creates a ctx object each time when it calls the getContext method, and therefore different ctx objects will be returned. Some of these ctx objects are empty. An empty ctx object may be obtained in a random selection. As a result, the image saved may have no content. The code is as follows:
Code for using canvas to draw an image:
pic() {
  var test = this.$element("canvas");
  var ctx = test.getContext("2d");
  var img = new Image();
  img.src = "/Common/pic3.jpg";
  img.onload = function () {
    console.log("Image loaded successfully.");
    ctx.drawImage(img, 10, 10, 300, 300, );
  }
  img.onerror = function () {
    console.log("Image loading failed.");
  }
},
Code for saving the image:
save() {
  var test = this.$element("canvas");
  test.toTempFilePath({
    fileType: "jpg",
    quality: 1.0,
    success: (data) => {
      console.log(`Canvas toTempFilePath success ${data.uri}`)
      console.log(`Canvas toTempFilePath success ${data.tempFilePath}`)
      media.saveToPhotosAlbum({
        uri: data.uri,
        success: function (ret) {
          console.log("save success: ");
        },
        fail: function (data, code) {
          console.log("handling fail, code=" + code);
        }
      })
    },
    fail: (data) => {
      console.log('Canvas toTempFilePath data =' + data);
    },
    complete: () => {
      console.log('Canvas toTempFilePath complete.');
    }
  })
}
Solution
Define ctx as a global variable and check whether it is empty. If so, assign a value to it.
Optimized code:
var ctx; // Define a global variable.
pic() {
  if (!ctx) { // Check whether a ctx object is empty. If it is empty, set it to 2d.
    var test = this.$element("canvas");
    var tt = test.getContext("2d");
    ctx = tt;
  }
  var img = new Image();
  img.src = "/Common/pic3.jpg";
  img.onload = function () {
    console.log("Image loaded successfully.");
    ctx.drawImage(img, 10, 10, 300, 300, );
  }
  img.onerror = function () {
    console.log("Image loading failed");
  }
}
Animation Drawn in canvas Using setInterval Is Slow
Symptom
In a quick app, the setInterval function is used to cyclically execute the code for using canvas. However, the quick app freezes when rendering an image on a Huawei phone.
The code where the exception occurs is as follows:
click0() {
  this.speed = 0.3
  let ctx = this.$element('canvas').getContext('2d')
  setInterval(() => {
    this.num0 += 2
    this.noise = Math.min(0.5, 1) * this.MAX
    this._draw(ctx)
    this.MAX <= 200 && (this.MAX += 4)
  }, 20)
},
_draw(ctx) {
  this.phase = (this.phase + this.speed) % (Math.PI * 64)
  ctx.clearRect(0, 0, this.width, this.height)
  this._drawLine(ctx, -2, 'rgba(0, 194, 255, 0.2)')
  this._drawLine(ctx, -6, 'rgba(0, 194, 255, 0.4)')
  this._drawLine(ctx, 4, 'rgba(0, 194, 255, 0.6)')
  this._drawLine(ctx, 2, 'rgba(0, 194, 255, 0.8)')
  this._drawLine(ctx, 1, 'rgba(0, 194, 255, 1)', 4)
},
Cause Analysis
The canvas drawing operation in This._draw() method takes at least 100 ms. However, the period in the code is only 20 ms. Huawei Quick App Engine executes all operations in this period and then executes operations the next period. Therefore, when the value is set to 20 ms, the animation is slow.
Solution
Check whether the Quick App Engine provider is Huawei using the device information API. If so, set the time to 100 ms or greater. If not, set the time to a value less than 100 ms. Optimized code:
onShow: function () {
    var that = this
    device.getInfo({
        success: function (ret) {
            console.log("handling success:", JSON.stringify(ret));
            that.engineProvider = ret.engineProvider;
        },
        fail: function (erromsg, errocode) {
            console.log("message:", erromsg, errocode);
        }
    })
},
click0() {
    var that = this
    this.speed = 0.3
    console.log(that.engineProvider)
    let ctx = this.$element('canvas').getContext('2d')
    if (that.engineProvider === "huawei") {
        setInterval(() => {
            this.num0 += 2
            this.noise = Math.min(0.5, 1) * this.MAX
            this._draw(ctx)
            this.MAX <= 200 && (this.MAX += 4)
        }, 120)
    } else {
        setInterval(() => {
            this.num0 += 2
            this.noise = Math.min(0.5, 1) * this.MAX
            this._draw(ctx)
            this.MAX <= 200 && (this.MAX += 4)
        }, 20)
    }
},
_draw(ctx) {
    this.phase = (this.phase + this.speed) % (Math.PI * 64)
    ctx.clearRect(0, 0, this.width, this.height)
    this._drawLine(ctx, -2, 'rgba(0, 194, 255, 0.2)')
    this._drawLine(ctx, -6, 'rgba(0, 194, 255, 0.4)')
    this._drawLine(ctx, 4, 'rgba(0, 194, 255, 0.6)')
    this._drawLine(ctx, 2, 'rgba(0, 194, 255, 0.8)')
    this._drawLine(ctx, 1, 'rgba(0, 194, 255, 1)', 4)
},
_drawLine(ctx, attenuation, color, width) {
    ctx.save()
    ctx.moveTo(0, 0);
    ctx.beginPath();
    ctx.strokeStyle = color;
    ctx.lineWidth = width || 1;
    var x, y;
    for (var i = -this.K; i <= this.K; i += 0.01) {
        x = this.width * ((i + this.K) / (this.K * 2))
        y = this.height / 2 + this.noise * this._globalAttenuationFn(i) * (1 / attenuation) * Math.sin(this.F * i - this.phase)
        ctx.lineTo(x, y)
    }
    ctx.stroke()
    ctx.restore()
},
Gradient Style Does Not Take Effect for the Image Background
Symptom
The gradient style background: linear-gradient(angle, color-stop1, color-stop2) added to an image does not take effect. However, the same style takes effect in the text element. The text background is as follows.
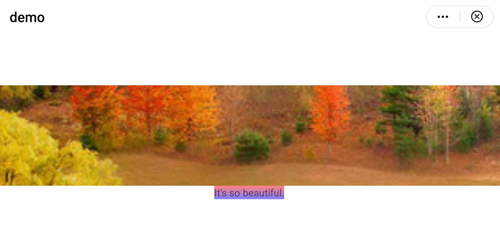
The code where the exception occurs is as follows:
<template>
  <!-- Only one root node is allowed in template. -->
  <div class="container">
   <image src="/Common/img/compress.png"
    style="width: 100%; height: 300px;background: repeating-linear-gradient( rgba(255, 0, 0, .5),rgba(0, 0, 255, .5));">
   </image>
   <text style="background: repeating-linear-gradient( rgba(255, 0, 0, .5),rgba(0, 0, 255, .5));">It's so beautiful.</text>
 </div>
</template>
Cause Analysis
The image is opaque. Even if the gradient background takes effect, the effect cannot be seen because it is blocked by the image above.
Solution
Use the stack element as the parent element of image, use div to contain image, and set the gradient background in the div element.
Sample code:
<template>
  <!-- Only one root node is allowed in template. -->
  <div class="container">
     <stack>
       <image src="/Common/img/compress.png" style="width: 100%; height: 300px"></image>
       <div style="width: 100%; height: 300px;background: repeating-linear-gradient( rgba(255, 0, 0, .5),rgba(0, 0, 255, .5));"></div>
     </stack>
    <text style="background: repeating-linear-gradient( rgba(255, 0, 0, .5),rgba(0, 0, 255, .5));">It's so beautiful.</text>
  </div>
</template>
Effect:
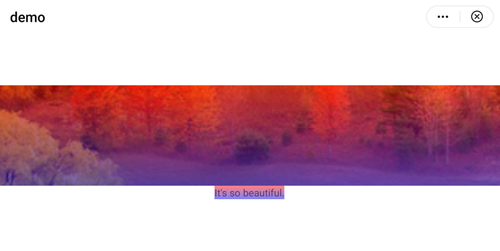
Card Color Set Through a Pseudo-Class Cannot Be Changed Back
Symptom
During card development, a pseudo-class is used for an element to change the color. The following figure shows the original background color.
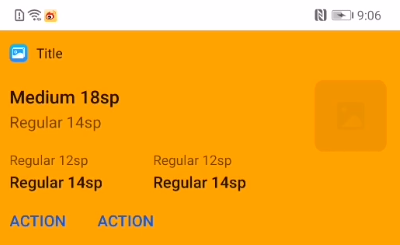
The following figure shows the color after change.
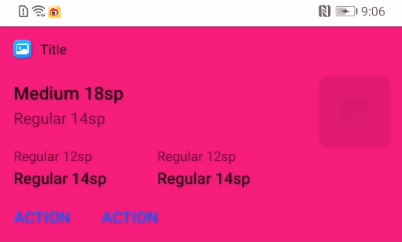
However, after you release your finger, the color does not change back.
Cause Analysis
Quick App Engine supports only some pseudo-classes of cards.
Solution
Simply add a click event to the element using the pseudo-class. No logic processing is needed for the click event.
The sample code is as follows:
<div class="sitetype_box" widgetid="8e4bf1ca-f716-46f8-8614-16d1b35002c5" onclick="test">
</div>
CSS style:
.sitetype_box {
    flex-direction: column;
    background-color:#FFBF00;
    padding: dpConvert(0) dpConvert($elementsMarginHorizontalL) dpConvert(0) dpConvert($elementsMarginHorizontalL);
}
 /** Pseudo-class */
.sitetype_box :active{
    background-color: #E40078;
}
Event method:
test(){
   console.log("message");
}
Swiping Left or Right May Drag the Video Progress Bar
Symptom
When the tab-content element (a subelement of tabs) contains the video element, the user is unable to swipe to switch between tab pages, with the result that the progress bar is dragged instead.
The code where the exception occurs is as follows:
<template>
  <div style="background-color: #00bfff;">
    <tabs index="0" >
      <tab-bar mode="fixed">
      </tab-bar>
      <tab-content>
        <div  style="flex-direction: column;">
          <text style="color: red">1</text>
          <stack class="video" >
            <video class="video1" id="111"
              src="https://ss0.bdstatic.com/-0U0bnSm1A5BphGlnYG/cae-legoup-video-target/93be3d88-9fc2-4fbd-bd14-833bca731ca7.mp4">
              </video>
          </stack>
        </div>
        <div  style="flex-direction: column;">
          <text style="color: red">2</text>
        </div>
        <div style="flex-direction: column;">
          <text style="color: red">3</text>
        </div>
      </tab-content>
    </tabs>
  </div>
</template>
Cause Analysis
The video element is a subelement of tabs. They both provide the swipe capability. The key problem lies in the video area. Based on the pop-up mechanism of the event from the inner layer to the outer layer, the system preferentially processes video swiping instead of tabs switching. Video swiping is to adjust the video playback progress.
Solution
Add a div element between video and its parent element stack to cover the video. Make sure that div is lower than video in height to ensure that the progress bar and buttons are not covered by other elements. When the user swipes across the video area, they are swiping on the div element. Because div and video are sibling elements, the video progress bar will not be dragged.
Sample code:
<template>
  <div style="background-color: #00bfff;">
    <tabs index="0" >
      <tab-bar mode="fixed">
      </tab-bar>
      <tab-content>
        <div  style="flex-direction: column;">
          <text style="color: red">1</text>
          <stack class="video">
            <video class="video1" id="111"
              src="https://ss0.bdstatic.com/-0U0bnSm1A5BphGlnYG/cae-legoup-video-target/93be3d88-9fc2-4fbd-bd14-833bca731ca7.mp4"
              onstart="start" ontouchmove="move" onseeked="seeked">
              </video>
              <div style="width: 100%;height:300px;" onclick="bof">
              </div>
          </stack>
        </div>
        <div  style="flex-direction: column;">
          <text style="color: red">2</text>
        </div>
        <div style="flex-direction: column;">
          <text style="color: red">3</text>
        </div>
      </tab-content>
    </tabs>
  </div>
</template>
White Screen Is Displayed and Buttons Do Not Respond for a While When a User Opens a Quick App
Symptom
When a user opens a quick app, a white screen is displayed and button taps do not respond. After a while, the buttons become available.
The code where the exception occurs is as follows:
<template>
  <!-- Only one root node is allowed in template. -->
  <div class="container">
    <input type="button" value="write" onclick="write" />
    <input type="button" value="delete" onclick="remove" />
  </div>
</template>
<style>
  .container {
    flex-direction: column;
    justify-content: center;
    align-items: center;
    background-color: red;
  }
</style>
<script>
  import file from '@system.file'
  import prompt from '@system.prompt';
  module.exports = {
    data: {
      componentData: {},
      arr: [],
      file: '',
      fileuri: '',
    },
    onInit() {
    },
    onReady() {
      this.write()
    },
    write() {
      console.log("handling success 11222111");
      for (let i = 0; i < 10000; i++) {
        file.writeText({
          uri: 'internal://cache/test/test' + i + '.txt',
          text: 'nihaadpafsafa fsafass faf  sfsa sf',
          encoding: 'UTF-8',
          success: function () {
            console.log('success');
          },
        })
      }
      console.log("handling success 11111");
      prompt.showToast({
        message: '10000 files have been written.',
        duration:"2000",
      })
    },
    remove() {
      file.list({
        uri: "internal://cache/test/",
        success: function (data) {
          console.log(data)
          for (let i = 0; i < 1000; i++) {
            console.log("message", data.fileList[i].uri);
            file.delete({
              uri: data.fileList[i].uri,
              success: function (data) {
                console.log("hjj handling success");
              },
              fail: function (data, code) {
                console.log("handling fail, code=" + code + data);
              }
            })
          }
        },
        fail: function (data, code) {
          console.log("handling fail, code=" + code);
        }
      })
      prompt.showToast({
        message: '10000 files have been deleted.',
        duration:"2000",
      })
    }
  }
</script>
The following screenshot shows the abnormality:
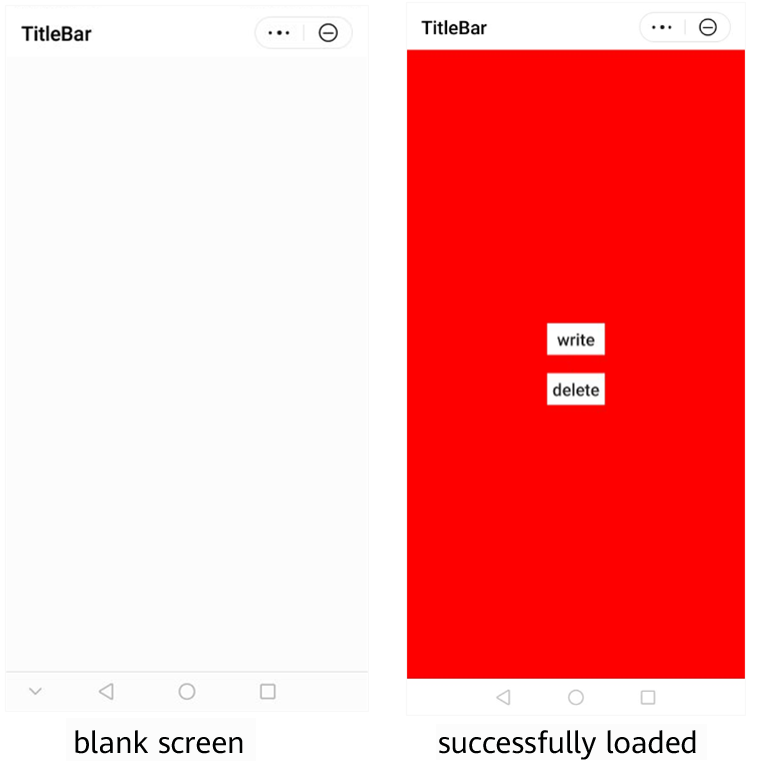
Cause Analysis
It is found that onReady uses the file API to create a large number of files when the app is launched.
A white screen is displayed because the file.write API is called in the write method to write 10,000 files in the for loop. This operation takes a period of time. As a result, the page is not rendered in time. The page can be displayed properly only after the files are all created.
File deletion has the same processing logic. When you click the delete button on the page, it takes a period of time to call the file.delete API to delete all files in the delete method of the response event. During this period, if you click another button, the system does not respond until the current operation is complete.
Solution
JavaScript event processing of Quick App Engine is single-threaded and events cannot be executed concurrently. Function executions and JavaScript event interactions are queued and processed one by one. Therefore, you are not advised to run time-consuming code in a quick app. You are advised to delete or optimize the write and delete methods. For example, create some, and perform the remaining operations later.
After flex-direction Is Set to row in the list Element, the Configured Height Does Not Take Effect
Symptom
In the list element, I have set the list height to 100 px. However, after I set flex-direction to row, the list became excessively high.
The code where the exception occurs is as follows:
<template>
    <!-- Only one root node is allowed in template. -->
    <div class="container">
            <list style="background-color: red;flex-direction:row;height: 100px;">
                <list-item type="list-item" for="listdata" style="background-color: green;">
                    <image src="{{$item}}"></image>
                </list-item>
            </list>
    </div>
</template>
<style>
    .container {
        flex-direction: column;
        justify-content: center;
        align-items: center;
    }
    .title {
        font-size: 50px;
        background-color: blue;
    }
</style>
<script>
    module.exports = {
        data: {
            componentData: {},
            listdata: ['/Common/logo.png', '/Common/logo.png', '/Common/logo.png']
        },
        onInit() {
        },
    }
</script>
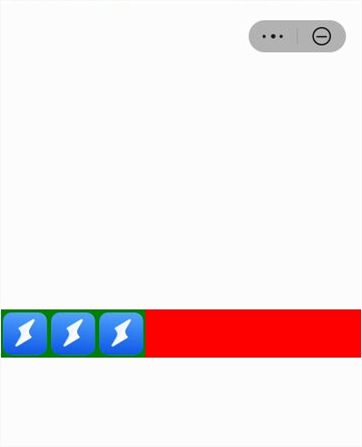
The following figure shows the abnormal display effect.
Cause Analysis
When flex-direction is set to column for div and flex-direction is set to row for list, the underlying code RecylerView onMeasure of Quick App Engine is executed multiple times. As a result, the passed value is different from the value set by you.
Solution
To solve the problem, you can add a div element to include the list element.
<template>
    <!-- Only one root node is allowed in template. -->
<div class="container">
    <!-- Add div. -->
        <div>
            <list style="background-color: red;flex-direction:row;height: 100px;">
                <list-item type="list-item" for="listdata" style="background-color: green;">
                    <image src="{{$item}}"></image>
                </list-item>
            </list>
        </div>
    </div>
</template>
<style>
    .container {
        flex-direction: column;
        justify-content: center;
        align-items: center;
    }
    .title {
        font-size: 50px;
        background-color: blue;
    }
</style>
<script>
    module.exports = {
        data: {
            componentData: {},
            listdata: ['/Common/logo.png', '/Common/logo.png', '/Common/logo.png']
        },
        onInit() {
        },
    }
</script>
The following figure shows the final effect.
Music Playback Pauses When a User Switches Songs on the Notification Bar
Symptom
During music playback, when a user switches to another page, and switches another song in the background status bar, the music playback pauses.
Cause Analysis
The audio API can only be used on the current app page. When a page where the API is called is dismissed, the page is destroyed and the bound context object no longer exists. In this case, when the user switches between the previous and next songs on the notification bar, Quick App Engine automatically pauses the current song and resets the playback status. However, the context object cannot be found for the binding event of the audio API, and the previous and next events cannot be triggered. As a result, this problem occurs.
Solution
Listen to audio events on the app home page, not only on the playback page. In this way, when the user leaves the playback page, each audio event can still be listened to, so as to control the playback logic.

Huawei Quick App Engine does not support the calling of the audio API in app.ux. Therefore, when a user exits the app, the app cannot receive the audio event callback even though the app is still playing in the background.
Sample Code
The following demo has two pages: Main (home page) and Audio. To avoid repeated code and ensure maintainability, separate the code for the Audio page as a common JavaScript for each page to call.
- The public utils.js code is as follows:
import audio from '@system.audio'; export default{ listenAudio() { var that=this; console.info("util.js listenAudio "); audio.onplay = function () { console.log('audio onplay') } audio.onpause = function () { console.log('audio onpause') } audio.onended = function () { console.log('audio onended') } audio.ondurationchange = function () { console.log('util.js ondurationchange') var total = audio.duration console.log('util.js ondurationchange total=' + total) } audio.ontimeupdate = function () { var time = audio.currentTime // console.log('util.js ontimeupdate time=' + time) } audio.onprevious = function () { audio.cover = 'https://xx.jpg' audio.title = "Piano music" audio.artist = "pianist" // Replace with NetEase cloud music resource link audio.src = 'https://xx.mp3' console.log(' util.js on previous event from notification ') } audio.onnext = function () { audio.cover = 'xx.jpg' audio.title = 'Pop'; audio.artist = 'Musician' // Replace with NetEase cloud music resource link audio.src = 'https://xx.mp3' console.log(' util.js on next event from notification ') } }, getAudioPlayState() { audio.getPlayState({ success: function (data) { console.log(`getAudioPlayState success: state: ${data.state},src:${data.src}, currentTime:${data.currentTime},autoplay:${data.autoplay},loop:${data.loop}, volume: ${data.volume},muted:${data.muted},notificationVisible:${data.notificationVisible}`); }, fail: function (data, code) { console.log('getAudioPlayState fail, code=' + code); } }); }, startPlay() { audio.play(); }, pausePlay() { audio.pause(); }, stopPlay() { audio.stop(); }, seekProress(len) { audio.currentTime = len; }, setVolume(value) { audio.volume = value; }, setMute(isMuted) { audio.muted = isMuted }, setLoop(isloop) { audio.loop = isloop }, setStreamType() { if (audio.streamType === 'music') { audio.streamType = 'voicecall' } else { audio.streamType = 'music' } console.error('audio.streamType =' + audio.streamType); }, setTitle(title) { console.info('setTitle=' + title); audio.title = title; }, setArtist(artist) { console.info('setArtist artist=' + artist) ; audio.artist = artist; }, setCover(src) { console.info('setCover src=' + src); audio.cover = src; } } - Add an audio event listener to the lifecycle function onShow of the Main page, and call listenAudio in utils.js. The sample code is as follows:
<script> import utils from '../Util/utils.js'; module.exports = { onShow(options) { utils.listenAudio(); }, } </script> - Add an audio event listener to the lifecycle function onShow of the Audio page, and call listenAudio in utils.js. The progress callback event is listened separately because the playback progress needs to be displayed on the playback page. The sample code is as follows:
onShow(options) {
  var that = this;
  utils.listenAudio();
  audio.ondurationchange = function () {
    console.log('audio ondurationchange')
    that.total = audio.duration
    console.log('audio ondurationchange total=' + that.total)
  }
  audio.ontimeupdate = function () {
    that.time = audio.currentTime
    console.log('ontimeupdate time=' + that.time)
  }
},
A Message Indicating that a Quick App Has Been Removed Is Displayed When a User Wants to Go to the Quick App Through a Deep Link
Symptom
When a deep link is used to redirect a user to an online quick app, the quick app cannot be opened, and a message is displayed indicating that the app may be removed or the user is not in the app service area.
Cause Analysis
The possible causes are as follows:
- Incorrect package name
The quick app package name in the deep link is incorrect. The app with the entered package name is not released on HUAWEI AppGallery. As a result, Huawei Quick App Loader cannot find the app.
- Incorrect release countries/regions
The package name is correct, but the quick app is not released in the service area where the user is located. For example, you have released quick app A in Germany, but the service area of the user's HUAWEI ID is set to the United Kingdom. In this case, this problem occurs when the user uses the deep link to open the quick app.
Solution
- Incorrect package name
Modify the deep link redirection code and enter the correct name of the released app package.
- Incorrect release countries/regions
Switch the service area of the test account to the country/region where the app is release. To switch to the country/region, sign in to HUAWEI AppGallery and go to Me > Settings > Country/Region.
Background Color Filling Error of the richtext Element
Symptom
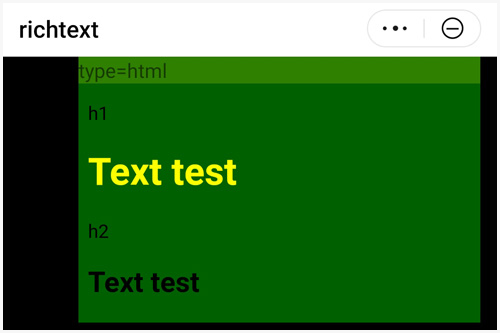
When the richtext element is used to display web page content, a white border appears, which affects the overall display effect.
The code where the exception occurs is as follows:
<template>
  <div class="doc-page">
    <div class="page-title-wrap">
      <text class="page-title ">richtext</text>
    </div>
    <div class="item-container">
      <text class="item-hint">type=html</text>
      <richtext type="html" class="rich-text">{{content}}</richtext>
    </div>
  </div>
</template>
<script>
  export default {
    private: {
      content: `<div class="item-content"  style="background-color: #006000";>
        <style>h1{color: yellow;}</style>
        <p class="item-title">h1</p>
        <h1>Text test</h1>
        <p class="item-title">h2</p>
        <h2>Text test</h2>
      </div>`
    },
    onInit () {
      this.$page.setTitleBar({text: 'richtext'})
    }
  }
</script>
<style>
  /* @import '../../../common/css/common.css'; */
  .doc-page{
    background-color: #000000;
  }
  .item-container {
    margin-bottom: 30px;
    margin-right: 30px;
    margin-left: 30px;
    flex-direction: column;
  /* background-color:#808000; */
  }
  .item-content {
    flex-direction: column;
  }
  .item-title {
    background-color:#1e90ff;
  }
  .item-hint {
    background-color:#308000;
  }
  .rich-text {
  }
</style>
The following figure demonstrates the exception.
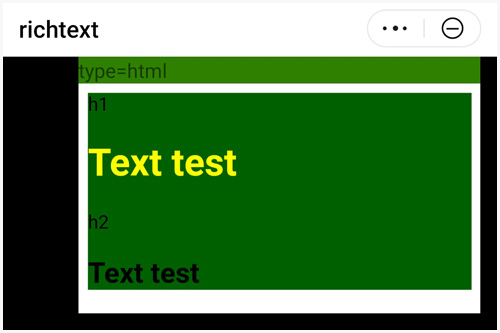
Cause Analysis
When the richtext element contains HTML content, the value of background-color set through a class in the quick app does not take effect. If the richtext element contains only the body of the web page, a white border is displayed around the richtext element even if the background color has been set for the body. Complete HTML content that needs to be written in richtext and set the background color for the HTML tag. After this, the background color can cover the border, and the white border will not appear.
Solution
Add a complete HTML page to richtext, and set the background color to cover the white border in the HTML tag.
The modified code is as follows:
<template>
  <div class="doc-page">
    <div class="page-title-wrap">
      <text class="page-title ">richtext</text>
    </div>
    <div class="item-container">
      <text class="item-hint">type=html</text>
      <richtext type="html" class="rich-text">{{content}}</richtext>
    </div>
  </div>
</template>
<script>
  export default {
    private: {
      content: `<!DOCTYPE html>
                <html lang="en" style="background-color: #006000;">
                    <head>
                    <meta charset="UTF-8" />
                    <meta name="viewport" content="width=device-width, initial-scale=1.0" />
                    <title>Document</title>
                    </head>
      <div class="item-content"  style="background-color: #006000";>
        <style>h1{color: yellow;}</style>
        <p class="item-title">h1</p>
        <h1>Text test</h1>
        <p class="item-title">h2</p>
        <h2>Text test</h2>
      </div>
      </body>
      </html>`
    },
    onInit () {
      this.$page.setTitleBar({text: 'richtext'})
    }
  }
</script>
<style>
  /* @import '../../../common/css/common.css'; */
  .doc-page{
    background-color: #000000;
  }
  .item-container {
    margin-bottom: 30px;
    margin-right: 30px;
    margin-left: 30px;
    flex-direction: column;
  /* background-color:#808000; */
  }
  .item-content {
    flex-direction: column;
  }
  .item-title {
    background-color:#1e90ff;
  }
  .item-hint {
    background-color:#308000;
  }
  .rich-text {
  }
</style>
The optimized display effect is as follows.
Listening to Network Status Changes Globally
Description
The network status API of the quick app can be used to monitor the network status of a user's mobile phone, for example, to check whether the network is available and whether the network type is Wi-Fi or mobile network. You can provide different UI designs based on the network type and traffic consumption in your app. However, if the network status is monitored on each page, too much duplicate code is required and some pages may be missed for listening. Is there any way to implement global listening? Yes. You can call the network status API in app.ux and use watch on each page to obtain the network status.
Implementation
- Define a global object in app.ux. In the following sample code, localeData is a global object, in which the currentType attribute is defined to record the result returned by the network status API.

Do not define currentType directly. Otherwise, the listener in step 3 cannot obtain the network status in real time. currentType needs to be listened on as an object attribute.
- Call the network status API in onCreate() of app.ux.
- The specific page calls the $watch() function to listen to the value of currentType in step 1 and obtain the result in real time.
Sample code:
app.ux file:
<script>
  import network from '@system.network';
  module.exports = {
    onCreate() {
      console.info('Application onCreate');
      this.listenNetwork();
    },
    onDestroy() {
      console.info('Application onDestroy');
      network.unsubscribe();
    },
    listenNetwork: function () {
      console.info("listenNetwork START ");
      var that = this
      network.subscribe({
        callback: function (ret) {
          that.data.localeData.currentType = ret.type;
          console.info("listenNetwork CALLBACK :" + that.data.localeData.currentType);
        },
        fail: function (erromsg, errocode) {
          console.log('network.subscribe----------' + errocode + ': ' + erromsg)
        }
      })
    },
    data: {
      localeData: {
        currentType: '',
      }
    }
  }
</script>
hello.ux file:
<template>
  <!-- Only one root node is allowed in template. -->
  <div class="container">
    <text class="title">Network Type: {{currentType.currentType}}</text>
  </div>
</template>
<style>
  .container {
    flex-direction: column;
    justify-content: center;
    align-items: center;
  }
  .title {
    font-size: 100px;
  }
</style>
<script>
  module.exports = {
    data: {
      componentData: {},
      currentType: {},
    },
    onInit() {
      this.$page.setTitleBar({
        text: 'menu',
        textColor: '#ffffff',
        backgroundColor: '#007DFF',
        backgroundOpacity: 0.5,
        menu: true
      });
      this.currentType=this.$app.$def.data.localeData;
      this.$watch('currentType.currentType', 'listenNetType');
    },
    listenNetType: function (newValue, oldValue) {
      console.info("listenNetType newValue= " + newValue + ", oldValue=" + oldValue);
      if(newValue==='wifi'){
      }else{
      }
    },
  }
</script>
Parameter Obtaining Error Occurs After a User Is Redirected to a Quick App Through a Deep Link
Symptom
When a deep link with parameters redirects a user to the home page of a quick app and the launch mode of the home page is set to singleTask, one of the following situations occurs:
- If the quick app has not been opened, the parameters can be received.
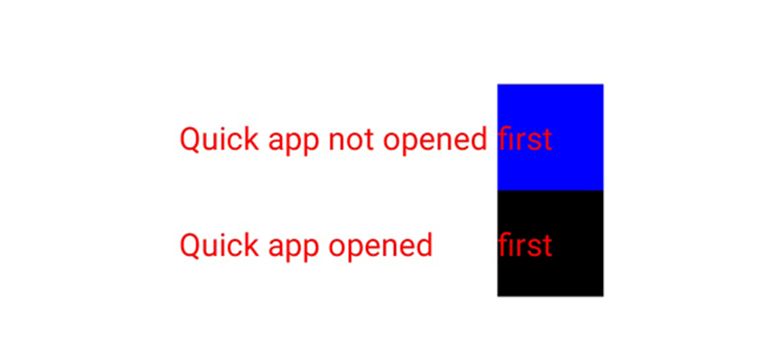
- If the user was redirected to the target page before and pressed the home button to switch the quick app to the background, the parameters different from those in the first time redirection cannot be received. Trace logs show that onRefresh was triggered on the home page, but this function recorded parameters in the previous deep link.
The code where the exception occurs is as follows:
Deep link in the first time redirection: hap://app/com.huawei.text?test=first
Deep link in the second time redirection: hap://app/com.huawei.text?test=second
Code for going to the home page of a quick app:
<template>
  <div style="flex-direction: column;align-items: center;justify-content: center;">
    <div>
      <text style="width:300px;height:100px;color:red">Quick app not opened</text>
      <text style="background-color: blue;width:100px;height:100px;color:red">{{ceshi}}</text>
    </div>
    <div>
      <text style="width:300px;height:100px;color:red">Quick app opened</text>
      <text style="background-color: black;width:100px;height:100px;color:red">{{ceshii}}</text>
    </div>
  </div>
</template>
<style>
</style>
<script>
  module.exports = {
    data: {
      ceshi: '',
      ceshii: '',
    },
    onInit() {
      this.ceshi = this.test
      console.log("message", this.test, "===========");
    },
    onShow() {
    },
    onRefresh() {
      this.ceshii = this.test
      console.log("message111111111", this.test, "===========", this.ceshii);
    }
  }
</script>
The following figure shows the parameters obtained in the scenario where the home page of the quick app is opened twice.
Cause Analysis
When the quick app is opened and the user is redirected through a deep link again, the lifecycle function onRefresh is triggered. Parameters are received in onRefresh. However, it is mistakenly considered that these parameters are the same as those received before because they are all received in this.xxx format. Actually, parameters in onRefresh need to be obtained through the lifecycle function.
Solution
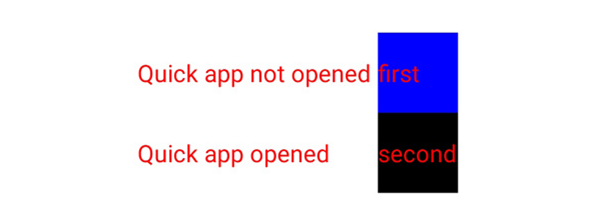
The parameters of the lifecycle function onRefresh are in data of onRefresh(data) and can be obtained using data.xxx. Optimized code:
<template>
  <div style="flex-direction: column;align-items: center;justify-content: center;">
    <div>
      <text style="width:300px;height:100px;color:red">Quick app not opened</text>
      <text style="background-color: blue;width:100px;height:100px;color:red">{{ceshi}}</text>
    </div>
    <div>
      <text style="width:300px;height:100px;color:red">Quick app opened</text>
      <text style="background-color: black;width:100px;height:100px;color:red">{{ceshii}}</text>
    </div>
  </div>
</template>
<style>
</style>
<script>
  module.exports = {
    data: {
      ceshi: '',
      ceshii: '',
    },
    onInit() {
      this.ceshi = this.test
      console.log("message", this.test, "===========");
    },
    onShow() {
    },
    onRefresh(e) {
      this.ceshii = e.test
      console.log("message111111111", e.test, "===========", this.ceshii);
    }
  }
</script>
The following figure shows the optimized effect.
Setting the Background Color at the Beginning of the Text
Description
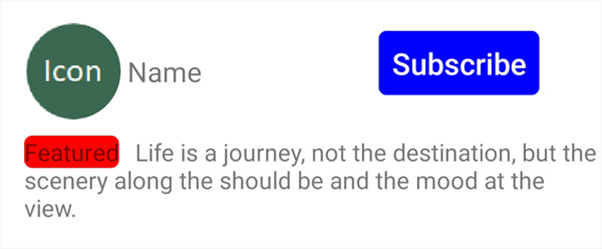
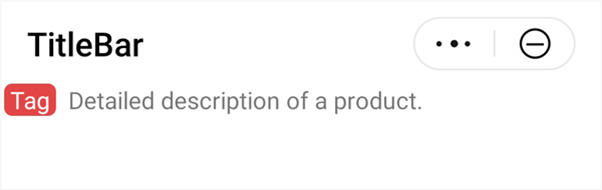
When you place a product on an e-commerce app, you may need to add a label at the beginning of the text, as shown in the following example. Labels with different background colors can help users distinguish different types of text, subsequently increasing the click-through rate and purchase rate.
Both the a and span elements do not support background color settings. If you use two text elements, a gap will be displayed in front of the second text, preventing the text from being properly wrapped. So, how can we achieve this effect?
Implementation
You can set position to absolute for the first text element and set text-indent for the second text element to a proper width value.
The sample code is as follows:
<template>
  <div style="flex-direction: column;">
    <div>
      <text id="11" style="background-color: #E34547;color:#FFFFFF;position: absolute;border-radius: 10px;margin-left: 5px">{{value}}</text>
      <text style="text-indent:{{kuan}};">Detailed description of a product.</text>
    </div>
  </div>
</template>
<style>
</style>
<script>
  module.exports = {
    data: {
      kuan: '',
      value: 'Featured'
    },
    onInit() {
      this.$page.setTitleBar({ text: '' })
      this.value=" Tag "
    },
    onShow() {
      '// Trigger operations when an element is shown.'
      var that = this
      this.$element('11').getBoundingClientRect({
        success: function (data) {
          that.kuan = data.width + 20 + 'px'
          console.log("message", that.kuan);
          console.log('getBoundingClientRect succeeded, result data =' + JSON.stringify(data));
          console.log('getBoundingClientRect succeeded, result data =' + data.width,'hou',that.kuan);
        },
      });
    },
  }
</script>
The following figure shows the app demo.
Width Setting of the list-item Element Is Invalid
Symptom
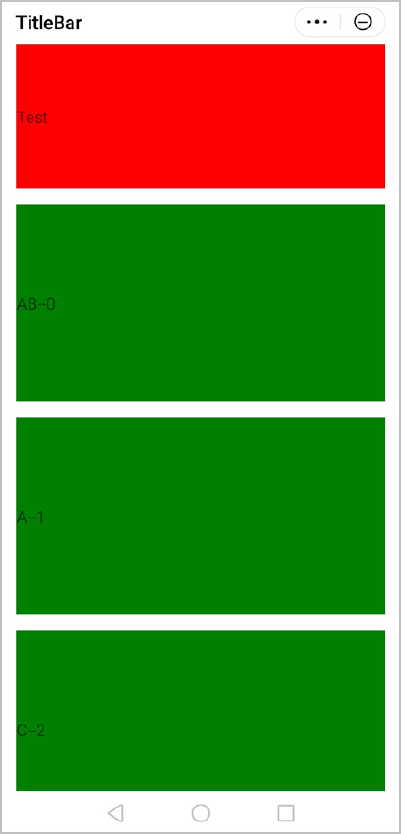
After layout-type is set to stagger for the list element, the width of the list-item element cannot be changed, and the configured width does not take effect. The width of each list-item element is the same.
The code where the exception occurs is as follows:
<template>
    <div style="padding-left:30px;padding-right: 30px;">
        <list style="flex-direction:row-reverse;width: 690px;">
            <list-item type="zxc">
                <list style="width: 690px;layout-type:stagger;display: flex;">
                    <list-item type="qqq" style="width: 100px;height: 300px;margin-bottom:30px;background-color: red">
                        <text class="font-big">Test</text>
                    </list-item>
                    <block for="{{listData}}">
                        <list-item type="qqq" style="width: 300px;height: 400px;margin-bottom:30px;background-color: green">
                            <text class="font-big">{{$item}}--{{$idx}}</text>
                        </list-item>
                    </block>
                </list>
            </list-item>
        </list>
    </div>
</template>
<style>
</style>
<script>
    module.exports = {
        data: {
            listData:['AB','A','C','D','E']
        },
        onInit() {
            this.$page.setTitleBar({ text: '' })
            this.accept = this.body;
            console.debug("message debug");
            console.log("message normal");
        },
    }
</script>
The effect is as follows.
Cause Analysis
When layout-type of the list element is set to stagger, only the height of each list-item element can be customized. The width depends on the width set for the list element and the value of columns. The width of each column is equal to the average width of the list element.
Solution
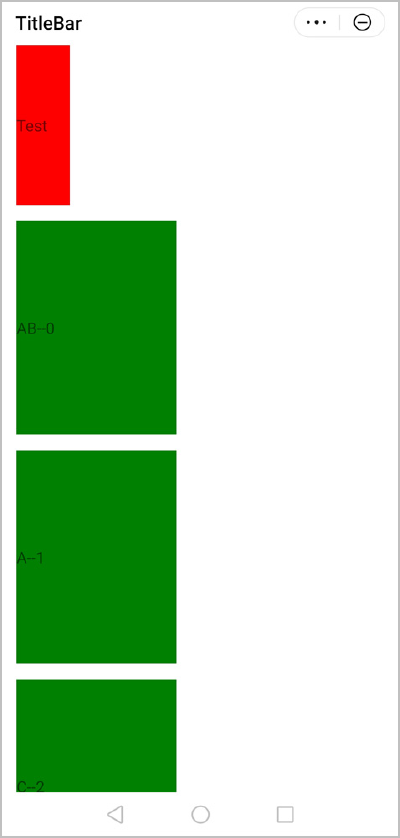
Delete layout-type:stagger. Customize the width of list-item based on the default grid layout.
<template>
    <div style="padding-left:30px;padding-right: 30px;">
        <list style="flex-direction:row-reverse;width: 690px;">
            <list-item type="zxc">
                <list style="width: 690px;display: flex;">
                    <list-item type="qqq" style="width: 100px;height: 300px;margin-bottom:30px;background-color: red">
                        <text class="font-big">Test</text>
                    </list-item>
                    <block for="{{listData}}">
                        <list-item type="qqq" style="width: 300px;height: 400px;margin-bottom:30px;background-color: green">
                            <text class="font-big">{{$item}}--{{$idx}}</text>
                        </list-item>
                    </block>
                </list>
            </list-item>
        </list>
    </div>
</template>
<style>
</style>
<script>
    module.exports = {
        data: {
            listData:['AB','A','C','D','E']
        },
        onInit() {
            this.$page.setTitleBar({ text: '' })
            this.accept = this.body;
            console.debug("message debug");
            console.log("message normal");
        },
    }
</script>
The modified effect is as follows.
Users Cannot Go Back to the Card by Tapping the Back Button from a Specified Page in a Quick App
Symptom
When page A in a quick app is opened, a user is redirected to page B of the quick app through a card. After the user taps the back button, the system returns to page A and then the card, but the user cannot directly exit the quick app and return to the card.
Cause Analysis
This problem occurs because the default launch mode standard is used on the page. In standard mode, a new target page is opened each time (multiple same pages exist when the target page address is accessed multiple times). As a result, pages A and B are cached in the page stack in sequence. When you exit, the pages are popped out in sequence and the user cannot go back in one-click mode. Therefore, you are advised to set the launch mode of page B to clearTask in dynamic declaration mode when a user is redirected from a card to a quick app. If clearTask is specified, page A is cleared and page B is opened. In this case, only page B exists in the page stack. So you can return to the previous page to exit the app.
Solution
Sample code for deep linking a user to a quick app from a card:
<!DOCTYPE html>
<html lang="en">
<head>
  <meta charset="UTF-8">
  <meta name="viewport" content="width=device-width, initial-scale=1.0">
  <meta http-equiv="X-UA-Compatible" content="ie=edge">
  <title>Quick app test</title>
</head>
<body>
  <a href="hwfastapp://com.huawei.hello1/Test?___PARAM_LAUNCH_FLAG___=clearTask">Open through hwfastapp.</a>
  <br>
  <br>
  <a href="hap://app/com.huawei.hello1/Test?___PARAM_LAUNCH_FLAG___=clearTask">Open through hap.</a>
</body>
</html>
Target page of the quick app to which the card is redirected (There is always only one page based on the number of current page stacks.)
<template>
  <div class="container">
    <text>___PARAM_LAUNCH_FLAG___=</text>
    <text>{{taskflag}}</text>
    <text>Number of current page stacks.</text>
    <text>{{length}}</text>
  </div>
</template>
<style>
  .container {
    flex-direction: column;
    align-content: center;
    align-items: center;
    justify-content: center;
  }
  text {
    margin-bottom: 50px;
  }
</style>
<script>
import router from '@system.router';
  export default {
    data: {
      // The default is the local app internal image.
      photoUri: '/Common/logo.png',
      taskflag:'',
      PARAM_LAUNCH_FLAG:'',
      length:''
    },
    onInit() {
      this.$page.setTitleBar({ text: 'deepLink' })
      var that=this;
      that.taskflag=this.PARAM_LAUNCH_FLAG;
      // Call the getPages method.
      let pages = router.getPages()
      // The obtained value is a JSON array. Therefore, the value cannot be displayed directly. You can use the following method to display the value:
      console.log("tag", this.printJSONArray(router.getPages()));
      that.length= router.getLength();
      console.log("pages' length = "+that.length);
    },
    printJSONArray(array) {
      let result = ""
      const suffix = ", "
      Array.isArray(array) && array.forEach((element, index) => {
        result = result + JSON.stringify(element) + (index === array.length-1 ? "" : ", ")
        })
      return result
    }
  }
</script>
Suggestions and Summary
The page launch mode can be configured in two modes: static declaration in the manifest file and dynamic parameter pass declaration. The dynamic mode is recommended. The static declaration mode applies to scenarios with fixed settings.
Error Caused by Reading an Undefined Variable in a Quick App
Symptom
During JavaScript development, an error often occurs during reading of an undefined variable or a variable with a null value. For example, the app.ux file contains the following error code:
<!-- a = {}; -->
<text>{{ a.b.c }}</text>
<!-- Error: Cannot read property 'c' of undefined -->
Solution
You can use either of the following solutions to solve the problem:
[Solution 1] Use && to avoid errors by defining the execution sequence of logical operations. The modified code is as follows:
<text>{{ a && a.b && a.b.c }}</text> [Solution 2] This solution is recommended. Add a function to ViewModel. For example, you can add the checkEmpty function. Sample code:
export default {
  checkEmpty(...args) {
    let ret
    if (args.length > 0) {
      ret = args.shift()
      let tmp
      while (ret && args.length > 0) {
        tmp = args.shift()
        ret = ret[tmp]
      }
    }
    return ret || false
  }
}
In this way, this method can be easily called at the position where attributes need to be obtained. The modified code is as follows:
<text>{{checkEmpty(a, 'b', 'c')}}</text> Avoiding JSON.parse() Parsing Errors in Quick Apps
Symptom
The data returned by the fetch request in the code is a JSON character string by default. You can parse the JSON object. However, once the server permission verification fails, an HTML page similar to error 503 is returned. In this case, JSON parsing fails.
Solution
You can use either of the following solutions to solve the problem:
[Solution 1] Add try-catch to each place where JSON.parse() is executed to capture and handle errors.
[Solution 2] This solution is recommended. Process JSON.parse() in the app.ux file of the quick app in advance and use try-catch. Track data or return the default data when an exception occurs. The sample code is as follows:
export function parseProxy () {
  const rawParse = JSON.parse
  JSON.parse = function (str, defaults) {
    try {
      return rawParse(str)
    }
    catch (err) {
      console.error(`JSON parsing failure:${str}, ${err.stack}`)
      return defaults
    }
  }
}
Implementing the Sticky Positioning in the list Element
Solution
Sticky positioning is an interaction mode first applied to web pages.
- The initial position of the sticky element is normally near the top of the web page.
- Once the user scrolls down on the page beyond the sticky element's initial position, the sticky element then sticks to the top of the page as the user continues scrolling down.
- When the user scrolls back up past its initial position, the sticky element unsticks.
Sticky positioning is implemented on traditional web pages through a listener to the scroll event. When the page scrolls to a certain position, processing is performed to change the position of the sticky element on the screen.
Different from the traditional web page, a quick app applies the scroll event only to the list element and obtains positions in the relative scrolling coordinates. To implement sticking positioning, the quick app needs to calculate the positions in the absolute coordinates through accumulation based on the obtained relative position data. This may cause potential performance problems, considering that the scroll event will be triggered frequently when a user scrolls the list.
Therefore, in the framework, you are advised to use the appear and disappear events to determine the scrolling position. The appear event is triggered when an element appears, and the disappear event is triggered when an element disappears.
The appear and disappear events are common events. All elements that support common events, including the div and list-item elements, support the two events. Using these two events, you can implement sticky positioning in most scenarios.
Sample code:
<template>
  <!-- Use the stack element to override the list with the mask for the sticky element in the list.-->
  <stack class="tutorial-page">
    <list class="list">
      <!-- Listen to the appear and disappear events of elements above the sticky element to control the display of the mask for the sticky element.-->
      <list-item type="top" ondisappear="showMask" onappear="hideMask">
        <div class="height-300 bg-blue">
          <text>Sticky element in the list</text>
        </div>
      </list-item>
      <!-- Sticky element in the list-->
      <list-item type="ceiling">
        <div class="height-300 bg-red">
          <text>Sticky element in the list</text>
        </div>
      </list-item>
      <!-- Common list element-->
      <list-item for="list" type="common" class="list-item">
        <text class="text">{{$item}}</text>
      </list-item>
    </list>
    <!-- Mask for the sticky element -->
    <div show="{{maskShow}}">
      <div class="height-300 bg-red">
          <text>Sticky element in the list</text>
      </div>
    </div>
  </stack>
</template>
<style lang="less">
  .tutorial-page {
    flex-direction: column;
    .list {
      width: 750px;
      flex-grow: 1;
      .list-item {
        height: 150px;
        border-bottom-width: 1px;
        border-bottom-color: #0faeff;
        .text {
          flex: 1;
          text-align: center;
        }
      }
    }
    .height-300 {
      height: 300px;
    }
    .bg-red {
      flex-grow: 1;
      justify-content: center;
      background-color: #f76160;
    }
    .bg-blue {
      flex-grow: 1;
      justify-content: center;
      background-color: #0faeff;
    }
  }
</style>
<script>
  export default {
    private: {
      maskShow: false,
      appearCount: 0,
      list: ['A', 'B', 'C', 'D', 'E', 'F', 'G', 'H', 'I', 'J', 'K', 'L', 'M', 'N']
    },
    onInit(){
      this.$page.setTitleBar({ text: 'Effect display: sticking' })
    },
    showMask () {
      this.maskShow = true
    },
    hideMask () {
      // When the page is loaded, the appear events of all elements are triggered once. Therefore, the first appear event needs to be filtered out.
      if (this.appearCount) {
        this.maskShow = false
      } else {
        ++this.appearCount
      }
    }
  }
</script>
In the preceding code, elements above the sticky element in the list are list-item elements with type set to top, and the sticky element in the list is the list-item element with type set to ceiling. The roadmap for implementing sticky positioning is as follows:
- Use the stack element as the container of the entire page. Subelements are stacked in sequence and the latter one overrides the previous one.
- Add a subelement to the end of the stack element as the mask to block the previous subelement. The display effect of the subelement is that it is stuck at the top of the page. The rendering effect of the mask is the same as that of the sticky element.
- When a sticky element sticks to the top of the page, the mask is displayed to implement sticky positioning. When sticky positioning is canceled, the mask is hidden.
The sticking conditions are as follows:
- When the page is scrolled upward and elements above the sticky element disappear from view, the sticky element needs to stick to the top of the page. Therefore, listen to the disappear event of upper elements and display the mask once detecting the event.
- When the page is scrolled down and upper elements appear on the screen, the sticky element needs to be unstuck. Therefore, listen to the appear event of upper elements and hide the mask once detecting the event.
Implementing Lazy Loading of Tabs
Usually, a tab bar will contain multiple tabs. For example, a news app may include tabs such as Recommended, Hot, Videos, and those for other categories.
If you use the tabs element directly, all tabs will be loaded by default. As a result, the JavaScript thread needs to render each tab page and cannot respond to click events in time. This compromises user experience greatly.
To address this, you can delay rendering until the user taps a tab, rather than rendering a page when the page is initialized. This function can be implemented by running the if statement.
Sample code:
<template>
  <div class="tutorial-page">
    <tabs onchange="onChangeTabIndex">
      <tab-bar class="tab-bar" mode="scrollable">
        <text for="{{tabHeadList}}" class="{{currentIndex === $idx ? 'active' : ''}}">{{$item.title}}</text>
      </tab-bar>
      <tab-content class="tab-content">
        <div class="tab-content-section" for="{{tabHeadList}}">
          <!-- During the initialization, if the value of render is false, the tab is not rendered. When the tab is tapped for the first time, the value changes to true. -->
          <text if="{{$item.render}}">{{$item.title}}</text>
        </div>
      </tab-content>
    </tabs>
  </div>
</template>
<style lang="less">
  .tutorial-page {
    flex-direction: column;
    justify-content: center;
    align-items: center;
    .tab-bar text{
      padding: 0 25px;
      text-align: center;
      font-size: 34px;
    }
    .tab-bar .active {
      color: #FF0000;
    }
    .tab-content {
      flex: 1;
      background-color: #eeeeee;
      .tab-content-section {
        flex: 1;
        margin: 10px;
        background-color: #ffffff;
        justify-content: center;
        text {
          text-align: center;
          color: #FF0000;
        }
      }
    }
  }
</style>
<script>
  export default {
    private: {
      tabHeadList: [
        { title: 'Recommended', render: false },
        { title: 'Hot', render: false },
        { title: 'Videos', render: false },
        { title: 'Jokes', render: false },
        { title: 'Cars', render: false },
        { title: 'Society', render: false },
        { title: 'Entertainment', render: false },
        { title: 'Military', render: false },
        { title: 'Sports', render: false },
        { title: 'Finance', render: false }
      ],
      currentIndex: 0
    },
    onInit () {
      this.$page.setTitleBar({ text: 'Lazy loading the tab...' })
    },
    /**
     * Modify the indexed data item on the list.
     * @param index
     */
    modifyListItemData (index) {
      this.tabHeadList[index].render = true
    },
    /**
     * Listen to value changes of index for the tabs component, whose value is set to 0 by default.
     * @param evt
     */
    onChangeTabIndex (evt) {
      this.currentIndex = evt.index
      this.modifyListItemData(evt.index)
    }
  }
</script>
div Element Style Is Abnormal Due to Too Many Lines in the Text
Symptom
When the text element contains multiple lines of text, the div element next to it will be deformed.
The code where the exception occurs is as follows:
<template>
  <div class="container">
    <div style="align-items: center;">
       <div class="typscolor" style="background-color: blue; opacity: 0.26; margin-left: 16px;">
</div>
      <text>{{text}}</text>
       <div class="typscolor" style="background-color: blue; opacity: 0.26; margin-left: 16px;">
</div>
      <text>{{text}}</text>
       <div class="typscolor" style="background-color: blue; opacity: 0.26; margin-left: 16px;">
</div>
      <text>{{text}}</text>
    </div>
  </div>
</template>
<style>
  .container {
    flex-direction: column;
    justify-content: center;
    height: 100%;
  }
   text {
    font-size: 24px;
  }
  .typscolor {
      border-radius: 50%;
      width: 30px;
      height: 30px;
      background-color: red;
      margin-right: 8px;
  }
</style>
<script>
  module.exports = {
    data: {
      text:'The circle on the left is displayed abnormally when there are too many texts.'
    },
    onInit() {
    },
  }
</script>
In the figure below, the circles are deformed.
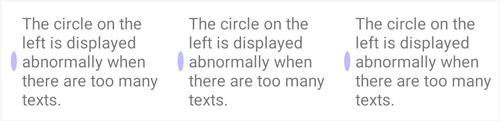
Cause Analysis
When the text element contains too much content, its width will increase, and less width will be left for the div element. That's because the flex layout automatically adjusts the width of both elements, so the div element is deformed.
Solution
To resolve this, set the flex-shrink attribute to 0 for the div element.
The modified code is as follows:
<template>
  <div class="container">
    <div style="align-items: center;">
       <div class="typscolor" style="background-color: blue; opacity: 0.26; margin-left: 16px;"></div>
      <text>{{text}}</text>
       <div class="typscolor" style="background-color: blue; opacity: 0.26; margin-left: 16px;"></div>
      <text>{{text}}</text>
       <div class="typscolor" style="background-color: blue; opacity: 0.26; margin-left: 16px;"></div>
      <text>{{text}}</text>
    </div>
  </div>
</template>
<style>
  .container {
    flex-direction: column;
    justify-content: center;
    height: 100%;
  }
   text {
    font-size: 24px;
  }
  .typscolor {
      border-radius: 50%;
      width: 30px;
      height: 30px;
      background-color: red;
      margin-right: 8px;
      flex-shrink: 0;   /* Add this attribute. */
  }
</style>
<script>
  module.exports = {
    data: {
      text:'The circle on the left is displayed abnormally when there are too many texts.'
    },
    onInit() {
    },
  }
</script>
The following figure illustrates the normal effects.
onShow Lifecycle Function on the Redirection Target Page Is Not Triggered
Symptom
When a user is redirected to a page that references only a single custom element in a quick app through the router.push API, the onShow lifecycle function for that page cannot be triggered. The following figure shows details.
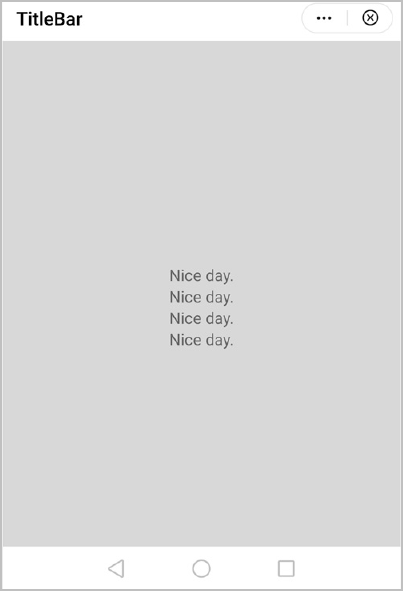
The code where the exception occurs is as follows:
Code of the page:
<import name="listone" src="./aa.ux"></import>
<template>
<listone></listone>
</template>
<script>
  import prompt from '@system.prompt'
  export default {
    private: {
    },
    onInit: function () {
    },
    onShow() {
      console.log('The onShow event triggers');
      prompt.showToast({
        message: 'The onShow event triggers'
      })
    }, // Triggering failed.
  }
</script>
<style>
  .demo-page {
    flex-direction: column;
    justify-content: center;
    align-items: center;
  }
  .title {
    font-size: 40px;
    text-align: center;
  }
</style>
Code for the custom element aa.ux:
<template>
  <div class="container">
    <text>Nice day.</text>
    <text>Nice day.</text>
    <text>Nice day.</text>
    <text>Nice day.</text>
  </div>
</template>
<style>
 .container {
    flex-direction: column;
    justify-content: center;
align-items: center;
background-color: #D8D8D8;
  }
</style>
<script>
  module.exports = {
    data: {
    },
    onInit() {
    },
  }
</script>
Cause Analysis
Huawei Quick App Engine does not trigger the onShow lifecycle function if the root node of the page is a custom element. However, the function can be triggered for a subelement.
Solution
Add the div element, instead of a custom element, as the root node.
The modified code of the page is as follows:
<import name="listone" src="./aa.ux"></import>
<template>
  <!-- The template can contain only one root node. -->
  <div><!-- Add div as the root node. -->
    <listone></listone>
  </div>
</template>
<script>
  import prompt from '@system.prompt'
  export default {
    private: {
    },
    onInit: function () {
    },
    onShow() {
      console.log('The onShow event triggers');
      prompt.showToast({
        message: 'The onShow event triggers'
      })
    },
  }
</script>
<style>
  .demo-page {
    flex-direction: column;
    justify-content: center;
    align-items: center;
  }
  .title {
    font-size: 40px;
    text-align: center;
  }
</style>
The modified effect is as follows.
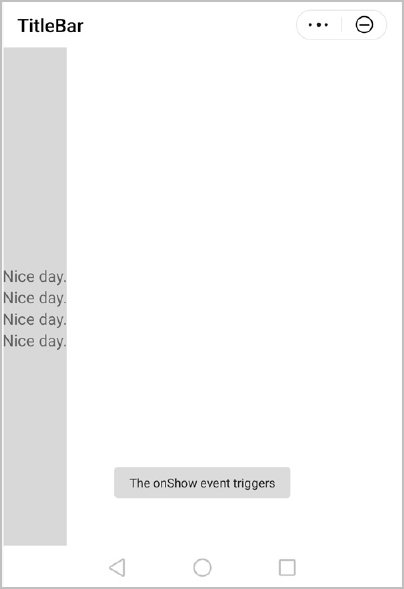
Unmasking a Password
Description
Many apps support account registration and sign-in. When a user enters a password, the password is usually masked for security purposes. However, users may need to know which character they have just entered to ensure that they have entered the correct password. To address this issue, you can add a button next to the text box, which enables users to mask and unmask the password.
Implementation
- Use the input element for the password input box. This element provides multiple types, and you need to bind types to dynamic variables. Set type to password for a ciphertext password, and to text for a plaintext password.
- Place the cursor at the end of the password during the switchover, or the cursor will appear at the beginning of the password after the switchover. You can use the setSelectionRange() method to place the cursor. In the method, set the start and end parameters to the current text length.
Sample code:
<template>
  <div class="container">
    <stack class="input-item">
      <input class="input-text" type="{{inputtype}}" id="inputpsdID" placeholder="please enter password" onchange="showChangePrompt"></input>
      <image src="../Common/lock.png"  class="lock" onclick="switchpassandshow"></image>
    </stack>
  </div>
</template>
<style>
  .container {
    flex: 1;
    padding: 20px;
    flex-direction: column;
    align-items: center;
  }
  .input-item {
    margin-bottom: 80px;
    margin-top: 10px;
    margin-left: 16px;
    margin-right: 16px;
     align-items: center;
     justify-content: flex-end;
  }
  .lock{
     width: 40px;
     height:54px;
  }
  .input-text {
    height: 80px;
    width: 100%;
    line-height: 80px;
    border-top-width: 1px;
    border-bottom-width: 1px;
    border-color: #999999;
    font-size: 30px;
    background-color: #ffffff;
    padding-right: 42px;
  }
  .input-text:focus {
    border-color: #f76160;
  }
</style>
<script>
  export default {
    data: {
      inputtype: 'password',
      lenth: 0
    },
    onInit() {
      this.$page.setTitleBar({ text: 'Switching between plaintext and ciphertext' });
    },
    showChangePrompt(e) {
      this.lenth = e.value.length;
      console.info("showChangePrompt   this.lenth= " + this.lenth);
    },
    switchpassandshow: function () {
      var com = this.$element('inputpsdID');
      if (this.inputtype === 'password') {
        this.inputtype = 'text';
      } else {
        this.inputtype = 'password';
      }
       com.setSelectionRange({ start: this.lenth, end: this.lenth});
    }
  }
</script>
The final effect is as follows.
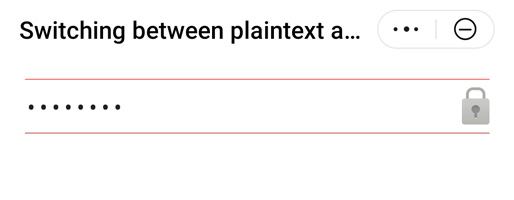
Implementing the Function of Touching and Holding an Image to Save It
Description
Touching and holding images to save them to the album is a common feature on mobile devices. HUAWEI Quick App does not currently have any API to achieve this function. However, you can use the longpress event to achieve the same effect.
Implementation
Use the image element to render images and add the longpress event to the element.
Sample code:
<template>
  <div class="doc-page">
    <div class="page-title-wrap">
      <text class="page-title">{{componentName}}</text>
    </div>
    <div class="item-container">
      <div class="item-content">
        <image src="https://tse1-mm.cn.bing.net/th/id/OIP.QFyNrABM6FhaY_0TCuUZqgHaFj?pid=Api&rs=1" id="image" style="object-fit:cover" onlongpress="onImageLongpress"></image>
      </div>
    </div>
  </div>
</template>
<style>
  .doc-page {
    flex: 1;
    flex-direction: column;
  }
  .item-container {
    margin-top: 40px;
    margin-bottom: 40px;
    flex-direction: column;
  }
  .item-title {
    padding-left: 30px;
    padding-bottom: 20px;
    color: #aaaaaa;
  }
  .item-content {
    height: 200px;
    justify-content: center;
  }
  #image {
    width: 240px;
    height: 160px;
    object-fit: contain;
  }
</style>
<script>
import prompt from'@system.prompt'
import media from '@system.media'
export default{
  private: {
        componentName:"Touch and hold the following picture to save to the album:",
    inputImageURL: 'https: //tse1-mm.cn.bing.net/th/id/OIP.QFyNrABM6FhaY_0TCuUZqgHaFj?pid=Api&rs=1'
  },
  onInit(){
        this.$page.setTitleBar({text: 'Demo'});
  },
  onImageLongpress(){
        var that=this;
    prompt.showDialog({
      message: 'Touch and hold to save the picture?',
      buttons: [{
        text: 'OK',
        color: '#33dd44'
      },
      {
        text: 'Cancel',
        color: '#33dd44'
      }],
      success: function(data){
                console.log("handling callback",data);
                if(data.index===0)
                {
                    that.$element("image").toTempFilePath({
                        fileType: 'jpg',
                        quality: 1.0,
                        success: function (ret) {
                            console.log('toTempFilePath success:tempFilePath=' + ret.tempFilePath)
                            media.saveToPhotosAlbum ({
                                uri: ret.tempFilePath,
                                success:function(data)
                                {
                                    console.log("save picture success");
                                },
                                fail: function(data, code) {
                                    console.log("handling fail, code=" + code);
                                }
                            })
                        },
                        fail: function (msg, code) {
                            console.log('toTempFilePath failed:code=' + code + '; msg=' + msg);
                        }, complete: function (ret) {
                            console.log('toTempFilePath complete');
                        }
                    })
                }
      },
      cancel: function(){
        console.log("cancel");
      }
    })
  }
}
</script>
The final effect is as follows.
Stack Overflow Occurs During Value Assignment in a Quick App
Symptom
The content obtained through $element('id') is assigned to a member variable. As a result, a stack overflow (RangeError: Maximum call stack size exceeded) occurs and the program crashes. When the page member variable stateText changes, a stack overflow error is also reported. The code where the exception occurs is as follows:
<template>
  <div id="content">
    <input type="button" class="button" @click="onTestClick" value="Stack overflow occurs."/>
    <text>{{ stateText }}</text>
  </div>
</template>
<script>
  export default {
    private: {
      mContentNode: null,
      stateText: 'init state'
    },
    onReady() {
      /* When data obtained by $element('id') is assigned to a member variable, a stack overflow may occur. */
      this.mContentNode = this.$element('content')
    },
    onTestClick() {
      /* If member variable references exist for a DOM, and a member variable changes, a stack overflow will occur. */
      this.stateText = 'new state'
    }
  }
</script>
Cause Analysis
Value assignment will lead to massive data changes. As a result, an internal abnormal loop occurs, causing a stack overflow.
Solution
Do not assign values to member variables. You can assign values to local or global variables. Sample code:
<script>
  let $gContentNode = null
  export default {
    private: {
      stateText: 'init state'
    },
    onReady() {
      /* You can assign the data obtained by $element('id') to a local or global variable to prevent the stack overflow. */
      const cContentNode = this.$element('content')
      $gContentNode = this.$element('content')
    },
    onTestClick() {
      this.stateText = 'new state'
    }
  }
</script>
Exception in Image Switchover Using Image Elements
Symptom
To achieve the image switchover effect, two image elements are stacked. One element's transparency changes from 1 to 0 to gradually disappear, so the other can appear. However, the previous image occasionally flickers and then disappears. The code where the exception occurs is as follows:
<template>
  <div class="page-wrapper">
    <input type="button" class="button" onclick="onCallAnimationClick" value="Animation" />
    <stack style="width: 400px; height: 400px">
      <image class="img" id="img1" src="{{imgUrl}}" oncomplete="imgcomplete"></image>
      <image class="img" id="img2" if="{{ximg}}" src="{{preUrl}}" oncomplete="imgcomplete2" style="{{'opacity:' + preop + ';'}}"></image>
    </stack>
  </div>
</template>
<script>
  export default {
    data: {
      imgsrc: ["../Common/logo.png",
        "../Common/image2.png",
        "../Common/image3.png",
        "../Common/image4.png",
        "../Common/image5.png",
      ],
      imgUrl: '',
      preUrl: '',
      ximg: true,
      preop: 0,
      i: 0
    },
    onInit: function () {
      this.imgUrl = this.imgsrc[0]
    },
    onCallAnimationClick() {
      if (this.i > 3) {
        this.i = 0;
        this.imgUrl = this.imgsrc[this.i]
      } else {
        this.i++
        this.imgUrl = this.imgsrc[this.i]
      }
      console.log('imgcomplete=', this.i)
    },
    imgcomplete() {
      console.log('imgcomplete 1')
      this.preop = 1
      var options = {
        duration: 500,
        easing: 'linear',
        delay: 0,
        fill: 'forwards',
        iterations: 1
      }
      var frames = [{
        opacity: 1
      },
      {
        opacity: 0
      }];
      var animation = this.$element('img2').animate(frames, options);
      animation.play();
      var self = this
      animation.onfinish = function () {
        console.log("imgcomplete animation  onfinish");
        self.ximg = false
        self.preop = 0
        setTimeout(() => {
          self.ximg = true
          self.preUrl = self.$element("img1").attr.src
        }, 30);
      }
    },
    imgcomplete2() {
      console.log('imgcomplete 2')
      setTimeout(() => {
        this.preop = 1
      }, 50);
    },
  }
</script>
<style>
  .page-wrapper {
    flex-direction: column;
    justify-content: center;
    align-items: center;
  }
  .img {
    width: 100%;
    height: 100%;
  }
  .button {
    color: #20a0ff;
    background-color: #ffffff;
    padding: 10px 20px;
    border: 1px solid #20a0ff;
    border-radius: 40px;
  }
</style>
Cause Analysis
In the preceding code, the switchover effect is implemented by changing the transparency of the two image elements. The transparency is set in CSS of the second image element. However, the transparency animation is configured on this element in the imgcomplete() method. That is, the transparency value changes from 1 to 0. But the transparency variable preop bound to the CSS is set to 1.
This exception occurs when the animation completion time is earlier than the CSS implementation time.
Solution
Delete style="{{'opacity:' + preop + ';'}}" of the second image element in the template. Instead, set the transparency change from 0 to 1 to achieve the effect.
Optimized code:
<template>
  <div class="page-wrapper">
    <input type="button" class="button" onclick="onCallAnimationClick" value="Animation" />
    <stack style="width:400px;height:400px">
    <image class="img" id="img1" src="{{imgUrl}}" oncomplete="imgcomplete"></image>
    <image class="img" id="img2" if="{{ximg}}" src="{{preUrl}}" oncomplete="imgcomplete2" ></image>
    </stack>
  </div>
</template>
<script>
export default {
  data: {
    imgsrc: ["../Common/logo.png",
        "../Common/image2.png",
        "../Common/image3.png",
        "../Common/image4.png",
        "../Common/image5.png",
      ],
    imgUrl:'',
    preUrl:'',
    ximg:true,
    preop:0,
    i:0
  },
  onInit: function () {
      this.imgUrl = this.imgsrc[0]
  },
      ...     // Omitted.
  imgcomplete2() {
      console.log('imgcomplete 2')
      var options = {
        duration: 10,
        easing: 'linear',
        delay: 0,
        fill: 'forwards',
        iterations: 1
      }
      var frames = [{
        opacity: 0
      },
      {
        opacity: 1
      }];
      var animation = this.$element('img2').animate(frames, options);
      animation.play();
    },
}
</script>
No Response to Taps on a Button Implemented by the Input Element
Symptom
After type in the input element is set to button and the border-radius attribute is set for the rounded corner, there is no response to taps on this button. After the border-radius attribute is deleted, the response to taps on the button is normal.
The code where the exception occurs is as follows:
<template>
  <div class="page-wrapper">
    <input type="button" class="button"  value="Animation" />
  </div>
</template>
<script>
</script>
<style>
.page-wrapper {
  flex-direction: column;
  justify-content: center;
  align-items: center;
}
.button {
  color: #20a0ff;
  background-color: red;
  padding: 10px 20px;
  border-radius: 40px;
}
</style>
Cause Analysis
After the border-radius attribute is set, the tap effect cannot be automatically implemented due to limitations at the bottom layer of Quick App Engine.
Solution
You can use a pseudo-class of the quick app to implement the button tap effect.
Optimized code:
<template>
  <div class="page-wrapper">
    <input type="button" class="button"  value="Animation" />
  </div>
</template>
<script>
</script>
<style>
.page-wrapper {
  flex-direction: column;
  justify-content: center;
  align-items: center;
}
.button {
  color: #20a0ff;
  background-color: red;
  padding: 10px 20px;
  border-radius: 40px;
}
.button:active{
  background-color: green;
}
</style>
Controlling the switch Element Through a Pop-up
Description
When a user turns a switch on or off, a confirmation pop-up needs to be displayed.
For example, if the switch is turned on by default, a pop-up needs to be displayed for a user to confirm the operation when the user turns the switch off. If the user taps CANCEL, the switch remains on, whereas if the user taps OK, the switch is turned off.
Implementation
You can use the change event of the switch element to respond to a user operation by changing the value of the checked attribute.
Sample code:
<template>
  <div class="container">
    <div class="page-title-wrap">
      <text class="page-title">{{componentName}}</text>
    </div>
    <div class="item-container">
      <text class="item-title">Default Style</text>
      <stack>
        <switch checked={{checkedValue}} id="switch" class="switch"></switch>
        <div class="item-content" style="opacity:0" onclick="switchTouch"></div>
      </stack>
    </div>
  </div>
</template>
<script>
  import prompt from '@system.prompt';
  export default {
    data: {
      componentName: 'switch',
      checkedValue: true,
    },
    onInit() {
      this.$page.setTitleBar({ text: 'switch' })
    },
    switchTouch: function () {
      if (this.checkedValue === false) {
        this.checkedValue = true;
      }
      else if (this.checkedValue === true) {
        console.log(this.checkedValue);
        var that = this
        prompt.showDialog({
          title: '',
          message: 'Are you sure you want to disable the switch?',
          buttons: [
            {
              text: 'OK',
              color: '#33dd44'
            },
            {
              text: 'cancel',
              color: '#33dd44'
            }
          ],
          success: function (data) {
            console.log("handling callback", data);
            if (data.index === 0) {
              that.checkedValue = false;
              console.log(that.checkedValue);
            }
            else {
              console.log(that.checkedValue);
            }
          },
          cancel: function () {
            console.log("cancel");
          }
        })
      }
    }
  }
</script>
<style>
  .container {
    flex: 1;
    flex-direction: column;
  }
  .page-title-wrap {
    padding-top: 50px;
    padding-bottom: 80px;
    justify-content: center;
  }
  .page-title {
    padding-top: 30px;
    padding-bottom: 30px;
    padding-left: 40px;
    padding-right: 40px;
    border-color: #bbbbbb;
    color: #bbbbbb;
    border-bottom-width: 2px;
  }
  .item-container {
    margin-top: 20px;
    margin-bottom: 30px;
    flex-direction: column;
  }
  .item-title {
    padding-left: 30px;
    padding-bottom: 30px;
    padding-top: 30px;
    border-bottom-width: 1px;
    border-color: #bbbbbb;
    color: #aaaaaa;
  }
  .item-content {
    background-color: #0000cd;
    border-bottom-width: 1px;
    border-color: #0000cd;
    margin-top: 10px;
    width: 130px;
    height: 60px;
  }
</style>
The final effect is as follows.
App Stutters While It Is Scrolled
Symptom
When a quick app loads 100 records at a time, the screen freezes when a user scrolls up or down on the page.
The code where the exception occurs is as follows:
<template>
  <div class="container">
    <div class="nav">
      <text class="nav-item">list</text>
    </div>
    <!-- List -->
    <list class="list" onclick="listClick" onlongpress="listLongPress"
      onscrollbottom="scrollbottom"  id="list" scrollpage="{{scrollPage}}">
      <list-item type="listItem" class="item"  onclick="listItemClick"
        if="{{listData.length>0}}">
           <div for="{{listData}}" style="flex-direction:column;">
                <text  class="txt">{{$item}}--{{$idx}}</text>
           </div>
      </list-item>
      <!-- Loading More  -->
      <list-item type="loadMore" class="load-more" if="{{loadMore}}">
        <progress type="circular"></progress>
        <text>More</text>
      </list-item>
    </list>
  </div>
</template>
<style>
  .container{
     flex-direction: column;
  }
  .list {
    padding-left: 10px;
    padding-right: 10px;
    columns: 1;
    flex-direction: column;
    border-color: #FF0000;
    border-width: 5px;
  }
  .item {
    flex-direction: column;
    align-items: flex-start;
    margin-bottom: 15px;
    border-color: #9400D3;
    border-width: 5px;
    margin-right: 20px;
    background-color: #f76160;
  }
  .load-more {
    justify-content: center;
    align-items: center;
    height: 100px;
    border-color: #bbbbbb;
    border-bottom-width: 1px;
  }
  .btn-little {
    flex: 1;
    height: 80px;
    margin-left: 15px;
    border-radius: 5px;
    color: #ffffff;
    font-size: 30px;
    text-align: center;
    background-color: #0faeff;
  }
  .nav {
    padding-left: 60px;
    padding-right: 60px;
    padding-bottom: 30px;
  }
  .nav-item {
    flex: 1;
    padding-bottom: 30px;
    border-bottom-width: 5px;
    border-color: #fbf9fe;
    font-size: 35px;
    color: #666666;
    text-align: center;
  }
</style>
<script>
  import prompt from '@system.prompt'
  export default {
    data: {
      componentName: 'list',
      loadMore: true,
      listAdd: ['A', 'B', 'C', 'D', 'E', 'F', 'G', 'H', 'I', 'J', 'K', 'L', 'M', 'N', 'O', 'P', 'Q', 'R', 'S', 'T', 'U', 'V', 'W', 'X', 'Y', 'Z'],
      listData: [],
      scrollPage: false,
    },
    onInit: function () {
      this.$page.setTitleBar({ text: 'list' })
      for(var index = 0;index < 100;index++){
          this.listData[index] = 'A';
     }
    },
    scrollbottom: function () {
      prompt.showToast({
        message: 'The list slides to the bottom and starts loading other data.'
      })
      // Load next page
      var that = this
      var renderData = [].concat(that.listData, that.listAdd)
      setTimeout(function () {
        that.listData = renderData
      }, 1000)
    },
    // monitoring during sliding
    scroll: function (e) {
      let msg = 'scroll' + '.scrollX:' + e.scrollX
        + ' .scrollY:' + e.scrollY
        + ' .scrollState:' + e.scrollState
      console.info(msg)
    },
    listItemClick: function (e) {
      e.stopPropagation()
      console.info('List Item is clicked.')
      prompt.showToast({
        message: 'List Item is clicked.'
      })
    },
    listClick: function (e) {
      e.stopPropagation()
      console.info('List is clicked.')
      prompt.showToast({
        message: 'List is clicked.'
      })
    },
    listLongPress: function (e) {
      e.stopPropagation()
      console.info('List is long pressed.')
      prompt.showToast({
        message: 'List is long pressed.'
      })
    },
  }
</script>
Cause Analysis
The preceding code uses the list and list-item elements to load a large amount of data. However, element usage is improper and an exception occurs, so the layout for list-item fails to be reused.
list and list-item are implemented through ListView and BaseAdapter. Therefore, no view is created for the content beyond the screen range, but instead initial views are used to display the content, just requiring data updates. The view of each row is actually a list-item.
In the preceding code, the list has only one list-item. If the for loop is used in list-item, a view is created for each loop. When there is a large amount of data, the memory usage increases. Frequently applying for and releasing memory resources deteriorate performance, leading to frame freezing.
Solution
Exercise caution when using the if and for statements in list-item based on the features of the list element. Based on the data features of each item on the list, set different types for list-item. Try to reuse the list-item and use the for statement in list-item. The modified code is as follows:
<template>
  <div class="container">
    <div class="nav">
      <text class="nav-item">list</text>
    </div>
    <!-- List -->
    <list class="list" onclick="listClick" onlongpress="listLongPress"
      onscrollbottom="scrollbottom"  id="list" scrollpage="{{scrollPage}}">
      <!-- Modified content -->
      <list-item type="listItem" class="item item-color"  onclick="listItemClick"
        for="{{listData}}">
        <text  class="txt">{{$item}}--{{$idx}}</text>
      </list-item>
      <!-- Loading More  -->
      <list-item type="loadMore" class="load-more" if="{{loadMore}}">
        <progress type="circular"></progress>
        <text>More</text>
      </list-item>
    </list>
  </div>
</template>
The following figures give a comparison.
|
|
Figure 1 After modification | Figure 2 Before modification |


In Figure 1, each item is a list-item, whose background color is set to red. All list-item elements have the same type and can be reused. Compared with Figure 1, the second figure, which shows the effect before the modification, has only one list-item, containing multiple subnodes. The effect in Figure 2 is the same as that of loading a large amount of data using the div element.
An Error Occurs When a User Is Redirected from a Card to a Quick App via an HAP Link
Symptom
When a user taps an HAP link on a HUAWEI Assistant∙TODAY card to open a quick app, an error message is displayed. However, the link works as normal for a web page.
The link is as follows:
hap://app/com.huawei.egcityservice?searchKey=HealthQrcode
The error information is as follows.

Cause Analysis
The cause is that the HAP link format is invalid.
The valid format is as follows:
hap://app/<package>/[path][?key=value]
The link in this case contains only the package name but no target page address. As a result, the user is redirected to the home page of the quick app by default. You need to add a slash (/) after <package>, and then add parameters after the slash.
Solution
Add a slash (/) before the parameters in the HAP link as follows:
hap://app/com.huawei.egcityservice?searchKey=HealthQrcode
Common methods for adding a launch flag to redirection links:
- For a link containing only a package name but no specific target page, for example:
hap://app/com.freecharge.android.quickapp
Add /? and the launch flag.
hap://app/com.freecharge.android.quickapp/?___PARAM_LAUNCH_FLAG___=clearTask

The characters /? must be added.
- For a link specifying a page but with no redirection parameter, for example:
hap://app/org.hap.govaffairs/views/HealthQrcode/Result
Add ? and the launch flag.
hap://app/org.hap.govaffairs/views/HealthQrcode/Result?___PARAM_LAUNCH_FLAG___=clearTask

The character ? must be added.
- For a link specifying both a specified page and redirection parameters, for example:
hap://app/com.wifi.quickapp.reader.free/Page/Go?path=read&bookid=70317&chapterid=15688960
Add & and the launch flag.
hap://app/com.wifi.quickapp.reader.free/Page/Go?path=read&bookid=70317&chapterid=15688960&___PARAM_LAUNCH_FLAG___=clearTask

The character & must be added.
Parameter Values in the router API Are Truncated
Symptom
When a user is redirected from quick app A to quick app B through the router.push API, the HTML5 address obtained by quick app B is truncated.
The code where the exception occurs is as follows:
Code in quick app A:
     router.push({
                uri: "hap://app/com.huawei.text/Hello?srcurl=https://timgsa.baidu.com/timg?image&quality=80&size=b9999_10000&sec=1571113692640&di=9ed87b0302d9b8ce9ca66f6ab7e18394&imgtype=jpg&src=http%3A%2F%2Fimg0.imgtn.bdimg.com%2Fit%2Fu%3D2161827460%2C376403171%26fm%3D214%26gp%3D0.jpg",
            })
Code in quick app B:
<template>
  <div class="container">
    <text class="txt">{{src}}</text>
  </div>
</template>
<script>
  export default {
    data: {
      src: 'Test',
    },
    onInit() {
      this.$page.setTitleBar({ text: 'switch' })
    },
    onShow: function () {
      this.src = this.srcurl
      console.log("@@@@@@@@@@@@@@*********", this.src)
    },
  }
</script>
<style>
  .container {
    flex: 1;
    flex-direction: column;
    align-items: center;
    justify-content: center;
  }
  .txt {
    width: 100%;
    height: 300px;
    font-size: 50px;
    color: red;
  }
</style>
The parameter information obtained by quick app B is https://timgsa.baidu.com/timg?image, as shown in the following figure.
Cause Analysis
The code in the involved API router.push is analyzed.
When the user is redirected from quick app A to the home page of quick app B, this API carries the srcurl parameter. The API uses an HAP link as the deep link.
hap://app/<package>/[path][?key=value&key1=value1]
In the redirection code, srcurl corresponds to the key in the HAP link, and the key value is an HTML5 address. However, the HTML5 address carries parameters, such as &quality=80&size=b9999_10000&sec=1571113692640. In this case, Huawei Quick App Loader will take this part as the parameters of the HAP link, instead of those of the HTML5 address, which leads to the truncation.
Solution
Include parameters in the router.push API of a quick app in the following format:
router.push({uri: 'HAP link', params: { key: 'value '}}); You can put the parameters in the HAP link to params.
The modified code in quick app A is as follows:
router.push({
                uri: "hap://app/com.huawei.text/Hello",
                params: {
                    srcurl: 'https://timgsa.baidu.com/timg?image&quality=80&size=b9999_10000&sec=1571113692640&di=9ed87b0302d9b8ce9ca66f6ab7e18394&imgtype=jpg&src=http%3A%2F%2Fimg0.imgtn.bdimg.com%2Fit%2Fu%3D2161827460%2C376403171%26fm%3D214%26gp%3D0.jpg'
                }
            })
The link obtained by quick app B is as follows.
Width Does Not Take Effect When Rich Text Is Loaded Using the richtext Element
Symptom
When the richtext element is used to load an ultra-wide HD image, and you have not controlled the image width, the image may go beyond the screen range, thereby undermining user experience. However, it is found that the width value set in the richtext element does not take effect.
The code where the exception occurs is as follows:
<richtext type="html" style="width: 100%;">{{htmlText}}</richtext>> Cause Analysis
Currently, the width of the richtext element cannot be set directly. You can only modify the width of the img element in the HTML file that the richtext element loads instead.
Solution
The sample code is as follows:
<template>
    <div class="item-container">
      <richtext type="html">{{htmlText}}</richtext>>
    </div>
</template>
<style>
    @import "../Common/css/common1.css" screen and (orientation: portrait);
    @import "../Common/css/common2.css" screen and (orientation: landscape);
</style>
<script>
    export default {
        data: {
            htmlText:
                `<!DOCTYPE html>
            <html lang="en" style="background-color: transparent">
            <head>
              <meta charset="UTF-8" />
              <meta name="viewport" content="width=device-width, initial-scale=1.0" />
              <title>Document</title>
            </head>
            <body>
              <div>
                <h1>Huawei</h1>
                <div>
                <img src='Base64 character string'  // Network images or Base64 character strings are supported.
                style="width: 100%"
                />
                </div>
              </div>
            </body>
          </html>
        `
        },
        onInit: function () {
            console.info('Application onInit');
        },
        onShow(options) {
            console.info('Application onShow');
        },
        onHide(options) {
            console.info('Application onHide');
        }
    }
</script>
Inconsistent Effects of the tab-content Element Between a Quick App and the IDE DOM
Symptom
When the tabs or tab-content element is used and the number of bound arrays decreases (that is, the delete button on the page is tapped), data stored in the DOM is inconsistent with the data rendered on the screen. As shown in Figure 2, there are two dynamic rendering nodes for in the IDE DOM, but the actual number of rendered pages is greater than two, as shown in Figure 1. However, when the add button is tapped to add a page, no problem occurs.
|
|
Figure 1 Rendering effect on the screen | Figure 2 Display effect in the IDE DOM |


The code where the exception occurs is as follows:
<template>
  <div style="flex-direction: column;">
    <tabs class="tabs" index="0">
      <tab-bar>
        <block for="{{tabdata}}">
          <text class="tab-text">{{ $item.title }}</text>
        </block>
      </tab-bar>
      <tab-content class="tab-content">
        <block for="{{tabdata}}">
          <div style="flex-direction: column; align-items: center;justify-content: center;">
            <text style="color: red">{{ $item.content }}</text>
          </div>
        </block>
      </tab-content>
    </tabs>
    <input type="button" class="btn" value="add" onclick="addpage" />
    <input type="button" class="btn" value="delete" onclick="delpage" />
  </div>
</template>
<style>
  .tabs {
    flex: 1;
    margin-top: 20px;
    margin-right: 30px;
    margin-left: 30px;
    background-color: #ffffff;
  }
  .tab-content {
    flex: 1;
  }
  .tab-bar {
    height: 100px;
    border-color: #bbbbbb;
    color: #bbbbbb;
    border-bottom-width: 1px;
  }
  .tab-text {
    width: 300px;
    text-align: center;
  }
  .tab-text:active {
    color: #f76160;
  }
  .btn {
    background-color: #00bfff;
    color: #f3f2f2;
    width: 80%;
    height: 80px;
    margin-top: 20px;
    margin-bottom: 20px;
    align-self: center;
  }
</style>
<script>
  module.exports = {
    data: {
      tabdata: [{ title: "title1", content: "page1" }, { title: "title2", content: "page2" }, { title: "title3", content: "page3" }]
    },
    onInit() {
      this.$page.setTitleBar({ text: "tab and video" });
    },
    refresh: function () { },
    addpage: function () {
      let len= this.tabdata.length+1;
      console.info("addpage len= "+len)
      let add = { title: "title"+len, content: "page"+len };
      this.tabdata.push(add);
    },
    delpage: function () {
       this.tabdata= [{ title: "newtitle1", content: "newpage1" }, { title: "newtitle2", content: "newpage2" }];
       let len= this.tabdata.length;
      console.info("delpage len= "+len);
    }
  };
</script>
Cause Analysis
Methods that are introduced over the Internet, for example, using Object.assign({}, this.XXX, arr), all failed to solve the problem. According to further analysis, the cause of the problem is that the tab-content element does not support dynamic page decrease. To decrease pages, you need to destroy the element and create an element instance for data display. HUAWEI Quick App provides the if statement. When the result of if is false, a page is not displayed and the corresponding node is also removed from the IDE DOM.
Solution
- Create one tabs element and one tab-content element and use the if statement to call them in turn. In this way, pages can be destroyed and created normally.
- Define a Boolean variable refreshpage that can control the if statement. When the number of arrays bound to the page decreases, the value of refreshpage needs to be updated.
Optimized code:
<template>
  <div style="flex-direction: column;">
    <tabs class="tabs" index="0" if="{{!refreshpage}}">
      <tab-bar>
        <block for="{{tabdata}}">
          <text class="tab-text">{{ $item.title }}</text>
        </block>
      </tab-bar>
      <tab-content class="tab-content">
        <block for="{{tabdata}}">
          <div style="flex-direction: column; align-items: center;justify-content: center;" >
            <text style="color: red">{{ $item.content }}</text>
          </div>
        </block>
      </tab-content>
    </tabs>
     <!--The element needs to be destroyed after data changes, so that the page display can be the same as that in the IDE DOM.-->
     <tabs class="tabs" index="0" if="{{refreshpage}}">
      <tab-bar>
        <block for="{{tabdata}}">
          <text class="tab-text">{{ $item.title }}</text>
        </block>
      </tab-bar>
      <tab-content class="tab-content">
        <block for="{{tabdata}}">
          <div style="flex-direction: column; align-items: center;justify-content: center;" >
            <text style="color: red">{{ $item.content }}</text>
          </div>
        </block>
      </tab-content>
    </tabs>
    <input type="button" class="btn" value="add" onclick="addpage" />
    <input type="button" class="btn" value="delete" onclick="delpage" />
  </div>
</template>
    <!--Retain the style-relevant code, which is not demonstrated here.-->
<script>
  module.exports = {
    data: {
      refreshpage:false,
      tabdata: [{ title: "title1", content: "page1" }, { title: "title2", content: "page2" }, { title: "title3", content: "page3" }]
    },
    delpage: function () {
       this.tabdata=[{title: "newtitle1", content: "newpage1"},{title: "newtitle2", content: "newpage2"}];
        var r=!this.refreshpage;
        this.refreshpage=r;
      let len= this.tabdata.length;
      console.info("delpage len= "+len);
    }
  };
</script>
Detecting Data Received by an API from the app.ux File in a Timely Manner
Symptom
For a quick app, some developers implement certain common capabilities in the app.ux file, so each page can call these common capabilities quickly. However, when a page is launched and some basic data is obtained from the app.ux file, there is a high probability that the API returns no data.
For example, when quick app A is launched, it needs to determine whether the user has signed in and implement the following logic accordingly: If the user has signed in, the signed-in account is displayed. If the user has not signed in, the sign-in page is displayed. When a user signs in to the quick app for the first time, the storage API of the quick app is called to store the account information locally. When the user accesses the app next time, the account information is read from the cache first. If account information exists in the cache, the user has signed in and does not need to perform sign-in again. However, for some users who have already signed in, the sign-in page is still displayed.
Cause Analysis
The code where the exception occurs is as follows:
app.ux file:
<script>
  import storage from '@system.storage';
  module.exports = {

    onCreate() {
      console.info('Application onCreate');
      // Obtain account sign-in information from the cache upon app launch.
        this.getLoginName();
    },

      /**
       * Obtain account sign-in information from the cache and save the obtained result in the global object userinfo.
       */
      getLoginName:function() {
        var that=this;
           storage.get({
             key: 'username',
             success: function (data) {
               console.log("app.ux getLoginName handling success data="+data);
               that.dataApp.userinfo.name=data;
               console.info("app.ux getLoginName that.dataApp.userinfo.name="+that.dataApp.userinfo.name);
             },
             fail: function (data, code) {
               console.log("handling fail, code = " + code);
             }
           })
      },
    onDestroy() {
      console.info('Application onDestroy');
    },
    dataApp: {
      // User account information object, which is used globally.
      userinfo: {
        name:''
      }
    }
  }
</script>
hello.ux file:
<template>
  <!-- Only one root node is allowed in template. -->
  <div class="container">
    <text class="title" if="{{userinfo.name}}">Welcome {{ userinfo.name }}</text>
    <input type="button" value="login" class="btn" if="{{!userinfo.name}}" onclick="dologin" />
  </div>
</template>
<style>
  .container {
    flex-direction: column;
    justify-content: center;
    align-items: center;
  }
  .title {
    font-size: 40px;
  }
  .btn{
     width: 160px;
     height: 60px;
     border-radius: 8px;
     background-color: #00bfff;
  }
  .btn:active{
     background-color: #00ced1;
  }
</style>
<script>
  import storage from "@system.storage";
  module.exports = {
    data: {
      userinfo: {}
    },
    onInit() {
      this.$page.setTitleBar({
        text: "menu",
        textColor: "#ffffff",
        backgroundColor: "#007DFF",
        backgroundOpacity: 0.5,
        menu: true
      });
      // Obtain account information from app.ux upon page launch.
       this.userinfo = this.$app.$def.dataApp.userinfo;
       if(this.userinfo.name){
         // Process the service logic after user sign-in.
         //todo
       }

    },
    onReady(options) {
      console.info("onready");
},
    /** Sign the user in to the quick app and cache the account information locally. */
    dologin: function () {
      this.userinfo.name = "wwz";
      storage.set({
        key: "username",
        value: this.userinfo.name,
        success: function (data) {
          console.log("handling success");
        },
        fail: function (data, code) {
          console.log("handling fail, code = " + code);
        }
      });
    }
  };
</script>
Quick app APIs return data asynchronously. When the page lifecycle function onInit is executed, data may fail to be returned from the app.ux file through the called API immediately. In this case, the this.userinfo.name object is empty. As a result, the sign-in button is displayed for the user to input the user name and password. This user may be tired of the sign-in and choose to exit the quick app. Then the quick app loses the user.
Solution
[Solution 1] Call the API for obtaining signed-in account information with a delay of hundreds of milliseconds for a page. Pay attention to setTimeout in the following code:
onInit() {
  this.$page.setTitleBar({
    text: "menu",
    textColor: "#ffffff",
    backgroundColor: "#007DFF",
    backgroundOpacity: 0.5,
    menu: true
  });
  // Obtain account information from app.ux upon page launch.
  setTimeout(() => {
    this.userinfo = this.$app.$def.dataApp.userinfo;
    console.info("oninit this.userinfo= " + JSON.stringify(this.userinfo));
    if (this.userinfo.name) {
      // Process the service logic after user sign-in.
      //todo
    }
  }, 200);
  // this.$watch("userinfo.name", "listenLogin");
},
Disadvantage of this solution: It is difficult to set a proper delay time. If the delay time is too long, user experience will be compromised. If the delay time is too short, a function error may occur.
[Solution 2] This solution is recommended. Use the quick app function $watch() to listen to the object attribute userinfo.name of the current page and obtain a result from the detected event in real time.

$watch() cannot be used to directly listen to the object attribute userinfo.name defined under dataApp in the app.ux file.
The sample code is as follows:
onInit() {
  this.$page.setTitleBar({
    text: "menu",
    textColor: "#ffffff",
    backgroundColor: "#007DFF",
    backgroundOpacity: 0.5,
    menu: true
  });
  // Obtain account information from app.ux upon page launch.
  this.userinfo = this.$app.$def.dataApp.userinfo;
   this.$watch("userinfo.name", "listenLogin");
},
Code for implementing the response event listenLogin is as follows:
listenLogin: function (newValue, oldValue) {
  console.info("listenLogin newValue= " + newValue + ", oldValue=" + oldValue);
  if(newValue){
    // Obtain account sign-in information and process the service logic after user sign-in.
  }
},
The optimized effect is as follows.
|
Implementing the Function of Not Triggering Tab Switchover When a Nested List Under tab-content is Scrolled
Description
In some complex layouts, an app page may be divided into multiple tab pages. A single tab may contain list nesting. For example, a horizontal list may be nested in a vertical list. In this case, if the scrollable attribute of the tab-content element is set to true and the nested list is scrolled to the end, tab switchover is triggered automatically.
If you do not want to trigger tab switchover in this case, you need to control the relevant touch event.
Implementation
Control the scrollbottom event of the nested list as follows: When this list is scrolled to the end, set the scrollable attribute of the tab-content element to false so that tab switchover is not triggered.
In addition, you also need to make sure that when a user touches an area beyond the nested list, the tab bar can be scrolled. To do so, set the scrollable attribute of the tab-content element to true to control the touchstart event beyond the nested list.
Sample code:
<template>
  <div class="item-container">
    <tabs class="tabs" index="2">
      <tab-bar class="tab-bar">
        <text class="tab-text">tab1</text>
        <text class="tab-text">tab2</text>
      </tab-bar>
      <tab-content class="tab-content" scrollable="{{scrollable}}">
        <div class="item-container">
          <list class="list">
            <list-item type="columnlist">
              <list class="list" style="flex-direction: row; height: 800px" onscroll="scroll" onscrollbottom="scrollbottom" id="list" scrollpage="{{scrollPage}}">
                <list-item type="listItem" class="swiper-container" for="{{ bannerList }}">
                  <block>
                    <div class="banner_wrap">
                      <text class="banner_text">{{ $item }}</text>
                      <image class="banner_image" style="object-fit: fill;" src="../Common/niu.jpg"></image>
                    </div>
                  </block>
                </list-item>
              </list>
            </list-item>
            <list-item type="textlist" ontouchstart="touchstart">
              <text style="text-align: center; width: 100%; height: 300px;background-color: #00bfff;">Scroll to switch tabs.</text>
            </list-item>
          </list>
        </div>
        <div class="item-container">
          <div class="item-content">
            <text class="item-title">tab2 page</text>
          </div>
        </div>
      </tab-content>
    </tabs>
  </div>
</template>
<script>
  export default {
    data: {
      scrollPage: true,
      scrollable: true,
      bannerList: ["A", "B", "C", "D", "E"]
    },
    onInit() {
      this.$page.setTitleBar({ text: "List nesting example" });
    },
    scrollbottom(e) {
      this.scrollable = false;
    },
    scroll(e) {
      if (e.scrollState === 1 || e.scrollState === 2) {
        this.scrollable = true;
      }
    },
    touchstart(e) {
      this.scrollable = true;
    }
  };
</script>
<style>
  @import "../Common/css/common.css";
  .tabs {
    flex: 1;
    background-color: #ffffff;
  }
  .tab-content {
    flex: 1;
  }
  .tab-bar {
    display: flex;
    flex-direction: row;
    height: 90px;
    flex-wrap: nowrap;
    border-bottom-color: #bbbbbb;
    border-bottom-width: 1px;
  }
  .tab-text {
    flex: 1;
    position: relative;
    padding: 15px 40px 20px;
    text-align: center;
  }
  .item-container {
    flex-direction: column;
  }
  .item-content {
    flex-direction: column;
    padding-bottom: 30px;
  }
  .list {
    flex: 1;
  }
  div {
    display: flex;
    flex-direction: column;
  }
  .swiper-container {
    flex-direction: column;
    margin-bottom: 10px;
  }
  .banner_wrap {
    width: 100%;
    height: 500px;
    flex-direction: column;
  }
  .banner_text {
    color: #000;
  }
  .banner_image {
    width: 750px;
    flex: 1;
  }
</style>
Implementation effect
|
Switching Between Manual and Automatic Control Over the swiper Element
Description
In some cases, the swiper element needs to be triggered without user touches. Then when a user touches the swiper element, the control mode of the swiper element needs to be changed from automatic to manual. When the user stops touching, the control mode of the swiper element changes back to automatic again.
Implementation
You can use the common event swipe to identify screen swiping actions. When a user is detected swiping left or right, the control mode of the swiper element needs to be changed to manual. When the user is detected swiping up or down or not swiping on the screen, the control mode needs to remain automatic. However, in actual use, it is not ideal to detect swipe events on the swiper element. As a result, the actions of swiping left or right may fail to be detected occasionally. To accurately identify the actions of swiping right, left, up, or down, you can use the block element to stack a div element on the swiper element and detect swipe events in the div element.
Sample code:
<template>
  <div class="container">
    <block>
      <div class="swiper" onswipe="swipe">
        <swiper class="swiper" vertical="{{vertical}}" id="swiper" autoplay="{{autoPlay}}" interval="2000" indicator="{{indicator}}" loop="{{isLoop}}" onchange="change" duration="{{sliderValueForDuration}}" style="height:{{heightSwiper}};indicator-size:{{iSize}}">
          <text class="item color-1">A</text>
          <text class="item color-2">B</text>
          <text class="item color-3">C</text>
          <text class="item color-4">D</text>
          <text class="item color-5">E</text>
          <text class="item color-6">F</text>
        </swiper>
        <div class="swipercover">
          <text>A transparent mask is added above the swiper to identify the swiping event.</text>
        </div>
      </div>
    </block>
  </div>
</template>
<style>
  @import "../Common/css/common.css";
  .item-container {
    margin-bottom: 50px;
    margin-right: 60px;
    margin-left: 60px;
    flex-direction: column;
  }
  .swiper {
    flex-direction: column;
    indicator-color: #800080;
    indicator-selected-color: #000000;
    height: 250px;
    position: fixed;
  }
  .swipercover {
    flex-direction: column;
    height: 250px;
    background-color: transparent;
    position: fixed;
    border-style: solid;
  }
  .item {
    height: 250px;
    text-align: center;
    color: #ffffff;
  }
  .color-1 {
    background-color: #09ba07;
  }
  .color-2 {
    background-color: #f76160;
  }
  .color-3 {
    background-color: #0faeff;
  }
  .color-4 {
    background-color: #9acd32;
  }
  .color-5 {
    background-color: #000000;
  }
  .color-6 {
    background-color: #8a2be2;
  }
</style>
<script>
  import prompt from "@system.prompt";
  export default {
    data: {
      heightSwiper: "250px",
      componentName: "swiper",
      autoPlay: true,
      indicator: true,
      sliderValue: 1500,
      sliderValueForDuration: 500,
      isLoop: true,
      vertical: false,
      iSize: "20px",
      index: 0
    },
    onInit() {
      this.$page.setTitleBar({ text: "swiper" });
    },
    change: function (e) {
      this.index = e.index;
    },
    swipe: function (e) {
      console.info("e.direction==" + e.direction);
      if (e.direction === "left") {
        prompt.showToast({
          message: "Change to the manual mode."
        });
        if (this.index === 5) {
          this.$element("swiper").swipeTo({ index: 0 });
        } else {
          this.$element("swiper").swipeTo({ index: this.index + 1 });
        }
        this.autoPlay = false;
        setTimeout(() => {
          this.autoPlay = true;
          prompt.showToast({
            message: "Change to the automatic mode."
          });
        }, 4000);
      }
      if (e.direction === "right") {
        prompt.showToast({
          message: "Change to the manual mode."
        });
        if (this.index === 0) {
          this.$element("swiper").swipeTo({ index: 5 });
        } else {
          this.$element("swiper").swipeTo({ index: this.index - 1 });
        }
        this.autoPlay = false;
        setTimeout(() => {
          this.autoPlay = true;
          prompt.showToast({
            message: "Change to the automatic mode."
          });
        }, 4000);
      }
    }
  };
</script>
Implementation effect
|
Displaying a Banner Ad in a Quick App at the Bottom of a Phone Screen
To display a banner ad in a quick app, you need to call the ad.createBannerAd(OBJECT) API, in which a top parameter is included. The value of this parameter indicates the ad display position. When top is set to 0, the banner overlaps the status bar, as shown in the following figure. Therefore, the smaller its value is, the higher the banner is displayed on the screen. In this case (top set to 0), you need to take the height of the title bar or status bar into consideration.
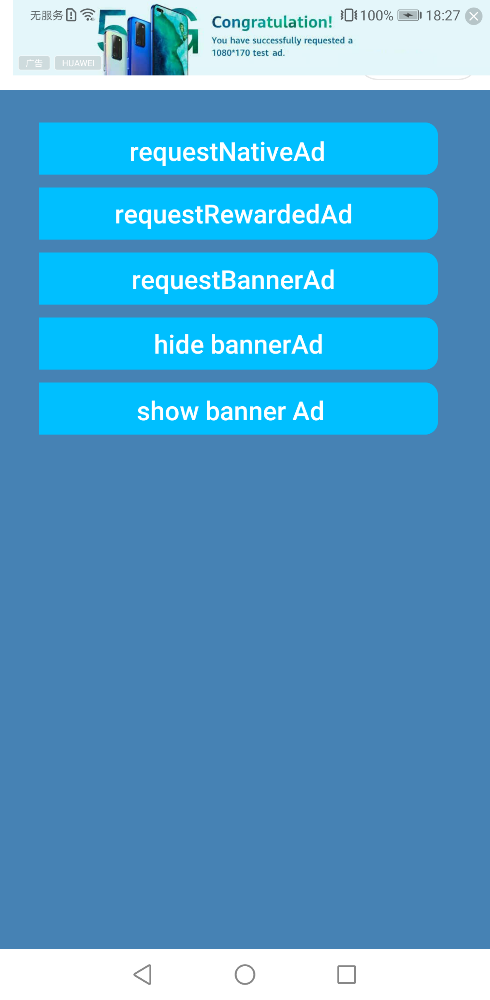
The screen resolution and density vary depending on the phone model. If you want to place the banner ad at the bottom of phones with different screen sizes, you first need to obtain the detailed parameters of the current screen.
The values you set will be adjusted to fit the current screen by Huawei Quick App Engine, ensuring the display effect under various resolutions. The formula is as follows:
RealPX/windowWidth = Value set for the screen/windowLogicWidth
- RealPX: result after adjustment by Huawei Quick App Engine.
- windowWidth: screen width, which can be obtained by calling the device information API.
- Value set for the screen: value set in the UX file.
- windowLogicWidth: baseline width of the screen, which can be obtained by calling the device information API.
The difference between dp and px will not be described here. The conversion formula from px to dp is as follows:
px = dp x Device screen density
Device screen density: The value can be obtained by calling the device information API.
The bottom coordinates can be calculated by using the preceding two formulas. The value of windowHeight (returned by the device information API) is the visible window height of the current screen. Therefore, the calculation rules are different depending on whether there is a title bar or not on the app screen.
With a title bar
Sample code:
data: {
  bannerAD: {
    adUnitId: "testw6vs28auh3",
    adIntervals: 30,
    style: {
      left: 20,
      top: 20,
      width: 360,
      height: 57
    }
  }
},
calBannerPostion1: function () {
var d = device.getInfoSync();
console.info("calBannerPostion1 d= "+JSON.stringify(d));
// Obtain the height and width of the visible window on the screen. The height does not include the height of the title bar and status bar.
let windowWidth = d.windowWidth;
let windowHeight=d.windowHeight;
// The value of logicWidth corresponds to the value of designWidth in the manifest.json file. The default value is 750.
let logicWidth = d.windowLogicWidth;
// The original unit dp needs to be converted to px for the ad.
let realAdHeighPX = this.bannerAD.style.height * d.screenDensity;
// The height of the title bar is about 42 dp. The unit should be converted to px.
let titleBarHeight=42*d.screenDensity;
// This formula is important. You need to add the heights of status and title bars.
let realToppx= windowHeight-realAdHeighPX+d.statusBarHeight+titleBarHeight;
// Convert the original unit to the current logical unit.
let logicWebTop = (realToppx * logicWidth) / windowWidth;
// Define this object under data.
this.bannerAD.style.top = logicWebTop;
console.info("calBannerPostion1 top=" + this.bannerAD.style.top+", logicWebTop= "+logicWebTop);
}, Effect
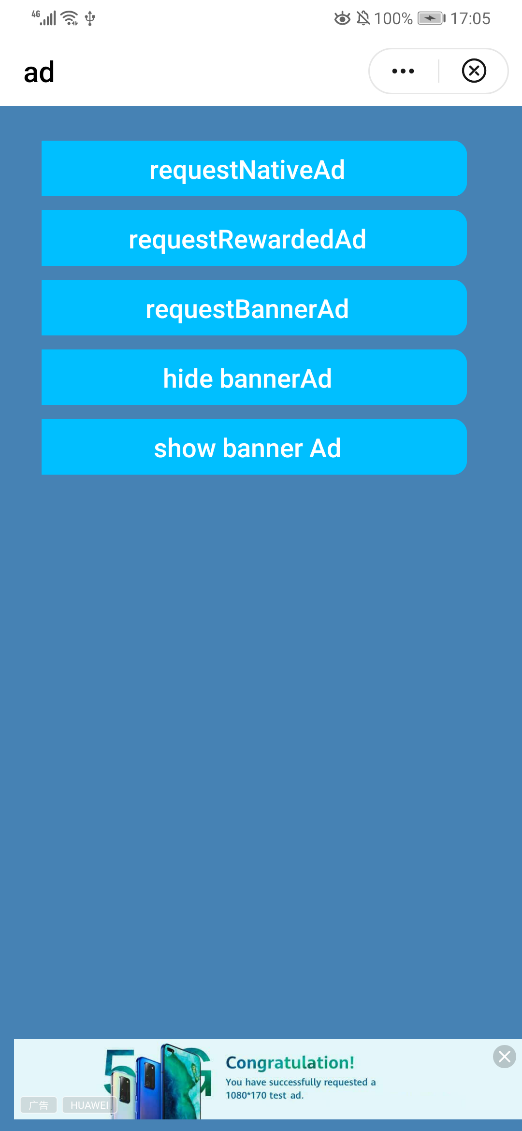
Without a title bar
Sample code:
calBannerPostionWithNoTitle: function () {
  var d = device.getInfoSync();
  console.info("calBannerPostion1 d= "+JSON.stringify(d));

  // Obtain the height and width of the visible window on the screen. The height does not include the height of the title bar and status bar.
  let windowWidth = d.windowWidth;
  let windowHeight=d.windowHeight;
  // The value of logicWidth corresponds to the value of designWidth in the manifest.json file. The default value is 750.
  let logicWidth = d.windowLogicWidth;
  // The original unit dp needs to be converted to px for the ad.
  let realAdHeighPX = this.bannerAD.style.height * d.screenDensity;

  // This formula is important. You need to add the heights of status and title bars.
  let realToppx= windowHeight-realAdHeighPX+d.statusBarHeight;
  // Convert the original unit to the current logical unit.
  let logicWebTop = (realToppx * logicWidth) / windowWidth;
  this.bannerAD.style.top = logicWebTop;
  console.info("calBannerPostionWithNoTitle top=" + this.bannerAD.style.top+", logicWebTop= "+logicWebTop);
},
Effect
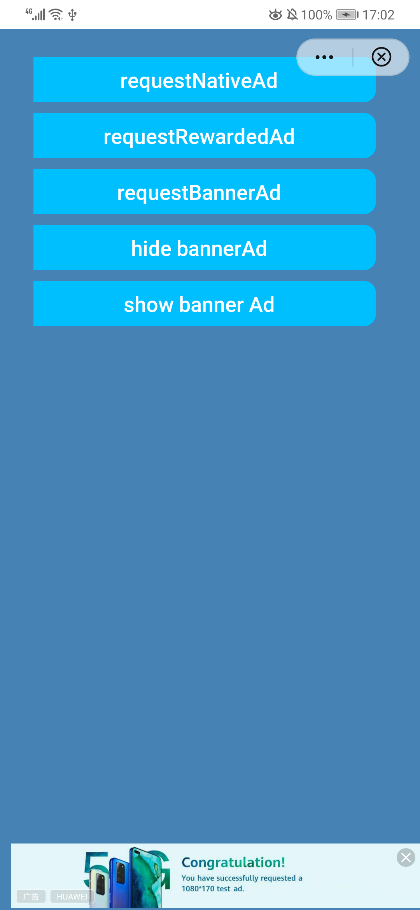
Suggestions and Summary
Huawei Quick App Engine does not provide a method for obtaining the height of the title bar. In this example, an approximate value 42 dp is used, based on EMUI specifications. Through this case, you can understand the size adjustment rules and related formulas used in quick apps. If you wish to display a banner ad at other places on the screen, you can refer to the rules illustrated in this case.
When a User Is Deep Linked to a Quick App, a Message is Displayed Indicating that the Target Page Does Not Exist
Symptom
When a quick app is opened on Huawei Quick App Loader through a deep link, a message is displayed indicating that the quick app page does not exist.
Cause Analysis
Check the code where the exception occurs. The code indicates that a deep link (hap://app/com.huawei.hwkyy/pages/main/main) is used to open the main.ux page.
The project structure is as follows:
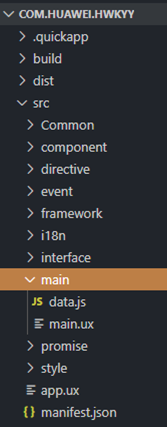
The router information configured in the manifest file is as follows:
The standard format of the deep link is hap://app/<package>/[path][?key=value], in which package indicates the package name of the quick app, and path indicates the path configured for the router in the manifest file, that is, the path from the src directory to the UX file directory in the project structure. In this case, the possible cause is that a developer incorrectly sets the path to the hierarchy configured in the manifest file.
In addition, if the page path carries parameters but they are not set in the format required by a deep link, an error will also occur.
Solution
Change the link from hap://app/com.huawei.hwkyy/pages/main/main to hap://app/com.huawei.hwkyy/main.
When a page path carries parameters, separate the path and parameters with a question mark (?).
[Negative code example]
hap://app/com.huawei.hwkyy/main&source=sa0001458&outerid=ou0001035&cid=HW001
[Positive code example]
hap://app/com.huawei.hwkyy/main?source=sa0001458&outerid=ou0001035&cid=HW001
Shielding Google Content in HTML5 Quick Apps
Symptom
When a quick app converted from an HTML5 app runs in Quick App Loader, the Google Play icon is displayed on the app page. You can tap the icon to open the corresponding native app in Google Play. No Google service is deployed on HMS mobile phones. Therefore, there is no response when you tap the icon, which affects user experience.
Cause Analysis
To ensure that the quick app does not contain unnecessary content that affects user experience, you should shield such content. However, the functions of HTML5 apps are implemented in HTML files. Quick App Engine uses the WebView to load the HTML5 URL and cannot detect the content on web pages. Therefore, Quick App Engine cannot solve this problem.
To address this issue, the ua attribute (indicating the user agent) is introduced in the quick app web specifications, so that your server can identify information such as the operating system and its version, CPU type, and browser and its version. The ua attribute helps you determine whether a user opens an app from the quick app. If so, you can shield unnecessary information.
Solution
- Define the variable ua and set its value to default. The default value provided by Quick App Engine will be used. The default value contains an HAP character string. The sample code is as follows:
export default { props: ['websrc'], data: { // TODO Replace the link to the H5 app loadUrl: "http://127.0.0.1:8088/wwz/fastgame_demo.html", ua: "default", list: ["new RegExp('https?.*')"] }, } - Bind the ua variable. The sample code is as follows:
<web class="web-page" src="{{loadUrl}}" trustedurl="{{list}}" onpagestart="onPageStart" onpagefinish="onPageFinish" onmessage="onMessage" ontitlereceive="onTitleReceive" onerror="onError" id="web" supportzoom="{{supportZoom}}" wideviewport="{{wideViewport}}" overviewmodeinload="{{overViewModeLoad}}" useragent="{{ua}}" allowthirdpartycookies="{{allowThirdPartyCookies}}"> </web> - Assign a value to ua. Set gms quickappua on the GMS mobile phone. The value of ua in the sample code is only for reference. To determine whether the mobile phone is a GMS mobile phone, call the quick app API package to check whether the GMS is installed.
- The HTML5 page shields the content that you do not want to display based on ua. The sample code is as follows:
var ua = window.navigator.userAgent;
console.info("ua=" + ua);
var index = ua.indexOf("hap");
console.info("ua hap index=" + index);
if (index >= 0) {
    // Request from a quick app on a mobile phone with HMS Core (APK) installed.
    console.info("request from quickapp on hms phone");
    document.getElementById("googleimg").style.display = "none";
    document.getElementById("tip").innerHTML = "request from quickapp on HMS phone";
} else if (ua == "gms quickappua") {
    document.getElementById("tip").innerHTML = "request from quickapp on GMS phone";
}
The complete sample code is as follows:
hello.ux file:
<template>
  <div class="doc-page">
    <!-- Replace the link to the HTML5 app -->
    <web class="web-page" src="{{loadUrl}}" trustedurl="{{list}}" onpagestart="onPageStart" onpagefinish="onPageFinish"
      onmessage="onMessage" ontitlereceive="onTitleReceive" onerror="onError" id="web" supportzoom="{{supportZoom}}"
      wideviewport="{{wideViewport}}" overviewmodeinload="{{overViewModeLoad}}"
      useragent="{{ua}}"
      allowthirdpartycookies="{{allowThirdPartyCookies}}">
    </web>

  </div>
</template>
<style>
  .doc-page {
    flex-direction: column;
    justify-content: center;
    align-content: center;
    align-items: center;
    width: 100%;
    height: 100%;
    position: fixed;

  }
  .web-page {
    width: 100%;
    height: 100%;
    border-top-left-radius: 100%;
  }
  .btn{
    position: fixed;
    left: 10px;
    bottom: 100px;
    width: 100%;
    height: 110px;
    background-color: #00bfff;

  }
</style>
<script>
  import router from "@system.router";
  import pkg from '@system.package';
  export default {
    props: ['websrc'],
    data: {
      title: "",
      model:"",
      // TODO Replace the link to the H5 app
      loadUrl: "https://xxx/h5_demo.html",
      // Attribute allowthirdpartycookies, indicates whether cookies can be delivered in cross-domain mode.
      // If you need login Google Account or Other Account, Please set TRUE.
      allowThirdPartyCookies: true,
      //Attribute supportzoom, indicates whether the H5 page can be zoomed with gestures.
      supportZoom: true,
      wideViewport: true,
      overViewModeLoad: true,
      ua: "default",
      // Here are the trustlist settings. When the loading page has multiple addresses, such as the successful loading of the sign-in address and the inconsistent entry address, you need to set the trustlist.
      list: ["new RegExp('https?.*')"]
    },
    onInit() {
      console.info('onInit: ');
    },
    onPageStart(e) {
      console.info('pagestart: ' + e.url)
    },

    setUA:function(uaValue){
      this.ua=uaValue;
    },

    onReady(options) {
       var that=this;
        pkg.hasInstalled({
        package: 'com.google.gms',
        success: function (data) {
          console.log('handling success hasInstalled gms: ' + data.result);
          if(data.result){
            that.setUA("gms quickappua");
          }
        },
        fail: function (data, code) {
          console.log('handling fail, code = ' + code);
        }
      })
    },
    // Each page switch triggers
    onPageFinish(e) {
      console.info('pagefinish: ' + e.url, e.canBack, e.canForward);
    },
    onTitleReceive(e) {
      this.title = e.title;
    },
    onError(e) {
      console.info('pageError : ' + e.errorMsg)
    },
    onMessage(e) {
      console.info('onmessage e = ' + e.message + ", url = " + e.url);
    },
    onShow: function () {
      console.info(" onshow");
    },
    onHide: function () {
      console.info("  onHide");
    },
    onBackPress() {
      console.log('onBackPress')
      this.$element('web').canBack({
        callback: function (e) {
          if (e) {
            console.log('web back')
            this.$element('web').back()
          } else {
            console.log('router back')
            router.back()
          }
        }.bind(this)
      })
      return true
    },
  }
</script>
h5_demo.html file:
<html>
<head>
    <title>H5 Demo</title>
    <meta http-equiv="Content-Type" content="text/html; charset=utf-8" />
    <meta name="viewport" content="width=device-width, initial-scale=1">
    <style>
    </style>
    <script language="javascript">
        window.onload = function () {
            var ua = window.navigator.userAgent;
            console.info("ua=" + ua);
            var index = ua.indexOf("hap");
            console.info("ua hap index=" + index);
            if (index >= 0) {
                // Request from a quick app on a mobile phone with HMS Core (APK) installed.
                console.info("request from quickapp on hms phone");
                document.getElementById("googleimg").style.display = "none";
                document.getElementById("tip").innerHTML = "request from quickapp on HMS phone";
            } else if (ua == "gms quickappua") {
                document.getElementById("tip").innerHTML = "request from quickapp on GMS phone";
            }
        };
    </script>
</head>
<body>
    <p style="text-align:center">
        this is a demo
    </p>
    <hr style="height:3px;border:none;border-top:3px double red;" />
    <p style="text-align:center">
        Welcome to you!
    </p>
    <p style="text-align:left">
        This is
        <br/>
        <span id="tip" style="height:50px;">(unknown)</span>
    </p>
    <p style="text-align:center;display:">
        <a id="googleimg" href="xxxxx">
            <img border="0" src="google.png" alt="google" width="90" height="40">
        </a>
    </p>
</body>
</html>
Confirming the Exit of a Quick App
Description
Many products are designed to retain users by displaying a pop-up to confirm whether to exit when they press the back key. Similar to native apps, quick apps implement this function in a page callback function.
Implementation
HUAWEI Quick App provides the callback function onBackPress (Page Lifecycle APIs). You can override the lifecycle function onBackPress and customize the return logic in it to ensure that return value is true. If the result value is not true, Quick App Engine processes the return value as false and the page exits directly. In the following sample code, the prompt API is called to implement the pop-up. If a user taps OK, the pop-up is closed. If a user taps Cancel, the pop-up remains on the current page.
onBackPress() {
    console.log("quit!!!")
    var that = this
    prompt.showDialog({
    title: 'title',
    message: 'Are you sure you want to exit?',
    buttons: [
        {
        text: 'OK',
        color: '#33dd44',
        },
        {
        text: 'Cancel',
        color: '#33dd44'
        }
    ],
    success: function (data) {
        console.log("handling callback", data); // Return the sequence number of the selected button in the buttons array.
        if (data.index === 0) {// Behavior after the OK button is tapped.
        that.$app.exit()
        }else if(data.index === 1){  // Behavior after the Cancel button is tapped.
            console.log("cancel button is clicked");
        }
    },
    cancel: function () {
        console.log("cancel");
    }
    })
    return true
},
The following figure shows the code running effect.
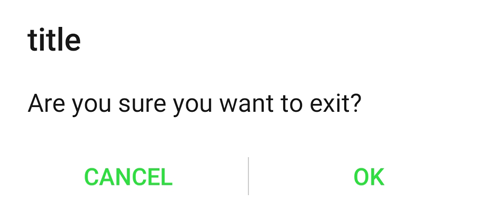
Rectifying the Error "Cannot read property 'animate' of undefined"
Symptom
An error is reported when the animation API of a quick app is called. The code where the exception occurs is as follows:
onInit() {
    var options = {
    duration: 15000,
    easing: 'linear',
    delay: 0,
    fill: 'forwards',
    iterations: 1
    }
    var frames = [
    {
        transform: {
        scaleX: "0.1",
        scaleY: "0.1",
        }
    },
    {
        transform: {
        scaleX: "1",
        scaleY: "1",
        }
    }];
    var animation = this.$element('ceshi').animate(frames, options);
    animation.play();
    animation.onfinish = function () {
    console.log("animation onfinish");
    }
    animation.oncancel = function () {
    console.log("animation oncancel");
    }
},
The following figure shows the error message.

Cause Analysis
This is caused by the calling of the animation API in the lifecycle function onInit. The onInit function listens to page initialization. At this time, the DOM cannot be obtained yet, and this.$element("xx") returns undefined. If the animation API is called again, such an error message is displayed. It is recommended that the animation API be called in the lifecycle function onReady (triggered when the page is created and ready for display) or onShow (triggered when the page is displayed). The DOM can be obtained in the two lifecycle functions.
Solution
Call the animation API in onReady or onShow. The sample code is as follows:
onInit() {
    this.$page.setTitleBar({
    text: "menu",
    textColor: "#ffffff",
    backgroundColor: "#007DFF",
    backgroundOpacity: 0.5,
    menu: true
    });
},
onReady() {         // Change it to onShow.
    var options = {
    duration: 15000,
    easing: 'linear',
    delay: 0,
    fill: 'forwards',
    iterations: 1
    }
    var frames = [
    {
        transform: {
        scaleX: "0.1",
        scaleY: "0.1",
        }
    },
    {
        transform: {
        scaleX: "1",
        scaleY: "1",
        }
    }];
    var animation = this.$element('ceshi').animate(frames, options);
    animation.play();
    animation.onfinish = function () {
    console.log("animation onfinish");
    }
    animation.oncancel = function () {
    console.log("animation oncancel");
    }
},
Failed to Refresh the Page When the Array Elements Are Changed
Symptom
When a quick app is integrated with IAP 3.0, a purchase entry is provided for each product on the in-app product list. When a user successfully purchases a product, a success message is displayed on the page. The following figures show the pages before and after the purchase.
|
|
Figure 1 Before the purchase | Figure 2 After the purchase |


In the preceding figures, the pages are rendered using the list element of the quick app. The data source of list is the product object array, which records each attribute of the product. When you tap Buy on the page shown in Figure 1, the owned attribute of the object is set to true. Figure 2 shows the expected result. However, during debugging, it is found that the values in the array are changed, but the page is not refreshed to Figure 2.
Sample code:
<template>
  <div class="container">
    <list class="list">
      <block for="{{nonConsumeData}}">
        <list-item class="listItem" type="item">
          <div class="productinfo">
            <text class="productName">{{ $item.productName }}</text>
            <text class="productDesc">{{ $item.productDesc }}</text>
            <text class="productDesc">{{ $item.price }}</text>
            <text class="productDesc" if="{{$item.owned}}">{{ $item.purchaseStateDesc }}</text>
            <input type="button" class="btn" value="Buy" onclick="payForNonConsable($item.productId,$item.priceType)" />
          </div>
        </list-item>
      </block>
    </list>
  </div>
</template>

<style>
  .container {
    flex: 1;
    flex-direction: column;
    padding: 16px;
  }

  .btn {
    height: 80px;
    text-align: center;
    border-radius: 5px;
    color: #ffffff;
    font-size: 30px;
    position: absolute;
    align-self: flex-end;
    background-color: #0faeff;
  }

  .productinfo {
    flex-direction: column;
    align-items: center;
    justify-content: center;
    align-content: space-between;
    width: 100%;
  }
  .productName {
    font-size: 37px;
    font-weight: bold;
    width: 90%;
  }

  .productDesc {
    font-size: 32px;
    font-weight: 300;
    width: 90%;
  }

  .list {
    margin-top: 10px;
    height: 100%;
  }

  .listItem {
    flex-direction: column;
    border-bottom: 1px solid #d9d6c3;
    margin-bottom: 10px;
  }
</style>

<script>
  import device from "@system.device";
  module.exports = {
    data: {
      nonConsumeData: []
    },

    onInit() {
      this.$page.setTitleBar({
        text: "Non-consumables",
        textColor: "#ffffff",
        backgroundColor: "#007DFF",
        backgroundOpacity: 0.8,
        menu: true
      });
    },
    onReady(options) {
      this.getProductList();
    },

    getProductList: function () {
      var that = this;
      device.getInfo({
        success: function (ret) {
          console.log("handling success,screenDensity=" + ret.screenDensity);
          let data = [{ productName: "membership", productId: "non01", productDesc: "free use", price: "1.00" }];
            that.nonConsumeData = data;
          that.initProductPurchase(that.nonConsumeData);
        }
      });
    },

    initProductPurchase: function (dataArray) {
      if (dataArray) {
        let size = dataArray.length;
        if (size > 0) {
          dataArray.forEach((item, index, array) => {
            item.owned = false;
            item.purchaseStateDesc = "Available for purchase";
          });
        }
      }
    },

    updateProductPurchaseState: function (productNo) {
      console.info("updateProductPurchaseState productNo=" + productNo);
      if (this.nonConsumeData) {
        let size = this.nonConsumeData.length;
        if (size > 0) {
          this.nonConsumeData.forEach((item, index, array) => {
            let itemId = item.productId;
            if (productNo == itemId) {
              item.owned = true;
              item.purchaseStateDesc = "Purchased";
              console.info("updateProductPurchaseState after item=" + JSON.stringify(item));
            }
          });
        }

        this.nonConsumeData.forEach((item, index, array) => {
          console.info("updateProductPurchaseState concat item=" + JSON.stringify(item));
        });
      }
    },

    payForNonConsable: function (productNo, productType) {
      this.updateProductPurchaseState(productNo);
    }
  };
</script>
Cause Analysis
The preceding code implements the functions of launching the page, obtaining the product list, and initializing products to be purchasable.

The payment code in the sample code is not real. Static data is used to simulate the scenario for your better understanding.
- getProductList(): obtains the product list, which is called in the page lifecycle function onReady.
- initProductPurchase(): initializes the product status, adds the owned and purchaseStateDesc attributes, and sets them to false and Available for purchase respectively. This method is called after the product list is returned.
- nonConsumeData: data source of the list element, which is a product array. The initial value is an empty array. When the getProductList method returns the product information, the product information is as follows:
{productName: "membership", productId: "non01", productDesc: "free use", price: "1.00"} - updateProductPurchaseState(): updates the purchase status of a product after a user successfully purchases a product by setting owned to true and purchaseStateDesc to Purchased.
The cause is analyzed layer by layer based on the code.
- The product element in the product array nonConsumeData does not have the owned and purchaseStateDesc attributes first. The two attributes are added by the initProductPurchase() method, and then the attribute values are updated by the updateProductPurchaseState() method. After value updates, the page is not refreshed.
- After the concat and splice methods of the array are used, the page is still not refreshed.
- initProductPurchase is called to set owned to true directly, but the page is still not refreshed.
- Vue cannot detect the addition or removal of attributes so it can only convert attributes that exist at the beginning to responsive ones. For details, please refer to Reactivity in Depth. However, when the preceding code assigns a value to nonConsumeData, the array element does not contain the owned and purchaseStateDesc attributes. As a result, the system cannot respond to the subsequent add operations.
Solution
Since JavaScript cannot detect the addition or removal of object attributes and HUAWEI Quick App does not provide a method similar to Vue.set(object, propertyName, value) to add a responsive property to the nested object, you can only ensure that each attribute in the array element is added during array initialization. The modified code is as follows:
getProductList: function () {
  var that = this;
  device.getInfo({
    success: function (ret) {
      console.log("handling success,screenDensity=" + ret.screenDensity);
      let data = [{ productName: "membership", productId: "non01", productDesc: "free use", price: "1.00" }];

        // Original implementation, where pages cannot be refreshed.
        // that.nonConsumeData = data;
        // that.initProductPurchase(that.nonConsumeData);

        that.initProductPurchase(data);
        that.nonConsumeData = data;
    }
  });
},
Rectifying the Asynchronous Calling Error "regeneratorRuntime is not defined"
Symptom
When the await method is called asynchronously, the client displays the error message "regeneratorRuntime is not defined", as shown in the following figure.
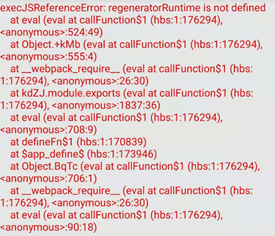
To call the await method, add @babel/runtime/regenerator. The sample code is as follows:
<script>
  const injectRef = Object.getPrototypeOf(global) || global;
  // injection regeneratorRuntime
  injectRef.regeneratorRuntime = require('@babel/runtime/regenerator');
  module.exports = {

  }
</script>
Solution
Add the preceding code declaration to the beginning of the app.ux file. The specific code is as follows:
<script>
  import push from "@service.push";
  import device from '@system.device';
  const injectRef = Object.getPrototypeOf(global) || global;
  // injection regeneratorRuntime
  injectRef.regeneratorRuntime = require('@babel/runtime/regenerator');
  module.exports = {
    data: {
      hasSaved: "no"
    },
    onCreate() {
      console.info("Application onCreate");
      console.info("Push service provider:" + push.getProvider());
      this.hasSaved = "yes";
      push.subscribe({
        success: function (data) {
          console.log("push.subscribe succeeded, regid=" + JSON.stringify(data));
        },
        fail: function (data, code) {
          console.log("push.subscribe failed, result data=" + JSON.stringify(data) + ", code=" + code);
        },
        complete: function () {
          console.log("push.subscribe completed");
        }
      });
      this.testAsync();
    },
    async testAsync() {
      try {
        let res = await device.getDeviceId();
        console.info("get device id " + JSON.stringify(res.data));
      } catch (e) {
        console.log("get device id error " + e.code);
      }
    },
    onShow(options) {
      //console.info("Global data in the manifest file:" + this.$app.$data.baseUrl);
    },
    onDestroy() {
      console.info("Application onDestroy");
    },
    dataApp: {
      localeData: {}
    }
  };
</script>
Abnormal Width of a Subelement in the refresh Element
Symptom
The width of a subelement in the refresh element is abnormal.
The code where the exception occurs is as follows:
<template>
  <div class="container">
    <refresh class="refresh">
        <input value="1111111" class="input-test" type="button" />
        <input value="2222222" class="input-test1" type="button" />
    </refresh>
  </div>
</template>
<style>
  .container {
    flex-direction: column;
    display: flex;
  }
  .refresh {
    width: 80%;
    height: 800px;
    background-image: url(../Common/logo.png);
    position: absolute;
  }
  .input-test {
    width: 500px;
    height: 200px;
    background-color: #ff0000;
  }
  .input-test1 {
    width: 500px;
    height: 200px;
    background-color: #006400;
  }
</style>
The following figure demonstrates the exception.
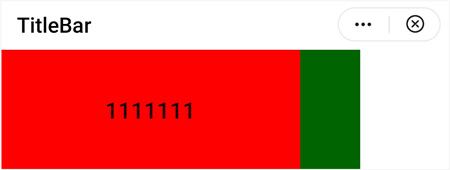
Cause Analysis
The layout of the refresh element is incorrect. The div tag needs to be added to the refresh element to avoid this problem.
Solution
Modify the code as follows:
<template>
  <div class="container">
    <refresh class="refresh">
      <div>
        <input value="1111111" class="input-test" type="button" />
        <input value="2222222" class="input-test1" type="button" />
      </div>
    </refresh>
  </div>
</template>

<style>
  .container {
    flex-direction: column;
    display: flex;
  }
  .refresh {
    width: 80%;
    height: 800px;
    background-image: url(../Common/logo.png);
    position: absolute;
  }
  .input-test {
    width: 500px;
    height: 200px;
    background-color: #ff0000;
  }
  .input-test1 {
    width: 500px;
    height: 200px;
    background-color: #006400;
  }
</style>
The modified effect is as follows.
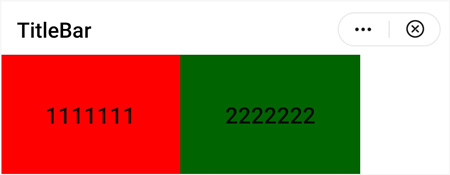
Playing or Pausing a Video Based on the Network Status
Description
Nowadays, a rich variety of streaming media services are available, and users may consume a large amount of traffic for them. To reduce the spending on mobile traffic, the following function needs to be implemented:
Videos are automatically played when devices are connected to a Wi-Fi network and are paused when the devices are disconnected from the Wi-Fi network. When devices are connected to a mobile network, users need to manually play videos.
Implementation
- You can use the network.subscribe API to globally listen to the network status change and obtain the callback of the network status.
- After the callback information is obtained, check whether the device is connected to a Wi-Fi or mobile network and further control the playback or pause of the video element.
Sample code:
app.ux file:
<script>
  import network from '@system.network';
  module.exports = {
    onCreate() {
      console.info('Application onCreate');
      this.listenNetwork();
    },
    onDestroy() {
      console.info('Application onDestroy');
      network.unsubscribe();
    },
    listenNetwork: function () {
      console.info("listenNetwork START ");
      var that = this
      network.subscribe({
        callback: function (ret) {
          that.data.localeData.currentType = ret.type;
          console.info("listenNetwork CALLBACK :" + that.data.localeData.currentType);
        },
        fail: function (erromsg, errocode) {
          console.log('network.subscribe----------' + errocode + ': ' + erromsg)
        }
      })
    },
    data: {
      localeData: {
        currentType: '',
      }
    }
  }
</script>
hello.ux file:
<template>
  <div class="container">
    <text class="title">Network Type:{{currentType.currentType}}</text>
    <video id="video" style="height: 50%;width: 100%;" src="../Common/demo.mp4"></video>
  </div>
</template>
<style>
  .container {
    flex-direction: column;
    justify-content: center;
    align-items: center;
  }
  .title {
    font-size: 40px;
  }
</style>
<script>
  import prompt from '@system.prompt';
  module.exports = {
    data: {
      componentData: {},
      currentType: {},
    },
    onInit() {
      this.$page.setTitleBar({
        text: 'menu',
        textColor: '#ffffff',
        backgroundColor: '#007DFF',
        backgroundOpacity: 0.5,
        menu: true
      });
      this.currentType = this.$app.$def.data.localeData;
      this.$watch('currentType.currentType', 'listenNetType');
    },
    listenNetType: function (newValue, oldValue) {
      console.info("listenNetType newValue= " + newValue + ", oldValue=" + oldValue);
      if (newValue === 'wifi') {
        this.$element("video").start();
        prompt.showToast({
          message: 'Wi-Fi, start.',
          duration: 3000,
          gravity: 'center'
        })
      } else {
        this.$element("video").pause();
        prompt.showToast({
          message: 'non Wi-Fi, pause.',
          duration: 3000,
          gravity: 'center'
        })
      }
    },
  }
</script>
Implementation effect
|
Failure to Listen to Animation Events by Calling addEventListener()
Symptom
The animation style is set in style and the addEventListener() method is called in the lifecycle function onShow to listen to animation events. However, no animation event is detected, and no callback result is returned.
The code where the exception occurs is as follows:
<template>
  <!-- Only one root node is allowed in template. -->
  <div class="container" id="ani">
    <text class="title" >Hello World</text>
  </div>
</template>
<style>
  .container {
    flex-direction: column;
    justify-content: center;
    align-items: center;
    animation-name: translateX;
    animation-duration: 1000ms;
  }
  .title {
    font-size: 100px;
  }
  @keyframes translateX {
    from {
      transform: translateX(20px);
    }
    to {
      transform: translateX(200px);
    }
  }
</style>
<script>
  import prompt from '@system.prompt';
  module.exports = {
    data: {
      componentData: {},
    },
    onInit() {
      this.$page.setTitleBar({
        text: 'menu',
        textColor: '#ffffff',
        backgroundColor: '#007DFF',
        backgroundOpacity: 0.5,
        menu: true
      });
    },
    onShow(options) {
      '// Do something .'
      console.log("111111111111111111111111111111111");
      var element = this.$element("ani")
      element.addEventListener("animationend", (event) => {
        console.log("22222222222222")
        prompt.showToast({
          message: 'type: ' + event.type + ', animationName: ' + event.animationName + ', elapsedTime: ' + event.elapsedTime
        })
      })
    },
  }
</script>
The callback result is as follows.

Cause Analysis
This is caused by the bottom-layer implementation difference between Huawei and the Quick App Alliance. To obtain the callback result, Huawei Quick App requires calling the listener before the animation effect is triggered. However, the animation effect has been triggered when the onShow function is called, and no animation event is detected. To obtain the callback result, you must call addEventListener and then dynamically modify the class to trigger the CSS-based animation effect.
Solution
Call the addEventListener listener before triggering an animation style. The animation effect can be triggered by dynamically changing the class. The code is as follows:
<template>
  <!-- Only one root node is allowed in template. -->
  <div class="container {{name}}" id="ani">
    <text class="title">Hello World</text>
  </div>
</template>
<style>
  .container {
    flex-direction: column;
    justify-content: center;
    align-items: center;
  }
  .animation {
    animation-name: translateX;
    animation-duration: 1000ms;
  }
  .title {
    font-size: 100px;
  }
  @keyframes translateX {
    from {
      transform: translateX(20px);
    }
    to {
      transform: translateX(200px);
    }
  }
</style>
<script>
  import prompt from '@system.prompt';
  module.exports = {
    data: {
      componentData: {},
      name: ''
    },
    onInit() {
      this.$page.setTitleBar({
        text: 'menu',
        textColor: '#ffffff',
        backgroundColor: '#007DFF',
        backgroundOpacity: 0.5,
        menu: true
      });
    },
    onShow(options) {
      '// Do something .'
      console.log("111111111111111111111111111111111");
      var element = this.$element("ani")
      element.addEventListener("animationend", (event) => {
        console.log('type: ' + event.type + ', animationName: ' + event.animationName + ', elapsedTime: ' + event.elapsedTime)
        prompt.showToast({
          message: 'type: ' + event.type + ', animationName: ' + event.animationName + ', elapsedTime: ' + event.elapsedTime
        })
      })
      this.name = "animation"
    },
  }
</script>
The callback result is as follows.

No Message Is Displayed on the Notification Bar Event If Result Code 80000 Is Returned by a Quick App
Symptom
When the quick app is integrated with Push Kit, an API of the server is used to push messages. Result code 80000 is returned but no message is displayed on the notification bar of the mobile phone.
Cause Analysis
The success of an API call does not necessarily mean that messages will be displayed on the notification bar. They will be displayed only when some conditions are met, for example, the home screen icon has been created or the app has been added to Favorites.
Solution
You are advised to perform the following operations to rectify the fault:
- Ensure that a home screen icon is added or the app is added to Favorites. If not, find the two operations in the unified menu and perform either of them, as shown in the following figure.
- You are advised to configure the callback address when configuring Push Kit. The callback address can be used to obtain the actual message delivery status on the device.
A quick app can push only five messages to a user every day. When frequency control is triggered, Huawei Push Kit server sends status code 102 to your callback address.

Once frequency control is triggered, the server does not send any message to the mobile phone.
- Check whether the value of the fast_app_target field in the message body is correct.
- If you need to push a message to Huawei Quick App Loader during development and debugging, set this field to 1.
- If you need to push a message to AppGallery before release, set this field to 2.
- Ensure that the value of validate_only in the message body is false. If this parameter is set to true, only the format validity check is performed on the test message, and the message will not be pushed to the user device.
- Check the setting of params in the message body. When pushtype is set to 0, the params parameter must be passed in the message body even if the message does not need to carry any parameter. Sample code:
"params":{ } - Ensure that the latest value of regId of the device is used.
Generally, the value of regId does not change and does not need to be reported to the server each time after it is obtained. If regId is reported every time and the server stores all updates instead of updating the value each time, one mobile phone will have multiple values of regId.
This will cause the following problem: When you push all values of regId and an earlier value is successfully pushed first, later values will be discarded due to frequency control. Also, Quick App Engine checks the value of regId. If the value is not the latest, the message will not be displayed, either. Therefore, when a value of regId is reported, the service server must replace the early value with the new one.

Error code 1001 is returned when the show method is called to stimulate a rewarded ad
Symptom
If you close a rewarded ad that is playing and then directly call the show method to play the ad again, error message "{"errCode":1001,"errMsg":"Parameter error."}" is displayed.
The code where the exception occurs is as follows:
<template>
  <div class="item-container">
    <text class="alert">This is a rewarded ad demo.</text>
    <text class="alert">Score:{{ score }}</text>
    <input type="button" class="btn" value="Play" onclick="play" />
    <input type="button" class="btn" value="Watch Video" onclick="rewardAdShow" />
  </div>
</template>
<style>
  .alert {
    font-size: 40px;
    margin-top: 20px;
    margin-bottom: 20px;
  }
  .item-container {
    margin-top: 50px;
    padding: 20px;
    flex-direction: column;
    align-items: center;
    align-content: center;
  }
  .btn {
    height: 80px;
    width: 60%;
    background-color: #00bfff;
    color: #ffffff;
    border-radius: 20px;
    margin-bottom: 20px;
  }
  .btn:active {
    background-color: #058fbd;
  }
</style>
<script>
  import ad from "@service.ad";
  import prompt from "@system.prompt";
  let rewardedVideoAd;
  export default {
    data: {
      provider: "",
      score: 0,
      rewarded: {
        adUnitId: "testx9dtjwj8hp",
        errStr: ""
      }
    },
    onInit() {
      this.$page.setTitleBar({ text: "Rewarded Ad" });
    },
    onReady(options) {
      this.loadRewardAd();
    },
    getAdProvider: function () {
      this.provider = ad.getProvider();
      prompt.showToast({
        message: "getProvider : " + this.provider,
        duration: 2000,
        gravity: "center"
      });
    },
    loadRewardAd() {
      this.getAdProvider();
      if (this.provider !== "huawei") {
        console.info("the device does not support ad.");
        return;
      }
      rewardedVideoAd = ad.createRewardedVideoAd({
        adUnitId: this.rewarded.adUnitId
      });
      rewardedVideoAd.onLoad(() => {
        this.rewarded.errStr = "";
        prompt.showToast({
          message: "onRewardedLoaded",
          duration: 2000,
          gravity: "center"
        });
      });
      rewardedVideoAd.onError(e => {
        console.error("load rewarded video ad error:" + JSON.stringify(e));
        this.rewarded.errStr = JSON.stringify(e);
      });
      rewardedVideoAd.onClose(res => {
        console.log("rewarded ad onClose is watch end: " + res.isEnded);
        if (res.isEnded) {
          prompt.showToast({
            message: "Watch video show finished , add 5 scores",
            duration: 2000,
            gravity: "center"
          });
          this.score += 5;
        }
      });
      rewardedVideoAd.load();
    },
    onDestroy() {
      rewardedVideoAd && rewardedVideoAd.destroy();
    },
    rewardAdShow: function () {
      rewardedVideoAd.show();
    },
    play: function () {
      if (this.score === 0) {
        prompt.showToast({
          message: "Watch video ad to add score",
          duration: 2000,
          gravity: "center"
        });
        return;
      }
      let randomNum = parseInt(Math.random(), 1);
      console.info("play randomNum= " + randomNum);
      if (randomNum === 1) {
        this.score += 1;
        prompt.showToast({
          message: 'you win!',
          duration: 2000,
          gravity: 'center'
        })
      } else {
        this.score -= 2;
        if (this.score < 0) {
          this.score = 0;
          prompt.showToast({
            message: 'you lose!',
            duration: 2000,
            gravity: 'center'
          })
        }
      }
    },
  };
</script>
Cause Analysis
Before calling the show API to display a rewarded ad, you need to perform the pre-loading operation. Otherwise, the ad resource cannot be requested and the ad cannot be displayed.
Solution
Call the load method in onClose. In this way, when a rewarded ad is closed, the ad resource required for the next time can be loaded in advance, and the show method can be called, if necessary, to display the ad without any delay.
rewardedVideoAd.onClose(res => {
  console.log("rewarded ad onClose is watch end: " + res.isEnded);
  if (res.isEnded) {
    prompt.showToast({
      message: "Watch video show finished , add 5 scores",
      duration: 2000,
      gravity: "center"
    });
    this.score += 5;
  }
  // Pre-load the next ad.
  rewardedVideoAd.load(); // Add the pre-loading code here.
});
rewardedVideoAd.load();
},
The code in the UX file is as follows:
<template>
  <div class="item-container">
    <text class="alert">This is a rewarded ad demo.</text>
    <text class="alert">Score:{{ score }}</text>
    <input type="button" class="btn" value="Play" onclick="play" />
    <input type="button" class="btn" value="Watch Video" onclick="rewardAdShow" />
  </div>
</template>
<style>
  .alert {
    font-size: 40px;
    margin-top: 20px;
    margin-bottom: 20px;
  }
  .item-container {
    margin-top: 50px;
    padding: 20px;
    flex-direction: column;
    align-items: center;
    align-content: center;
  }
  .btn {
    height: 80px;
    width: 60%;
    background-color: #00bfff;
    color: #ffffff;
    border-radius: 20px;
    margin-bottom: 20px;
  }
  .btn:active {
    background-color: #058fbd;
  }
</style>
<script>
  import ad from "@service.ad";
  import prompt from "@system.prompt";
  let rewardedVideoAd;
  export default {
    data: {
      provider: "",
      score: 0,
      rewarded: {
        adUnitId: "testx9dtjwj8hp",
        errStr: ""
      }
    },
    onInit() {
      this.$page.setTitleBar({ text: "Rewarded Ad" });
    },
    onReady(options) {
      this.loadRewardAd();
    },
    getAdProvider: function () {
      this.provider = ad.getProvider();
      prompt.showToast({
        message: "getProvider : " + this.provider,
        duration: 2000,
        gravity: "center"
      });
    },
    loadRewardAd() {
      this.getAdProvider();
      if (this.provider !== "huawei") {
        console.info("the device does not support ad.");
        return;
      }
      rewardedVideoAd = ad.createRewardedVideoAd({
        adUnitId: this.rewarded.adUnitId
      });
      rewardedVideoAd.onLoad(() => {
        this.rewarded.errStr = "";
        prompt.showToast({
          message: "onRewardedLoaded",
          duration: 2000,
          gravity: "center"
        });
      });
      rewardedVideoAd.onError(e => {
        console.error("load rewarded video ad error:" + JSON.stringify(e));
        this.rewarded.errStr = JSON.stringify(e);
      });
      rewardedVideoAd.onClose(res => {
        console.log("rewarded ad onClose is watch end: " + res.isEnded);
        if (res.isEnded) {
          prompt.showToast({
            message: "Watch video show finished , add 5 scores",
            duration: 2000,
            gravity: "center"
          });
          this.score += 5;
        }
        // rewardedVideoAd.offError(() => { console.log('offError'); })
        // rewardedVideoAd.offLoad(() => { console.log('offLoad'); })
        // rewardedVideoAd.destroy();
        // Pre-load the next ad.
        rewardedVideoAd.load();
      });
      rewardedVideoAd.load();
    },
    onDestroy() {
      rewardedVideoAd && rewardedVideoAd.destroy();
    },
    rewardAdShow: function () {
      rewardedVideoAd.show();
    },
    play: function () {
      if (this.score === 0) {
        prompt.showToast({
          message: "Watch video ad to add score",
          duration: 2000,
          gravity: "center"
        });
        return;
      }
      let randomNum = parseInt(Math.random(), 1);
      console.info("play randomNum= " + randomNum);
      if (randomNum === 1) {
        this.score += 1;
        prompt.showToast({
          message: 'you win!',
          duration: 2000,
          gravity: 'center'
        })
      } else {
        this.score -= 2;
        if (this.score < 0) {
          this.score = 0;
          prompt.showToast({
            message: 'you lose!',
            duration: 2000,
            gravity: 'center'
          })
        }
      }
    },
  };
</script>
Adding a Badge to the Upper Right Corner of a Quick App Icon
Description
App icon badges can help attract customers. An example is as follows.
With rich elements and APIs, Huawei Quick App also supports this function.
Implementation
[Method 1] Use the stack element to implement layer-by-layer stacking.
Place an image at the bottom layer and use the text element to override the bottom layer by controlling the margin attribute of the text element.
The sample code is as follows:
<template>
  <!-- Only one root node is allowed in template. -->
  <div class="container">
    <stack class="stack">
      <div style="flex-direction: column;">
        <image class="img" src="/Common/3.jpg"></image>
        <text style="height: 60px;font-size: 40px;text-align: center;color: #000000;">Quick app</text>
      </div>
      <text class="txt"> $1 off</text>
    </stack>
  </div>
</template>
<style>
  .container {
    flex-direction: column;
    justify-content: center;
    align-items: center;
  }
  .stack {
    width: 100%;
    height: 400px;
    margin-left: 30px;
  }
  .img {
    width: 300px;
    height: 300px;
    margin-top: 5px;
  }
  .txt {
    color: white;
    width: 150px;
    height: 40px;
    text-align: center;
    margin-left: 200px;
    background-color: red;
    border-radius: 20px;
    font-size: 35px;
  }
</style>
<script>
  module.exports = {
    data: {
      componentData: {},
      value: '',
      display: true
    },
    onInit() {
      this.$page.setTitleBar({
        text: 'menu',
        textColor: '#ffffff',
        backgroundColor: '#007DFF',
        backgroundOpacity: 0.5,
        menu: true
      });
    },
  }
</script>
The final effect is as follows.
[Method 2] Use the canvas element to implement this function.
- Call image and drawImage of canvas to draw an app icon.
- Prepare another canvas, call the fillText() method to draw the text in the upper right corner of the canvas, use the toTempFilePath() method to convert the text into an image, and then obtain the URI of the converted image.
- Call the image and drawImage methods in the first canvas to place the badge at the top.
<template>
  <!-- Only one root node is allowed in template. -->
  <div class="container">
    <canvas class="canvas" id="canvas"></canvas>
    <canvas show="{{display}}" class="canvas1" id="canvas1"></canvas>
  </div>
</template>
<style>
  .container {
    flex-direction: column;
    justify-content: center;
    align-items: center;
  }
  .txt {
    color: white;
    width: 150px;
    height: 40px;
    text-align: center;
    margin-left: 200px;
    background-color: red;
    border-radius: 20px;
    font-size: 35px;
  }
  .canvas {
    width: 100%;
    height: 400px;
    margin-left: 30px;
  }
  .canvas1 {
    width: 150px;
    height: 40px;
    border-radius: 20px;
    background-color: red;
  }
</style>
<script>
  module.exports = {
    data: {
      componentData: {},
      value: '',
      display: true
    },
    onInit() {
      this.$page.setTitleBar({
        text: 'menu',
        textColor: '#ffffff',
        backgroundColor: '#007DFF',
        backgroundOpacity: 0.5,
        menu: true
      });
    },
    onShow(options) {
      '// Trigger operations when an element is shown.'
      this.drawSmallPic();
      setTimeout(() => {
        this.drawBigPic()
        this.display = false
      }, 50);
},
// Draw an icon.
    drawBigPic() {
      var test = this.$element("canvas");
      var ctx = test.getContext("2d");
      var img = new Image();
      img.src = "/Common/3.jpg";
      img.onload = function () {
        console.log("Image loaded successfully.");
        ctx.drawImage(img, 10, 10, 300, 300);
      }
      this.draw()
},
// Draw a badge.
    draw() {
      var test = this.$element("canvas");
      var ctx = test.getContext("2d");
      var img = new Image();
      img.src = this.src;
      img.onload = function () {
        console.log("Image loaded successfully.");
        ctx.drawImage(img, 200, 0);
      }
},
// Draw the text on the badge, convert the text into an image, and assign the image URI to the src variable.
    drawSmallPic() {
      this.message = "drawfillStyleforcreatePattern";
      var test = this.$element("canvas1");
      var ctx = test.getContext("2d");
      ctx.font = "35px";
      ctx.fillText(" $1 off", 0, 30);
      test.toTempFilePath({
        x: 0,
        y: 0,
        width: 150,
        height: 40,
        fileType: "png",
        quality: 1.0,
        success: (data) => {
          this.src = data.uri;
          console.log(`Canvas toTempFilePath success ${data.uri}`)
          console.log(`Canvas toTempFilePath success ${data.tempFilePath}`)
        },
        fail: (data) => {
          console.log('Canvas toTempFilePath data =' + data);
        },
        complete: () => {
          console.log('Canvas toTempFilePath complete.');
        }
      })
    }
  }
</script>
The final effect is as follows.
Failure to Display Images Downloaded Through the File Download API
Symptom
Logs show that a success callback is triggered after images are downloaded through the file download API, but the returned value does not contain any file path. As a result, the image address cannot be obtained.

The code where the exception occurs is as follows:
download() {
      var that = this
      // download file, store locally
      request.download({
        url: "https://developer.huawei.com/dev_index/img/logo_ch.png"
        description: 'This is description.',
        filename: 'HuaweiLogo.png',
        success: function (ret) {
          that.fileDownloadData = ret.token
          console.log('file_download_data--------' + JSON.stringify(ret.token))
        },
        fail: function (errmsg, errcode) {
          console.log('file_download_data--------' + errcode + ': ' + errmsg)
        }
      })
    },
Cause Analysis
When an image is successfully downloaded through the request.download API, a token is returned, but the image address is not returned. The request.onDownloadComplete API needs to be called to listen to the download task. The URI of the downloaded file can be returned only after the returned token is passed to this API as a parameter. In this case, the image address can be obtained.
Solution
Call the request.download API to obtain a token. Then call the request.onDownloadComplete API and pass the token as a parameter. When a success callback is triggered, the URI of the downloaded file can be obtained.
Sample code:
<template>
  <div class="container">
    <image if="{{display}}" style="width:400px;height: 400px;object-fit: contain;" src="{{imgSrc}}"></image>
    <input type="button" class="btn" value="Download" onclick="download" />
  </div>
</template>
<style>
  .container {
    flex-direction: column;
    align-content: center;
    align-items: center;
justify-content: center;
background-color: grey;
  }
  text {
    margin-bottom: 50px;
  }
  input {
    margin-bottom: 50px;
    margin-right: 60px;
    margin-left: 60px;
    justify-content: center;
  }
</style>
<script>
  import request from '@system.request';
  export default {
    data: {
      display: false,
      imgSrc: '',
      fileDownloadData: ''
    },
    onInit() {
    },
    download() {
      var that = this
      // download file, store locally
      request.download({
        url: "https://developer.huawei.com/dev_index/img/logo_ch.png",
        description: 'This is description.',
        filename: 'HuaweiLogo.png',
        success: function (ret) {
          that.fileDownloadData = ret.token
          console.log('file_download_data--------' + JSON.stringify(ret.token))
          request.onDownloadComplete({
            token: that.fileDownloadData,
            success: function (ret) {
              that.imgSrc = ret.uri
              that.display = true
              console.log('fileDownloadUri--------' + JSON.stringify(ret.uri))
            },
            fail: function (errmsg, errcode) {
              console.log('fileDownloadUri failed--------' + errcode + ': ' + errmsg)
            }
          })
        },
        fail: function (errmsg, errcode) {
          console.log('file_download_data--------' + errcode + ': ' + errmsg)
        }
      })
    },
  }
</script>
The log content is as follows.

Only the Last Ad Can Be Redirected to the Landing Page When a Page Contains Multiple Ads
Symptom
If a page has multiple native ad subelements, only the last one can be redirected to the landing page.
The code where the exception occurs is as follows:
nativeAd.ux file:
<template>
  <div>
  <div class="item-container">
    <image class="img" src="{{native.adImgSrc}}" @click="reportNativeClick"></image>
    <div class="container" if="isShow">
      <div class="container-left">
        <text class="title" if="isShowTitle">{{native.title}}</text>
        <div class="source">
          <text if="isShowSource">{{native.source}}</text>
          <text>Ad</text>
        </div>
      </div>
      <div if="native.creativeType === 3" class="known-more-btn" @click="reportNativeClick">
        <image src="../../assets/img/Public_qus.png"></image>
        <text>{{native.btnTxt}}</text>
      </div>
      <div if="native.creativeType > 100" class="ad-btn">
        <input type="button" class="btn" />
        <div class="progress" style="{{progress}}"></div>
        <text class="btn-text">{{native.btnTxt}}</text>
      </div>
    </div>
  </div>
  </div>
</template>
<style lang="less">
  .item-container {
    width: 100%;
    padding: 0 16px;
    flex-direction: column;
    align-items: center;
    align-content: center;
  }
  .img{
    width: 100%;
    background-size: cover;
    border-top-left-radius: 16px;
    border-top-right-radius: 16px;
  }
  .container {
    width: 100%;
    padding: 8px 12px;
    flex-direction: row;
    justify-content: center;
    align-items: center;
    border-bottom-left-radius: 16px;
    border-bottom-right-radius: 16px;
    background-color: #fff;
  }
  .container-left {
    flex-direction: column;
    flex: 1;
  }
  .title {
    font-size: 16px;
    line-height: 21px;
    color: #000000;
    lines: 1;
    text-overflow: ellipsis;
  }
  .source {
    text {
      font-size: 12px;
      color: #999;
    }
  }
  .known-more-btn {
    flex-direction: row;
    align-content: center;
    text-align: center;
    height: 28px;
    line-height: 28px;
    border-radius: 14px;
    background-color: rgba(#FF7500, 0.1);
    padding: 6px 10px;
    margin-right: 8px;
    text {
      color: #FF7500;
      font-size: 12px;
    }
    image {
      margin-right: 5px;
    }
  }
  .ad-btn {
    width: 60px;
    height: 28px;
    line-height: 28px;
    border-radius: 14px;
    margin-right: 8px;
  }
  .btn {
    width: 100%;
    height: 100%;
    font-size: 12px;
    color: #FF7500;
    border-radius: 14px;
    background-color: rgba(#FF7500, 0.2);
  }
  .btn-text {
    font-size: 12px;
    color: #FF7500;
    position: absolute;
    top: 5px;
    left: 0;
    right: 0;
    text-align: center;
  }
  .progress {
    position: absolute;
    top: 0;
    right: 0;
    bottom: 0;
    background-color: rgba(#fff, 0.3);
  }
  .more {
    width: 24px;
    height: 24px;
    background-size: contain;
    opacity: 0.6;
    transform:rotate(90deg);
  }
  .not-like {
    width: 80px;
    height: 30px;
    line-height: 30px;
    border-radius: 5px;
    position: absolute;
    bottom: 50px;
    right: 16px;
    font-size: 12px;
    text-align: center;
    font-weight: 700;
    background-color: #fff;
    border: 1px solid #ddd;
  }
</style>
<script>
  import ad from "@service.ad";
  let TAG = "nativeAd";
  let nativeAd;
  export default {
    data: {
      componentName: "ad",
      provider: "",
      isShow: false,
      isShowAd: true,
      style: {},
      isShowLike: false,
      isShowTitle: false,
      isShowSource: false,
      progress: {},
      native: {
        adId: "",
        title: "",
        source: "",
        adImgSrc: "",
        btnTxt: "",
        creativeType: null,
        adData: {},
        adUnitId: "testb65czjivt9", // testu7m3hc4gvm: large image with text; testb65czjivt9: large image with text and the download button
      }
    },
    props: {
      advertId: String, //@default: ''  description: ad ID
    },
    onInit() {
      this.$page.setTitleBar({ text: "Native Ad" });
    },
    onReady() {
      this.showNativeAd();
    },
    showNativeAd() {
      // Obtain the service provider. If the obtained service provider is not huawei, ads are not supported.
      this.provider = ad.getProvider();
      if (this.provider !== "huawei") {
        return;
      }
      // Create an ad element.
      nativeAd = ad.createNativeAd({ adUnitId: this.advertId });
      nativeAd.onLoad(data => {
        // Callback upon success.
        this.native.adData = data.adList[0];
        if (this.native.adData) {
          if (this.native.adData.imgUrlList && this.native.adData.imgUrlList.length > 0) {
            this.native.adImgSrc = this.native.adData.imgUrlList[0];
          } else {
            this.native.adImgSrc = "";
            this.isShowAd = false;
          }
          this.native.creativeType = this.native.adData.creativeType || null;
          this.native.title = this.native.adData.title || "";
          this.native.adId = this.native.adData.adId || "";
          if (!this.native.title) {
            // The title is not displayed if it is empty.
            this.isShowTitle = false;
          }
          if (!this.native.adData.source) {
            // If the source is empty, the word ad is displayed in the position where the source is supposed to display.
            this.isShowSource = false;
          } else {
            this.native.source = this.native.adData.source + ' '
          }
          if (this.native.creativeType === 3) {
            // Large image with text.
            if (this.native.adData.clickBtnTxt) {
              this.native.btnTxt = this.native.adData.clickBtnTxt;
            } else {
              this.native.btnTxt = "Learn more";
            }
          }
          if (this.native.creativeType === 103) {
            // Large image with text and a download button.
            if (this.native.adData.clickBtnTxt) {
              this.native.btnTxt = this.native.adData.clickBtnTxt;
            } else {
              this.native.btnTxt = "Download";
            }
          }
          this.isShowTitle = true;
          this.isShowSource = true;
          this.reportNativeShow();
        }
      });
      nativeAd.onError(e => {
        console.error(TAG," load ad fail:" + JSON.stringify(e));
        // Callback upon failure.
        this.isShowAd = false;
      });
      // Obtain ad data.
      nativeAd.load();
    },
    reportNativeShow() {
      if (nativeAd) {
        console.log(TAG,"nativeAd reportAdShow");
        nativeAd.reportAdShow({ adId: this.native.adId });
      }
    },
    reportNativeClick() {
      console.log(TAG,"nativeAd reportAdClick");
      nativeAd.reportAdClick({
        adId: this.native.adId
      });
    },
    onDestroy() {
      if (nativeAd) {
        // Destroy the ad element and cancel the download.
        nativeAd.destroy();
        nativeAd.cancelDownload({
          adId: this.native.adId
        });
      }
    },
  };
</script>
hello.ux file:
<import name="native-ad" src="../compoment/nativeAd.ux"></import>
<template>
  <!-- Only one root node is allowed in template. -->
  <div class="container">
    <native-ad advert-id="testu7m3hc4gvm"></native-ad>
    <native-ad advert-id="testu7m3hc4gvm"></native-ad>
  </div>
</template>
<style>
  .container {
    flex-direction: column;
    justify-content: center;
    align-items: center;
  }
  .title {
    font-size: 100px;
  }
</style>
<script>
  module.exports = {
    data: {
      componentData: {},
    },
    onInit() {
      this.$page.setTitleBar({
        text: 'menu',
        textColor: '#ffffff',
        backgroundColor: '#007DFF',
        backgroundOpacity: 0.5,
        menu: true
      });
    }
  }
</script>
Cause Analysis
This issue is related to the definition of the ad object nativeAd. The object is defined as a global object on the page. As a result, the object created by the ad.createNativeAd API is overwritten by the latest creation result. The value of adId returned by each ad element is unique. When the previous ad is tapped, the engine cannot obtain the corresponding object. As a result, the response fails.
Solution
Bind the ad object nativeAd in the subelement to the this object to implement an independent object that will not be overwritten. Modify the nativeAd.ux file as follows:
<script>
  import ad from "@service.ad";
  let TAG = "nativeAd";
 // let nativeAd;
  export default {
    data: {
      componentName: "ad",
      provider: "",
      isShow: false,
      isShowAd: true,
      style: {},
      isShowLike: false,
      isShowTitle: false,
      isShowSource: false,
      progress: {},
      native: {
        adId: "",
        title: "",
        source: "",
        adImgSrc: "",
        btnTxt: "",
        creativeType: null,
        adData: {},
        adUnitId: "testb65czjivt9", // testu7m3hc4gvm: large image with text; testb65czjivt9: large image with text and the download button
      }
    },
    props: {
      advertId: String, //@default: ''  description: ad ID
    },
    onInit() {
      this.$page.setTitleBar({ text: "Native Ad" });
    },
    onReady() {
      this.showNativeAd();
    },
    showNativeAd() {
      // Obtain the service provider. If the obtained service provider is not huawei, ads are not supported.
      this.provider = ad.getProvider();
      if (this.provider !== "huawei") {
        return;
      }
      // Create an ad element.
     this.nativeAd = ad.createNativeAd({ adUnitId: this.advertId });
      this.nativeAd.onLoad(data => {
        // Callback upon success.
        this.native.adData = data.adList[0];
        if (this.native.adData) {
          if (this.native.adData.imgUrlList && this.native.adData.imgUrlList.length > 0) {
            this.native.adImgSrc = this.native.adData.imgUrlList[0];
          } else {
            this.native.adImgSrc = "";
            this.isShowAd = false;
          }
          this.native.creativeType = this.native.adData.creativeType || null;
          this.native.title = this.native.adData.title || "";
          this.native.adId = this.native.adData.adId || "";
          if (!this.native.title) {
            // The title is not displayed if it is empty.
            this.isShowTitle = false;
          }
          if (!this.native.adData.source) {
            // If the source is empty, the word ad is displayed in the position where the source is supposed to display.
            this.isShowSource = false;
          } else {
            this.native.source = this.native.adData.source + ' '
          }
          if (this.native.creativeType === 3) {
            // Large image with text.
            if (this.native.adData.clickBtnTxt) {
              this.native.btnTxt = this.native.adData.clickBtnTxt;
            } else {
               this.native.btnTxt = "Learn more";
            }
          }
          if (this.native.creativeType === 103) {
            // Large image with text and a download button.
            if (this.native.adData.clickBtnTxt) {
              this.native.btnTxt = this.native.adData.clickBtnTxt;
            } else {
              this.native.btnTxt = "Download";
            }
          }
          this.isShowTitle = true;
          this.isShowSource = true;
          this.reportNativeShow();
        }
      });
      this.nativeAd.onError(e => {
        console.error(TAG," load ad fail:" + JSON.stringify(e));
        // Callback upon failure.
        this.isShowAd = false;
      });
      // Obtain ad data.
      this.nativeAd.load();
    },
    reportNativeShow() {
      if (this.nativeAd) {
        console.log(TAG,"nativeAd reportAdShow");
        this.nativeAd.reportAdShow({ adId: this.native.adId });
      }
    },
    reportNativeClick() {
      console.log(TAG,"nativeAd reportAdClick");
      this.nativeAd.reportAdClick({
        adId: this.native.adId
      });
    },
    onDestroy() {
      if (this.nativeAd) {
        // Destroy the ad element and cancel the download.
        this.nativeAd.destroy();
        this.nativeAd.cancelDownload({
          adId: this.native.adId
        });
      }
    },
  };
</script>
Failure to Listen to the scrollbottom Event for the list Element of a Quick App
Symptom
When the list element is scrolled to the bottom, the scrollbottom event cannot be listened to.
The code where the exception occurs is as follows:
<template>
  <!-- Only one root node is allowed in template. -->
  <div class="container">
    <list onscrollbottom="handleScrollbottom">
      <list-item type="1" style="height:700px;width:100%;background-color:black"></list-item>
      <list-item type="2" style="height:700px;width:100%;background-color:red" >
      </list-item>
      <list-item type="3" style="height:700px;width:100%;background-color:yellow"></list-item>
       <list-item type="4"></list-item>
    </list>
  </div>
</template>
<style>
  .container {
    flex-direction: column;
    justify-content: center;
    align-items: center;
  }
  }
</style>
<script>
  import prompt from '@system.prompt';
  module.exports = {
    data: {
      componentData: {},
      show:false
    },
    onInit() {
      this.$page.setTitleBar({
        text: 'list',
        textColor: '#ffffff',
        backgroundColor: '#007DFF',
        backgroundOpacity: 0.5,
        menu: true
      });
    },
    handleScrollbottom(){
      console.error('2222');
      prompt.showToast({
        message: 'slide to the bottom',
        duration: 2000,
        gravity: 'center'
      })
    }
  }
</script>
Cause Analysis
When determining whether a list is scrolled to the bottom, Quick App Engine needs to compare the value of lastIndex (index position of the last visible list-item) with the value of total (total number of list-item elements). The scrollbottom event is triggered only when the value of lastIndex plus 1 is greater than or equal to the value of total.
The preceding code contains four list-item elements of different types, so the value of total is 4. height is set for the first three list-item elements. However, height, padding-top/bottom, and margin-top/bottom are not set for the last list-item element. As a result, the last item list is invisible because its height is 0. When a list is scrolled to the bottom, the value of lastIndex is 2, but the value of lastIndex plus 1 is less than the value of total. Therefore, the scrollbottom event cannot be triggered.
Solution
Ensure that the height of the last list-item is not 0, that is, the attribute values in the CSS style meet the following condition:
height + padding-top + padding-bottom + margin-top + margin-bottom>=1
The list-item element is a container. To prevent the failure to expand subelements, the height is not fixed. Therefore, you only need to set the other four attributes to 1, which does not affect the final layout effect.
The modified key code is as follows:
<template>
  <!-- Only one root node is allowed in template. -->
  <div class="container">
    <list onscrollbottom="handleScrollbottom">
      <list-item type="1" style="height:700px;width:100%;background-color:black"></list-item>
      <list-item type="2" style="height:700px;width:100%;background-color:red" >
      </list-item>
      <list-item type="3" style="height:700px;width:100%;background-color:yellow"></list-item>
      <list-item type="4" class="lastItemstyle"></list-item>
    </list>
  </div>
</template>
<style>
  .container {
    flex-direction: column;
    justify-content: center;
    align-items: center;
  }
   .lastItemstyle{
      /* height: 1px;
      margin-bottom: 1px;
      padding-top: 1px;
      padding-top: 1px; */
      padding-bottom: 1px;
   }
  }
</style>
Failure to Receive the Event Object When It Is Passed Together with Custom Parameters
Symptom
In the quick app, the following method is used to bind the event method of an element and pass the event object and custom parameters together. It is found that the event object is not correctly received in the callback method.
The code where the exception occurs is as follows:
<template>
  <!-- Only one root node is allowed in template. -->
  <div class="container">
    <input id="input1" type="button" value="Go" onclick="jump(event,1)"/>
  </div>
</template>
<script>
  module.exports = {
    jump: function (event, v) {
      console.info("e = " + JSON.stringify(event));
      console.info("v = " + v);
    },
  }
</script>
The logs are as follows.

Cause Analysis
In the preceding code, jump(event,1) does not need to carry the event object. When the callback function is called, an evt parameter is automatically added at the end of the parameter list. This parameter is used to access the context data related to the callback event.
Solution
The modified code is as follows:
<template>
  <!-- Only one root node is allowed in template. -->
  <div class="container">
    <!--Change jump(event,1) in the code where the issue is reported to jump(1).-->
    <input id="input1" type="button" value="Go" onclick="jump(1)" />
  </div>
</template>
<script>
  module.exports = {
    jump: function (v, evt) {
      console.info("e = " + JSON.stringify(evt));
      console.info("v = " + v);
    }
  }
</script>
Run logs generated after the code is modified are as follows.
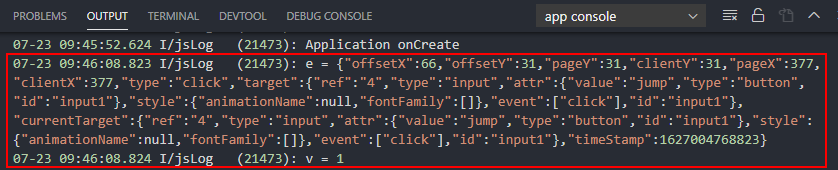
Video Jitter Occurs When Animation Is Played upon a Class Style Change
Symptom
When video jitter occurs when animation is played after the class style is changed. As shown in the video, when you tap Rotate, the text Obtain playback status will rotate, but video jitter occurs.
|
The code where the exception occurs is as follows:
<template>
  <!-- The template can contain only one root node. -->
  <div class="wrapper">
    <text @click="rotate">Rotate</text>
    <text
      class="title {{ isRotate ? 'title_play' : 'title_pause' }}"
      @click="getCurrentTIme"
    >
      {{ title }}
    </text>
    <input
      class="btn"
      type="button"
      value="Open player"
      onclick="onDetailBtnClick"
    />
  </div>
</template>

<script>
  import router from '@system.router'
  import prompt from '@system.prompt';
  export default {
    // The data model of the page-level element affects the overwrite mechanism of the input data. The attributes defined in private cannot be overwritten.
    private: {
      title: 'Obtain playback status',
      player: null,
      duration: 269,
      player: null,
      isRotate: false
    },
    onInit() {
    },
    getCurrentTIme() {
      this.player = $Player.getInstance()
      if (this.player) {
        this.player.getStatus().then(res => {
          console.log(res)

          prompt.showToast({
            message: res,
            duration: 2000,
            gravity: 'center'
          })
        })
      }
    },
    onDetailBtnClick() {
      router.push({
        uri: '/pages/DemoDetail'
      })
    },
    rotate() {
      this.isRotate = !this.isRotate
    }
  }
</script>
<style lang="scss">
  @import './../../assets/styles/style.scss';
  .wrapper {
    @include flex-box-mixins(column, center, center);
    .title {
      font-size: 8 * $size-factor;
      text-align: center;
      color: $black;
    }
    .btn {
      width: 90 * $size-factor;
      height: 16 * $size-factor;
      border-radius: 8 * $size-factor;
      background-color: $brand;
      color: $white;
      font-size: 30px;
      margin-top: 16 * $size-factor;
    }
  }
  .slider-wrapper {
    margin: 30px 50px 0;
    width: 100%;
    flex-direction: column;
  }
  .title {
    margin-top: 50px;
    transform-origin: 0 0;
    animation-duration: 0.3s;
    animation-iteration-count: 1;
    animation-timing-function: ease-in-out;
    &_play {
      transform: rotate(24deg);
      animation-name: playAni;
    }
    &_pause {
      transform: rotate(0deg);
      animation-name: pauseAni;
    }
  }
  @keyframes playAni {
    from {
      transform: rotate(0deg);
    }
    to {
      transform: rotate(24deg);
    }
  }
  @keyframes pauseAni {
    from {
      transform: rotate(24deg);
    }
    to {
      transform: rotate(0deg);
    }
  }
</style>
Cause Analysis
The problem occurs in the following style switching code:
.title {
  margin-top: 50px;
  transform-origin: 0 0;
  animation-duration: 0.3s;
  animation-iteration-count: 1;
  animation-timing-function: ease-in-out;
  &_play {
    transform: rotate(24deg);
    animation-name: playAni;
  }
  &_pause {
    transform: rotate(0deg);
    animation-name: pauseAni;
  }
}
The transform and animation-name attributes cannot be set at the same time. Otherwise, the animation will be executed repeatedly.
Solution
Delete the transform field from the preceding code, retain only the animation-name field, and add animation-fill-mode: forwards;. The code is as follows:
<template>
  <!-- The template can contain only one root node. -->
  <div class="wrapper">
    <text @click="rotate">Rotate</text>
    <text
      class="title {{ isRotate ? 'title_play' : 'title_pause' }}"
      @click="getCurrentTIme"
    >
      {{ title }}
    </text>
    <input
      class="btn"
      type="button"
      value="Open player"
      onclick="onDetailBtnClick"
    />
  </div>
</template>

<script>
  import router from '@system.router'
  import prompt from '@system.prompt';
  export default {
    // The data model of the page-level element affects the overwrite mechanism of the input data. The attributes defined in private cannot be overwritten.
    private: {
      title: 'Obtain playback status',
      player: null,
      duration: 269,
      player: null,
      isRotate: false
    },
    onInit() {
    },
    getCurrentTIme() {
      this.player = $Player.getInstance()
      if (this.player) {
        this.player.getStatus().then(res => {
          console.log(res)

          prompt.showToast({
            message: res,
            duration: 2000,
            gravity: 'center'
          })
        })
      }
    },
    onDetailBtnClick() {
      router.push({
        uri: '/pages/DemoDetail'
      })
    },
    rotate() {
      this.isRotate = !this.isRotate
    }
  }
</script>
<style lang="scss">
  @import './../../assets/styles/style.scss';
  .wrapper {
    @include flex-box-mixins(column, center, center);
    .title {
      font-size: 8 * $size-factor;
      text-align: center;
      color: $black;
    }
    .btn {
      width: 90 * $size-factor;
      height: 16 * $size-factor;
      border-radius: 8 * $size-factor;
      background-color: $brand;
      color: $white;
      font-size: 30px;
      margin-top: 16 * $size-factor;
    }
  }
  .slider-wrapper {
    margin: 30px 50px 0;
    width: 100%;
    flex-direction: column;
  }
  .title {
    margin-top: 50px;
    transform-origin: 0 0;
    animation-duration: 0.3s;
    animation-iteration-count: 1;
    animation-timing-function: ease-in-out;
    animation-fill-mode: forwards;// After the animation is complete, the last attribute value (defined in the last key frame) is retained.
    &_play {
      animation-name: playAni;
    }
    &_pause {
      animation-name: pauseAni;
    }
  }
  @keyframes playAni {
    from {
      transform: rotate(0deg);
    }
    to {
      transform: rotate(24deg);
    }
  }
  @keyframes pauseAni {
    from {
      transform: rotate(24deg);
    }
    to {
      transform: rotate(0deg);
    }
  }
</style>
How Does Quick App Center Display a Title Bar at the Top Center?
Symptom
In a quick app, the built-in title bar is displayed on the left by default and cannot be customized. However, you may require the title bar to be displayed at the top center.
This case aims to help you customize the title bar.
Implementation
- In the manifest.json file, set the titleBar attribute to false to hide the built-in title bar.
"display": { "titleBar": false, "pages": { "Hello": { "statusBarBackgroundColor": "#0faeff" } } } - Use a text element to customize the title bar and center the title bar.
<template>
  <!-- Only one root node is allowed in template. -->
  <div class="container">
    <text class="txt">titlebar</text>
    <div class="label">
      <text style="font-size: 60px">this is test page</text>
    </div>
  </div>
</template>
<style>
  .container {
    flex-direction: column;
    align-items: center;
  }
  .txt {
    font-size: 60px;
    color: #00ced1;
    margin-top: 15px;
  }
  .label {
    flex-direction: column;
    justify-content: center;
    width: 100%;
    height: 100%;
  }
</style>
<script>
  module.exports = {
    data: {
      status: 1
    },
    onInit() {
    },
    onShow(options) {
      '// Trigger operations when an element is shown.'
    },
  }
</script>
The final effect is as follows.
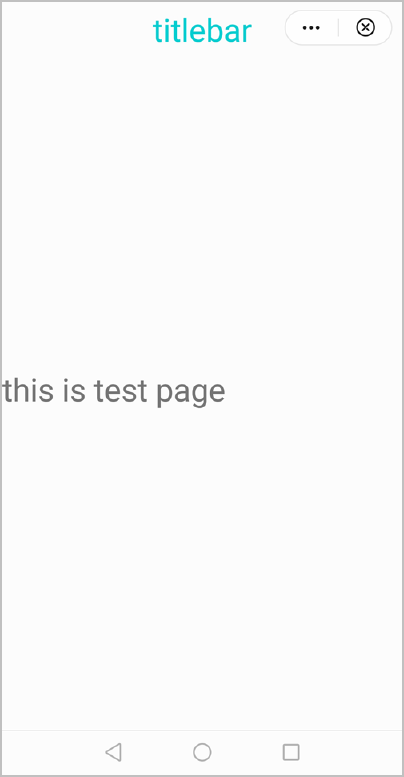
Compiling the Nesting Style
Symptom
The following nesting style may cause IDE compilation errors:
<style>
  .item-container {
    margin-bottom: 50px;
    flex-direction: column;
    .image {
      border-radius: 100px;
    }
  }
</style>
The error information is as follows.

Cause Analysis
When a nesting style is defined in style, the IDE compilation cannot be identified if the precompiler is not specified.
Solution
The modified code is as follows:
<style lang="less">
  .item-container {
    margin-bottom: 50px;
    flex-direction: column;
    .image {
      border-radius: 100px;
    }
  }
</style>
Error Code 300 Is Returned When the file.delete API Fails to Delete a File
Symptom
The "code= 300" message is displayed when the file.delete API is used to delete the bin file downloaded through the downloadtask.downloadFile API.
The code where the exception occurs is as follows:
click() {
  this.download_task = downloadtask.downloadFile({
    header: {
      "host": "windspeed-drcn.dbankcdn.com"
    },
    url: "https://640aa0d6fddbf8651e2232aaf3162e67.cc.cdnhwc5.com/download/random2000.bin?auth_key=1627344862-6B5A47E8B8FF40E38021DEAA14E2C5FD-0-519320d987b2717bd7b35a84ad193125",/*The URL is only an example.*/
    success(res) {
      console.log("Download success. resp = " + JSON.stringify(res))
    },
    fail(res) {
      console.log("Download fail. resp = " + JSON.stringify(res))
    }
  })
  this.download_task.onProgressUpdate(res => {
    console.log("Download onProgressUpdate = " + JSON.stringify(res))
  })
},
find() {
  var that = this
  file.list({
    uri: "internal://mass/Download/",
    success: function (data) {
      console.log(JSON.stringify(data.fileList))
      console.log(data.fileList[0].uri)
      that.path = data.fileList[0].uri
    },
    fail: function (data, code) {
      console.log("handling fail, code=" + code);
    }
  })
},
delete() {
  file.delete({
    uri: this.path,
    success: function (data) {
      console.log('handling success');
    },
    fail: function (data, code) {
      console.log('handling fail, code = ' + code);
    }
  })
}
The code where the exception occurs is as follows:
08-04 08:36:57.084 I/jsLog   (13195): Download onProgressUpdate = {"progress":100,"totalBytesWritten":2250,"totalBytesExpectedToWrite":2250}
08-04 08:36:57.091 I/jsLog   (13195): Download success. resp = {"filePath":"internal://mass/Download/4316495718641443.bin?auth_key=1627344862-6B5A47E8B8FF40E38021DEAA14E2C5FD-0-519320d987b2717bd7b35a84ad193125","header":{"X-Frame-Options":"SAMEORIGIN","Connection":"keep-alive","Set-Cookie":"AUTHSESSID=c42c5e68901b; HttpOnly;Secure;","Content-Length":"2250","Date":"Wed, 04 Aug 2021 00:36:54 GMT","Content-Type":"text/html"},"statusCode":200}
08-04 08:36:59.238 I/jsLog   (13195): [{"lastModifiedTime":1628037417000,"length":2250,"type":"file","uri":"internal://mass/Download/4316495718641443.bin?auth_key=1627344862-6B5A47E8B8FF40E38021DEAA14E2C5FD-0-519320d987b2717bd7b35a84ad193125"}]
08-04 08:36:59.238 I/jsLog   (13195): internal://mass/Download/4316495718641443.bin?auth_key=1627344862-6B5A47E8B8FF40E38021DEAA14E2C5FD-0-519320d987b2717bd7b35a84ad193125
08-04 08:37:01.205 I/jsLog   (13195): handling fail, code=300
Cause Analysis
The preceding code implements the file download, query, and deletion capabilities.
- click(): downloads files. The downloaded files are stored in the mass partition.
- find(): searches for files in the mass partition and assigns a file path to the page variable path.
- delete(): deletes the file from a specified path.
In the code, fileName is not set in downloadtask.downloadFile(). Quick App Engine obtains the file name from the network request or URL by default.
In this case, the file name in the filePath field returned in the success callback is random2000.bin?auth_key=1627344862-6B5A47E8B8FF40E38021DEAA14E2C5FD-0-519320d987b2717bd7b35a84ad193125. In this file name, there are multiple special characters. Ensure that the name of each file in your project contains no more than 300 characters, including letters, digits, dots (.), underscores (_), hyphens (-), or parentheses but not a double dot (..) or dot-slash (./).
When the file.delete API is used to delete a file, the file path needs to be entered. However, the file path in the previous code contains a question mark (?) and an equal sign (=), which do not meet the requirements. As a result, error code 300 is returned.
Solution
Add the filename parameter to the downloadtask.downloadFile API to rename the downloaded file.
Sample code:
click() {
  this.download_task = downloadtask.downloadFile({
    header: {
      "host": "windspeed-drcn.dbankcdn.com"
    },
    url: "https://640aa0d6fddbf8651e2232aaf3162e67.cc.cdnhwc5.com/download/random2000.bin?auth_key=1627344862-6B5A47E8B8FF40E38021DEAA14E2C5FD-0-519320d987b2717bd7b35a84ad193125",/*The URL is only an example.*/
    filename: "test.bin", // Rename the downloaded file.
    success(res) {
      console.log("Download success. resp = " + JSON.stringify(res))
    },
    fail(res) {
      console.log("Download fail. resp = " + JSON.stringify(res))
    }
  })
  this.download_task.onProgressUpdate(res => {
    console.log("Download onProgressUpdate = " + JSON.stringify(res))
  })
},
Logs are as follows in a normal scenario:
08-04 08:37:52.823 I/jsLog   (12036): Download onProgressUpdate = {"progress":100,"totalBytesWritten":2250,"totalBytesExpectedToWrite":2250}
08-04 08:37:52.829 I/jsLog   (12036): Download success. resp = {"filePath":"internal://mass/Download/test.bin","header":{"X-Frame-Options":"SAMEORIGIN","Connection":"keep-alive","Set-Cookie":"AUTHSESSID=e347f58b1572; HttpOnly;Secure;","Content-Length":"2250","Date":"Wed, 04 Aug 2021 00:37:50 GMT","Content-Type":"text/html"},"statusCode":200}
08-04 08:37:54.638 I/jsLog   (12036): [{"lastModifiedTime":1628037472000,"length":2250,"type":"file","uri":"internal://mass/Download/test.bin"}]
08-04 08:37:54.638 I/jsLog   (12036): internal://mass/Download/test.bin
08-04 08:37:56.023 I/jsLog   (12036): handling success
Soft Keyboard Displayed Blocking Some Content on the HTML5 Web Page
Symptom
If the quick app element web is used to load an HTML5 web page with a text box, for example, registration or sign-in page, the pop-up soft keyboard blocks some content on the HTML5 web page when the text box is focused.
The code where the exception occurs is as follows:
<template>
 <web  src="{{loadUrl}}" trustedurl="{{list}}" onpagestart="onPageStart" onpagefinish="onPageFinish"
      onmessage="onMessage" ontitlereceive="onTitleReceive" onerror="onError" id="web" supportzoom="true"
      wideviewport="true" overviewmodeinload="true"
      multiwindow="true"
      allowthirdpartycookies="true">
 </web>
</template>
Cause Analysis
- This issue is related to the page layout of the web element.
In the preceding template, web is used as the root element. When the soft keyboard is called, Quick App Engine does not recalculate the page layout. As a result, the page is not scrolled up.
- In addition, check the value of windowSoftInputMode in the manifest.json file.
If the value is not adjustPan, the page is not scrolled up.
Solution
- Add div tags to enclose the web element and use the div element as the root element. The modified code is as follows:
<template> <div class="doc-page "> <web class="web-page" src="{{loadUrl}}" trustedurl="{{list}}" onpagestart="onPageStart" onpagefinish="onPageFinish" onmessage="onMessage" ontitlereceive="onTitleReceive" onerror="onError" id="web" supportzoom="true" wideviewport="true" overviewmodeinload="true" multiwindow="true" allowthirdpartycookies="true"> </web> </div> </template> <style> .doc-page { flex-direction: column; justify-content: center; align-content: center; align-items: center; width: 100%; height: 100%; position:fixed; } .web-page { width: 100%; height: 100%; } </style> - Set windowSoftInputMode in the manifest.json file to adjustPan.
Quick App IDE Compilation Error Reported After less Is Updated to 4.0
Symptom
When the less version is set to 4.0 or the fa-toolkit version is set to 11.4.1 in Quick App IDE, the following error information is displayed during compilation:
Module build failed (from ./node_modules/fa-toolkit/node_modules/less-loader/dist/cjs.js):
Operation on an invalid type
Cause Analysis
This problem is reported after the less version is updated. The division expression needs to be modified. For details, please refer to release notes.
Solution
Add parentheses to the division expression according to the error message.
The code where the exception occurs is as follows:
@adapt: 36/75;
The modified code is as follows:
@adapt: (36/75);
A Compiling Error Is Reported When the if and show Commands Are Used on the Root Node
Symptom
A compiling error is reported when the if and show commands are used in the UX file of a subelement on the root node to determine whether to display the layout.
The code where the exception occurs is as follows:
ERROR: Root node 'div' cannot use the attribute 'if'.
The subelement code is as follows:
<template>
  <!-- Only one root node is allowed in template. -->
  <div if="{{showlayout}}" class="container">
    <image class="img"  src="./Images/close.png" onclick="close"></image>
    <div id="box" class="box">
      <text id="txt1" class="elliptxt">{{ text }}</text>
    </div>
  </div>
</template>

<style>
  .container {
    width: 100%;
    flex-direction: row;
    align-items: center;
    padding-left: 16px;
    padding-right: 16px;
  }

  .img {
    width: 28px;
    height: 28px;
    align-self: center;
    margin-right: 8px;
    resize-mode: contain;
    flex-shrink: 0;
  }
  .box {
    flex-direction: column;
    align-items: flex-start;
  }

  .elliptxt {
    text-overflow: ellipsis;
    lines: 1;
  }
</style>

<script>
  module.exports = {
    props: {
      text: {
        type: String,
        default: ''
      },
      backgroundColor: {
        type: String,
        default: '#fffbe8'
      },
      color: {
        type: String,
        default: '#de8c17'
      },
      showClose: {
         // Whether to display the close button on the left.
        type: Boolean,
        default: false
      }
},
   data() {
      return {
        showlayout:true
      }
    },
    onInit() {
    },
    onDestroy: function () {
      console.log("ondestroy");
       this.showClose =false;
    },
    close: function () {
      console.log("close=");
      this.showlayout=false;
    },
  }
</script>
Cause Analysis
The preceding code defines the layout of a subelement. To be specific, the showlayout parameter is bound to the root node to control the display of the subelement. When the close icon is tapped, the close method is triggered and the showlayout parameter is set to false. The following figure shows the UI effect of the subelement (in light yellow background).
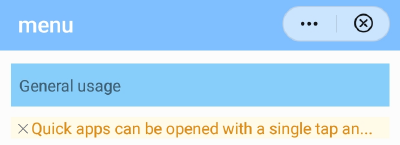
However, only one root node is allowed according to the quick app UX specifications. When the if and show commands are used, they will determine whether to display or hide the entire page. As a result, the page will be blank after the app being released.
Solution
Do not use the if and show commands on the root node.
You can use the display attribute of the CSS to determine whether to display the page. The value of this attribute can be flex or none. If the value is set to flex, the page is displayed. If it is set to none, the page is not displayed.
The modified code is as follows:
<template>
  <!-- Only one root node is allowed in template. -->
  <div class="container" style="background-color: {{backgroundColor}};display:{{displaynotice}}" >
    <image class="img" src="./Images/close.png" onclick="close"></image>
    <div id="box" class="box" >
      <text id="txt1" class="elliptxt">{{ text }}</text>
    </div>
  </div>
</template>

<style>
  .container {
    width: 100%;
    flex-direction: row;
    align-items: center;
    padding-left: 16px;
    padding-right: 16px;
  }

  .img {
    width: 28px;
    height: 28px;
    align-self: center;
    margin-right: 8px;
    resize-mode: contain;
    flex-shrink: 0;
  }

  .box {
    flex-direction: column;
    align-items: flex-start;
  }

  .elliptxt {
    text-overflow: ellipsis;
    lines: 1;
  }
</style>

<script>
  module.exports = {
    props: {
      text: {
        type: String,
        default: ''
      },
      backgroundColor: {
        type: String,
        default: '#fffbe8'
      },
      color: {
        type: String,
        default: '#de8c17'
      },
      showClose: {
        // Whether to display the close button on the left.
        type: Boolean,
        default: false
      }
    },
    data() {
      return {
        displaynotice: "flex"
      }
    },
    onInit() {

    },
    onDestroy: function () {
      console.log("notice bar ondestroy");
    },
    close: function () {
      console.log("close=");
       this.displaynotice = "none";
    },
  }
</script>
Suggestions and Summary
In addition to the solution described in this document, you can use the if and show commands to control the display of a subelement in the code where the parent element references subelement.
Ads Download Process Tasks Started at Different Times Have the Same Progress
Symptom
When a user taps to download two download ads in sequence on the same page, their download progress is identical.
The code where the exception occurs is as follows:
// Listen to download progress changes.
this.nativeAd.onDownloadProgress(data => {
  console.error(this.native.adUnitId, 'and', data.uniqueId, ' onDownloadProgress data.progress = ', data.progress);
  this.progress = data.progress + '%';
});
The effect is as follows.
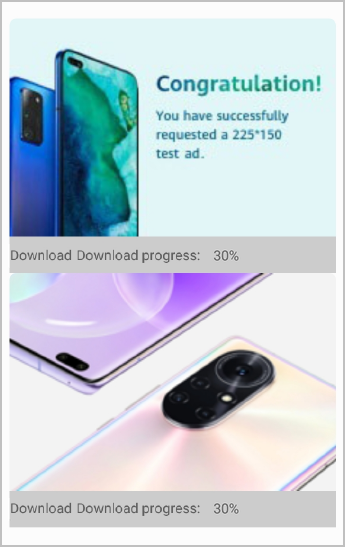
Cause Analysis
Huawei Quick App Loader allows registering download progress and listening on status callback for only one ad at a time. When the download buttons are tapped one after the other, the value of uniqueId returned through the onDownloadProgress method is the ID of the first ad. The second one will start downloading until the first one has been downloaded. If the value of uniqueId is not checked, the download progress of the first ad is obtained, causing the later one to display the identical download progress.
Solution
When the download button of the second ad is tapped, compare the values of uniqueId returned through onDownloadProgress and adId returned through onLoad. If they are equal, the download progress of the second ad is displayed.
The modified code is as follows:
// Listen to download progress changes.
this.nativeAd.onDownloadProgress(data => {
  console.error(this.native.adUnitId, 'and', data.uniqueId, ' onDownloadProgress data.progress = ', data.progress);
  if (this.adIdd === data.uniqueId) {
    this.progress = data.progress + '%';
  }
});
The running effect is as follows:
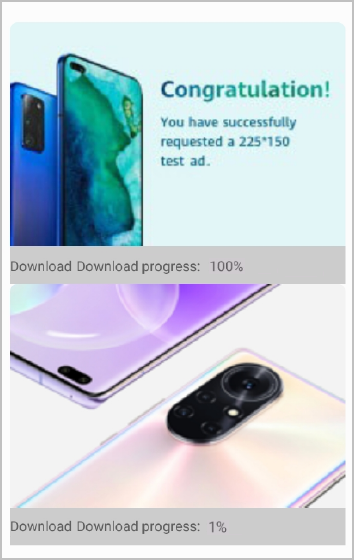
The complete sample code is as follows:
nativeAd.ux file:
<template>
<div>
<div class="item-container">
<image class="img" src="{{native.adImgSrc}}" @click="reportNativeClick"></image>
<div style="background-color: #ccc;width: 100%;height: 80px;">
<div class="flex-direction: column;">
<text onclick="dealdownload()">Download</text>
<text onclick="dealdownload()">Download progress: {{ progress }}</text>
</div>
</div>
</div>
</div>
</template>
<style lang="less">
.item-container {
width: 100%;
padding: 0 16px;
flex-direction: column;
align-items: center;
align-content: center;
}
.img {
width: 100%;
background-size: cover;
border-top-left-radius: 16px;
border-top-right-radius: 16px;
}
.container {
width: 100%;
padding: 8px 12px;
flex-direction: row;
justify-content: center;
align-items: center;
border-bottom-left-radius: 16px;
border-bottom-right-radius: 16px;
background-color: #fff;
}
.container-left {
flex-direction: column;
flex: 1;
}
.title {
font-size: 16px;
line-height: 21px;
color: #000000;
lines: 1;
text-overflow: ellipsis;
}
.source {
text {
font-size: 12px;
color: #999;
}
}
.known-more-btn {
flex-direction: row;
align-content: center;
text-align: center;
height: 28px;
line-height: 28px;
border-radius: 14px;
background-color: rgba(#FF7500, 0.1);
padding: 6px 10px;
margin-right: 8px;
text {
color: #FF7500;
font-size: 12px;
}
image {
margin-right: 5px;
}
}
.ad-btn {
line-height: 28px;
border-radius: 14px;
margin-right: 8px;
}
.btn {
width: 100%;
height: 100%;
color: #FF7500;
border-radius: 14px;
background-color: rgba(#FF7500, 0.2);
}
.btn-text {
color: #FF7500;
position: absolute;
top: 5px;
left: 0;
right: 0;
text-align: center;
}
.progress {
position: absolute;
top: 0;
right: 0;
bottom: 0;
background-color: rgba(#fff, 0.3);
}
.more {
width: 24px;
height: 24px;
background-size: contain;
opacity: 0.6;
transform: rotate(90deg);
}
.not-like {
width: 80px;
height: 30px;
line-height: 30px;
border-radius: 5px;
position: absolute;
bottom: 50px;
right: 16px;
font-size: 12px;
text-align: center;
font-weight: 700;
background-color: #fff;
border: 1px solid #ddd;
}
</style>
<script>
import ad from "@service.ad";
let TAG = "nativeAd";
export default {
data: {
componentName: "ad",
provider: "",
progress: '',
native: {
adId: "",
title: "",
source: "",
adImgSrc: "",
btnTxt: "",
creativeType: null,
adData: {},
adUnitId: "testb65czjivt9",
adIdd: ''
}
},
props: {
advertId: String, //@default: '' description: ad ID
},
onInit() {
this.$page.setTitleBar({ text: "Native Ad" });
},
onReady() {
this.showNativeAd();
},
dealdownload(evt) {
evt.stopPropagation();
// Obtain the download status.
let downloadstatus = this.nativeAd.getAppStatus({
adId: this.native.adId
});
// console.error('downloadstatus = ',downloadstatus);
if (downloadstatus === "DOWNLOAD") {
// Start the download.
this.nativeAd.startDownload({
adId: this.native.adId
});
// Listen to download progress changes.
this.nativeAd.onDownloadProgress(data => {
console.error(this.native.adUnitId, 'and', data.uniqueId, ' onDownloadProgress data.progress = ', data.progress);
if (this.adIdd === data.uniqueId) {
this.progress = data.progress + '%';
}
});
// Listen to download status changes.
this.nativeAd.onStatusChanged(data => {
// console.log("onStatusChanged data = ", data);
let status = data.status;
});
} else if (downloadstatus === "DOWNLOADING") {
// Pause the download.
this.native.btnTxt = "Continue";
this.nativeAd.pauseDownload({
adId: this.native.adId
});
} else if (downloadstatus === "PAUSE") {
// Continue the download.
this.nativeAd.resumeDownload({
adId: this.native.adId
});
} else if (downloadstatus === "INSTALL") {
// The installation is waiting.
this.native.btnTxt = "Waiting for installation";
} else if (downloadstatus === "INSTALLING") {
// The app is being installed.
this.native.btnTxt = "Installing...";
} else if (downloadstatus === "DOWNLOADFAILED") {
// The download fails.
this.native.btnTxt = "Download failed";
} else if (downloadstatus === "WAITING") {
// The app is waiting for download.
this.native.btnTxt = "Waiting for download";
} else if (downloadstatus === "INSTALLED") {
this.native.btnTxt = "Open";
}
},
showNativeAd() {
// Obtain the service provider. If the obtained service provider is not huawei, ads are not supported.
this.provider = ad.getProvider();
if (this.provider !== "huawei") {
return;
}
// Create an ad element.
this.nativeAd = ad.createNativeAd({ adUnitId: this.advertId });
this.nativeAd.onLoad(data => {
// Callback upon success.
this.native.adData = data.adList[0];
if (this.native.adData) {
if (this.native.adData.imgUrlList && this.native.adData.imgUrlList.length > 0) {
this.native.adImgSrc = this.native.adData.imgUrlList[0];
}
this.native.creativeType = this.native.adData.creativeType || null;
this.native.title = this.native.adData.title || "";
this.native.adId = this.native.adData.adId || "";
if (this.native.creativeType === 3) {
// Large image with text.
if (this.native.adData.clickBtnTxt) {
this.native.btnTxt = this.native.adData.clickBtnTxt;
} else {
this.native.btnTxt = "Learn more";
}
}
if (this.native.creativeType === 103) {
// Large image with text and a download button.
if (this.native.adData.clickBtnTxt) {
this.native.btnTxt = this.native.adData.clickBtnTxt;
} else {
this.native.btnTxt = "Download";
}
}
this.isShowTitle = true;
this.isShowSource = true;
this.reportNativeShow();
this.adIdd = data.adList[0].adId
console.log(this.adIdd, "test", data.adList[0].adId)
}
});
this.nativeAd.onError(e => {
console.error(TAG, " load ad fail:" + JSON.stringify(e));
// Callback upon failure.
this.isShowAd = false;
});
// Obtain ad data.
this.nativeAd.load();
},
reportNativeShow() {
if (this.nativeAd) {
console.log(TAG, "nativeAd reportAdShow");
this.nativeAd.reportAdShow({ adId: this.native.adId });
}
},
reportNativeClick() {
console.log(TAG, "nativeAd reportAdClick");
this.nativeAd.reportAdClick({
adId: this.native.adId
});
},
onDestroy() {
if (this.nativeAd) {
// Destroy the ad element and cancel the download.
this.nativeAd.destroy();
this.nativeAd.cancelDownload({
adId: this.native.adId
});
}
},
};
</script> hello.ux file:
<import name="native-ad" src="../compoment/nativeAd.ux"></import>

<template>
  <!-- Only one root node is allowed in template. -->
  <div class="container">
  <!-- The following ad IDs are for test. Replace them with the formal ad IDs. -->
    <native-ad advert-id="testb65czjivt9"></native-ad>
    <native-ad advert-id="testr6w14o0hqz"></native-ad>
  </div>
</template>

<style>
  .container {
    flex-direction: column;
    justify-content: center;
    align-items: center;
  }

  .title {
    font-size: 100px;
  }
</style>

<script>
  module.exports = {
    data: {
      componentData: {},
    },
    onInit() {
      this.$page.setTitleBar({
        text: 'menu',
        textColor: '#ffffff',
        backgroundColor: '#007DFF',
        backgroundOpacity: 0.5,
        menu: true
      });
    }
  }
</script>
Playing the Local Audio Files in a Quick App
Scenario Description
You can use the relative or absolute path in the project, file path on the mobile phone, or file path in the Mass partition to play the local audio files in a quick app.
In this case, you will learn how to set audio.src to play the local audio files in a quick app.
Implementation
Scenario 1: Play the music.mp3 file in the project. The project structure is as follows.
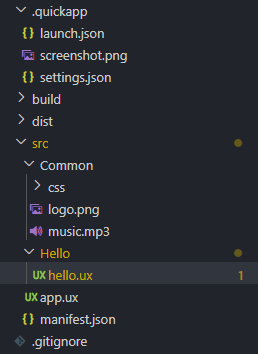
- Use the relative path of the file. Sample code:
autoPlay: function () { var that = this; var srcUri ='../Common/music.mp3'; audio.src = srcUri; audio.volume = 0.2; var isshow = that.notify; audio.notificationVisible = isshow; audio.autoplay = true; audio.loop = true; audio.onplay = function () { console.log("audio onplay"); }; audio.onpause = function () { console.log("audio onpause"); }; audio.onended = function () { console.log("audio onended"); }; audio.ondurationchange = function () { console.log("audio ondurationchange"); that.total = audio.duration; console.log("audio ondurationchange total=" + that.total); }; audio.ontimeupdate = function () { that.time = audio.currentTime; console.log("audio ontimeupdate time=" + that.time); }; }, - Use the absolute path of the file. Sample code:
manualPlay: function () {
    var that = this;
    var s =  '/Common/music.mp3';
    audio.src = s;
    audio.play();
    audio.onplay = function () {
        console.log("audio onplay");
    };
    audio.onpause = function () {
        console.log("audio onpause");
    };
    audio.onended = function () {
        console.log("audio onended");
    };
    audio.ondurationchange = function () {
        console.log("audio ondurationchange");
        that.total = audio.duration;
    };
    audio.ontimeupdate = function () {
        console.log("audio ontimeupdate");
        that.time = audio.currentTime;
    };
},
Scenario 2: Play an audio file stored in the mobile phone.
pickFiles(){
    var that = this;
    media. pickFile ({
        success: function (data) {
            console.log(`handling success: ${data.uri}`)
            that.url = data.uri;
            console.log("autoPlay url: " + that.url)
            var srcUri = that.url;
            audio.src = srcUri;
            audio.volume = 0.2;
            var isshow = that.notify;
            audio.notificationVisible = isshow;
            audio.autoplay = true;
            audio.loop = true;
            audio.onplay = function () {
                console.log("audio onplay");
            };
            audio.onpause = function () {
                console.log("audio onpause");
            };
            audio.onended = function () {
                console.log("audio onended");
            };
            audio.ondurationchange = function () {
                console.log("audio ondurationchange");
                that.total = audio.duration;
                console.log("audio ondurationchange total=" + that.total);
            };
            audio.ontimeupdate = function () {
                that.time = audio.currentTime;
                console.log("audio ontimeupdate time=" + that.time);
            };
        },
        fail: function (data, code) {
            console.log(`handling fail, code = ${code}`)
        }
    })
},
Scenario 3: Play the audio file downloaded to the Mass partition.
Call the request.download and request.onDownloadComplete APIs to obtain the URI of the downloaded file stored in the Mass partition. If the URI is internal://mass/music.mp3, the sample code is as follows:
autoPlay: function () {
    var that = this;
    var srcUri ='internal://mass/music.mp3';
    audio.src = srcUri;
    audio.volume = 0.2;
    var isshow = that.notify;
    audio.notificationVisible = isshow;
    audio.autoplay = true;
    audio.loop = true;
    audio.onplay = function () {
        console.log("audio onplay");
    };
    audio.onpause = function () {
        console.log("audio onpause");
    };
    audio.onended = function () {
        console.log("audio onended");
    };
    audio.ondurationchange = function () {
        console.log("audio ondurationchange");
        that.total = audio.duration;
        console.log("audio ondurationchange total=" + that.total);
    };
    audio.ontimeupdate = function () {
        that.time = audio.currentTime;
        console.log("audio ontimeupdate time=" + that.time);
    };
},
Default Values Cannot Be Obtained When undefined Is Passed to props
Symptom
The attributes and their default values are defined in props of the subelement. However, an error occurs when the parent element references the subelement and the passed valued is undefined.
The code where the exception occurs is as follows:
hello.ux file:
<import name="t-item" src="./t-item.ux"></import>
<template>
  <div class="" style="width: 100%">
    <list style="flex-direction: row;">
      <list-item type="test" class="" for="{{list}}">
        <t-item class="t-item" item="{{$item}}" width="{{undefined}}" height="{{undefined}}"></t-item>
      </list-item>
    </list>
  </div>
</template>

<script>
  export default {
    name: '',
    data() {
      return {
        list: [
          { image: 'https://communityfile-drcn.op.dbankcloud.cn/FileServer/getFile/cmtyPub/011/111/111/0000000000011111111.20210630171132.81169860478879908890618042853305:50001231000000:2800:5B3F311838C1A0A84070AB295D7020B1CC4A34EDC7CDFAE542B5796724B6B76B.jpg?needInitFileName=true?needInitFileName=true', name: 'HDR MODE' },
          { image: 'https://communityfile-drcn.op.dbankcloud.cn/FileServer/getFile/cmtyPub/011/111/111/0000000000011111111.20191017101406.43002136489534577410716813748735:50001231000000:2800:81AFB5724E2C53650157AD6B81ECEF3D15CACFBD14220E12EB406F51F2E9DFF2.png?needInitFileName=true?needInitFileName=true?needInitFileName=true?needInitFileName=true', name: 'Night Mode' },
        ],
      };
    },

    async onInit() {
    },
  };
</script>

<style lang="less">
</style>
t-item.ux file:
<template>
  <div class="col" style="width: {{width}}px">
    <div class="size" style="height: {{height}}px">
      <image class="image" src="{{item.image}}" />
    </div>
    <div class="name">
      <text style="lines: 2">{{ item.name }}</text>
    </div>
  </div>
</template>

<script>
    export default {
        data() {
            return {}
        },
        props: {
            item: {
                type: Object,
                required: true,
            },
            width: {
                type: Number | String,
                default: 298,
            },
            height: {
                type: Number | String,
                default: 325,
            },
        },
    onInit() {
      console.log("this.width:"+this.width);
      console.log("this.height:"+this.height);
    },
    }
</script>

<style
    lang="less" >
    .image {
      width: 100%;
      height: 100%;
      border-radius: 8px;
      object-fit: fill;
    }

    .name {
      margin-top: 10px;
    }
    .col {
      flex-direction: column;
    }
</style>
The figure is not displayed correctly. The effect is as follows.
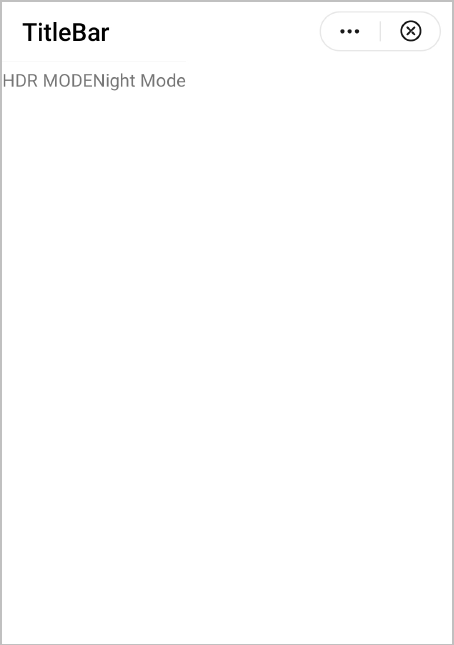
Cause Analysis
The following logs show that undefined is passed to both width and height, indicating that it is used as a normal value by Huawei Quick App Loader. That is the root cause.
08-26 17:14:03.557 I/jsLog   (20859): this.width:undefined
08-26 17:14:03.557 I/jsLog   (20859): this.height:undefined
Solution
If you want to use the default values of the attributes in props, remove the values to be passed from the parent element to the subelement. The modified code is as follows:
<import name="t-item" src="./t-item.ux"></import>
<template>
  <div class="" style="width: 100%">
    <list style="flex-direction: row;">
      <list-item type="test" class="" for="{{list}}">
        <t-item class="t-item" item="{{$item}}"></t-item>
      </list-item>
    </list>
  </div>
</template>
onShow Is Not Working When the Root Node Is a Subelement
Symptom
The onShow function does not work when the root node of the page is a subelement.
Layout code:
<import name="steps" src="../Steps/stepscanvas1.ux"></import>
<template>
  <!-- Only one root node is allowed in template. -->
    <!--The root node is steps.-->
    <steps  class="stepcss" options="{{list2}}" active-color="#007AFF" active="{{active}}" direction="column" >
    </steps>
</template>
Page lifecycle code:
onInit() {
    console.info("hello onInit ");
    this.$page.setTitleBar({
    text: 'Steps',
    textColor: '#ffffff',
    backgroundColor: '#007DFF',
    backgroundOpacity: 0.5,
    menu: true
    });
},
onShow(options) {
    console.info("hello onShow ");
},
Cause Analysis
It is a compatibility issue that only occurs on Huawei Quick App Loader.
Solution
Use a div element as the root node.
The modified code is as follows:
<import name="steps" src="../Steps/stepscanvas1.ux"></import>
<template>
  <!-- Only one root node is allowed in template. -->
   <div class="container">
     <steps  class="stepcss" options="{{list2}}" active-color="#007AFF" active="{{active}}" direction="column" >
    </steps>
   </div>
  </template>
The output logs are as follows:
09-08 09:31:52.672 I/jsLog   ( 4552): Application onCreate
09-08 09:31:52.686 I/jsLog   ( 4552): hello onInit
09-08 09:31:52.747 I/jsLog   ( 4552): hello onShow
Width Setting Does Not Take Effect in the progress Element
Symptom
The width setting does not take effect no matter whether it is in the progress element directly or in the div element, as shown in the following figure.
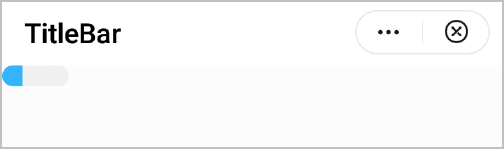
The code where the exception occurs is as follows:
<template>
  <div class="item-container">
    <div class="container">
      <progress class="progress" type="horizontal" percent="30"></progress>
    </div>
  </div>
</template>
<style>
  .item-container {
    flex-direction: column;
  }
  .container {
    width: 50%;
  }
  .progress {
    width: 50%;
  }
</style>
<script>
  export default {
    data: {
    },
    onInit() {
    },
  };
</script>
Cause Analysis
In the preceding code, the vertical layout is not set in the div element.
Solution
To resolve the problem, set flex-direction: column in the div element. The modified code is as follows:
.container {
    flex-direction: column;
    width: 50%;
  }
The effect is as follows.
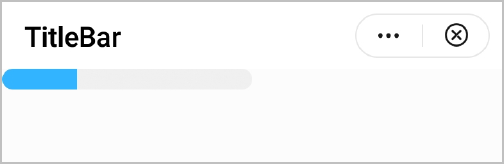
The Error Message "Buffer is not defined" Is Displayed When the buffer API Is Called
Symptom
When the buffer API is called in the quick app, the error message "Buffer is not defined" is displayed. The related code is as follows:
onShow: function () {
  var text = Buffer.from("hello world").toString('base64').replace(/\+/g, '-').replace(/\//g, '_')
  console.log("text: " + text);
},
The error logs are as follows:
09-10 09:38:36.003 I/jsLog   ( 6507): Application onCreate
09-10 09:38:36.104 E/jsLog   ( 6507): event callback with exception, ReferenceError: Buffer is not defined
Cause Analysis
Since Quick APP IDE 11.4.1, webpack used in the compiler of Quick APP IDE has been updated to webpack 5. In this version, some modules, including the buffer module, are removed.
Solution
- Add the quickapp.config.js file to the root directory of the project and add the following code:
module.exports = {
    resolve: {
        mainFields: ['browser', 'quickapp', 'main', 'module'],
        fallback: {
            "zlib": require.resolve("browserify-zlib"),
            "crypto": require.resolve("crypto-browserify"),
            "assert": require.resolve("assert"),
            "stream": require.resolve("stream-browserify"),
            "util": require.resolve("util"),
            "buffer": require.resolve("buffer")
        }
    }
}
The quickapp.config.js file takes effect only when the version of the fa-toolkit compiler configured in the package.json file is 3.1.2 or later.
- Switch to the TERMINAL tab page in IDE and run the following command to install the dependency:
npm i browserify-zlib crypto-browserify assert stream-browserify util buffer
- Import the dependency in the code file.
import {Buffer} from 'buffer' - If the HAService.js file is used, specify the UUID version as 3.4.0 in the package.json file and reinstall the dependency.
{
  "name": "com.huawei.shop",
  "version": "1.0.0",
  "description": "",
  "scripts": {
    "fa-build": "node node_modules/webpack/bin/webpack.js --progress --config ./node_modules/fa-toolkit/webpack.config.js",
    "fa-watch": "node node_modules/webpack/bin/webpack.js --watch --progress --config ./node_modules/fa-toolkit/webpack.config.js",
    "fa-release": "node ./node_modules/cross-env/src/bin/cross-env.js uglifyjs=true sign=release node_modules/webpack/bin/webpack.js --progress --config ./node_modules/fa-toolkit/webpack.config.js"
  },
  "devDependencies": {
    "fa-toolkit": "file:fa-toolkit-3.1.2-Stable.300.tgz",
    "cross-env": "^7.0.2"
    "uuid": "3.4.0"
  }
}
Logs are as follows if operations are performed correctly:

The Height of a Fixed Element Is Equal to the Screen Height
Symptom
When position of an element is set to fixed in CSS, its height will be equal to the screen height. The following figure shows the effect.
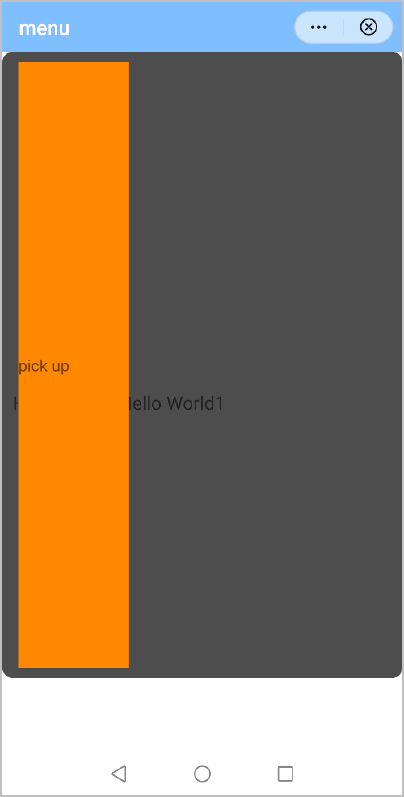
The code where the exception occurs is as follows:
<template>
  <div class="container">
    <text class="title">Hello World</text>
    <text class="title">Hello World1</text>
    <div class="fixed">
      <text class="desc">pick up</text>
    </div>
  </div>
</template>

<style lang="less">
  .container {
    width: 100%;
    height: 100%;
  }
  .title {
    font-size: 35px;
    margin-left: 20px;
  }
  .desc{
    background-color: #ff8800;
    width: 30%;
  }
  .fixed {
    justify-content: center;
    width: 100%;
    background-color: rgba(0, 0, 0, 0.7);
    flex-direction: row;
    padding: 20px 30px;
    border-radius: 20px;
    justify-content: space-between;
    bottom: 140px;
    position: fixed;
  }
</style>

<script>
  module.exports = {
    data: {
      componentData: {},
    },
    onInit() {
      this.$page.setTitleBar({
        text: 'menu',
        textColor: '#ffffff',
        backgroundColor: '#007DFF',
        backgroundOpacity: 0.5,
        menu: true
      });
    }
  }
</script>
Cause Analysis
This issue only occurs on Huawei Quick App Loader.
In the preceding code, the direction of the root node is not specified. According to the quick app specifications, the direction of div is horizontal by default. So, when the height of a fixed subelement is not set, Huawei Quick App Loader will set its height as the screen height.

If the direction of the root node is set to column, the height of the fixed element can be displayed normally.
Solution
Specify the height of the fixed element in the CSS.
The modified code is as follows:
.fixed {
    justify-content: center;
    width: 100%;
    height: 100px;
    background-color: rgba(0, 0, 0, 0.7);
    flex-direction: row;
    padding: 20px 30px;
    border-radius: 20px;
    justify-content: space-between;
    bottom: 140px;
    position: fixed;
}
The modified effect is as follows.
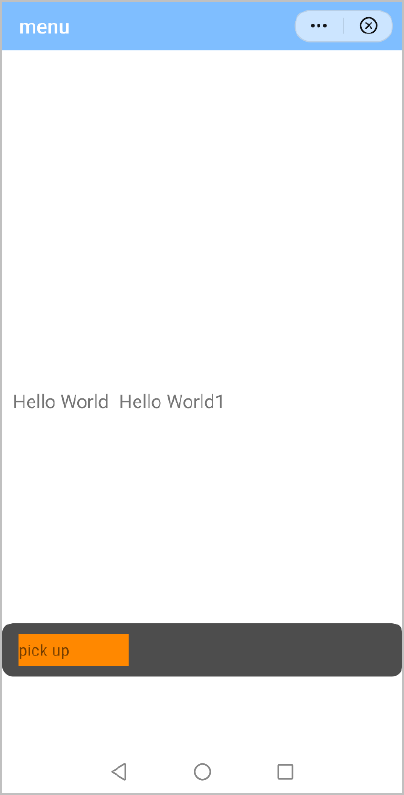
Error Code 202 Is Returned When the media.saveToPhotosAlbum API Is Called
Symptom
Error code 202 is returned when the media.saveToPhotosAlbum API is called to save the images on the Internet.
The code where the exception occurs is as follows:
<script>
  import prompt from '@system.prompt';
  import media from '@system.media';
  module.exports = {
    data: {
      componentData: {},
      imgurl: "https://ywopen-1252317822.image.myqcloud.com/openwx/recommendimg/20210908/6138797a4e3b3.jpg"
    },
    save() {
      media.saveToPhotosAlbum({
        uri: this.imgurl,
        success: function () {
          console.log('save success');
        },
        fail: function (data, code) {
          console.log('handling fail, code = ' + code);
        }
      })
    }
  }
</script>
The error logs are as follows:
09-16 14:12:01.511 E/jsLog   (19071): saveToPhotosAlbum: input err: invalid param.
09-16 14:12:01.519 I/jsLog   (19071): handling fail, code = 202
Cause Analysis
Currently, the saveToPhotosAlbum API only supports saving the local images to the album. The images on the Internet are not supported.
Solution
To save the images or videos on the Internet, you can call the request.download to download them to the local first and then call saveToPhotosAlbum to save them to the album.
The modified code is as follows:
<template>
  <!-- Only one root node is allowed in template. -->
  <div class="container">
    <text class="txt" onclick="download">download</text>
    <text class="txt" onclick="save">savetoPhotosAlbum</text>
  </div>
</template>

<style>
  .container {
    flex-direction: column;
    align-items: center;
    justify-content: center;
  }
  .txt {
    font-size: 30px;
    text-align: center;
    width: 50%;
    height: 70px;
    margin-top: 5px;
    border: 1px solid #000000;
  }
</style>

<script>
  import prompt from '@system.prompt';
  import request from '@system.request';
  import media from '@system.media';
  module.exports = {
    data: {
      componentData: {},
      imgurl: "https://ywopen-1252317822.image.myqcloud.com/openwx/recommendimg/20210908/6138797a4e3b3.jpg",
      downloadtoken: '',
      downloadurl: ''
    },
    save() {
      media.saveToPhotosAlbum({
        uri: this.downloadurl,
        success: function () {
          console.log('save success');
          prompt.showToast({
            message: 'save success',
          })
        },
        fail: function (data, code) {
          prompt.showToast({
            message: 'handling fail, code = ' + code,
          })
          console.log('handling fail, code = ' + code);
        }
      })
    },
    download() {
      var that = this
      request.download({
        "url": this.imgurl,
        success: function (data) {
          console.log(data.token);
          that.downloadtoken = data.token
        },
        fail: function (data, code) {
          console.log("handling fail, code = " + code);
        },
        complete() {
          that.ondownloadcomplete()
        }
      })
    },
    ondownloadcomplete() {
      var that = this
      request.onDownloadComplete({
        "token": this.downloadtoken,
        success: function (data) {
          console.log(data.uri);
          that.downloadurl = data.uri
        },
        fail: function (data, code) {
          console.log("handling fail, code = " + code);
        }
      })
    }
  }
</script>
Logs are as follows in a normal scenario:
09-16 14:28:03.468 I/jsLog   (19152): 341
09-16 14:28:03.843 I/jsLog   (19152): internal://mass/Download/6138797a4e3b3-2.jpg
09-16 14:28:05.479 I/jsLog   (19152): save success
09-16 14:29:04.878 I/jsLog   (19152): save success
The Obtained Coordinate Is Incorrect When scrollTo Is called in the list Element
Symptom
When the scrollTo method is called in the list element, the obtained coordinate is incorrect. The log is as follows:
09-27 09:43:05.694 I/jsLog ( 1471): scroll.scrollX:0 .scrollY:0 .scrollState:0
The code where the exception occurs is as follows:
<template>
  <div class="container">
    <div class="nav">
      <text class="nav-item">list</text>
      <input type="button" value="jump" onclick="jump" />
    </div>
    <!-- List -->
    <list class="list" onclick="listClick" onlongpress="listLongPress" onscrollbottom="scrollbottom" id="list" scrollpage="{{scrollPage}}" onscroll="scroll">
      <list-item type="listItem" class="item item-color" onclick="listItemClick" for="{{listData}}">
        <text class="txt">{{$item}}--{{$idx}}</text>
      </list-item>
      <!-- Loading More  -->
      <list-item type="loadMore" class="load-more" if="{{loadMore}}">
        <progress type="circular"></progress>
        <text>More</text>
      </list-item>
    </list>
  </div>
</template>
<style>
  .container {
    flex-direction: column;
  }
  .list {
    padding-left: 10px;
    padding-right: 10px;
    columns: 1;
    flex-direction: column;
    border-color: #FF0000;
    border-width: 5px;
  }
  .item {
    flex-direction: column;
    align-items: flex-start;
    margin-bottom: 15px;
    border-color: #9400D3;
    border-width: 5px;
    margin-right: 20px;
    background-color: #f76160;
  }
  .load-more {
    justify-content: center;
    align-items: center;
    height: 100px;
    border-color: #bbbbbb;
    border-bottom-width: 1px;
  }
  .btn-little {
    flex: 1;
    height: 80px;
    margin-left: 15px;
    border-radius: 5px;
    color: #ffffff;
    font-size: 30px;
    text-align: center;
    background-color: #0faeff;
  }
  .nav {
    padding-left: 60px;
    padding-right: 60px;
    padding-bottom: 30px;
  }
  .nav-item {
    flex: 1;
    padding-bottom: 30px;
    border-bottom-width: 5px;
    border-color: #fbf9fe;
    font-size: 35px;
    color: #666666;
    text-align: center;
  }
</style>
<script>
  import prompt from '@system.prompt'
  export default {
    data: {
      componentName: 'list',
      loadMore: true,
      listAdd: ['A', 'B', 'C', 'D', 'E', 'F', 'G', 'H', 'I', 'J', 'K', 'L', 'M', 'N', 'O', 'P', 'Q', 'R', 'S', 'T', 'U', 'V', 'W', 'X', 'Y', 'Z'],
      listData: [],
      scrollPage: false,
    },
    onInit: function () {
      this.$page.setTitleBar({ text: 'list' })
      for (var index = 0; index < 100; index++) {
        this.listData[index] = 'A';
      }
    },
    scrollbottom: function () {
      prompt.showToast({
        message: 'The list slides to the bottom and starts loading other data.'
      })
      // Load next page
      var that = this
      var renderData = [].concat(that.listData, that.listAdd)
      setTimeout(function () {
        that.listData = renderData
      }, 1000)
    },
    // monitoring during sliding
    scroll: function (e) {
      let msg = 'scroll' + '.scrollX:' + e.scrollX
        + ' .scrollY:' + e.scrollY
        + ' .scrollState:' + e.scrollState
      console.info(msg)
    },
    listItemClick: function (e) {
      e.stopPropagation()
      console.info('List Item is clicked.')
      prompt.showToast({
        message: 'List Item is clicked.'
      })
    },
    listClick: function (e) {
      e.stopPropagation()
      console.info('List is clicked.')
      prompt.showToast({
        message: 'List is clicked.'
      })
    },
    listLongPress: function (e) {
      e.stopPropagation()
      console.info('List is long pressed.')
      prompt.showToast({
        message: 'List is long pressed.'
      })
    },
    jump: function (e) {
      this.$element('list').scrollTo({ index: 30, smooth: false })
    }
  }
</script>
Cause Analysis
If smooth in scrollTo is set to false, the page is scrolled to the specified coordinate immediately so that the onScroll event can only obtain the final result, not the data during scrolling.
Solution
To resolve the problem, set smooth to true. The modified code is as follows:
jump: function (e) {
  this.$element('list').scrollTo({ index: 30, smooth: true })
}
Passing Data in props from the Parent Element to the Subelement
Symptom
When you update the data of props in the parent element, the data in the subelement will be updated accordingly. In this way, data is passed from the parent element to the subelement.
Implementation
The parent element code is as follows:
<import name="t-item" src="../Test/t-item.ux"></import>
<template>
  <div class="container">
    <text class="title" onclick="handleclick">Hello World</text>
    <t-item class="title" say="{{say1}}" prop-object="{{count:111}}">{{say}}</t-item>
  </div>
</template>
<style>
  .container {
    flex-direction: column;
    justify-content: center;
    align-items: center;
  }
  .title {
    font-size: 100px;
  }
</style>
<script>
  module.exports = {
    data: {
      say1:"hello",
      componentData: {},
      count:{
      }
    },
    onInit() {
      this.$page.setTitleBar({
        text: 'menu',
        textColor: '#ffffff',
        backgroundColor: '#007DFF',
        backgroundOpacity: 0.5,
        menu: true
      });
    },
    handleclick(){
      console.log ("Clicked");
      this.say1="change "
    }
  }
</script>
Data can be received in the subelement in the following ways:
- Receive the value passed by props as the default value in data.
<script>
  export default {
    props: ['say', 'propObject'],
    data() {
      return {
        obj: this.propObject.count
      }
    },
    onInit() {
      console.info (`Data passed externally: `, this.say, this.propObject)
    }
  }
</script>
If you want to receive propObject directly in data, use JSON.parse(JSON.stringify(propObject)) to deep clone propObject.
- Listen to the data changes by using $watch.
Parameters in $watch should be in Object.Attribute format, for example, $watch(xxx.xxx.xxx, methodName), so that the attribute of the object will be listened to.
<script> module.exports = { props: ['say', 'propObject'], data() { return { propSay: this.say } }, onInit() { // Listen to the data changes. console.log(this.say); this.$watch('say', 'watchPropsChange') this.$watch('propObject.count', 'watchPropsChange') }, /** * Listen to the data changes. You can process the data and set it in data. * @param newV * @param oldV */ watchPropsChange(newV, oldV) { console.log (`Listen to the data changes: `, newV, oldV) this.propSay = newV && newV.toUpperCase() } } </script> - Use the computed attributes (1050+).
For details, please refer to Computed Attributes.
<script>
    module.exports = {
        props: ['say', 'propObject'],
       computed: {
            obj() {
                console.log("say:" + this.say);
                console.log("propObject.count:" + this.propObject.count);
                return this.say.toUpperCase()
            }
        },
        onReady() {
            console.log(this.obj)
        }
    }
</script>
Web Page Opened By Calling the webview API Is Automatically Zoomed In On
Symptom
The web page is automatically zoomed in on if it is opened by calling the webview API.
webview.loadUrl({
  url: 'https://cdn.langqing.club/jQuery/index.html',
  allowthirdpartycookies: true
})
Cause Analysis
Because Huawei Quick App Loader does not change the web page width according to the screen, the web page is displayed with its actual width, causing the content cannot all displayed on the screen.
Solution
To avoid such problem, use the web element to load the web page and set the overviewmodeinload attribute to true. The code is as follows:
<template>
  <div class="container">
    <web src="https://cdn.langqing.club/jQuery/index.html" overviewmodeinload="true"></web>
  </div>
</template>
<style>
  .container {
    flex-direction: column;
  }
</style>
<script>
  module.exports = {
    data: {
    },
    onInit() {
      this.$page.setTitleBar({
        text: 'menu',
        textColor: '#ffffff',
        backgroundColor: '#007DFF',
        backgroundOpacity: 0.5,
        menu: true
      });
    },
  }
</script>
No Response When I Sign In to Huawei Quick App IDE
Symptom
There is no response when I click the sign-in button on the welcome page or main page.
In addition, "Error: spawn explorer.exe ENOENT" is displayed in the tool.
Cause Analysis
The path of the explorer.exe file is not set in the environment variable. As a result, the IDE cannot find the specified program.
Solution
Add the environment variable windir and set its value to C:\Windows.
Creating Home Screen Icon Quickly
Description
To improve the retention rate, many developers want to add an entry for creating the home screen icon on their app pages if users have not created a home screen icon.
Implementation
To avoid editing too much repeated code on each app page, you can customize a subelement to implement the entry.
- Define the hasshortcut attribute in the subelement and call the home screen icon API in onReady() to check whether the home screen icon exists. If yes, the subelement is not displayed.
The root node cannot use the if and show commands in the IDE. Therefore, set display to flex or none in CSS to determine the display of the subelement.
- Design the layout of the subelement:
- Specify opacity and set position to fixed, and fix the subelement on the bottom of the page.
- Set a button for creating the home screen icon on the page. When this button is clicked, the home screen icon API is called to create the home screen icon. After the callback by success is received, the subelement is hidden.
Sample code
shortcutcmp.ux file:
<template>
  <div class="{{hasshortcut ? 'nodisplay':'container'}}">
    <image class="img" src="/Common/logo.png"></image>
    <text class="txt">Add Ebay to your home screen</text>
    <input type="button" class="btn" value="Add" onclick="add"></input>
  </div>
</template>

<style>
    .container {
      display: flex;
      flex-direction: row;
      background-color: #000000;
      opacity: 0.7;
      align-items: center;
      position: fixed;
      height: 64px;
      bottom: 10px;
      left: 16px;
      right: 16px;
      padding-left: 12px;
      padding-right: 12px;
      border-radius: 10px;
    }

    .nodisplay{
      display: none;
      flex-direction: row;
      background-color: #000000;
      opacity: 0.8;
      align-items: center;
      position: fixed;
      height: 64px;
      bottom: 10px;
      left: 16px;
      right: 16px;
      padding-left: 12px;
      padding-right: 12px;
      border-radius: 10px;
    }

    .txt {
      color: #ffffff;
      font-size: 16px;
      width: 100%;
      margin-right: 8px;
      margin-left: 8px;
      text-overflow: ellipsis;
    }

    .img {
      width: 40px;
      height: 40px;
      flex-shrink: 0;
    }

    .btn {
      width: 86px;
      height: 40px;
      background-color: red;
      color: #ffffff;
      border-radius: 16px;
      flex-shrink: 0;
    }
    .btn:active{
       background-color: red;
       opacity: 0.9
    }
</style>
<script>
    import shortcut from '@system.shortcut';
    import prompt from '@system.prompt';
    export default {
        props: ['websrc'],
        data: {
            hasshortcut:false

        },
        onInit() {
            console.info('onInit: ');
        },

        onReady(options) {
            var that=this;
            shortcut.hasInstalled({
                success: function (ret) {
                    console.log(' onReady hasInstalled success ret---' + ret);
                    if (ret) {
                        that.hasshortcut=true;
                    } else {
                        that.hasshortcut=false;
                    }
                }.bind(this),
                fail: function (erromsg, errocode) {
                    console.log('hasInstalled fail ret---' + erromsg);
                },
                complete: function () {
                }
            })
        },

        alertSucess:function(){
            prompt.showToast({
                      message: 'Let\'s Ebay on your home screen',
                      duration: 2000,
                      gravity: 'center'
                  })
        },
        alertShortcut: function () {
            var that=this;
            shortcut.install({
                message: 'Adds the Ebay shortcut to the desktop for convenient use next time.',
                success: function (ret) {
                    console.log('handling createShortCut success');
                 that.hasshortcut=true;

                },
                fail: function (erromsg, errocode) {
                    console.log('handling createShortCut fail');
                      that.hasshortcut=false;
                },
            })
        },
        add: function () {
            var that = this;
             this.alertShortcut();
        },

    }
</script>
hello.ux file:
<import name="shortcmp" src="../Shortcut/shortcutcmp.ux"></import>
<template>
    <div class="doc-page">
        <shortcmp></shortcmp>
    </div>
</template>
Video Plays Automatically Only When It Is Fully Displayed During Page Swiping
Description
When a user swipes to browse videos in a video app, make the video to play automatically only when it is fully displayed.
Implementation
The onappear and ondisapper events can be used to implement such function.
- Use list and list-item in the layout, add two text elements in each list-item, and place the video element between the two text elements.
- Set footervalue and headrvalue (both are Boolean variables) for each object in the videoadd array, the data source of list, to determine whether the current video is fully displayed.
- Add the onappear and ondisappear events in the two text elements to determine whether to play the video.
- During page swiping, if the text elements above and below the video element appear at the same time, the onappear events are both triggered. In this case, the video automatically plays when footervalue and headrvalue are set to true.
- During page swiping, if either the text element above or that below the video element disappears, the ondisappear event is triggered. In this case, the video stops playing when footervalue and headrvalue are set to false.
Sample code
<template>
  <!-- Only one root node is allowed in template. -->
  <div class="container">
    <list class="list">
      <list-item class="list-item" type="video" for="{{videoadd}}">
        <div class="videocss">
          <text class="header" onappear="headerappear($idx)" ondisappear="headerdisappear($idx)">This is the start of video {{ $idx + 1 }}.</text>
          <video id="video{{$idx}}" class="video" src="{{$item.videosrc}}"></video>
          <text class="header" onappear="footerappear($idx)" ondisappear="footerdisappear($idx)">This is the end of video {{ $idx + 1 }}.</text>
        </div>
      </list-item>
    </list>
  </div>
</template>

<style>
  .container {
    flex-direction: column;
    justify-content: center;
    align-items: center;
  }
  .list {
    width: 100%;
    height: 100%;
    display: flex;
  }
  .list-item {
    width: 700px;
    height: 800px;
  }
  .videocss {
    flex-direction: column;
    margin-left: 50px;
    margin-bottom: 50px;
  }
  .header {
    font-size: 40px;
    height: 50px;
    width: 700px;
    background-color: #00ced1;
    text-align: center;
  }
  .video {
    width: 700px;
    height: 600px;
  }
</style>

<script>
  module.exports = {
    data: {
      videoadd: [
        {
          footervalue: false,
          headrvalue: false,
          videosrc: "https://ss0.bdstatic.com/-0U0bnSm1A5BphGlnYG/cae-legoup-video-target/93be3d88-9fc2-4fbd-bd14-833bca731ca7.mp4"
        },
        {
          footervalue: false,
          headrvalue: false,
          videosrc: "https://ss0.bdstatic.com/-0U0bnSm1A5BphGlnYG/cae-legoup-video-target/93be3d88-9fc2-4fbd-bd14-833bca731ca7.mp4",
        },
        {
          footervalue: false,
          headrvalue: false,
          videosrc: "https://ss0.bdstatic.com/-0U0bnSm1A5BphGlnYG/cae-legoup-video-target/93be3d88-9fc2-4fbd-bd14-833bca731ca7.mp4",
        },
      ],
      test: "",
    },
    onInit() {
    },
    headerappear(index) {
      this.videoadd[index].headrvalue = true
      // Determine whether the video plays automatically when a page is swiping up.
      if (this.videoadd[index].footervalue === true) {
        this.test = "video" + index
        this.$element(this.test).start()
      }
      console.log("headerappear", index, this.videoadd[index].headrvalue);
    },
    headerdisappear(index) {
      this.videoadd[index].headrvalue = false
      console.log("headerdisappear", index, this.videoadd[index].headrvalue);
    },
    footerappear(index) {
      this.videoadd[index].footervalue = true
      console.log("footerappear", index, this.videoadd[index].footervalue);
      // Determine whether the video plays automatically when a page is swiping down.
      if (this.videoadd[index].headrvalue === true) {
        this.test = "video" + index
        this.$element(this.test).start()
      }
    },
    footerdisappear(index) {
      this.videoadd[index].footervalue = false
      console.log("footerdisappear", index, this.videoadd[index].footervalue);
    }
  }
</script>
Implementing the Welcome Page for the Quick App
Description
When a user starts an app, the app performs some tasks such as requesting the network and manipulating the database, which could cause the user waiting too long at the function page. In this case, you can add a full-screen welcome page which lasts about 1 second before the function page is displayed.
Implementation
- Set the welcome page as the home page in the manifest.json file, enable the full screen mode and hide the title bar.
"router": { "entry": "Home", "pages": { "Hello": { "component": "hello" }, "Home": { "component": "home" } } }, "display": { "pages": { "Hello": { "titleBarText": "TitleBar" }, "Home": { "fullScreen": true, "titleBar": false } } } - Design the layout of the welcome page in the home.ux file.
- For the layout of bottom, set position to fixed.
- Use setTimeout() to set the lasting time of the welcome page and implement the page redirection in the onReady() lifecycle function.
- If resources need to be loaded in advance, you can make it in the app.ux file.
Sample code
home.ux file:
<template>
  <div class="doc-page">
    <div class="logo_image">
      <image src="/Common/logo.png"></image>
      <text class="alert">Welcome to you</text>
    </div>
    <div class="bottom">
      <div class="firstRow">
        <image class="small_logo" src="/Common/logo.png"></image>
        <text class="app_name">your app name</text>
      </div>
      <text class="secondTxt">huawei</text>
    </div>
  </div>
</template>
<style>
  .doc-page {
    flex-direction: column;
    flex-direction: column;
    justify-content: center;
    align-content: center;
    align-items: center;
    width: 100%;
    height: 100%;
    border-top-left-radius: 100%;
  }
  .logo_image {
    flex-direction: column;
    align-items: center;
    justify-content: center;
  }
  .alert {
    margin-top: 30px;
    font-size: 35px;
  }
  .app_name {
    font-size: 36px;
    font-weight: 800;
  }
  .bottom {
    position: fixed;
    flex-direction: column;
    align-items: center;
    justify-content: center;
    width: 100%;
    bottom: 20px;
  }
   .firstRow {
    flex-direction: row;
    align-items: center;
    justify-content: center;
  }
  .small_logo {
    width: 36px;
    height: 36px;
    margin-right: 10px;
  }
  .secondTxt {
     font-size: 26px;
      color: #808080;
  }
</style>
<script>
  import router from '@system.router';
  export default {
    data: {
      openPage: ""
    },
    onInit() {
      console.info('onInit: ');
    },
    onReady(options) {
      const that = this;
      this.openPage = this.page;
      console.info("onReady this.openPage:" + this.openPage);
      setTimeout(function () {
        that.jump();
          that.$page.finish();
      }, 1000)
    },
    jump: function () {
      router.push({
        uri: '/Hello',
        params: { body: " test send message" }
      });
    },
    onError(e) {
      console.info('pageError : ' + e.errorMsg)
    },
    onMessage(e) {
      console.info('onmessage e = ' + e.message + ", url = " + e.url);
    },
    onShow: function () {
      console.info(" onshow");
    },
    onHide: function () {
      console.info("  onHide");
    }
  }
</script>
Implementing the Immersive Page for the Quick App
Description
To implement the immersive page, your quick app should be able to hide the system status bar and navigation bar automatically, and they can be displayed by swiping from the edge of device screen. The immersive page is commonly used in the reading apps. The following figures show the effect.
|
|
Status bar and navigation bar are hidden automatically. | Status bar and navigation bar are displayed by swiping. |


Implementation
- In the manifest.json file, set titleBar to false to hide the built-in title bar.
"display": { "pages": { "Hello": { "titleBar":false, } } } - In script, set the visible attribute of the navigation bar to false to hide the system status bar and navigation bar.
this.$page.setNavigationBar({visible:false});
No Ad Identity for the Native Ad
Symptom
My ad was rejected by the Petal Ads team because the native ad in my app did not contain the ad identity.
Cause Analysis
The locally rendered native ad is normally displayed together with non-ad content. So, users may mistakenly tap the ad if there is no ad identity to distinguish the ad from non-ad content, affecting user experience.
The ad identity can be an icon or text.
Solution
In the following example code, the text AD configured in the ad layout part is used as the ad identity.
The sample code is as follows. Design the UI effect based on your product.
<template>
  <div class="item-container">
    <text class="alert">This is native ad demo</text>
    <div if="native.isShow" class="container" onappear="dealAppear">
      <text style="margin-bottom: 8px;">ad title :{{native.adData.title}}</text>
      <video id="video" if="native.isShowVideo" src="{{native.adVideoSrc}}" autoplay="true" onclick="reportNativeClick()" class="ad-video"></video>
      <stack class="stackstyle " onclick="reportNativeClick()">
        <image if="native.isShowImg" class="img" src="{{native.adImgSrc}}"></image>
        <input if="native.isShowBtn" type="button" class="adbtn" value="{{native.btnTxt}}" onclick="clickAdBtn()" />
      </stack>
      <div style="flex-direction: row; width: 100%;align-items: center;align-content: center;">
        <text class="adidenty">AD</text>
        <text style="width: 100%;">ad source:{{native.adData.source}}</text>
        <image class="closeImg" src="/Common/close.png" onclick="closeAd"></image>
      </div>
    </div>

    <text if="native.isShowData">{{ native.adData }}</text>
    <text if="native.errStr">{{ native.errStr }}</text>
  </div>
</template>
<style>
  .container {
    flex-direction: column;
    margin-top: 20px;
    width: 100%;
    margin-bottom: 50px;
    border: 2px solid #e90707;
    padding: 12px;
  }
  .stackstyle {
    width: 100%;
    height: 300px;
  }

   .adidenty{
   background-color: #fffafa;
   border: 1px solid #dad7d7;
    border-radius: 6px;
    width: 100px;
    height: 40px;
    text-align: center;
    margin-right: 20px;
  }
  .img {
    width: 100%;
    resize-mode: contain;
  }
  .closeImg {
    width: 48px;
    height: 48px;
    flex-shrink: 0;
  }
  .alert {
    font-size: 40px;
    margin-top: 20px;
    margin-bottom: 20px;
  }
  .item-container {
    margin-top: 50px;
    padding: 20px;
    width: 100%;
    flex-direction: column;
    align-items: center;
    align-content: center;
  }
  .ad-video {
    object-fit: contain;
    width: 100%;
    height: 415px;
  }
  .btn {
    height: 80px;
    width: 60%;
    background-color: #00bfff;
    color: #ffffff;
    border-radius: 20px;
    margin-bottom: 20px;
  }
  .btn:active {
    background-color: #058fbd;
  }
  .adbtn {
    width: 150px;
    height: 60px;
    color: #ffffff;
    background-color: #00bfff;
    border-radius: 8px;
    position: absolute;
    align-self: flex-end;
    bottom: 20px;
    right: 20px;
  }
  .adbtn:active {
    background-color: #058fbd;
  }
</style>
<script>
  import ad from "@service.ad";
  import router from '@system.router';
  import prompt from "@system.prompt";
  export default {
    data: {
      componentName: "ad",
      provider: "",
      native: {
        adUnitId: "u7m3hc4gvm",
        isShow: false,
        adData: {},
        isShowImg: true,
        isShowVideo: true,
        isShowData: true,
        isShowBtn: true,
        errStr: "",
        btnTxt: "",
        adImgSrc: "https://cs02-pps-drcn.dbankcdn.com/cc/creative/upload/20191226/b750592e-04be-4132-9971-52494b1e5b43.jpg",
        adVideoSrc: ""
      }
    },
    onInit() {
      this.$page.setTitleBar({ text: "page Native Ad" });
    },
    onReady(options) {
      console.info("native ad onReady");
      this.showNativeAd();
    },
    onShow(options) {
      console.info("native onshow");
      if (this.native.isShow) {
        this.reportNativeShow();
      }
    },
    getAdProvider: function () {
      this.provider = ad.getProvider();
      prompt.showToast({
        message: "getProvider : " + this.provider,
        duration: 2000,
        gravity: "center"
      });
    },
    isDownloadAd(creativeType) {
      let downloadTypes = [103, 106, 107, 108, 101, 102, 110];
      return downloadTypes.includes(creativeType);
    },
    showNativeAd() {
      var that = this;
      this.getAdProvider();
      if (this.provider !== "huawei") {
        console.info("the device  does not support ad.");
        return;
      }
      this.nativeAd = ad.createNativeAd({ adUnitId: this.native.adUnitId });
       this.nativeAd.onLoad(data => {
        console.info("ad data loaded: " + JSON.stringify(data));
        this.native.adData = data.adList[0];
        if (this.native.adData) {
          if (this.native.adData.imgUrlList) {
            this.native.adImgSrc = this.native.adData.imgUrlList[0];
            console.info(" this.native.adImgSrc =" + this.native.adImgSrc);
            this.native.isShowImg = true;
          } else {
            this.native.isShowImg = false;
            this.native.adImgSrc = "";
          }
          if (this.native.adData.clickBtnTxt) {
            this.native.btnTxt = this.native.adData.clickBtnTxt;
            this.native.isShowBtn = true;
          } else {
            this.native.isShowBtn = false;
            this.native.btnTxt = "";
          }
          if (this.native.adData.videoUrlList && this.native.adData.videoUrlList[0]) {
            this.native.adVideoSrc = this.native.adData.videoUrlList[0];
            this.native.isShowVideo = true;
          } else {
            this.native.isShowVideo = false;
            this.native.adVideoSrc = "";
          }
          this.native.isShow = true;
          this.native.errStr = "";
          this.reportNativeShow();
        }
      });
       this.nativeAd.onError(e => {
        console.error("load ad error:" + JSON.stringify(e));
        this.native.isShowImg = false;
        this.native.isShowVideo = false;
        this.native.isShow = false;
        this.native.errStr = JSON.stringify(e);
      });
       this.nativeAd.load();
    },
    reportNativeShow() {
      if ( this.nativeAd) {
        console.info("native reportAdShow");
         this.nativeAd.reportAdShow({ adId: this.native.adData.adId });
      }
    },
    reportNativeClick() {
       this.nativeAd.reportAdClick({
        adId: this.native.adData.adId
      });
    },
    listenNativeAdDownloadStatus(downloadstatus) {
      if (downloadstatus === "INSTALLED") {
        this.native.btnTxt = "OPEN";
      }
    },
    clickAdBtn(evt) {
      evt.stopPropagation();
      // Check whether there is a download button.
      let createType = this.native.adData.creativeType;
      let ans = this.isDownloadAd(createType);
      console.info("clickAdBtn dealdownload ans=" + ans);
      if (ans) {
        this.dealdownload();
      } else {
        this.reportNativeClick();
      }
    },
    dealdownload: function () {
      let downloadstatus =  this.nativeAd.getAppStatus({
        adId: this.native.adData.adId
      });
      console.log("downloadstatus downloadstatus = " + downloadstatus);
      if (downloadstatus === "DOWNLOAD") {
        // The app download has not started.
        const resultCode =  this.nativeAd.startDownload({
          adId: this.native.adData.adId
        });
        console.log("dealdownload startDownload  resultCode= " + resultCode);
        const progress =  this.nativeAd.getDownloadProgress({
          adId: this.native.adData.adId
        });
        console.log("getDownloadProgress progress = " + progress);
         this.nativeAd.onDownloadProgress(data => {
          console.log("onDownloadProgress data = ", data);
          this.native.btnTxt = data.progress + "%";
        });
         this.nativeAd.onStatusChanged(data => {
          console.log("onStatusChanged data = ", data);
          let status = data.status;
          this.listenNativeAdDownloadStatus(status);
        });
      } else if (downloadstatus === "DOWNLOADING") {
        this.native.btnTxt = "pause";
         this.nativeAd.pauseDownload({
          adId: this.native.adData.adId
        });
      } else if (downloadstatus === "PAUSE") {
        this.native.btnTxt = "resume download";
         this.nativeAd.resumeDownload({
          adId: this.native.adData.adId
        });
      } else {
        this.reportNativeClick();
      }
    },
    removeAdListen: function () {
      if ( this.nativeAd) {
         this.nativeAd.offDownloadProgress();
         this.nativeAd.offError(() => {
          console.log("nativeAd offError");
        });
         this.nativeAd.offLoad(() => {
          console.log("nativeAd offLoad");
        });
         this.nativeAd.offStatusChanged();
      }
    },
    onDestroy() {
      if ( this.nativeAd) {
         this.nativeAd.cancelDownload({
          adId: this.native.adData.adId
        });
         this.nativeAd.destroy();
      }
    },
    closeAd: function () {
      this.native.isShow = false;
    },
    dealAppear: function () {
      console.info("native Appear");
    }
  };
</script>
Error adb server version (40) doesn't match this client (41) Is Reported By Huawei Quick App IDE
Symptom
When I was using Huawei Quick App IDE to run a quick app created from the Quick App Alliance IDE, Huawei Quick App IDE reported the following error:
adb server version (40) doesn't match this client (41); killing... * daemon started successfully
Cause Analysis
ADB is a debug tool used for interaction between a computer and a mobile phone or simulator.
The cause of the error is that the ADB version does not match the requirement of Huawei Quick App IDE. The required version is 41 while the installed version is 40.
Please check:
- Whether the quick app project contains the ADB dependency.
- Whether ADB has installed on the PC and is configured in the environment variables.
You can open the CLI and enter where adb to have a check.

As shown in the preceding figure, ADB is installed on drive D and configured in the system variables. The last line indicates that Huawei Quick App IDE also has an ADB. If your PC does not have one, ADB in Huawei Quick App IDE will be executed when you run the quick app.
To fix the reported error, you have to close or delete the ADB of the incorrect version, and execute the correct one.
Solution
- Close the Quick App Alliance IDE.
- Delete the environment variables of ADB, or replace the ADB with that of Huawei Quick App IDE.
- Restart Huawei Quick App IDE.
Gradient Style Does Not Take Effect Dynamically
Symptom
The gradient style dynamically set in template does not take effect. The problematic code is as follows:
<div class="wrapper" style="background:linear-gradient({{gradient}});"></div> Cause Analysis
Wrapping variables in style to dynamically change the style is not supported by quick apps.
Solution
Set the gradient style by dynamically changing the class name.
Sample code
<template>
  <!-- Only one root node is allowed in template. -->
  <div class="container">
    <div class="{{gradient}}">
      <text class="title">{{ gradient }}</text>
    </div>
    <input class="button" type="button" onclick="click($idx)" value="{{$item}}" for="{{list}}" />
  </div>
</template>

<style>
  .container {
    flex-direction: column;
    justify-content: center;
    align-items: center;
  }
  .button {
    width: 250px;
    margin-top: 10px;
    background-color: #00ced1;
    border-radius: 10px;
  }
  .redtoblue {
    background: linear-gradient(red, blue);
  }
  .redtogreen {
    background: linear-gradient(red, green);
  }
  .bluetogreen {
    background: linear-gradient(blue, green);
  }
  .redtoyellow {
    background: linear-gradient(red, yellow);
  }
  .yellowtogreen {
    background: linear-gradient(yellow, green);
  }
  .bluetoyellow {
    background: linear-gradient(blue, yellow);
  }
  .title {
    font-size: 100px;
  }
</style>

<script>
  module.exports = {
    data: {
      gradient: 'redtoblue',
      list: ["redtogreen", "bluetogreen", "redtoyellow", "yellowtogreen", "bluetoyellow", "redtoblue"]
    },
    onInit() {
      this.$page.setTitleBar({
        text: 'menu',
        textColor: '#ffffff',
        backgroundColor: '#007DFF',
        backgroundOpacity: 0.5,
        menu: true
      });
    },
    click(index) {
      this.gradient = this.list[index]
    }
  }
</script>
The final effect is as follows.
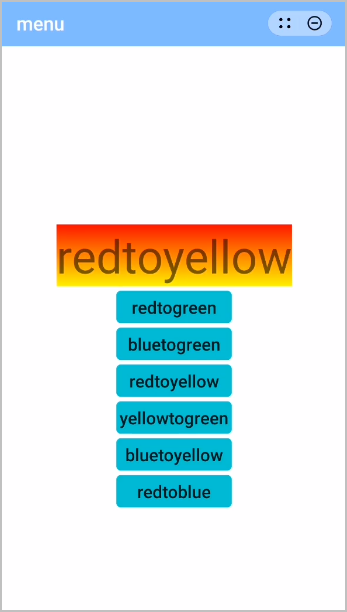
Huawei Quick App IDE Does Not Work on Windows 7
Symptom
Huawei Quick App IDE does not work on Windows 7 when I try to run or debug the project, or create a new template.
Cause Analysis
The current node.exe version does not support Windows 7.
Solution
Download the node.exe of version 12 to replace node.exe in the /resources/app/extensions/deveco-debug/lib/toolkit/nodeTool directory of Huawei Quick App IDE.
Conversion Between px and vp
Description
When designing the quick app page layout, you need to know the style and position of each element. In this case, you need to understand the concept of px and vp, and the conversion principle between them.
Solution
- A pixel (abbreviated px), is the smallest square of the display screen.
- A virtual pixel (abbreviated vp) can be calculated from px based on the formula vp = (px x 160)/PPI.
- Pixels Per Inch (abbreviated PPI) indicates the pixel density on the screen, that is, the number of pixels in each inch of the screen. The calculation formula is as follows: PPI = Number of diagonal pixels/Screen size.
The following table lists the conversion examples for your reference.
Resolution | Screen Density | Conversion Relationship |
|---|---|---|
240 x 320 | 120 | 1 vp = 0.75 px |
320 x 480 | 160 | 1 vp = 1 px |
480 x 800 | 240 | 1 vp = 1.5 px |
720 x 1280 | 320 | 1 vp = 2 px |
1920 x 1280 | 480 | 1 vp = 3 px |
For example, if the resolution is 1080 x 2340 pixels, and you want to convert 200 pixels, you can check 1920 x 1080 pixels, whose clarity is close to 1080 x 2340 and conversion relationship is 1 vp = 3 px. In this case, you can convert 200 pixels to 67 virtual pixels.
This is a rough calculation, which is not very accurate. However, the loss or the addition of several pixels does not have much impact. To obtain the accurate result, you need to use the preceding formulas.
The Previous Link Page Cannot Be Displayed by Tapping the Back Button After Multiple Link Redirects
Symptom
The user agreement and privacy policy page contains a link. After multiple link redirects, I tapped the back button, but the user agreement and privacy policy page, instead of the previous link page, is displayed.
Cause Analysis
The redirection is implemented on the same page, and no relevant event is bound to the back button.
Solution
Bind the event for going back to the previous page to the back button.
onBackPress() {
  this.$element('web').canBack({
      callback: function (e) {
          if (e) {
              this.$element('web').back();
          } else {
              router.back();
          }
      }.bind(this)
  });
  return true;
},
The following is the sample code.
service.ux file:
<template>
  <web id="web" src="{{openUrl}}"></web>
</template>
<script>
    import router from '@system.router'
    export default {
        public: {
            openUrl: '',
            menuTitle: ''
        },
        onInit() {
            let { openUrl, menuTitle } = this
            this.openUrl = openUrl
            this.$page.setTitleBar({ text: menuTitle, textColor: '#000', backgroundColor: '#FFFFFF', backgroundOpacity: 0.5, menu: true })
        },
        onBackPress() {
            this.$element('web').canBack({
                callback: function (e) {
                    if (e) {
                        this.$element('web').back();
                    } else {
                        router.back();
                    }
                }.bind(this)
            });
            return true;
        },

    }
</script>
userAgreement.ux file:
<template>
  <div class="label">
    <div class="content">
      <div class="title"><text>User Agreement and Privacy Policy</text></div>

      <list class="content-warp">
        <list-item class="first-line" type="list-item">
          <text>Welcome</text>
        </list-item>

        <list-item class="primary-line" type="list-item-content">
          <text>User agreement and privacy policy content.</text>
          <text>
            By tapping the agree button, you agree to these terms as well as the following:
            <a @click="openPage(1)" class="service">User Agreement</a>
            and
            <a @click="openPage(2)" class="service">Privacy Policy</a>
          </text>
        </list-item>
      </list>
      <div @click="agree" class="handle-btn">
        <text>Agree</text>
      </div>
      <div @click="cancel" class="disagree-btn">
        <text>Disagree</text>
      </div>
    </div>
  </div>
</template>
<script>
  export default {
    onInit() {

    },
    openPage(flag) {
      this.$emit('openServicePage', { flag })
    },
    agree() {
      this.$dispatch("dispatchEvent", {
        display: false,
        isagree: "agree"
      });
    },
    cancel() {
      this.$app.exit();
    }
  }
</script>

<style lang="less">
  .content {
    padding: 30px;
    border-radius: 12px;
    width: 600px;
    flex-direction: column;
    align-items: center;
    background-color: #fff;
    .title {
      text {
        font-weight: bold;
        color: #000000;
        font-size: 36px;
      }
    }
    .content-warp {
      height: 500px;
      flex-direction: column;
      .service {
        color: #007aff;
        text-decoration: underline;
      }
      .first-line {
        flex-direction: column;
        text {
          font-weight: bold;
          color: #000000;
          font-size: 32px;
        }
      }
      .primary-line {
        flex-direction: column;
        text {
          text-indent: 40px;
        }
      }
    }
    .handle-btn {
      width: 474px;
      height: 82px;
      border-radius: 41px;
      justify-content: center;
      align-items: center;
      background-color: #d63016;
      margin-top: 30px;
      text {
        font-weight: 600;
        color: #fff;
        font-size: 34px;
      }
    }
    .disagree-btn {
      margin-top: 30px;
      text {
        font-weight: 600;
        font-size: 34px;
      }
    }
  }
  .label {
    position: fixed;
    top: 0;
    right: 0;
    left: 0;
    bottom: 0;
    background-color: rgba(0, 0, 0, 0.8);
    flex-direction: column;
    justify-content: center;
    align-items: center;
  }
</style>
hello.ux file:
<import name="userAgreement" src="./UserAgreement/userAgreement.ux"></import>
<template>
  <!-- Only one root node is allowed in template. -->
  <div class="container">
    <stack>
      <text class="title" onclick="save">Hello World</text>
      <block if="{{ display }}">
        <userAgreement onopen-service-page="openServicePage"></userAgreement>
      </block>
    </stack>
  </div>
</template>
<style>
  .container {
    flex-direction: column;
    justify-content: center;
    align-items: center;
    background-color: #d39b75;
  }
  .title {
    font-size: 100px;
  }
</style>
<script>
  import storage from "@system.storage";
  import router from '@system.router'
  module.exports = {
    private: {
      display: false,
      isagree: "disagree"
    },
    onInit() {
      this.$page.setTitleBar({
        text: "hello",
        textColor: "#ffffff",
        backgroundColor: "#007DFF",
        backgroundOpacity: 0.5,
        menu: true
      });
    },
    openServicePage({ detail: { flag } }) {
      let openUrl, menuTitle
      switch (flag) {
        case 1:
          openUrl = '*'
          menuTitle = 'User Agreement'
          break;
        case 2:
          openUrl = '*'
          menuTitle = 'Privacy Policy'
          break;
        default:
          break;
      }

      router.push({
        uri: 'Hello/Service',
        params: {
          openUrl,
          menuTitle
        }
      })
    },
    onShow(options) {
      var that = this;
      that.get()
      setTimeout(() => {
        if (that.isagree === "agree") {
          that.display = false;
        } else {
          setTimeout(() => {
            that.display = true;
          }, 100);
        }
      }, 500);
      console.log("message:", that.isagree);
      this.$on("dispatchEvent", this.dispatchEvent);
    },
    dispatchEvent(evt) {
      this.display = evt.detail.display;
      this.isagree = evt.detail.isagree;
      this.save(this.isagree);
    },
    save(params) {
      storage.set({
        key: "agreeFlag",
        value: params,
        success: function (data) {
          console.log("handling success");
        },
        fail: function (data, code) {
          console.log("handling fail, code = " + code);
        }
      });
    },
    get() {
      var that = this;
      storage.get({
        key: "agreeFlag",
        success: function (data) {
          that.isagree = data;
          console.log("handling success", data);
        },
        fail: function (data, code) {
          console.log("handling fail, code = " + code);
        }
      });
    }
  };
</script>
Failed to Obtain the Value Returned by an Asynchronous Callback Method
Symptom
After setting the value for deviceInfo by an asynchronous callback or promise method, and recording the logs using console, I found the output value is null.
The code where the exception occurs is as follows:
<script>
  import push from "@service.push";
  import device from '@system.device';
  const injectRef = Object.getPrototypeOf(global) || global;
  // injection regeneratorRuntime
  injectRef.regeneratorRuntime = require('@babel/runtime/regenerator');
  module.exports = {
    data: {
      deviceInfo: ''
    },
    onCreate() {
      this.testAsync();
      console.log("this.$def.data: ", this.$def.data);
    },
    async testAsync() {
      try {
        let res = await device.getInfo();
        console.info("get device id " + JSON.stringify(res.data));
        this.$def.data.deviceInfo = res.data
      } catch (e) {
        console.log("get device id error " + e.code);
      }
    },
    onDestroy() {
      console.info("Application onDestroy");
    },
    dataApp: {
      localeData: {}
    }
  };
</script>
The result is as follows:
06-27 15:03:12.460 I/jsLog   ( 8661): Application onDestroy
06-27 15:03:13.509 I/jsLog   ( 8661): this.$def.data: {"deviceInfo":""}
06-27 15:03:13.520 I/jsLog   ( 8661): get device id {"brand":"HUAWEI","manufacturer":"HUAWEI","model":"ELE-AL00","product":"ELE-AL00","osType":"android","osVersionName":"9","osVersionCode":28,"platformVersionName":"1.10","platformVersionCode":1100,"language":"zh","region":"CN","screenWidth":1080,"screenHeight":2139,"screenRefreshRate":60.000003814697266,"timeZone":"GMT+08:00","deviceType":"phone","emuiApiLevel":"19","emuiVer":"9.1.0","vendorOsName":"emui","vendorOsVersion":"9.1.0","fontScale":1,"characteristics":"default","windowWidth":0,"windowHeight":0,"cutout":[],"statusBarHeight":75,"pixelRatio":3,"engineProvider":"huawei","screenDensity":3,"screenLogicWidth":750,"screenLogicHeight":1485,"windowLogicWidth":0,"windowLogicHeight":0,"marketingName":"HUAWEI P30","harmonyOSVer":""}
Cause Analysis
When an asynchronous callback is called, the values in the method will be recorded in the logs immediately. However, the execution of the asynchronous callback or promise has not finished yet, thus the output value is null.
Solution
Add a delay, for example, 50 ms in the asynchronous callback method so that the code for recording the values will be executed after the result is returned.
Sample code:
<script>
  import push from "@service.push";
  import device from '@system.device';
  const injectRef = Object.getPrototypeOf(global) || global;
  // injection regeneratorRuntime
  injectRef.regeneratorRuntime = require('@babel/runtime/regenerator');
  module.exports = {
    data: {
      deviceInfo: ''
    },
    onCreate() {
      this.testAsync();
      setTimeout(() => {
        console.log("this.$def.data: ", this.$def.data);
      }, 50);
    },
    async testAsync() {
      try {
        let res = await device.getInfo();
        console.info("get device id " + JSON.stringify(res.data));
        this.$def.data.deviceInfo = res.data
      } catch (e) {
        console.log("get device id error " + e.code);
      }
    },
    onDestroy() {
      console.info("Application onDestroy");
    },
    dataApp: {
      localeData: {}
    }
  };
</script>
The result is as follows:
06-27 15:11:44.123 I/jsLog   ( 8661): Application onDestroy
06-27 15:11:45.444 I/jsLog   ( 8661): get device id {"brand":"HUAWEI","manufacturer":"HUAWEI","model":"ELE-AL00","product":"ELE-AL00","osType":"android","osVersionName":"9","osVersionCode":28,"platformVersionName":"1.10","platformVersionCode":1100,"language":"zh","region":"CN","screenWidth":1080,"screenHeight":2139,"screenRefreshRate":60.000003814697266,"timeZone":"GMT+08:00","deviceType":"phone","emuiApiLevel":"19","emuiVer":"9.1.0","vendorOsName":"emui","vendorOsVersion":"9.1.0","fontScale":1,"characteristics":"default","windowWidth":0,"windowHeight":0,"cutout":[],"statusBarHeight":75,"pixelRatio":3,"engineProvider":"huawei","screenDensity":3,"screenLogicWidth":750,"screenLogicHeight":1485,"windowLogicWidth":0,"windowLogicHeight":0,"marketingName":"HUAWEI P30","harmonyOSVer":""}
06-27 15:11:45.480 I/jsLog   ( 8661): this.$def.data: {"deviceInfo":{"brand":"HUAWEI","manufacturer":"HUAWEI","model":"ELE-AL00","product":"ELE-AL00","osType":"android","osVersionName":"9","osVersionCode":28,"platformVersionName":"1.10","platformVersionCode":1100,"language":"zh","region":"CN","screenWidth":1080,"screenHeight":2139,"screenRefreshRate":60.000003814697266,"timeZone":"GMT+08:00","deviceType":"phone","emuiApiLevel":"19","emuiVer":"9.1.0","vendorOsName":"emui","vendorOsVersion":"9.1.0","fontScale":1,"characteristics":"default","windowWidth":0,"windowHeight":0,"cutout":[],"statusBarHeight":75,"pixelRatio":3,"engineProvider":"huawei","screenDensity":3,"screenLogicWidth":750,"screenLogicHeight":1485,"windowLogicWidth":0,"windowLogicHeight":0,"marketingName":"HUAWEI P30","harmonyOSVer":""}}
Quick App Icon Configuration
Implementation
In order to define a name and an icon to identify a quick app,
{
     "package": "com.test.testIcon",
     "name": "One Bird",
     "icon": "/Common/advertLogo.png",
     "versionName": "1.0.0",
     "versionCode": 1,
     "minPlatformVersion": 1060
}
However, you should pay attention to the following restrictions:
- 2. The icon image must be 216 x 216 pixels. A PNG image cannot exceed 2 MB, and a WEBP image should be limited within 100 KB.
- 3. The icon image should be stored under the src directory of the project. When it is referred, the URI should be absolute. For example, "/Common/advertLogo.png".
Common Errors
The following configurations will cause the image configuration fail to take effect:
- 1. The image URI is an online address.
{ "package": "com.test.testIcon", "name": "One Bird", "versionName": "1.0.0", "versionCode": 1, "icon": "https://developer.huawei.com/dev_index/img/logo_ch.png", "minPlatformVersion": 1060, "features": [], "config": {} } - 2. The directory storing the icon image is not the project directory.
{ "package": "com.test.testIcon", "name": "One Bird", "versionName": "1.0.0", "versionCode": 1, "icon": "../ICON/advertLogo.png", "minPlatformVersion": 1060, "features": [], "config": {} } - 3. The configured URI is the mobile phone file address.
{
    "package": "com.test.testIcon",
    "name": "One Bird",
    "versionName": "1.0.0",
    "versionCode": 1,
    "icon": "internal://files/test/advertLogo.png",
    "minPlatformVersion": 1060,
    "features": [],
    "config": {}
}
- 1. The image URI is an online address.
Obtaining a Global Variable
Description
Global variables are usually used for global configuration, for example, location, step count, and bullet screen mode. Because JavaScript is single-threaded, obtaining global variables can ensure linear security of variables.
Implementation
Method A: Define a user global variable helloDemo in config.data of manifest.json.
 "config": {
    "data":{
      "helloDemo":"This is a demo"
    }
}, <template>
<div style="flex-direction: column">
<text>{{title}}</text>
<input type="button" onclick="addnum" value="add" />
</div>
</template>
<script>
export default {
private: {
title: ""
},
onShow(options) {
this.title = this.$app.$data.helloDemo;
},
addnum() {
this.$app.$data.helloDemo = this.$app.$data.helloDemo === "This is a demo"? "This is not a demo" : "This is a demo";
this.title = this.$app.$data.helloDemo;
}
}
</script> Method B: Define index:XX in data in app.ux.
<script>
module.exports = {
onCreate() {
console.info('Application onCreate');
},
onDestroy() {
console.info('Application onDestroy');
},
// Define index the global variable here.
data: {
index:0
}
}
</script> Use this.$app.$def.data.index on other pages to obtain the variable.
<template>
<div style="flex-direction: column">
<text>{{count}}</text>
<input type="button" onclick="addnum" value="add" />
</div>
</template>
<script>
export default {
private: {
title: ""
},
onShow(options) {
this.count = this.$app.$def.data.index;
},
addnum() {
this.$app.$def.data.index += 10;
this.count = this.$app.$def.data.index;
}
}
</script> Implementing Scheduled Notifications
Symptom
Sometimes it is bothering for users to find the quick app from the home screen or Quick App Center.
In this case, you can add a timer to send a notification message periodically after your quick app is closed.
Cause Analysis
After a timer is added to onHide, the onShow method will be triggered to shut down the timer when the quick app is opened by tapping its icon. However, if the quick app is opened by tapping the notification message, the onShow method will not be triggered, causing messages continuing being sent.
Solution
Declare the launch mode of the current page to singleTask. Each time when the target page is opened, the onRefresh lifecycle function will be triggered to shut down the timer.
Code in manifest.json:
"router": {
"entry": "Hello",
"pages": {
"Hello": {
"launchMode": "singleTask",
"component": "hello"
}
}
}, hello.ux file:
onHide: function () {
this.notificationShow = setInterval(() => {
this.show()
}, 1000)
}, onShow: function () {
clearInterval(this.notificationShow);
},
onRefresh() {
clearInterval(this.notificationShow);
}, Sample code:
<template>
<div class="container">
<div class="item-container">
<div class="item-content">
<div class="item-content-detail">
<text class="txt">Title:</text>
<input class="input" placeholder="Please input title" onchange="titleFn" />
</div>
<div class="item-content-detail">
<text class="txt">Content:</text>
<input class="input" placeholder="Please input content" onchange="contentFn" />
</div>
</div>
<input type="button" class="btn" value="Send a notification" onclick="show" />
</div>
</div>
</template>
<style>
.container {
flex: 1;
flex-direction: column;
}
.item-container {
margin-top: 50px;
margin-right: 60px;
margin-left: 60px;
flex-direction: column;
}
.item-content {
flex-direction: column;
background-color: #ffffff;
padding-left: 30px;
padding-right: 30px;
padding-top: 15px;
padding-bottom: 15px;
margin-bottom: 100px;
}
.item-content-detail {
align-items: center;
}
.input {
flex: 1;
font-size: 30px;
padding-left: 20px;
}
.txt {
width: 150px;
padding-top: 15px;
padding-bottom: 15px;
text-align: right;
}
.btn {
height: 80px;
text-align: center;
border-radius: 5px;
margin-right: 60px;
margin-left: 60px;
margin-bottom: 50px;
color: #ffffff;
font-size: 30px;
background-color: #0faeff;
}
</style>
<script>
import prompt from '@system.prompt'
import notification from '@system.notification'
export default {
data: {
componentData: {},
inputTitle: 'title',
inputContent: 'content',
num: '',
},
onInit: function () {
this.$page.setTitleBar({ text: 'notification' })
},
onHide: function () {
this.notificationShow = setInterval(() => {
this.show()
}, 1000)
},
onShow: function () {
clearInterval(this.notificationShow);
},
onRefresh() {
clearInterval(this.notificationShow);
},
show: function () {
var that = this
that.num++;
prompt.showToast({
message: 'Message: ' + that.inputTitle + ' "has been sent. Please check it on the notification bar. ' + ',No:' + that.num,
})
notification.show({
contentTitle: that.inputTitle,
contentText: that.inputContent + ',No:' + that.num,
clickAction: {
uri: '/Hello'
},
})
},
titleFn: function (e) {
this.inputTitle = e.text
},
contentFn: function (e) {
this.inputContent = e.text
},
}
</script> Element Events Are Triggered for Multiple Times When a Custom Element Is Destroyed
Symptom
When a custom element is destroyed, its events are triggered for multiple times. The following figure shows the logs of the problem.
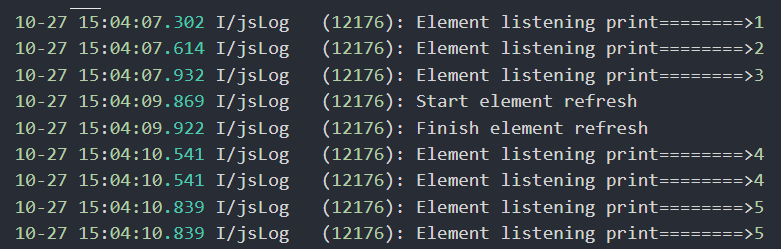
Cause Analysis
The parent element of the custom element has an if statement. If the value changes to false, the custom element will not be destroyed and all events of it can be triggered.
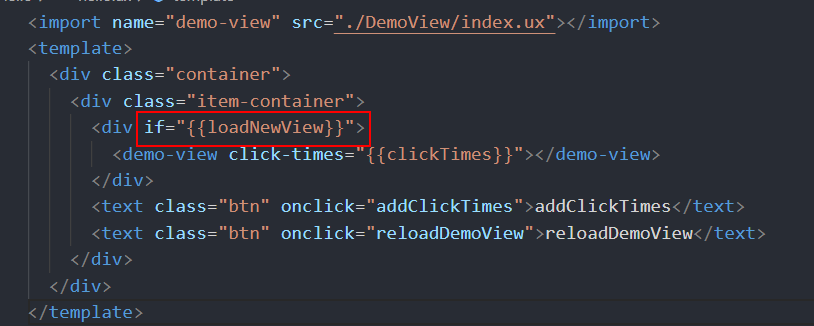
Solution
To destroy a custom element, write the if statement in the custom element instead of the parent element.
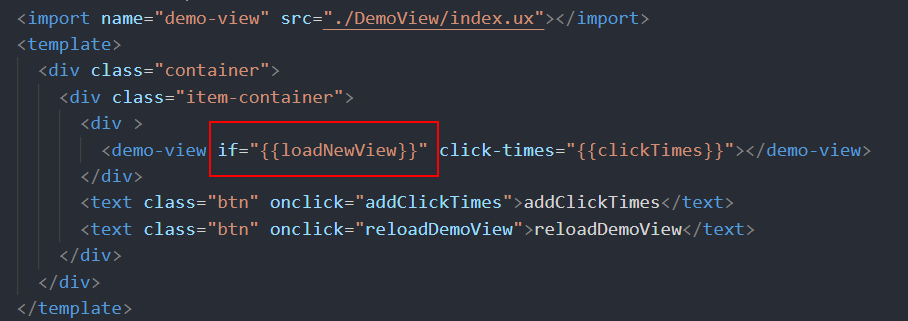
Filling the Remaining Height of list While the Height of One Subelements Is Fixed
Implementation
You can use the getBoundingClientRect method to obtain the height of list and the fixed subelement. The height of the subelement to be set is the difference between the two obtained heights.
The sample code is as follows:
<template>
<!-- Only one root node is allowed in template. -->
<div class="container">
<list id="main" class="list">
<list-item id="item" class="listitem" type="text">
<text class="title">first listitem content</text>
</list-item>
<list-item type="list-item" style="height: {{seconditemheight}}px;background-color:green">
<text class="title">second listitem content</text>
</list-item>
</list>
<text class="title" onclick="custom">set height</text>
</div>
</template>
<style>
.container {
flex-direction: column;
justify-content: center;
align-items: center;
}
.list {
height: 80%;
border: 1px solid #000000;
}
.title {
font-size: 50px;
}
.listitem {
height: 200px;
background-color: #00ced1;
}
</style>
<script>
module.exports = {
data: {
componentData: {},
seconditemheight: 0,
listheight: 0,
firstitemheight: 0,
},
onInit() {
this.$page.setTitleBar({
text: 'menu',
textColor: '#ffffff',
backgroundColor: '#007DFF',
backgroundOpacity: 0.5,
menu: true
});
},
custom() {
var that = this
that.$element('main').getBoundingClientRect({
success: function (data) {
that.listheight = data.height;
},
});
that.$element('item').getBoundingClientRect({
success: function (data) {
that.firstitemheight = data.height;
},
});
setTimeout(() => {
that.seconditemheight = that.listheight - that.firstitemheight
console.log("this.seconditemheight ", that.seconditemheight)
}, 50);
}
}
</script> Null Is Returned After device.getOAID Is Called
Symptom
When the quick app which has integrated with Ads Kit calls device.getOAID to obtain the OAID, the return value is null, though the API is called successfully.
The code where the exception occurs is as follows:
device.getOAID({
success: function (ret) {
that.OAID = JSON.stringify(ret);
console.log("that.OAID", that.OAID);
prompt.showToast({
message: 'message' + that.OAID,
duration: 2000,
gravity: 'center'
})
},
fail: function (erromsg, errocode) {
that.OAID = errocode + ': ' + erromsg
},
}) Cause Analysis
The reason can be either of the following:
- The current device does not support OAID.
- The used debugger tools are from the quick app alliance.
Solution
- Go to Settings > Ads and privacy > More information in the phone to check whether the value exists. The value does not exist if it is not supported by the device. In this case, change another device.
- Use the Huawei quick app loader.
Folding and Unfolding Adaptations of Quick Apps
Symptom
A quick app with a fixed style is normal on a foldable phone when the phone is folded, but becomes abnormal when the phone is unfolded.
Solution
You can use onConfigurationChanged provided by quick apps to listen on the changes of app configurations. The foldScreenMode attribute is triggered when the physical size of the screen changes, for example, the screen is folded or unfolded.
If foldScreenMode is true, call device.getInfoSync() to determine whether the screen is folded or unfolded based on the return value of screenWidth. Then, set different styles for each mode.
The sample code is as follows:
<template>
<!-- Only one root node is allowed in template. -->
<div class="container" style="flex-direction: column">
<input type="button" value="hello" />
</div>
</template>
<style lang="sass" >
</style>
<script>
import device from '@system.device';
module.exports = {
data: {
width: 0
},
onShow(options) {
const res = device.getInfoSync();
// Obtain the width of the folded screen first.
this.width = res.screenWidth
console.log("width:", this.width);
},
onConfigurationChanged(e) {
if (e.type === "foldScreenMode") {
try {
// Determine whether the screen is folded or unfolded based on the width.
const res = device.getInfoSync();
console.log("res.screenwidth:", res.screenWidth);
// Compare the returned width with the folded width.
if (res.screenWidth === this.width) {
// Set the style for the folding mode.
console.log("The screen is folded.");
} else {
// Set the style for the unfolding mode.
console.log("The screen is unfolded.");
}
} catch (e) {
console.log(e.code + e.message);
}
}
}
}
</script> An Error Is Reported When align-self Is Used in the style Tag
Symptom
In Huawei Quick App IDE, when align-self is used in the style tag of the text or image element, the error message '<text>' does not support 'align-self' style or '<image>' does not support 'align-self' style is reported.
The code where the exception occurs is as follows:
<template>
<!-- Only one root node is allowed in template. -->
<div class="container">
<text class="title" style="align-self: center">Hello World</text>
<image class="img" style="align-self: center" src="/Common/logo.png"></image>
</div>
</template> Cause Analysis
It is because Huawei Quick App IDE has difference with that of the alliance. Although align-self is supported by Huawei Quick App IDE, it cannot be set in the style tag. Set it in pseudo classes.
Solution
The sample code is as follows:
<template>
<!-- Only one root node is allowed in template. -->
<div class="container">
<text class="title">Hello World</text>
<image class="img" src="/Common/logo.png"></image>
</div>
</template>
<style>
.container {
flex-direction: column;
justify-content: center;
align-items: center;
}
.title {
font-size: 100px;
align-self: center;
}
.img {
align-self: center;
}
</style> Data Set by $set Does Not Take Effect
Symptom
When $set is used in quick apps to dynamically set data, the page displays undefined instead of the set data.
The code where the exception occurs is as follows:
<template>
<!-- Only one root node is allowed in template. -->
<div class="container">
<text class="title" id="txt">{{value}}</text>
</div>
</template>
<style>
.container {
flex-direction: column;
justify-content: center;
align-items: center;
}
.title {
font-size: 60px;
align-self: center;
}
</style>
<script>
module.exports = {
data: {
componentData: {},
},
onShow(options) {
// Do something
this.$set('value', "Hello ")
this.$vm('txt').$set('value', "Hello ")
},
}
</script> Cause Analysis
The $set method is set in the onshow lifecycle, but the corresponding variable is not defined in data. As a result, the data binding in template does not take effect.
Solution
- [Method 1] Set the data in onInit.
<script> module.exports = { data: { componentData: {}, }, onInit() { // Do something this.$set('value', "Hello ") this.$vm('txt').$set('value', "Hello ") }, } </script> - [Method 2] Set the data in onshow and define the variable in data.
<script> module.exports = { data: { componentData: {}, value: '' }, onShow() { // Do something this.$set('value', "Hello ") this.$vm('txt').$set('value', "Hello ") }, } </script>
The effect is shown in the following figures.