Intelligent Assistant
Chat with our virtual assistant to get answers promptly.
As a lightweight IDE tool plugin, HMS Toolkit implements app creation, coding, conversion, debugging, test, and release. It helps you integrate HMS Core APIs with lower costs and higher efficiency.
Configuration Wizard of HMS Toolkit enables you to automatically complete necessary configuration for development preparations.
Windows: Start Android Studio, go to , enter HMS Toolkit in the search box, and click Install. After the installation is complete, restart Android Studio.
macOS: Start Android Studio, go to , enter HMS Toolkit in the search box, and click Install. After the installation is complete, restart Android Studio.
To develop an app, create it in AppGallery Connect and set required information.
You only need to perform the preceding two steps in AppGallery Connect. Then go to Configuration Wizard of HMS Toolkit and perform configurations according to Configuring the HMS Toolkit Environment.
Before calling the Game Service capabilities, perform the following steps to configure the environment:
If you have not signed in to AppGallery Connect, Toolkit automatically opens the browser and prompts you to sign in and perform authorization.
After you select the team name and project module, HMS Toolkit automatically checks whether the corresponding app is available in AppGallery Connect. If the error messages in red in the following figure are displayed, click Link to check whether the app has been created in AppGallery Connect.
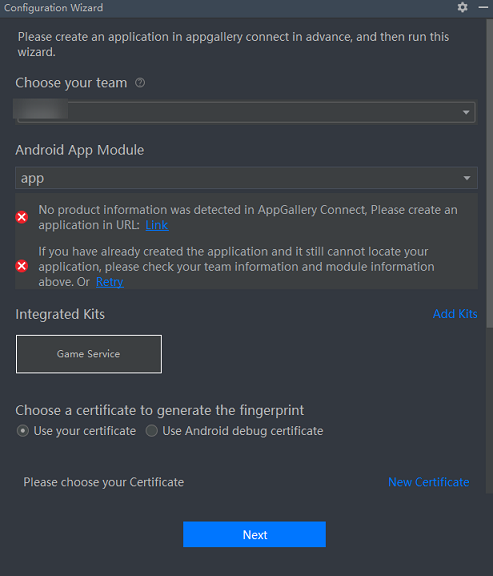
Two certificate type options:
Click Generate to generate a certificate fingerprint. If the generation fails, check whether the certificate information matches the fingerprint. Alternatively, manually generate a fingerprint by referring to Generating a Signing Certificate Fingerprint and enter it in the text box.
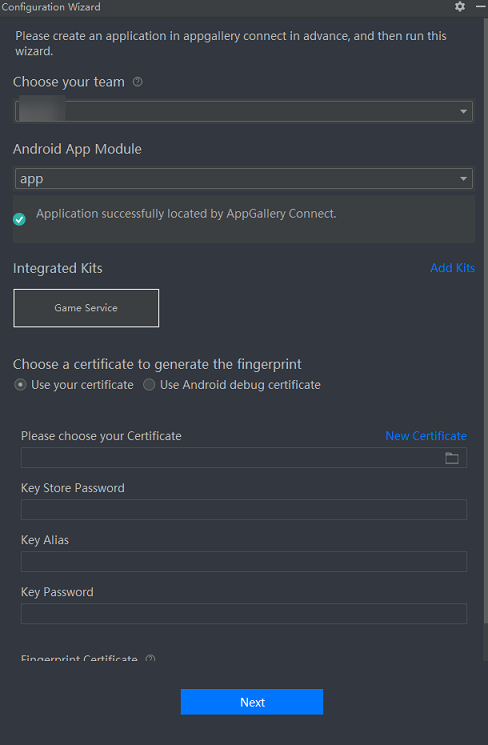
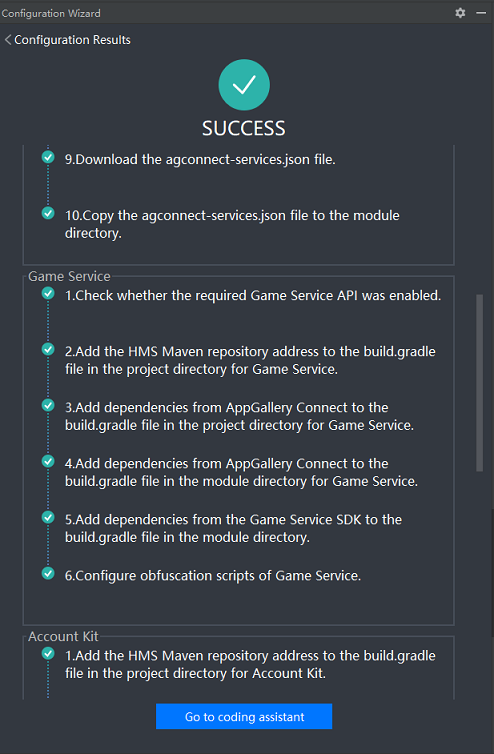
HMS Toolkit automatically checks the integration environment of Game Service, including the general environment and the environment dedicated for the kit.
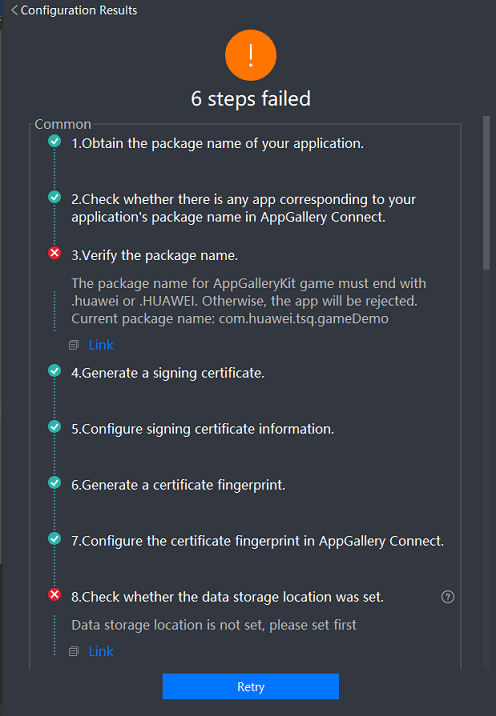
 or refer to the following table to rectify the item. After the setting, click Retry to perform the check again.
 No. | Check Item | Suggestions |
|---|---|---|
1 | Obtain the package name of your application | Create an app in AppGallery Connect in advance, and make sure that its package name is the same as that specified in HMS Toolkit for the app that you are developing. NOTE HMS Toolkit only queries the app in AppGallery Connect based on the package name and does not proactively create an app. The package name is specified by android.defaultConfig.applicationId in build.gradle. |
2 | Check whether there is any app corresponding to your application's package name in AppGallery Connect | |
3 | Verify the package name | Make sure that the package name ends with .HUAWEI or .huawei. This restriction is applied only to joint operations games. |
4 | Generate a signing certificate | If you select Use Your Certificate, make sure that the certificate file is created successfully, and keyPassword and storePassword are set correctly. |
5 | Configure signing certificate information | |
6 | Generate a certificate fingerprint | |
7 | Configure the certificate fingerprint in AppGallery Connect | Manually copy the SHA-256 certificate fingerprint and paste it in the text box under Generate a certificate fingerprint, click the link that appears in the HMS Toolkit window, and enter the SHA-256 certificate fingerprint for the app. |
8 | Check whether the data storage location was set | Click the link that appears in the HMS Toolkit window, and set a data storage location. |
9 | Check whether the required xxx Kit service was enabled | Click the link that appears in the HMS Toolkit window, and enable required services. After a service is enabled in HMS Toolkit, go to Project settings > Manage APIs in AppGallery Connect and enable the service. |
10 | Check whether the required xxx Kit API was enabled | |
11 | Download the agconnect-services.json file | Ensure that the package name that you have specified for the app when you create it in AppGallery Connect is the same as that of the selected project template. |
12 | Copy the agconnect-services.json file to the module directory | |
13 | Add the HMS Maven repository address to the build.gradle file in the project directory for xxx Kit | No manual intervention is required. |
14 | Add dependencies from AppGallery Connect to the build.gradle file in the project directory for xxx Kit | |
15 | Add dependencies from AppGallery Connect to the build.gradle file in the module directory for xxx Kit | |
16 | Add dependencies from the xxx Kit SDK to the build.gradle file in the module directory | |
17 | Configure obfuscation scripts of xxx Kit |
Go to HMS > Coding Assistant, and select Game Service in the kit list. The following figure shows all the scenarios of Game Service.
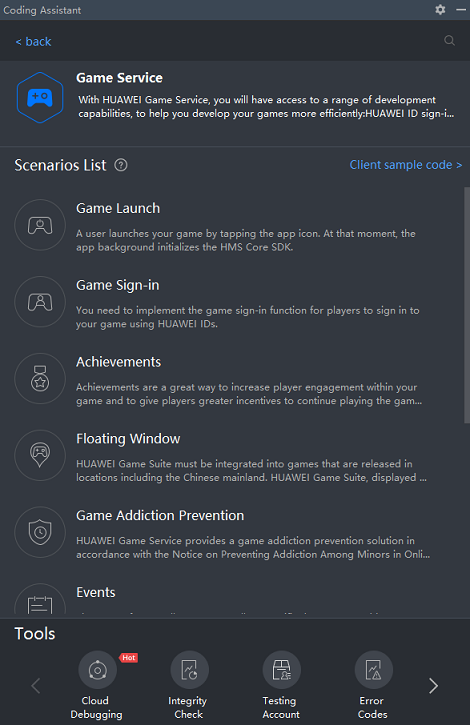
Select a scenario card, for example, Game Launch, and drag and drop it to the code editing area to create code for initializing the game app.
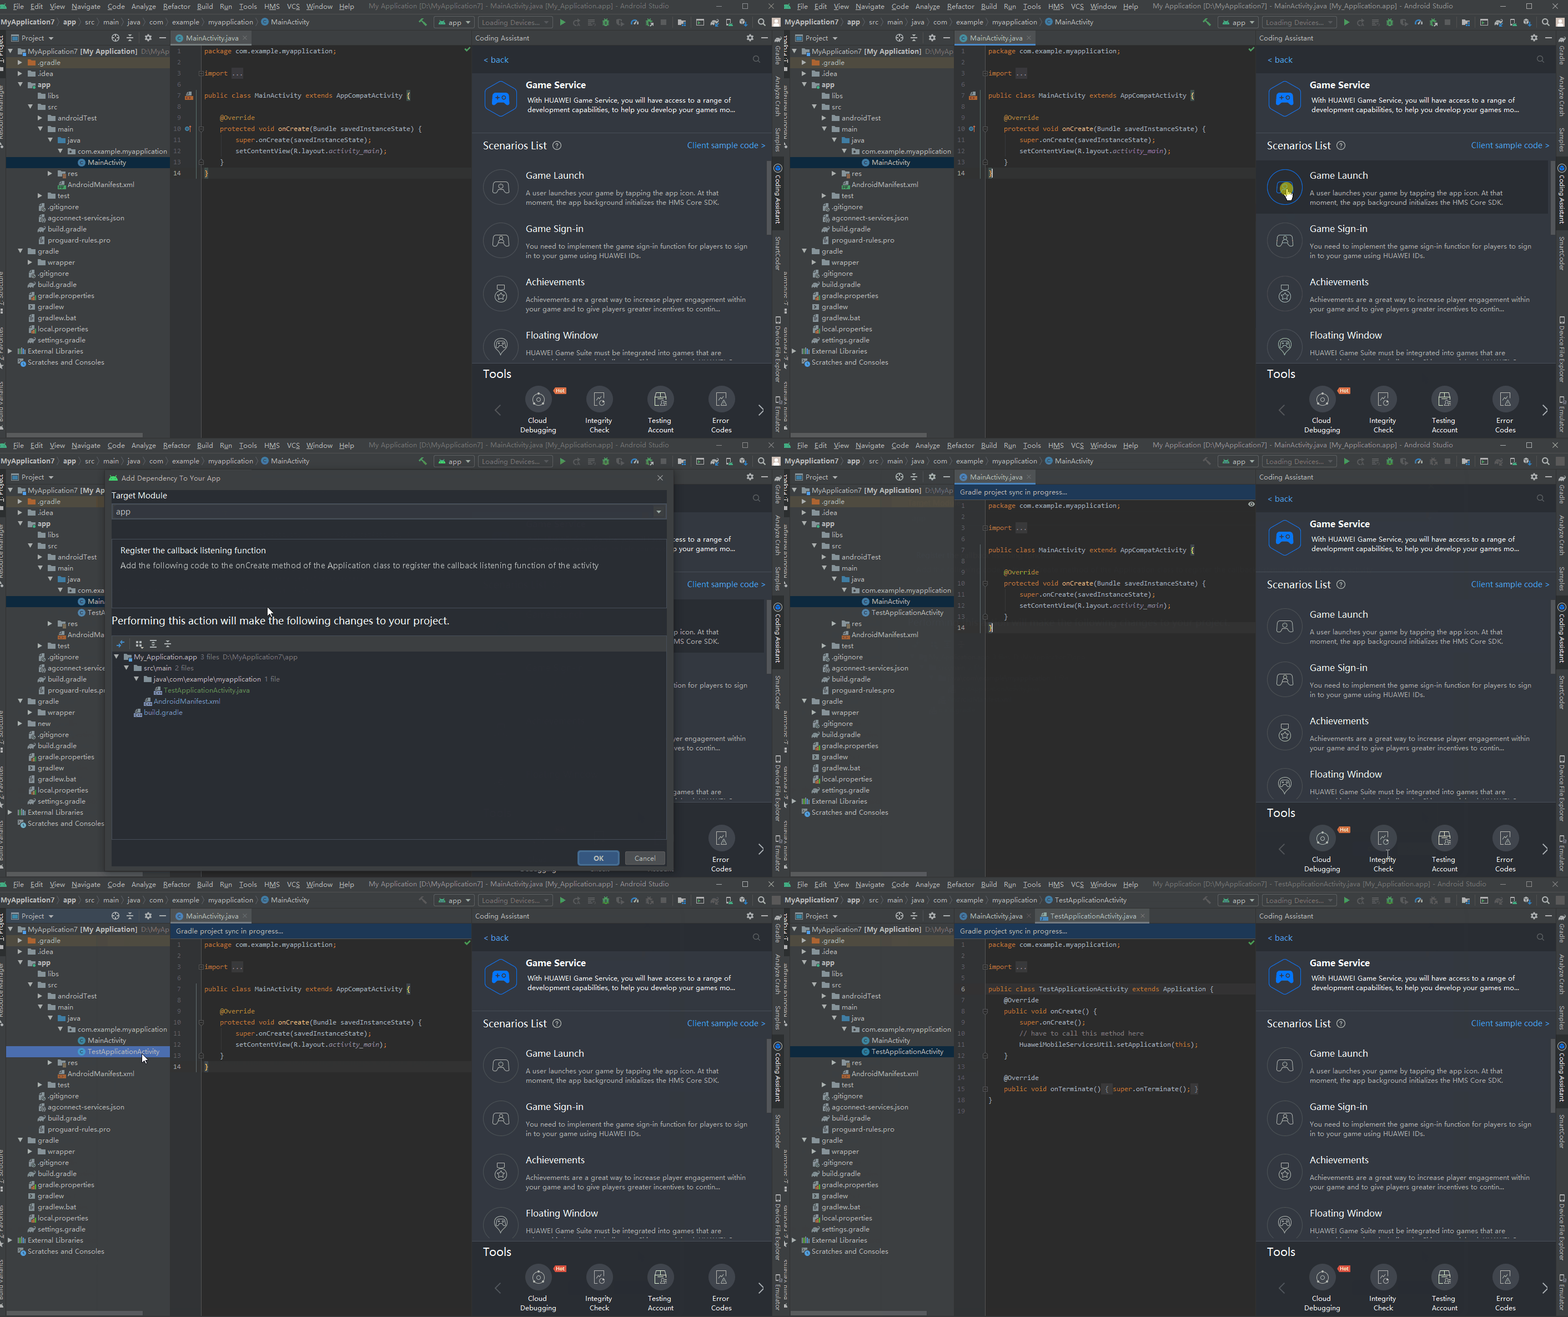
When you drag and drop the scenario card, Toolkit automatically generates an Activity file and XML layout file, and writes the configurations and dependencies required for the project running to the AndroidManifest.xml file, project-level build.gradle file, and app-level build.gradle file. To open the Activity, you need to call the Activity in the code. After the Activity is called, you can run the app on the device.
To implement other functions, drag and drop the related cards or copy the related code. You can also manually implement them by referring to the development guide.
After the preceding operations are complete, you can use Cloud Debugging in HMS Toolkit to debug the app on a real device. For details, please refer to Cloud Debugging.

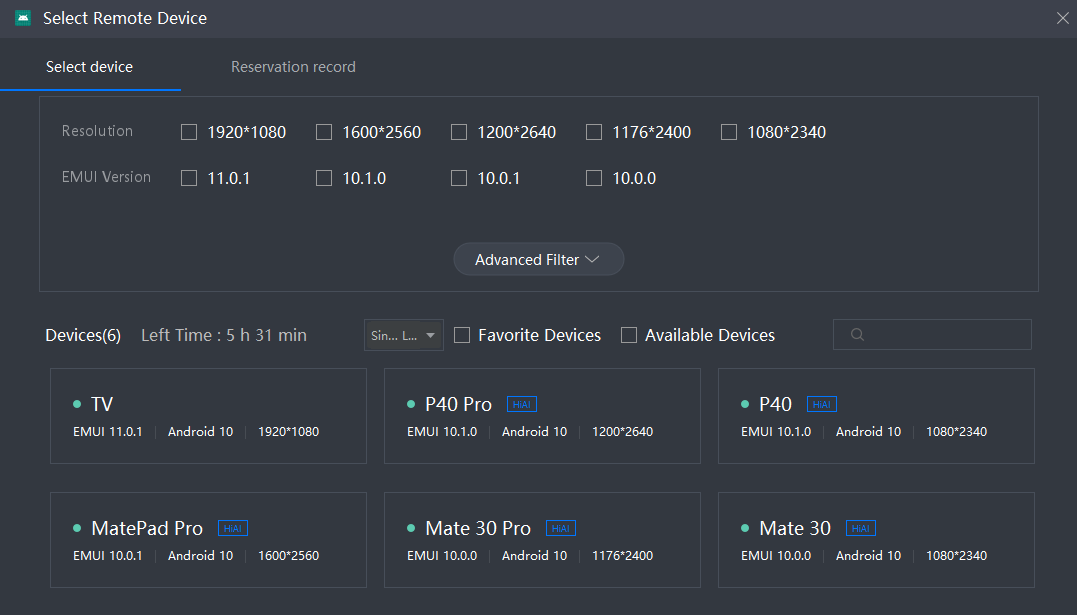
 or
or  to run or debug the app, respectively, on the remote device. You can also run ADB commands to perform operations. For details, please refer to ADB commands.
Click  or
or  to run or debug the app, respectively, on the local device.

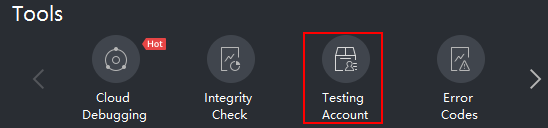
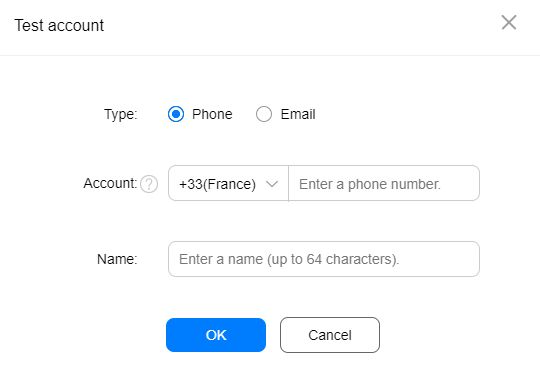
Testing Account is used to add or delete test accounts. To complete joint commissioning in Game Service without real payments, you can set test accounts in AppGallery Connect and allow these accounts to perform sandbox testing. For details about the sandbox testing, please refer to Sandbox Testing.



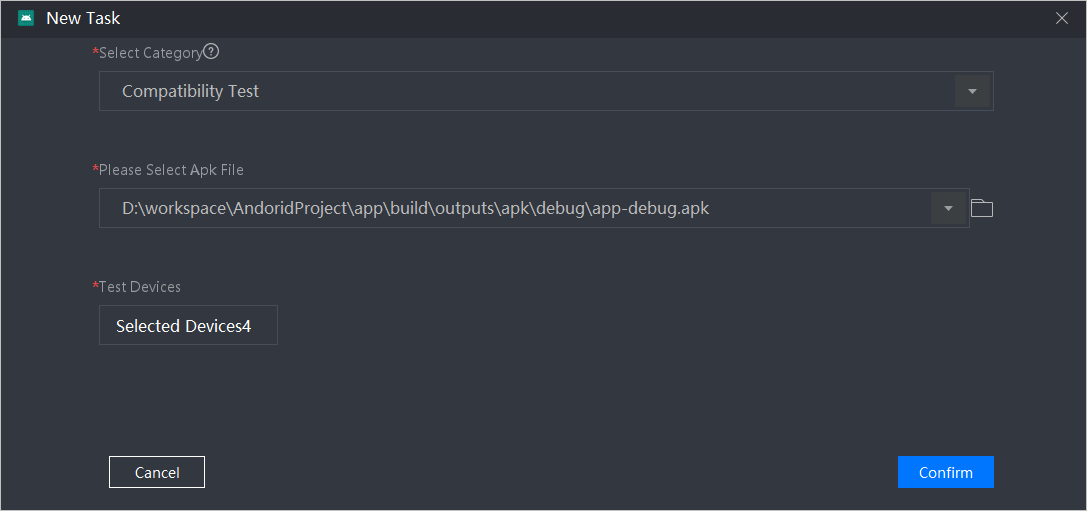
Test Duration: This parameter is valid only when Select Category is set to Stability Test. This parameter is optional. The value ranges from 10 to 60 minutes.
 to view the test report.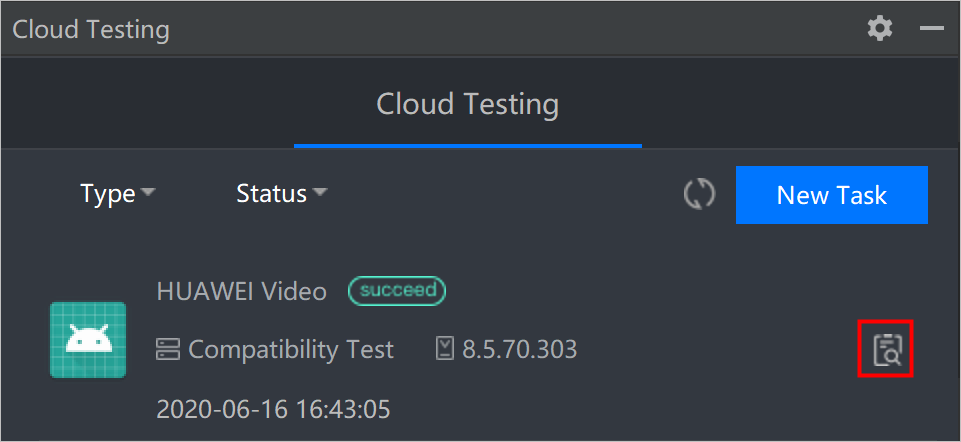
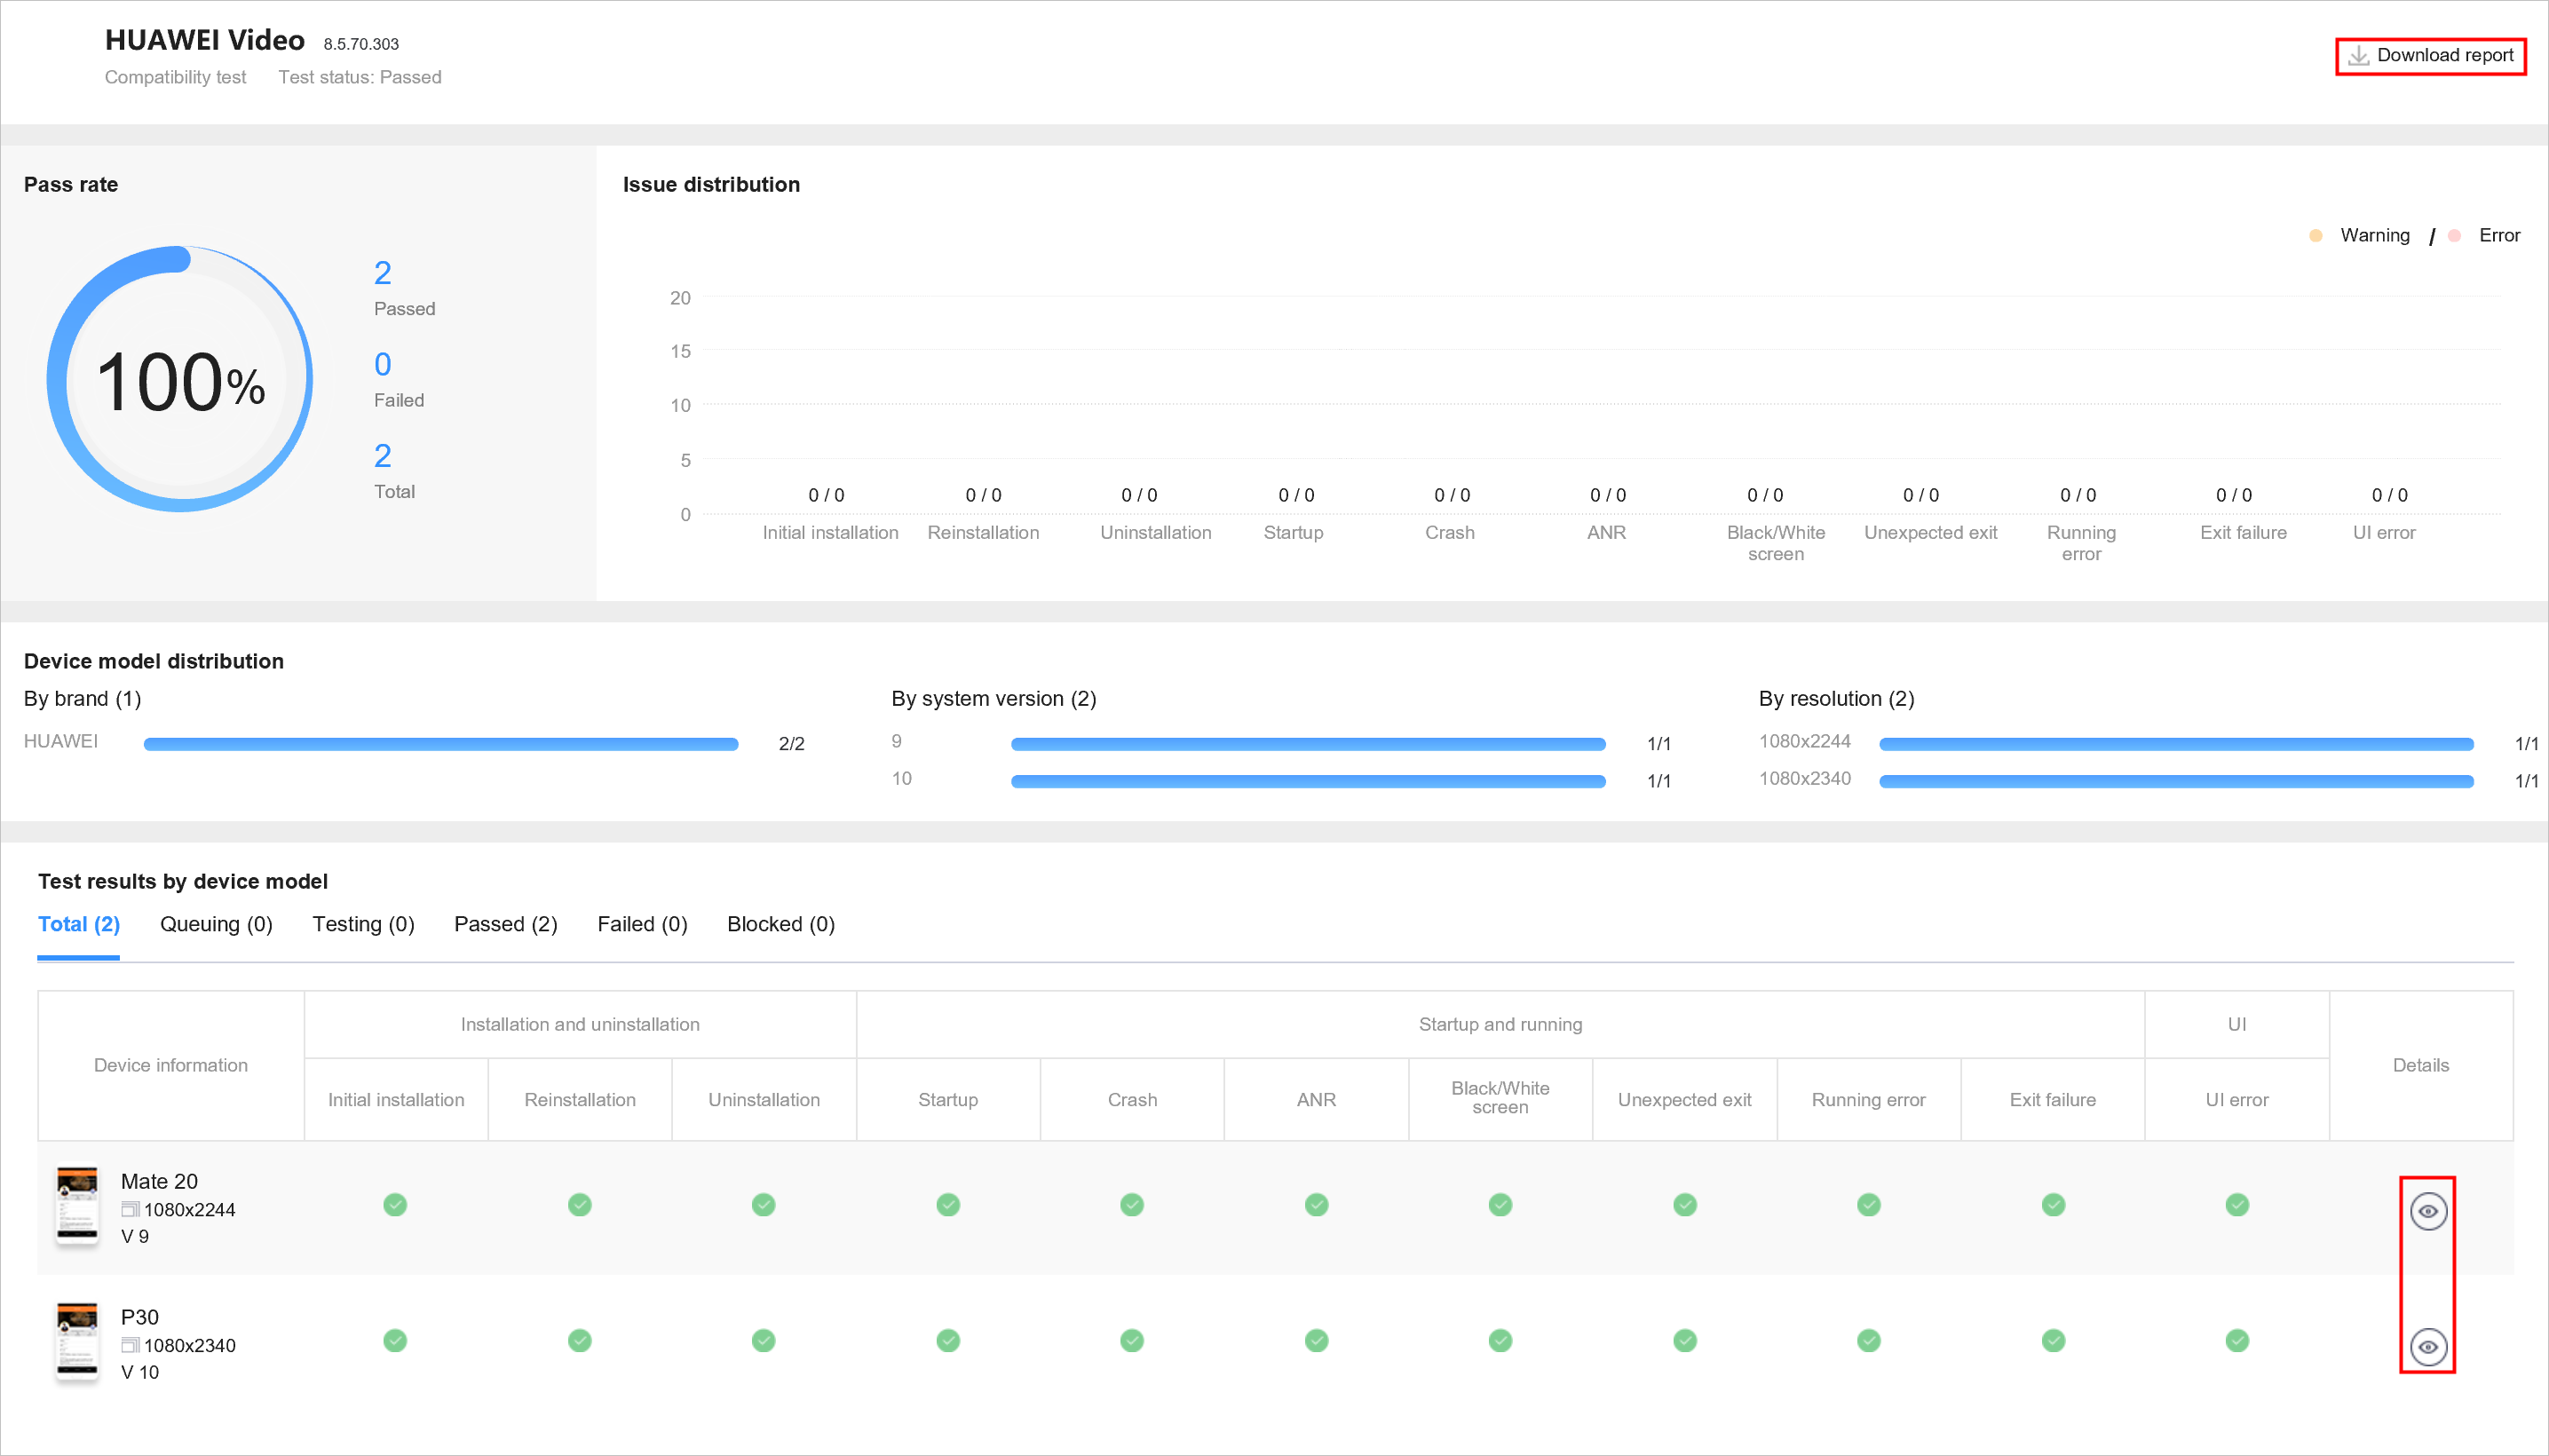
Click Download report to download the report locally. Click  to view the test details. For details about the report description of each test, please refer to Operation Guide.
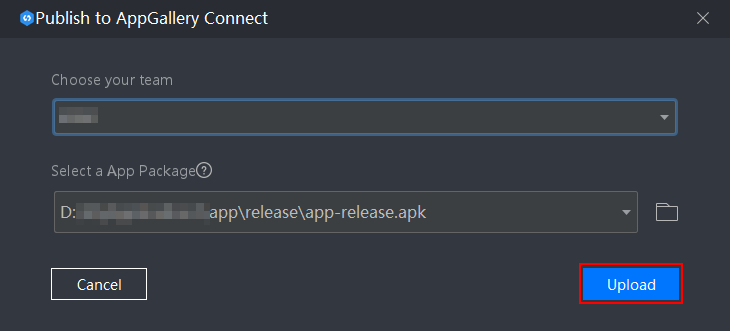
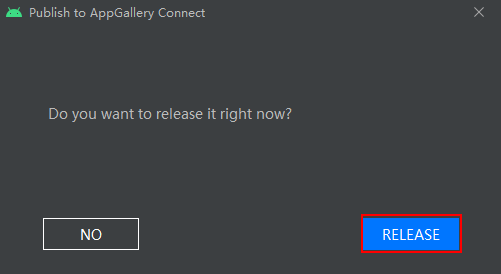
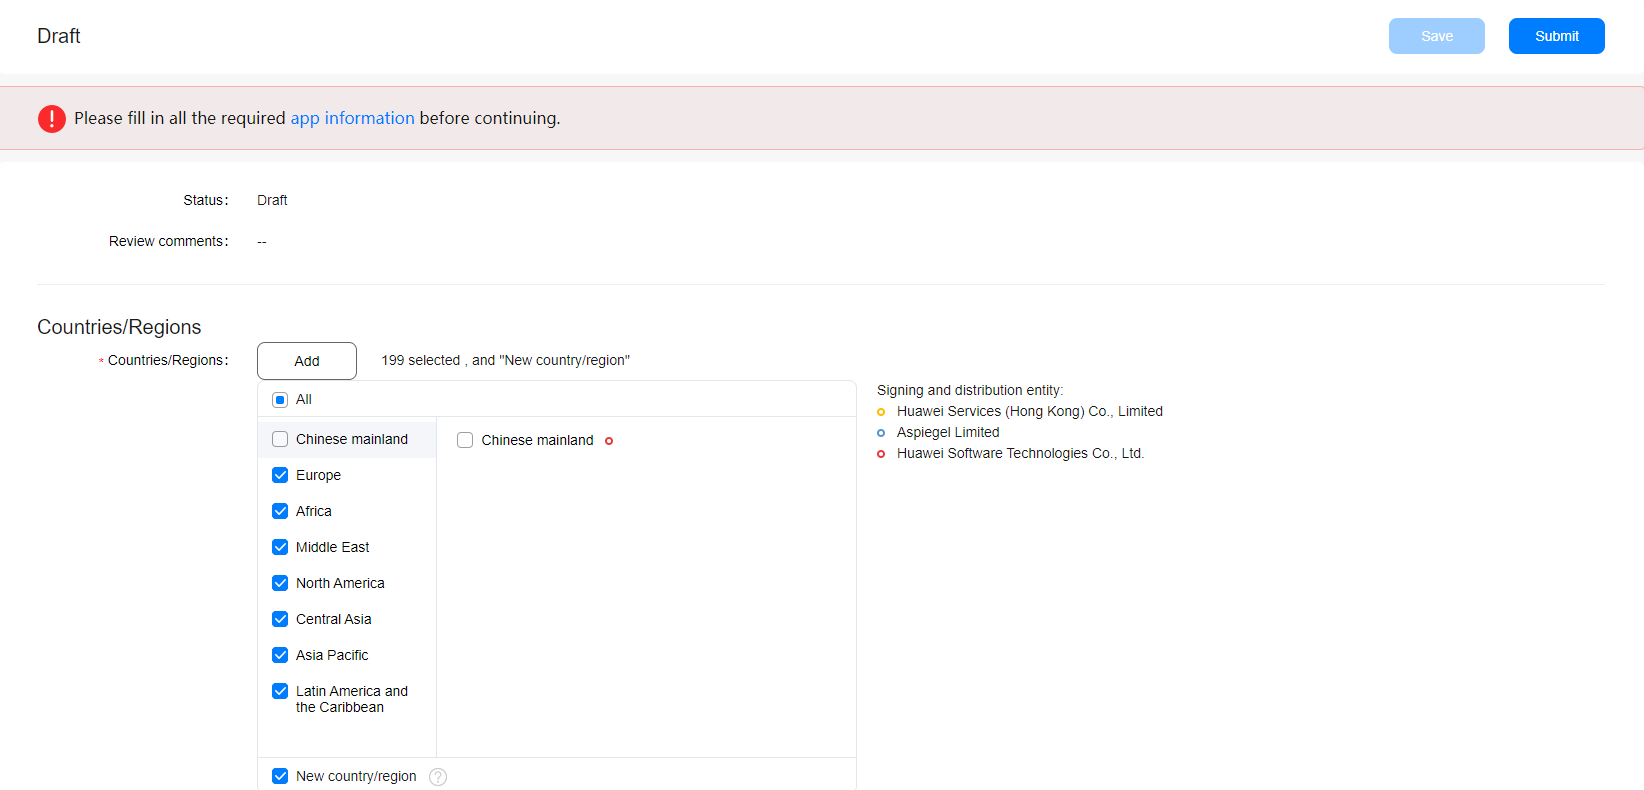
After developing and debugging an app, Publish to AppGallery Connect helps you to release the APK package to AppGallery Connect.
When the APK file is uploaded, the following two checks are performed. If an error is reported, modify the file and upload it again.
>keytool -printcert -jarfile app-release.apk directory in the project directory Set app-release.apk directory in the project directory as required.