Configuring the Code
- Initialize Analytics Kit using the onCreate method of the first activity to obtain a HiAnalyticsInstance instance. If the configuration file is incorrect, null will be returned and events cannot be added.
Java
@Override
protected void onCreate(Bundle savedInstanceState) {
    super.onCreate(savedInstanceState);
    setContentView(R.layout.activity_main);
    // Obtain the HiAnalyticsInstance instance.
    HiAnalyticsInstance instance = HiAnalytics.getInstance(this);
}
Kotlin override fun onCreate(savedInstanceState: Bundle?) { super.onCreate(savedInstanceState) setContentView(R.layout.activity_main) // Obtain the HiAnalyticsInstance instance. val instance = HiAnalytics.getInstance(this) } - (Optional) Insert code for reporting events in the proper position.

Skip this step if you use the visual event function to add events.
Java
// Customize an event to report.
// Set the custom event name to Purchase.
String eventName = "Purchase";
// Customize event parameters.
Bundle bundle = new Bundle();
// Set a value of the Double type.
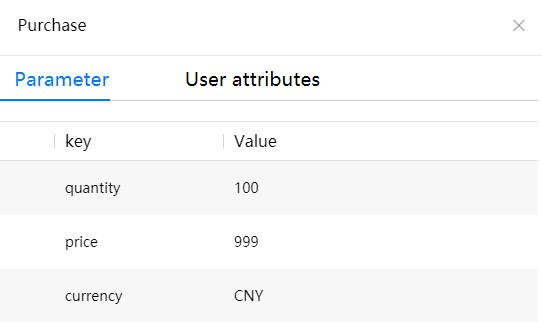
bundle.putDouble("price", 9.99);
// Set a value of the Long type.
bundle.putLong("quantity", 100L);
// Set a value of the String type.
bundle.putString("currency", "CNY");

// Report events.
if (instance != null) {
instance.onEvent(eventName, bundle);
}
Kotlin // Customize an event to report. // Set the custom event name to Purchase. val eventName = "Purchase" // Customize event parameters. val bundle = Bundle() bundle.apply { // Set a value of the Double type. putDouble("price", 9.99) // Set a value of the Long type. putLong("quantity", 100L) // Set a value of the String type. putString("currency", "CNY") } // Report events. instance?.let { it.onEvent(eventName, bundle) }
Using the Debug Mode

- HUAWEI Analytics template
Command for enabling the debug mode: adb shell setprop debug.huawei.hms.analytics.app <package_name>
Command for disabling the debug mode: adb shell setprop debug.huawei.hms.analytics.app .none.
- Google Analytics (Firebase) template
Command for enabling the debug mode: adb shell setprop debug.firebase.analytics.app <package_name>
Command for disabling the debug mode: adb shell setprop debug.firebase.analytics.app .none.
- Other templates (such as Adjust and AppsFlyer)
Command for enabling the debug mode: adb shell setprop debug.huawei.hms.dtm.app <package_name>
Command for disabling the debug mode: adb shell setprop debug.huawei.hms.dtm.app .none.
For details about debugging operations in AppGallery Connect, please refer to App Debugging.
During development, you can enable the debug mode to view the event records in real time, observe the results, and adjust the event tracking scheme as needed.
Enabling/Disabling the Debug Mode
The following uses HUAWEI Analytics as an example:
- Run the following command in the CLI on your PC or Terminal in Android Studio to enable the debug mode:
adb shell setprop debug.huawei.hms.analytics.app <package_name>After the debug mode is enabled, all events will be reported in real time.
Successfully reported data is displayed on HUAWEI Analytics in real time, as shown in the screenshot below.
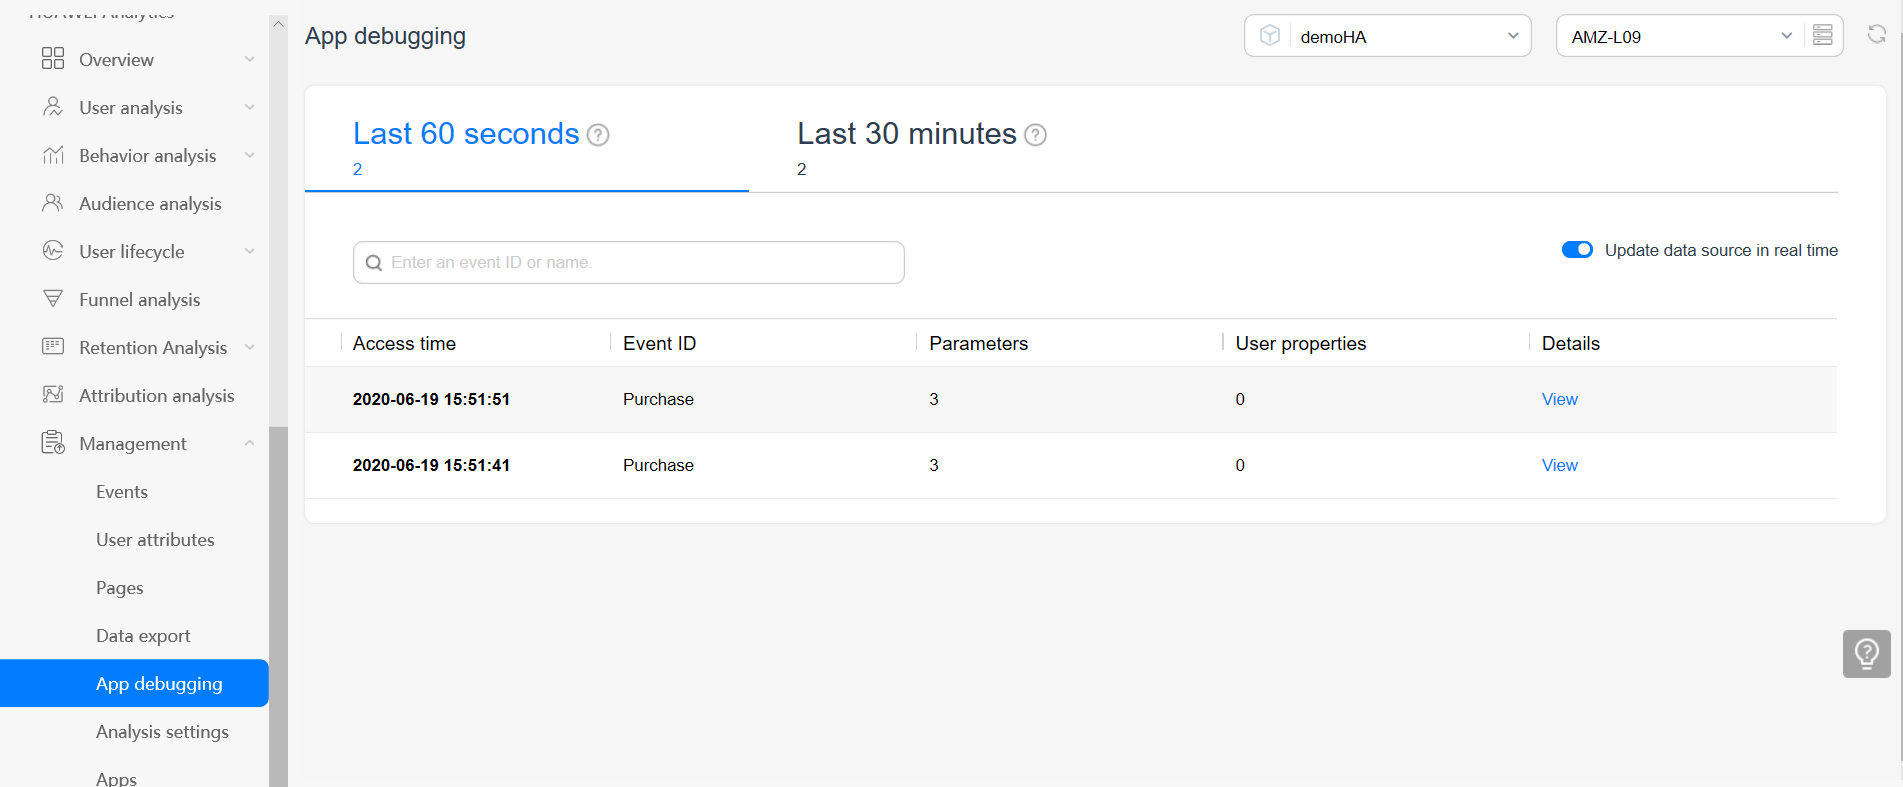
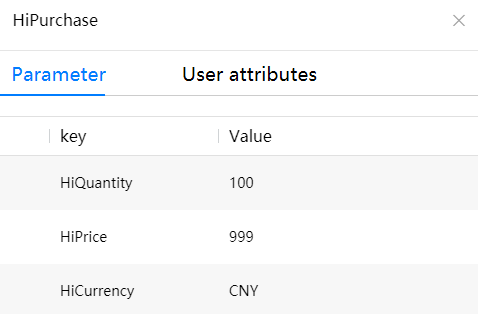
You can click View in the Details column of an event ID to view the event details.
- Run the following command to disable the debug mode:
adb shell setprop debug.huawei.hms.analytics.app.none.