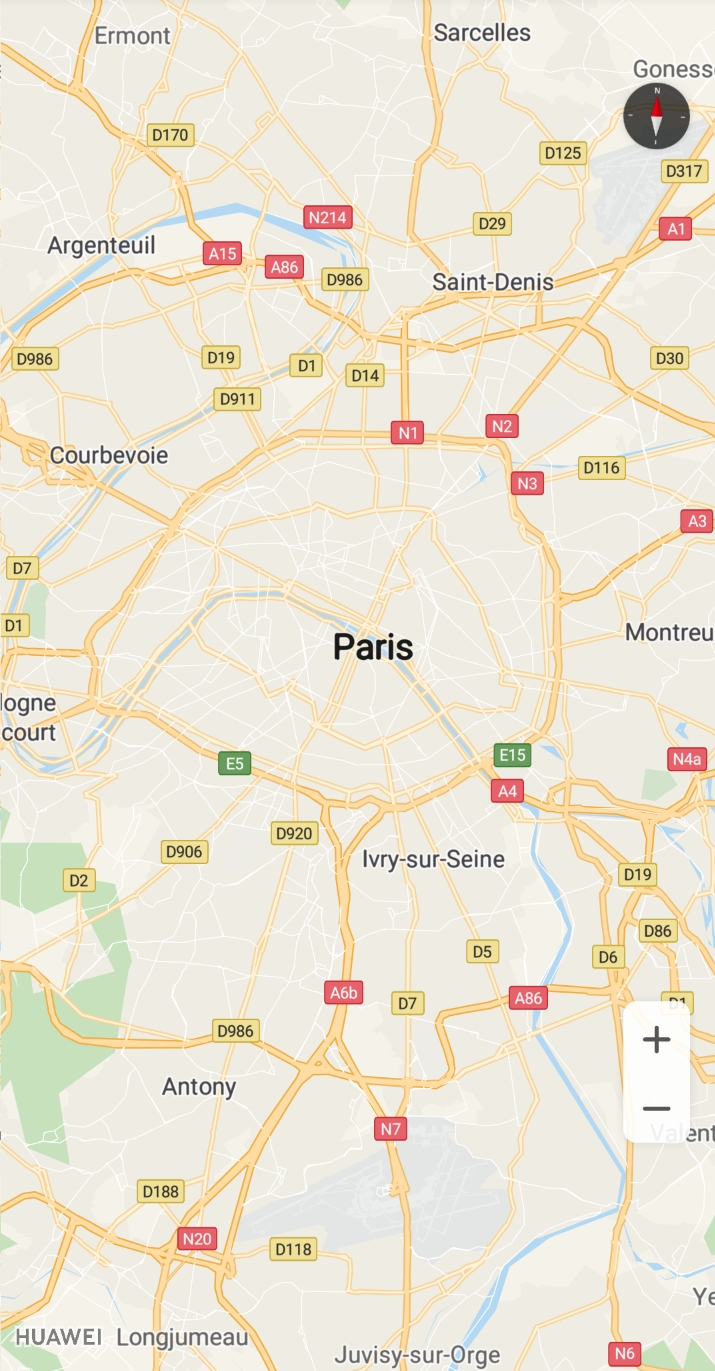
This section describes how to use a map container to quickly obtain a map object, change the map type, display my-location on the map, and enable the map's lite mode. For details, please refer to files such as MapViewDemoActivity.java and MapFragmentDemoActivity.java in the sample code project. Click here to download sample code.
Map Container
Currently, the HMS Core Map SDK supports two map containers: MapFragment and MapView.
MapFragment is a subclass of the Android Fragment class. You can use it to place a map within a fragment. It can also function as a map container and provide an entry for accessing a HuaweiMap object.
MapView is a subclass of the Android View class. You can use it to place a map within an Android view. Like MapFragment, MapView functions as a map container and displays core map functions through a HuaweiMap object. To use the MapView class when calling APIs in normal interaction mode, you must call the following methods in the corresponding methods of your activity/fragment: onCreate(), onStart(), onResume(), onPause(), onStop(), onDestroy(), onSaveInstanceState(Bundle outState), and onLowMemory(). For details, please refer to the MapViewCodeDemoActivity.java file.
The following describes how to create a map instance using MapFragment.
1. Add a MapFragment in the layout file of an activity, and set the map attributes using the XML file.
- <fragment xmlns:android="http://schemas.android.com/apk/res/android"
- xmlns:map="http://schemas.android.com/apk/res-auto"
- android:id="@+id/mapfragment_mapfragmentdemo"
- class="com.huawei.hms.maps.MapFragment"
- android:layout_width="match_parent"
- android:layout_height="match_parent"
- map:cameraTargetLat="48.893478"
- map:cameraTargetLng="2.334595"
- map:cameraZoom="10" />
2. To use a map in your app, you need to implement the OnMapReadyCallback API.
- public class MapFragmentDemoActivity extends AppCompatActivity implements OnMapReadyCallback {
- ...
- }
3. Load MapFragment in the onCreate() method of your activity and call getMapAsync() to register the callback.
- private MapFragment mMapFragment;
- mMapFragment = (MapFragment) getFragmentManager().findFragmentById(R.id.mapfragment_mapfragmentdemo);
- mMapFragment.getMapAsync(this);
4. Call the onMapReady callback to obtain the HuaweiMap object.
- public void onMapReady(HuaweiMap map) {
- Log.d(TAG, "onMapReady: ");
- hMap = map;
- }
5. Run your project to view the map in your app, as shown in the screenshot below.
Figure 1: Creating a map using MapFragment
The following describes how to create a map instance using MapView.
Procedure
1. Add a MapView in the layout file of an activity, and set the map attributes using the XML file.
- <com.huawei.hms.maps.MapView xmlns:android="http://schemas.android.com/apk/res/android"
- xmlns:map="http://schemas.android.com/apk/res-auto"
- android:id="@+id/mapview_mapviewdemo"
- android:layout_width="match_parent"
- android:layout_height="match_parent"
- map:cameraTargetLat="48.893478"
- map:cameraTargetLng="2.334595"
- map:cameraZoom="10" />
2. To use a map in your app, you need to implement the OnMapReadyCallback API.
- public class MapViewDemoActivity extends AppCompatActivity implements OnMapReadyCallback {
- ...
- }
3. Load MapView in the onCreate() method of your activity and call getMapAsync() to register the callback.
- private MapView mMapView;
- mMapView = findViewById(R.id.mapview_mapviewdemo);
- Bundle mapViewBundle = null;
- if (savedInstanceState != null) {
- mapViewBundle = savedInstanceState.getBundle("MapViewBundleKey");
- }
- mMapView.onCreate(mapViewBundle);
- mMapView.getMapAsync(this);
4. Call the onMapReady callback to obtain the HuaweiMap object.
- public void onMapReady(HuaweiMap map) {
- Log.d(TAG, "onMapReady: ");
- hMap = map;
- }
5. Call the onStart(), onStop(), onResume(), onPause(), onDestroy(), onLowMemory(), and onSaveInstanceState(Bundle outState) methods of the MapView class in corresponding methods of your activity/fragment.
- private static final String MAPVIEW_BUNDLE_KEY = "MapViewBundleKey";
- @Override
- public void onSaveInstanceState(Bundle outState) {
- super.onSaveInstanceState(outState);
- Bundle mapViewBundle = outState.getBundle(MAPVIEW_BUNDLE_KEY);
- if (mapViewBundle == null) {
- mapViewBundle = new Bundle();
- outState.putBundle(MAPVIEW_BUNDLE_KEY, mapViewBundle);
- }
- mMapView.onSaveInstanceState(mapViewBundle);
- }
- @Override
- protected void onStart() {
- super.onStart();
- mMapView.onStart();
- }
- @Override
- protected void onResume() {
- super.onResume();
- mMapView.onResume();
- }
- @Override
- protected void onPause() {
- mMapView.onPause();
- super.onPause();
- }
- @Override
- protected void onStop() {
- super.onStop();
- mMapView.onStop();
- }
- @Override
- protected void onDestroy() {
- super.onDestroy();
- mMapView.onDestroy();
- }
- @Override
- public void onLowMemory() {
- super.onLowMemory();
- mMapView.onLowMemory();
- }
6. Run your project to view the map in your app, as shown in the screenshot below.
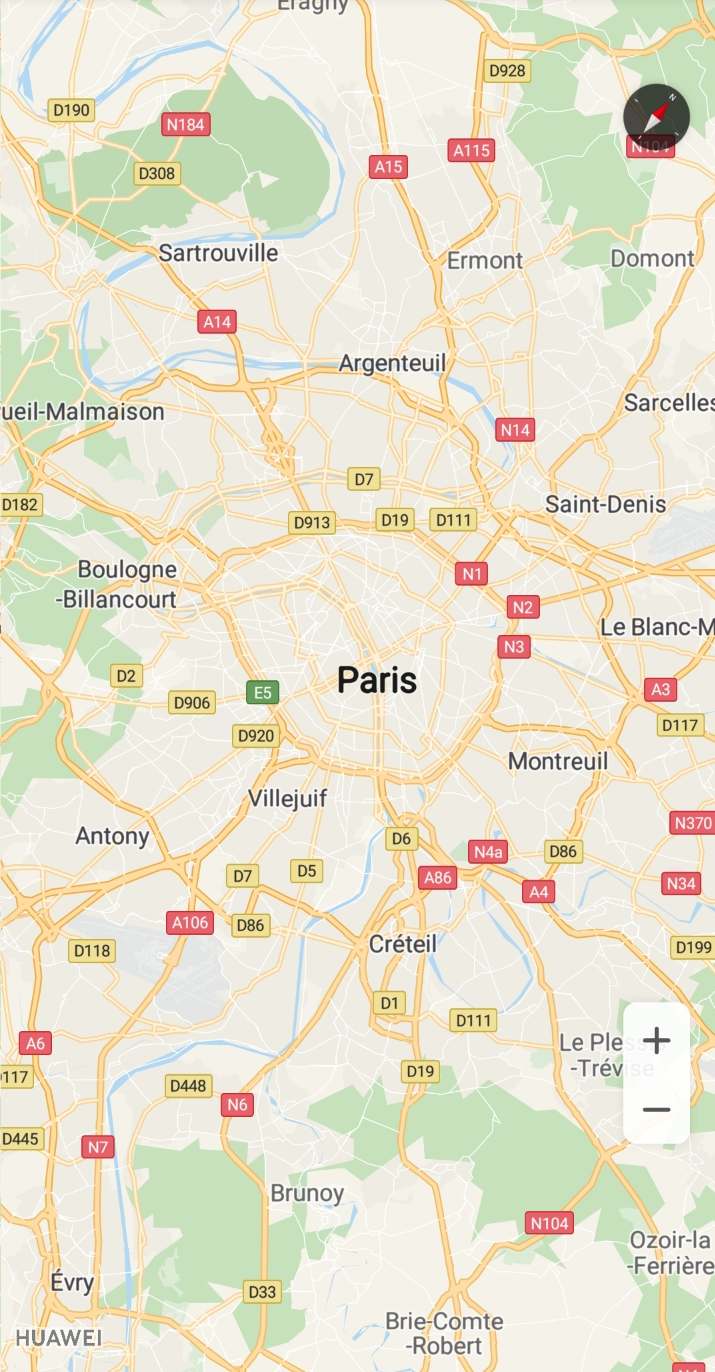
Figure 2: Creating a map using MapView
Currently, HuaweiMap supports two types of maps:
MAP_TYPE_NORMAL: standard map, which shows roads, artificial structures, and natural features such as rivers.
MAP_TYPE_NONE: empty map without any data.
To set the map type, call the setMapType method of the HuaweiMap object and transfer the static constant defined in HuaweiMap.
To set an empty map, call the setMapType(HuaweiMap.MAP_TYPE_NONE) method of the HuaweiMap object. Figure 3 shows the map display effect.
To set a standard map, call the setMapType(HuaweiMap.MAP_TYPE_NORMAL) method of the HuaweiMap object. Figure 4 shows the map display effect.
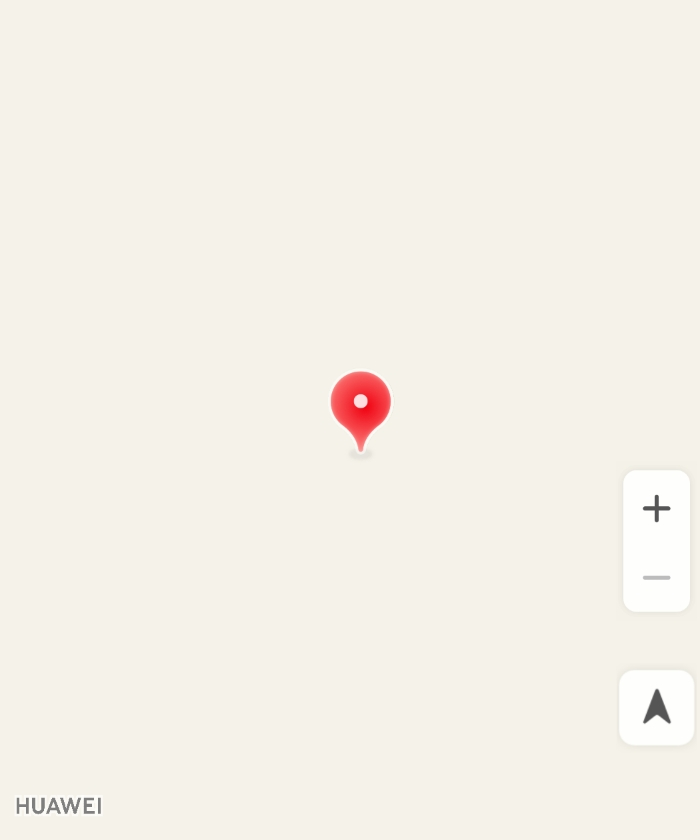
Figure 3: Empty map
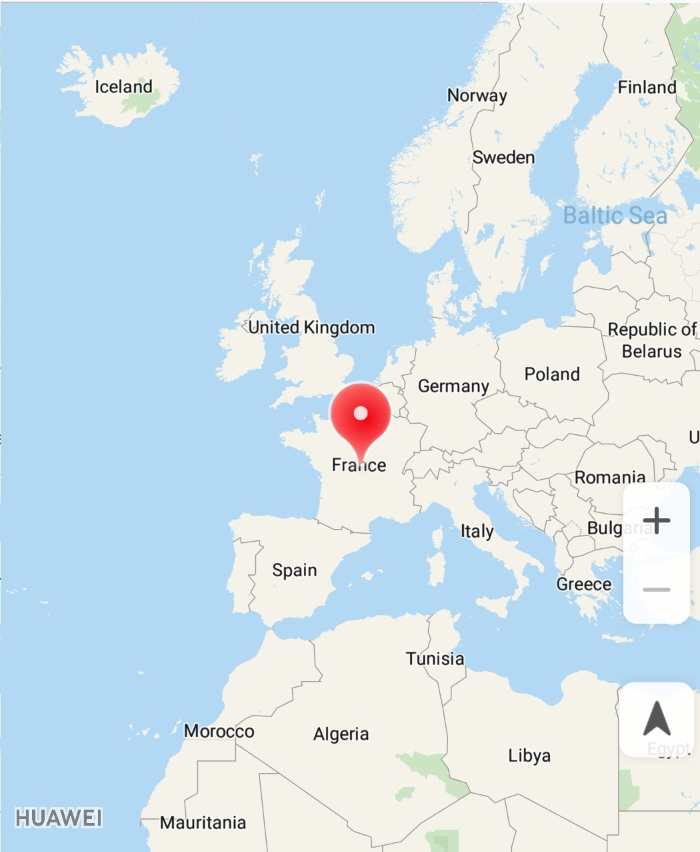
Figure 4: Standard map
The my-location function allows users to get their current locations when using your app. Before using this function, ensure that your app has been granted the location permission. The Android OS provides two location permissions: ACCESS_COARSE_LOCATION (approximate location permission) and ACCESS_FINE_LOCATION (precise location permission).You need to apply for the permissions in the Manifest file.
- <uses-permission android:name="android.permission.ACCESS_COARSE_LOCATION"/>
- <uses-permission android:name="android.permission.ACCESS_FINE_LOCATION"/>
After adding the preceding information to the Manifest file, you need to dynamically apply for the permissions in the code (according to risky permission requirements in Android 6.0).
- if (Build.VERSION.SDK_INT >= Build.VERSION_CODES.M) {
- Log.i(TAG, "sdk >= 23 M");
- if (ActivityCompat.checkSelfPermission(this,
- Manifest.permission.ACCESS_FINE_LOCATION) != PackageManager.PERMISSION_GRANTED
- || ActivityCompat.checkSelfPermission(this,
- Manifest.permission.ACCESS_COARSE_LOCATION) != PackageManager.PERMISSION_GRANTED) {
- String[] strings =
- {Manifest.permission.ACCESS_FINE_LOCATION, Manifest.permission.ACCESS_COARSE_LOCATION};
- ActivityCompat.requestPermissions(this, strings, 1);
- }
- }
To enable this function, call the setMyLocationEnabled(true) method of the HuaweiMap object.
- @RequiresPermission(allOf = {ACCESS_FINE_LOCATION, ACCESS_WIFI_STATE})
- @Override
- public void onMapReady(HuaweiMap map){
- hMap = map;
- hMap.setMyLocationEnabled(true);// Enable the my-location overlay.
- hMap.getUiSettings().setMyLocationButtonEnabled(true);// Enable the my-location icon.
- }
Once this function has been enabled, the my-location icon will be displayed in the lower right corner of the map by default and the user's current location will be displayed as a blue dot (Figure 5). When a user taps this icon, the user's current location (if obtained) will be displayed in the center of the screen (Figure 6). After you set a listener for the my-location icon and a user taps the icon, the onMyLocationButtonClick() callback of HuaweiMap.OnMyLocationButtonClickListener will be triggered.
You can also call getUiSettings().setMyLocationButtonEnabled(false) of the HuaweiMap object to hide the my-location icon.
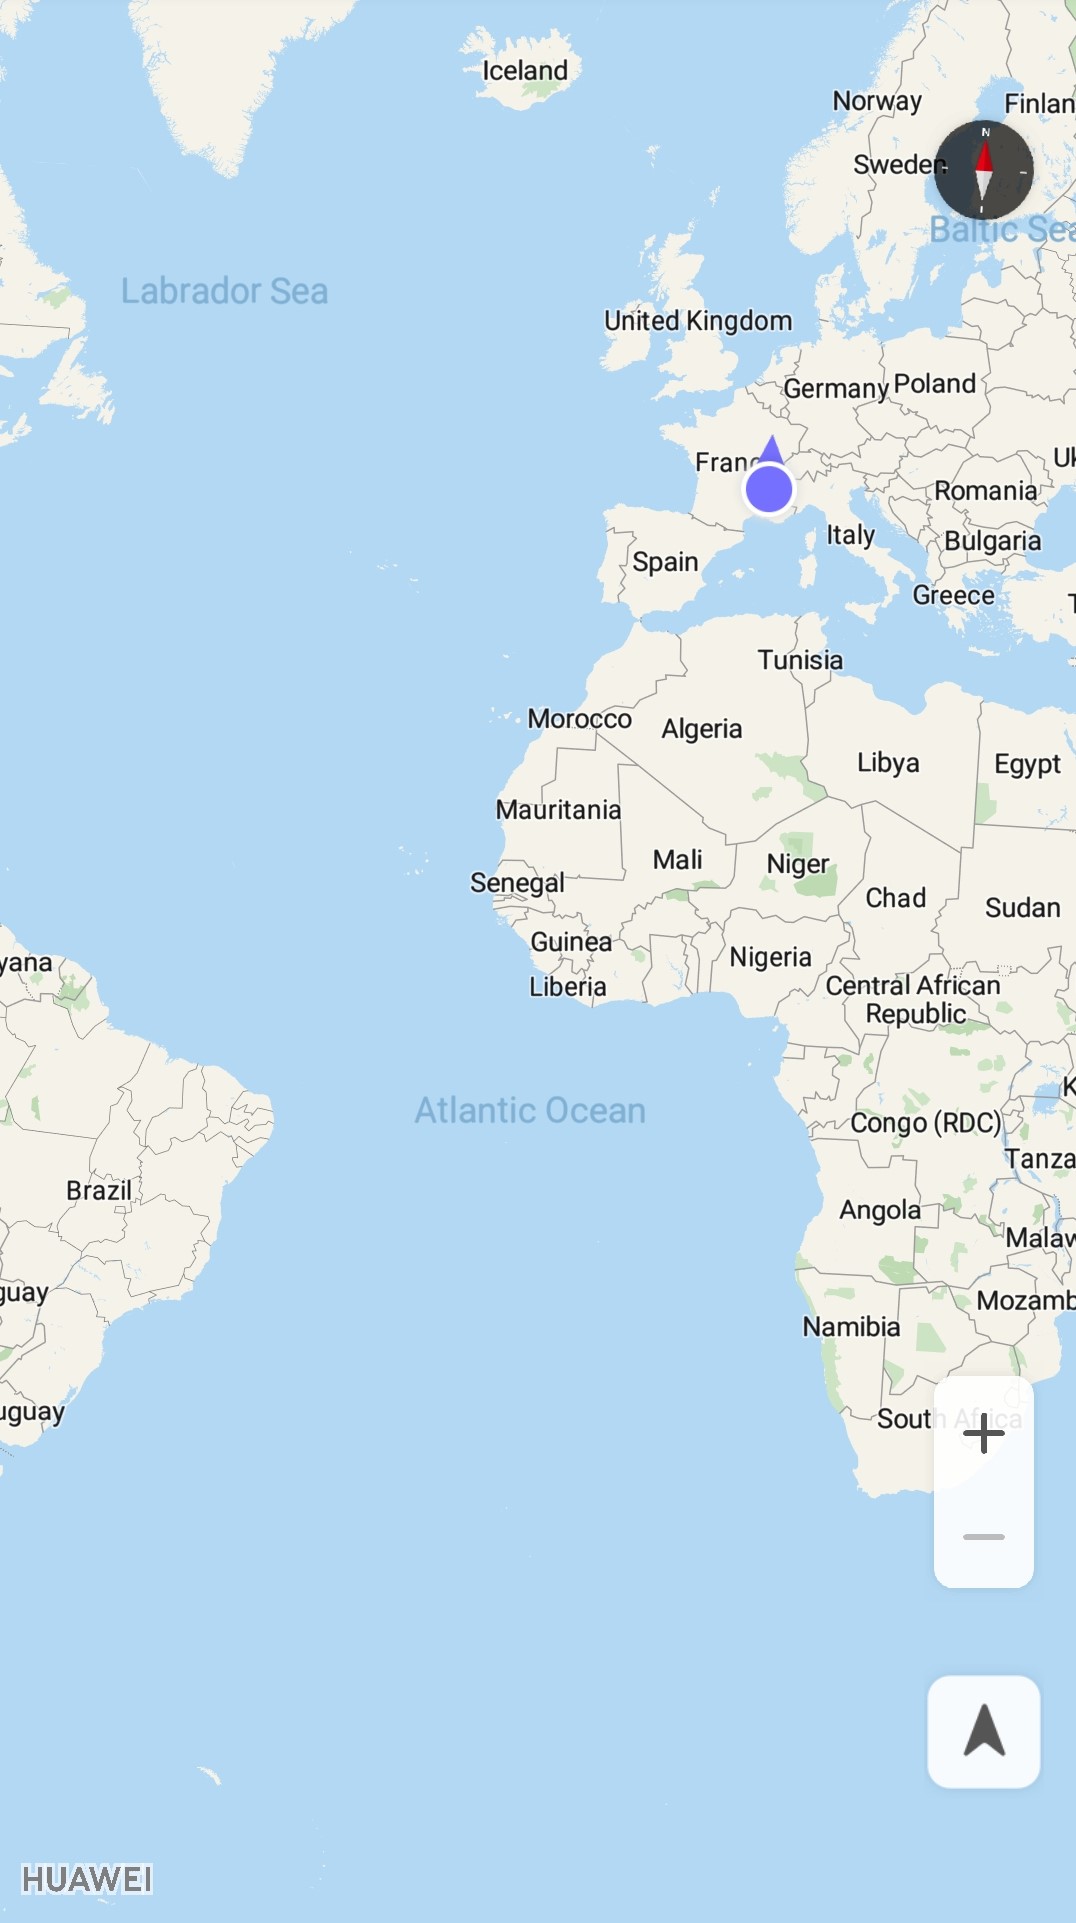
Figure 5: Screen before a user taps the my-location icon
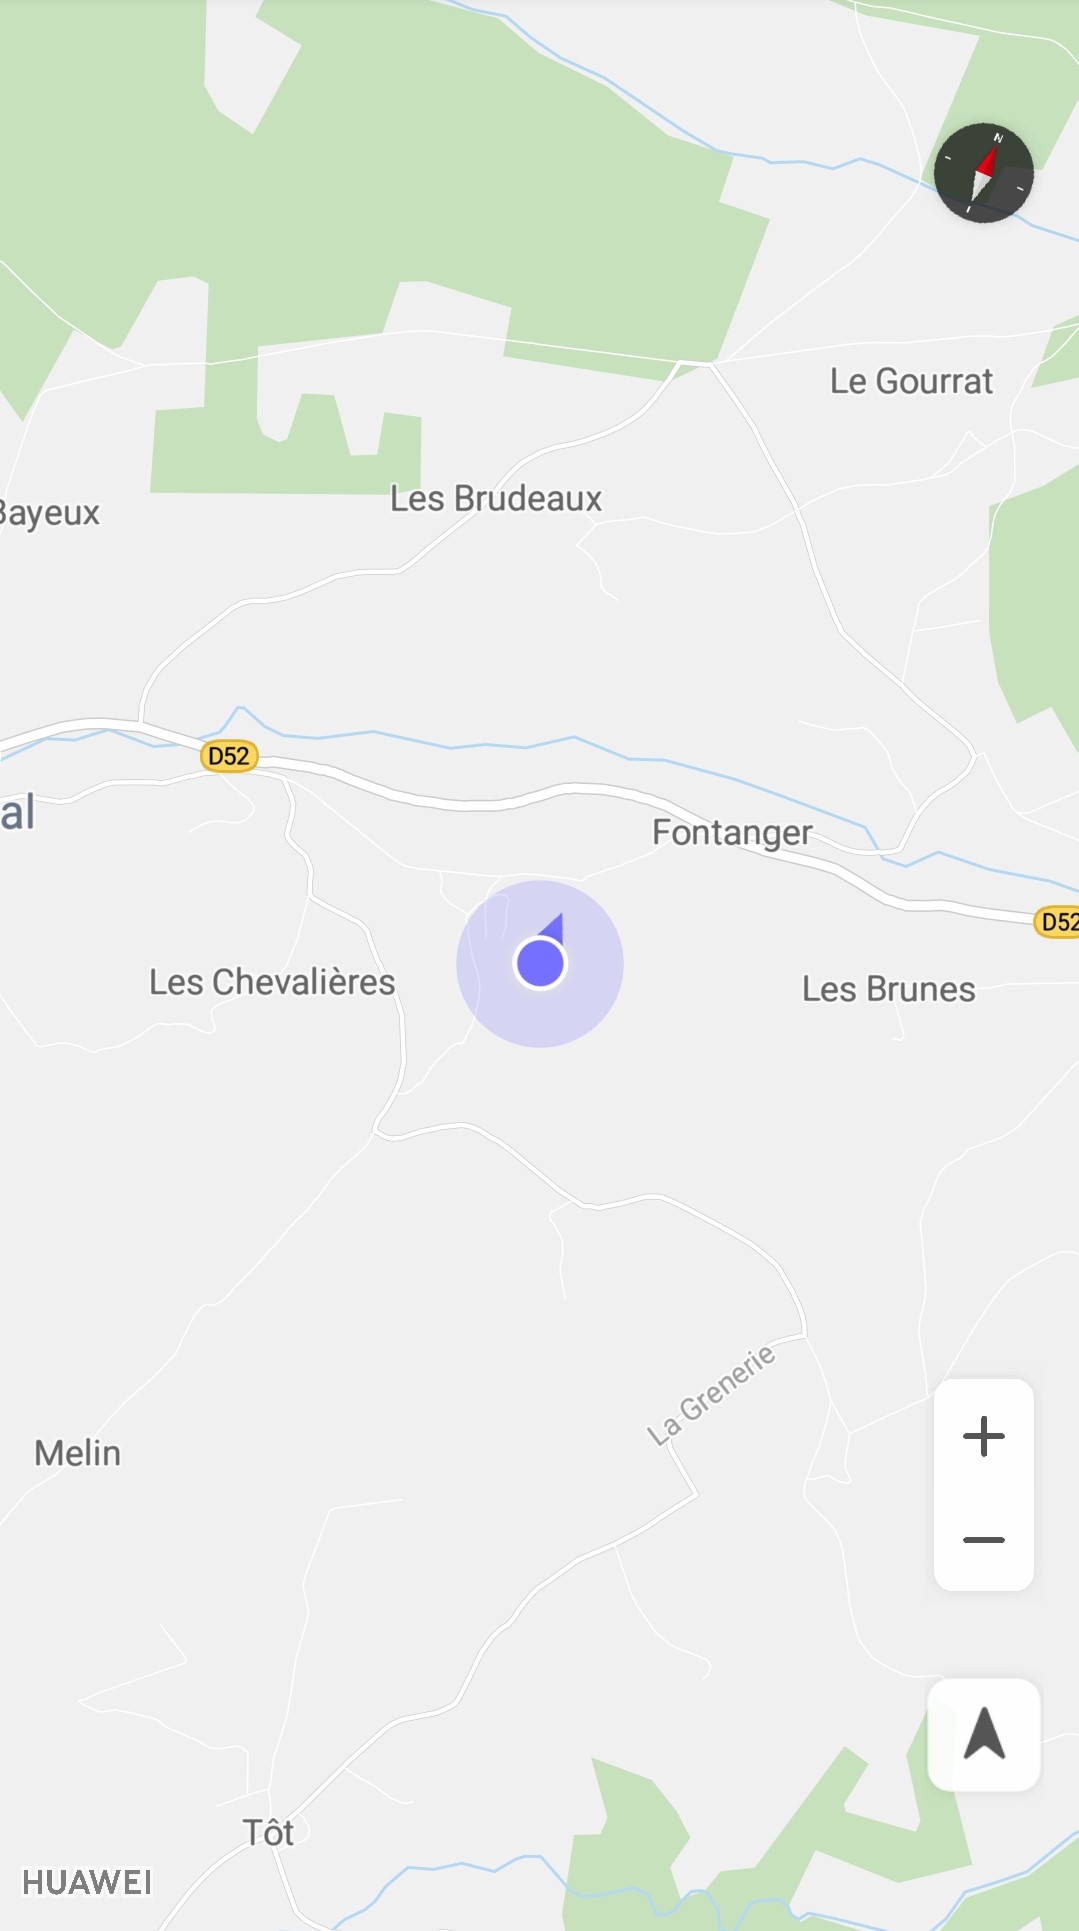
Figure 6: Screen after a user taps the my-location icon
You can set initial map attributes using XML or in code and dynamically update them later.
Setting Attributes Using XML
The HMS Core Map SDK defines a group of custom XML attributes for MapFragment and MapView. You can directly add these attributes in the layout file of a map as the map's initial attributes.
Before using these attributes, ensure that you have declared the following namespace:
- xmlns:map="http://schemas.android.com/apk/res-auto"
After declaring the namespace, you can add the following attributes as the initial attributes of a map:
mapType: map type. The options are none and normal.
cameraTargetLng and cameraTargetLat: longitude and latitude of the map center.
cameraZoom: zoom level near the center of the screen.
cameraBearing: angle of a map rotated from the north in a clockwise direction.
cameraTilt: angle of the camera from the nadir (directly facing the Earth), in degrees.
uiZoomControls: indicates whether the zoom function is enabled. The zoom function is enabled by default.
uiCompass: indicates whether the compass is enabled. The compass is enabled by default.
uiZoomGestures, uiScrollGestures, uiRotateGestures, and uiTiltGestures: indicates whether the zoom gestures, scroll gestures, rotate gestures, and tilt gestures are enabled. By default, these gestures are enabled.
zOrderOnTop: indicates whether the map view is placed on the top of the map window. By default, the map view is placed on the top of the map window.
useViewLifecycle: indicates whether to bind the map lifecycle to MapFragment or the view of MapFragment. This parameter is only valid for MapFragment. By default, the map lifecycle is bound to MapFragment.
liteMode: indicates whether to enable the lite mode for the map. By default, the lite mode is disabled.
cameraMinZoomPreference and cameraMaxZoomPreference: preferred minimum and maximum zoom levels.
latLngBoundsSouthWestLatitude, latLngBoundsSouthWestLongitude, latLngBoundsNorthEastLatitude, and latLngBoundsNorthEastLongitude: latitudes and longtitudes of the bounds of a LatLngBounds, which constrain the camera target so that the camera target does not move outside the bounds when a user scrolls the map camera. It should be noted that latLngBoundsNorthEastLatitude cannot be smaller than latLngBoundsSouthWestLatitude.
- <fragment xmlns:android="http://schemas.android.com/apk/res/android"
- xmlns:map="http://schemas.android.com/apk/res-auto"
- android:id="@+id/mapfragment_mapfragmentdemo"
- class="com.huawei.hms.maps.MapFragment"
- android:layout_width="match_parent"
- android:layout_height="match_parent"
- map:cameraBearing="45"
- map:cameraMaxZoomPreference="13"
- map:cameraMinZoomPreference="3"
- map:cameraTargetLat="48.893478"
- map:cameraTargetLng="2.334595"
- map:cameraTilt="20"
- map:cameraZoom="10"
- map:latLngBoundsNorthEastLatitude="49.893478"
- map:latLngBoundsNorthEastLongitude="1.334595"
- map:latLngBoundsSouthWestLatitude="47.893478"
- map:latLngBoundsSouthWestLongitude="3.334595"
- map:liteMode="false"
- map:mapType="normal"
- map:uiCompass="true"
- map:uiRotateGestures="false"
- map:uiScrollGestures="true"
- map:uiTiltGestures="true"
- map:uiZoomControls="false"
- map:uiZoomGestures="true"
- map:useViewLifecycle="true"
- map:zOrderOnTop="true" />
Setting Attributes in Code
You can also set initial attributes for a map in code and update these attributes when the camera status needs to be updated. All XML attributes can be set in code.
- MapFragment mMapFragment;
- CameraPosition cameraPosition =
- CameraPosition.builder().target(new LatLng(48.893478, 2.334595)).zoom(10).bearing(45).tilt(20).build();
- LatLng southwest = new LatLng(47.893478, 3.334595);
- LatLng northeast = new LatLng(49.893478, 1.334595);
- LatLngBounds latLngBounds = new LatLngBounds(southwest, northeast);
- HuaweiMapOptions options = new HuaweiMapOptions();
- options.mapType(HuaweiMap.MAP_TYPE_NORMAL)
- .camera(cameraPosition)
- .zoomControlsEnabled(false)
- .compassEnabled(true)
- .zoomGesturesEnabled(true)
- .scrollGesturesEnabled(true)
- .rotateGesturesEnabled(false)
- .tiltGesturesEnabled(true)
- .zOrderOnTop(true)
- .useViewLifecycleInFragment(true)
- .liteMode(false)
- .minZoomPreference(3)
- .maxZoomPreference(13)
- .latLngBoundsForCameraTarget(latLngBounds);
- mMapFragment = MapFragment.newInstance(options);
Overview
In the lite mode, the HMS Core Map SDK allows your app to show the static map image of a specified location at a specified zoom level to a user. The lite mode supports only static image–based functions. It is useful when the user wants to show multiple maps on one screen, or share their location using WeChat Moments.
The following table lists the functions supported by the HMS Core Map SDK in lite mode.
| Function | Support |
| MapFragment and MapView | Completely supported |
| My location | Completely supported |
| Interaction gesture | Not supported |
| Map camera | Partially supported (Tilt and bearing cannot be set and animation is not supported.) |
| Map event | Partially supported (Only tap and long press events are supported.) |
| Map type | Partially supported (Only standard maps and empty maps are supported.) |
| Marker | Partially supported (Dragging and rotation are not supported.) |
| Marker information window | Completely supported |
| GroundOverlay | Not supported |
| Shape (Circle/Polyline/Polygon) | Completely supported |
| Custom map style | Not supported |
Usage
You can enable the lite mode in either of the following ways:
1. Configure the XML file as follows:
- <com.huawei.hms.maps.MapView xmlns:android="http://schemas.android.com/apk/res/android"
- xmlns:map="http://schemas.android.com/apk/res-auto"
- android:id="@+id/mapView"
- android:layout_width="match_parent"
- android:layout_height="match_parent"
- map:mapType="normal"
- map:liteMode="true"
- map:uiCompass="true"
- map:uiZoomControls="true"
- map:cameraTargetLat="51"
- map:cameraTargetLng="10"
- map:cameraZoom="8.5"/>
2. Add the following code:
- private MapView mMapView;
- @Override
- protected void onCreate(Bundle savedInstanceState) {
- super.onCreate(savedInstanceState);
- setContentView(R.layout.activity_map_lite_mode);
- HuaweiMapOptions huaweiMapOptions = new HuaweiMapOptions();
- huaweiMapOptions.liteMode(true);//Enable the lite mode for the map.
- mMapView = new MapView(this, huaweiMapOptions);
- Bundle mapViewBundle = null;
- if (savedInstanceState != null) {
- mapViewBundle = savedInstanceState.getBundle("MapViewBundleKey");
- }
- mMapView.onCreate(mapViewBundle);
- mMapView.getMapAsync(this);
- //Add mMapView to the page.
- ((LinearLayout)findViewById(R.id.view_main)).addView(mMapView, 0);
- }
HUAWEI Map Kit is implemented by simulating a camera. The map camera area centers on the target location and will be padded. Map controls (such as the compass, zoom icons, and my-location icon) and Huawei logo are placed at the border of the map camera area. By default, the compass is placed in the upper right corner of the map camera area, the zoom icons and my-location icon are placed in the lower right corner of the map camera area, and the Huawei logo is placed in the lower left corner of the map camera area.
You can use the HuaweiMap.setPadding(int left, int top, int right, int bottom) method to set the padding between the map camera area bounds and map controls or HUAWEI logo. Input parameters of the method are as follows:
left: padding between the Huawei logo and the left bound of the map camera area, in pixels.
top: padding between the compass and the top bound of the map camera area, in pixels.
right: padding between the compass, zoom icons, or my-location icon and the right bound of the map camera area, in pixels.
bottom: padding between the zoom icons, my-location icon, or Huawei logo and the bottom bound of the map camera area, in pixels.
Figures 7 and 8 show the default and custom map padding effects, respectively.
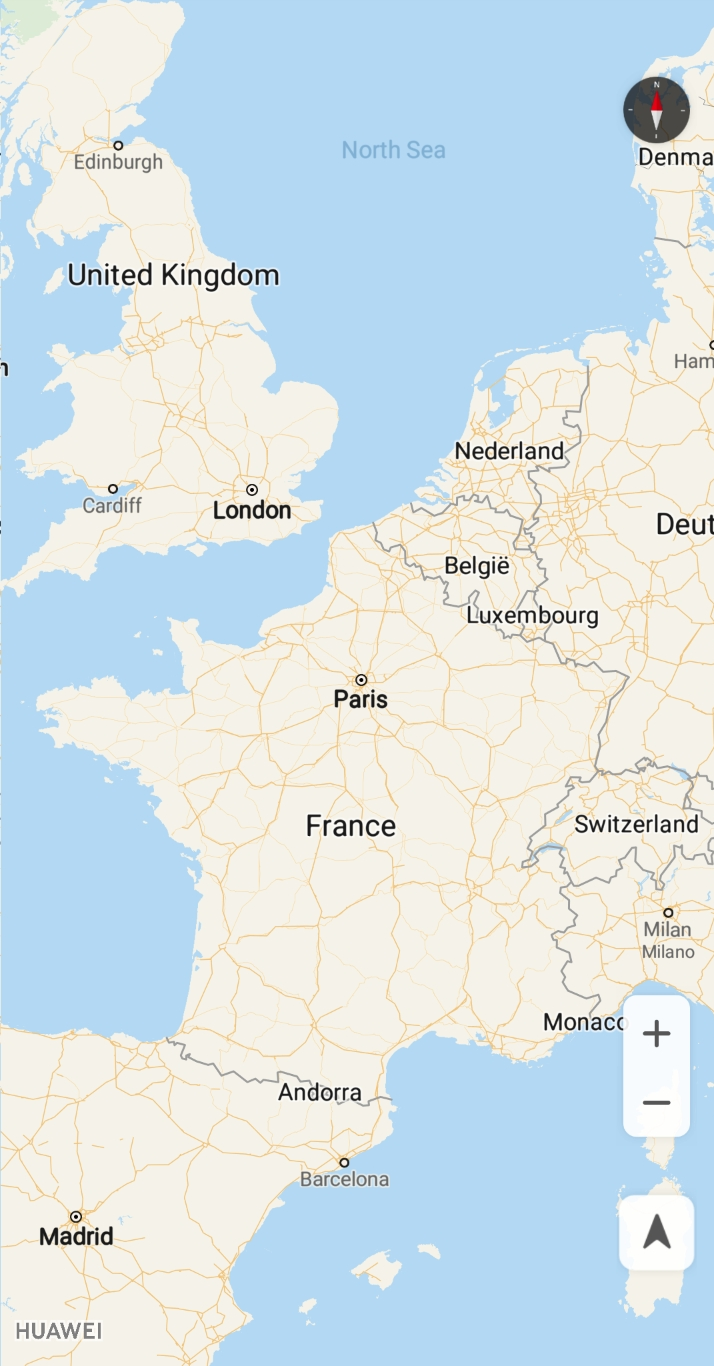
Figure 7: Default padding effect
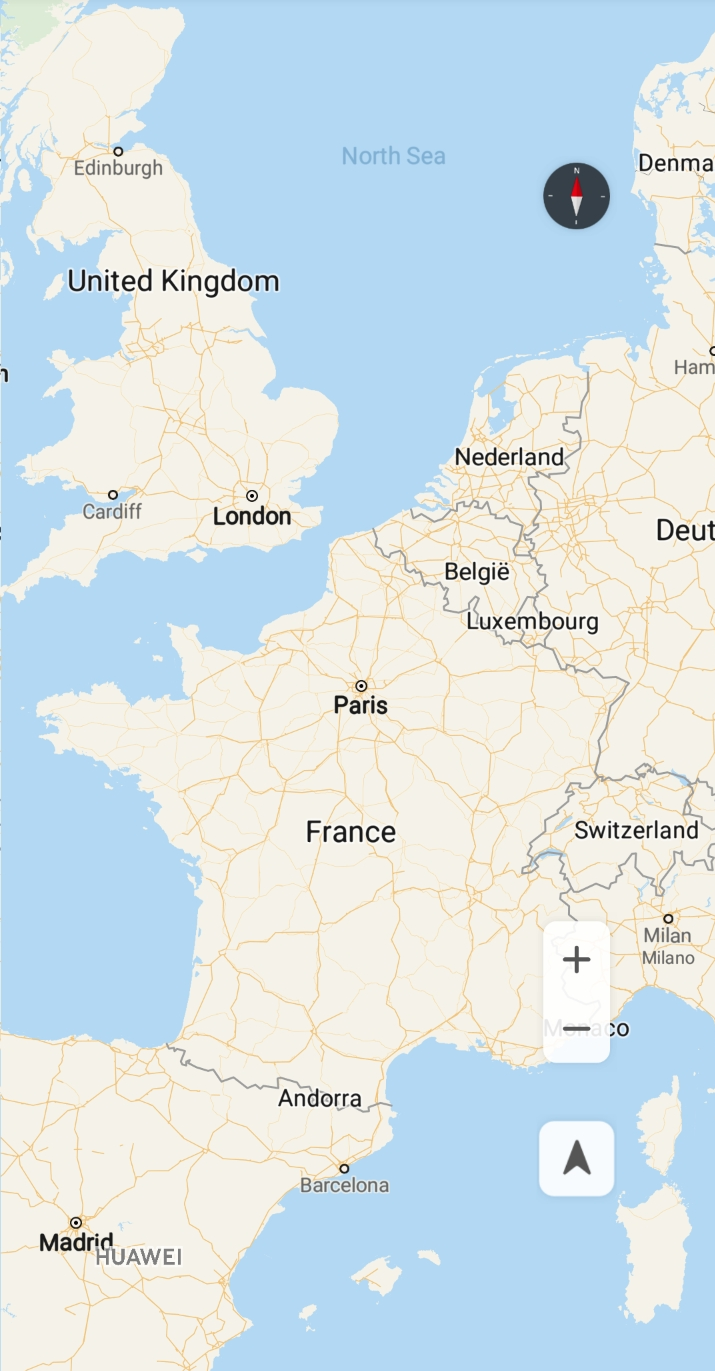
Figure 8: Custom padding effect