


Intelligent Assistant
Chat with our virtual assistant to get answers promptly.
Open Device Identifier (ODID): a developer-level non-permanent device identifier provided by Push Kit. A developer can be an enterprise or individual developer registered on HUAWEI Developers.
Example: dff3cdfd-7beb-1e7d-fdf7-1dbfddd7d30c
An ODID will be regenerated in the following scenarios:
An ODID is generated based on the following rules:
The ODIDs for multiple apps of the same developer on the same device are the same and can be used as the unique identifier of a device.
When multiple apps of the same developer report data, the ODIDs in the data indicate the relationships between the apps.
The version of HMS Core (APK) must be 5.0.2.300 or later.
To release your app on HUAWEI AppGallery, make necessary preparations by referring to Preparations. To obtain the ODID but not to release your app on HUAWEI AppGallery, you only need to integrate the OpenDevice SDK.
The procedure for configuring the Maven repository address in Android Studio is different for Gradle plugin earlier than 7.0, Gradle plugin 7.0, and Gradle plugin 7.1 or later. Click a relevant link below to find the configuration procedure for the specific Gradle plugin version.
The Maven repository address cannot be accessed from a browser. It can only be configured in the IDE. If there are multiple Maven repositories, add the Maven repository address of Huawei as the last one.
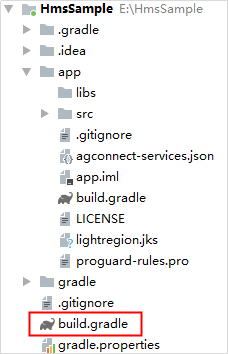
buildscript {
    repositories {
        google()
        jcenter()
        // Configure the Maven repository address for the HMS Core SDK.
        maven {url 'https://developer.huawei.com/repo/'}
    }
    dependencies {
        ...
        // Add the AppGallery Connect plugin configuration. Please refer to AppGallery Connect Plugin Dependency to select a proper plugin version.
        classpath 'com.huawei.agconnect:agcp:1.6.0.300'
    }
}

allprojects {
    repositories {
        google()
        jcenter()
        // Configure the Maven repository address for the HMS Core SDK.
        maven {url 'https://developer.huawei.com/repo/'}
    }
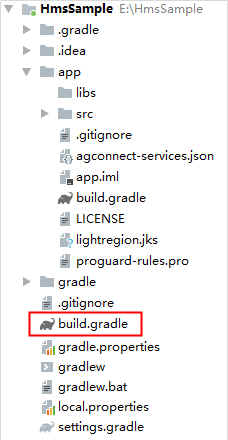
} 
buildscript {
    repositories {
        google()
        jcenter()
        // Configure the Maven repository address for the HMS Core SDK.
        maven {url 'https://developer.huawei.com/repo/'}
    }
    dependencies {
        ...
        // Add the Android Gradle plugin configuration. You need to replace {version} with the actual Gradle plugin version, for example, 7.0.1.
        classpath 'com.android.tools.build:gradle:{version}'
        // Add the AppGallery Connect plugin configuration. Please refer to AppGallery Connect Plugin Dependency to select a proper plugin version.
        classpath 'com.huawei.agconnect:agcp:1.6.0.300'
    }
} dependencyResolutionManagement {
...
repositories {
google()
jcenter()
// Configure the Maven repository address for the HMS Core SDK.
maven {url 'https://developer.huawei.com/repo/'}
}
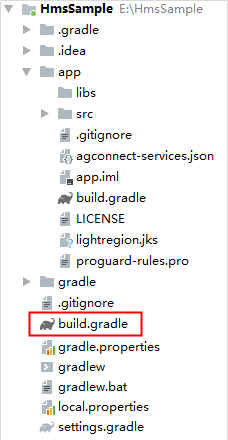
} 
buildscript {
    dependencies {
        ...
        // Add the Android Gradle plugin configuration. You need to replace {version} with the actual Gradle plugin version, for example, 7.1.1.
        classpath 'com.android.tools.build:gradle:{version}'
        // Add the AppGallery Connect plugin configuration. Please refer to AppGallery Connect Plugin Dependency to select a proper plugin version.
        classpath 'com.huawei.agconnect:agcp:1.6.0.300'
    }
} pluginManagement {
repositories {
gradlePluginPortal()
google()
mavenCentral()
// Configure the Maven repository address for the HMS Core SDK.
maven { url 'https://developer.huawei.com/repo/' }
}
}
dependencyResolutionManagement {
...
repositories {
google()
mavenCentral()
// Configure the Maven repository address for the HMS Core SDK.
maven { url 'https://developer.huawei.com/repo/' }
}
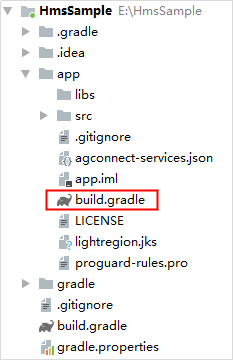
} 
dependencies {
    implementation 'com.huawei.hms:opendevice:6.7.0.300'
} apply plugin: 'com.huawei.agconnect'
plugins {
    id 'com.android.application'
    // Add the following configuration:
    id 'com.huawei.agconnect'
} Call the OpenDeviceClient.getOdid() method to obtain the ODID.
// Call the getOdid method to obtain the ODID.
Task<OdidResult> idResult = OpenDevice.getOpenDeviceClient(getApplicationContext()).getOdid();

// Add a listener.
idResult.addOnSuccessListener(new OnSuccessListener<OdidResult>() {
     @Override
     public void onSuccess(OdidResult odidResult) {
            String odid = odidResult.getId();
            Log.d("TAG", "getODID successfully, the ODID is " + odid );
     }
}).addOnFailureListener(new OnFailureListener() {
     @Override
     public void onFailure(Exception myException) {
        Log.d("TAG", "getODID failed, catch exception : " + myException);
     }
});
// Call the getOdid method to obtain the ODID.
val idResult = OpenDevice.getOpenDeviceClient(this).odid
// Add a listener.
idResult.addOnSuccessListener{ odidResult ->
Log.d("TAG", "getODID successfully, the ODID is " + odidResult.getId() )
}.addOnFailureListener{ myException ->
Log.d("TAG", "getODID failed, catch exception : $myException")
}