


Intelligent Assistant
Chat with our virtual assistant to get answers promptly.
We use essential cookies for the website to function, as well as analytics cookies for analyzing and creating statistics of the website performance. To agree to the use of analytics cookies, click "Accept All". You can manage your preferences at any time by clicking "Cookie Settings" on the footer. More Information.
HarmonyOS
Before enabling Push Kit, create a project and an app by referring to Application Development Preparations.
Since HarmonyOS NEXT Developer Beta2, you no longer need to configure the public key fingerprint and client ID.
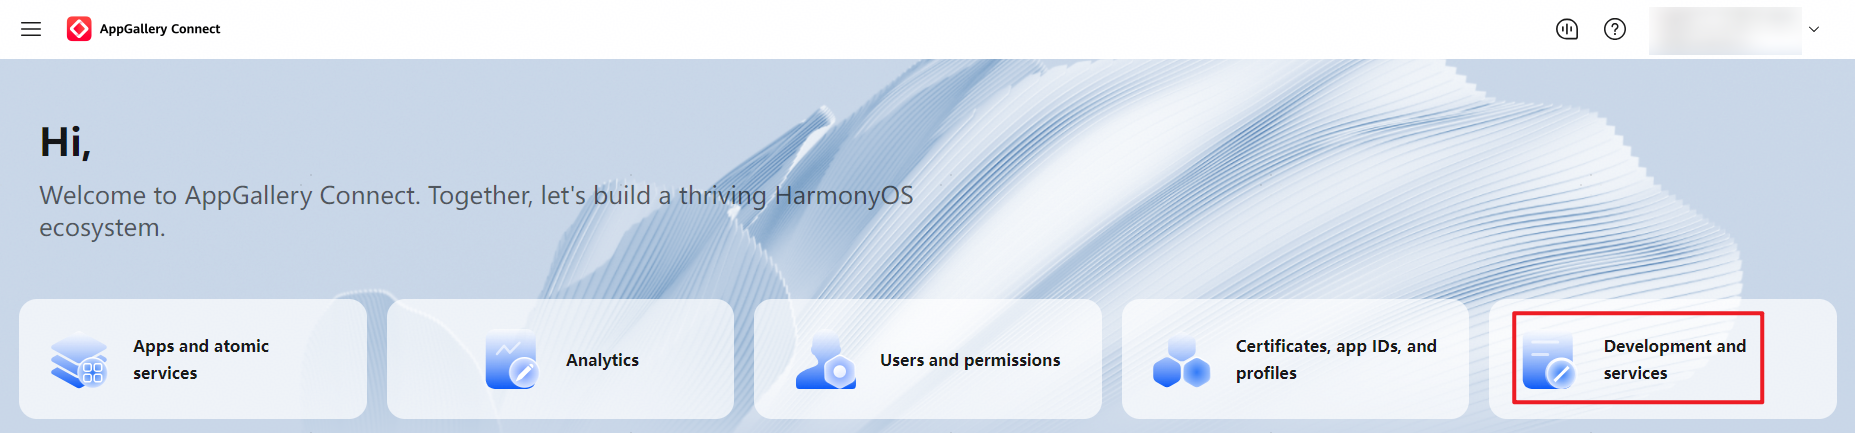
Sign in to AppGallery Connect and click Development and services.
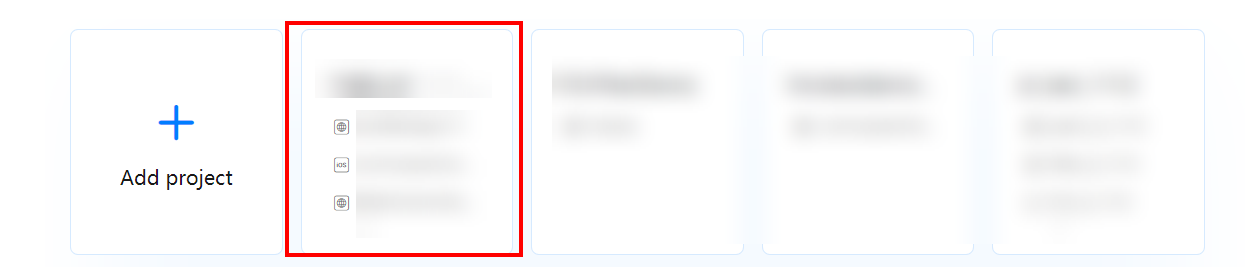
Find and click the desired project in the project list, and click the app for which you need to set Push Kit parameters.
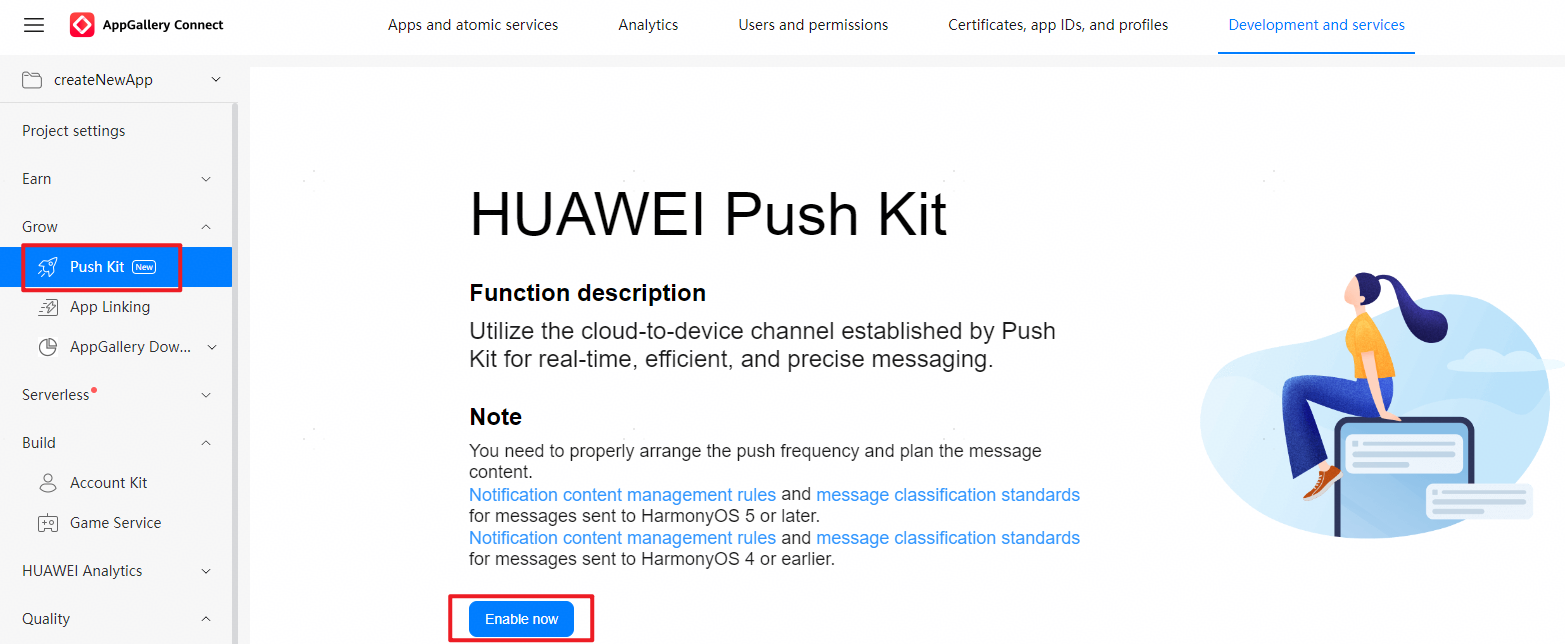
Go to Grow > Push Kit and click Enable now. In the dialog box that is displayed, click OK.
Push Kit is enabled at the project level. If you have enabled Push Kit earlier for a project, the kit is available for all apps in this project, including those added later.
If no data processing location is configured for the project, click OK in the dialog box displayed. A dialog box for setting the data processing location will be displayed. Set the data processing location and click OK.
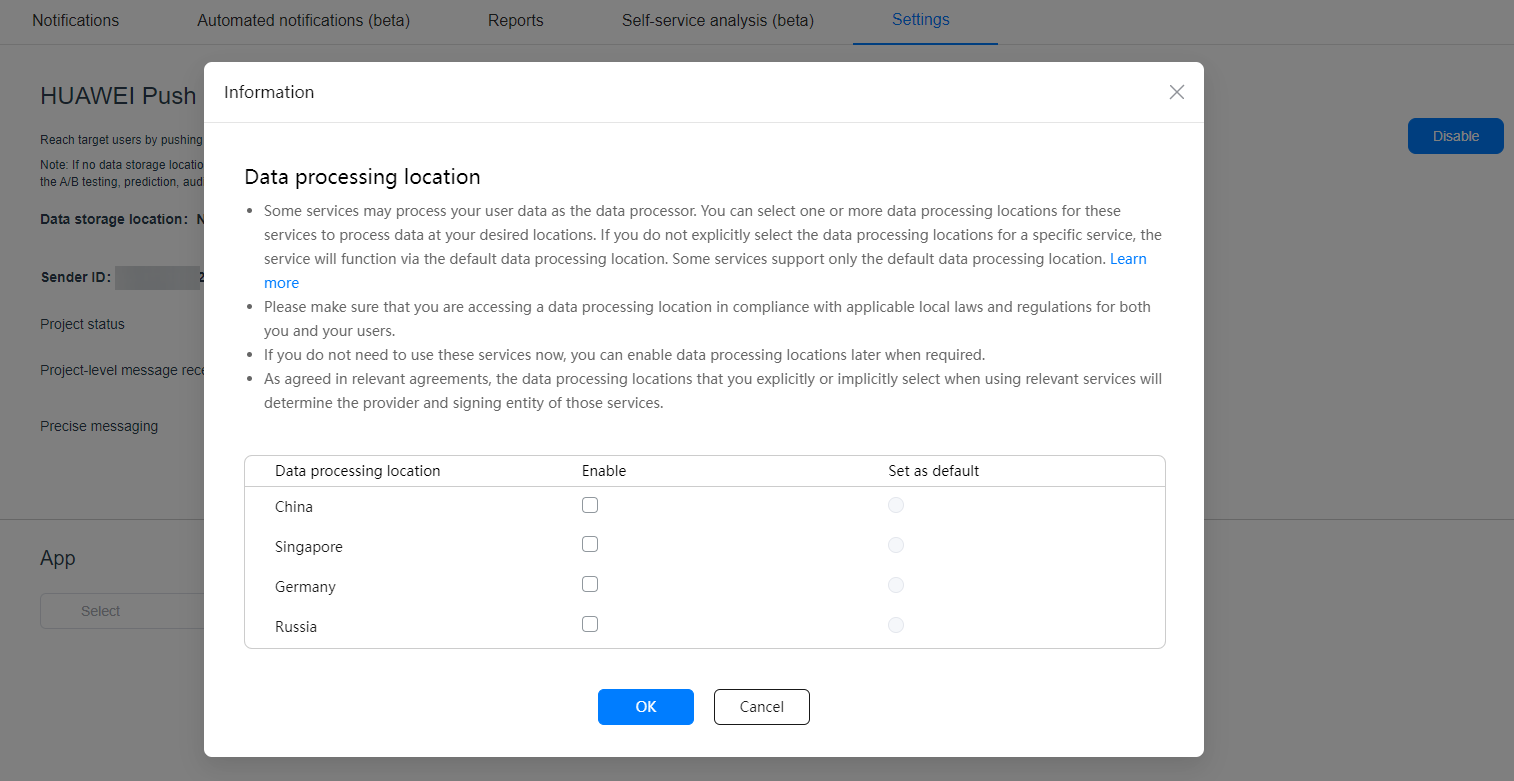
For details about the countries/regions where Push Kit is supported on wearables, please refer to Supported Countries/Regions. You can set the data processing location based on the supported countries/regions. For other devices, Push Kit is available only in the Chinese mainland, and the data processing location is fixed to China.
Sign your app in either of the following ways during debugging. Note that, in development and debugging scenarios, DevEco Studio 6.0.0 Beta5 and later versions provide a more efficient automatic signing solution for you to choose.
Manual signing: During app debugging, you must apply for a debug certificate, register a debug device, enable Push Kit under Grow > Push Kit, apply for a new debug profile file, and complete manual signing for your app.
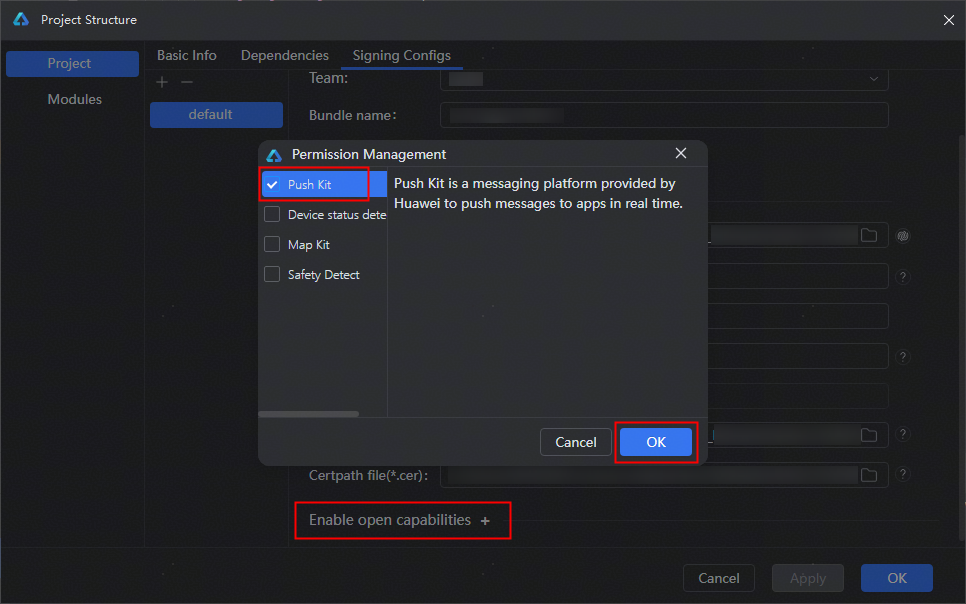
Automatic signing (new): In DevEco Studio, click Enable open capabilities. In the Permission Management dialog box that is displayed, select Push Kit and click OK. Then DevEco Studio will automatically sign your app. For details, please refer to Signing Your App/Service Automatically.
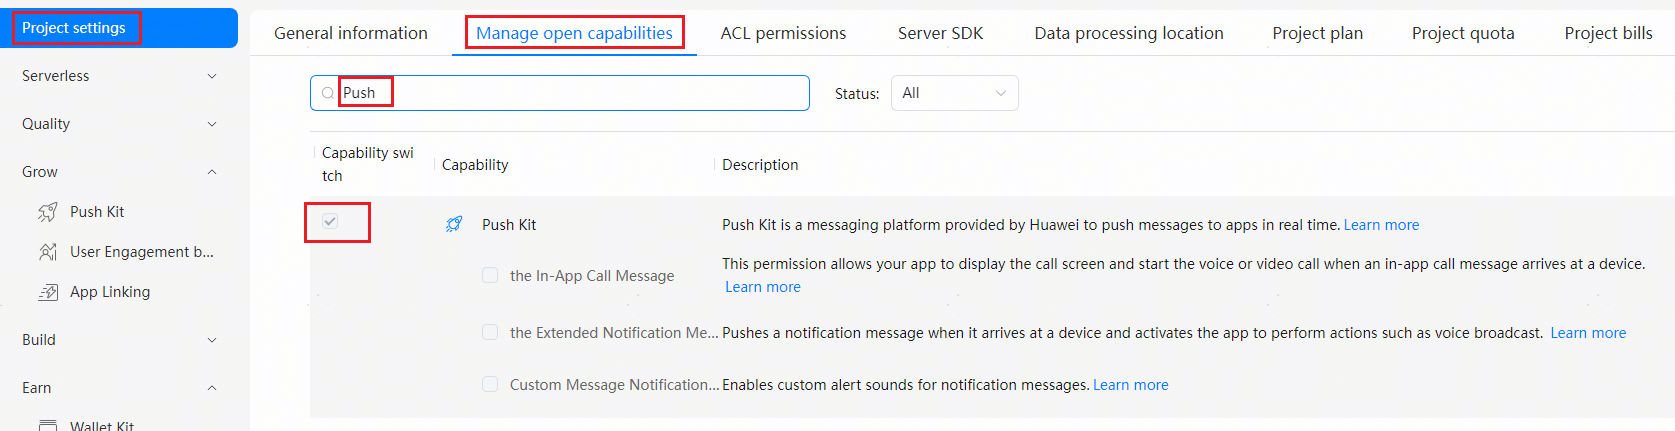
Wait for 5 to 10 minutes, sign in to AppGallery Connect, and go to Project settings > Manage open capabilities. You will find that Push Kit has been selected. At the same time, Push Kit is also automatically enabled under Grow > Push Kit.
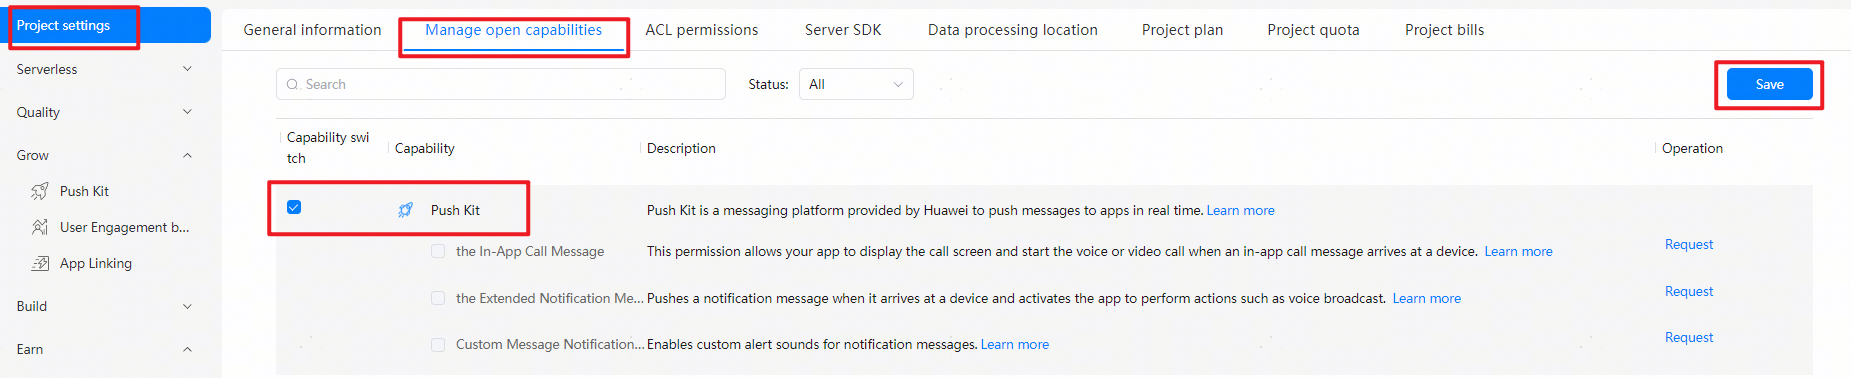
During app release, apply for a release certificate, ensure that Push Kit is enabled under Grow > Push Kit, apply for a new release profile file, and complete manual signing. For details about app signing for app release, please refer to Configuring Signature Information.
Go to Grow > Push Kit > Settings. Select the desired app for which you need to apply for the message self-classification permission, and click Apply on the Self-classification row. For details, please refer to the application procedure.
You are advised to apply for the notification message self-classification permission and send notifications by category. Otherwise, Push Kit classifies these messages as news and marketing messages by default. In this case, your app is subject to the restriction that it can push up to two or five messages to each device on a daily basis.
(Optional) Enable or disable the message receipt function at the project and app levels on the Settings page.
If the message receipt function has been enabled at the project level but not for a specific app, this app will use the project-level message receipt.
If the message receipt function has been enabled at the project level and also for a specific app, this app will use the message receipt enabled for itself.
To set or change the data processing location, perform the following steps:
If the data processing location is different from your server location, or is different from the location of users that the app serves, push messages will fail to be sent.
Sign in to AppGallery Connect, click Development and services, click the desired project, and go to Project settings.
Click the project for which you want to set data processing locations.
Go to Project settings > Data processing location, and click Edit.
Set a data processing location as required.
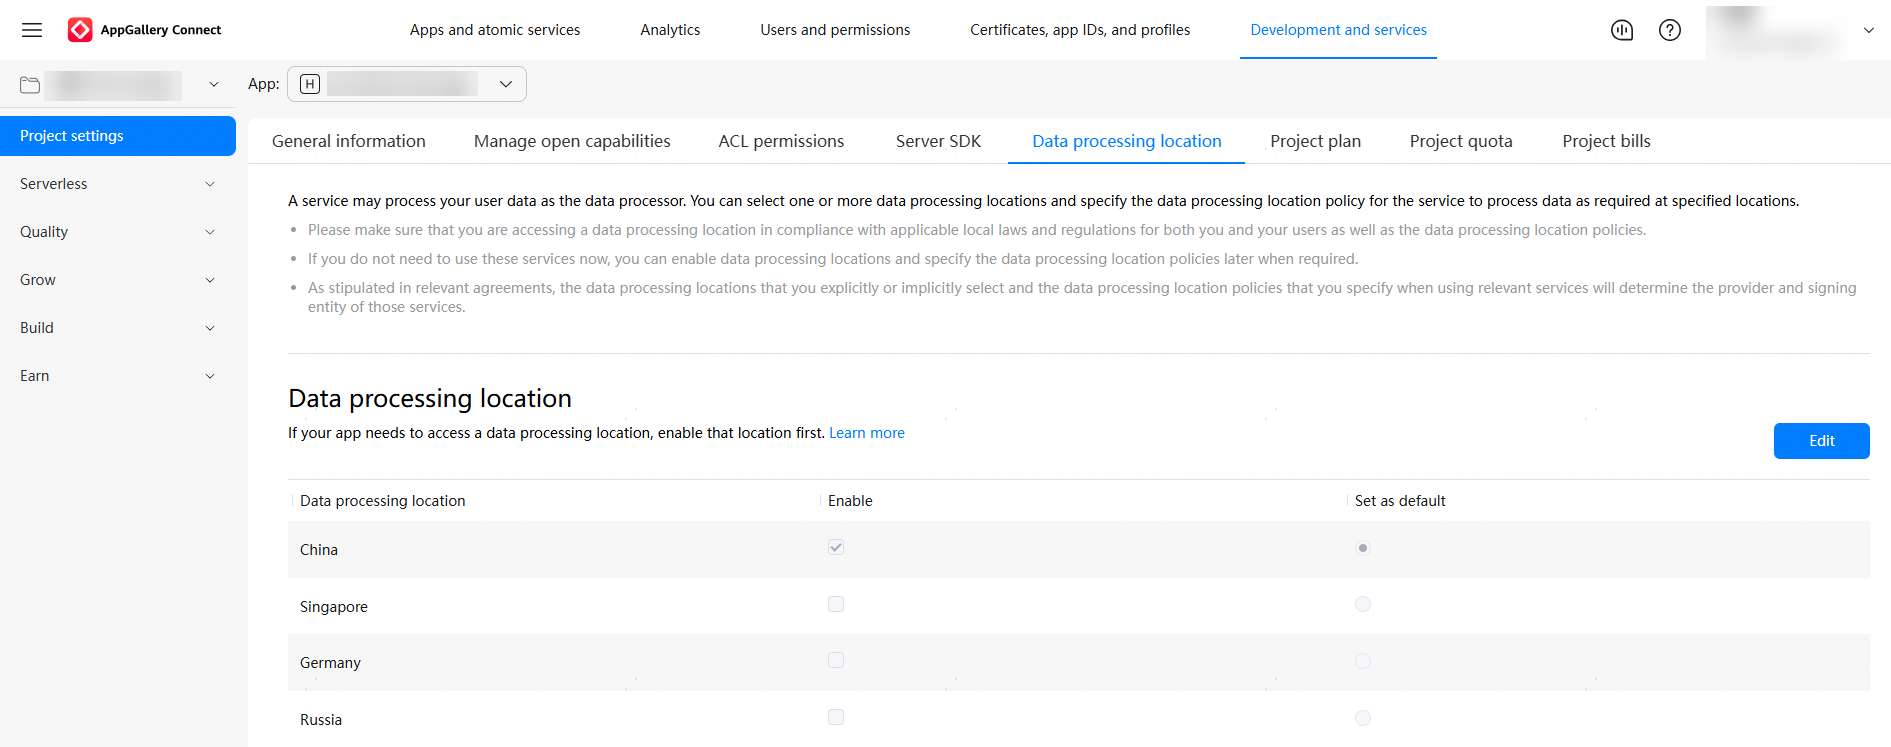
Click Save.
Intelligent Assistant
Chat with our virtual assistant to get answers promptly.
Quick start
Helps you find desired resources with ease.