Map Container
Currently, the Map SDK supports the following map containers: MapView, MapFragment, SupportMapFragment, TextureMapView, TextureMapFragment, and TextureSupportMapFragment. SupportMapFragment and MapView are commonly used map containers, which are described as follows:
- SupportMapFragment is a subclass of the Fragment class in Android. You can use it to place a map within a fragment. It can also function as a map container and provide an entry for accessing a HuaweiMap object.
- MapView is a subclass of the View class in Android. You can use it to place a map within an Android view. Like SupportMapFragment, MapView functions as a map container and displays core map functions through a HuaweiMap object. If you use the MapView class when calling APIs in normal interaction mode, you must call the following methods in the corresponding methods of your activity or fragment: onCreate(), onStart(), onResume(), onPause(), onStop(), onDestroy(), onSaveInstanceState(Bundle outState), and onLowMemory(). For details, please refer to the MapViewCodeDemoActivity.java file.
[h2]SupportMapFragment
The following describes how to create a map instance using SupportMapFragment.
- Add a fragment element in the layout file (for example, activity_main.xml), and set map attributes in the file.
<fragment xmlns:android="http://schemas.android.com/apk/res/android" xmlns:map="http://schemas.android.com/apk/res-auto" android:id="@+id/mapfragment_mapfragmentdemo" class="com.huawei.hms.maps.SupportMapFragment" android:layout_width="match_parent" android:layout_height="match_parent" map:cameraTargetLat="48.893478" map:cameraTargetLng="2.334595" map:cameraZoom="10" /> - To use a map in your app, implement the OnMapReadyCallback API. The sample code is as follows:
Java
public class SupportMapDemoActivity extends AppCompatActivity implements OnMapReadyCallback {
   ...
}
Kotlin class SupportMapDemoActivity : AppCompatActivity(),OnMapReadyCallback { ... } - Initialize the SDK, for example, in the onCreate method of the activity before loading the map. You can initialize the SDK in either of the following ways:
- MapsInitializer.initialize(Context context)
- MapsInitializer.initialize(Context context, String routePolicy) (This method allows you to set the data processing and routing location.)
Load SupportMapFragment and call getMapAsync() to register a callback after the initialization is complete.
The sample code is as follows:Java // Initialize the SDK. MapsInitializer.initialize(this); setContentView(R.layout.mapfragment_mapfragmentdemo); SupportMapFragment mSupportMapFragment; mSupportMapFragment = (SupportMapFragment) getSupportFragmentManager().findFragmentById(R.id.mapfragment_mapfragmentdemo); mSupportMapFragment.getMapAsync(this);Kotlin // Initialize the SDK. MapsInitializer.initialize(this); setContentView(R.layout.mapfragment_mapfragmentdemo); var mSupportMapFragment: SupportMapFragment? = null mSupportMapFragment = supportFragmentManager.findFragmentById(R.id.mapfragment_mapfragmentdemo) as SupportMapFragment? mSupportMapFragment?.getMapAsync(this)
You are advised to initialize the SDK after the user accepts the privacy statement.
- Call the onMapReady callback to obtain the HuaweiMap object. The sample code is as follows:
Java
public void onMapReady(HuaweiMap huaweiMap) {
    Log.d(TAG, "onMapReady: ");
    hMap = huaweiMap;
}
Kotlin override fun onMapReady(huaweiMap: HuaweiMap) { Log.d(TAG, "onMapReady: ") hMap = huaweiMap } - Run your project and then install your app to view the map in your app, as shown in the figure below.
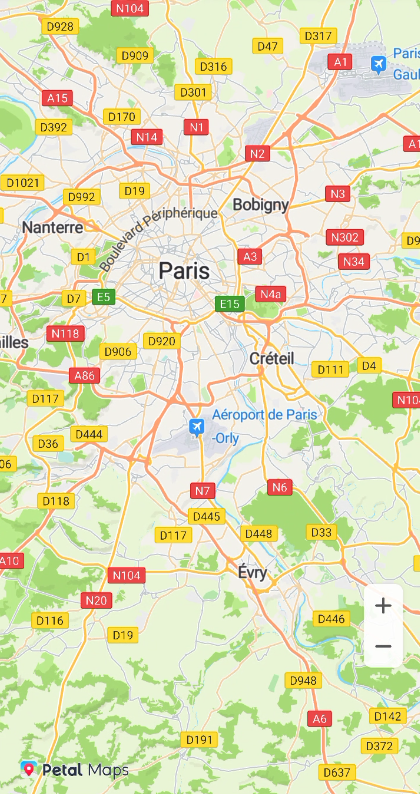
[h2]MapView
The following describes how to create a map instance using MapView.
- Add a MapView in the layout file, and set the map attributes in the file.
<com.huawei.hms.maps.MapView xmlns:android="http://schemas.android.com/apk/res/android" xmlns:map="http://schemas.android.com/apk/res-auto" android:id="@+id/mapview_mapviewdemo" android:layout_width="match_parent" android:layout_height="match_parent" map:cameraTargetLat="48.893478" map:cameraTargetLng="2.334595" map:cameraZoom="10"/> - To use a map in your app, implement the OnMapReadyCallback API. The sample code is as follows:
Java
public class MapViewDemoActivity extends AppCompatActivity implements OnMapReadyCallback {
   ...
}
Kotlin class MapViewDemoActivity : AppCompatActivity(), OnMapReadyCallback { ... } - In the onCreate() method of the activity, initialize the SDK, load MapView, and call getMapAsync() to register a callback. The sample code is as follows:
Java
// Initialize the SDK.
MapsInitializer.initialize(this);
MapView mMapView;
mMapView = findViewById(R.id.mapview_mapviewdemo);
Bundle mapViewBundle = null;
if (savedInstanceState != null) {
      mapViewBundle = savedInstanceState.getBundle("MapViewBundleKey");
}
mMapView.onCreate(mapViewBundle);
mMapView.getMapAsync(this);
Kotlin // Initialize the SDK. MapsInitializer.initialize(this); private lateinit var mMapView: MapView mMapView = findViewById(R.id.mapview_mapviewdemo) var mapViewBundle: Bundle? = null if (savedInstanceState != null) { mapViewBundle = savedInstanceState.getBundle("MapViewBundleKey") } mMapView.onCreate(mapViewBundle) mMapView.getMapAsync(this)
You are advised to initialize the SDK after the user accepts the privacy statement.
- Call the onMapReady callback to obtain the HuaweiMap object. The sample code is as follows:
Java
public void onMapReady(HuaweiMap huaweiMap) {
    Log.d(TAG, "onMapReady: ");
    hMap = huaweiMap;
}
Kotlin override fun onMapReady(huaweiMap: HuaweiMap) { Log.d(TAG, "onMapReady: ") hMap = huaweiMap } - Call the onStart(), onResume(), onPause(), onStop(), onDestroy(), onSaveInstanceState(Bundle outState), and onLowMemory() methods of the MapView class in corresponding methods of your activity or fragment. The sample code is as follows:
Java
private static final String MAPVIEW_BUNDLE_KEY = "MapViewBundleKey";

@Override
public void onSaveInstanceState(Bundle outState) {
    super.onSaveInstanceState(outState);

    Bundle mapViewBundle = outState.getBundle(MAPVIEW_BUNDLE_KEY);
    if (mapViewBundle == null) {
        mapViewBundle = new Bundle();
        outState.putBundle(MAPVIEW_BUNDLE_KEY, mapViewBundle);
    }

    mMapView.onSaveInstanceState(mapViewBundle);
}

@Override
protected void onStart() {
    super.onStart();
    mMapView.onStart();
}

@Override
protected void onResume() {
    super.onResume();
    mMapView.onResume();
}

@Override
protected void onPause() {
    super.onPause();
    mMapView.onPause();
}

@Override
protected void onStop() {
    super.onStop();
    mMapView.onStop();
}

@Override
protected void onDestroy() {
    super.onDestroy();
    mMapView.onDestroy();
}

@Override
public void onLowMemory() {
    super.onLowMemory();
    mMapView.onLowMemory();
}
Kotlin companion object { private const val MAPVIEW_BUNDLE_KEY = "MapViewBundleKey" } override fun onSaveInstanceState(outState: Bundle?) { super.onSaveInstanceState(outState) var mapViewBundle: Bundle? = outState?.getBundle(MAPVIEW_BUNDLE_KEY) if (mapViewBundle == null) { mapViewBundle = Bundle() outState?.putBundle(MAPVIEW_BUNDLE_KEY, mapViewBundle) } mMapView.onSaveInstanceState(mapViewBundle) } override fun onStart() { super.onStart() mMapView.onStart() } override fun onResume() { super.onResume() mMapView.onResume() } override fun onPause() { super.onPause() mMapView.onPause() } override fun onStop() { super.onStop() mMapView.onStop() } override fun onDestroy() { super.onDestroy() mMapView.onDestroy() } override fun onLowMemory() { super.onLowMemory() mMapView.onLowMemory() }
When creating a map using MapView, you must override the onDestroy() method of your activity or fragment so that the onDestroy() method of MapView can be called, preventing the created map from memory leaks. When creating a map using multi-entity objects such as ListView or RecyclerView, you also need to call the onDestroy() method of each entity. Otherwise, memory leaks may occur.
- Run your project and then install your app to view the map in your app, as shown in the figure below.

Setting the API Key
In the Map SDK 5.0.0.300 or later for Android, you must set the API key in either of the following ways before initializing the map:
Way 1: Directly copy the API key in api_key in the agconnect-services.json file.
- Set the API key in the entry class of your project. The sample code is as follows:
Java
// In the entry class (inherited from android.app.Application) of the app, call this method in the overridden onCreate() method.
public class MyApp extends Application {
    @Override
    public void onCreate() {
        super.onCreate();
        // Set the API key.
        MapsInitializer.setApiKey("Your API key");
    }
}
Kotlin
// In the entry class (inherited from android.app.Application) of the app, call this method in the overridden onCreate() method.
class MyApp : Application() {
    override fun onCreate() {
        super.onCreate()
        // Set the API key.
        MapsInitializer.setApiKey("Your API key")
    }
}
- Set the API key in Fragment or MapView. The sample code is as follows:
Java
@Override
protected void onCreate(Bundle savedInstanceState) {
    Log.i(TAG, "onCreate: ");
    super.onCreate(savedInstanceState);
    // Set the API key before calling setContentView.
    MapsInitializer.setApiKey("Your API key");
    setContentView(R.layout.basic_demo);
}
Kotlin
override fun onCreate(savedInstanceState: Bundle?) {
    Log.i(TAG, "onCreate: ")
    super.onCreate(savedInstanceState)
    // Set the API key before calling setContentView.
    MapsInitializer.setApiKey("Your API key")
    setContentView(R.layout.basic_demo)
}

- If you use MapsInitializer.setApiKey(String apiKey) to set the API key, ensure that the value of apiKey is the same as that of api_key in the agconnect-services.json file.
- If an API key is set using the MapsInitializer.setApiKey method and the agconnect-services.json file also has an API key, the API key set using this method takes precedence.