You can add a custom overlay on the map.
Adding a Custom Image Overlay and a Text Box Overlay
JavaScript
var map, overlayPopup;
var popup = document.querySelector('#popup')
var popup_content = popup.querySelector('.popup_content')
var popup_close = popup.querySelector('.close')

function initMap() {
    var mapOptions = {};
    mapOptions.center = {lat: 48.856613, lng: 2.352222};
    mapOptions.zoom = 8;
    map = new HWMapJsSDK.HWMap(document.getElementById('map'), mapOptions);

    // Initialize the HWOverlay marker image.
    overlayMarker = new HWMapJsSDK.HWOverlay({
        map: map,
        content: '<div id="marker"></div>',
        stopEvent: true,
        position: map.getCenter()
    });

    // Initialize HWOverlay.
    overlayLabel = new HWMapJsSDK.HWOverlay({
        map: map,
        offset: [40, -10],
        stopEvent: true,
        position: map.getCenter()
    });

    // Set the overlay (textarea text box).
    overlayLabel.setContent('<textarea id="label" placeholder="label" cols="10" rows="2"></textarea>')
}
HTML
html,
body {
    margin: 0;
    padding: 0;
    height: 100%;
    width: 100%;
}
#map {
    height: 100%;
    width: 100%;
    margin: 0 auto;
}
#marker {
    background: url('./marker-with-dot.png');
    user-select: none;
    width: 48px;
    height: 48px;
}
#label {
    padding: 2px;
    text-indent: 2px;
}
#popup {
    position: absolute;
    opacity: 0;
    max-width: 276px;
    padding: 1;
    font: 400 14px Arial, Helvetica, sans-serif;
    line-height: 1.3;
    background-color: #fff;
    border: 1px solid rgba(0, 0, 0, .2);
    border-radius: 6px;
    box-shadow: 0 5px 10px rgba(0, 0, 0, .2);
}
#popup::after {
    width: 0;
    height: 0;
    content: '';
    display: block;
    border: 10px solid transparent;
    border-top-color: #fff;
    position: absolute;
    left: calc(50% - 10px);
}
.popover_title {
    border-bottom: 1px solid rgba(0, 0, 0, .2);
    padding: 10px;
    margin: 0;
}
.close {
    float: right;
    user-select: none;
    cursor: pointer;
}
.popup_content {
    padding: 10px;
    word-wrap: break-word;
    max-width: 200px;
    text-align: center;
}
<div id="map">
        <div id="popup">
            <h3 class="popover_title">overlayPopup
                <span class="close">x</span>
            </h3>
            <div class="popup_content"></div>
        </div>
</div>
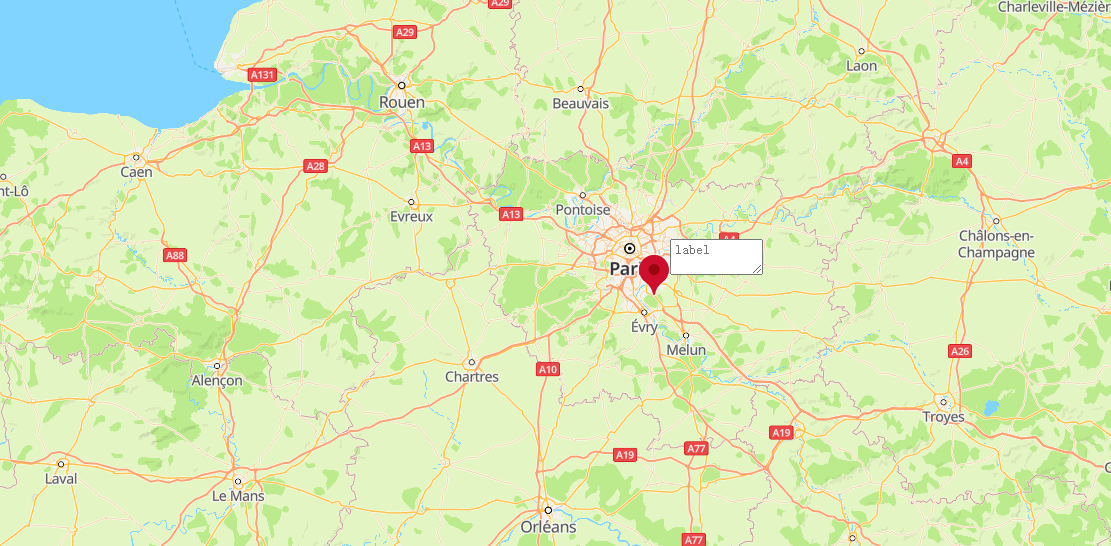
The sample code adds a custom image overlay and a text box overlay at longitude-latitude point (48.85, 2.35), as shown in the figure below.
Adding a Custom Popup Overlay
Call the HWMapJsSDK.HWOverlay(overlayOptions) method to create a custom popup overlay on the map.
// Initialize the HWOverlay popup.
overlayPopup = new HWMapJsSDK.HWOverlay({
    map: map,
    content: popup,
    stopEvent: false
});

// Set that the overlay does not support penetration.
overlayPopup. setStopEvent(true)

// Listen for map tap events, and bind the map instance.
map.on('click', function (e) {
    overlayPopup.setMap(map)
    const coordinate = HWMapJsSDK.HWMapUtils.epsgToLatLng(e.coordinate);
    Popup.setText(JSON.stringify(coordinate))
    // Set the position of the popup overlay.
    overlayPopup.setPosition(coordinate)
})

// Unbind the map instance.
popup_close.onclick = function () {
    overlayPopup.setMap(null)
}

// Build the popup method.
class Popup {
    static async setText(text) {
        popup.style.opacity = 1
        popup_content.innerText = await text
        Popup.setStyle()
    }
    static async setStyle() {
        popup.style.left = (-popup.offsetWidth / 2) + 'px'
        popup.style.top = (-popup.offsetHeight - 10) + 'px'
    }
}
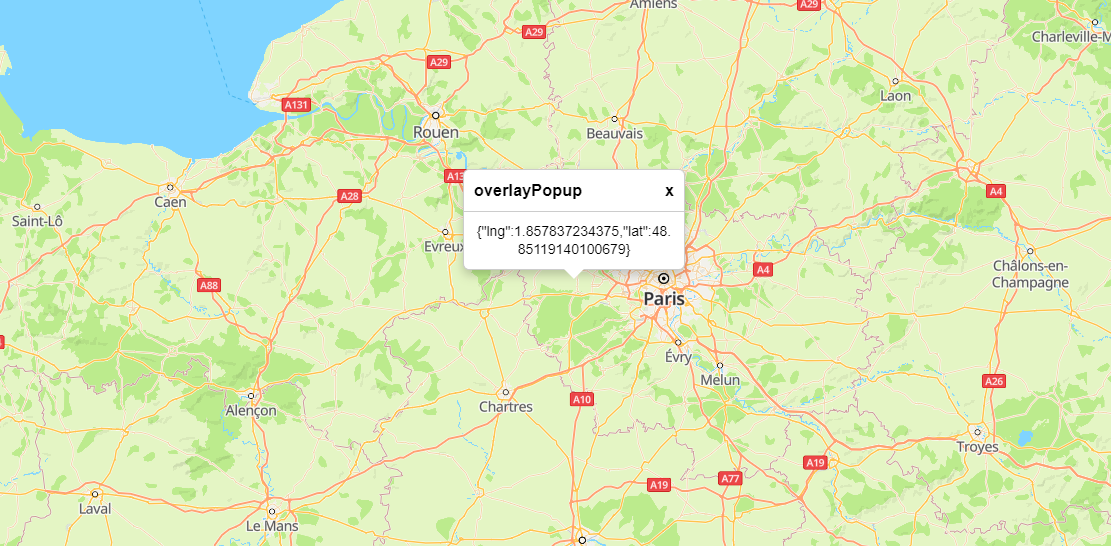
The sample code adds a custom popup overlay on the map, as shown in the figure below.
Deleting a Custom Overlay
To remove a custom overlay from a map, call the setMap() method and pass null as a parameter of the method.
// Unbind the map instance.
popup_close.onclick = function () {
    overlayPopup.setMap(null)
}
Modifying a Custom Overlay
Call methods provided by HWOverlay to modify overlay attributes. For example, call the setContent(content) method to modify the overlay content.
// Modify the overlay content.
overlayLabel.setContent('<textarea id="label" placeholder="label" cols="10" rows="2"></textarea>')
The following table describes overlay attributes that can be customized. For details, please refer to HWOverlay Methods.
| Attribute | Description |
|---|---|
| setContent(content) | Sets the overlay content. |
| setMap(map) | Sets the map to which an overlay is bound. |
| setPosition(latLng) | Sets the overlay position. |
| setStopEvent(boolean) | Sets whether an overlay supports penetration. |