
Funnel analysis allows you to customize a user behavior funnel to analyze the conversion rates in key steps and find key nodes that affect user experience and conversion, providing a basis for product optimization.
Sign in to AppGallery Connect and select "My projects".
Click the app for which you need to view analytics data.
Click "Analyze > Funnel Analysis". The Funnel analysis page is displayed.
On the Audience analysis page, you can:
View a list of created funnels, including the basic information about each funnel, such as the name, and creation time.
Click Add funnel at the upper right corner of the Funnel analysis page to add a funnel. There are three types of predefined funnels, and funnels can also be customized. A new funnel takes effect on the next day.
To create a predefined funnel:
1) Create a registration conversion funnel.
Scenario: Analyze the conversion rates of users installing, registering with, and signing in to an app.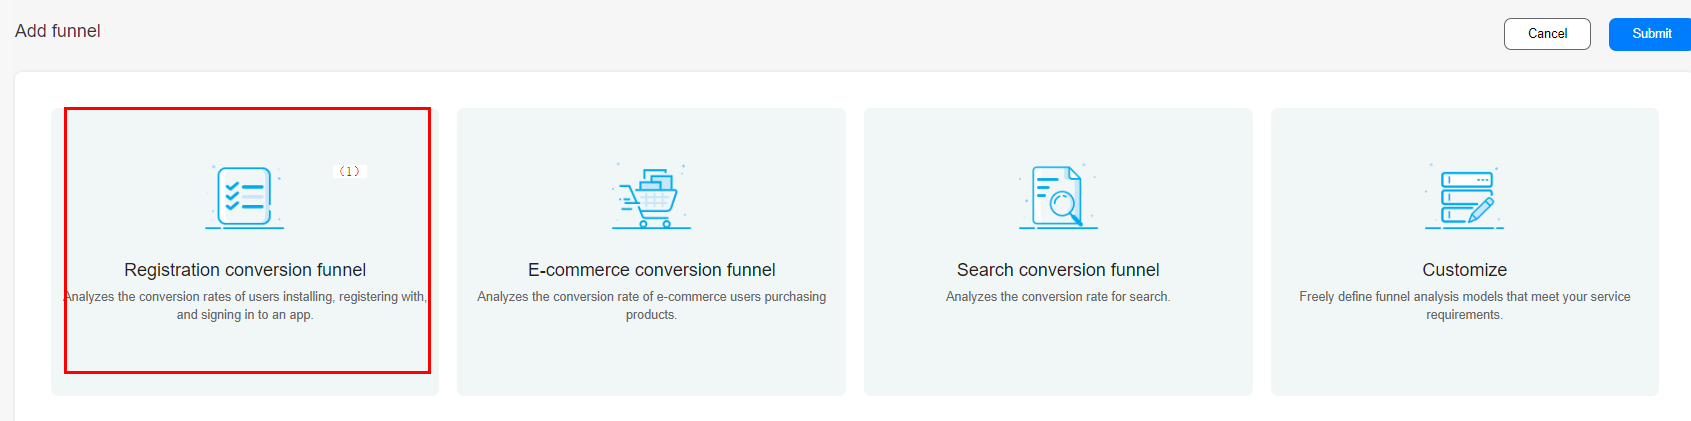
In area (1), click Registration conversion funnel to go to the Add funnel page. The funnel name and description have been predefined in the system. You can also edit them.
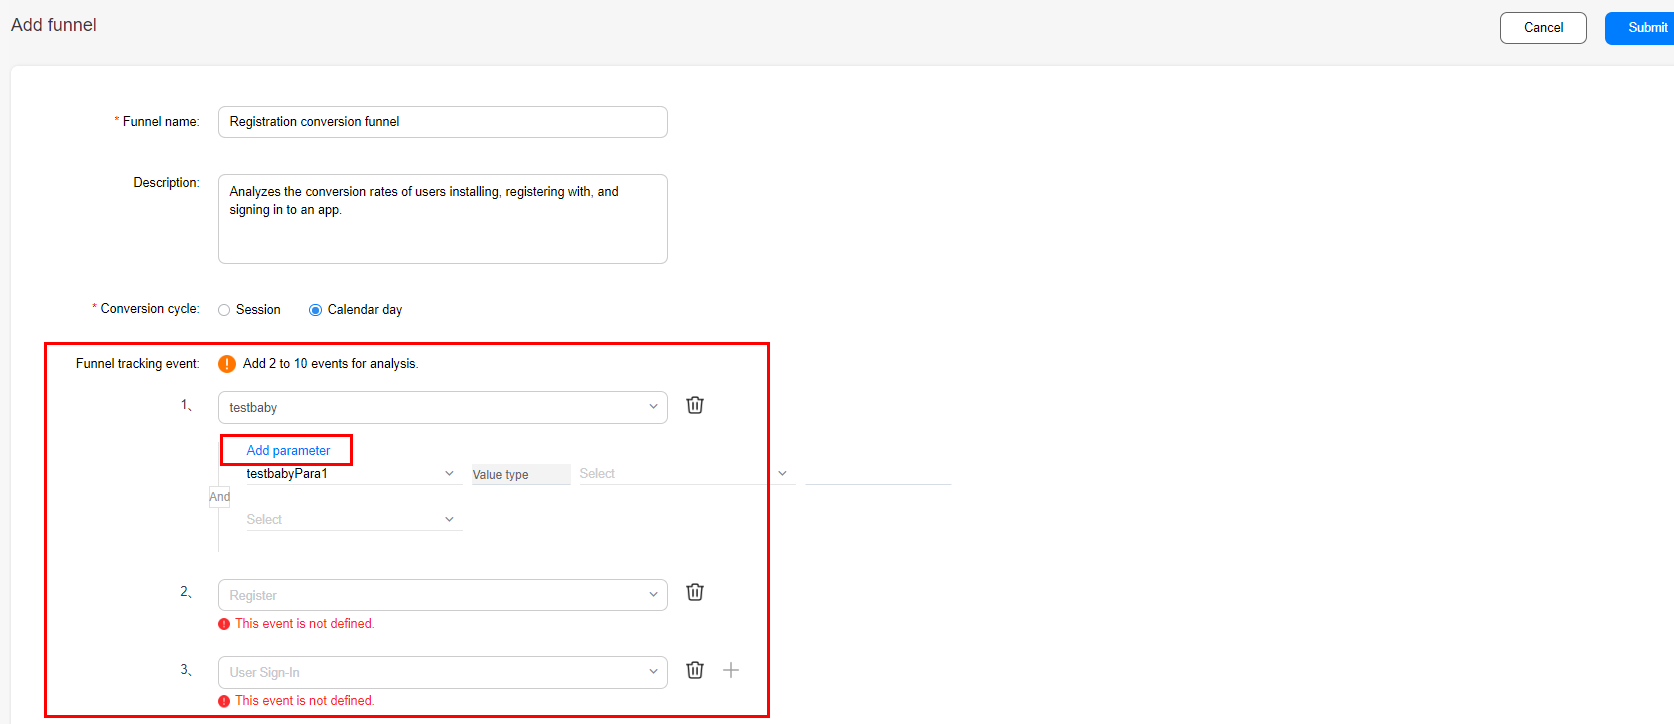
The following table describes the related parameters.
Parameter | Description |
Funnel name | Enter a funnel name that is easy to remember and understand. |
Description | Enter the purpose and business semantics of this funnel. |
Conversion cycle | Select the mode of calculating conversion events: by session or by calendar day. The difference lies in the time limit for the user to complete the funnel. By session: A successful conversion is the process proceeding from the first step to the last step in the same session. By calendar day: A successful conversion is the process proceeding from the first step to the last step on the same calendar day. |
Funnel tracking event | Add events to be tracked based on your service scenario. You need to add 2 to 10 events. |
Add parameter | Add parameters to a tracking event for so that event parameters can be filtered to meet refined operation requirements. A maximum of 10 parameters can be added. |
The following table lists the preset events used by the funnel.
No. | Event |
1 | STARTApp |
2 | REGISTERACCOUNT |
3 | SIGNIN |
2) Create an e-commerce conversion funnel.
Scenario: Analyze the conversion rate of e-commerce users purchasing products.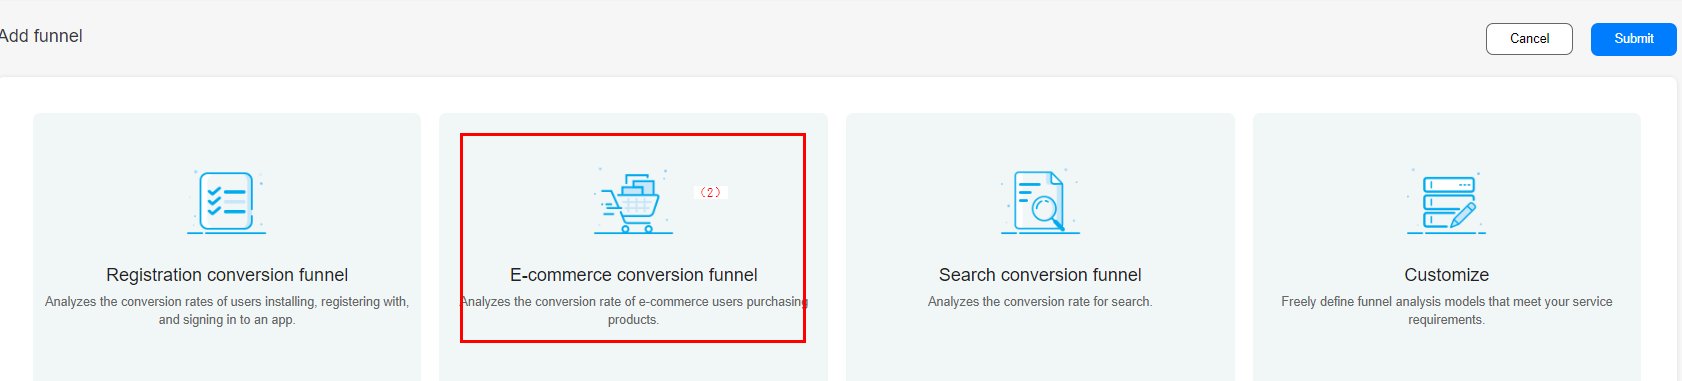
In area (2), click E-commerce conversion funnel to go to the Add funnel page. The funnel name and description have been predefined in the system. You can also edit them.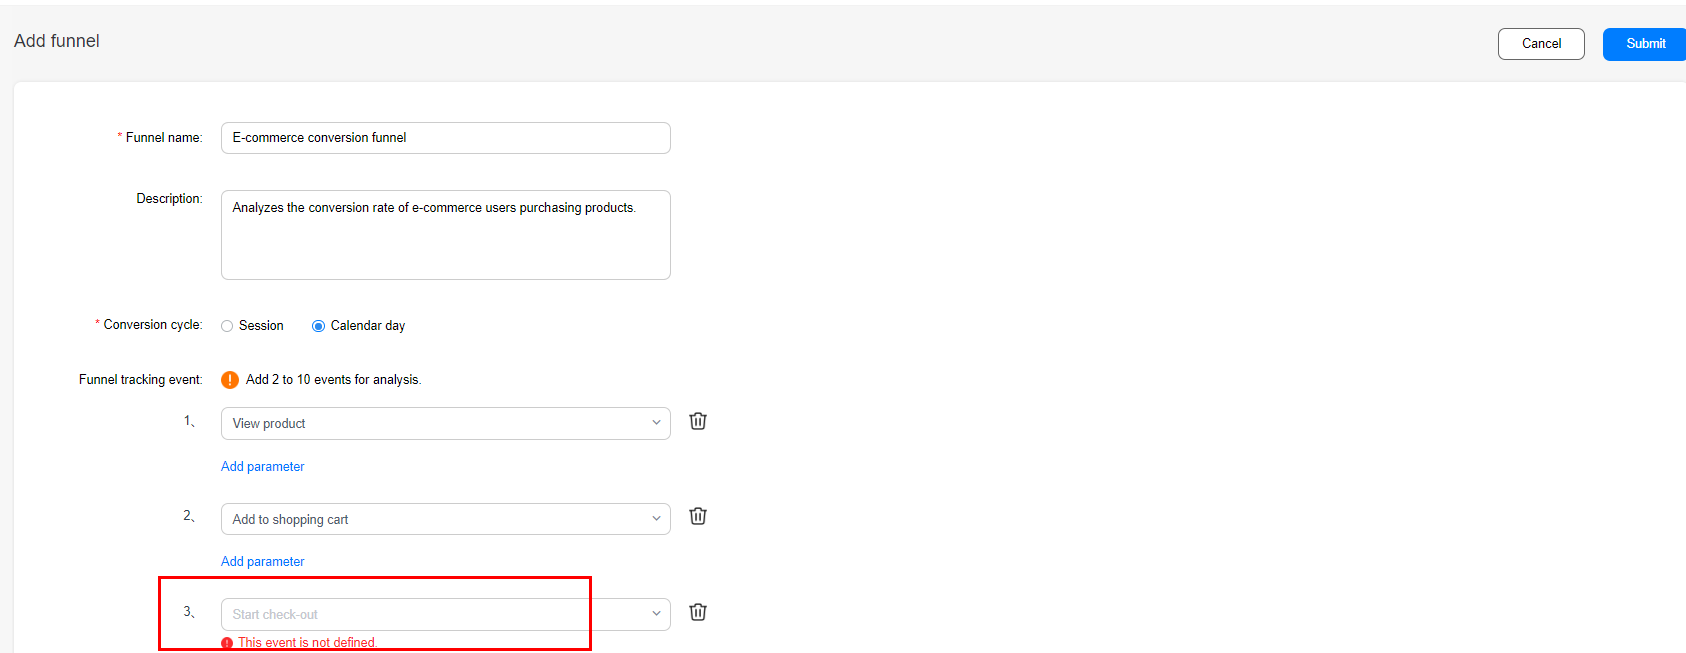
For details about the parameters, see Creating a Registration Conversion Funnel.
The preset events used by the funnel are as follows:
No. | Event |
1 | VIEWPRODUCT |
2 | ADDPRODUCT2CART |
3 | STARTCHECKOUT |
4 | COMPLETEPURCHASE |
5 | REFUNDORDER |
3) Create a search conversion funnel.
Scenario: Analyze the conversion rate of user search.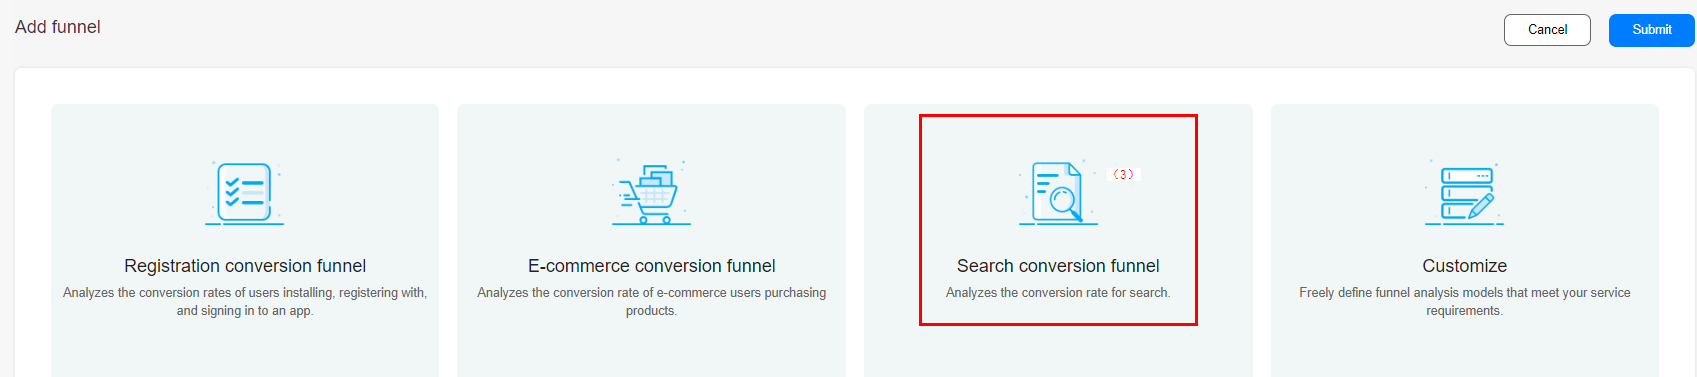
In area (3), click Search conversion funnel to go to the Add funnel page. The funnel name and description have been predefined in the system. You can also edit them.
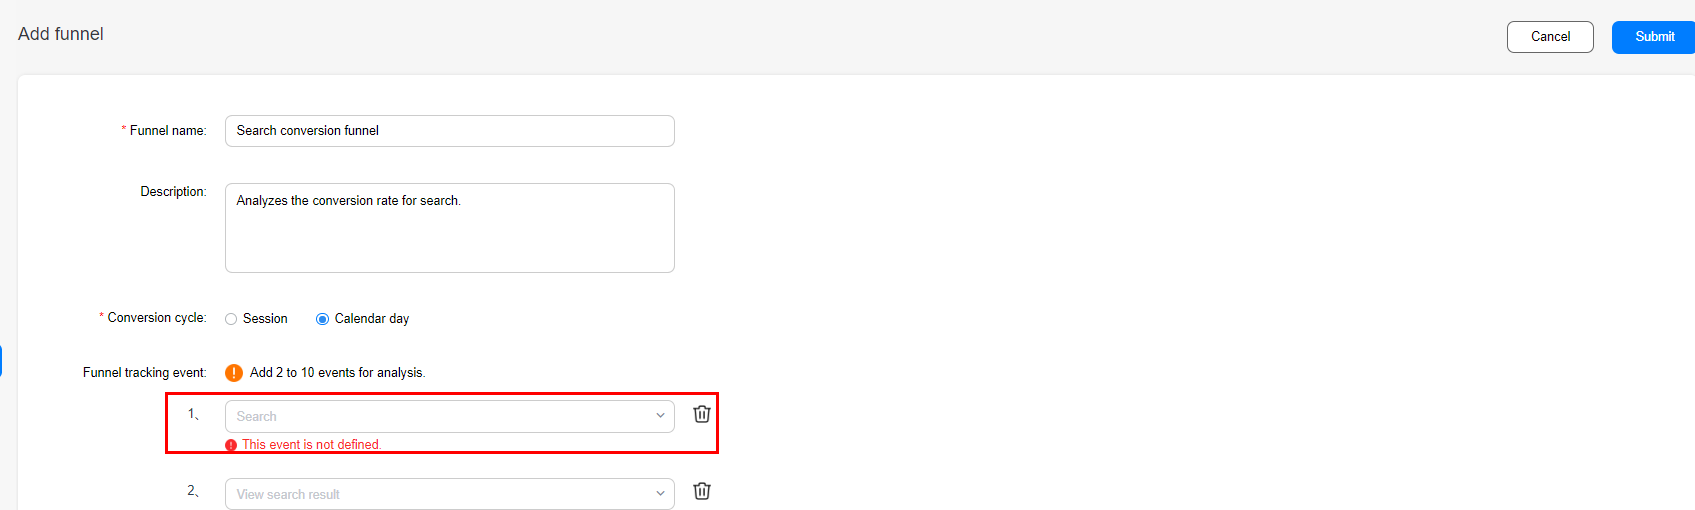
For details about the parameters, see Creating a Registration Conversion Funnel.
The preset events used by the funnel are as follows:
No. | Event |
1 | SEARCH |
2 | VIEWSEARCHRESULT |
3 | VIEWPRODUCT |
4) To create a custom funnel:
In area (4), click Customize to go to the Add funnel page. For details about the parameters, see Creating a Registration Conversion Funnel.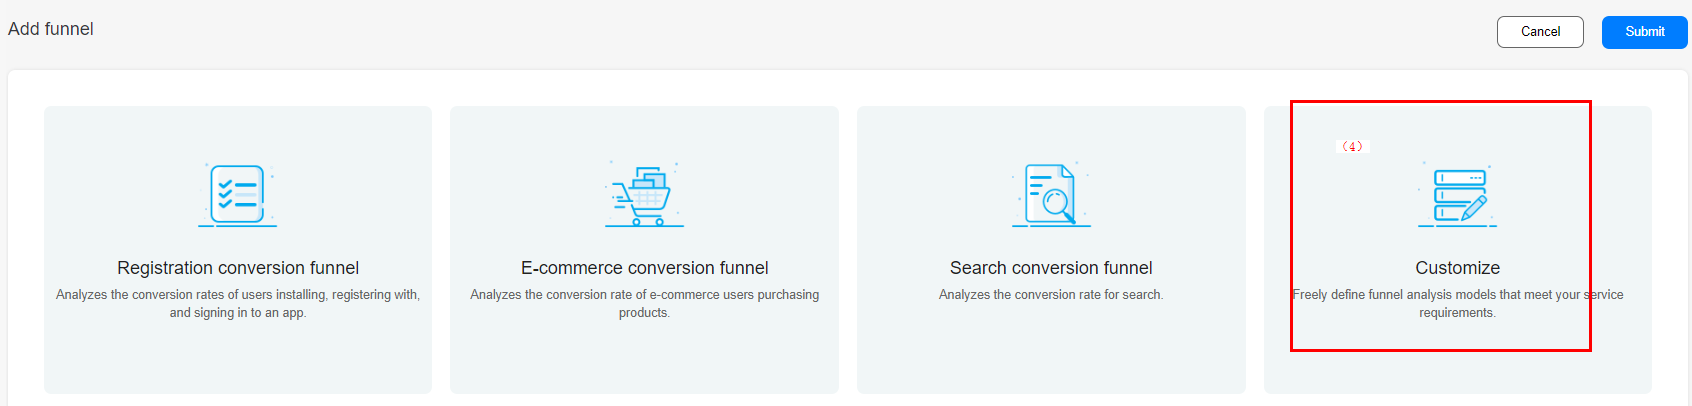
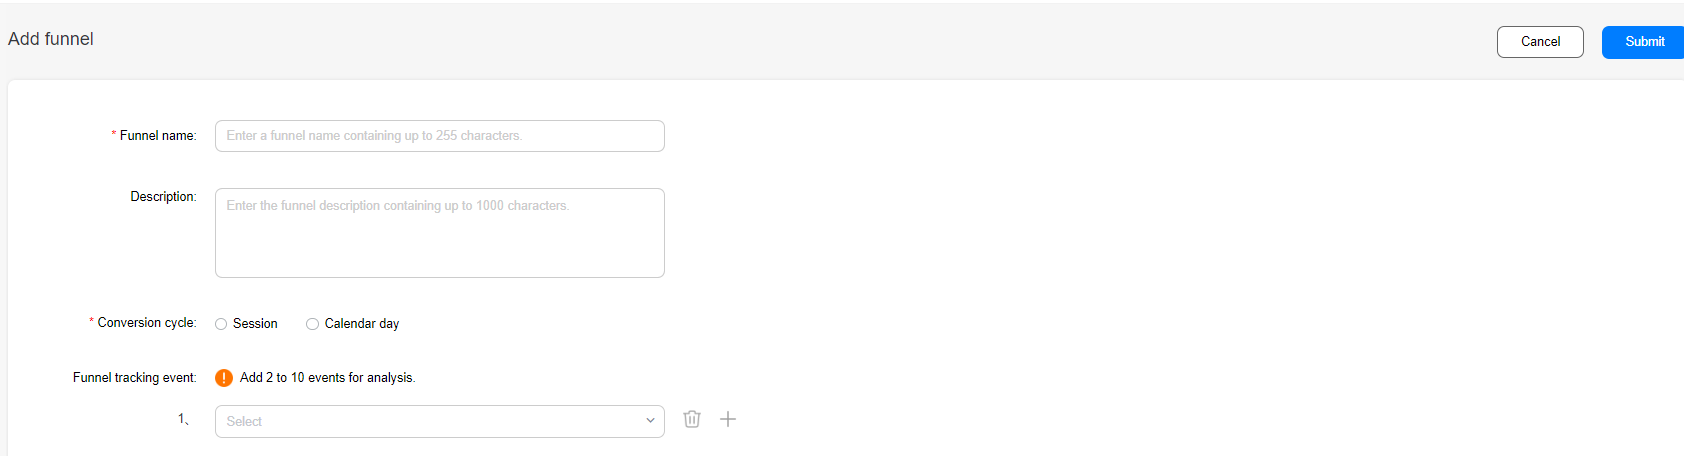
To modify the name and description of a funnel you created, click Edit in the Operation column on the Funnel analysis page.
To delete a funnel you created, click Delete in the Operation column.
Click the name of a funnel on the Funnel analysis page to view the funnel analysis report.
In area (1), you can use the filter control to filter audiences and user attributes. In area (2), you can use the date control to set the analysis time range. In area (3), you can use the filter control to add user attributes and audiences for comparison analysis.
1) View the funnel conversion.
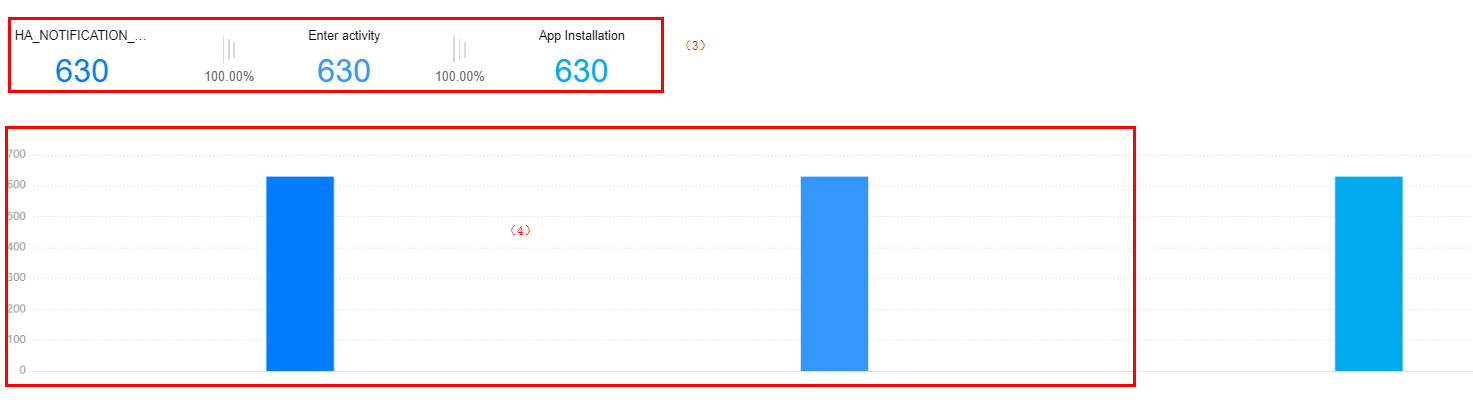
In area (1), you can switch between two indicators (number of users and number of events) to view conversion information.
Area (2) shows the overall conversion rate. The conversion rate is calculated as follows: Number of users (or events) of the last event tracked/Number of users (or events) of the first event tracked x 100%
Area (3) shows the number of users (or events) of each event in the sequence defined in the funnel and calculates the conversion rate when users go from one event to the next event.
Area (4) shows the user quantity of each event (or event count) in a column chart, clearly representing the conversion trend.
2) Viewing funnel details
This report displays detailed funnel data. You can click Download report at the upper right corner to download data for personalized analysis. Click a user count to create audiences so that you can perform personalized in-depth analysis on the users who flow in or out of the funnel at a certain step or have messages pushed to the users.
As shown in the preceding figure, you can click the user count for a specific conversion event to save the inflow and outflow users of the funnel as audiences.
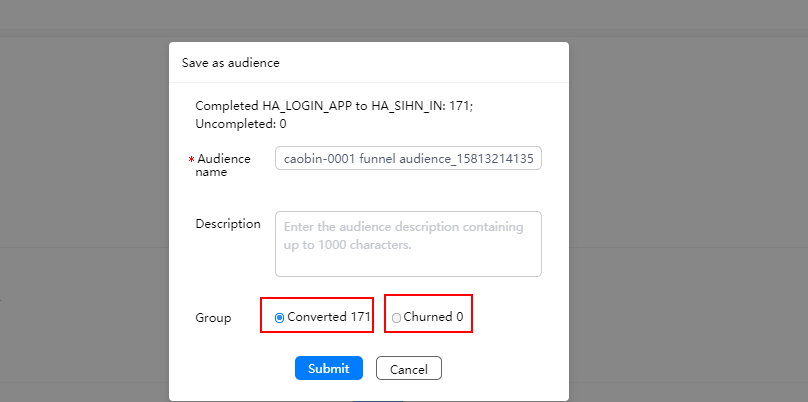
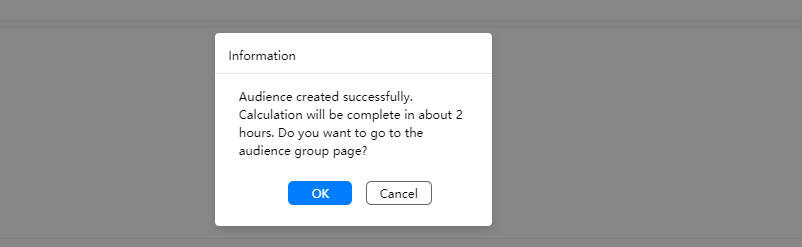
After you click Submit and then OK, the created audiences are displayed in the audience list on the audience analysis page.
3) Adding comparison analysis
You can perform comparison analysis on a specific indicator by the app type, app, user attribute, or audience. For example, you can compare the funnel conversion rates of different device models or perform drill-down analysis for user categories.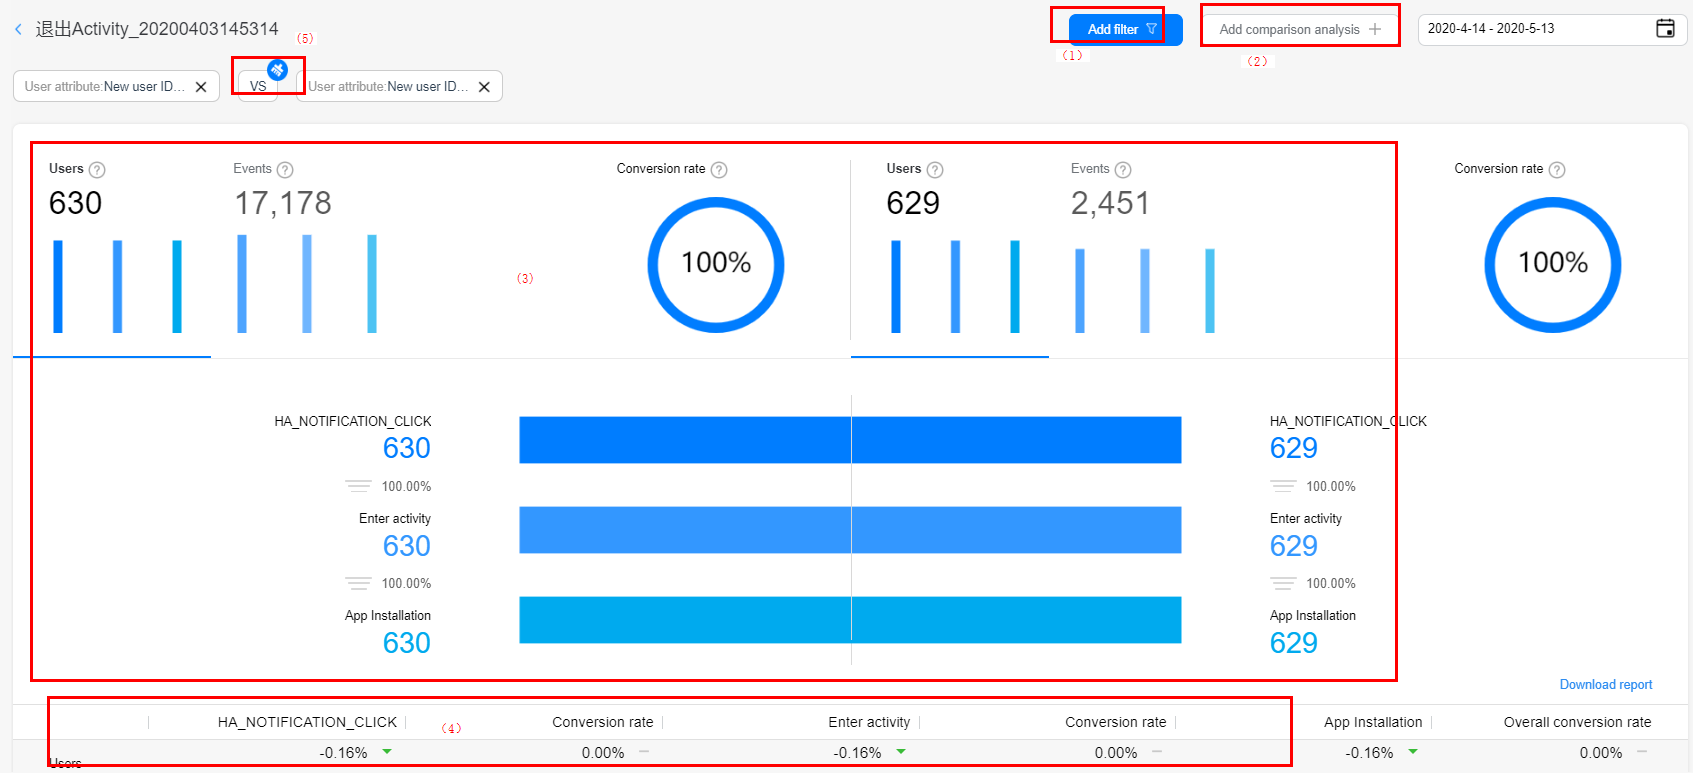
Click Add filter in area (1) to add filters, and click Add comparison analysis in area (2) to add comparison conditions. Then, the comparison result is displayed in area (3) and comparison details are displayed in the table in area (4). To clear the comparison conditions, click VS in area (5).
Funnel name: 255 characters at maximum.
Event description: 1000 characters at maximum.
Number of funnels for a project: 100 at maximum.
Effective time of a new or modified funnel: T+1 day.