This section is intended for operations personnel and developers.
You can use the HUAWEI Push Kit console in AppGallery Connect to configure and manage your rights on HUAWEI Push Kit, send messages, and view detailed messaging reports.
Before using the HUAWEI Push Kit console in AppGallery Connect to send messages, you must enable HUAWEI Push Kit and configure related rights, including Receipt status, iOS push agent, Web push agent, and Receive uplink message.
Enable the Push API rights. For details, please refer to Enabling Services.
To enable Push Kit, click Enable now on the console home page and Setting HUAWEI Push Kit Parameters.
Currently, the rights include Receipt status, iOS push agent, Web push agent, and Receive uplink message. Enable and configure them as required.
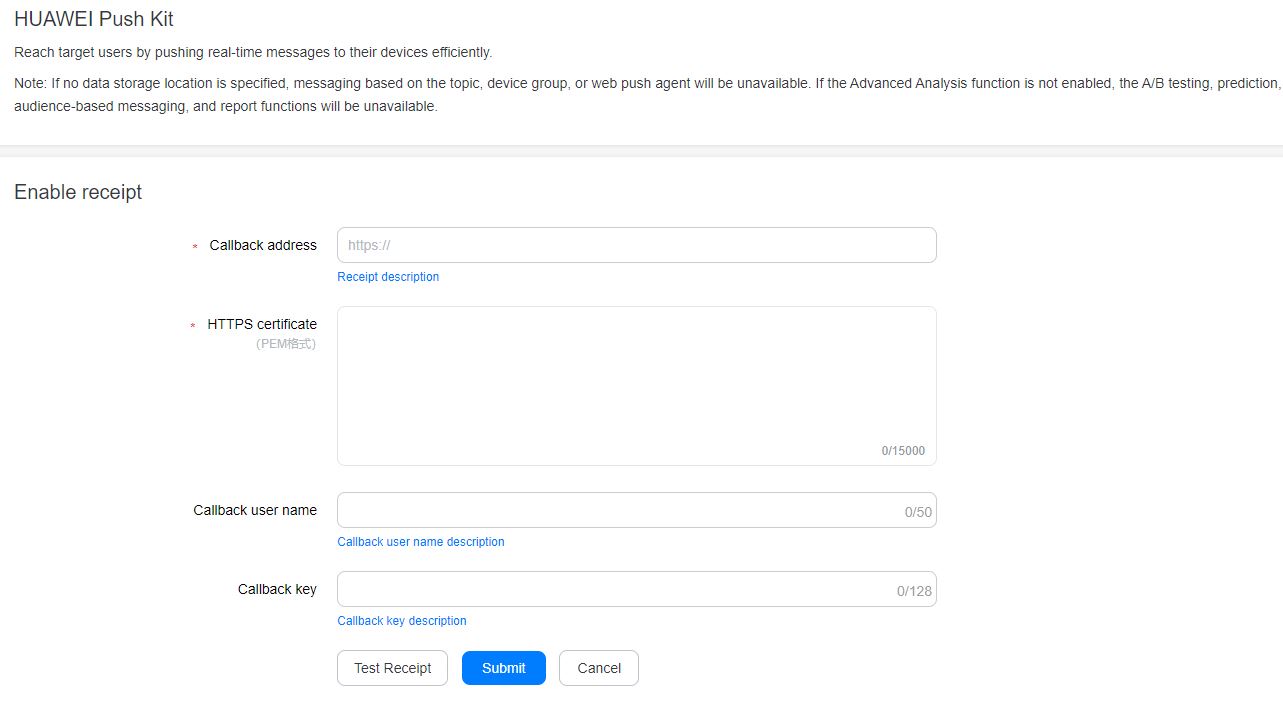
1. Set the message receipt callback address to the URL for receiving your message receipts.
2. Configure the HTTPS certificate.
3. Configure the callback user name and callback key (optional) for authentication.
4. Click Test Receipt to test the receipt callback address. After completing the test, click Submit. The service enabling process ends.
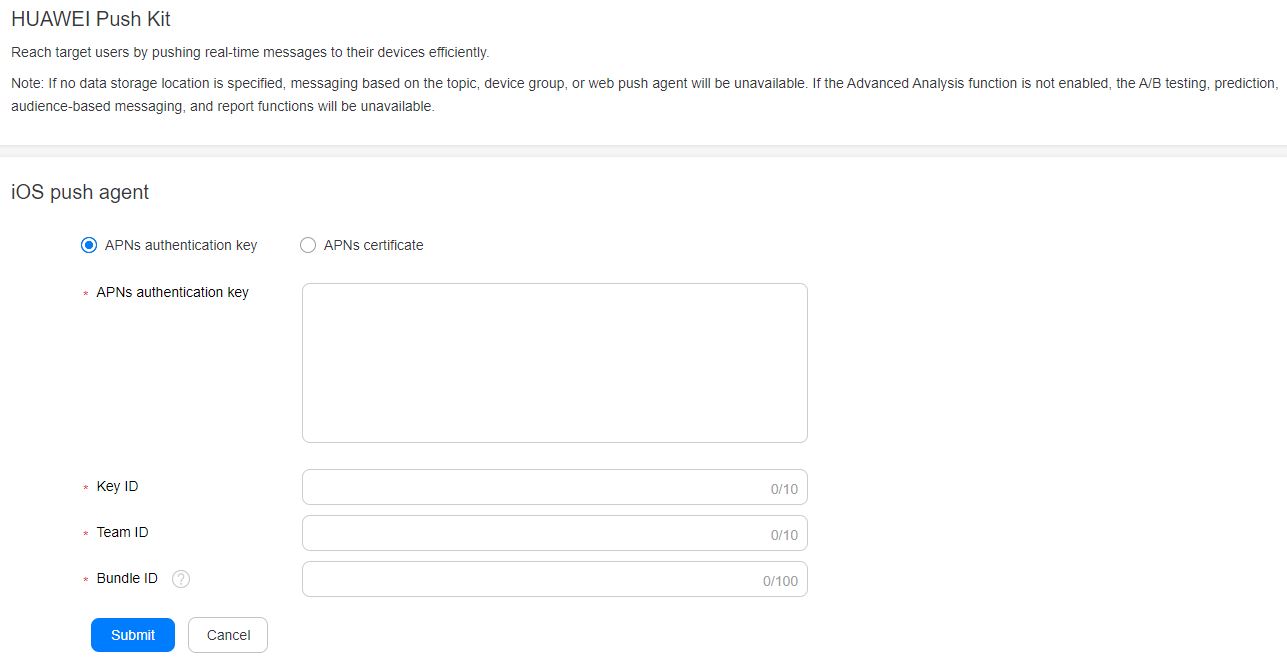
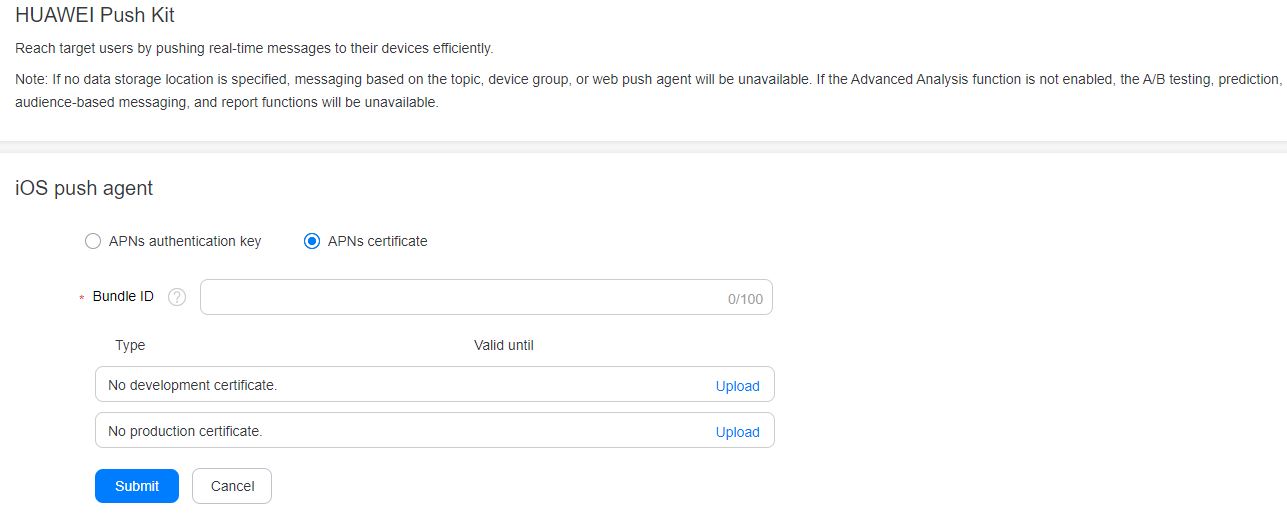
After enabling the iOS push agent, upload the APNs authentication key or certificate that you have applied for on Apple Developer.
1. Upload your APNs authentication key.
2. Upload your APNs certificate. You can upload multiple certificates.
Click Generate key pair to generate a valid key pair.

After clicking Enable, you need to set Destination URL and HTTPS certificate (in PEM format).
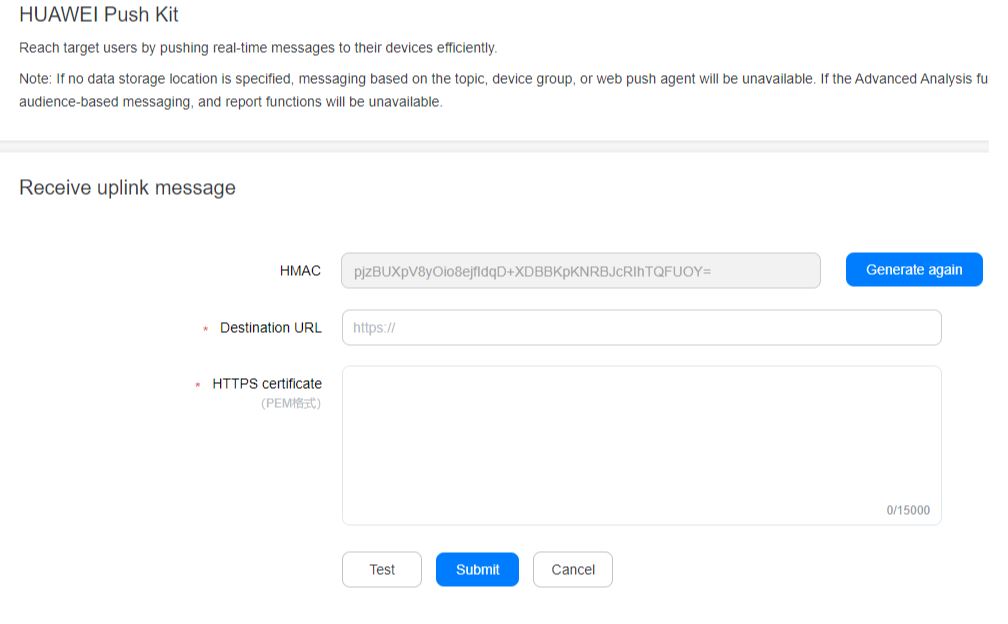
You can send messages on the HUAWEI Push Kit console in AppGallery Connect as described in the following:
Send notification messages and data messages to Android apps.
Send notification messages to Huawei quick apps.
Specify the push scope, which can be a specified device, audience, subscriber, or all users.
Create one-off or periodic messaging tasks.
Sign in to AppGallery Connect and select My projects. Find your project from the project list and click the app for which you need to send messages. Go to Growing > Push Kit > Notifications. Then click Add notification.
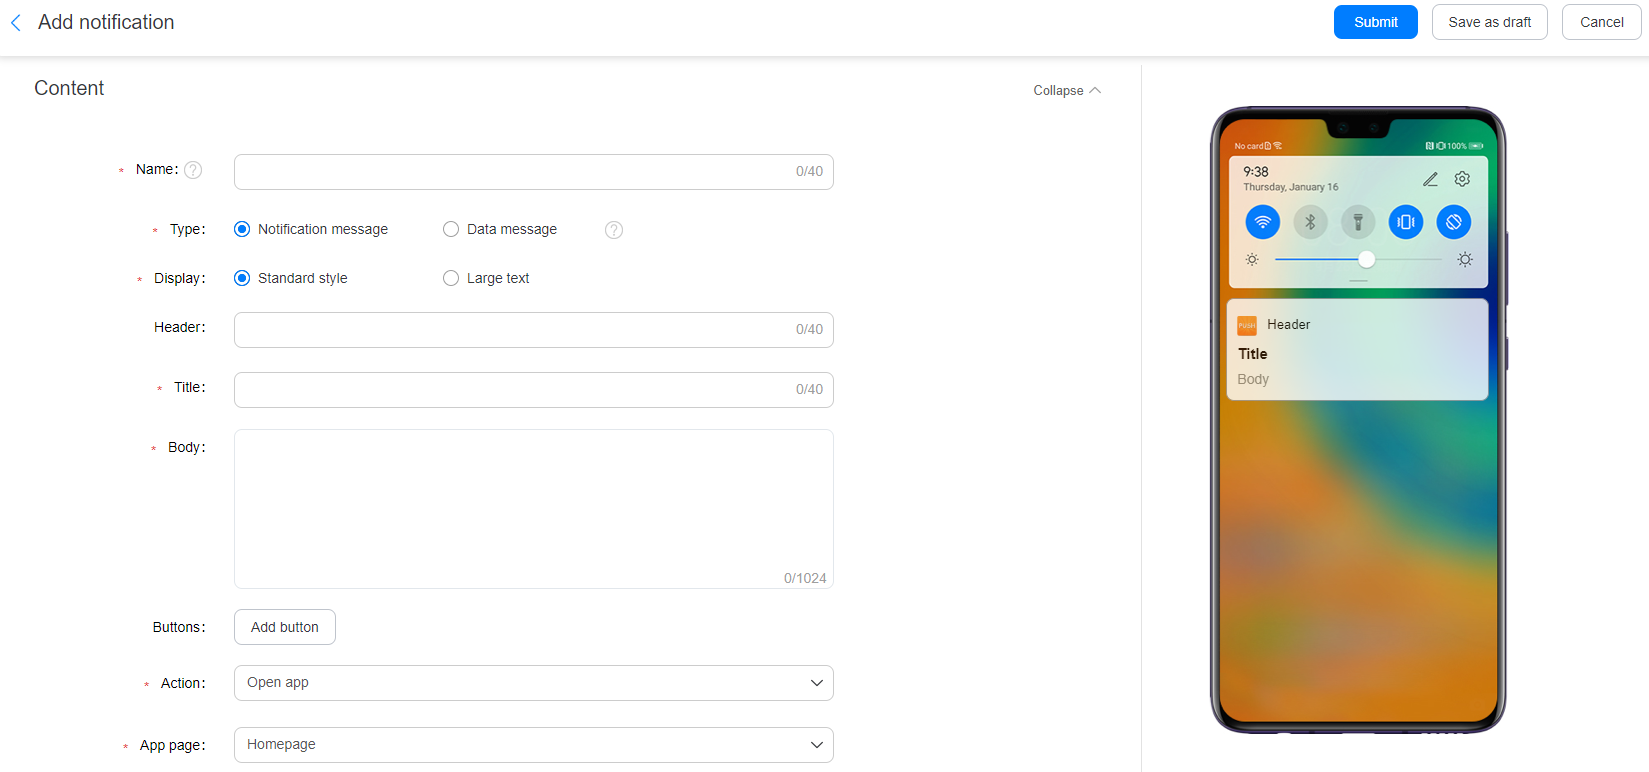
Step 1: Set the basic information about the message content.
The basic information includes Name (messaging task name), Type, Display, Title, and Body. A message body in standard style displays only one line of text. A message body in large text style can display multiple lines of text. However, the number of lines in a message body is restricted by the Android native system. The value of Title can contain a maximum of 40 characters, and that of Body can contain a maximum of 1024 characters. The view on the right dynamically shows the message abstract, title, body, and button name that you have configured.
Step 2: Add a button.
You can customize the button name and select an action for the button, including Open app, Open web page, Clear notification, and Share.
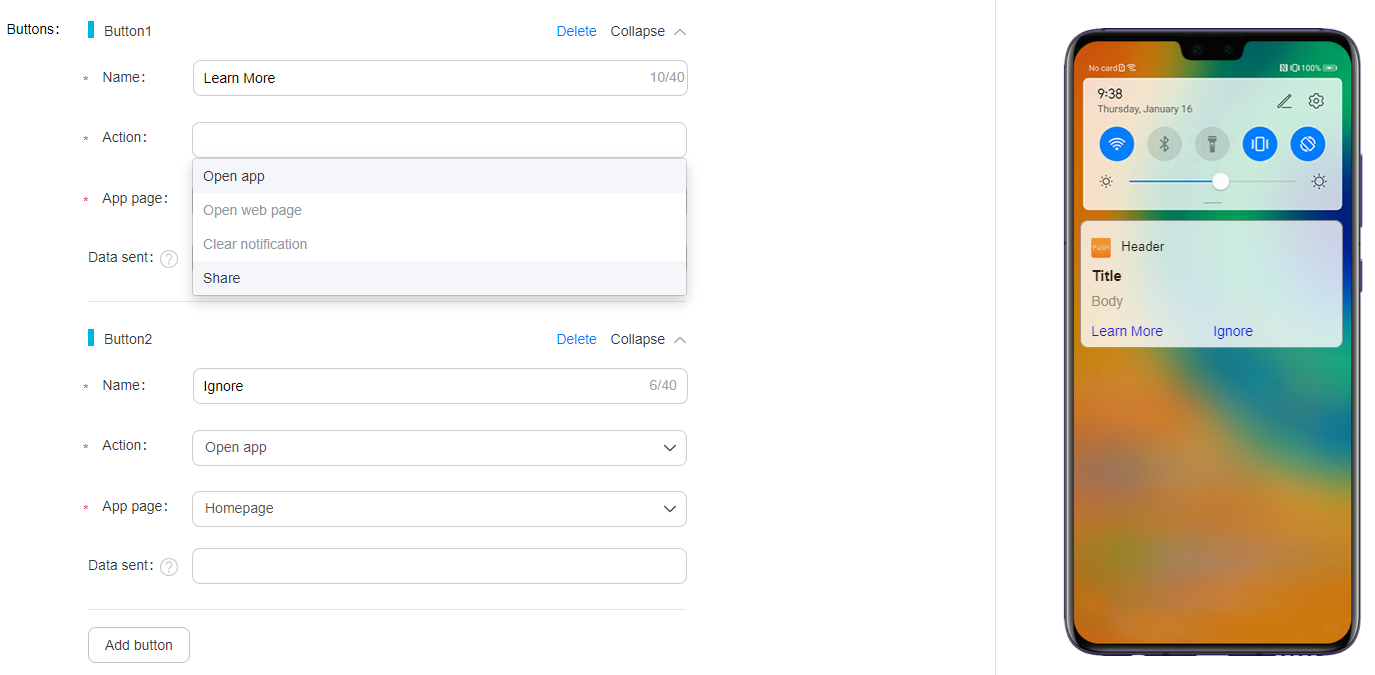
1. If you select Open app, you need to set App page and Data sent, where Data sent is optional.
a. Set App page to Homepage, Custom action page, or Custom intent URI page.
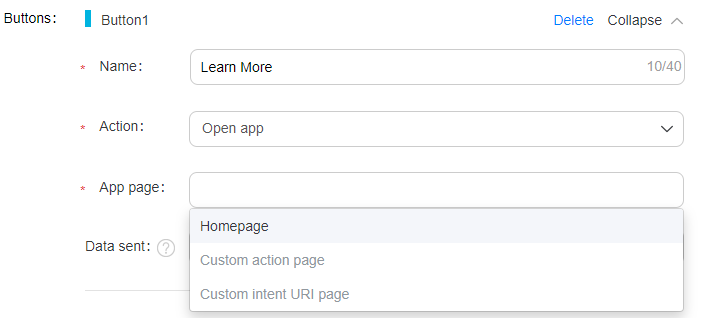
b. When Action is set to Open app, Data sent is used to transparantly transmit key-value pairs to the app. Its value can contain a maximum of 1024 characters and must adopt the key-value format, that is, {"key 1":"value 1","key 2":"value 2",..., "key n":"value n"}.
2. If you select Open web page, you need to enter the web page URL.
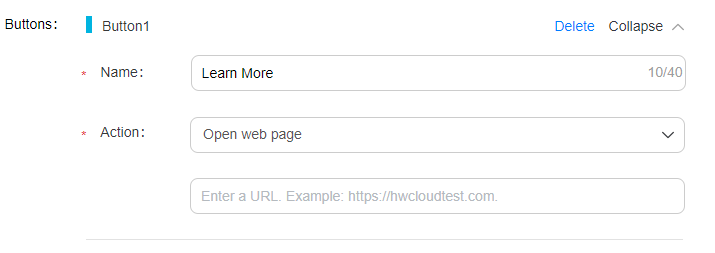
3. If you select Share, you need to enter the content to be shared.
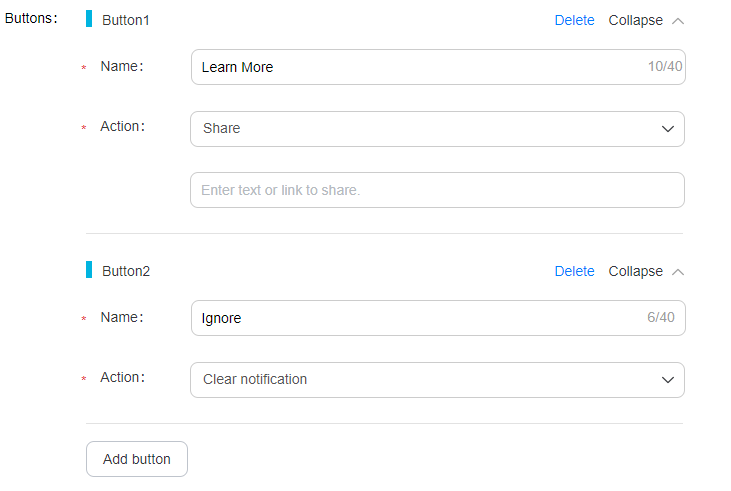
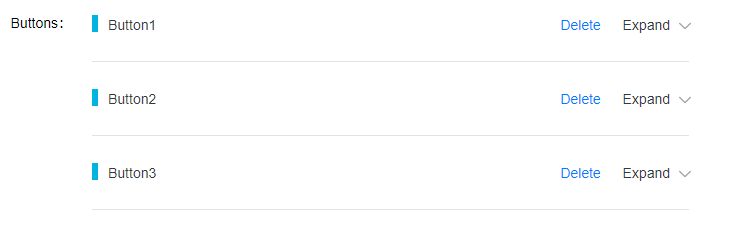
If you have configured multiple buttons, the buttons can be collapsed and expanded.
Step 3: Set Action to Open app, Open web page for the notification message. For game apps, Action can only be set to Open app because messages cannot contain URLs.
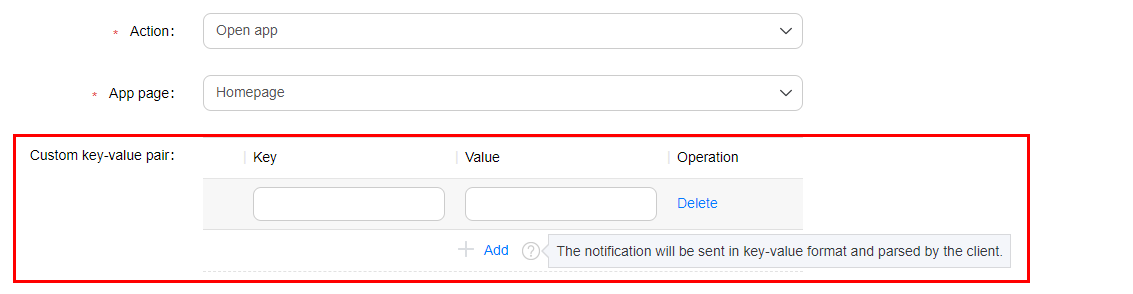
1. If Action is set to Open app, set the App page and Custom key-value pair parameters, where Custom key-value pair is optional.
a. Set App page to Homepage, Custom action page, or Custom intent URI page.
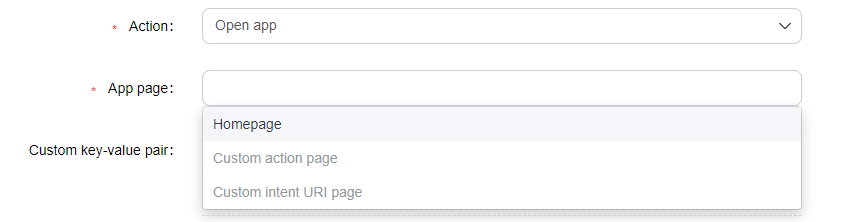
If App page is set to Homepage, the app home page will be opened when a user taps the notification message.
If App page is set to Custom action page, set an action in the text box that is displayed. Then the page corresponding to the specified action will be opened when a user taps the notification message.
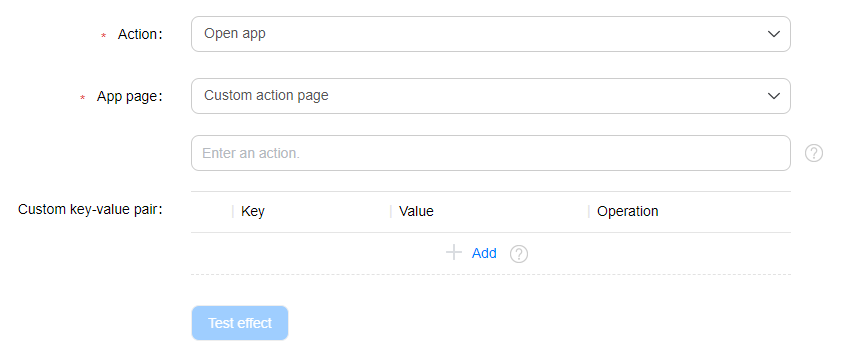
If App page is set to Custom intent URI page, set an intent URI in the text box that is displayed. Then the page with the specified URI will be opened when a user taps the notification message.
b. Customize a key-value pair, which will be parsed and processed by the app.
2. If Action is set to Open web page, set Web page URL to an HTTPS URL.

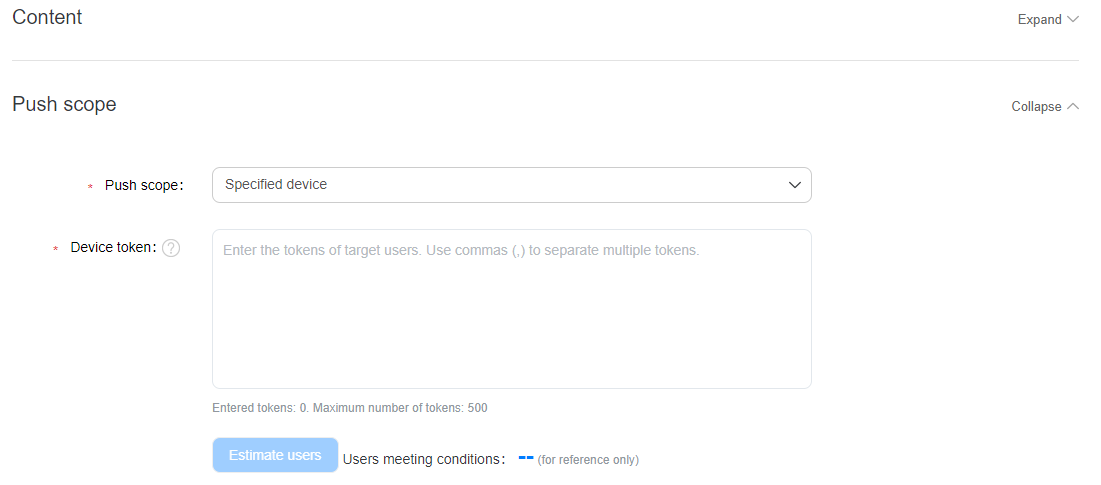
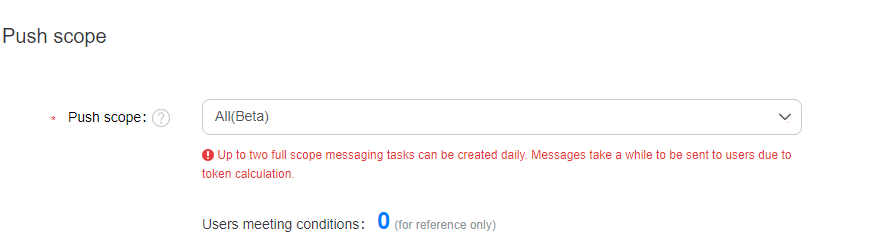
Currently, Push scope can be set to Specified device, Audience, Subscriber, or All(Beta).
1. If Push scope is set to Specified device, set tokens of target users. Currently, a maximum of 500 tokens are allowed.
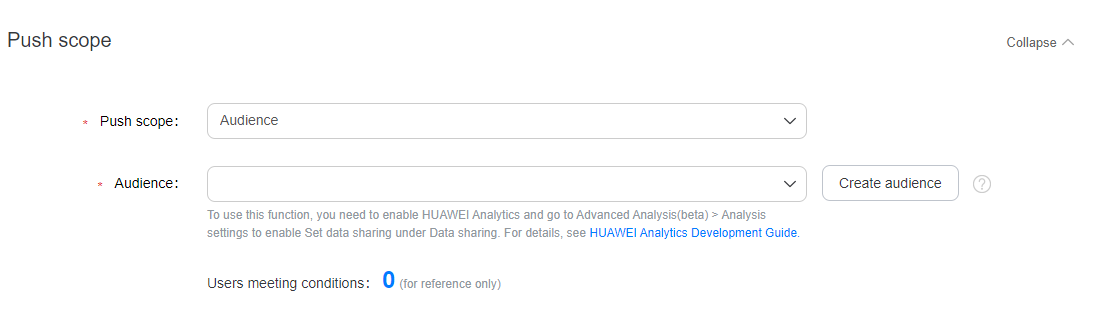
2. If Push scope is set to Audience, select a target audience. The system can explicitly preset a target audience. If there is no target audience, you can click Create audience and then create one on the console of HUAWEI Analytics Kit.
If HUAWEI Analytics Kit is not enabled, enable it first. The number of users in the created audience is 0. The sent messages cannot be received.
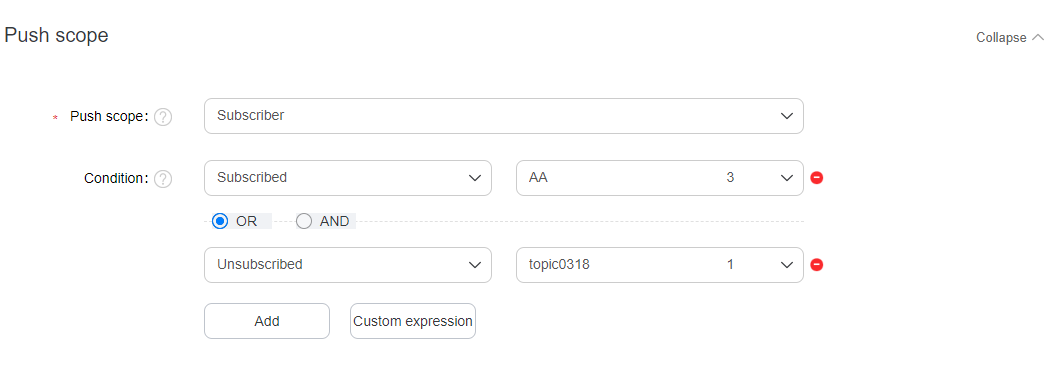
3. If Push scope is set to Subscriber, select a topic list.
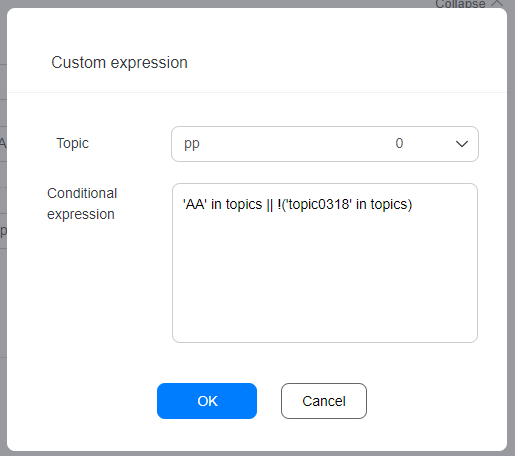
You can add a maximum of five groups of topic lists to form an expression. If the combination expression cannot meet your requirements, you can switch to the custom expression mode. However, you cannot switch back to the original mode.
Common mode
Custom expression mode
4. If Push scope is set to All(Beta), a message can be sent to all users.
Push time can be one-off (Now and Scheduled) or periodic (Every day and Every week). Time zone is mandatory for all push time values except Now. Duration can be modified, whose value is 1 day by default.
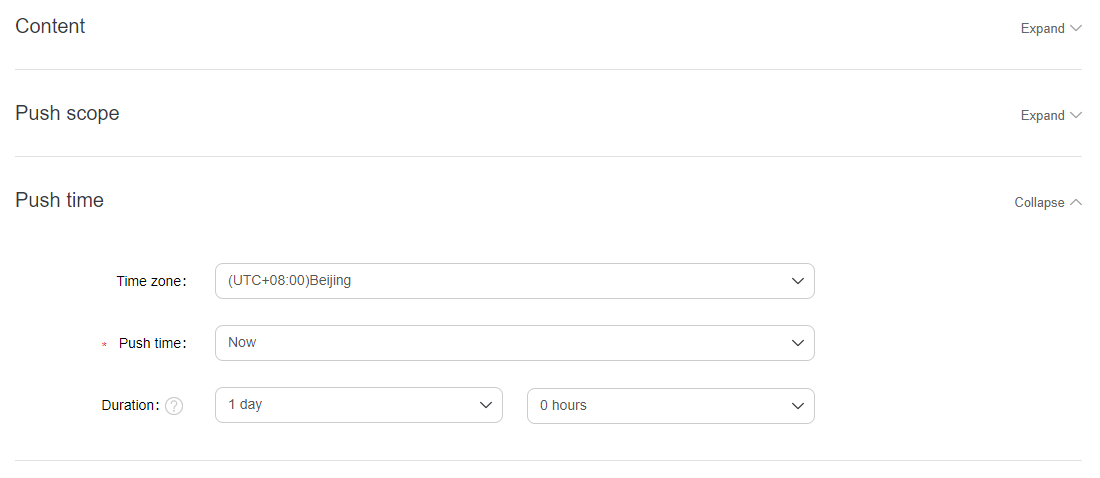
1. If Push time is set to Now, you do not need to select a time zone.
2. If Push time is set to Scheduled, select a time zone and specify Sending time.
3. If Push time is set to Every day, select a time zone and specify Start and end dates as well as Sending time.
4. If Push time is set to Every week, select a time zone and specify Start and end dates as well as Sending time.
5. Notification validity period can be set to a maximum of 15 days and the value can be accurate to hour.
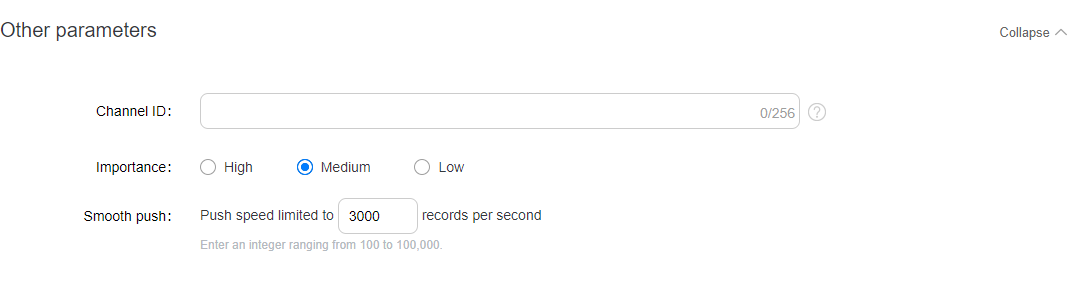
Other parameters are optional, including Channel ID, Importance, and Smooth push.
Channel ID: Customized notification channel of your app, for displaying a message that arrives.
Importance: Priority of a message. The default value is Medium.
Smooth push: Number of messages sent per second. The default value is 3000, indicating 3000 messages per second.
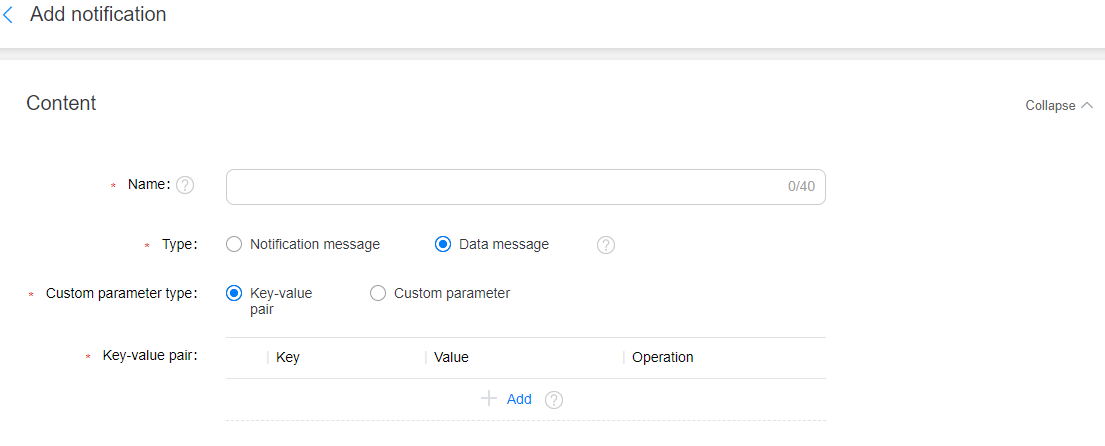
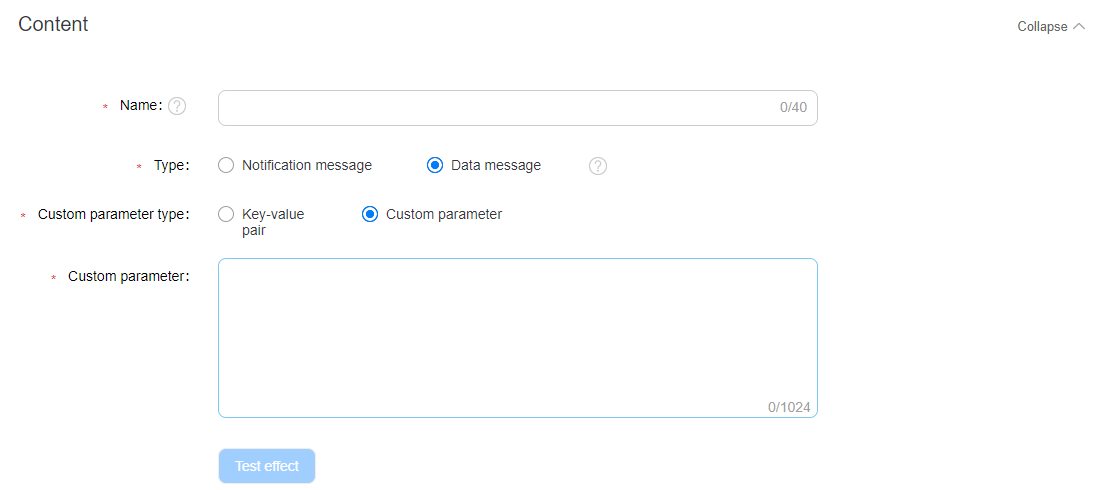
You can set the content of a data message using the Cusom parameter type parameter, whose options are Key-value pair and Custom parameter.
1. Key-value pair: The value adopts the key-value format. Multiple key-value pairs can be added.
2. Custom parameter: The value can contain a maximum of 1024 characters, in String or JSON Object format.
For details about how to set the push time and scope, please refer to Sending a Notification Message to an Android App.
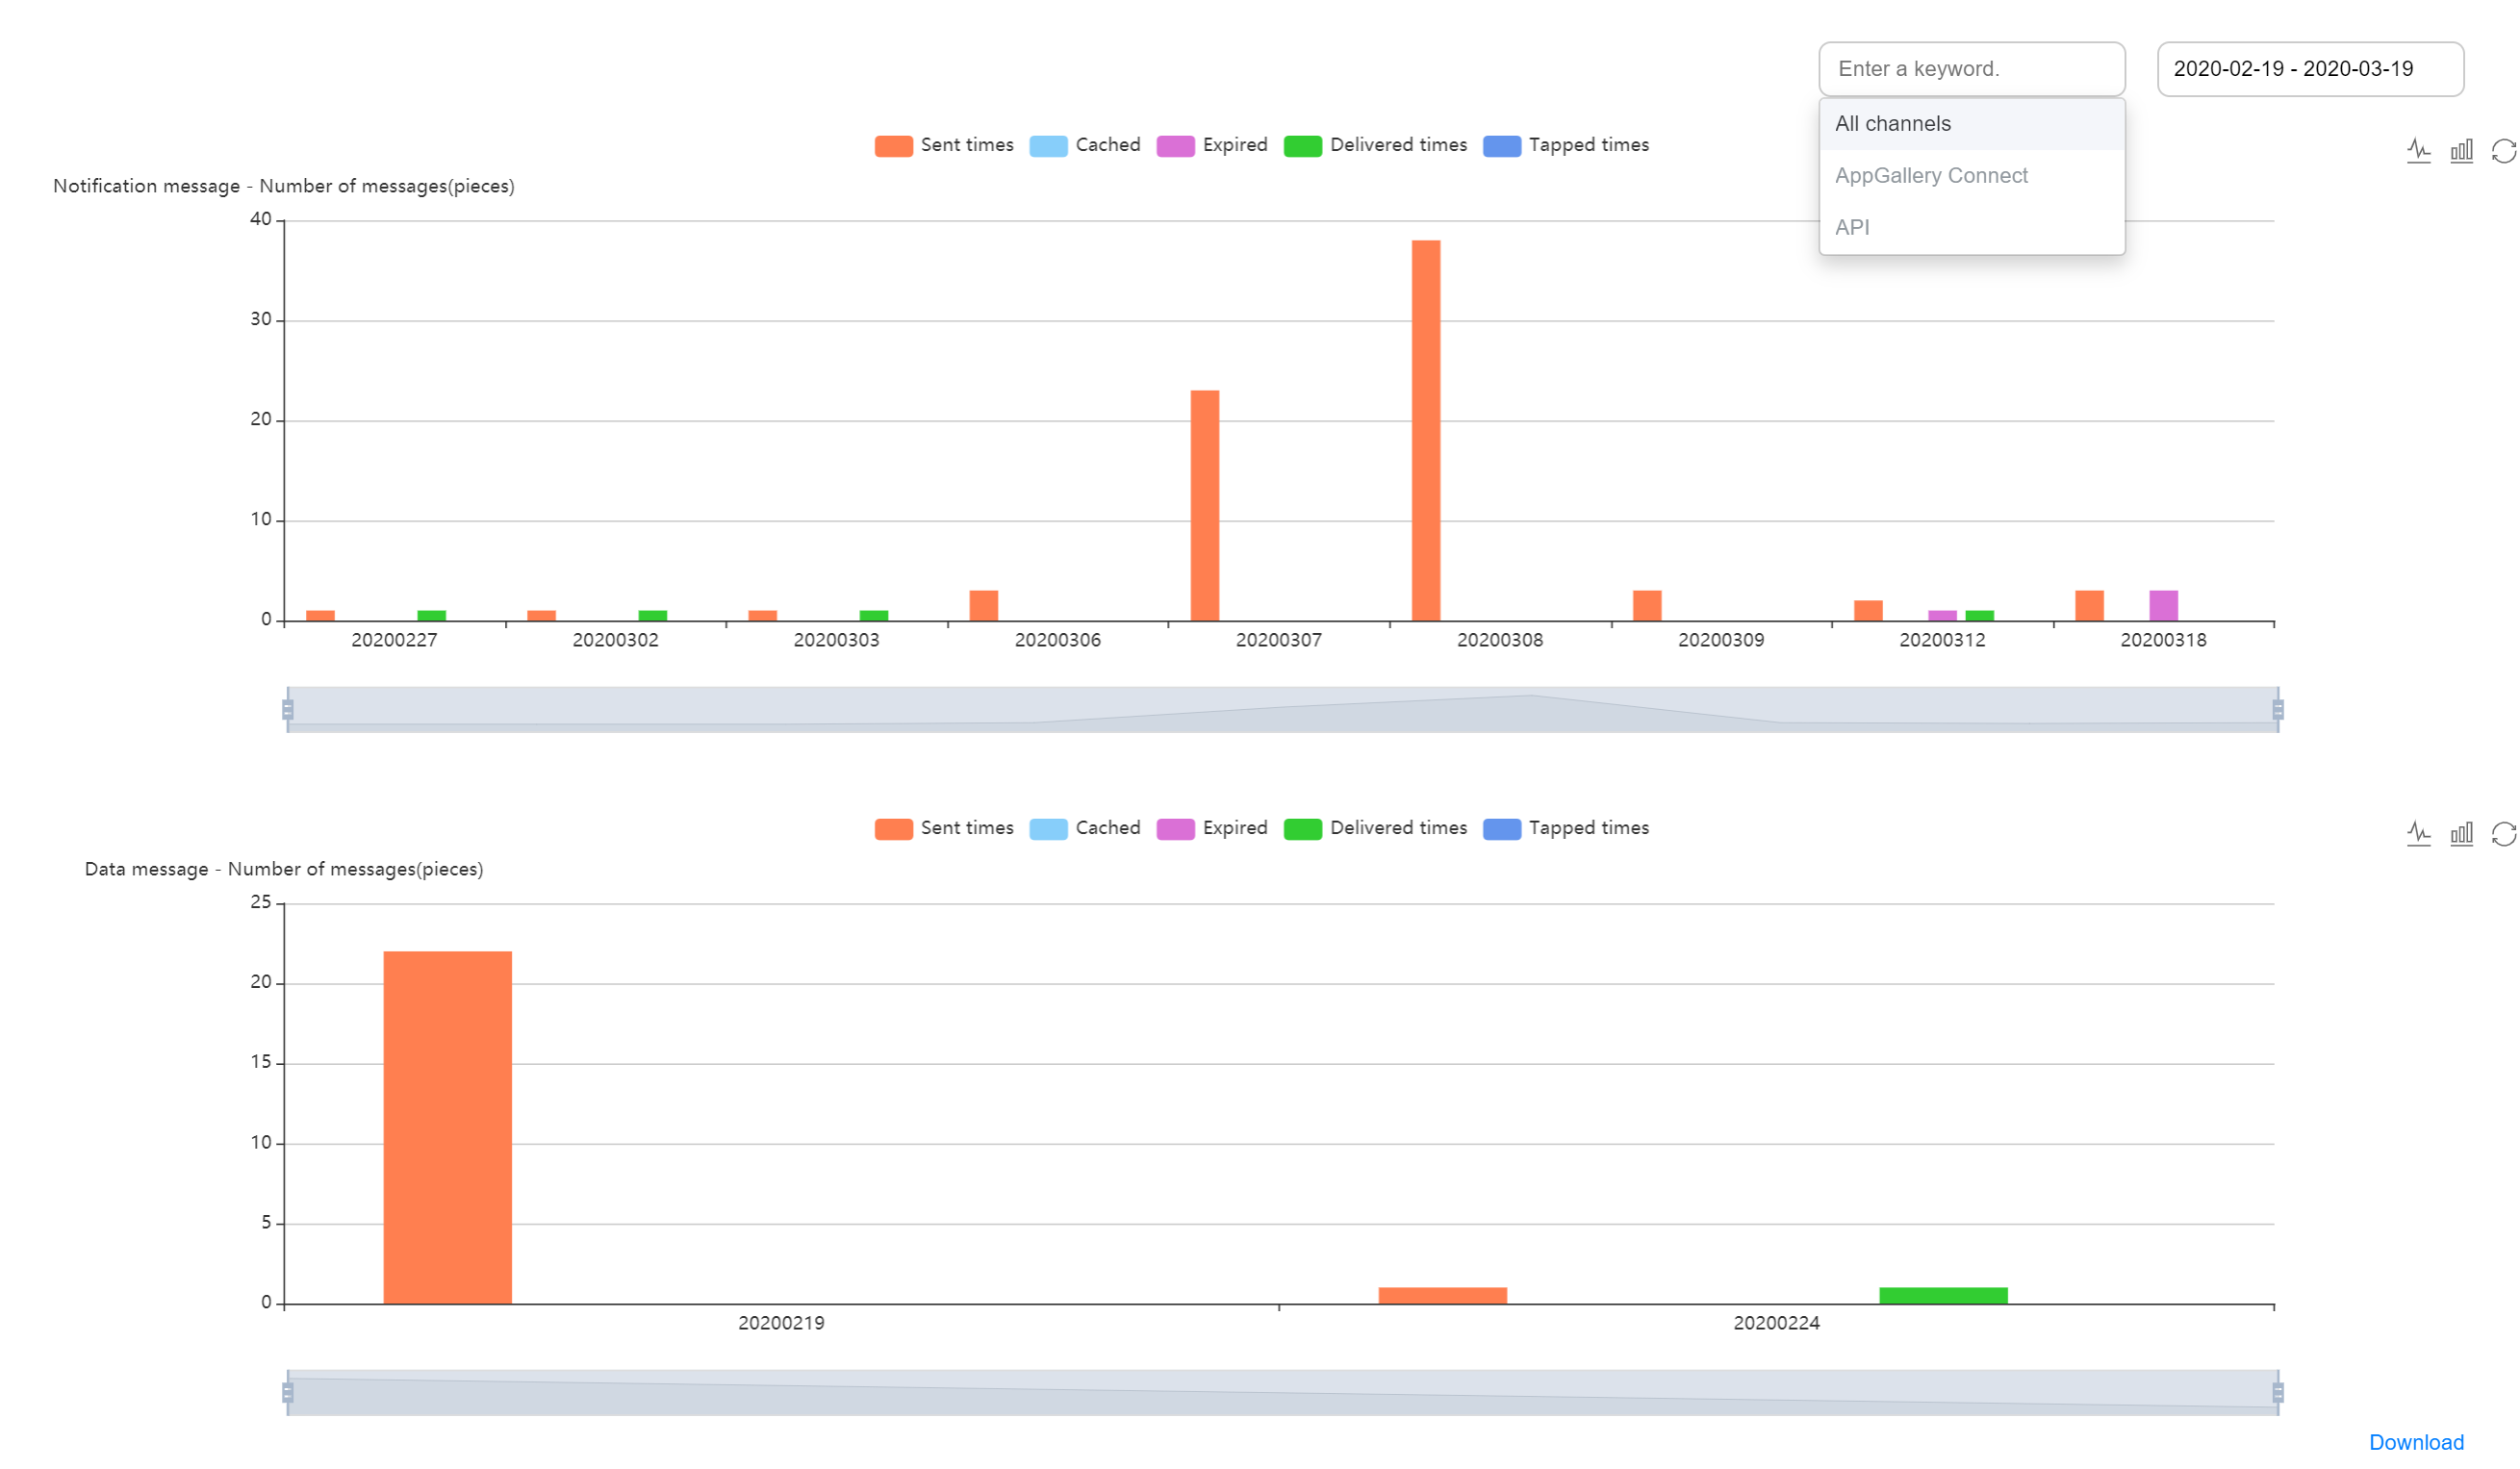
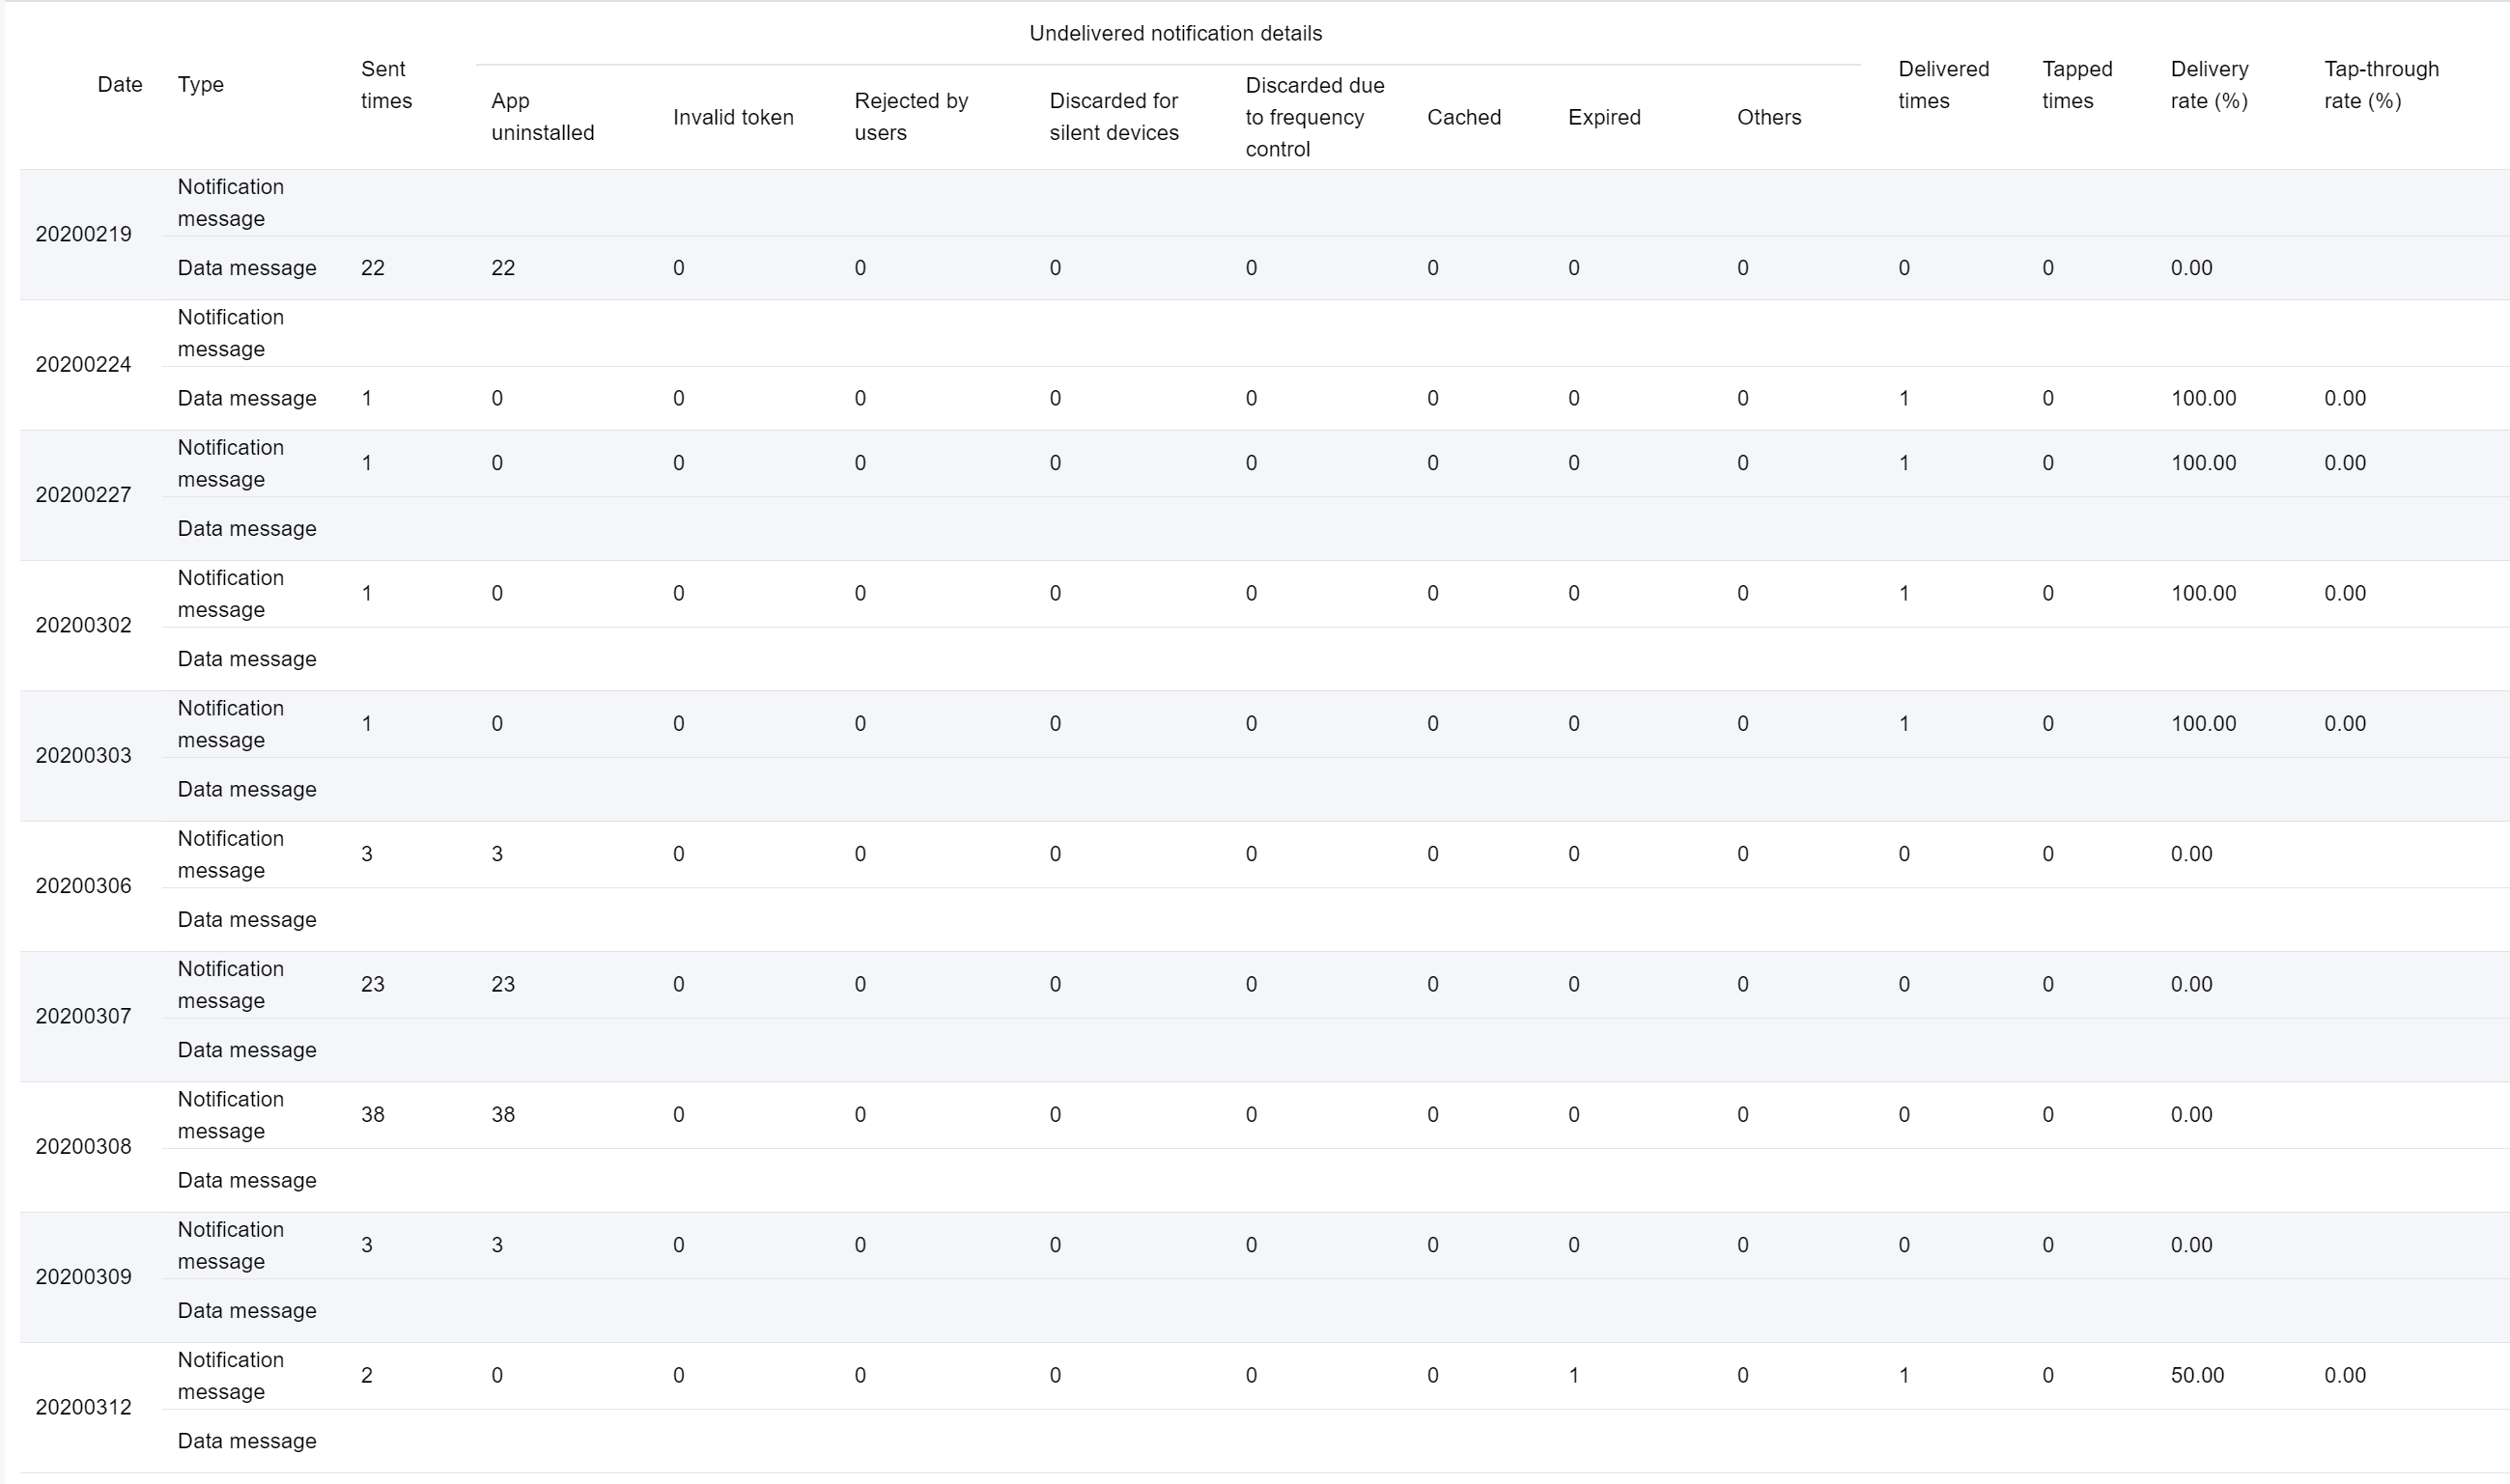
You can view details about messages sent and target users in message sending reports.
You can view details about notification and data messages sent in charts and tables. In addition, you can select AppGallery Connect or API from the drop-down list box to filter the details by channel.
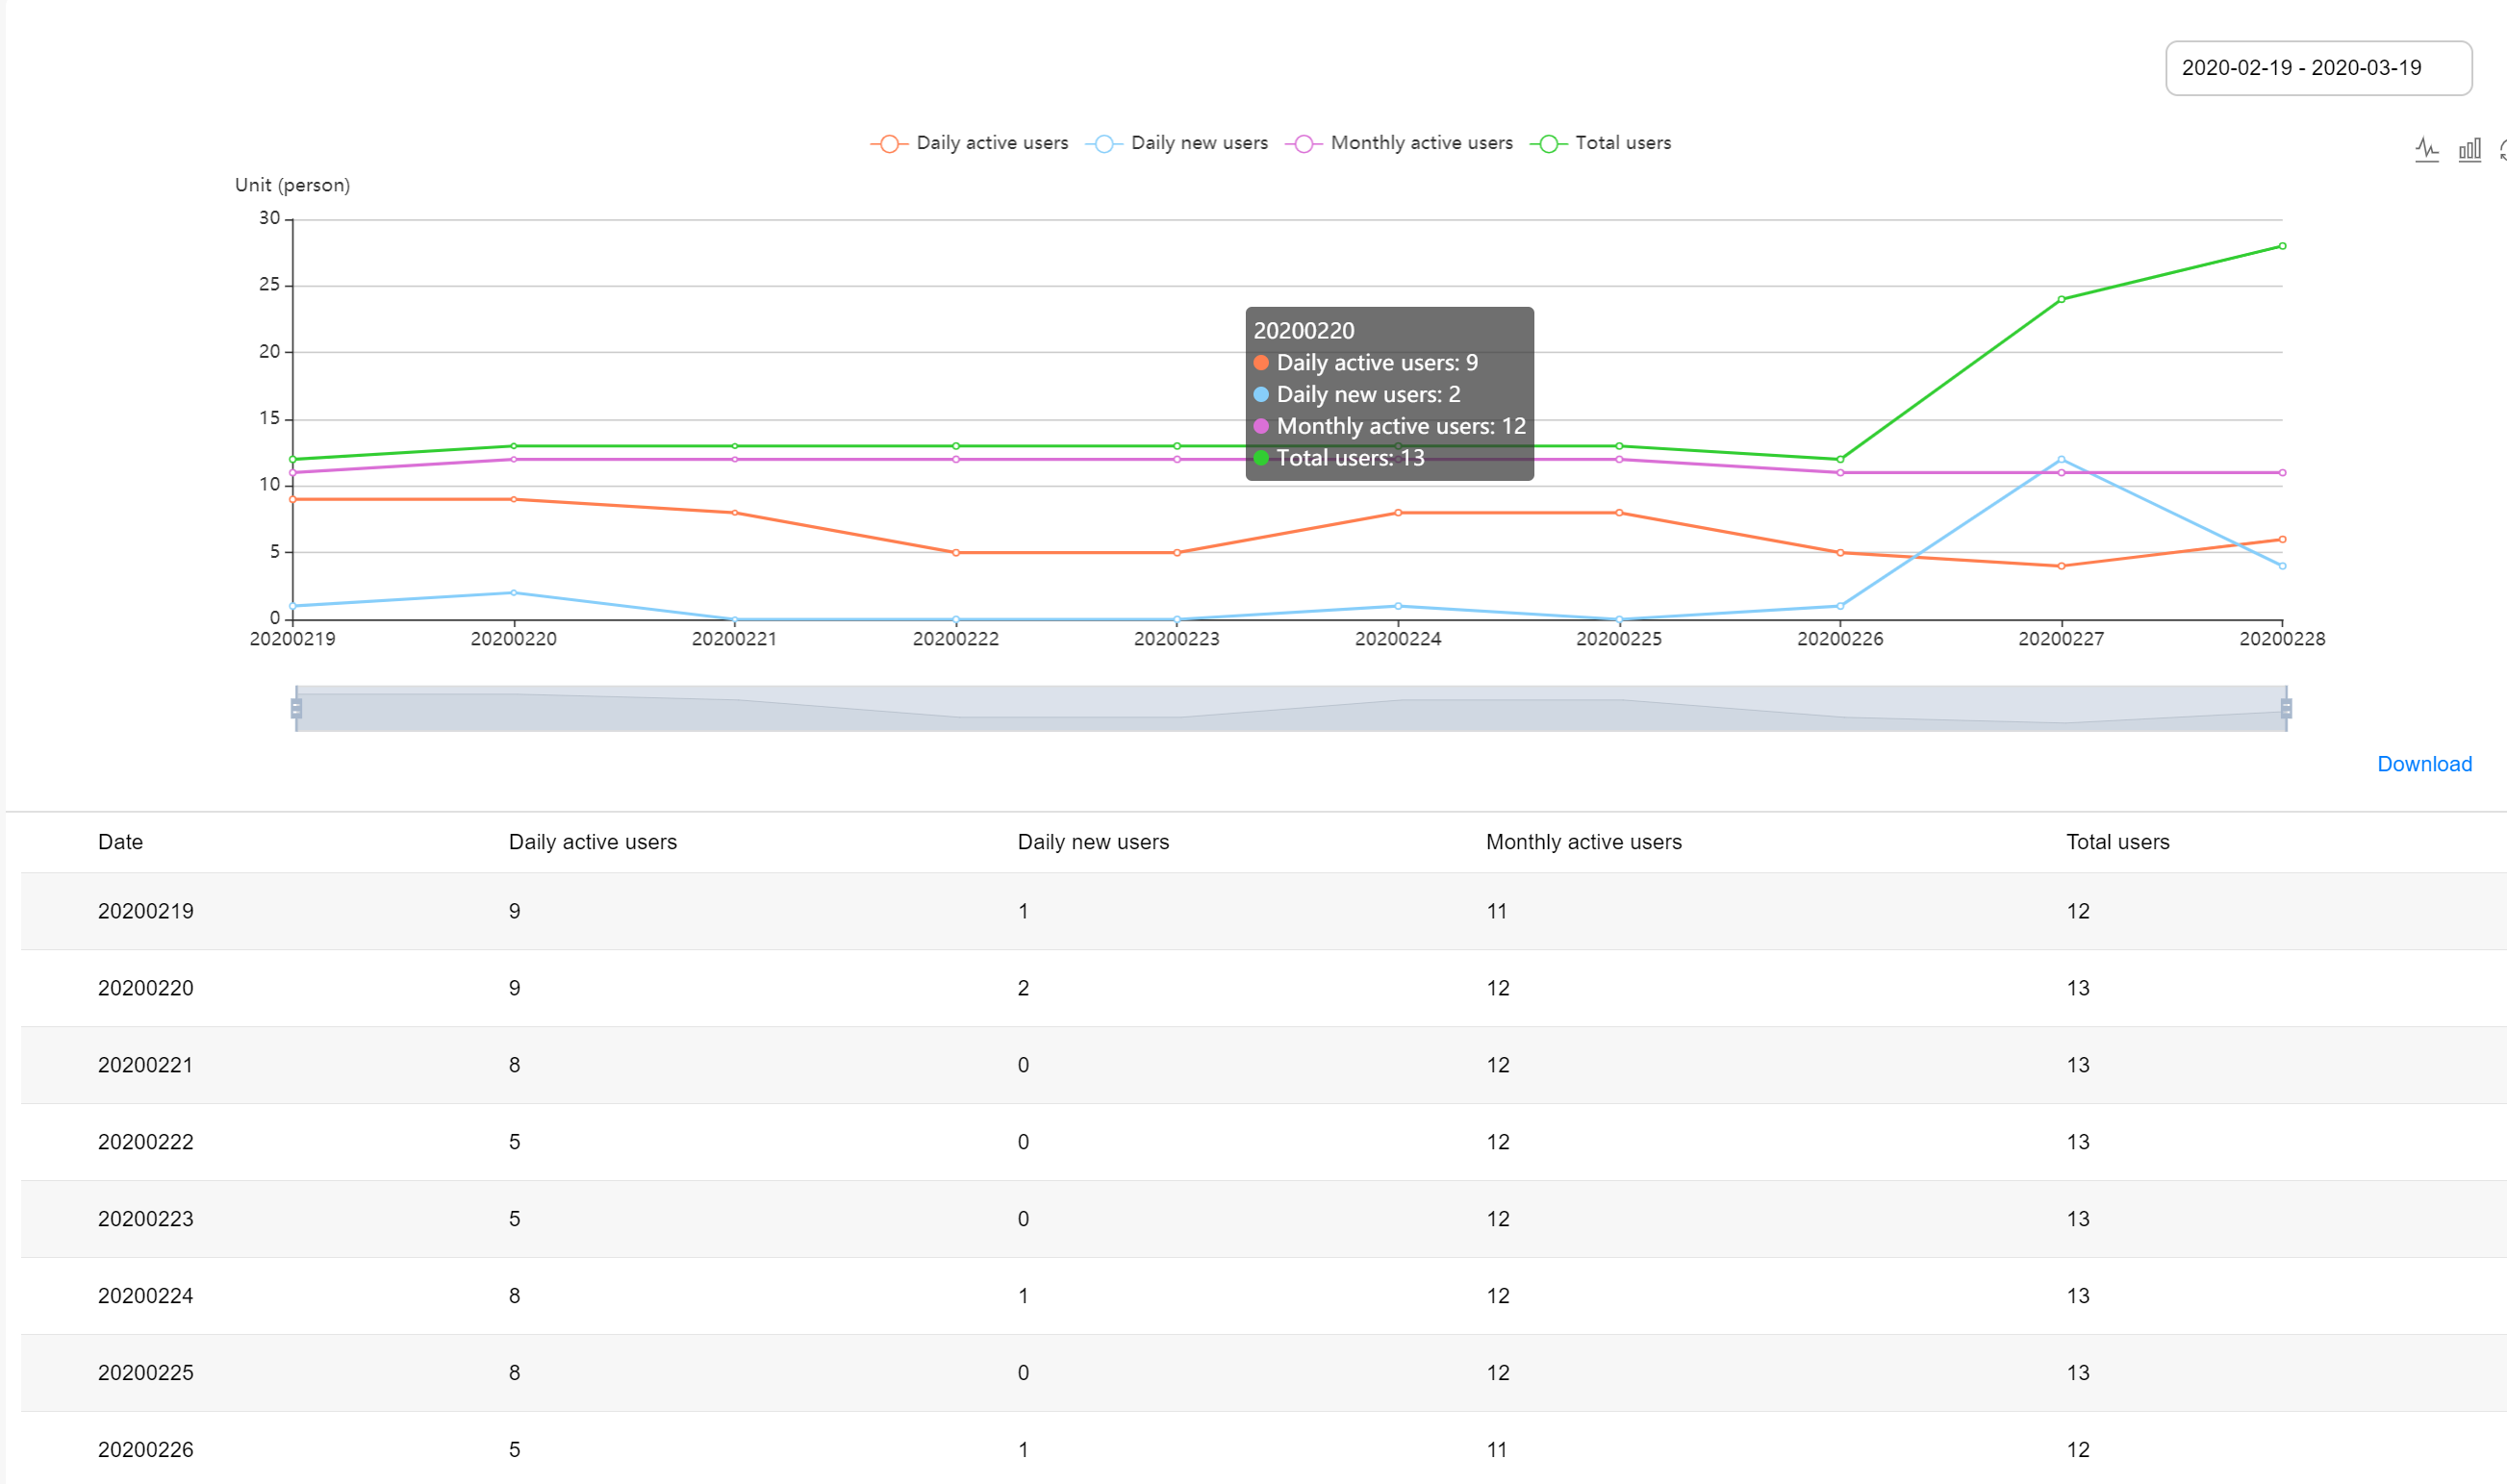
You can view details about target users in charts and tables. The user data is collected in different dimensions, including active, new, and total users.