ArkUI提供了LazyColumnLayout、LazyVGridLayout、LazyVWaterFlowLayout三种预置懒加载布局容器,分别支持垂直线性布局、垂直网格布局和垂直瀑布流布局。当这些预置布局容器无法满足业务需求时,可以使用LazyDynamicLayout组件配合自定义布局算法实现灵活的懒加载布局。
LazyDynamicLayout是一个支持懒加载的动态布局容器,允许开发者通过自定义布局算法LazyLayoutAlgorithm实现任意布局模式。该组件仅对父可滚动组件可视区域内的子组件进行创建和布局,减少首帧渲染时间和内存开销。
从API版本26.0.0开始,支持LazyDynamicLayout组件。
使用场景
LazyDynamicLayout适用于以下典型场景。
-
自定义布局模式:预置的LazyColumnLayout、LazyVGridLayout、LazyVWaterFlowLayout提供固定的布局模式,当业务需要特殊的布局方式时,可以通过自定义布局算法实现。例如:
- 错落布局:子组件高度不一,需要按特定规则排列。
- 环形布局:子组件按圆形或扇形排列。
- 定制化布局:特定子组件定制布局位置,如吸顶、吸底等。
-
动态布局参数调整:在运行时需要动态调整布局参数(如间距、尺寸比例),并希望调整后保持滚动位置稳定。通过自定义布局算法可以精确控制布局参数变化时的位置调整逻辑。
-
复杂混合布局:在同一个LazyDynamicLayout中需要实现多种布局模式的组合,预置布局容器无法满足时,可以通过自定义算法实现。
约束与限制
-
LazyDynamicLayout需要配合可滚动父组件使用,仅限于List、Scroll、WaterFlow、FlowItem或LazyColumnLayout,并支持使用自定义组件或NodeContainer组件封装后应用在上述组件中。
-
LazyDynamicLayout在不同父组件下的懒加载支持条件如下。
-
在WaterFlow组件下,仅在WaterFlow组件的单列模式或分段布局中的单列分段场景下使用时支持懒加载。
-
在List组件下,当List设置了lanes、chainAnimation、scrollSnapAlign属性中的任意一个时,该组件的懒加载功能会失效。
-
在Scroll、List、WaterFlow组件下使用时,Scroll、List、WaterFlow的滚动方向(水平或垂直)必须和该组件布局方向相同,若布局方向不同会导致应用崩溃。该组件布局方向通过LazyCustomLayoutAlgorithm的构造函数参数axis成员设置。
-
通过FlowItem、LazyColumnLayout、自定义组件或NodeContainer封装使用时,懒加载行为取决于其上层滚动组件(如WaterFlow、Scroll或List)的配置条件。
-
-
当布局算法为LazyCustomLayoutAlgorithm时,LazyDynamicLayout组件FrameNode的setMeasuredSize方法优先级高于尺寸设置和边框设置属性,子组件FrameNode的measure和layout方法优先级高于ignoreLayoutSafeArea属性。
自定义布局算法开发步骤
自定义布局算法需要继承LazyCustomLayoutAlgorithm类,并实现onMeasure和onLayout方法。以下以LazyColumnLayoutAlgorithm为例,介绍自定义布局算法的开发步骤。
[h2]创建布局算法类
首先创建一个继承自LazyCustomLayoutAlgorithm的类,定义布局所需的参数和数据结构。
/**
 * LazyColumnLayoutAlgorithm - 单列布局算法
 *
 * 功能:
 * - 单列垂直布局
 * - 懒加载:只测量和布局可视范围内的元素
 * - 锚点保持:间距变化时保持位置稳定
 *
 * 核心数据结构:
 * - itemArr: 存储已测量元素的位置信息(按元素索引排序)
 * - itemArrStartIndex: itemArr 中第一个元素对应的索引
 */
export class LazyColumnLayoutAlgorithm extends LazyCustomLayoutAlgorithm {
  // === 核心布局数据 ===
  private itemArr: ItemPos[] = [];          // 已测量元素的位置数组
  private itemArrStartIndex: number = -1;   // itemArr[0] 对应的实际元素索引
  private estimateItemHeight: number = -1;  // 估算的平均元素高度(用于未知区域的测量)
  private totalHeight: number = 0;          // 总高度(包含未测量区域的估算高度)

  // === 元素信息 ===
  private childCnt: number = 0;             // 子元素总数
  private startIndex: number = -1;          // 当前可视范围的第一个元素索引
  private endIndex: number = -1;            // 当前可视范围的最后一个元素索引

  // === 布局参数 ===
  private rowGap: number = 0;               // 元素间距
  private leftPadding: number = 0;          // 左内边距
  private rightPadding: number = 0;         // 右内边距
  private topPadding: number = 0;           // 上内边距
  private bottomPadding: number = 0;        // 下内边距

  // === 状态追踪 ===
  private prevRowGap: number = 0;           // 上一次的间距(用于检测变化)
  private selfNode?: FrameNode;             // 节点引用(用于触发重新布局)
  private prevStartIndex = -1;              // 上一次布局完成的起始索引号
  private prevEndIndex = -1;                // 上一次布局完成的末尾索引号

  // === 锚点信息(滚动时保持稳定) ===
  private anchorChildIndex: number = -1;              // 锚点元素的索引
private anchorChildRelativePos: number = 0; // 锚点位置(正向距内容顶部,反向距内容底部) 定义内边距变量用于存储容器的内边距信息。通过getUserConfigPadding方法获取用户设置的padding属性值,该方法返回的LengthMetrics类型需要转换为像素值。
private updatePadding(self: FrameNode, constraint: LayoutConstraint): void {
  const padding = self.getUserConfigPadding();
  const containerWidth = constraint.percentReference.width;

  this.leftPadding = this.convertToPx(padding?.left, containerWidth);
  this.rightPadding = this.convertToPx(padding?.right, containerWidth);
  this.topPadding = this.convertToPx(padding?.top, containerWidth);
  this.bottomPadding = this.convertToPx(padding?.bottom, containerWidth);
}

private convertToPx(lengthMetrics: LengthMetrics | undefined, referenceSize?: number): number {
  if (!lengthMetrics) {
    return 0;
  }

  const value = lengthMetrics.value;
  const unit = lengthMetrics.unit ?? LengthUnit.VP;

  switch (unit) {
    case LengthUnit.PX:
      return value;
    case LengthUnit.VP:
      return this.uiContext ? this.uiContext.vp2px(value) : value;
    case LengthUnit.PERCENT:
      return referenceSize ? (value) * referenceSize : 0;
    case LengthUnit.FP:
      return this.uiContext ? this.uiContext.fp2px(value) : value;
    case LengthUnit.LPX:
      return this.uiContext ? this.uiContext.lpx2px(value) : value;
    default:
      return value;
  }
} 提供setRowGap方法用于动态修改间距。当布局参数变化时,调用setNeedsLayout方法触发重新布局。
setRowGap(value: number): void {
  if (this.rowGap === value) {
    return;
  }
  this.prevRowGap = this.rowGap;
  this.rowGap = value;
  this.selfNode?.setNeedsLayout();
}
[h2]实现onMeasure方法
onMeasure方法负责测量子组件并计算容器大小。在懒加载模式下,该方法的核心流程如下。
/**
 * onMeasure - 测量布局的核心方法
 *
 * 流程:
 * 1. 计算并保存内边距
 * 2. 处理空子元素或非懒加载布局
 * 3. 保存锚点信息
 * 4. 测量可视范围内的元素
 * 5. 回收不再可见的元素
 * 6. 调整锚点位置保持滚动稳定
 * 7. 设置布局容器自身大小
 */
onMeasure(self: FrameNode, constraint: LayoutConstraint, helper?: LazyLayoutHelper): void {
  this.childCnt = self.getChildrenCount(ChildrenCountMode.ALL_NOT_EXPAND);
  this.selfNode = self;

  this.updatePadding(self, constraint);
  const verticalPadding = this.topPadding + this.bottomPadding;

  if (this.childCnt == 0) {
    this.clearMeasureState();
    self.setMeasuredSize({ width: constraint.maxSize.width, height: verticalPadding });
    return;
  }

  if (!helper) {
    this.measureAllChildren(self, constraint);
    self.setMeasuredSize({ width: constraint.maxSize.width, height: this.totalHeight + verticalPadding });
    this.prevRowGap = this.rowGap;
    return;
  }

  // 保存锚点信息
  this.saveAnchorInfo(helper, this.totalHeight);

  this.measureInViewRange(self, constraint, helper);

  // 回收不再可见的元素
  this.recycleChildren(helper);

  // 调整锚点位置保持滚动稳定
  this.adjustAnchorPosition(helper);

  self.setMeasuredSize({ width: constraint.maxSize.width, height: this.totalHeight + verticalPadding });
}
下面对每个子步骤进行详细说明。
-
计算并保存内边距。
通过getUserConfigPadding方法获取容器设置的padding属性值,并根据单位类型转换为像素值。内边距需要在后续测量和布局中使用。
-
处理空子元素或非懒加载布局。
首先获取子组件总数,使用ChildrenCountMode.ALL_NOT_EXPAND避免全量加载导致懒加载失效。如果子组件数量为0,清空测量状态并设置容器高度为垂直内边距(topPadding + bottomPadding)。如果helper参数为undefined,表示不支持懒加载(如在List多列模式下),需要全量测量所有子组件。
-
处理布局参数变化保持滚动稳定。
当布局参数(如间距)发生变化时,所有子组件的位置都会发生偏移。例如,当间距从5vp增加到10vp时,第11个子组件的位置会向下偏移50vp(10 * 5vp)。如果不调整滚动位置,用户会感觉内容突然跳动,影响体验。
为了保持滚动稳定,需要在布局参数变化前后,确保可视区域内的锚点子组件保持在相同的相对位置。这需要通过以下子步骤实现。
-
保存锚点信息。
在测量开始前,需要保存锚点子组件的位置信息。锚点是指可视区域边缘的子组件。
- 正向滚动(FORWARD,从上到下):锚点是可视区域的第一个子组件(startIndex)。
- 反向滚动(BACKWARD,从下到上):锚点是可视区域的最后一个子组件(endIndex)。
/** * saveAnchorInfo - 保存锚点信息 * * 作用:在测量前保存锚点,确保滚动时保持稳定 * * 锚点选择: * - FORWARD(正向):startIndex(可视区域第一个元素) * - BACKWARD(反向):endIndex(可视区域最后一个元素) * * anchorChildRelativePos: * - FORWARD:锚点元素的绝对位置(距离总高度顶部) * - BACKWARD:锚点距离总高度底部的距离 */ private saveAnchorInfo(helper: LazyLayoutHelper, prevTotalHeight: number): void { this.anchorChildIndex = -1; this.anchorChildRelativePos = 0; if (helper.getLazyLayoutDirection() === LazyLayoutDirection.FORWARD) { if (this.startIndex > 0 && this.startIndex < this.childCnt) { this.anchorChildIndex = this.startIndex; const arrayIndex = this.anchorChildIndex - this.itemArrStartIndex; if (arrayIndex >= 0 && arrayIndex < this.itemArr.length) { this.anchorChildRelativePos = this.itemArr[arrayIndex].start; // 锚点子组件距离总高度顶部的位置 } } } else { if (this.endIndex >= 0 && this.endIndex < this.childCnt - 1) { this.anchorChildIndex = this.endIndex; const arrayIndex = this.anchorChildIndex - this.itemArrStartIndex; if (arrayIndex >= 0 && arrayIndex < this.itemArr.length) { this.anchorChildRelativePos = prevTotalHeight - this.itemArr[arrayIndex].end; } } } } -
测量并计算新位置。
测量完成后,锚点子组件的位置可能已经发生变化。需要计算新位置:
- 正向滚动时,新位置是锚点元素的start值,即锚点子组件距离总高度顶部的位置。
- 反向滚动时,新位置是锚点元素距离总高度底部的距离。
-
调整滚动位置。
通过对比锚点的新旧位置,计算偏移调整量,并通过setAdjustedOffset调整滚动位置。
/**
 * adjustAnchorPosition - 调整锚点位置保持滚动稳定
 *
 * 作用:测量完成后调整滚动偏移量,确保锚点保持在相对可视区域的相同位置
 */
private adjustAnchorPosition(helper: LazyLayoutHelper): void {
  if (this.anchorChildIndex >= 0) {
    if (helper.getLazyLayoutDirection() === LazyLayoutDirection.FORWARD) {
      const arrayIndex = this.anchorChildIndex - this.itemArrStartIndex;
      if (arrayIndex >= 0 && arrayIndex < this.itemArr.length) {
        let newPos = this.itemArr[arrayIndex].start; // 锚点子组件重新测量后距离总高度顶部的位置
        if (newPos !== this.anchorChildRelativePos) {
          helper.setAdjustedOffset(this.anchorChildRelativePos - newPos);
        }
      }
    } else {
      const arrayIndex = this.anchorChildIndex - this.itemArrStartIndex;
      if (arrayIndex >= 0 && arrayIndex < this.itemArr.length) {
        let newPos = this.totalHeight - this.itemArr[arrayIndex].end;
        if (newPos !== this.anchorChildRelativePos) {
          helper.setAdjustedOffset(newPos - this.anchorChildRelativePos);
        }
      }
    }
  }
}
原理说明
正向滚动时,锚点是可视区域第一个子组件。布局参数变化后,该子组件的实际位置可能变化。
反向滚动时,锚点是可视区域最后一个子组件,锚点位置是相对于总高度底部计算的。例如,假设共有20个子组件,每个子组件高度为80vp,锚点子组件索引为10(即第11个子组件):
- 间距从5vp变为10vp
- 该子组件原来距离总高度底部的位置:9 * 80vp + 9 * 5vp = 765vp
- 该子组件新的距离总高度底部的位置:9 * 80vp + 9 * 10vp = 810vp
- 偏移调整量:810vp - 765vp = 45vp
调用setAdjustedOffset(45vp)后,LazyDynamicLayout的父可滚动组件会调整滚动位置,使锚点子组件保持在可视区域的相同相对位置。
-
-
测量可视范围内的元素。
测量可视范围内的元素需要以下步骤:获取子组件、创建子组件测量约束、调用子组件measure函数、获取子组件测量大小。
-
获取子组件。
通过getChild方法获取指定索引的子组件FrameNode。必须传入ExpandMode.LAZY_NOT_EXPAND参数,避免全量加载导致懒加载失效。
let child = self.getChild(currIndex, ExpandMode.LAZY_NOT_EXPAND);
-
创建子组件测量约束。
根据容器约束和布局需求,为子组件创建测量约束。单列布局中,子组件宽度等于容器宽度减去左右内边距。
/** * 创建子元素的布局约束 * 单列布局:元素宽度等于容器宽度减去左右内边距 */ private createChildConstraint(constraint: LayoutConstraint): LayoutConstraint { const horizontalPadding = this.leftPadding + this.rightPadding; const containerWidth = constraint.maxSize.width; const childWidth = containerWidth - horizontalPadding; const childConstraint: LayoutConstraint = { maxSize: { width: childWidth, height: constraint.maxSize.height, }, minSize: { width: 0, height: constraint.minSize.height, }, percentReference: { width: childWidth, height: constraint.percentReference.height, }, }; return childConstraint; } -
调用子组件measure函数和获取测量大小。
调用子组件FrameNode的measure方法,传入测量约束,触发子组件测量流程。测量完成后,通过getMeasuredSize方法获取子组件的测量大小。
完整测量流程示例
以下示例展示了正向测量可视范围内元素的完整流程,包含获取子组件、创建约束、调用measure、获取测量大小、记录位置信息。
private measureForward(
  self: FrameNode,
  constraint: LayoutConstraint,
  helper: LazyLayoutHelper,
  startIndex: number,
  startPos: number,
  tmpItemArr: ItemPos[],
  tmpItemArrStartIndex: number
): number {
  let currIndex = startIndex;
  let currPos = startPos;
  let childConstraint = this.createChildConstraint(constraint);

  for (; currIndex < this.childCnt; currIndex++) {
    let itemHeight = 0;
    let child = self.getChild(currIndex, ExpandMode.LAZY_NOT_EXPAND);
    if (child) {
      child.measure(childConstraint);
      itemHeight = child.getMeasuredSize().height;
    }
    tmpItemArrStartIndex = Math.min(currIndex, tmpItemArrStartIndex);
    tmpItemArr[currIndex - tmpItemArrStartIndex] = {
      start: currPos,
      end: currPos + itemHeight,
    };
    currPos += itemHeight;
    if (currIndex < this.childCnt - 1) {
      currPos += this.rowGap;
    }

    if (currPos > helper.getViewEnd()) {
      break;
    }
  }

  return tmpItemArrStartIndex;
}
对于未测量的子组件区域,使用估算高度计算总高度,避免为了获取总高度而全量测量所有子组件。
private calculateEstimateItemHeight(): void { let totalSize = 0; for (const item of this.itemArr) { totalSize += (item.end - item.start); } this.estimateItemHeight = totalSize / this.itemArr.length; } private updateTotalHeight(): void { const endPos = this.itemArr[this.itemArr.length - 1].end; const measuredCount = this.itemArrStartIndex + this.itemArr.length; const remainingCount = this.childCnt - measuredCount; if (remainingCount > 0 && this.estimateItemHeight > 0) { // 当还有未测量的元素时,需要考虑间距 this.totalHeight = endPos + remainingCount * (this.estimateItemHeight + this.rowGap); } else { this.totalHeight = endPos; } } -
-
回收离开可视区域的子组件。
当子组件离开可视区域后,通过setChildrenInactive将其设置为非激活态,释放内存。
/** * recycleChildren - 回收不再可见的元素 * * 作用:释放滚动后离开可视区域的元素,节省内存 * * 回收范围: * - 向前滚动:回收 [this.prevStartIndex, this.startIndex) 范围内的元素 * - 向后滚动:回收 (this.endIndex, this.prevEndIndex] 范围内的元素 */ private recycleChildren(helper: LazyLayoutHelper): void { let recycleList: number[] = []; if (this.prevStartIndex >= 0 && this.prevStartIndex < this.startIndex) { for (let i = this.prevStartIndex; i < this.startIndex; i++) { recycleList.push(i); } } if (this.prevEndIndex >= 0 && this.prevEndIndex > this.endIndex) { for (let i = this.endIndex + 1; i <= this.prevEndIndex; i++) { recycleList.push(i); } } if (recycleList.length > 0) { helper.setChildrenInactive(recycleList); } } -
设置布局容器自身大小。
最后调用setMeasuredSize设置容器的测量大小。容器宽度通常设置为constraint.maxSize.width,高度根据子组件排列情况、估算高度和垂直内边距(topPadding + bottomPadding)计算得出。
关键接口说明
接口 说明 getChildrenCount 获取子组件总数。使用ChildrenCountMode.ALL_NOT_EXPAND避免获取子组件总数时全量加载导致懒加载失效。 getChild 获取指定索引的子组件FrameNode。使用ExpandMode.LAZY_NOT_EXPAND避免获取子组件时全量加载导致懒加载失效。 getViewStart 获取可视区域的起始位置(相对于LazyDynamicLayout内容区域顶部)。 getViewEnd 获取可视区域的结束位置。 getLazyLayoutDirection 获取当前布局方向。FORWARD表示正向布局(从上到下),BACKWARD表示反向布局(从下到上)。 setAdjustedOffset 设置偏移调整量。用于布局参数变化后调整滚动位置,使锚点子组件在可视区域内的相对位置保持不变;正向布局时锚点为可视区域第一个子组件,反向布局时为可视区域最后一个子组件。 setChildrenInactive 将指定索引的子组件设置为非激活态。非激活态的子组件会被回收,释放内存。 getUserConfigPadding 获取用户设置的padding属性值。返回LengthMetrics类型,需要转换为像素值。 setMeasuredSize 设置组件的测量大小。
[h2]实现onLayout方法
onLayout方法负责确定每个子组件的位置。在onLayout方法中,需要遍历可视区域的所有子组件,调用每个子组件的layout方法,传入相对于LazyDynamicLayout组件区域左上角的布局位置。布局子组件时需要考虑内边距:子组件的x坐标为leftPadding,y坐标为itemArr中记录的位置加上topPadding。
onLayout(self: FrameNode): void {
  this.prevStartIndex = this.startIndex;
  this.prevEndIndex = this.endIndex;
  if (this.childCnt == 0) {
    return;
  }
  for (let i = this.startIndex; i <= this.endIndex; i++) {
    let child = self.getChild(i, ExpandMode.LAZY_NOT_EXPAND);

    if (child) {
      const arrayIndex = i - this.itemArrStartIndex;

      if (arrayIndex >= 0 && arrayIndex < this.itemArr.length) {
        const x = this.leftPadding;
        const y = this.itemArr[arrayIndex].start + this.topPadding;
        child.layout({x: x, y: y});
      }
    }
  }
}
使用自定义布局算法
完成自定义布局算法的开发后,即可将布局算法实例传入LazyDynamicLayout组件,配合父可滚动组件实现自定义布局模式的懒加载。本节介绍如何创建LazyDynamicLayout组件、动态调整布局参数以及监听可视区域变化。
[h2]创建LazyDynamicLayout组件
使用LazyDynamicLayout组件时,需要先导入组件和布局算法类,然后在构造函数中传入布局算法实例。
@Component
export struct CustomLazyColumnLayoutSample {
  // ...

  aboutToAppear(): void {
    const uiContext = this.getUIContext();
    if (!uiContext) {
      return;
    }
    this.lazyAlgorithm.setUIContext(uiContext);
    this.lazyAlgorithm.setRowGap(uiContext.vp2px(this.rowGap));
    for (let i = 0; i < 50; i++) {
      this.arr.pushData(`Item ${i}`);
    }
  }

  build() {
    NavDestination() {
      Stack({ alignContent: Alignment.Bottom }) {
        List() {
          LazyDynamicLayout(this.lazyAlgorithm) {
            // ...
          }
          .onVisibleIndexesChange((child: number[]) => {
            console.info(`onVisibleIndexesChange: ${child}`);
          })
          .width('100%')
        }
        .width('100%')
        .height('100%')
        .padding({ left: 12, right: 12 })

        Button(`RowGap: ${this.rowGap}vp`)
          .fontSize(12)
          .onClick(() => {
            this.rowGap = this.rowGap === 5 ? 10 : 5;
          })
          .margin({ bottom: 20 })
      }
      .height('100%')
      .width('100%')
    }
    .backgroundColor('#f1f2f3')
    .title($r('app.string.customLazyColumnLayout_title'))
  }
} 动态调整布局参数,配合@Watch装饰器监听参数变化。
@State @Watch('onRowGapChange') rowGap: number = 5; 布局算法中的尺寸参数使用像素单位,需要通过getUIContext().vp2px方法进行单位转换。
onRowGapChange(): void {
  const uiContext = this.getUIContext();
  if (!uiContext) {
    return;
  }
  this.lazyAlgorithm.setRowGap(uiContext.vp2px(this.rowGap));
}
[h2]监听可视区域变化
LazyDynamicLayout组件提供了onVisibleIndexesChange事件,用于监听可视区域内子组件索引值的变化。当LazyDynamicLayout首次布局完成或在其父可滚动组件可视区域内的子组件索引值发生变化时触发回调,返回可视区域内子组件的索引值列表。
LazyDynamicLayout(this.lazyAlgorithm) {
  // ...
}
.onVisibleIndexesChange((child: number[]) => {
  console.info(`onVisibleIndexesChange: ${child}`);
})
完整示例
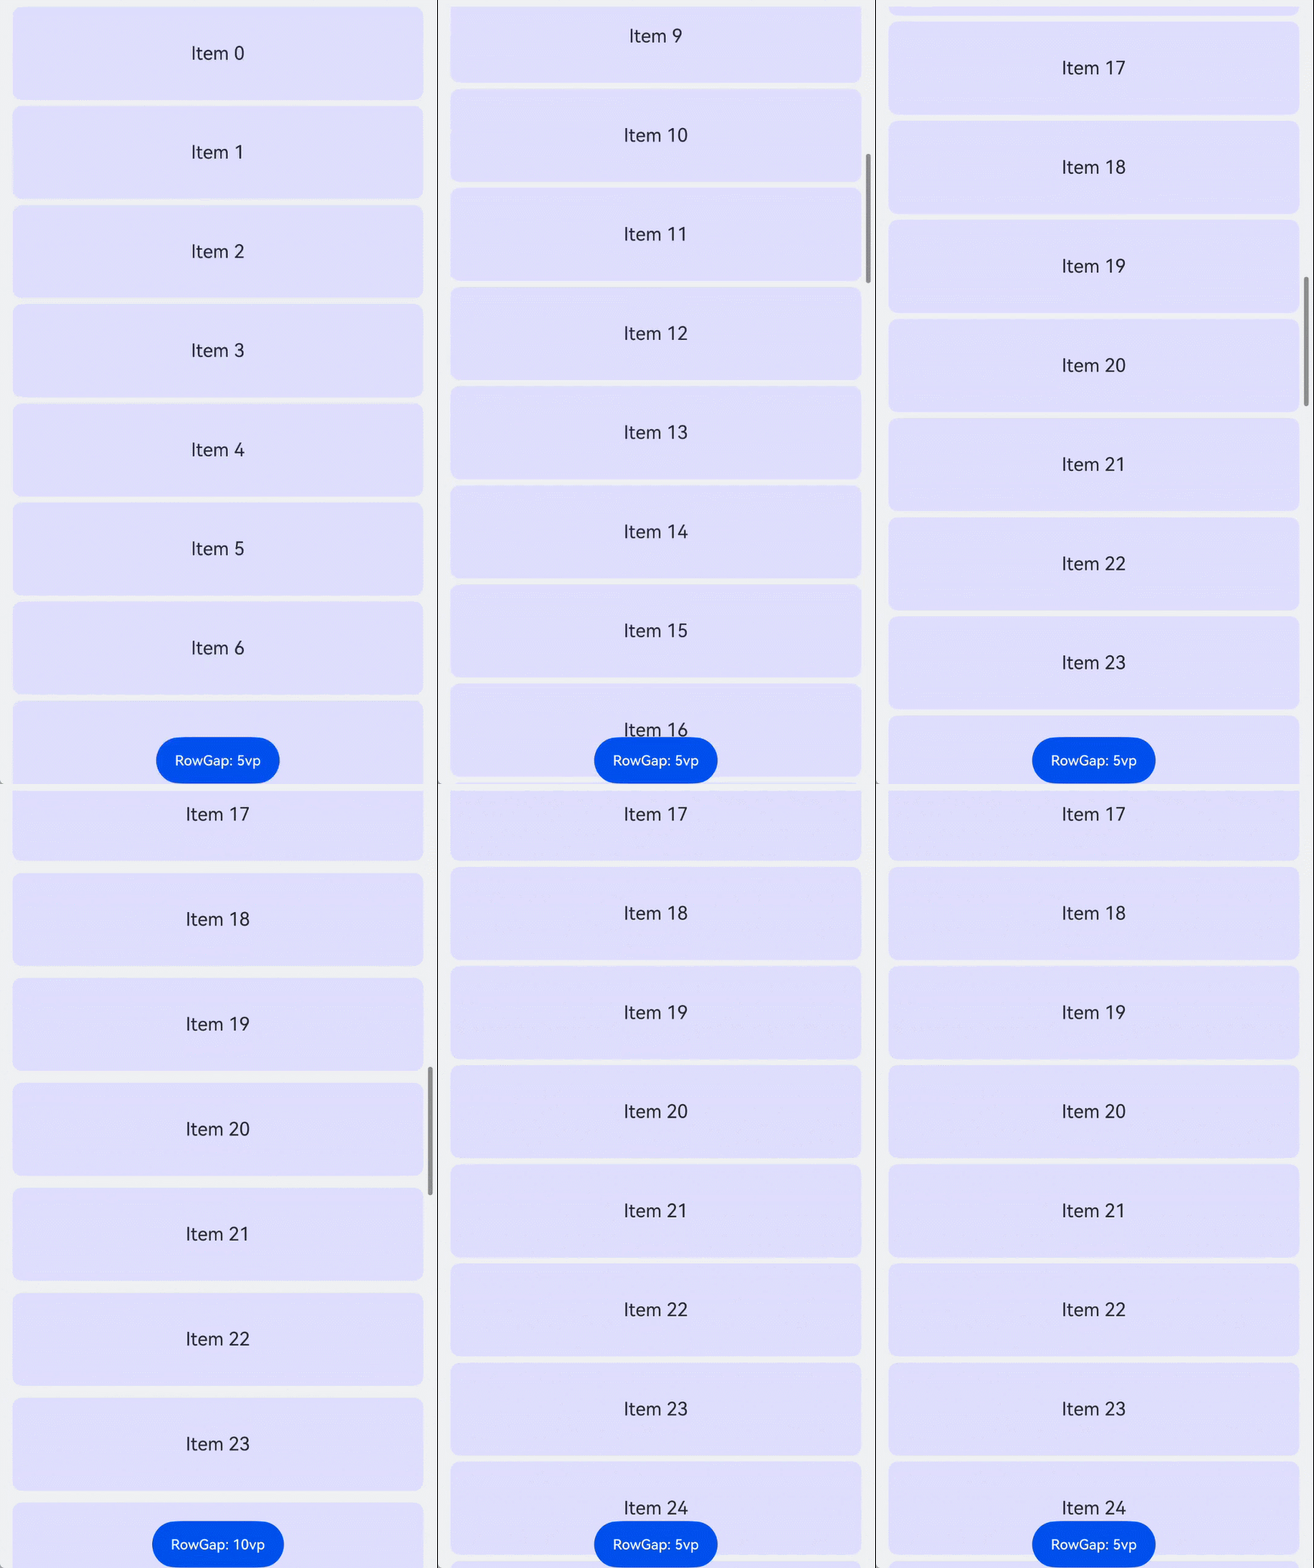
以下示例展示了如何使用LazyDynamicLayout配合自定义布局算法LazyColumnLayoutAlgorithm实现懒加载单列列表,支持动态调整行间距并保持滚动位置稳定。
完整示例请参考自定义懒加载单列布局示例。
上述示例中,点击底部按钮可以切换行间距。由于布局算法中实现了setAdjustedOffset调整逻辑,切换间距后锚点子组件(正向布局时为可视区域第一个子组件,反向布局时为可视区域最后一个子组件)的位置保持不变,避免了滚动跳动。
针对自定义懒加载布局的开发,有以下相关实例可供参考。
- 自定义懒加载单列布局示例:展示如何使用LazyDynamicLayout配合LazyColumnLayoutAlgorithm实现懒加载单列列表。
- 自定义懒加载网格布局示例:展示如何使用LazyDynamicLayout配合LazyGridLayoutAlgorithm实现懒加载网格布局。
- 自定义懒加载瀑布流布局示例:展示如何使用LazyDynamicLayout配合LazyWaterFlowLayoutAlgorithm实现懒加载瀑布流布局。