目录

Downloading and Installing the ArkGraphics Editor Plugin and Editor

ArkGraphics Editor is a 3D editor that provides core editing capabilities for 3D models, animations, ShaderGraph, and more, enabling designers and developers to quickly get started with 3D development. With its visual editing capabilities, you can develop 3D scenes through operations such as drag-and-drop and preview the 3D design effects in real time No coding is required. It also supports fast transfer of 3D resources from PCs to mobile devices, significantly improving 3D app development efficiency.

Main Features

ArkGraphics Editor provides the following features:

The ArkGraphics Editor plugin provides the following main features:

Installing the Plugin and Using the Editor

  1. Go to Download Center and download the latest ArkGraphics Editor plugin.

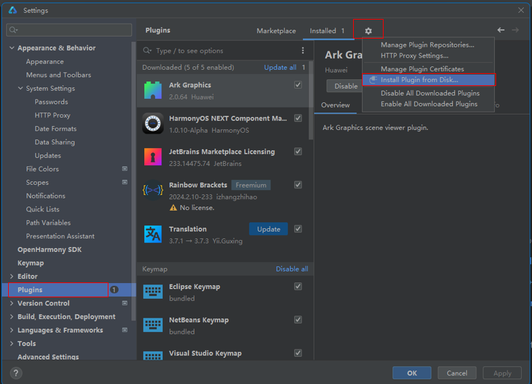
  2. In DevEco Studio, choose File > Settings, and select Plugins in the left pane.

  3. Click the settings button at the top of the Plugins window and select Install Plugin from Disk....

  4. Select the downloaded plugin and install it.

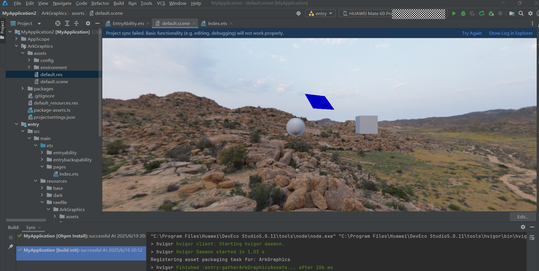
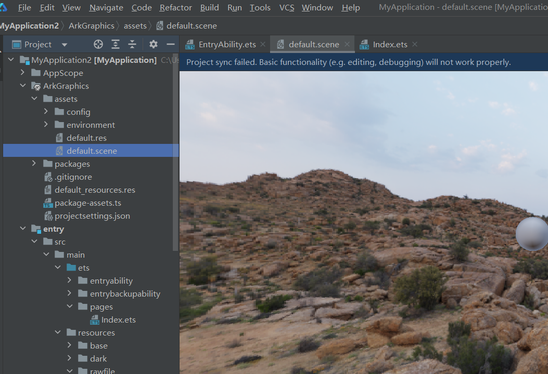
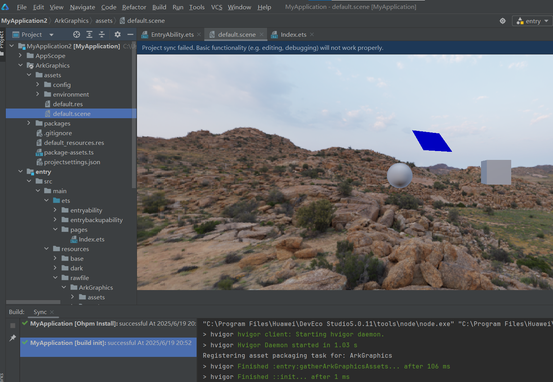
  5. After the plugin is installed, close and reopen DevEco Studio. Select a *.scene file in a 3D project to preview the 3D scene in DevEco Studio.

  6. Go to Download Center to download and install the latest ArkGraphics Editor.

    The plugin is mainly used for previewing 3D scenes. To edit 3D resources, click Open Ark Graphics Editor to open the 3D editor.

    • To use ArkGraphics Editor, the following requirements must be met:

      • Visual Studio 2022 Community is installed on the device.

      • The Desktop development with C++ workload is installed in Visual Studio 2022 Community.

    • 3D resource files generated by the editor can currently be loaded and rendered only on devices running HarmonyOS 6.0.0 or later.

Creating a Project That Uses 3D Editor Resources

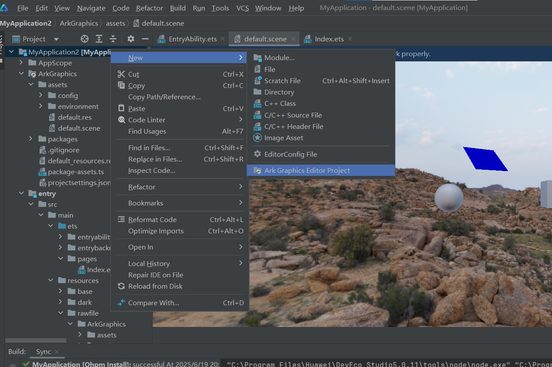
  1. Create a project, or right-click the project name in an existing project and choose New > Ark Graphics Editor Project.

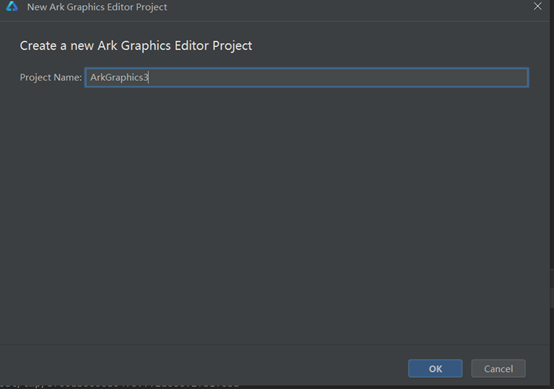
  2. Enter a name for the 3D resource project.

  3. Double-click default.scene to display the created 3D scene resource.

  4. Click Editor in the lower-right corner to open the editor and edit the 3D resource. After you save the changes, the updated resource is displayed.

  5. Modify the resource copy script.

    Script path: xxx/MyApplication/entry/hvigorfile.ts

    When the project runs, the script copies the 3D resources to the assets directory.

    // entry/hvigorfile.ts
    import { hapTasks } from '@ohos/hvigor-ohos-plugin';
     
    import { getNode } from '@ohos/hvigor';
    import * as MyEditorProject  from '../ArkGraphics/package-assets';
    MyEditorProject.packageAssetsToModule(getNode(__filename));
     
    export default {
        system: hapTasks,  /* Built-in plugin of Hvigor. It cannot be modified. */
        plugins:[]         /* Custom plugin to extend the functionality of Hvigor. */
    }
  6. Modify Index.ets to load the 3D resources.

    Ensure that the directory name loaded in Index.ets is the same as the 3D resource project name.

    // Index.ets
    import * as scene3d from '@ohos.graphics.scene'
     
    @Entry
    @Component
    struct Index {
      scene: scene3d.Scene | null = null;
      cam: scene3d.Camera | null = null;
      @State sceneOpts: SceneOptions | null = null;
      @State statusText: string = "";
     
      onPageShow(): void {
        this.Init();
      }
     
      Init(): void {
        if (this.scene == null) {
          this.statusText = 'Loading scene. Please wait.'
          const resource = $rawfile('ArkGraphics/assets/default.scene');
     
          scene3d.Scene.load(resource).then(async (scene: Scene) => {
            this.scene = scene;
     
            this.cam = this.scene.root?.getNodeByPath("Perspective Camera") as scene3d.Camera;
            this.cam.enabled = true;
     
            this.sceneOpts = { scene: this.scene, modelType: ModelType.SURFACE };
            this.statusText = 'Done.'
          }).catch(() => {
            this.statusText = 'Failed to load scene.'
          })
        }
      }
     
      build() {
        Row() {
          Column() {
            Text('Ark Graphics Scene Example 3')
            if (this.sceneOpts) {
              Component3D(this.sceneOpts).width('70%').height('70%')
            }
            if (this.statusText) {
              Text(this.statusText)
            }
          }.width('100%')
        }
        .height('100%')
      }
    }
  7. After completing the preceding steps, run the project on a physical device to check the 3D resource loading effect.

    3D resource files generated by the editor can currently be loaded and rendered only on devices running HarmonyOS 6.0.0 or later.