Configuring App Debugging
Whether an app supports debugging is determined based on the debug field in the app.json5 file and the debuggable field in the build-profile.json5 file. The app.json5 file takes precedence over the build-profile.json5 file.
- Configure the debug field in the app.json5 file.
- true: The app supports debugging.
- false: The app does not support debugging.
- If the debug field is not set, the debuggable field in the build-profile.json5 file takes effect.
- true: The app supports debugging. If the build mode is not release, the default value of debuggable is true, indicating that the app supports debugging.
- false: The app does not support debugging. If the build mode is release, the default value of debuggable is false, indicating that debugging is not supported.
Setting the Debug Type
Choose Run > Edit Configurations > Debugger. On the left pane, choose Application > target module. On the right pane, set Debug type.
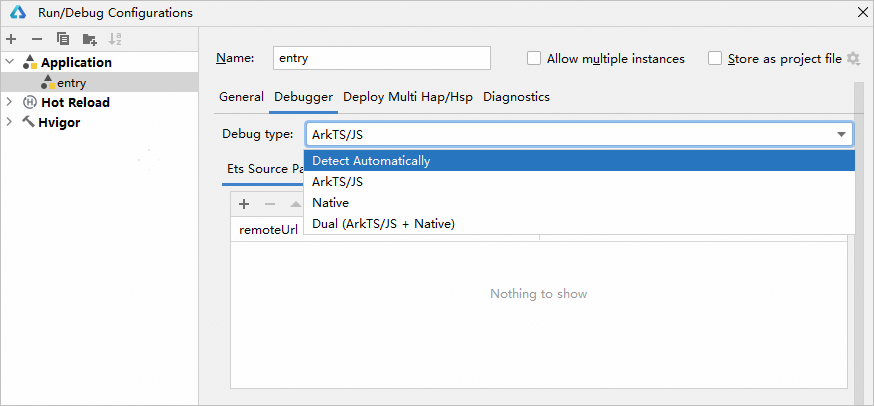
Debug Type | Code Type |
|---|---|
Detect Automatically | ArkTS/JS. The debugger is selected based on the programming languages involved in the project module and its dependent modules. |
ArkTS/JS |
|
Native | C/C++ |
Dual (ArkTS/JS + Native) | ArkTS/JS and C/C++ for C/C++ projects |
Setting the HAP Installation Mode
You can use either of the following modes as required:
- Mode 1: Uninstall the app/atomic service and then reinstall it. This will clear all cached app/atomic service data on the device.
Since DevEco Studio 4.1 Canary2, the app/atomic service package is not pushed for installation if the code does not change. That is, only the changed modules and the modules that rely on the changed modules are pushed and installed on the device. For example, the entry module relies on the HSP module. If the code of the HSP module changes, the HSP and entry modules will be pushed and installed during debugging.
- Mode 2: Install the app/atomic service in overwrite mode, which does not uninstall the existing app/atomic service. In this mode, the cached data of the app/atomic service will be retained.
To set the HAP installation mode:
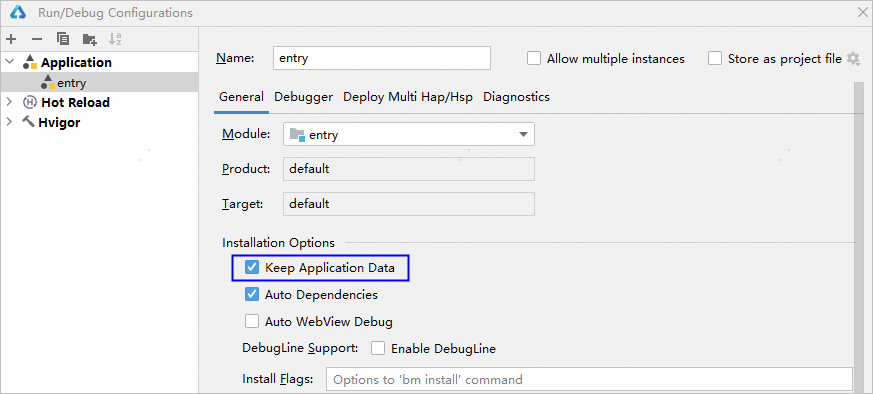
Choose Run > Edit Configurations, and select or deselect Keep Application Data under Installation Options. Selecting Keep Application Data will install the app/atomic service in overwrite mode, which retains the app/atomic service cached data.
[h2]Setting Debugging Parameters
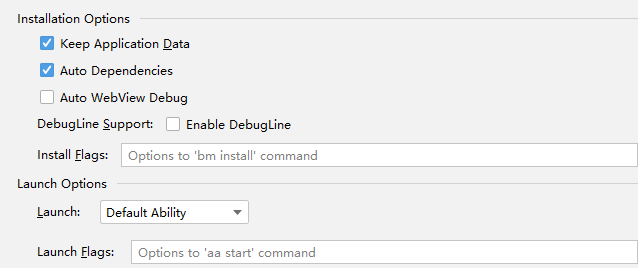
If you do not set debugging parameters, the app/atomic service will be installed and run based on the default configuration. You can set the parameters under Installation Options and Launch Options to match your case.
- Installation Options
- DebugLine Support: Select Enable DebugLine to enable the system components in the build products to include the debugline attribute, with which you can navigate through source code in ArkUI Inspector.
- Install Flags: You can enter parameters of the bm install command. For details, see install. For example, you can enter -w 360 to set the timeout to 360 seconds.
- Launch Options
- Launch: Select the ability to start after the app is installed.
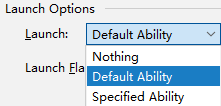
- Nothing: does not start any ability.
- Default Ability: starts the default EntryAbility. The default EntryAbility varies with the development model you use.
- Stage model: The default EntryAbility is the first ability under skills in the module.json5 file. If no ability is configured under skills, it is the ability specified by mainElement (the ability must be configured in the abilities array). If mainElement is not specified, the default EntryAbility is the first ability in the abilities array.

- FA model: The default EntryAbility is the first ability under skills in the config.json file. If no ability is configured under skills, it is the ability specified by mainAbility (the ability must be configured in the abilities array). If mainAbility is not specified, the default EntryAbility is the first ability in the abilities array.
- Stage model: The default EntryAbility is the first ability under skills in the module.json5 file. If no ability is configured under skills, it is the ability specified by mainElement (the ability must be configured in the abilities array). If mainElement is not specified, the default EntryAbility is the first ability in the abilities array.
- Specified Ability: starts a UIAbility or an ExtensionAbility in the project.
You can add a UIAbility or an ExtensionAbility to the project. For details, see UIAbility Component or ExtensionAbility Component.
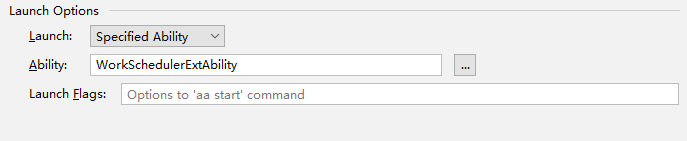
- Launch Flags: You can enter parameters of the aa start command. For details, see start.
- Launch: Select the ability to start after the app is installed.
[h2]Setting Environment Variables
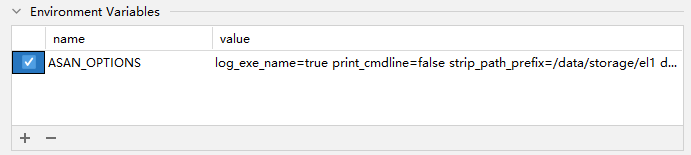
By configuring environment variables under Environment Variables, you can configure and manage the app development environment, as well as control the app behavior.

Click  to add a configuration item. The following configuration items are supported:
- ASAN_OPTIONS: defines behavior of ASan at runtime. You can set the detection level, output format, detail level of memory error reports, and other options. For details, see Configuring Parameters. If log_exe_name and abort_on_error are not configured, DevEco Studio will automatically fill them in. ASAN_OPTIONS applies at the app level and is only effective when configured in entry and feature modules; it does not take effect in HAR or HSP modules.

After the environment variables are configured, Keep Application Data does not take effect.
Select the set environment variables, and then click Apply for them to take effect.
Automatically Mapping the WebView Debugging Link.
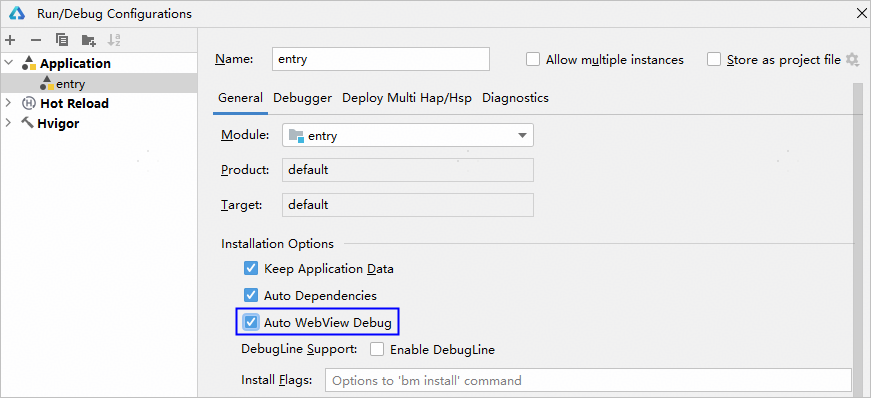
If your app contains a WebView component page to be debugged, use DevTools of the browser. For details, see Debugging Frontend Pages by Using DevTools. Debugging the WebView component requires complex command line operations such as port forwarding. You can select Auto WebView Debug in DevEco Studio, which automatically listens for the WebView process that can be debugged and completes port forwarding within two minutes after the app is started.
This feature is supported since DevEco Studio 5.0.5 Release.
To enable the feature:
Choose Run > Edit Configurations. On the General tab page, select Auto WebView Debug.
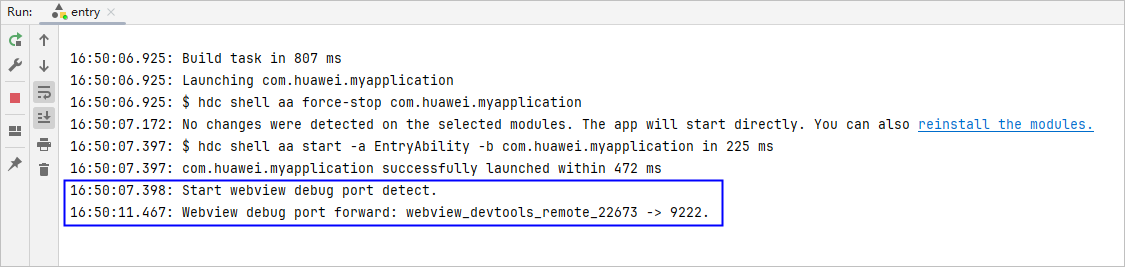
After this feature is enabled, when a WebView component process that can be debugged is detected on the device, the port that is successfully forwarded is displayed on the Run panel. You can connect to the port for debugging using DevTools of the browser.
[h2]Installing Multiple Modules
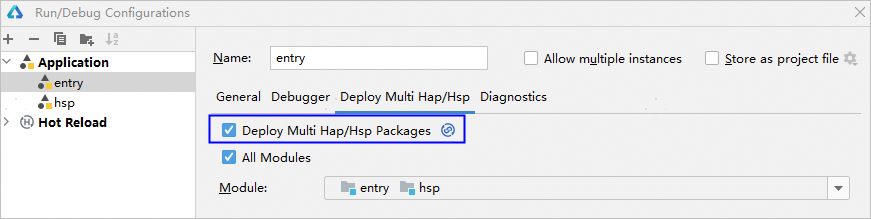
If a device in a project has multiple modules (for example, a device has entry and feature modules) and the modules are invoked by each other, you need to install the HAPs of the modules on the device in the debugging phase. In this case, you need to specify the modules on the Deploy Multi Hap/Hsp tab page. When you start debugging, DevEco Studio will install the specified modules on the device.
To install multiple modules for debugging:
Choose Run > Edit Configurations. On the Deploy Multi Hap/Hsp tab page, select Deploy Multi Hap/Hsp Packages and specify the modules.
[h2]Installing Dependencies Automatically
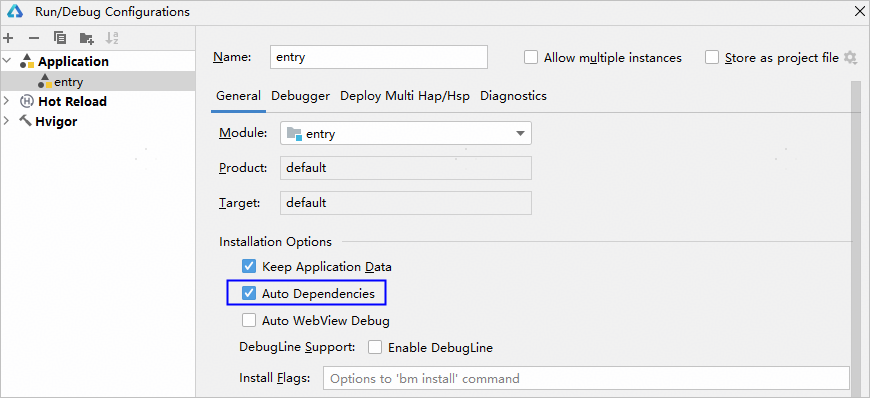
If a module has direct and indirect dependency modules (for example, the entry module depends on the HAR module, which in turn depends on the HSP module), you need to install HAPs of all these modules in the debugging phase. In this case, you can select Auto Dependencies. When you start debugging, DevEco Studio will install all dependency modules on the device.
To deploy dependencies:
Choose Run > Edit Configurations. On the General tab page, select Auto Dependencies.
In the Before launch pane, click  to add a task before the app is started.
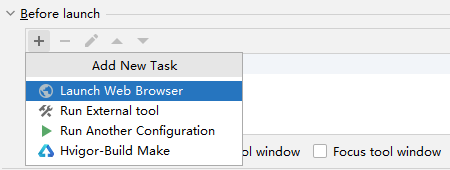
To remove a task, click  .

After selecting Auto Dependencies, you can also select Deploy Multi Hap/Hsp Packages to push all packages.
Running on Multiple Devices
DevEco Studio 6.0.2 Beta1 and later versions allow your app to run on multiple devices, including real devices and launched emulators.
- In the device selection box, click Select Multiple Devices… to open the multi-device selection dialog.
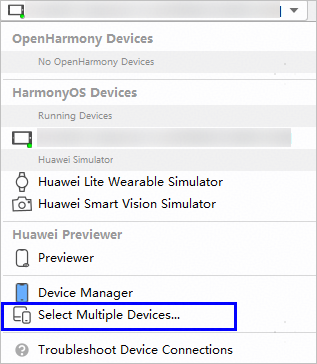
- Select the target devices where you want to run your app.
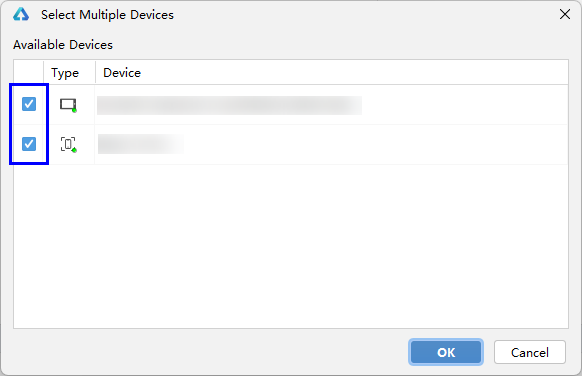
- The device bar will show Multiple Devices(N), indicating that N devices are selected. Click the Run button to launch and run the app on all selected devices at once.
