背景知识
- startAbility通过该方法可以启动一个UIAbility。
- getMainWindowSync获取该windowStage实例下的主窗口。
- setWindowLayoutFullScreen设置主窗口或子窗口的布局是否为沉浸式布局,使用Promise异步回调。沉浸式布局生效时,布局不避让状态栏与导航栏,组件可能产生与其重叠的情况。
- getWindowAvoidArea获取当前应用窗口内容规避的区域。如系统栏区域、刘海屏区域、手势区域、软键盘区域等与窗口内容重叠时,需要窗口内容避让的区域。
- on('avoidAreaChange')开启当前应用窗口系统规避区变化的监听。
- setSpecificSystemBarEnabled可以设置主窗口状态栏、底部导航区域的显示或隐藏。
- setWindowBackgroundColor设置窗口的背景色。未调用该接口时,窗口在浅色模式默认背景色为'#FFF0F0F0',在深色模式默认背景色为'#FF1A1A1A'。
- expandSafeArea控制组件扩展其安全区域。
- background设置组件背景。从API version 20开始,content参数新增了对ResourceColor类型的支持,并新增了背景向父组件的安全区扩展的能力。
- padding设置组件的内边距属性。
- setWindowDecorHeight设置窗口的标题栏高度,对存在标题栏和三键区的窗口形态生效。
- setWindowDecorVisible设置窗口标题栏是否可见,对存在标题栏和三键区的窗口形态生效。
- setTitleAndDockHoverShown设置主窗口进入全屏模式时鼠标Hover到热区上是否显示窗口标题栏和Dock栏。
- maximize实现最大化功能。主窗口可调用此接口实现最大化功能;子窗口需在创建时设置子窗口参数maximizeSupported为true,再调用此接口可实现最大化功能。
解决方案
本文通过十种方案实现沉浸式效果,以下表格为十种方案的对比及适用场景。
方案 | 关键技术点 | 适用场景 |
|---|---|---|
沉浸式模式下显示避让区。 | 在EntryAbility中通过窗口的setWindowLayoutFullScreen方法设置窗口为沉浸式,并用getWindowAvoidArea接口获取状态栏和导航条的高度,保存在AppStorage中,并在页面中获取ShowAvoidAreaEntryAbility.ets中保存的状态栏和导航条的高度,并通过padding给页面设置内边距以达到避让导航栏的效果。 | 此方案适用于应用全局设置沉浸式,并在页面内控制是否避让安全区。 |
页面中设置沉浸式并隐藏避让区。 | 在页面中通过setWindowLayoutFullScreen方法设置窗口沉浸式,并通过setSpecificSystemBarEnabled方法来控制状态栏和导航条的显示和隐藏。 | 此方案适用应用全局设置沉浸式并隐藏状态栏和导航条,如游戏、儿童识字学习类应用的场景。 |
通过设置窗口背景色实现沉浸式。 | 通过setWindowBackgroundColor设置窗口背景色实现沉浸式效果。 | 此方案适用于实现页面级沉浸式,实现简单,适用于页面整体色调一致的场景。 |
通过expandSafeArea实现沉浸式。 | 通过expandSafeArea属性控制组件扩展其安全区域 | 此方案适用于实现页面级沉浸式,并且可单独设置状态栏、导航条是否沉浸式。 |
滚动类组件实现沉浸式。 | 使用expandSafeArea属性控制List组件是否扩展到状态栏或者导航条。 | 此方案适用于滚动类组件。 |
通过background实现页面级沉浸式。 | 通过background设置页面的背景来实现沉浸式效果。 | 此方案实现简单,适用于实现页面级沉浸式。 |
通过ignoreLayoutSafeArea实现页面级沉浸式。 | 通过getWindowAvoidArea获取当前状态栏和导航条的高度,并设置ignoreLayoutSafeArea和组件的高度为LayoutPolicy.matchParent,再通过padding属性设置组件的内边距达到避让的效果。 | 作为组件级的沉浸式方案,每个页面均需单独配置。当页面内容与避让区发生冲突时,需由开发者手动进行避让处理。 |
通过ignoreLayoutSafeArea实现沉浸式并避让挖孔区。 | 通过setSpecificSystemBarEnabled方法设置状态栏和导航栏隐藏,最后通过on('avoidAreaChange')方法监听挖孔区的方向,根据此方向,通过padding设置组件的内边距,达到避让挖孔区的效果。 | 在需要充分利用屏幕可视区域的场景中,若要在状态栏显示重要信息或操作按钮,不仅需隐藏原始状态栏和导航条,还需对挖孔区域进行避让。这种情况下可以将背景全屏沉浸,内容区对挖孔区域做避让处理。 |
自由多窗实现全屏和非全屏模式时的沉浸式。 | 通过setWindowDecorVisible(false)接口设置标题栏的隐藏,仅保留右上角的三键区,setWindowDecorHeight()接口设置标题栏高度,控制右上角三键区显示高度,on('windowTitleButtonRectChange')注册右上角三键大小变化监听,用于页面布局避让。 | 此方案适用于自由窗口模式下,需隐藏默认标题栏,保留关闭、最小化、最大化三键区,使页面延伸至原标题栏区域,实现窗口沉浸式。 |
自由多窗实现仅在全屏模式时的沉浸式。 | 通过maximize接口设置window.MaximizePresentation.ENTER_IMMERSIVE窗口为全屏模式,通过setTitleAndDockHoverShown接口设置窗口标题栏和Dock栏隐藏即可实现仅在全屏模式时的沉浸式。 | 此方案适用于自由窗口模式下仅在全屏模式时的沉浸式。 |
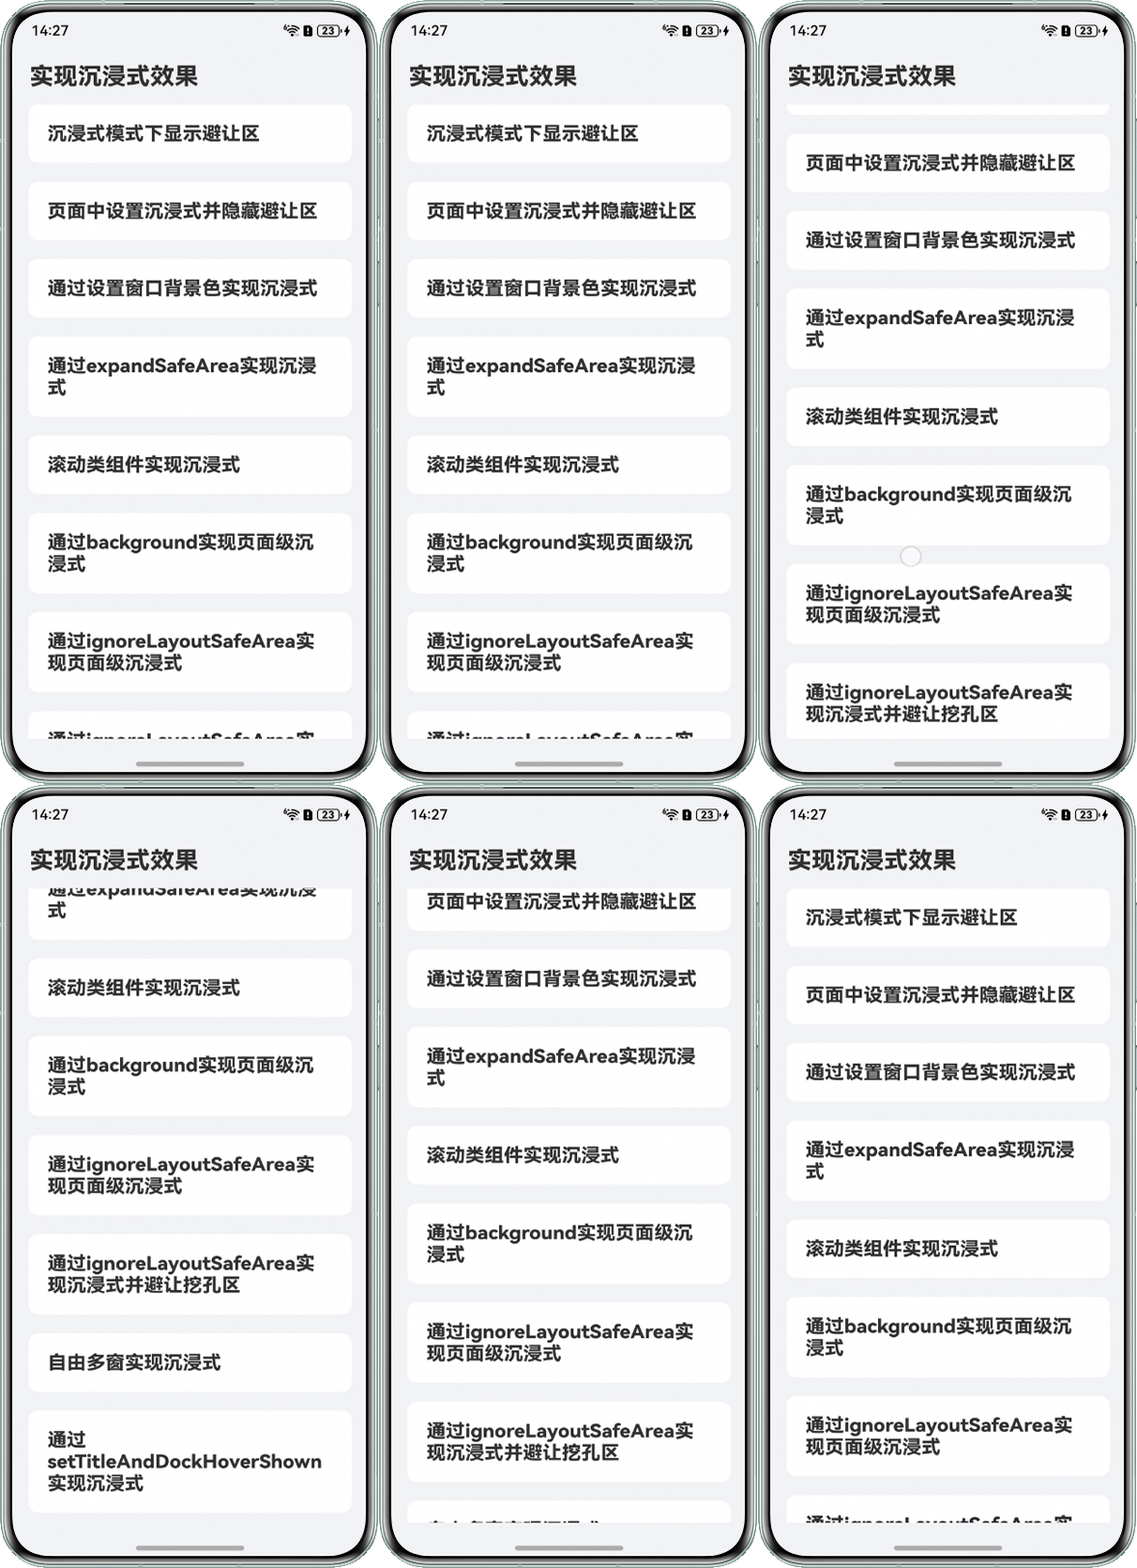
创建一个页面,作为十种沉浸式方案的入口载体,并创建十个EntryAbility,详细命名见以下表格。
沉浸式模式下显示避让区 | 页面中设置沉浸式并隐藏避让区 | 通过设置窗口背景色实现沉浸式 | 通过expandSafeArea实现沉浸式 | 滚动类组件实现沉浸式 | 通过background实现页面级沉浸式 | 通过ignoreLayoutSafeArea实现页面级沉浸式 | 通过ignoreLayoutSafeArea实现沉浸式并避让挖孔区 | 自由多窗实现全屏和非全屏模式时的沉浸式 | 自由多窗实现仅在全屏模式时的沉浸式 |
ShowAvoidAreaEntryAbility | HideAvoidAreaEntryAbility | WindowBackGroundColorEntryAbility | ExpandSafeAreaEntryAbility | ScrollableComponentEntryAbility | PageLevelFullScreenEntryAbility | PageFullScreenByIgnoreLayoutSafeAreaEntryAbility | IgnoreLayoutSafeAreaAvoidCutoutEntryAbility | FreeWindowFullScreenEntryAbility | MaximizeFullScreenEntryAbility |
- 创建WindowFullScreenHideAvoidAreaPage.ets用来承载十种沉浸式方案的入口,新建Item类用来承载需要跳转的EntryAbility的相关信息,并在aboutToAppear方法中实例化各个EntryAbility对应的Item,再通过startAbility方法跳转到对应方案的EntryAbility,示例代码如下:
import { common, Want } from '@kit.AbilityKit'; import { window } from '@kit.ArkUI'; class Item { name: string = ''; abilityName: string = ''; constructor(name: string, abilityName: string) { this.name = name; this.abilityName = abilityName; } } @Entry @Component struct WindowFullScreenHideAvoidAreaPage { @State dataSource: Item[] = []; @State statusBarHeight: number = 0; aboutToAppear(): void { this.dataSource.push(new Item('沉浸式模式下显示避让区', 'ShowAvoidAreaEntryAbility')); this.dataSource.push(new Item('页面中设置沉浸式并隐藏避让区', 'HideAvoidAreaEntryAbility')); this.dataSource.push(new Item('通过设置窗口背景色实现沉浸式', 'WindowBackGroundColorEntryAbility')); this.dataSource.push(new Item('通过expandSafeArea实现沉浸式', 'ExpandSafeAreaEntryAbility')); this.dataSource.push(new Item('滚动类组件实现沉浸式', 'ScrollableComponentEntryAbility')); this.dataSource.push(new Item('通过background实现页面级沉浸式', 'PageLevelFullScreenEntryAbility')); this.dataSource.push(new Item('通过ignoreLayoutSafeArea实现页面级沉浸式', 'PageFullScreenByIgnoreLayoutSafeAreaEntryAbility')); this.dataSource.push(new Item('通过ignoreLayoutSafeArea实现沉浸式并避让挖孔区', 'IgnoreLayoutSafeAreaAvoidCutoutEntryAbility')); this.dataSource.push(new Item('自由多窗实现沉浸式', 'FreeWindowFullScreenEntryAbility')); let windowStage = AppStorage.get('windowStage') as window.WindowStage; windowStage.getMainWindow().then((data) => { if (data == null) { console.error('Failed to obtain the main window. Cause: The data is empty'); return; } this.statusBarHeight = data.getWindowAvoidArea(window.AvoidAreaType.TYPE_SYSTEM).topRect.height; }); } build() { Column({ space: 15 }) { Text('实现沉浸式效果') .padding({ left: 20, top: 20 }) .fontSize(25) .fontWeight(800) .width('100%') .textAlign(TextAlign.Start); List({ space: 20, initialIndex: 0 }) { ForEach(this.dataSource, (item: Item) => { ListItem() { Text(item.name) .padding({ left: 20, top: 20, bottom: 20, right: 20 }) .fontWeight(800) .width('100%') .fontSize(20) .textAlign(TextAlign.Start) .borderRadius(10) .backgroundColor(0xFFFFFF); } .onClick(() => { this.jumpAbilityMethod(item.abilityName); }); }, (item: Item) => item.name); } .listDirection(Axis.Vertical) // 排列方向 .scrollBar(BarState.Off) .friction(0.6) .edgeEffect(EdgeEffect.Spring) // 边缘效果设置为Spring .width('90%'); } .padding({ top: this.getUIContext().px2vp(this.statusBarHeight), bottom: 100 }) .backgroundColor('#f1f3f5') .justifyContent(FlexAlign.Center) .alignItems(HorizontalAlign.Center) .height('100%') .width('100%'); } jumpAbilityMethod(abilityName: string) { let context = this.getUIContext().getHostContext() as common.UIAbilityContext; let want: Want = { deviceId: '', bundleName: 'com.example.windowfullscreendemo', abilityName: abilityName }; try { context.startAbility(want, (err: BusinessError) => { if (err.code) { // 处理业务逻辑错误 console.error(`startAbility failed, code is ${err.code}, message is ${err.message}`); return; } // 执行正常业务 console.info('startAbility succeed'); }); } catch (err) { // 处理入参错误异常 let code = (err as BusinessError).code; let message = (err as BusinessError).message; console.error(`startAbility failed, code is ${code}, message is ${message}`); } } } - 在EntryAbility.ets的loadContent方法中加载WindowFullScreenHideAvoidAreaPage.ets页面,示例代码如下:
import { UIAbility } from '@kit.AbilityKit';
import { hilog } from '@kit.PerformanceAnalysisKit';
import { window } from '@kit.ArkUI';

const DOMAIN = 0x0000;

export default class EntryAbility extends UIAbility {
  onDestroy(): void {
    hilog.info(DOMAIN, 'testTag', '%{public}s', 'Ability onDestroy');
  }

  onWindowStageCreate(windowStage: window.WindowStage): void {
    // Main window is created, set main page for this ability
    hilog.info(DOMAIN, 'testTag', '%{public}s', 'Ability onWindowStageCreate');
    windowStage.loadContent('pages/WindowFullScreenHideAvoidAreaPage', (err) => {
      if (err.code) {
        hilog.error(DOMAIN, 'testTag', 'Failed to load the content. Cause: %{public}s', JSON.stringify(err));
        return;
      }
      AppStorage.setOrCreate('windowStage', windowStage);
      let windowClass: window.Window = windowStage.getMainWindowSync(); // 获取应用主窗口
      // 1. 设置窗口全屏
      let isLayoutFullScreen = true;
      windowClass.setWindowLayoutFullScreen(isLayoutFullScreen).then(() => {
        console.info('Succeeded in setting the window layout to full-screen mode.');
      }).catch((err: BusinessError) => {
        console.error(`Failed to set the window layout to full-screen mode. Code is ${err.code}, message is ${err.message}`);
      });
    });
  }

  onWindowStageDestroy(): void {
    // Main window is destroyed, release UI related resources
    hilog.info(DOMAIN, 'testTag', '%{public}s', 'Ability onWindowStageDestroy');
  }

  onForeground(): void {
    // Ability has brought to foreground
    hilog.info(DOMAIN, 'testTag', '%{public}s', 'Ability onForeground');
  }

  onBackground(): void {
    // Ability has back to background
    hilog.info(DOMAIN, 'testTag', '%{public}s', 'Ability onBackground');
  }
};
实现效果如下:
[h2]方案一:沉浸式模式下显示避让区
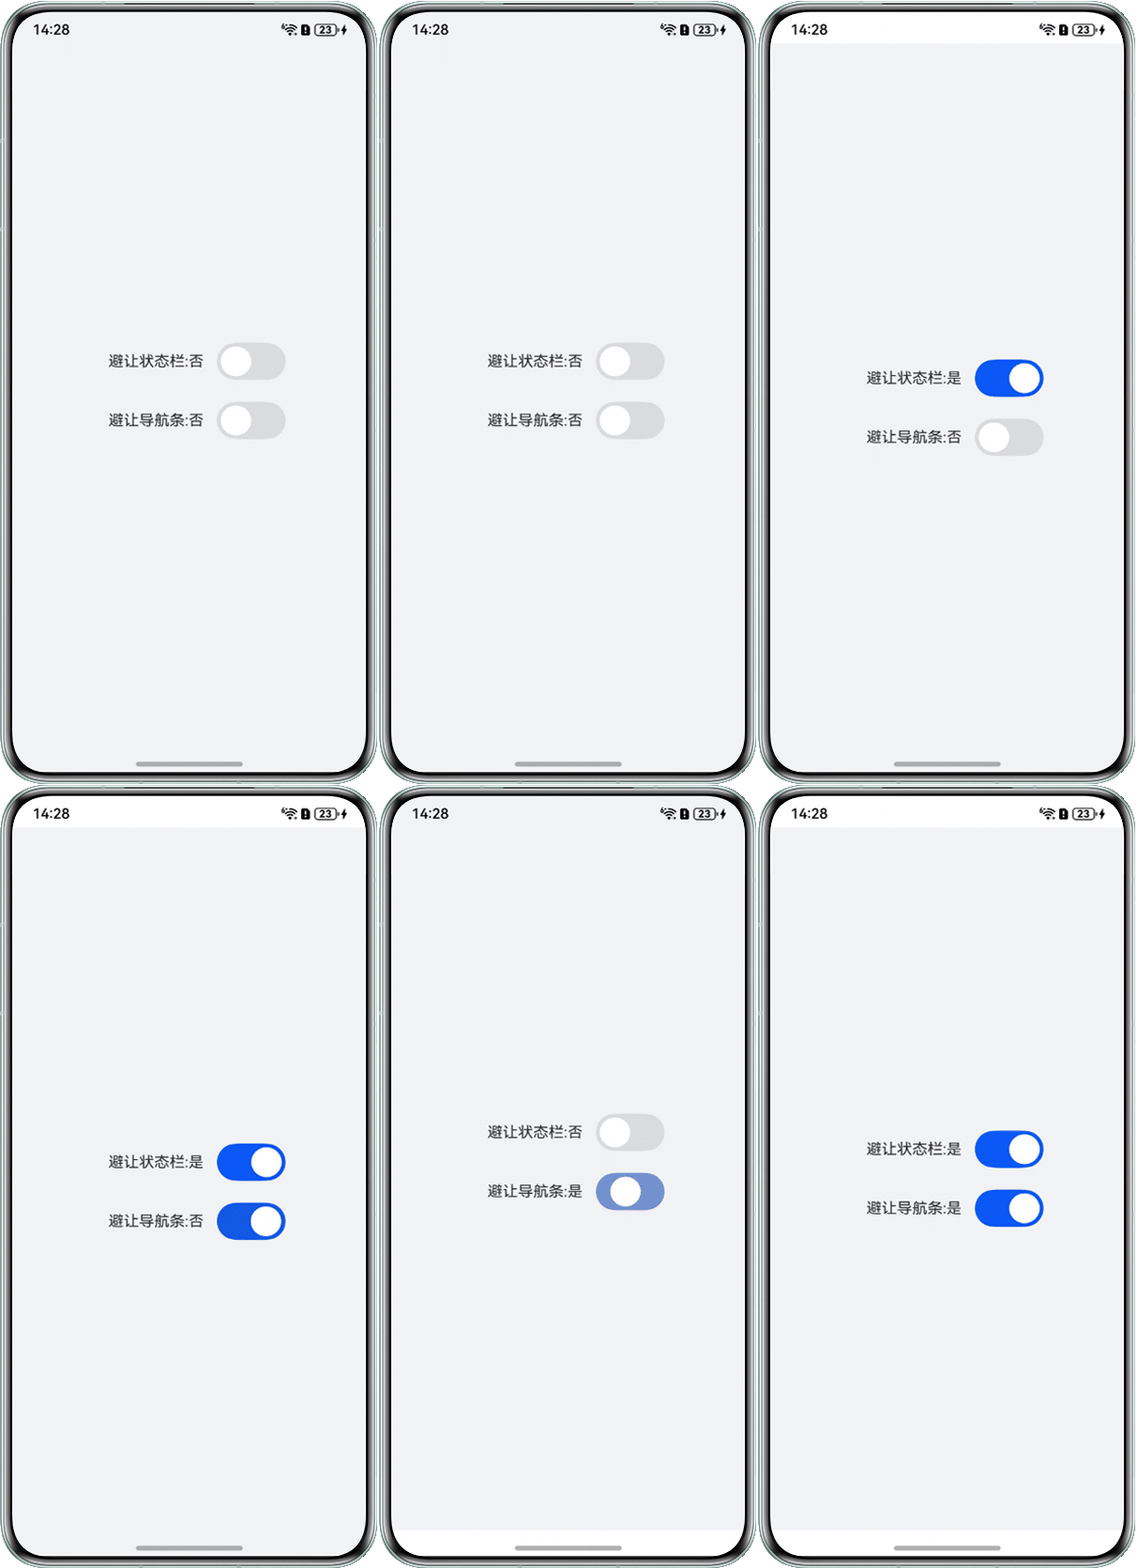
通过窗口的setWindowLayoutFullScreen方法设置窗口为沉浸式,并用getWindowAvoidArea接口获取状态栏和导航条的高度,保存在AppStorage中,并在页面中获取ShowAvoidAreaEntryAbility.ets中保存的状态栏和导航条的高度,并通过padding给页面设置内边距以达到避让导航栏的效果,在本例中通过Toggle组件来控制是否避让状态栏和导航条。
- 在ShowAvoidAreaEntryAbility.ets中通过窗口的setWindowLayoutFullScreen方法设置窗口为沉浸式,并用getWindowAvoidArea接口获取状态栏和导航条的高度,保存在AppStorage中,以供后续在页面中获取状态栏和导航条的高度,示例代码如下:
import { UIAbility } from '@kit.AbilityKit'; import { hilog } from '@kit.PerformanceAnalysisKit'; import { window } from '@kit.ArkUI'; const DOMAIN = 0x0000; export default class ShowAvoidAreaEntryAbility extends UIAbility { onDestroy(): void { hilog.info(DOMAIN, 'testTag', '%{public}s', 'Ability onDestroy'); } onWindowStageCreate(windowStage: window.WindowStage): void { // Main window is created, set main page for this ability hilog.info(DOMAIN, 'testTag', '%{public}s', 'Ability onWindowStageCreate'); windowStage.loadContent('pages/ShowAvoidAreaPage', (err) => { if (err.code) { hilog.error(DOMAIN, 'testTag', 'Failed to load the content. Cause: %{public}s', JSON.stringify(err)); return; } let windowClass: window.Window = windowStage.getMainWindowSync(); // 获取应用主窗口 // 1. 设置窗口全屏 let isLayoutFullScreen = true; windowClass.setWindowLayoutFullScreen(isLayoutFullScreen).then(() => { console.info('Succeeded in setting the window layout to full-screen mode.'); }).catch((err: BusinessError) => { console.error(`Failed to set the window layout to full-screen mode. Code is ${err.code}, message is ${err.message}`); }); // 获取导航条和状态栏高度 let type = window.AvoidAreaType.TYPE_NAVIGATION_INDICATOR; // 此处以导航条避让为例 let avoidArea = windowClass.getWindowAvoidArea(type); let bottomRectHeight = avoidArea.bottomRect.height; // 获取到导航区域的高度 AppStorage.setOrCreate('bottomRectHeight', bottomRectHeight); type = window.AvoidAreaType.TYPE_SYSTEM; // 以状态栏避让为例 avoidArea = windowClass.getWindowAvoidArea(type); let topRectHeight = avoidArea.topRect.height; // 获取状态栏区域高度 AppStorage.setOrCreate('topRectHeight', topRectHeight); hilog.info(DOMAIN, 'testTag', 'Succeeded in loading the content.'); windowClass.on('avoidAreaChange', (data) => { if (data.type === window.AvoidAreaType.TYPE_SYSTEM) { let topRectHeight = data.area.topRect.height; AppStorage.setOrCreate('topRectHeight', topRectHeight); } else if (data.type == window.AvoidAreaType.TYPE_NAVIGATION_INDICATOR) { let bottomRectHeight = data.area.bottomRect.height; AppStorage.setOrCreate('bottomRectHeight', bottomRectHeight); } }); }); } onWindowStageDestroy(): void { // Main window is destroyed, release UI related resources hilog.info(DOMAIN, 'testTag', '%{public}s', 'Ability onWindowStageDestroy'); } onForeground(): void { // Ability has brought to foreground hilog.info(DOMAIN, 'testTag', '%{public}s', 'Ability onForeground'); } onBackground(): void { // Ability has back to background hilog.info(DOMAIN, 'testTag', '%{public}s', 'Ability onBackground'); } }; - 在ShowAvoidAreaPage.ets页面中用@StorageProp获取ShowAvoidAreaEntryAbility.ets中保存的状态栏和导航条的高度,并通过padding给页面设置内边距以达到避让导航栏的效果,在本例中通过Toggle组件来控制是否避让状态栏和导航条,示例代码如下:
@Entry
@Component
struct ShowAvoidAreaPage {
  @StorageProp('bottomRectHeight') bottomRectHeight: number = 0;
  @StorageProp('topRectHeight') topRectHeight: number = 0;
  @State isAvoidStatus: boolean = false;
  @State isAvoidNavigationIndicator: boolean = false;

  build() {
    Column() {
      Column({ space: 35 }) {
        Row({ space: 30 }) {
          if (this.isAvoidStatus) {
            Text('避让状态栏:是');
          } else {
            Text('避让状态栏:否');
          }
          Toggle({ type: ToggleType.Switch, isOn: this.isAvoidStatus })
            .scale({ x: 2, y: 2 })
            .onChange((isOn: boolean) => {
              this.isAvoidStatus = isOn;
            });
        };

        Row({ space: 30 }) {
          if (this.isAvoidNavigationIndicator) {
            Text('避让导航条:是');
          } else {
            Text('避让导航条:否');
          }
          Toggle({ type: ToggleType.Switch, })
            .scale({ x: 2, y: 2 })
            .onChange((isOn: boolean) => {
              this.isAvoidNavigationIndicator = isOn;
            });
        };
      }
      .justifyContent(FlexAlign.Center)
      .alignItems(HorizontalAlign.Center)
      .backgroundColor('#f1f3f5')
      .height('100%')
      .width('100%');
    }
    .padding({
      top: this.isAvoidStatus ? this.getUIContext().px2vp(this.topRectHeight) : 0,
      bottom: this.isAvoidNavigationIndicator ? this.getUIContext().px2vp(this.bottomRectHeight) : 0
    })
    .height('100%')
    .width('100%');
  }
}
实现效果如下:
[h2]方案二:页面中设置沉浸式并隐藏避让区
- 在HideAvoidAreaEntryAbility.ets的loadContent方法中加载Index.ets页面,示例代码如下:
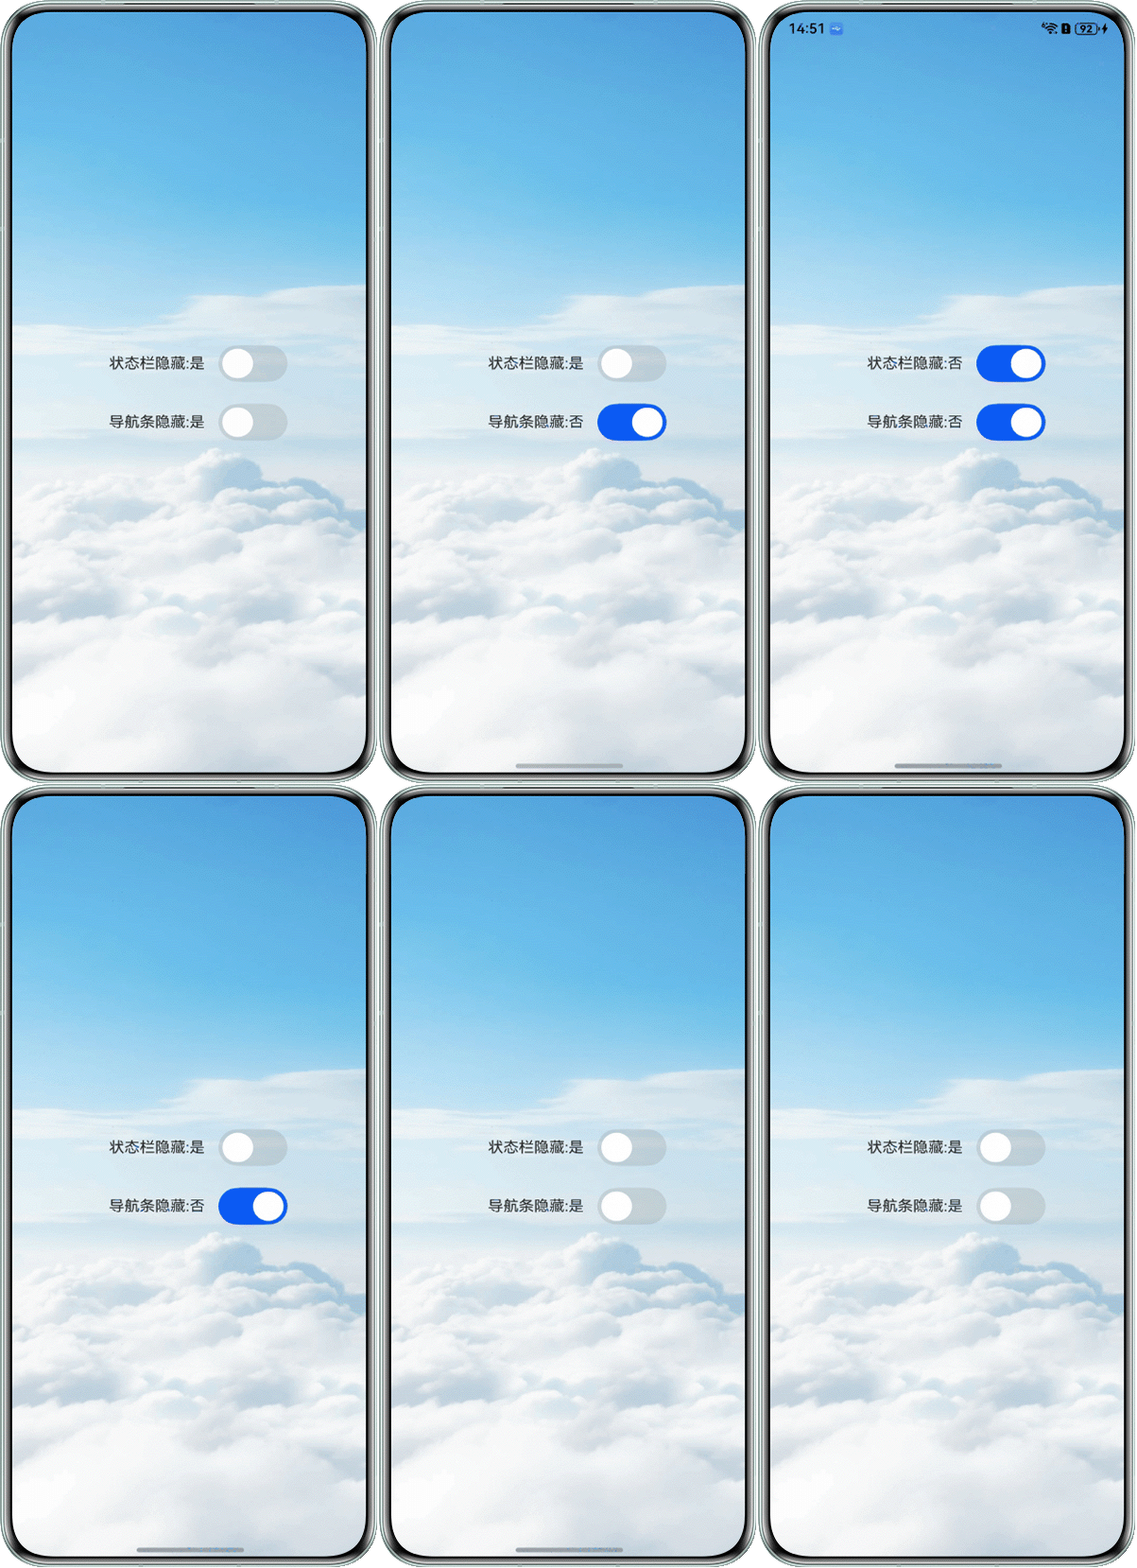
import { UIAbility } from '@kit.AbilityKit'; import { hilog } from '@kit.PerformanceAnalysisKit'; import { window } from '@kit.ArkUI'; const DOMAIN = 0x0000; export default class HideAvoidAreaEntryAbility extends UIAbility { onDestroy(): void { hilog.info(DOMAIN, 'testTag', '%{public}s', 'Ability onDestroy'); } onWindowStageCreate(windowStage: window.WindowStage): void { // Main window is created, set main page for this ability hilog.info(DOMAIN, 'testTag', '%{public}s', 'Ability onWindowStageCreate'); windowStage.loadContent('pages/Index', (err) => { if (err.code) { hilog.error(DOMAIN, 'testTag', 'Failed to load the content. Cause: %{public}s', JSON.stringify(err)); return; } AppStorage.setOrCreate('windowStage', windowStage); }); } onWindowStageDestroy(): void { // Main window is destroyed, release UI related resources hilog.info(DOMAIN, 'testTag', '%{public}s', 'Ability onWindowStageDestroy'); } onForeground(): void { // Ability has brought to foreground hilog.info(DOMAIN, 'testTag', '%{public}s', 'Ability onForeground'); } onBackground(): void { // Ability has back to background hilog.info(DOMAIN, 'testTag', '%{public}s', 'Ability onBackground'); } }; - 在Index.ets页面中通过setWindowLayoutFullScreen方法设置窗口沉浸式,并通过setSpecificSystemBarEnabled方法配合Toggle组件控制状态栏和导航条的显示和隐藏,示例代码如下:
import { window } from '@kit.ArkUI';

@Entry
@Component
struct Index {
  @State isShowStatus: boolean = false;
  @State isShowNavigationIndicator: boolean = false;
  private windowStage = AppStorage.get('windowStage') as window.WindowStage;
  private windowClass: window.Window = this.windowStage.getMainWindowSync(); // 获取应用主窗口

  aboutToAppear(): void {
    // 1. 设置窗口全屏
    let isLayoutFullScreen = true;
    this.windowClass.setWindowLayoutFullScreen(isLayoutFullScreen).then(() => {
      console.info('Succeeded in setting the window layout to full-screen mode.');
    }).catch((err: BusinessError) => {
      console.error(`Failed to set the window layout to full-screen mode. Code is ${err.code}, message is ${err.message}`);
    });
    // 1. 设置状态栏隐藏
    this.setStatusMethod();
    // 2. 设置导航区域隐藏
    this.setNavigationIndicatorMethod();
  }

  setStatusMethod() {
    this.windowClass.setSpecificSystemBarEnabled('status', this.isShowStatus).then(() => {
      console.info('Succeeded in setting the status bar to be invisible.');
    }).catch((err: BusinessError) => {
      console.error(`Failed to set the status bar to be invisible. Code is ${err.code}, message is ${err.message}`);
    });
  }

  setNavigationIndicatorMethod() {
    this.windowClass.setSpecificSystemBarEnabled('navigationIndicator', this.isShowNavigationIndicator).then(() => {
      console.info('Succeeded in setting the navigation indicator to be invisible.');
    }).catch((err: BusinessError) => {
      console.error(`Failed to set the navigation indicator to be invisible. Code is ${err.code}, message is ${err.message}`);
    });
  }

  build() {
    Stack() {
      Image($r('app.media.img_2'))
        .height('100%')
        .width('100%');
      Column() {
        Column({ space: 35 }) {
          Row({ space: 30 }) {
            if (this.isShowStatus) {
              Text('状态栏隐藏:否');
            } else {
              Text('状态栏隐藏:是');
            }
            Toggle({ type: ToggleType.Switch, isOn: this.isShowStatus })
              .scale({ x: 2, y: 2 })
              .onChange((isOn: boolean) => {
                this.isShowStatus = isOn;
                this.setStatusMethod();
              });
          };

          Row({ space: 30 }) {
            if (this.isShowNavigationIndicator) {
              Text('导航条隐藏:否');
            } else {
              Text('导航条隐藏:是');
            }
            Toggle({ type: ToggleType.Switch, isOn: this.isShowNavigationIndicator })
              .scale({ x: 2, y: 2 })
              .onChange((isOn: boolean) => {
                this.isShowNavigationIndicator = isOn;
                this.setNavigationIndicatorMethod();
              });
          };
        };

      };
    }
    .backgroundColor('#f1f3f5')
    .height('100%');
  }
}
实现效果如下:
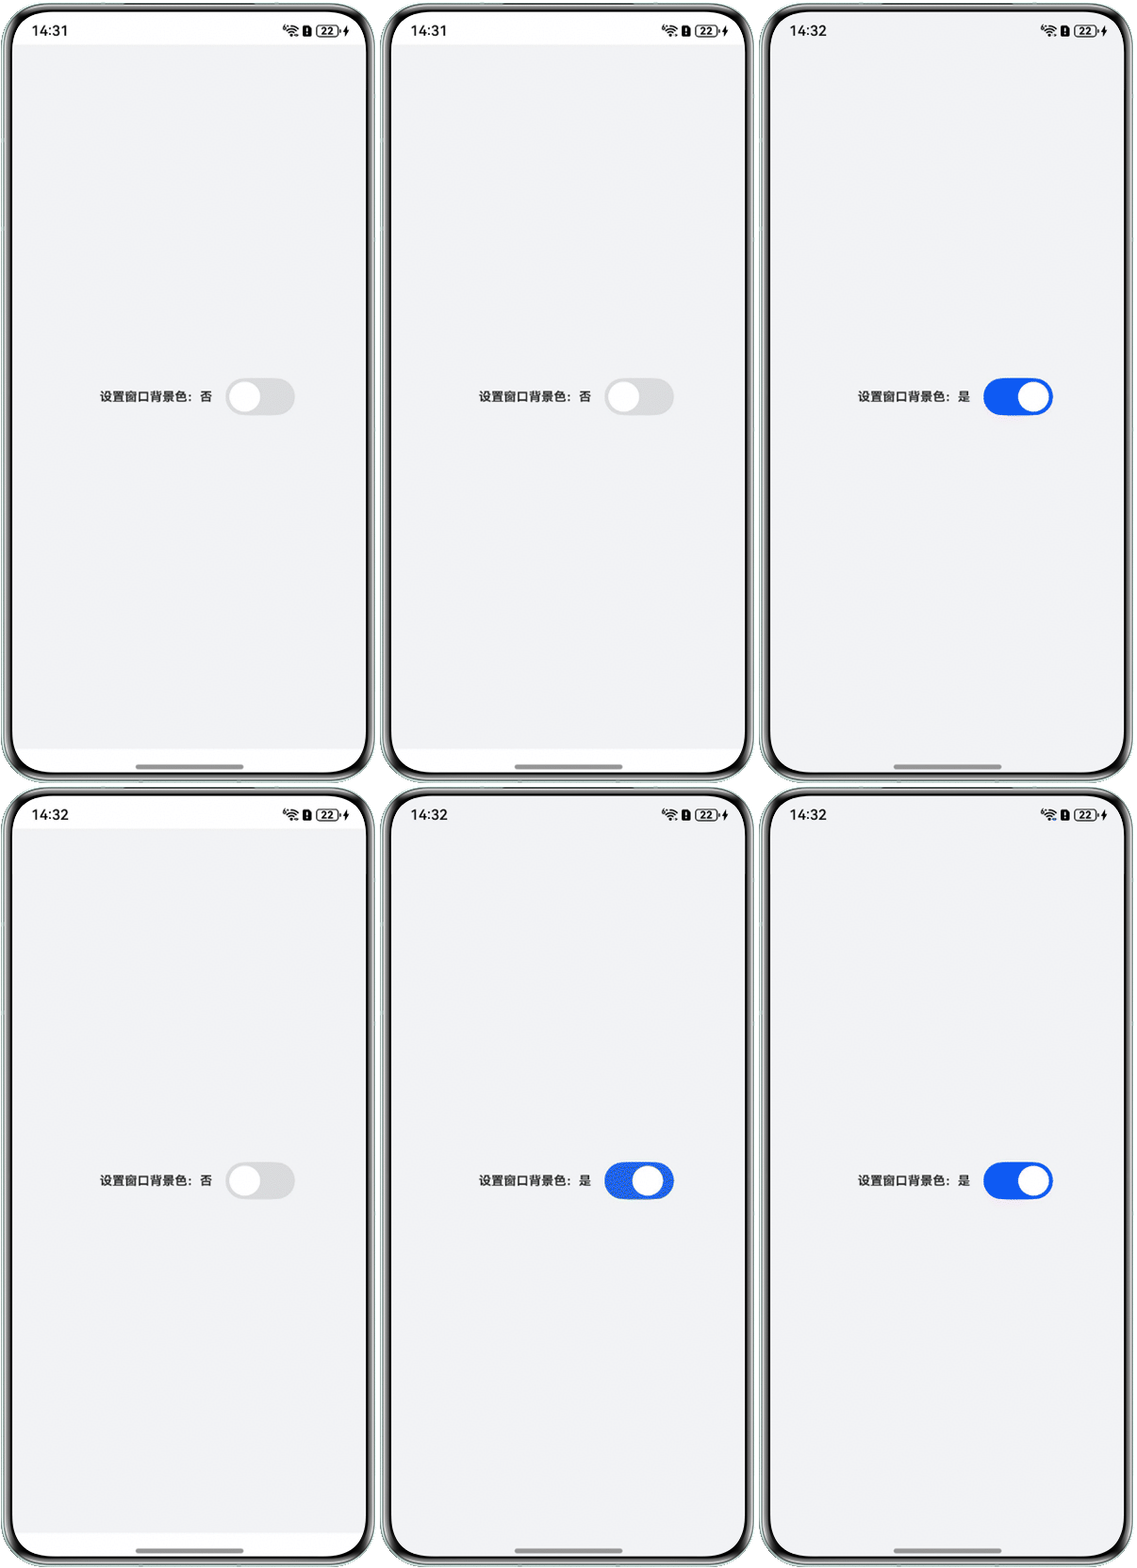
[h2]方案三:通过设置窗口背景色实现沉浸式
- 在WindowBackGroundColorEntryAbility.ets文件中的loadContent方法中加载下一步创建的WindowBackGroundColorDemo.ets页面,并保存windowStage到AppStorage中,示例代码如下:
import { UIAbility } from '@kit.AbilityKit'; import { hilog } from '@kit.PerformanceAnalysisKit'; import { window } from '@kit.ArkUI'; const DOMAIN = 0x0000; export default class WindowBackGroundColorEntryAbility extends UIAbility { onDestroy(): void { hilog.info(DOMAIN, 'testTag', '%{public}s', 'Ability onDestroy'); } onWindowStageCreate(windowStage: window.WindowStage): void { // Main window is created, set main page for this ability hilog.info(DOMAIN, 'testTag', '%{public}s', 'Ability onWindowStageCreate'); windowStage.loadContent('pages/WindowBackGroundColorDemo', (err) => { if (err.code) { hilog.error(DOMAIN, 'testTag', 'Failed to load the content. Cause: %{public}s', JSON.stringify(err)); return; } AppStorage.setOrCreate('windowStage', windowStage); hilog.info(DOMAIN, 'testTag', 'Succeeded in loading the content.'); }); } onWindowStageDestroy(): void { // Main window is destroyed, release UI related resources hilog.info(DOMAIN, 'testTag', '%{public}s', 'Ability onWindowStageDestroy'); } onForeground(): void { // Ability has brought to foreground hilog.info(DOMAIN, 'testTag', '%{public}s', 'Ability onForeground'); } onBackground(): void { // Ability has back to background hilog.info(DOMAIN, 'testTag', '%{public}s', 'Ability onBackground'); } }; - 创建WindowBackGroundColorDemo.ets页面,并通过setWindowBackgroundColor和Toggle组件配合来控制是否设置窗口背景色,示例代码如下:
import { window } from '@kit.ArkUI';

@Entry
@Component
struct WindowBackGroundColorDemo {
  private windowStage = AppStorage.get('windowStage') as window.WindowStage;
  private windowClass: window.Window = this.windowStage.getMainWindowSync(); // 获取应用主窗口
  @State isWindowBackGroundColor: boolean = false;

  build() {
    RelativeContainer() {
      Row({ space: 30 }) {
        if (this.isWindowBackGroundColor) {
          Text('设置窗口背景色:是')
            .fontSize(13)
            .fontWeight(FontWeight.Bold);
        } else {
          Text('设置窗口背景色:否')
            .fontSize(13)
            .fontWeight(FontWeight.Bold);
        }

        Toggle({ type: ToggleType.Switch })
          .scale({ x: 2, y: 2 })
          .onChange((isOn: boolean) => {
            this.isWindowBackGroundColor = isOn;
            if (isOn) {
              this.windowClass.setWindowBackgroundColor('#f1f3f5');
            } else {
              this.windowClass.setWindowBackgroundColor('#ffffff');
            }
          });
      }
      .alignRules({
        center: { anchor: '__container__', align: VerticalAlign.Center },
        middle: { anchor: '__container__', align: HorizontalAlign.Center }
      });
    }
    .backgroundColor('#f1f3f5')
    .height('100%')
    .width('100%');
  }
}
实现效果如下:
[h2]方案四:通过expandSafeArea实现沉浸式
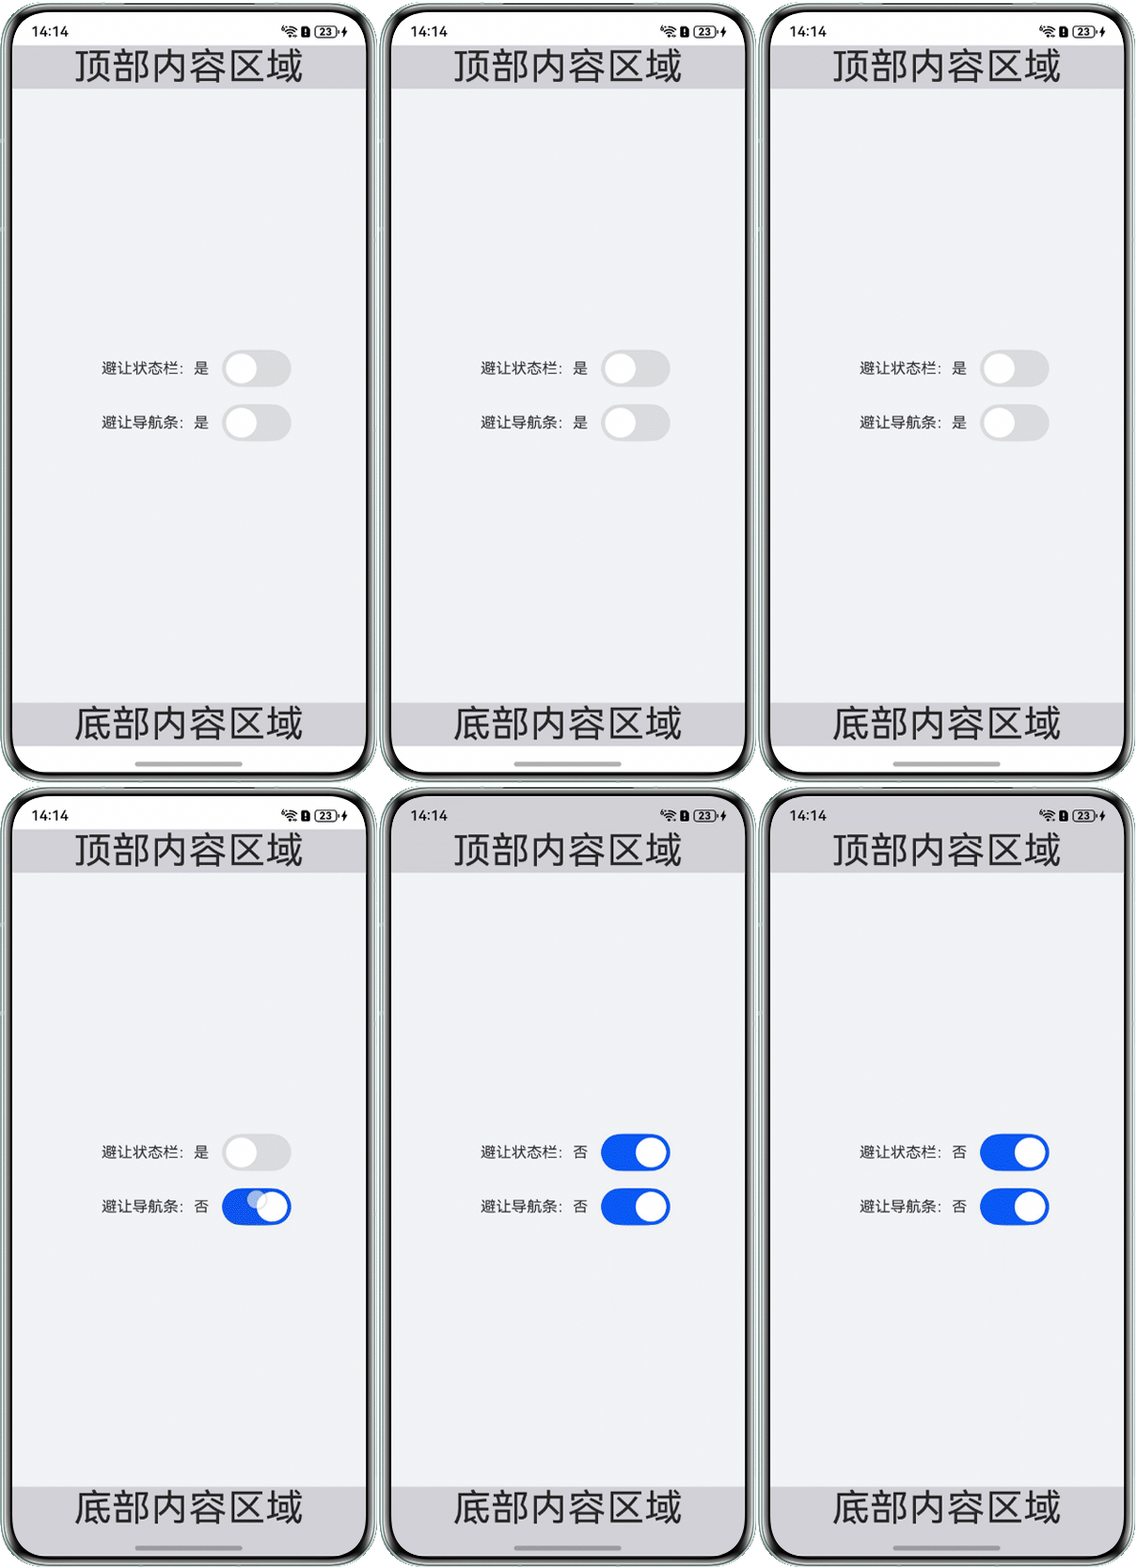
- 创建ExpandSafeAreaPage.ets页面,并用expandSafeArea属性配合Toggle组件控制组件扩展其安全区域,示例代码如下:
@Entry @Component struct ExpandSafeAreaPage { @State topSafeAreaArr: Array<SafeAreaEdge> = []; @State bottomSafeAreaArr: Array<SafeAreaEdge> = []; build() { Column() { Row() { Text('顶部内容区域').fontSize(40).textAlign(TextAlign.Center).width('100%'); }.backgroundColor('#d1d1d6') // 设置顶部绘制延伸到状态栏 .expandSafeArea([SafeAreaType.SYSTEM], this.topSafeAreaArr); Column({ space: 30 }) { Row({ space: 30 }) { if (this.topSafeAreaArr.length > 0) { Text('避让状态栏:否'); } else { Text('避让状态栏:是'); } Toggle({ type: ToggleType.Switch }) .scale({ x: 2, y: 2 }) .onChange((isOn: boolean) => { if (isOn) { this.topSafeAreaArr = [SafeAreaEdge.TOP]; } else { this.topSafeAreaArr = []; } }); }; Row({ space: 30 }) { if (this.bottomSafeAreaArr.length > 0) { Text('避让导航条:否'); } else { Text('避让导航条:是'); } Toggle({ type: ToggleType.Switch }) .scale({ x: 2, y: 2 }) .onChange((isOn: boolean) => { if (isOn) { this.bottomSafeAreaArr = [SafeAreaEdge.BOTTOM]; } else { this.bottomSafeAreaArr = []; } }); }; }; Row() { Text('底部内容区域').fontSize(40).textAlign(TextAlign.Center).width('100%'); }.backgroundColor('#d1d1d6') // 设置底部绘制延伸到导航区域 .expandSafeArea([SafeAreaType.SYSTEM], this.bottomSafeAreaArr); } .width('100%') .height('100%') .alignItems(HorizontalAlign.Center) .backgroundColor('#f1f3f5') .justifyContent(FlexAlign.SpaceBetween); } } - 在ExpandSafeAreaEntryAbility.ets文件中的loadContent方法中加载ExpandSafeAreaPage.ets页面,示例代码如下:
import { UIAbility } from '@kit.AbilityKit';
import { hilog } from '@kit.PerformanceAnalysisKit';
import { window } from '@kit.ArkUI';

const DOMAIN = 0x0000;

export default class ExpandSafeAreaEntryAbility extends UIAbility {
  onDestroy(): void {
    hilog.info(DOMAIN, 'testTag', '%{public}s', 'Ability onDestroy');
  }

  onWindowStageCreate(windowStage: window.WindowStage): void {
    // Main window is created, set main page for this ability
    hilog.info(DOMAIN, 'testTag', '%{public}s', 'Ability onWindowStageCreate');
    windowStage.loadContent('pages/ExpandSafeAreaPage', (err) => {
      if (err.code) {
        hilog.error(DOMAIN, 'testTag', 'Failed to load the content. Cause: %{public}s', JSON.stringify(err));
        return;
      }
      hilog.info(DOMAIN, 'testTag', 'Succeeded in loading the content.');
    });
  }

  onWindowStageDestroy(): void {
    // Main window is destroyed, release UI related resources
    hilog.info(DOMAIN, 'testTag', '%{public}s', 'Ability onWindowStageDestroy');
  }

  onForeground(): void {
    // Ability has brought to foreground
    hilog.info(DOMAIN, 'testTag', '%{public}s', 'Ability onForeground');
  }

  onBackground(): void {
    // Ability has back to background
    hilog.info(DOMAIN, 'testTag', '%{public}s', 'Ability onBackground');
  }
};
实现效果如下:
[h2]方案五:滚动类组件实现沉浸式
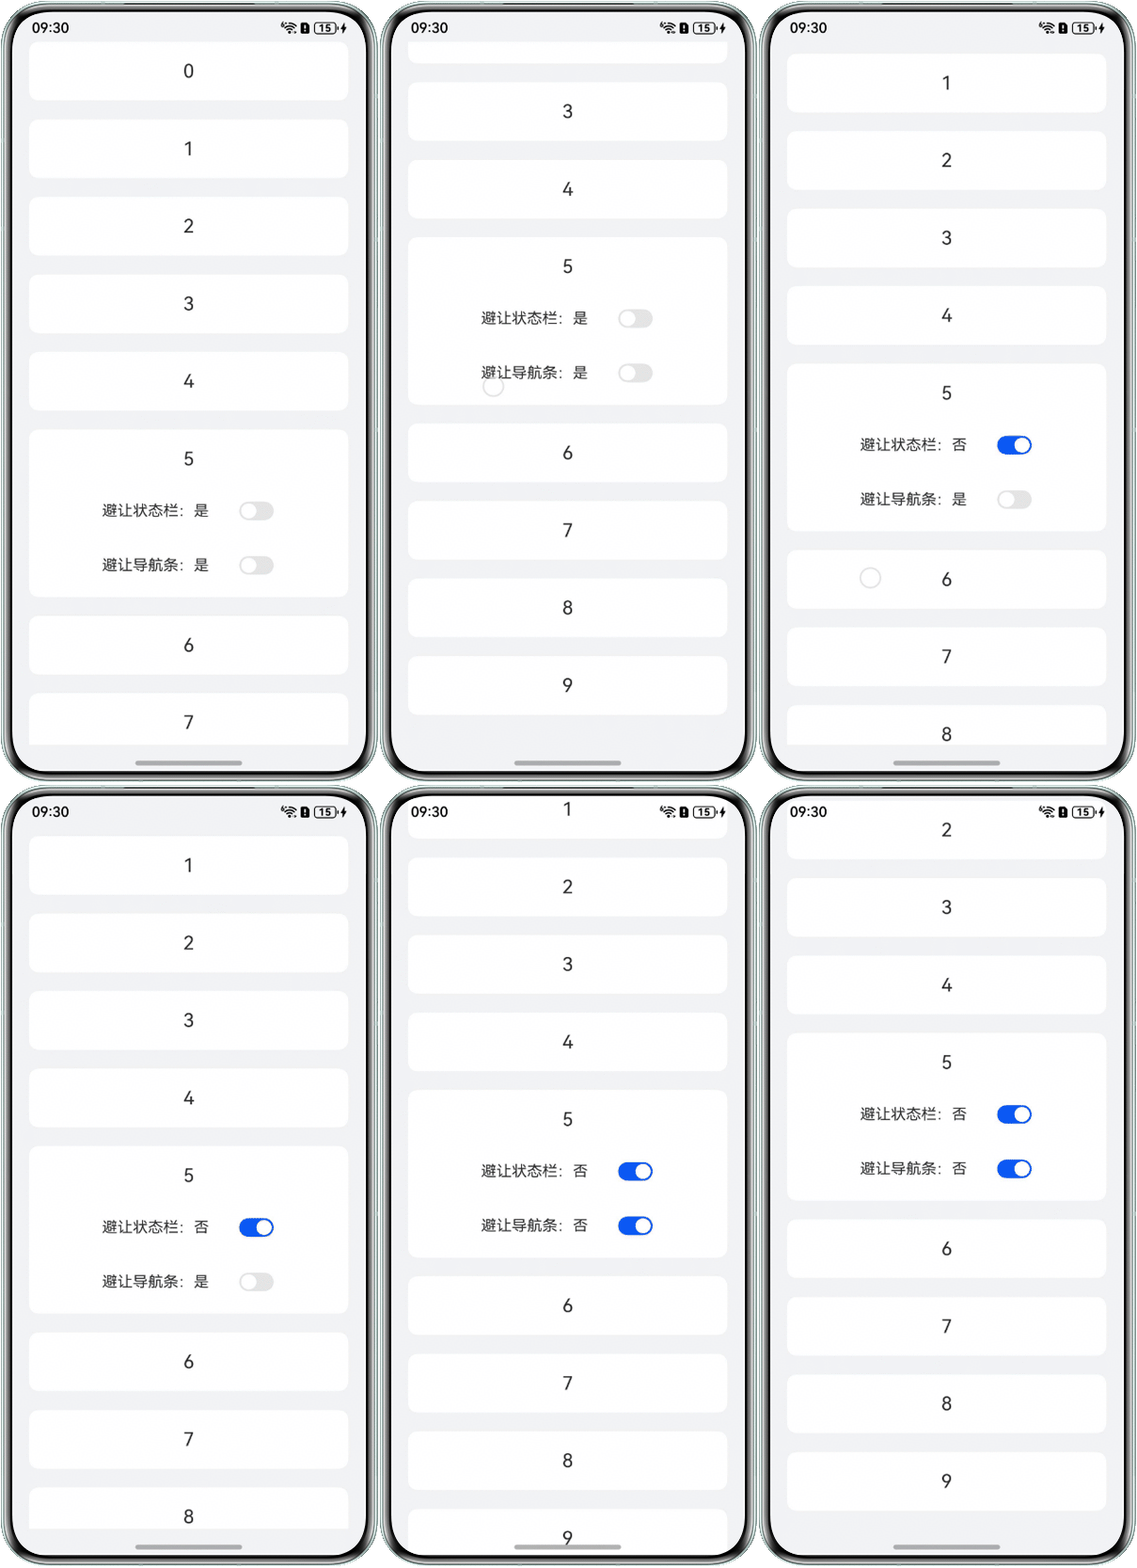
- 在ScrollableComponentEntryAbility.ets文件中的loadContent方法中加载下一步创建的ScrollableComponentPage.ets页面,并通过窗口的setWindowBackgroundColor方法设置背景色,示例代码如下:
import { UIAbility } from '@kit.AbilityKit'; import { hilog } from '@kit.PerformanceAnalysisKit'; import { window } from '@kit.ArkUI'; const DOMAIN = 0x0000; export default class ScrollableComponentEntryAbility extends UIAbility { onDestroy(): void { hilog.info(DOMAIN, 'testTag', '%{public}s', 'Ability onDestroy'); } onWindowStageCreate(windowStage: window.WindowStage): void { // Main window is created, set main page for this ability hilog.info(DOMAIN, 'testTag', '%{public}s', 'Ability onWindowStageCreate'); windowStage.loadContent('pages/ScrollableComponentPage', (err) => { if (err.code) { hilog.error(DOMAIN, 'testTag', 'Failed to load the content. Cause: %{public}s', JSON.stringify(err)); return; } windowStage.getMainWindowSync().setWindowBackgroundColor('#f1f3f5'); // 配置窗口整体底色 }); } onWindowStageDestroy(): void { // Main window is destroyed, release UI related resources hilog.info(DOMAIN, 'testTag', '%{public}s', 'Ability onWindowStageDestroy'); } onForeground(): void { // Ability has brought to foreground hilog.info(DOMAIN, 'testTag', '%{public}s', 'Ability onForeground'); } onBackground(): void { // Ability has back to background hilog.info(DOMAIN, 'testTag', '%{public}s', 'Ability onBackground'); } }; - 创建ScrollableComponentPage.ets页面,使用expandSafeArea属性配合Toggle组件来控制List组件是否扩展到状态栏或者导航条,示例代码如下:
// xxx.ets
@Entry
@Component
struct ScrollableComponentPage {
  private dataSource: number[] = [0, 1, 2, 3, 4, 5, 6, 7, 8, 9];
  @State arr: Array<SafeAreaEdge> = [];
  @State safeAreaTypeArr: Array<SafeAreaType> = [];

  build() {
    Column() {
      List({ space: 20, initialIndex: 0 }) {
        ForEach(this.dataSource, (item: number, index: number) => {
          ListItem() {
            Column({ space: 30 }) {
              Text(item.toString())
                .fontSize(20)
                .textAlign(TextAlign.Center)
                .width('100%');
              if (index == 5) {
                Row({ space: 30 }) {
                  if (this.arr.includes(SafeAreaEdge.TOP)) {
                    Text('避让状态栏:否');
                  } else {
                    Text('避让状态栏:是');
                  }
                  Toggle({ type: ToggleType.Switch })
                    .onChange((isOn: boolean) => {
                      if (isOn) {
                        if (!this.safeAreaTypeArr.includes(SafeAreaType.SYSTEM)) {
                          this.safeAreaTypeArr.push(SafeAreaType.SYSTEM);
                        }
                        this.arr.push(SafeAreaEdge.TOP);
                      } else {
                        if (!this.arr.includes(SafeAreaEdge.BOTTOM)) {
                          this.safeAreaTypeArr = [];
                        }
                        this.arr = this.arr.filter(item => item == SafeAreaEdge.TOP);
                      }
                    });
                };

                Row({ space: 30 }) {
                  if (this.arr.includes(SafeAreaEdge.BOTTOM)) {
                    Text('避让导航条:否');
                  } else {
                    Text('避让导航条:是');
                  }
                  Toggle({ type: ToggleType.Switch })
                    .onChange((isOn: boolean) => {
                      if (isOn) {
                        if (!this.safeAreaTypeArr.includes(SafeAreaType.SYSTEM)) {
                          this.safeAreaTypeArr.push(SafeAreaType.SYSTEM);
                        }
                        this.arr.push(SafeAreaEdge.BOTTOM);
                      } else {
                        this.arr = this.arr.filter(item => item == SafeAreaEdge.BOTTOM);
                      }
                    });
                };
              }
            }
            .padding({ top: 20, bottom: 20 })
            .borderRadius(10)
            .backgroundColor(0xFFFFFF);
          };
        }, (item: number) => item.toString());
      }
      .listDirection(Axis.Vertical) // 排列方向
      .scrollBar(BarState.Off)
      .friction(0.6)
      .edgeEffect(EdgeEffect.Spring) // 边缘效果设置为Spring
      .width('90%')
      // List组件的视窗范围扩展至导航条或者状态栏。
      .expandSafeArea(this.safeAreaTypeArr, this.arr);
    }
    .width('100%')
    .height('100%');
  }
}
实现效果如下:
[h2]方案六:通过background实现页面级沉浸式
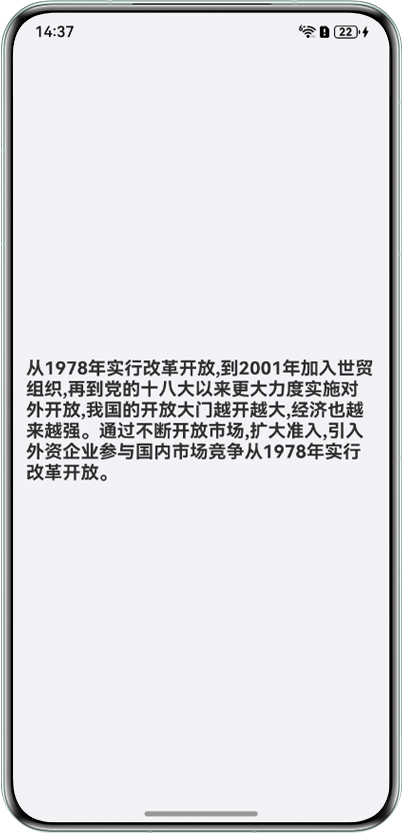
- 创建PageLevelFullScreenByBackgroundPage.ets页面,通过background设置页面的背景来实现沉浸式效果,示例代码如下:
@Entry @Component struct PageLevelFullScreenByBackgroundPage { private message: string = '从1978年实行改革开放,到2001年加入世贸组织,再到党的十八大以来更大力度实施对外开放,' + '我国的开放大门越开越大,经济也越来越强。' + '通过不断开放市场,扩大准入,引入外资企业参与国内市场竞争从1978年实行改革开放。'; build() { RelativeContainer() { Text(this.message) .padding({ left: 12, right: 15 }) .fontSize(18) .fontWeight(FontWeight.Bold) .alignRules({ center: { anchor: '__container__', align: VerticalAlign.Center }, middle: { anchor: '__container__', align: HorizontalAlign.Center } }); } // 通过background属性实现单页面的沉浸式 .background('#f1f3f5') .height('100%') .width('100%'); } } - 在PageLevelFullScreenEntryAbility.ets文件中的loadContent方法中加载PageLevelFullScreenByBackgroundPage.ets页面,示例代码如下:
import { UIAbility } from '@kit.AbilityKit';
import { hilog } from '@kit.PerformanceAnalysisKit';
import { window } from '@kit.ArkUI';

const DOMAIN = 0x0000;

export default class PageLevelFullScreenEntryAbility extends UIAbility {
  onDestroy(): void {
    hilog.info(DOMAIN, 'testTag', '%{public}s', 'Ability onDestroy');
  }

  onWindowStageCreate(windowStage: window.WindowStage): void {
    // Main window is created, set main page for this ability
    hilog.info(DOMAIN, 'testTag', '%{public}s', 'Ability onWindowStageCreate');
    windowStage.loadContent('pages/PageLevelFullScreenByBackgroundPage', (err) => {
      if (err.code) {
        hilog.error(DOMAIN, 'testTag', 'Failed to load the content. Cause: %{public}s', JSON.stringify(err));
        return;
      }
      hilog.info(DOMAIN, 'testTag', 'Succeeded in loading the content.');
    });
  }

  onWindowStageDestroy(): void {
    // Main window is destroyed, release UI related resources
    hilog.info(DOMAIN, 'testTag', '%{public}s', 'Ability onWindowStageDestroy');
  }

  onForeground(): void {
    // Ability has brought to foreground
    hilog.info(DOMAIN, 'testTag', '%{public}s', 'Ability onForeground');
  }

  onBackground(): void {
    // Ability has back to background
    hilog.info(DOMAIN, 'testTag', '%{public}s', 'Ability onBackground');
  }
};
实现效果如下:
[h2]方案七:通过ignoreLayoutSafeArea实现页面级沉浸式
- 在PageFullScreenByIgnoreLayoutSafeAreaEntryAbility.ets文件中的loadContent方法中加载下一步创建的PageFullScreenByIgnoreLayoutSafeAreaPage.ets页面,并通过AppStorage保存windowStage,示例代码如下:
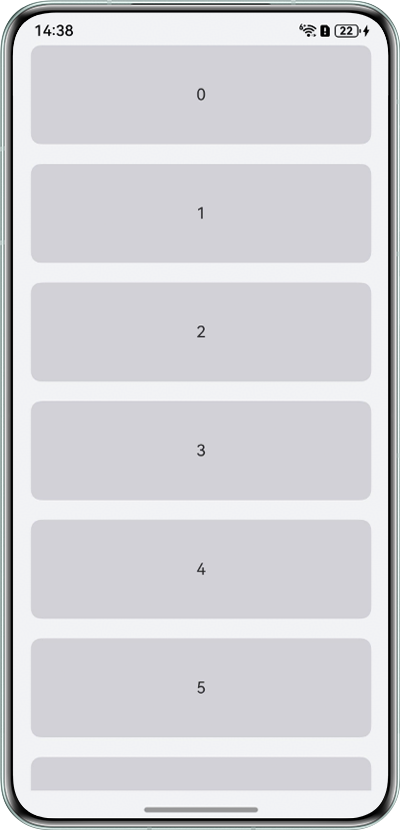
import { UIAbility } from '@kit.AbilityKit'; import { hilog } from '@kit.PerformanceAnalysisKit'; import { window } from '@kit.ArkUI'; const DOMAIN = 0x0000; export default class PageFullScreenByIgnoreLayoutSafeAreaEntryAbility extends UIAbility { onDestroy(): void { hilog.info(DOMAIN, 'testTag', '%{public}s', 'Ability onDestroy'); } onWindowStageCreate(windowStage: window.WindowStage): void { // Main window is created, set main page for this ability hilog.info(DOMAIN, 'testTag', '%{public}s', 'Ability onWindowStageCreate'); windowStage.loadContent('pages/PageFullScreenByIgnoreLayoutSafeAreaPage', (err) => { if (err.code) { hilog.error(DOMAIN, 'testTag', 'Failed to load the content. Cause: %{public}s', JSON.stringify(err)); return; } AppStorage.setOrCreate('windowStage', windowStage); hilog.info(DOMAIN, 'testTag', 'Succeeded in loading the content.'); }); } onWindowStageDestroy(): void { // Main window is destroyed, release UI related resources hilog.info(DOMAIN, 'testTag', '%{public}s', 'Ability onWindowStageDestroy'); } onForeground(): void { // Ability has brought to foreground hilog.info(DOMAIN, 'testTag', '%{public}s', 'Ability onForeground'); } onBackground(): void { // Ability has back to background hilog.info(DOMAIN, 'testTag', '%{public}s', 'Ability onBackground'); } }; - 创建PageFullScreenByIgnoreLayoutSafeAreaPage.ets页面,并在aboutToAppear生命周期中通过getMainWindow方法获取当前主窗口实例,再通过getWindowAvoidArea获取当前状态栏和导航条的高度,并设置ignoreLayoutSafeArea和组件的高度为LayoutPolicy.matchParent,再通过padding属性设置组件的内边距达到避让的效果,示例代码如下:
import window from '@ohos.window';

@Entry
@Component
struct PageFullScreenByIgnoreLayoutSafeAreaPage {
  @State statusBarHeight: number = 0;
  @State navigationIndicatorHeight: number = 0;
  private dataSource: number[] = [];

  aboutToAppear(): void {
    for (let index = 0; index < 30; index++) {
      this.dataSource.push(index);
    }
    let windowStage = AppStorage.get('windowStage') as window.WindowStage;
    windowStage.getMainWindow().then((data) => {
      if (data == null) {
        console.error('Failed to obtain the main window. Cause: The data is empty');
        return;
      }
      this.statusBarHeight = data.getWindowAvoidArea(window.AvoidAreaType.TYPE_SYSTEM).topRect.height;
      this.navigationIndicatorHeight =
        data.getWindowAvoidArea(window.AvoidAreaType.TYPE_NAVIGATION_INDICATOR).bottomRect.height;
    }).catch((err: BusinessError) => {
      console.error(`Failed to obtain the main window. Cause code: ${err.code}, message: ${err.message}`);
    });
  }

  build() {
    Column() {
      Column() {
        List({ space: 20, initialIndex: 0 }) {
          ForEach(this.dataSource, (item: number) => {
            ListItem() {
              Text('' + item)
                .width('100%')
                .height(100)
                .fontSize(16)
                .textAlign(TextAlign.Center)
                .borderRadius(10)
                .backgroundColor('#d1d1d6');
            };
          }, (item: number) => item.toString());
        }
        .listDirection(Axis.Vertical) // 排列方向
        .scrollBar(BarState.Off)
        .width('90%');
      }
      .width('100%')
      .ignoreLayoutSafeArea()
      .height(LayoutPolicy.matchParent)
      .backgroundColor('#f1f3f5')
      .padding({
        top: this.getUIContext().px2vp(this.statusBarHeight),
        bottom: this.getUIContext().px2vp(this.navigationIndicatorHeight)
      });
    }
    .width('100%')
    .height('100%');
  }
}
实现效果如下:
[h2]方案八:通过ignoreLayoutSafeArea实现沉浸式并避让挖孔区
- 在IgnoreLayoutSafeAreaAvoidCutoutEntryAbility.ets文件中的loadContent方法中加载下一步创建的IgnoreLayoutSafeAreaAvoidCutoutPage.ets页面,并通过AppStorage保存windowStage,示例代码如下:
import { UIAbility } from '@kit.AbilityKit'; import { hilog } from '@kit.PerformanceAnalysisKit'; import { window } from '@kit.ArkUI'; const DOMAIN = 0x0000; export default class IgnoreLayoutSafeAreaAvoidCutoutEntryAbility extends UIAbility { onDestroy(): void { hilog.info(DOMAIN, 'testTag', '%{public}s', 'Ability onDestroy'); } onWindowStageCreate(windowStage: window.WindowStage): void { // Main window is created, set main page for this ability hilog.info(DOMAIN, 'testTag', '%{public}s', 'Ability onWindowStageCreate'); windowStage.loadContent('pages/IgnoreLayoutSafeAreaAvoidCutoutPage', (err) => { if (err.code) { hilog.error(DOMAIN, 'testTag', 'Failed to load the content. Cause: %{public}s', JSON.stringify(err)); return; } AppStorage.setOrCreate('windowStage', windowStage); hilog.info(DOMAIN, 'testTag', 'Succeeded in loading the content.'); }); } onWindowStageDestroy(): void { // Main window is destroyed, release UI related resources hilog.info(DOMAIN, 'testTag', '%{public}s', 'Ability onWindowStageDestroy'); } onForeground(): void { // Ability has brought to foreground hilog.info(DOMAIN, 'testTag', '%{public}s', 'Ability onForeground'); } onBackground(): void { // Ability has back to background hilog.info(DOMAIN, 'testTag', '%{public}s', 'Ability onBackground'); } }; - 在IgnoreLayoutSafeAreaAvoidCutoutPage.ets文件中,首次进入页面通过getWindowAvoidArea方法获取挖孔区的高度和距离屏幕顶部的高度,再通过setSpecificSystemBarEnabled方法设置状态栏和导航栏隐藏,最后通过on('avoidAreaChange')方法监听挖孔区的方向,根据此方向,通过padding设置组件的内边距,达到避让挖孔区的效果,示例代码如下:
import { display, window } from '@kit.ArkUI';

@Entry
@Component
struct IgnoreLayoutSafeAreaAvoidCutoutPage {
  @State avoidAreaPadding: Padding = {};
  private windowStage = AppStorage.get('windowStage') as window.WindowStage;
  private windowClass: window.Window = this.windowStage.getMainWindowSync(); // 获取应用主窗口

  // 避让挖孔区
  aboutToAppear(): void {
    this.avoidAreaPadding.top =
      this.getUIContext()
        .px2vp(this.windowClass.getWindowAvoidArea(window.AvoidAreaType.TYPE_CUTOUT).topRect.height +
        this.windowClass.getWindowAvoidArea(window.AvoidAreaType.TYPE_CUTOUT).topRect.top) + 10;
    this.windowClass.setSpecificSystemBarEnabled('status', false).then(() => {
      console.info('Succeeded in setting the status bar to be invisible.');
    }).catch((err: BusinessError) => {
      console.error(`Failed to set the status bar to be invisible. Code is ${err.code}, message is ${err.message}`);
    });
    this.windowClass.setSpecificSystemBarEnabled('navigationIndicator', false).then(() => {
      console.info('Succeeded in setting the navigation indicator to be invisible.');
    }).catch((err: BusinessError) => {
      console.error(`Failed to set the navigation indicator to be invisible. Code is ${err.code}, message is ${err.message}`);
    });
    try {
      this.windowClass.on('avoidAreaChange', (data) => {
        if (data.type === window.AvoidAreaType.TYPE_CUTOUT) {
          this.updateAvoidPadding(data.area);
        }
      });
    } catch (exception) {
      console.error(`Failed to enable the listener for system avoid area changes. Cause code: ${exception.code}, message: ${exception.message}`);
    }
  }

  updateAvoidPadding(area: window.AvoidArea) {
    try {
      // Top cutout area: set top padding.
      if (area.topRect.height > 0) {
        this.avoidAreaPadding.top = this.getUIContext().px2vp(area.topRect.height + area.topRect.top) + 10;
        this.avoidAreaPadding.left = 0;
        this.avoidAreaPadding.right = 0;
        this.avoidAreaPadding.bottom = 0;
      }
      // Left cutout area: set left padding.
      if (area.leftRect.width > 0) {
        this.avoidAreaPadding.left = this.getUIContext().px2vp(area.leftRect.left + area.leftRect.width) + 10;
        this.avoidAreaPadding.top = 0;
        this.avoidAreaPadding.right = 0;
        this.avoidAreaPadding.bottom = 0;
      }
      // Right cutout area: set right padding.
      if (area.rightRect.width > 0) {
        this.avoidAreaPadding.right =
          this.getUIContext().px2vp(display.getDefaultDisplaySync().width - area.rightRect.left) + 10;
        this.avoidAreaPadding.top = 0;
        this.avoidAreaPadding.left = 0;
        this.avoidAreaPadding.bottom = 0;
      }
      // Bottom cutout area: set bottom padding.
      if (area.bottomRect.height > 0) {
        this.avoidAreaPadding.bottom =
          this.getUIContext().px2vp(display.getDefaultDisplaySync().height - area.bottomRect.top) + 10;
        this.avoidAreaPadding.top = 0;
        this.avoidAreaPadding.right = 0;
        this.avoidAreaPadding.left = 0;
      }
    } catch (error) {
      let err = error as BusinessError;
      console.info('TestLog', `Failed to set avoid padding. Code: ${err.code}, message: ${err.message}`);
    }
  }

  build() {
    Column() {
      Image($r('app.media.img'));
    }
    .padding(this.avoidAreaPadding)
    .height('100%')
    .width('100%');
  }
}
实现效果如下:
正向竖屏 |
|
|---|---|
横屏 |
|
反向竖屏 |
|
反向横屏 |
|


[h2]方案九:自由多窗实现全屏和非全屏模式时的沉浸式
- 在FreeWindowFullScreenEntryAbility.ets文件中的loadContent方法中加载下一步创建的FreeWindowFullScreenPage.ets页面,并通过AppStorage保存windowStage,示例代码如下:
import { UIAbility } from '@kit.AbilityKit'; import { hilog } from '@kit.PerformanceAnalysisKit'; import { window } from '@kit.ArkUI'; const DOMAIN = 0x0000; export default class FreeWindowFullScreenEntryAbility extends UIAbility { onDestroy(): void { hilog.info(DOMAIN, 'testTag', '%{public}s', 'Ability onDestroy'); } onWindowStageCreate(windowStage: window.WindowStage): void { // Main window is created, set main page for this ability hilog.info(DOMAIN, 'testTag', '%{public}s', 'Ability onWindowStageCreate'); windowStage.loadContent('pages/FreeWindowFullScreenPage', (err) => { if (err.code) { hilog.error(DOMAIN, 'testTag', 'Failed to load the content. Cause: %{public}s', JSON.stringify(err)); return; } AppStorage.setOrCreate('windowStage', windowStage); hilog.info(DOMAIN, 'testTag', 'Succeeded in loading the content.'); }); } onWindowStageDestroy(): void { // Main window is destroyed, release UI related resources hilog.info(DOMAIN, 'testTag', '%{public}s', 'Ability onWindowStageDestroy'); } onForeground(): void { // Ability has brought to foreground hilog.info(DOMAIN, 'testTag', '%{public}s', 'Ability onForeground'); } onBackground(): void { // Ability has back to background hilog.info(DOMAIN, 'testTag', '%{public}s', 'Ability onBackground'); } }; - 创建FreeWindowFullScreenPage.ets页面,通过setWindowDecorVisible(false)接口设置标题栏的隐藏,仅保留右上角的三键区,setWindowDecorHeight()接口设置标题栏高度,控制右上角三键区显示高度,on('windowTitleButtonRectChange')注册右上角三键大小变化监听,用于页面布局避让,示例代码如下:
import { window } from '@kit.ArkUI';

@Entry
@Component
struct FreeWindowFullScreenPage {
  @State itleButtonWidth: number = 0;

  aboutToAppear(): void {
    let windowStage = AppStorage.get('windowStage') as window.WindowStage;
    let windowClass: window.Window = windowStage.getMainWindowSync(); // 获取应用主窗口
    windowClass.setWindowDecorHeight(56);
    windowClass.setWindowDecorVisible(false);
    try {
      windowClass.on('windowTitleButtonRectChange', (titleButtonRect) => {
        this.itleButtonWidth = titleButtonRect.width;
      });
    } catch (exception) {
      console.error(`Failed to enable the listener for window title buttons area changes. Cause code: ${exception.code}, message: ${exception.message}`);
    }
  }

  build() {
    Column() {
      Text('自由窗口标题栏沉浸案例自由窗口标题栏沉浸案例自由窗口标题栏沉浸案例自由窗口标题栏沉浸案例自由窗口标题栏沉浸案例自由窗口标题栏沉浸案例自由窗口标题栏沉浸案例自由窗口标题栏沉浸案例自由窗口标题栏沉浸案例自由窗口标题栏沉浸案例自由窗口标题栏沉浸案例自由窗口标题栏沉浸案例')
        .height(30)
        .padding({ left: 12, top: 10, right: this.itleButtonWidth });
    }
    .backgroundColor('#f1f3f5')
    .height('100%')
    .width('100%');
  }
}
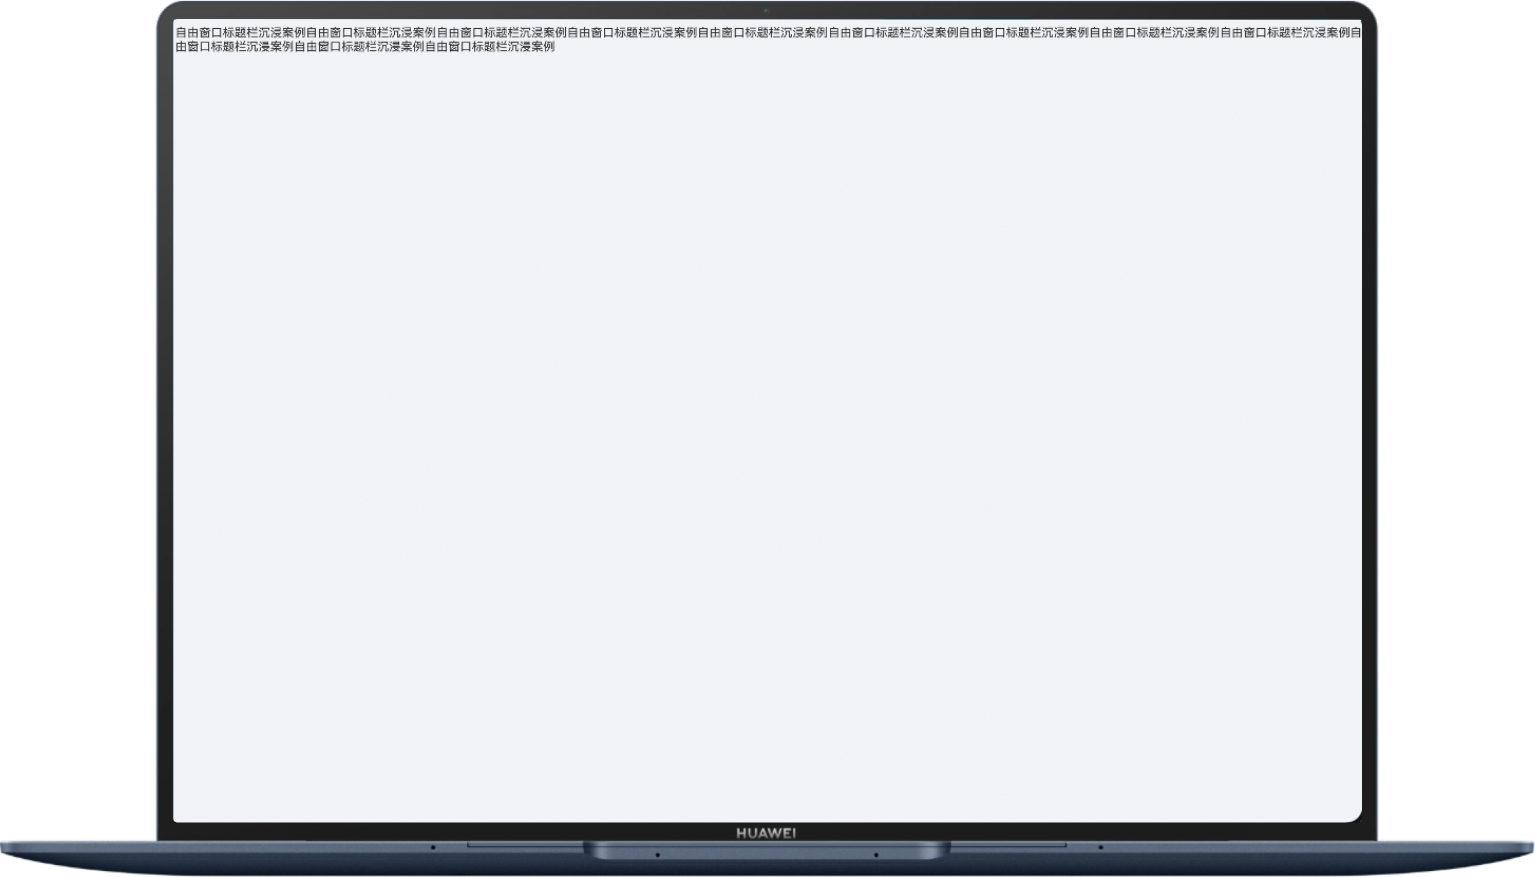
实现效果如下:
全屏 | 非全屏 |
|---|---|
|
|


[h2]方案十:自由多窗实现仅在全屏模式时的沉浸式
- 在MaximizeFullScreenEntryAbility.ets文件中通过getMainWindowSync接口获取当前应用的主窗口,再通过maximize接口设置应用为全屏模式,通过setTitleAndDockHoverShown接口隐藏主窗口全屏模式下的标题栏和Dock栏,示例代码如下:
import { UIAbility } from '@kit.AbilityKit'; import { hilog } from '@kit.PerformanceAnalysisKit'; import { window } from '@kit.ArkUI'; const DOMAIN = 0x0000; export default class MaxmizeFullScreenEntryAbility extends UIAbility { onDestroy(): void { hilog.info(DOMAIN, 'testTag', '%{public}s', 'Ability onDestroy'); } onWindowStageCreate(windowStage: window.WindowStage): void { // Main window is created, set main page for this ability hilog.info(DOMAIN, 'testTag', '%{public}s', 'Ability onWindowStageCreate'); windowStage.loadContent('pages/MaximizeFullScreen', (err) => { if (err.code) { hilog.error(DOMAIN, 'testTag', 'Failed to load the content. Cause: %{public}s', JSON.stringify(err)); return; } let windowClass: window.Window = windowStage.getMainWindowSync(); // 获取应用主窗口 windowClass.maximize(window.MaximizePresentation.ENTER_IMMERSIVE); windowClass.setTitleAndDockHoverShown(true, false); hilog.info(DOMAIN, 'testTag', 'Succeeded in loading the content.'); }); } onWindowStageDestroy(): void { // Main window is destroyed, release UI related resources hilog.info(DOMAIN, 'testTag', '%{public}s', 'Ability onWindowStageDestroy'); } onForeground(): void { // Ability has brought to foreground hilog.info(DOMAIN, 'testTag', '%{public}s', 'Ability onForeground'); } onBackground(): void { // Ability has back to background hilog.info(DOMAIN, 'testTag', '%{public}s', 'Ability onBackground'); } }; - 创建FreeWindowFullScreenPage.ets页面用以展示沉浸式效果,示例代码如下:
@Entry
@Component
struct MaximizeFullScreen {
  build() {
    Column() {
      Text('自由窗口标题栏沉浸案例自由窗口标题栏沉浸案例自由窗口标题栏沉浸案例自由窗口标题栏沉浸案例自由窗口标题栏沉浸案例自由窗口标题栏沉浸案例自由窗口标题栏沉浸案例自由窗口标题栏沉浸案例自由窗口标题栏沉浸案例自由窗口标题栏沉浸案例自由窗口标题栏沉浸案例自由窗口标题栏沉浸案例')
        .height(30)
        .padding({ left: 30, top: 10 });
    }
    .backgroundColor('#f1f3f5')
    .height('100%')
    .width('100%');
  }
}
实现效果如下: