背景知识
- Tabs:进行内容视图切换的容器组件,每个页签对应一个内容视图。
- tabBar:设置TabBar上显示内容。
- barHeight:设置TabBar的高度值。
- onAnimationEnd:切换动画结束时触发该回调,包括动画过程中手势中断。当animationDuration为0时动画关闭,不触发该回调。
- onGestureSwipe:在页面跟手滑动过程中,逐帧触发该回调。
- animateTo:用于为闭包代码中的状态变化添加过渡动画效果。
- translate:设置组件平移。
- visibility:控制组件的显示或隐藏。
- onAreaChange:组件区域变化时触发该回调。仅会响应由布局变化所导致的组件大小、位置发生变化时的回调。
解决方案
实现场景 | 实现方案 |
|---|---|
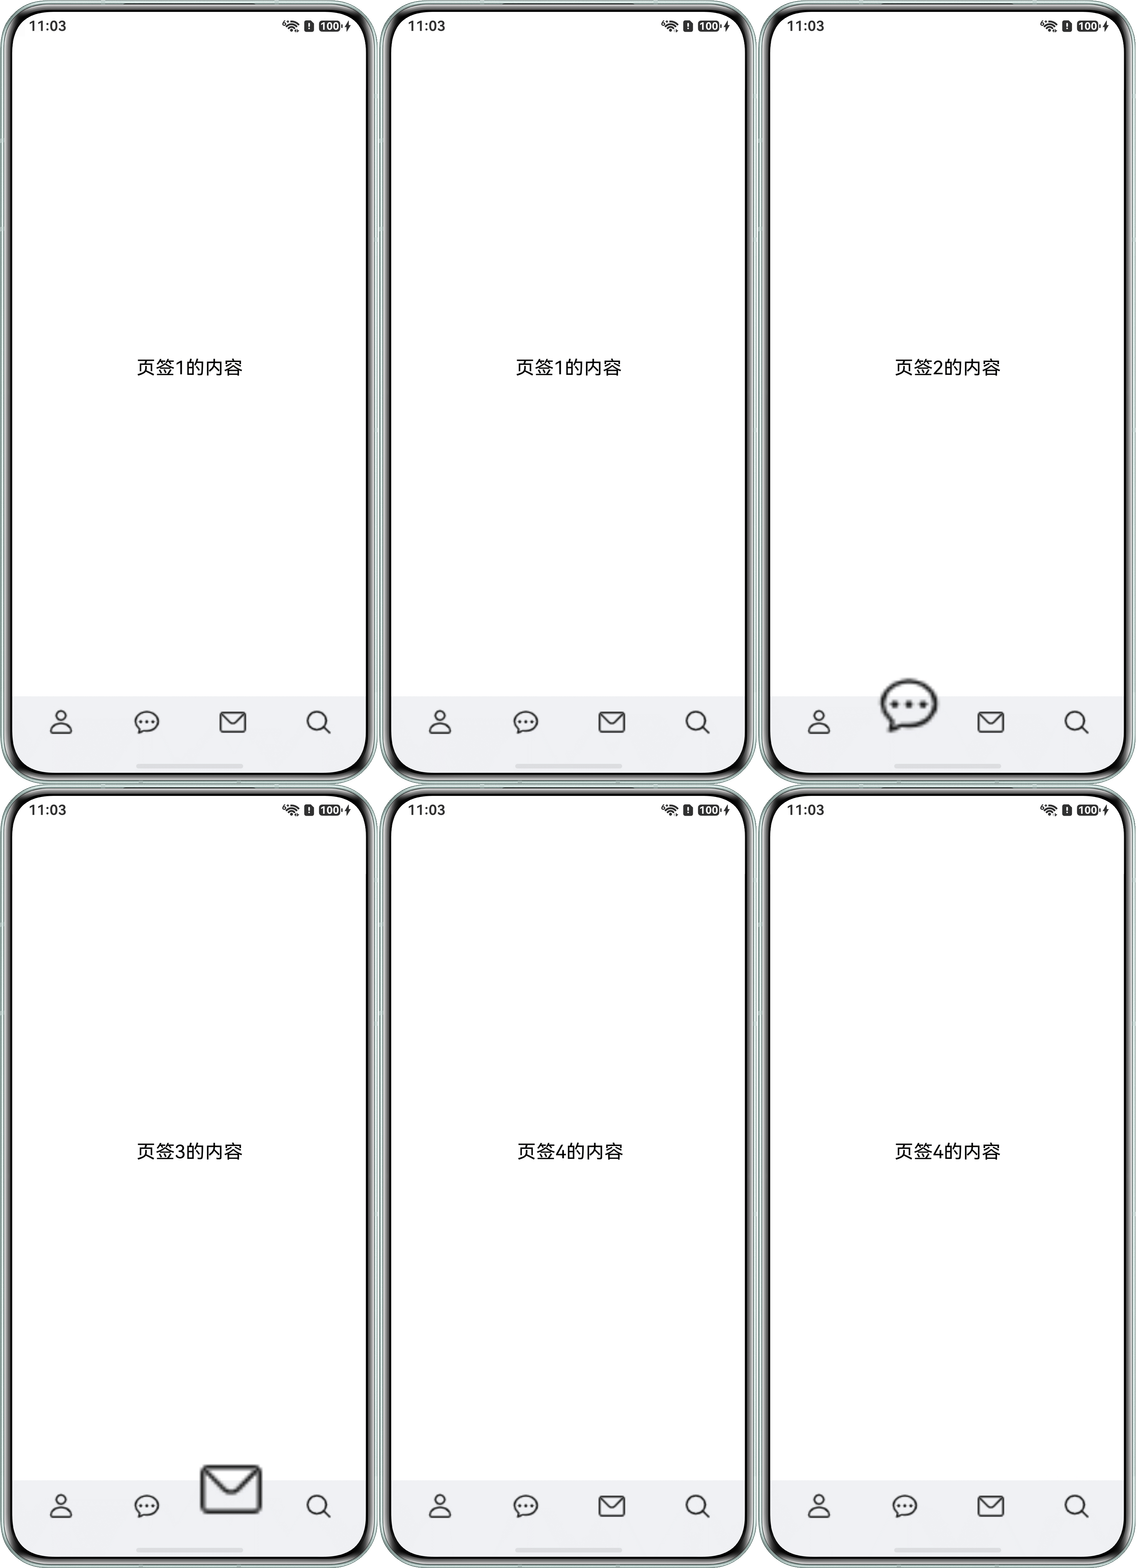
场景一:实现先放大后缩小复原动效。 | 使用Stack将自定义Tab栏与Tabs的TabBar区域重合,并通过 if/else 控制自定义Tab栏的渲染。通过animateTo的onFinish回调实现Tab内容的先放大后缩小,最后复原的动画效果。 |
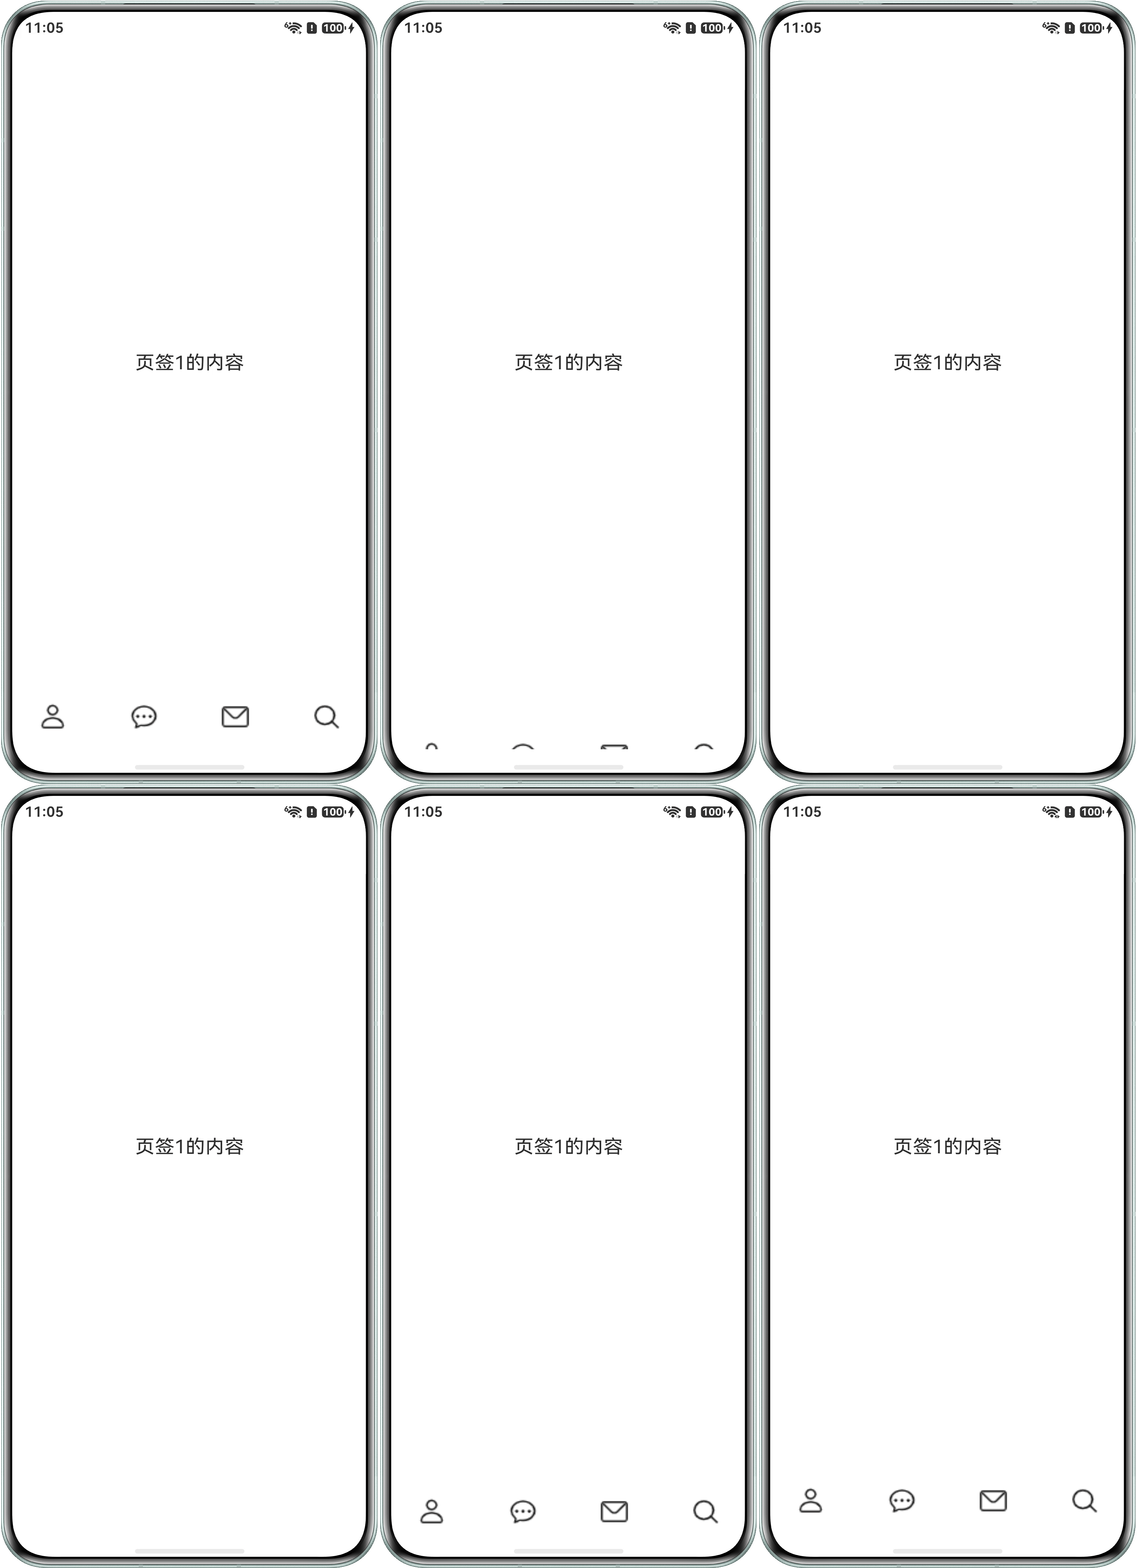
场景二:点击空白区域实现Tab栏下滑隐藏动效。 | 使用animateTo和translate方法控制Tab栏内容在y轴上的下滑动画效果。通过onClick事件触发动画,实现Tab栏的隐藏和显示。 |
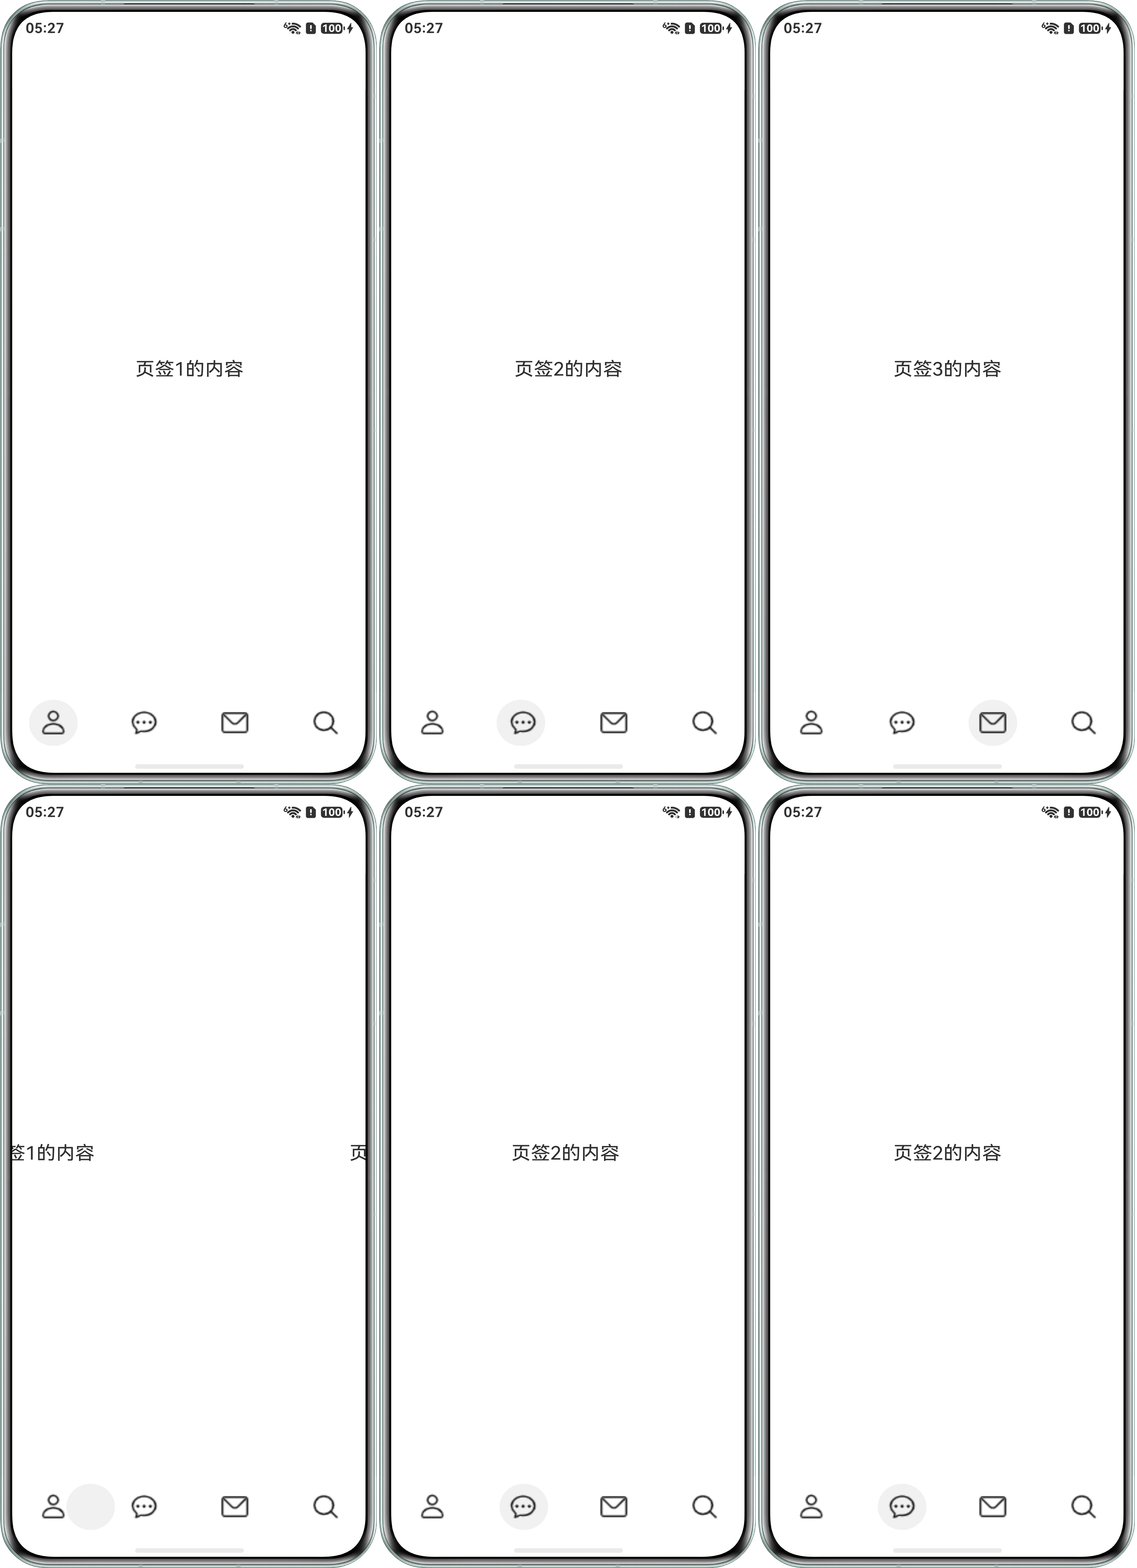
场景三:实现背景跟随手指拖动效果。 | 使用Stack将Tabs与背景组件堆叠,通过onAreaChange获取Tab宽度,计算中心位置。滑动时触发onGestureSwipe,背景跟随手指移动。滑动结束触发onAnimationEnd,根据移动距离判断是否吸附到目标Tab中心或回弹。 |
[h2]场景一:实现先放大后缩小复原动效
使用Stack将自定义Tab栏与Tabs的TabBar区域重合,并通过if/else对自定义Tab栏进行渲染控制。通过animateTo中onFinish回调实现Tab内容的先放大后缩小,最后复原的动画效果。参考代码如下所示:
@Entry
@Component
struct OutFrame {
  fontColor: string = '#182431';
  selectedFontColor: string = '#007DFF';
  iconMinHeight: number = 640;
  // 图片资源仅供参考,开发者可替换成所需资源
  iconList: Resource[] = [
    $r('app.media.person'),
    $r('app.media.ellipsis_message'),
    $r('app.media.envelope'),
    $r('app.media.magnifyingglass')
  ];
  iconX: number = 20; // 图片位置x
  iconY: number = 65; // 图片位置Y
  private controller: TabsController = new TabsController();
  @State currentIndex: number = 0;
  @State iconWidth: number = 80; // 图片宽度
  @State iconHeight: number = 80; // 图片高度
  @State showAnimation: boolean = false; // 控制动画显示
  @State showTabIcon: boolean = true; // 控制Tab栏图标显隐

  @Builder
  tabBuilder(img: Resource, index: number) {
    Column() {
      Image(img)
        .width(30)
        .height(30)
        .visibility((this.showTabIcon && index === this.currentIndex) || index !== this.currentIndex ?
          Visibility.Visible : Visibility.Hidden);
    }
    .width('100%')
    .padding({ top: 5, bottom: 5 });
  }

  build() {
    Stack({ alignContent: Alignment.Bottom }) {
      if (this.showAnimation) {
        Row() {
          ForEach(this.iconList, (item: Resource, index: number) => {
            ListItem() {
              Image(item)
                .width(this.iconWidth)
                .height(this.iconHeight)
                .visibility(this.currentIndex === index ? Visibility.Visible : Visibility.Hidden);
            }
            .margin({ top: -20 });
          });
        }
        .width('90%')
        .justifyContent(FlexAlign.SpaceAround)
        .zIndex(1)
        .position({ x: this.iconX, y: this.iconY + this.iconMinHeight });
      }
      Tabs({ barPosition: BarPosition.End, controller: this.controller }) {
        ForEach(this.iconList, (item: Resource, index: number) => {
          TabContent() {
            Text(`页签${index + 1}的内容`)
              .fontSize(20)
              .fontColor('#000000');
          }
          .backgroundColor('#ffffff')
          .tabBar(this.tabBuilder(item, index));
        });
      }
      .zIndex(0)
      .vertical(false)
      .barMode(BarMode.Fixed)
      .barWidth(360)
      .barHeight('auto')
      .animationDuration(400)
      .onChange((index: number) => {
        // currentIndex控制TabContent显示页签
        this.currentIndex = index;
        this.showAnimation = true;
        this.showTabIcon = false;
        this.iconWidth = 70;
        this.iconHeight = 70;
        this.iconY = 65;
        // 设置动画实现效果
        this.getUIContext().animateTo({
          delay: 0,
          duration: 500,
          onFinish: () => {
            this.getUIContext().animateTo({
              delay: 0,
              duration: 500,
              onFinish: () => {
                this.showAnimation = false;
                this.showTabIcon = true;
              }
            }, () => {
              this.iconWidth = 5;
              this.iconHeight = 5;
              this.iconY = 80;
            });
          }
        }, () => {
          this.iconY = 45;
        });
      })
      .onAnimationStart((index: number, targetIndex: number) => {
        if (index === targetIndex) {
          return;
        }
      })
      .width('100%')
      .height('100%')
      .backgroundColor('#F1F3F5');
    }
    .width('100%');
  }
}
效果图如下:
[h2]场景二:点击空白区域实现Tab栏下滑隐藏动效
使用animateTo和translate方法控制Tab栏内容在y轴上的下滑动画效果。参考代码如下所示:
@Entry
@Component
struct HideTabBar {
  // 图片资源仅供参考,开发者可替换成所需资源
  iconList: Resource[] = [
    $r('app.media.person'),
    $r('app.media.ellipsis_message'),
    $r('app.media.envelope'),
    $r('app.media.magnifyingglass')
  ];
  barHeight: number = 70;
  @State transY: number = 0;
  @State showTabBar: boolean = true;

  @Builder
  tabBuilder(img: Resource) {
    Column() {
      Image(img)
        .width(30)
        .height(30);
    }
    .width('100%')
    .padding({ top: 5, bottom: 5 })
    .translate({ y: this.transY });
  }

  build() {
    Tabs({ barPosition: BarPosition.End }) {
      ForEach(this.iconList, (item: Resource, index: number) => {
        TabContent() {
          Text(`页签${index + 1}的内容`)
            .fontSize(20);
        }
        .tabBar(this.tabBuilder(item))
        .backgroundColor('#ffffff');
      });
    }
    .barHeight(this.barHeight)
    .vertical(false)
    .height('100%')
    .width('100%')
    .onClick(() => {
      // 添加消失动画
      this.getUIContext().animateTo({
        delay: 0,
        duration: 500,
        curve: Curve.EaseOut,
        iterations: 1
      }, () => {
        if (this.showTabBar) {
          this.transY = this.barHeight;
        } else {
          this.transY = 0;
        }
        this.showTabBar = !this.showTabBar;
      });
    });
  }
}
效果图如下:
[h2]场景三:实现背景跟随手指拖动效果
- 使用Stack将Tabs与背景组件堆叠,并通过onAreaChange获取页面和单个Tab的宽度,计算每个Tab的中心位置。
- 滑动过程中触发onGestureSwipe,根据页面滑动的比例让背景跟随手指移动。
- 页面滑动结束触发onAnimationEnd,根据背景移动距离占总切换距离的比例判断是否超过设定阈值,超过则吸附到目标Tab的中心,未超过则回弹至原Tab的中心。
参考代码如下所示:
@Entry
@Component
struct DragAction {
  // 图片资源仅供参考,开发者可替换成所需资源
  iconList: Resource[] = [
    $r('app.media.person'),
    $r('app.media.ellipsis_message'),
    $r('app.media.envelope'),
    $r('app.media.magnifyingglass')
  ];
  private controller: TabsController = new TabsController();
  threshold: number = 0.7; // 吸附阈值
  barHeight: number = 56;
  circleHeight: number = 50;
  circleWidth: number = 50;
  @State barWidth: number = 0; // 单个TabBar的宽度值
  @State currentIndex: number = 0;
  @State bgTransX: number = 0; // 背景的X偏移量
  @State pageWidth: number = 0; // tabContent内页面的宽度

  @Builder
  tabBuilder(img: Resource) {
    Column() {
      Image(img)
        .width(30)
        .height(30);
    }
    .width('100%');
  }

  // 计算背景的X偏移量
  getBgOffset(index: number) {
    return index * this.barWidth + (this.barWidth - this.circleWidth) / 2;
  }

  build() {
    Stack({ alignContent: Alignment.BottomStart }) {
      Circle()
        .width(this.circleWidth)
        .height(this.circleHeight)
        .zIndex(3)
        .fillOpacity(0.05)
        .animation({ duration: 200, curve: Curve.EaseOut })
        .translate({
          x: this.bgTransX,
          y: -(this.barHeight - this.circleHeight) / 2
        });
      Tabs({ barPosition: BarPosition.End, controller: this.controller }) {
        ForEach(this.iconList, (item: Resource, index: number) => {
          TabContent() {
            Text(`页签${index + 1}的内容`)
              .fontSize(20);
          }
          .tabBar(this.tabBuilder(item))
          .backgroundColor('#ffffff');
        });
      }
      // 获取单个TabBar的宽度值、背景的X偏移量、tabContent内页面的宽度
      .onAreaChange((old, current) => {
        console.info(`Succeeded in getting info.Old:${old.width},current:${current.width}.`);
        this.barWidth = Number(current.width) / this.iconList.length;
        this.bgTransX = this.getBgOffset(0);
        this.pageWidth = Number(current.width);
      })
      .id('tabs')
      .zIndex(1)
      .barMode(BarMode.Fixed)
      .scrollable(true)
      .animationDuration(200)
      .onChange((index: number) => {
        this.getUIContext().animateTo({
          delay: 0,
          duration: 200,
          curve: Curve.EaseOut,
          iterations: 1
        }, () => {
          this.currentIndex = index;
          // 重新偏移
          this.bgTransX = this.getBgOffset(index);
          this.currentIndex = index;
        });
      })
      .vertical(false)
      .height('100%')
      .width('100%')
      .backgroundColor('#ffffff')
      // 滑动过程中:跟随手指滑动
      .onGestureSwipe((index: number, event: TabsAnimationEvent) => {
        if (this.pageWidth <= 0 || this.barWidth <= 0) {
          return;
        }
        const ratio = event.currentOffset / this.pageWidth;
        const from = this.getBgOffset(index);
        this.bgTransX = from - ratio * this.barWidth;
      })
      // 松手后
      .onAnimationEnd((index: number) => {
        const targetIndex = index + 1;
        const from = this.getBgOffset(index); // 当前Tab的中心位置
        const to = this.getBgOffset(targetIndex); // 目标Tab的中心位置
        const totalMove = to - from;
        const currentMove = this.bgTransX - from;
        const progress = Math.abs(currentMove / totalMove); // 滑动进度
        this.getUIContext().animateTo({
          delay: 0,
          duration: 200,
          curve: Curve.EaseOut,
          iterations: 1
        }, () => {
          // 超过阈值,吸附到目标图标中心
          if (progress >= this.threshold) {
            this.bgTransX = to;
          } else {
            // 回弹原位置
            this.bgTransX = from;
          }
        });
      });
    }
    .height('100%')
    .width('100%');
  }
}
效果图如下:
常见FAQ
Q:为什么对SVG和PNG使用animateTo,最终动画效果不同?
A:SVG的矢量特性支持属性级动画,PNG作为栅格图像,仅能通过组件的通用动画属性。设置SVG图片的动画,开发者可参考svg动画。
Q:如何优化动画效果?
A:优化动画效果可通过减少动画的复杂性、优化代码实现、使用硬件加速、调整动画帧率、缓存和重用动画资源等方式实现。