Overview
This topic describes how to design the project structure and configure the application release for one-time development for multi-device applications. When developing one-time development for multi-device applications, you need to adapt to the hardware features of different devices such as smartphones, tablets, PCs, wearables, and Visions, and properly organize the code project to improve development efficiency and deployment flexibility. To ensure consistent user experience across devices, the system provides corresponding configuration capabilities.

This topic takes DevEco Studio 6.0.0 Release as an example. The UIs and operations may vary with the DevEco Studio version.
Creating a Three-Layer Architecture Project
You are advised to use the three-layer architecture project described in Architecture Design during application development. It is recommended that basic common code be stored in the common layer, independent feature module code be stored in the features layer, and independent product code be stored in the product layer. By depending on the common capabilities provided by the features and common layers at the products layer, you can maximize code reuse and separate responsibilities.
The three-layer architecture project organizes the project at the common, features, and products layers to improve code reuse and development efficiency. The following is an example of the project structure:
/application
 ├── common                  # Common feature directory
 │
 ├── features                # Feature module directory
 │   ├── feature1            # Sub-feature
 │   ├── feature2            # Sub-feature 2
 │   └── ...                 # Sub-feature n
 │
 └── products                # Product-layer directory
     ├── default             # Default devices
     ├── tv                  # Visions
     ├── wearable            # Wearables
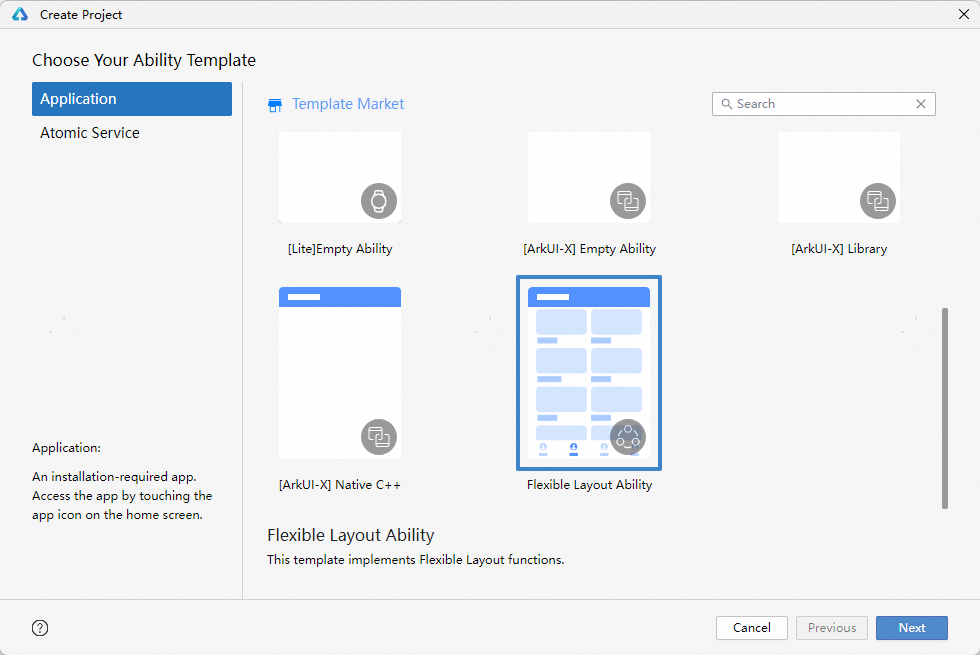
You are advised to use DevEco Studio to create a new three-layer architecture project. In the Create Project dialog box, select the Flexible Layout Ability template. This template can be used to create a three-layer project structure for cross-device application development. For details about project templates, see Introduction to Project Templates.
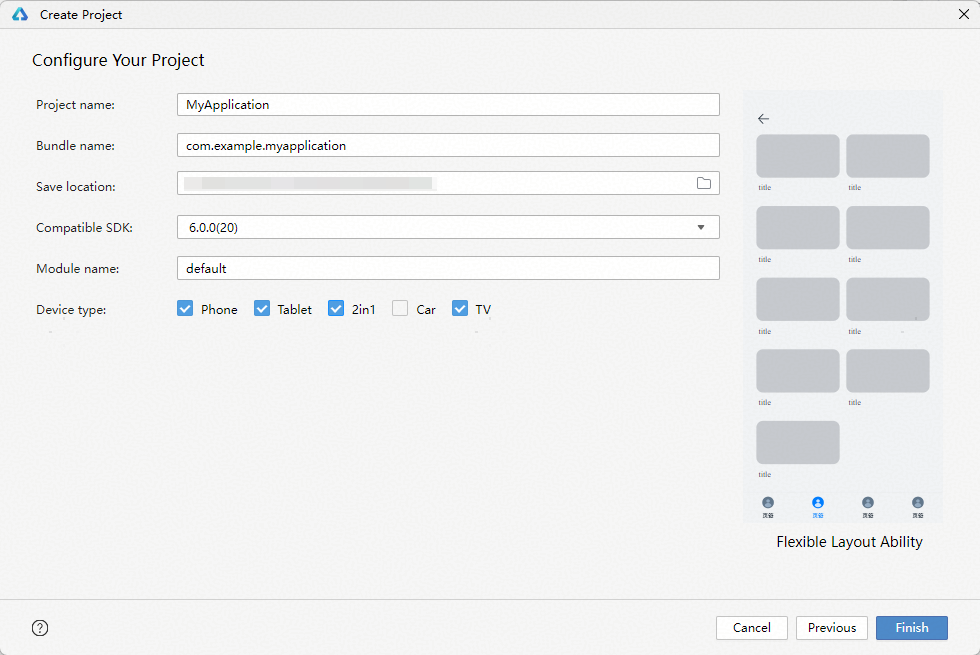
Configure the project name, bundle name, and other basic information, select the target device types, and then create a project.
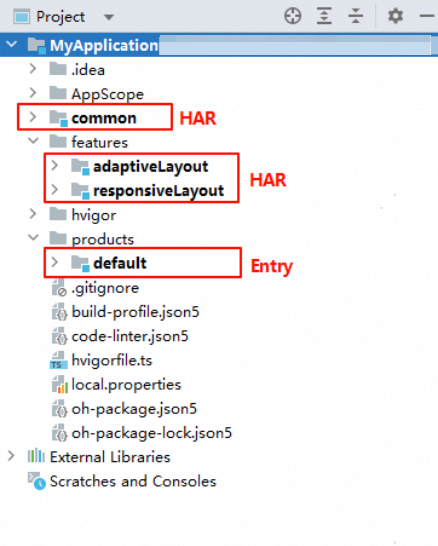
The following figure shows the directory of the created project.
- The common layer contains a Harmony Archive (HAR) module, which provides basic capabilities such as common components and tool classes.
- The features layer contains two HAR modules by default, which are used to encapsulate independent functional modules and service logic, improving modularization and reusability.
- The products layer contains an entry Harmony Ability Package (HAP) module, which is the main entry module of the application and carries differentiated personalized configurations and startup logic of devices and scenarios.
You can add or delete modules as required. For details, see Adding or Deleting a Module.

When developing one-time development for multi-device applications, you can determine whether to create an independent HAP module based on the device type. For example, the layout and feature design of smartphones and tablets are similar, and they can share one HAP module. However, Visions and wearables differ greatly from other devices. Therefore, it is recommended that you create separate HAP modules for them.
Modifying the Module Type and Device Type
Modifying the Module Type
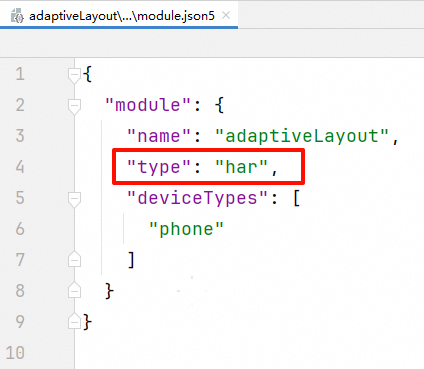
When adding a module, you can select the module type. To change the type of a created module, you can edit the type field in the module.json5 file. The value of type can be entry, feature, har, or shared, which indicates the main module, dynamic feature module, static shared module, and dynamic shared module of an application, respectively. You can select or change the module type based on the usage scenario by referring to Application Package Development and Usage.
Modifying the Device Type
When adding a module, you can specify the device types supported by the module. To change the supported device types of a created module, you can modify the deviceTypes field in the module.json5 file. The deviceTypes field supports the phone, tablet, 2in1, tv, wearable, and car values. After the modification, click Sync Now in the upper right corner. Otherwise, the modification does not take effect.
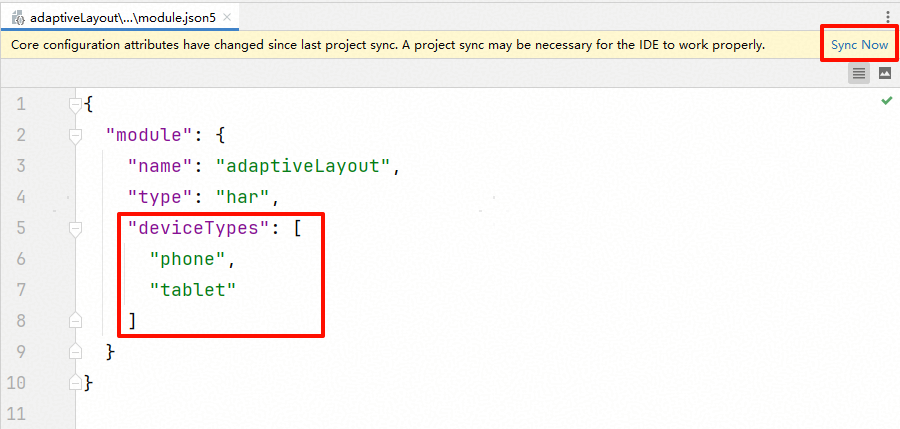

The module.json5 file defines the basic configuration information of a module. For details about the fields, see module.json5 Configuration File.
Modifying Dependencies
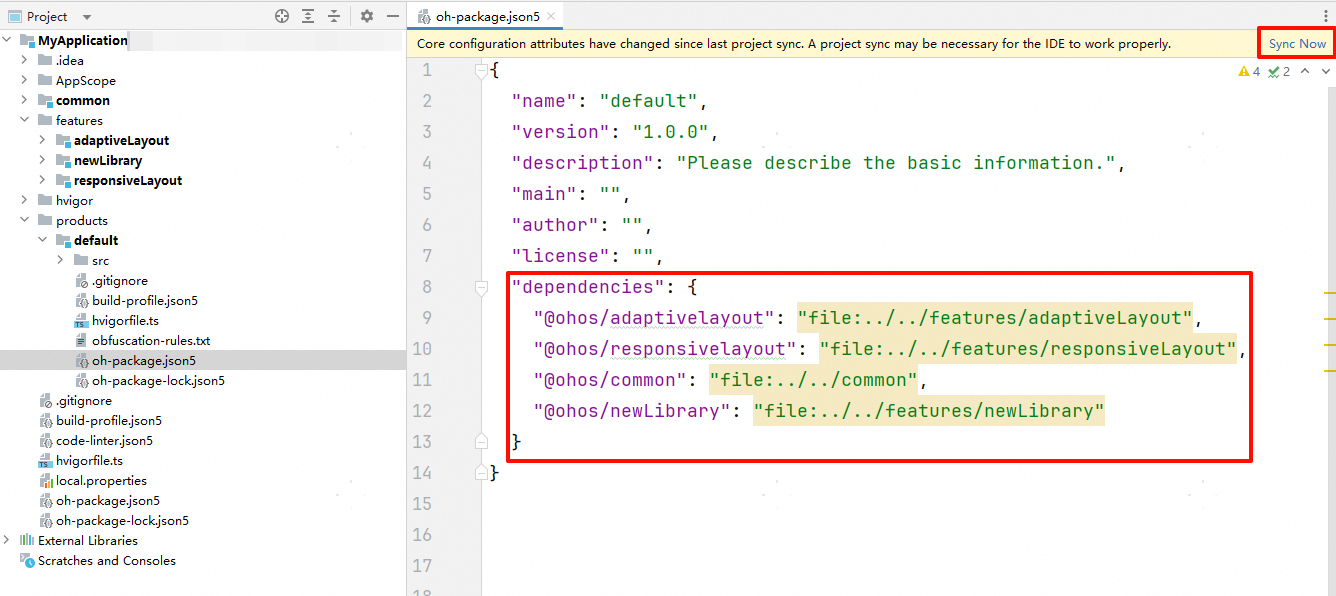
According to the three-layer architecture design principle introduced in Architecture Design, when a module references another module, you need to configure the dependency in the oh-package.json5 file of the module. For the three-layer architecture created using the Flexible Layout Ability template, the dependency is configured by default. To add a new dependency, modify the dependencies field and add the new dependency in the following format:
"Dependency name": "Local relative path"
After the configuration is complete, you can use the feature or common module by dependency name in the code.
After modifying the file, click Sync Now in the upper right corner. Otherwise, the modification does not take effect. For details, see Referencing and Managing a Shared Package.
Configuring an Enhanced Starting Window
The starting window is the first page displayed during the cold launch of an application, when the process is not ready, or when the content is not loaded. The one-time development for multi-device applications on different devices use the same set of code. Therefore, the starting window effects may vary depending on the breakpoints of different devices, as shown in the following table.
Horizontal Breakpoint | sm | md | lg | xl |
|---|---|---|---|---|
Demo |
|
|
|
|


The system provides the enhanced capabilities for configuring the starting window, which ensures the consistent starting window experience of applications across multiple devices and reduces the manual adaptation workload of developers. You can configure startup resources based on design requirements. The resources can be scaled according to the window size, which makes multi-device adaptation easier.
The enhanced starting window is implemented by configuring a JSON file. You need to create the JSON file and place it in the project directory. The configuration file can contain diversified elements, such as icons, illustrations, background colors, background images, and brand logos, which help improve users' recognition of the product. For details, see Configuring an Enhanced Starting Window.

The enhanced starting window is supported since API version 19. The configuration does not take effect in earlier versions.
Releasing a One-Time Development for Multi-Device Application
When releasing a one-time development for multi-device application, you can distribute the application to multiple devices. By default, the application is distributed to the device types selected during project creation. You can change the device types as required. Once released, your application can be installed and used on all supported devices. For details about the release process, see Releasing a HarmonyOS App.
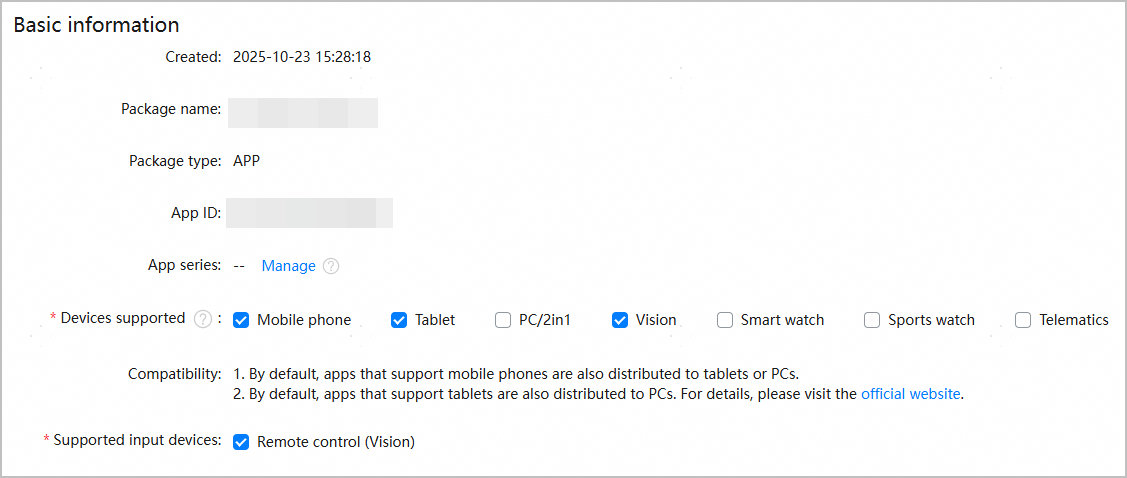
If a one-time development for multi-device project contains multiple HAPs that are differentiated by device and the supported devices are selected during the configuration, the application (.app file) will be unpacked into multiple entry HAPs in the pipeline or on AppGallery. The HAPs will be distributed to different devices based on the device types specified in the deviceTypes field in the HAPs.


- Ensure that the supported device types (enumerated values of the deviceTypes field in the module.json5 file) declared in the software package contains the device types selected in AppGallery Connect. If the declared device types are fewer than the selected ones, the excessive ones will not take effect. To add a supported device, see Modifying the Module Type and Device Type.
- Before releasing an application, you can modify the devices to which the application is distributed. After the application is released, you can only add devices to the updated version but cannot delete the selected devices.
- If there are multiple entry modules in a project, to avoid device support conflicts, DevEco Studio checks the device types supported by each module and ensures that each device type belongs to only one entry module.