
- When Charles displays a confirmation dialog box during environment setup, click Allow to connect to the mobile phone.
- Certificates in .crt format are not supported. You need to convert the certificates to the .pem format before installation.
- Charles cannot capture packets of the upload and download APIs in the @ohos.request module.
Charles is a proxy tool used for network debugging and analysis, which allows you to view and debug the network communication between devices and servers. With this tool, you can monitor the network traffic of applications, modify requests and responses, and even simulate different network conditions. It provides the following functions:
- Intercepts HTTP and HTTPS network packets.
- Resends network requests to facilitate backend debugging.
- Modifies network request parameters.
- Intercepts and dynamically modifies network requests.
- Supports simulation of low-speed networks.
When using Charles to capture packets, you need to configure a Charles client proxy to forward application requests to the server. When you start Charles, it automatically sets the browser as a proxy. Once network requests are sent through the browser, Charles directly captures network packets of the network requests and their responses.
Charles can capture HTTP requests from both PCs and applications. To implement network capturing on a mobile device, you need to configure the Charles proxy. To capture HTTPS packets, you need to download the Charles certificate and install the certificate.
To use Charles, perform the following steps:
- Install Charles.
- Configure the Charles proxy.
- Check the IP address of Charles. Generally, the IP address is the same as the IP address of the PC.
- To view the IP address of Charles, choose Help > Local IP Address.
- To view the IP address of the PC, open the Run dialog box (press Win+R or click Search on the taskbar), enter cmd, and run ipconfig in the command line window.
- Set the debugging port number for Charles.
- Choose Proxy > SSL Proxy Settings. In the Include area, click Add, and then add : to set Host and Port as * and add *:443 to set Host as * and Port as 443. Click OK.
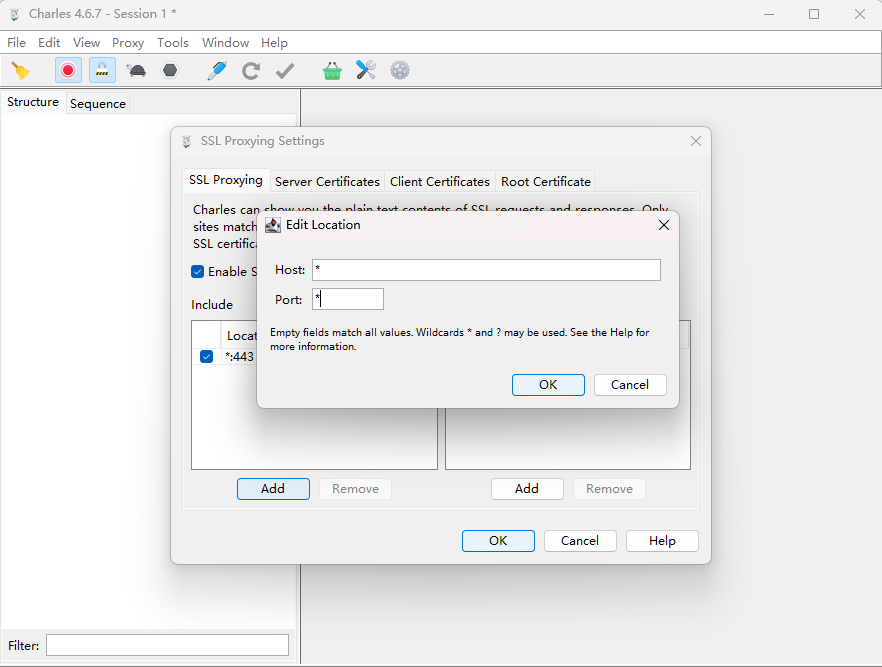
- Choose Proxy > Proxy Settings. In the HTTP Proxy area, set Port to the listening port of Charles, which is 8888 by default. Select Enable transparent HTTP proxying. Then click OK.

- Choose Proxy > SSL Proxy Settings. In the Include area, click Add, and then add : to set Host and Port as * and add *:443 to set Host as * and Port as 443. Click OK.
- Connect the mobile phone and PC to the same LAN. Enable manual proxy setup for Wi-Fi on the mobile phone, and set the host name and port of the server to the IP address and listening port of Charles.
Tap the target Wi-Fi network to launch the setup screen. Select Manual from Proxy, and set the host name and port number of the proxy server to the IP address and listening port of Charles (that is, 8888). Then, enter the correct password to connect to the Wi-Fi network.
- Check the IP address of Charles. Generally, the IP address is the same as the IP address of the PC.
- Download the Charles certificate.
- Install the Charles root certificate in a directory trusted by the PC.
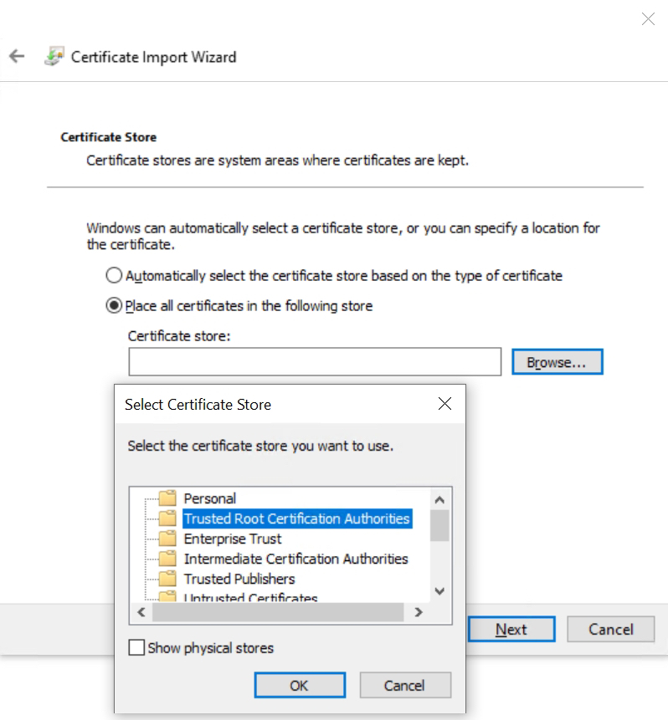
On the top menu bar, choose Help > SSL Proxying > Install Charles Root Certificate > Install Certificate. Set the storage location (the current user or local computer) and click Next. Select Place all certificates in the following store, click Browse, and set the certificate storage path to Trusted Root Certification Authorities.
- Import the system root certificate to the mobile phone.
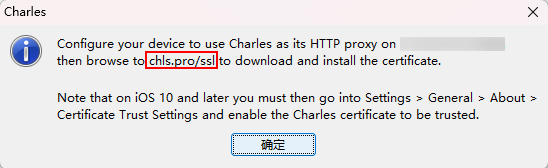
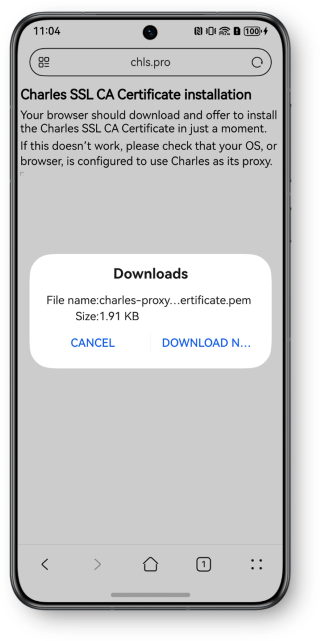
Method 1: On the top menu bar, choose Help > SSL Proxying > Install Charles Root Certificate on a Mobile Device or Remote Browser. Access http://chls.pro/ssl -> via the browser of the mobile phone, and click Download Now to download the certificate to the mobile phone memory.
Method 2: On the PC, choose Help > SSL Proxying > Save Charles Root Certificate... to save the certificate in .pem format to the local PC. Connect the mobile phone to the PC, and upload the PEM file to the phone through DevEco Studio (specifically, right-click the folder where the PEM file is to be uploaded, click Upload..., and select the PEM file).
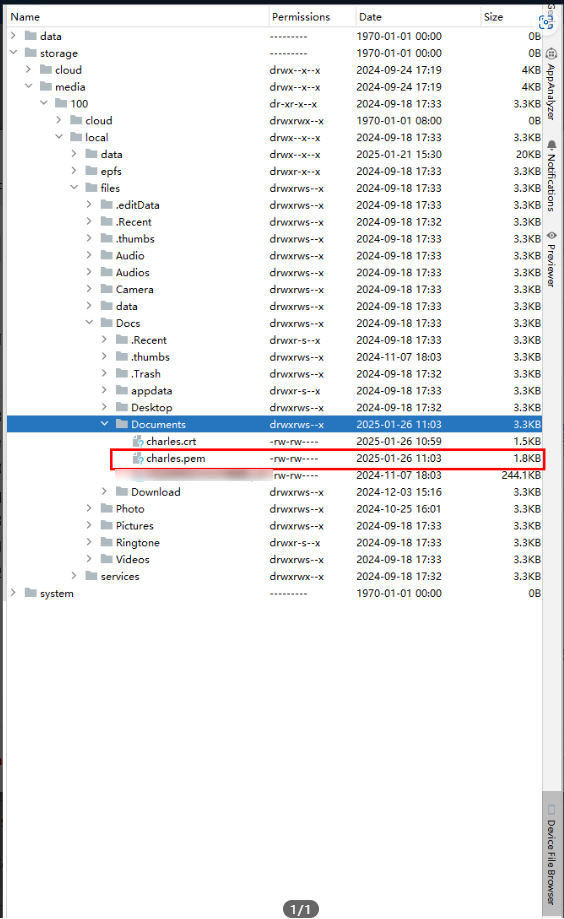
- Install the Charles root certificate in a directory trusted by the PC.
- Install the certificate.
To install a certificate on a mobile phone, perform the following steps:
On the mobile phone, go to Settings > Security > More settings > Encryption and credentials. Select Install from storage, and click CA Certificate. When you see a warning, click Continue, navigate to the downloaded certificate, click the certificate to install it. The certificate is successfully installed if a success message is displayed.
Selecting Install from storage
Clicking CA Certificate


- Filter network requests.
Generally, the tool is expected to listen only for the requests sent by the specified directory server and filter out other network requests. To meet this requirement, you can use either of the following methods:
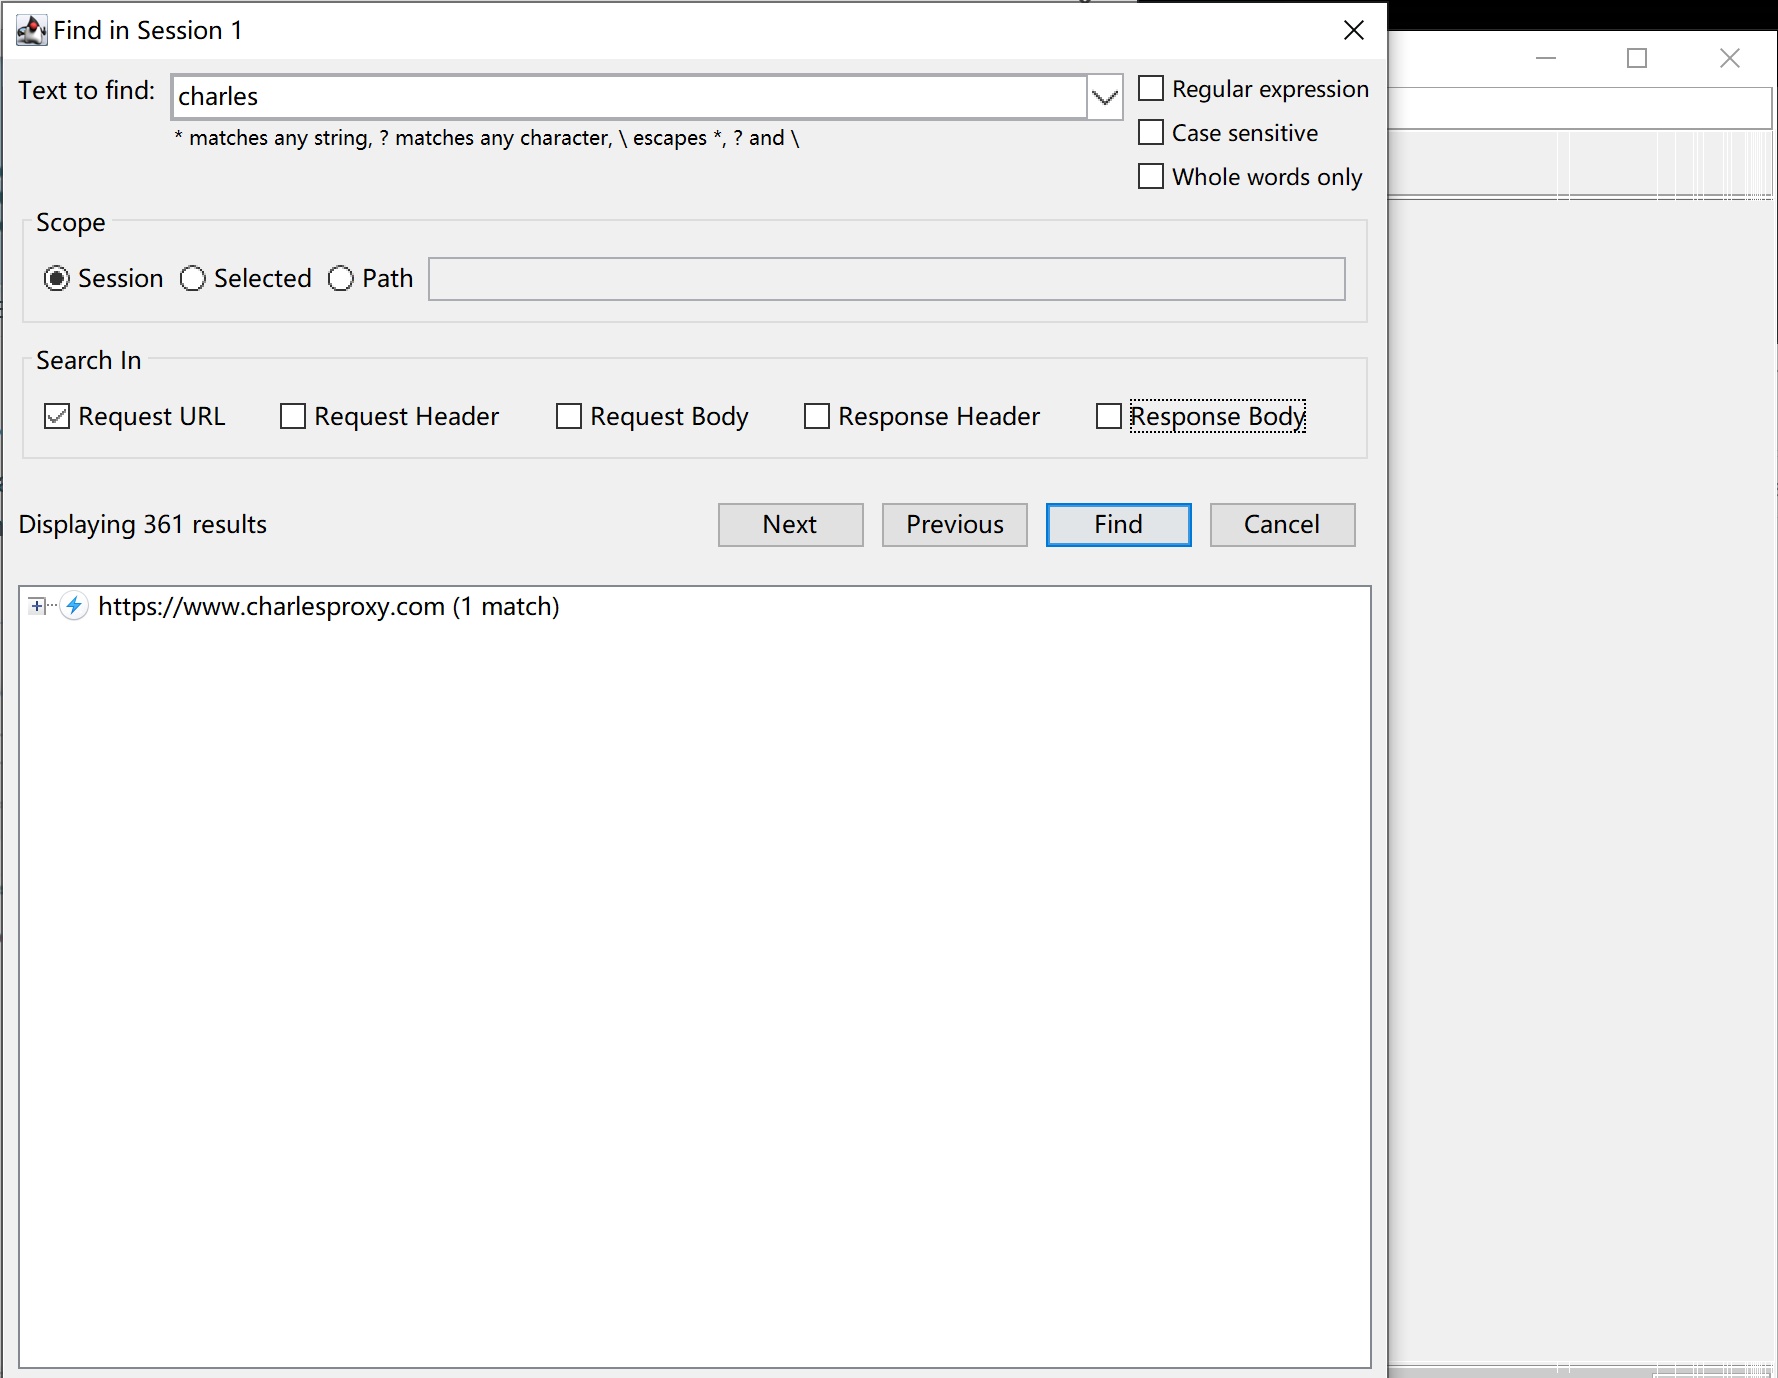
- On the main screen, press Ctrl+F to open the search box and enter the keywords to be filtered. Assume that the target address is www.charlesproxy.com. You only need to set the filter criteria in the Text to find area, select other options as needed, and click Find.
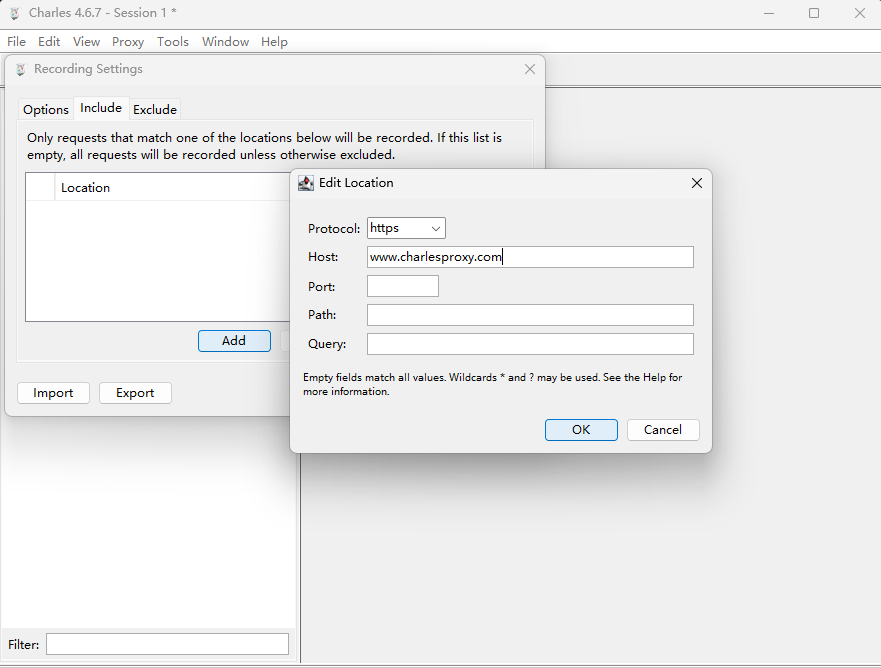
- On the menu bar of Charles, choose Proxy > Recording Settings. On the Include tab, click Add to add a project. Set the protocol information as required and start listening again. In this way, the tool listens only for network requests from the target website.
- On the main screen, press Ctrl+F to open the search box and enter the keywords to be filtered. Assume that the target address is www.charlesproxy.com. You only need to set the filter criteria in the Text to find area, select other options as needed, and click Find.