You need to enable Cloud Storage before using it. If you have enabled it, skip this step.
Sign in to AppGallery Connect and click Development and services.
Click the project for which you need to enable Cloud Storage.
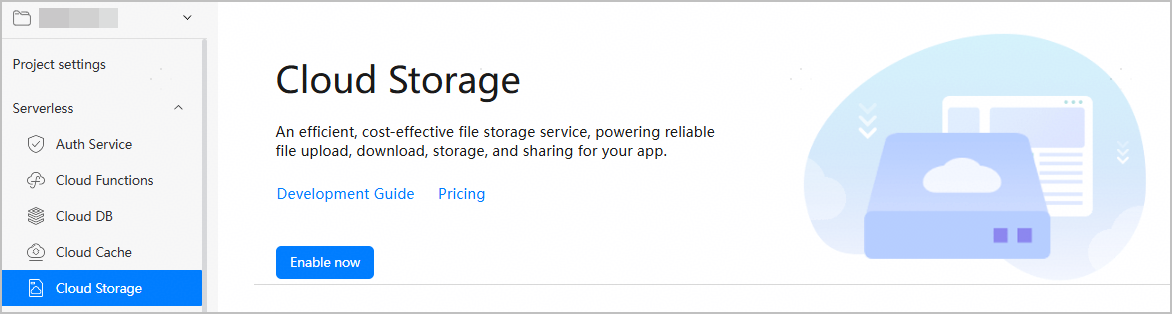
Go to Serverless > Cloud Storage. On the Cloud Storage page, click Enable now.
On the page displayed, set Storage instance and Default data processing location.
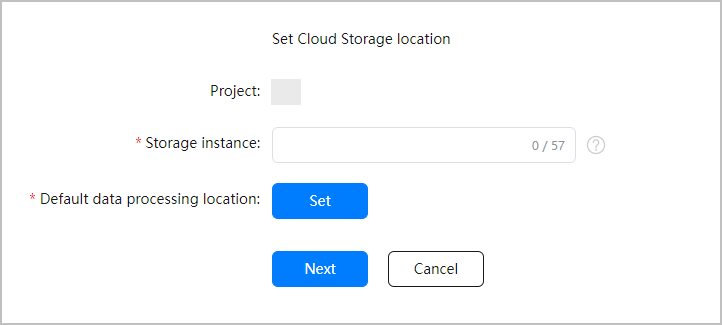
Parameter Description Storage instance Storage instance name, which must:
- Contain only lowercase letters, digits, and hyphens (-).
- Start and end with a digit or letter.
- Contain 3 to 57 characters.
- Not be an IP address.
- Not contain two or more consecutive hyphens (-).
- Be globally unique and cannot be changed after being created.
Default data processing location Currently, you can enable multiple data processing locations for Cloud Storage. You do not need to set this parameter if you have already set a data processing location for the project. Click Next and view the default security rule.
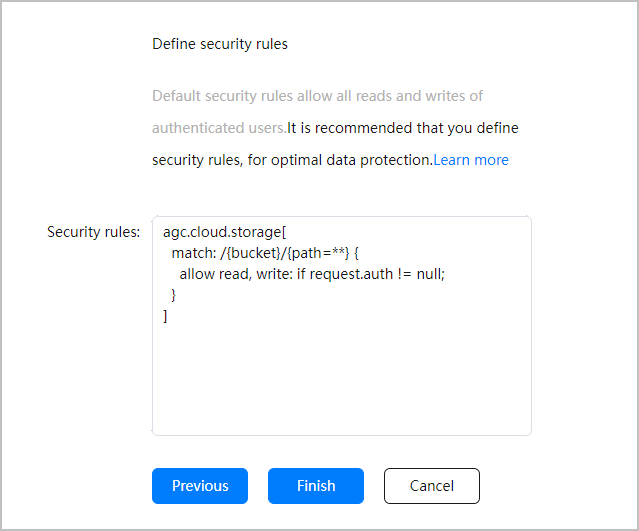

The default security rule allows authenticated users to perform all read and write operations. The security rule cannot be modified when you enable the service. After enabling the service, you can design a more appropriate security rule to protect your user data. For details about how to modify the security rule, please refer to Security Rules.
Click Finish.
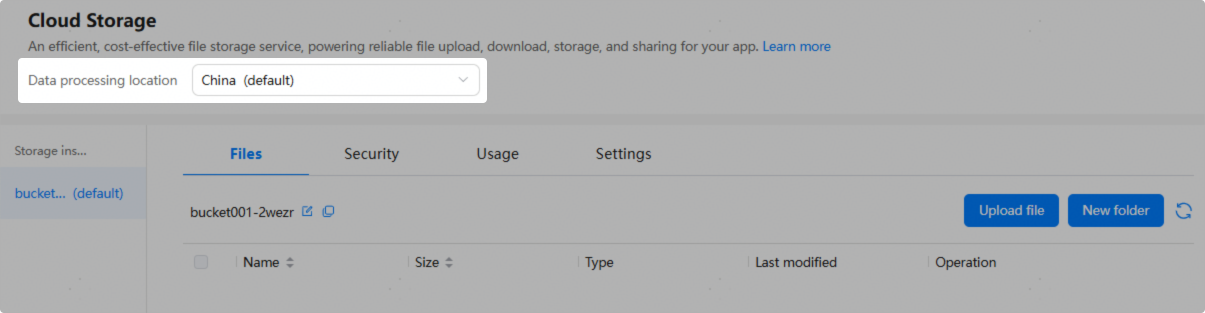
After the service is enabled, AppGallery Connect will create a default storage instance for you, and its name is in the format Storage instance name configured in step 4-Five random digits and letters, for example, bucket001-2wezr.
If you have enabled multiple data processing locations, you can switch among these locations to facilitate management.