Creating a Function
After enabling the Cloud Functions service, you need to create a function in AppGallery Connect and add code to execute the function.
Sign in to AppGallery Connect and click Development and services.
Click the project for which you want to create a cloud function.
Go to Serverless > Cloud Functions.
Click New on the Functions tab page.
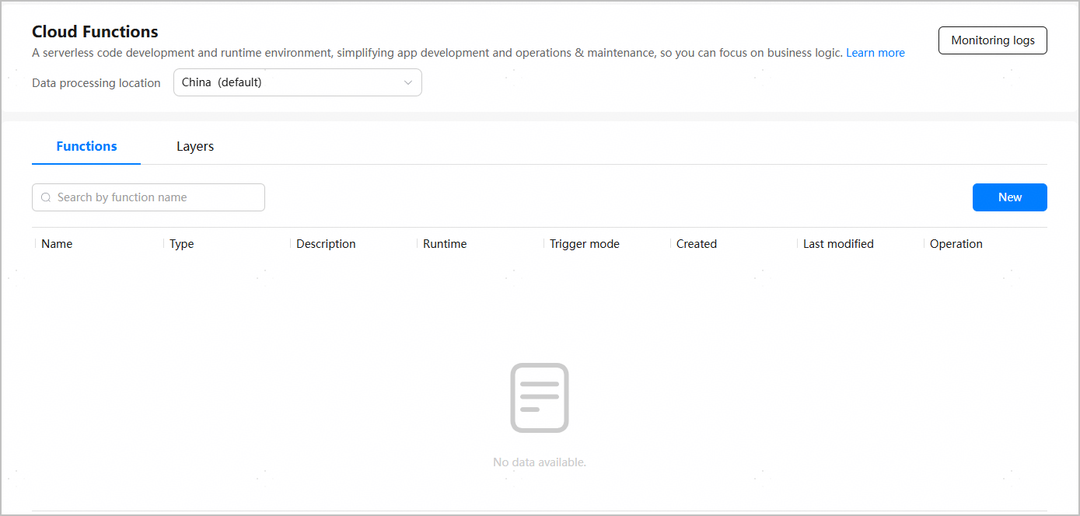
On the Create Function page displayed on the right, set relevant parameters in the Function configuration > Trigger > Function Code > Layer configuration sequence as prompted.
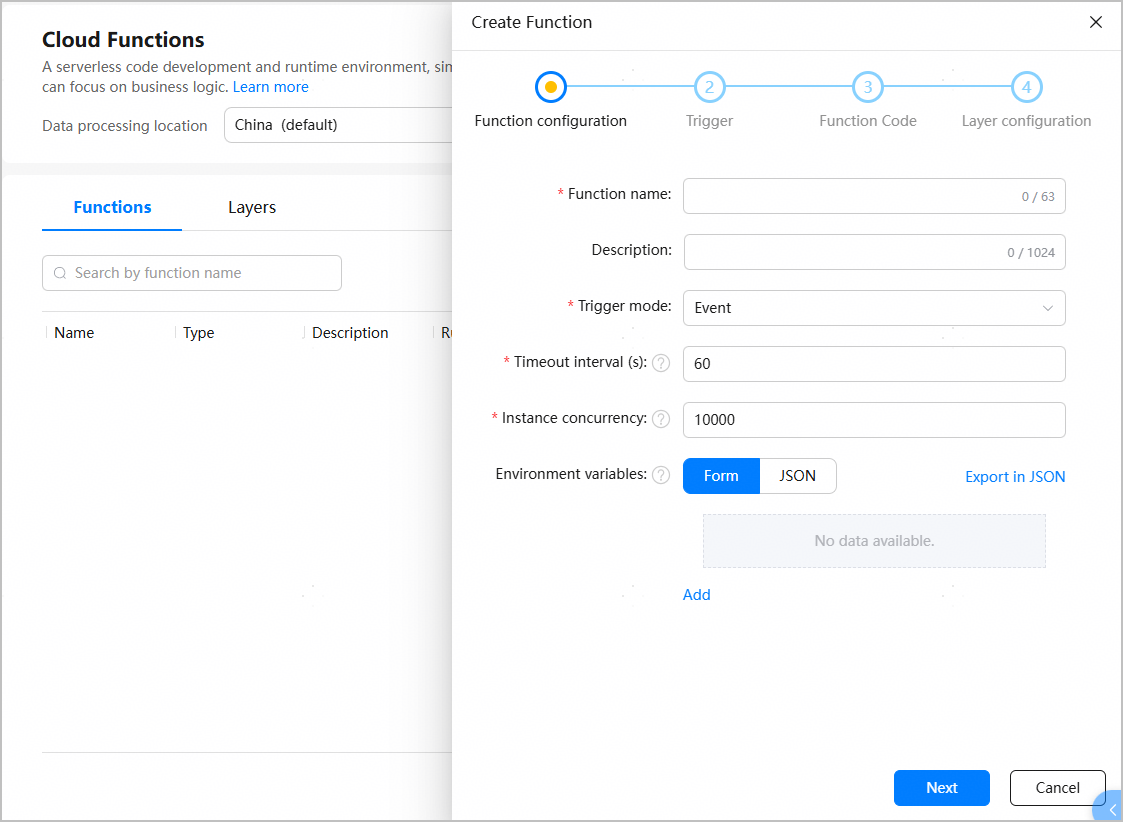
Configuring a Function
On the Function configuration page, set Function name, Trigger mode, Timeout interval, and other function parameters.
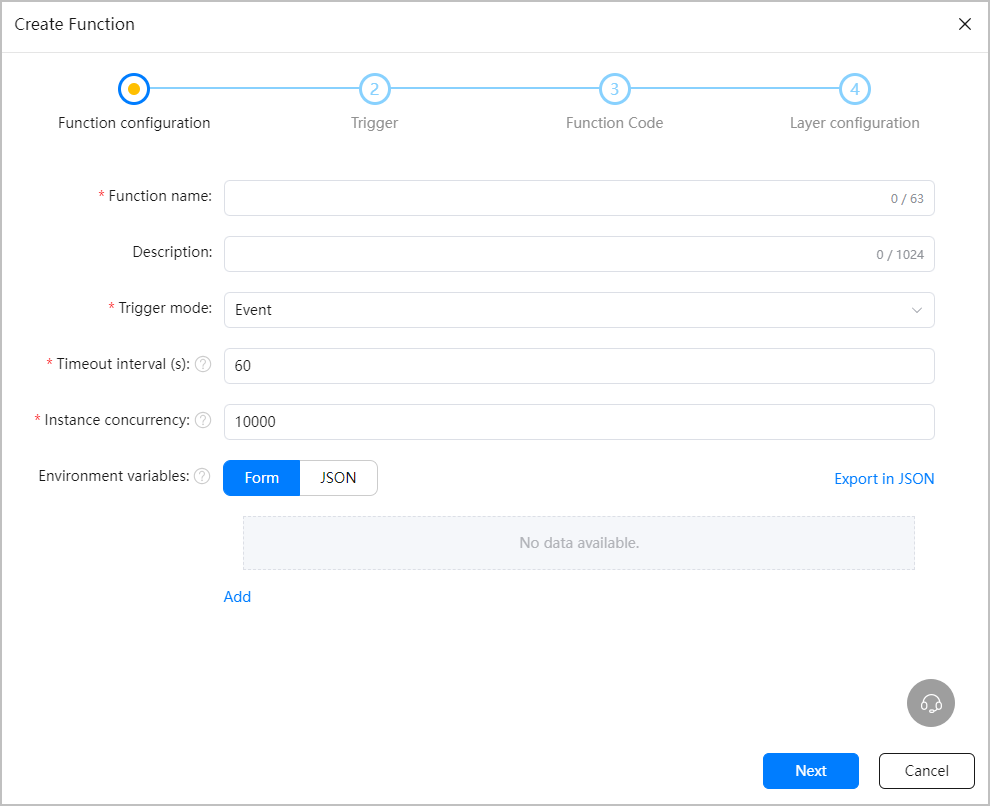
Parameter Description Function name Name of a function. Description Description of a function. Trigger mode Mode for triggering a function. Set this parameter to Event.
This value indicates that the function will be called by a trigger.
Timeout interval (s) Maximum timeout interval for running a function, in seconds. If a function times out, it is considered to have failed by default. The value ranges from 1 to 1800. The value varies according to the call mode.
- In synchronous call mode, the maximum value is 55 seconds.
- In asynchronous call mode, the maximum value is 1800 seconds.
Instance concurrency Maximum number of concurrent function requests. The value ranges from 1 to 10000. Environment variables Environment variables in key-value pairs. You can pass environment variables to the runtime environment of a function, allowing it to read and use them during execution. (Optional) Add environment variables in Form or JSON format as required. After adding environment variables, you can click Export in JSON to export an environment variable file in Function name.json format for future use.

The key of an environment variable must be unique, and PROJECT_CREDENTIAL and AGC_ are system-level environment variables. Do not add environment variables that use PROJECT_CREDENTIAL or AGC_ as the name or as a prefix.
A maximum of 1000 environment variables are allowed.
Form
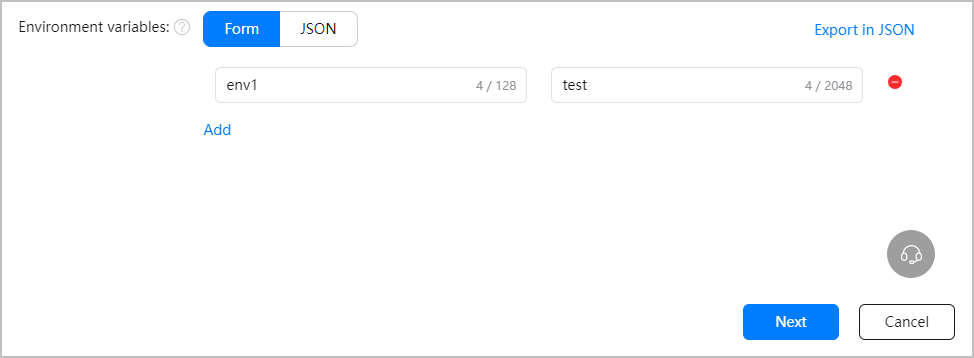
Click Add and enter the corresponding key and value. As shown in the figure below, env1 and test indicate the key and value of the environment variable, respectively. You can click
 to delete the environment variable.
JSON
Click JSON and enter environment variables in JSON key-value pairs in the text box. If many environment variables are added, you can click format to format and sort the environment variables for easy review.
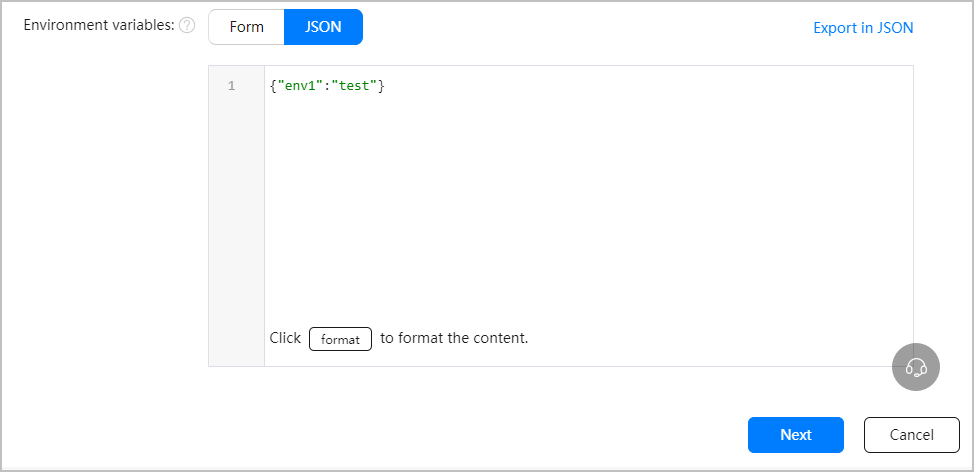
Click Next.
Configuring a Trigger
On the Trigger page, configure a trigger based on the function triggering scenario. In this scenario, an HTTP trigger is added. Retain the default values for Trigger type and Method, set Authentication Type and Url Decode, and click Next.
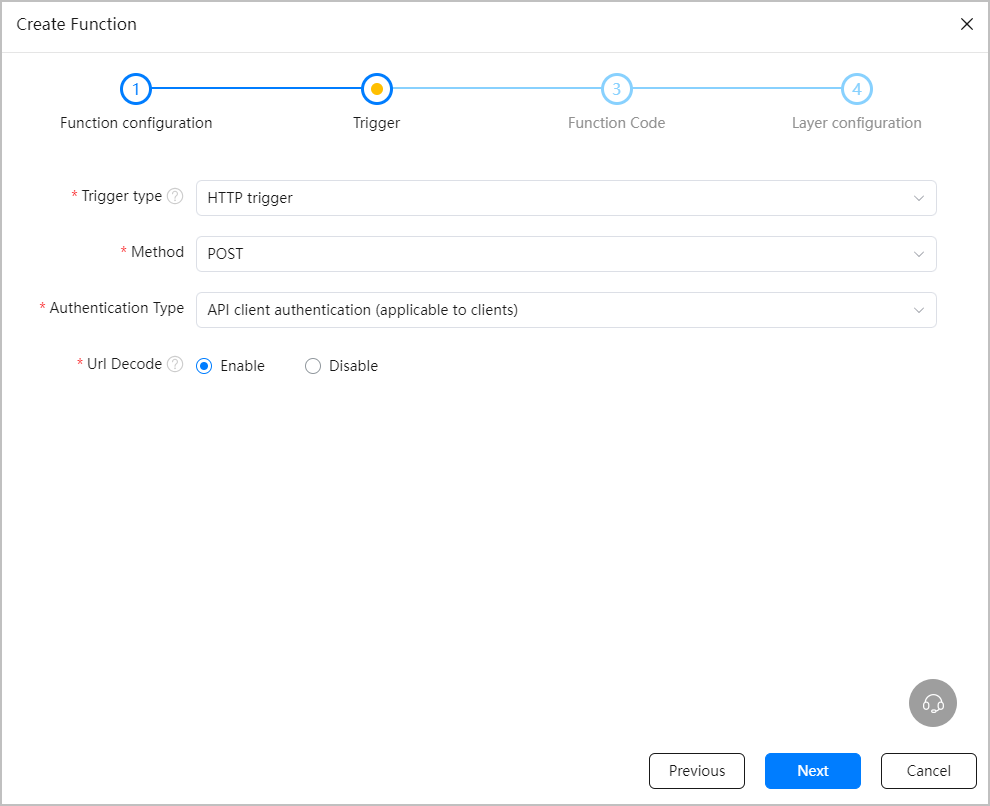
| Parameter | Description |
|---|---|
| Trigger type | Type of the trigger. Set this parameter to HTTP trigger. |
| Method | Request method. Set this parameter to POST, which is currently the only supported method for HTTP triggers. |
| Authentication Type | Authentication type of the HTTP trigger to be added. - API client authentication (applicable to clients): device-side gateway authentication, applicable only to function calls from the app client (that is, from a local app or project). - API client authentication (applicable to Server): cloud-side gateway authentication, applicable only to function calls from the app server (that is, from Cloud Functions). |
| Url Decode | Indicates whether to use URLDecoder to decode the body of an HTTP-based function trigger request whose contentType is application/x-www-form-urlencoded before passing the body to the function. |
Configuring Function Code
On the Function Code page, set Runtime, Memory, Code input type, and other parameters, and click Next.
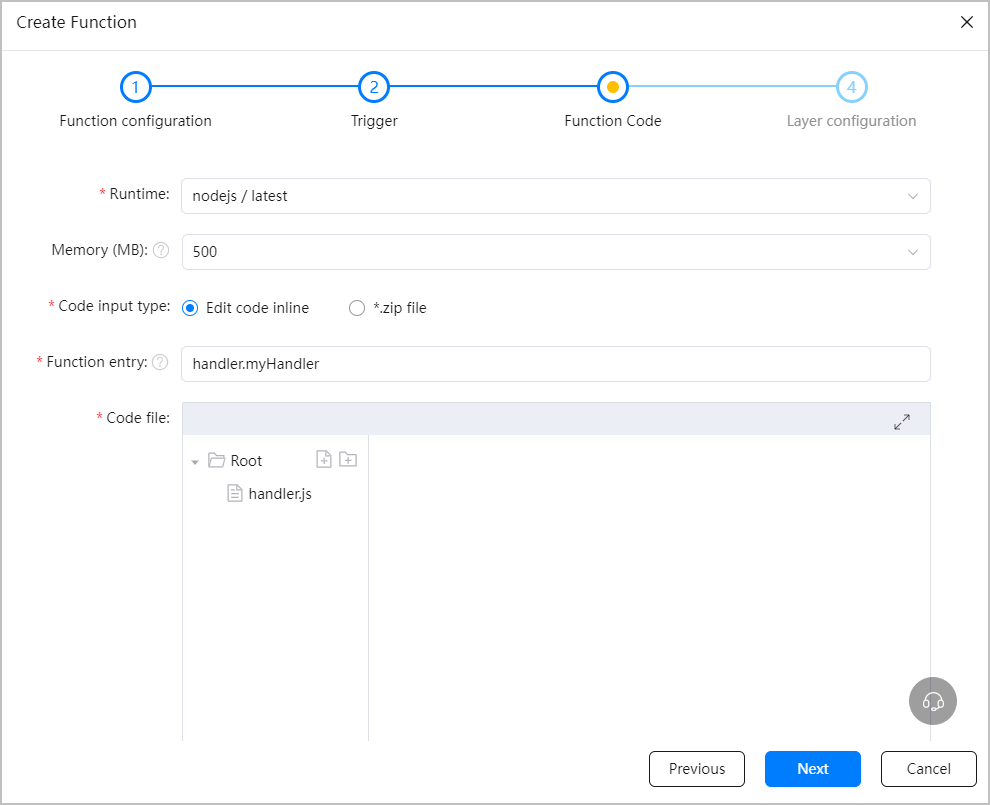
| Parameter | Description |
|---|---|
| Runtime | Function container runtime environment. Select nodejs 20.x or latest, where latest indicates the latest version. |
| Memory (MB) | Size of the memory occupied by the function container, in MB. The options are 500, 1000, 2000, and 4000. |
| Code input type | The value can be Edit code inline (default) or *.zip file. If you select *.zip file for Code input type when creating a function, edit an entry point method file by referring to Entry Point Method. |
| Function entry | The value is in Entry point file name.Entry point method name format, for example, handler.myHandler. In this example, handler is the name of the entry point file and myHandler is the name of the entry point method. In the Node.js runtime environment, the entry point file must be stored in the root directory of the function deployment package. For details, please refer to Preparing Your Function Deployment Package. |
| Code file | Code file that can be edited online or function deployment package to be uploaded. - If Code input type is set to Edit code inline, the Create Function page provides a web-based IDE, allowing you to edit function code online. The following will describe how to use a web-based IDE. - If Code input type is set to *.zip file, click |

Web-based IDE
If Code input type is set to Edit code inline, the Create Function page provides a web-based IDE, allowing you to edit function code online.

If you update function code or configurations when a function instance is running, AppGallery Connect will carry out a rolling update of the function instance. Wait for about 10 to 20 seconds.
The web-based IDE contains the directory tree, code editor, and maximize icon. After the editing is complete, AppGallery Connect will generate a deployment package and upload it.
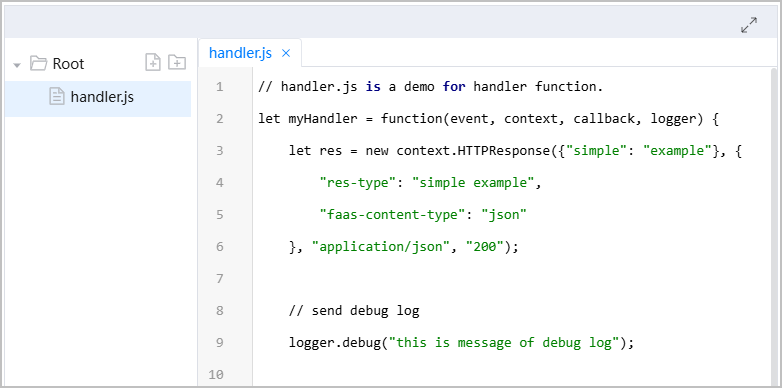
| Component | Description |
|---|---|
| Directory tree | Supports the following capabilities: - Adding a folder: Select a file or folder and click - Adding a file: Select a file or folder and click - Deleting a file or folder: Select a file or folder and click - Renaming a file or folder: Double-click a file or folder, enter a new name, and press Enter. The name can contain only letters, digits, underscores (_), and hyphens (-). |
| Editor | Provides the following capabilities: - Syntax highlighting: highlights code based on the syntax of Node.js. - Syntax verification: displays error messages when a syntax error is found. - Code suggestion: automatically displays suggested code during coding. - Code autocomplete: autocompletes with suggested code. - Formatting: formats the code using Ctrl+Shift+B. - Shortcut keys: for example, Ctrl+V, Ctrl+C, Ctrl+Z, Ctrl+X, Ctrl+F, and Ctrl+/. |
| Maximize icon | You can click the maximize icon  to enlarge the online editing area. To restore it, click  or press Esc. |


Configuring a Layer
Layers allow you to publish and deploy common dependency libraries. By extracting the common libraries and dependencies that your function needs into a layer, you can bind this layer to your function and use the libraries within the function without including them in the function's code package. This can reduce the size of the function's code package, shorten deployment time, and avoid potential errors that may occur during dependency installation and packaging due to the use of the function code. For details about layer management, please refer to Managing Layers.
If no layer has been created, skip the following steps and click Create at the bottom of the page to complete function definition. After creating a layer, you can configure the layer and bind it to the function on the function details page. If you have created a layer before creating a function, perform the following steps:
On the Layer configuration page, click Bind layer.
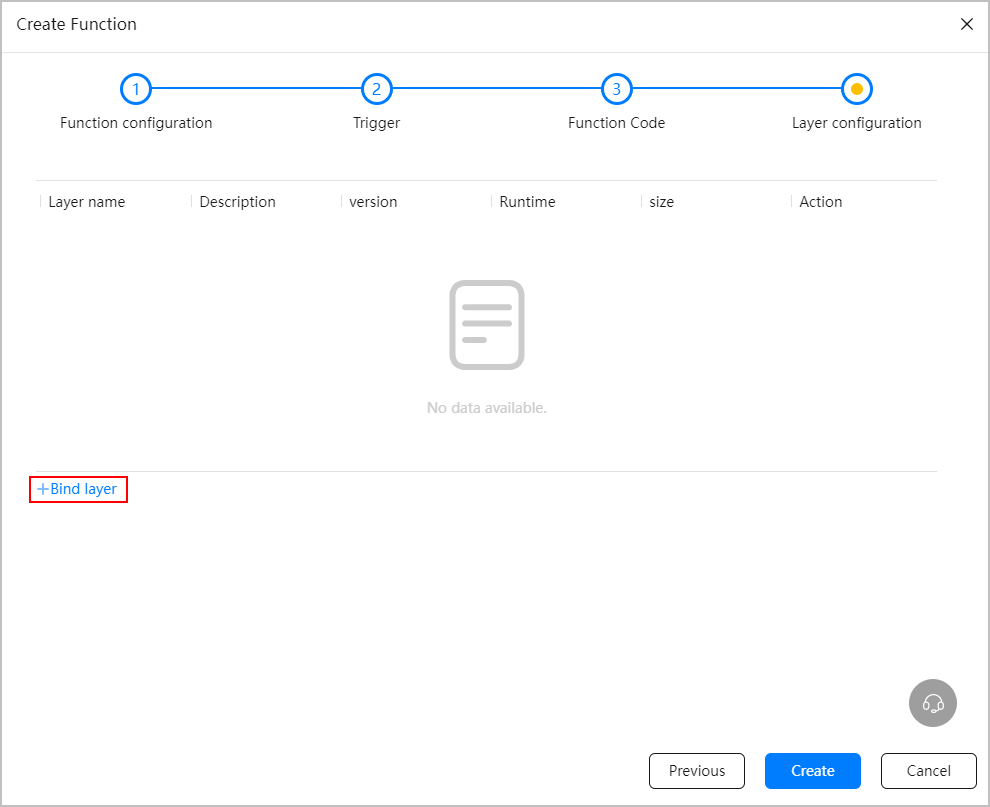
On the Bind layer page, set Layer name and Version, and click OK. Note that other parameters, such as Layer scope, will be automatically filled. A function can be bound to a maximum of five layers.

When selecting a layer, the compatible runtime environment of the layer must match the function runtime environment. The system will automatically filter layers. If no layer is available, create a layer with a runtime environment same as the function runtime environment and then bind it to the function.

Parameter Description Layer name Name of a layer. If a layer with the specified name already exists, a new version will be automatically added to the existing layer. Version Version of a layer. If a layer has multiple versions, select a version to bind to the function. Layer scope Sharing scope of a layer.
- Sharing Within Project
- Sharing Within team
Compatible runtime Runtime environment used by the layer. Select nodejs. Layer description Description of a layer, which can contain up to 1024 characters. View the bound layer on the Layer configuration page. To unbind a layer from the function, click Unbind in the Action column of the layer.
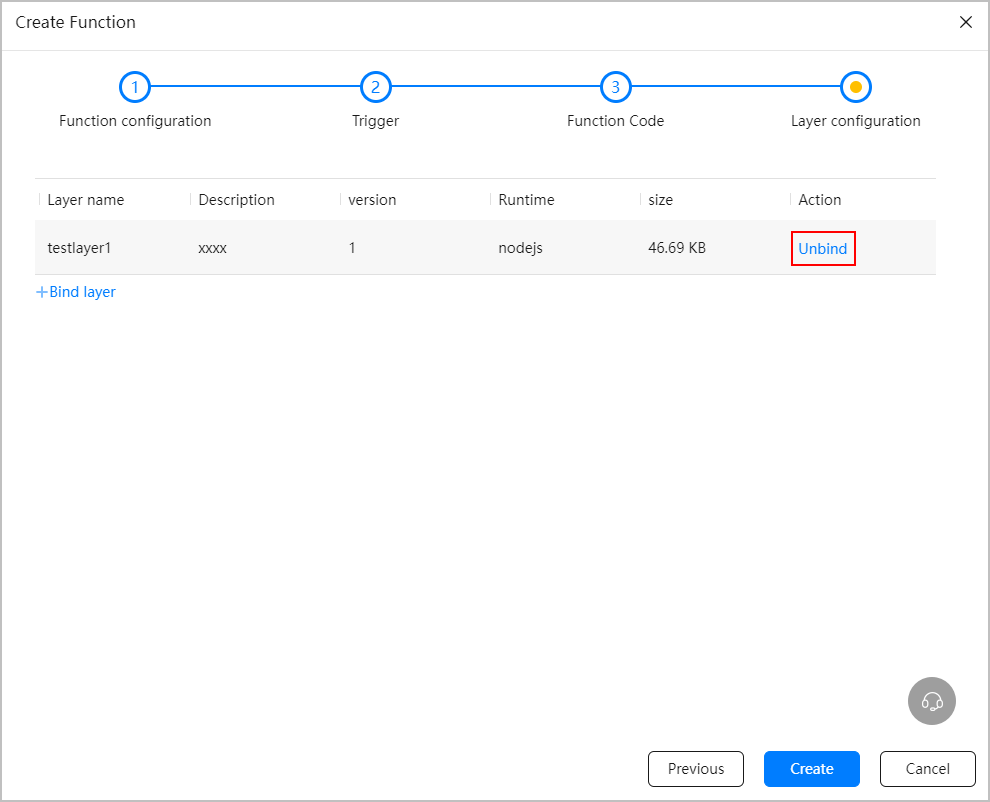
Click Create to submit the function definition. During function creation, you can click Previous to go back to the Function Code, Trigger, or Function configuration page and modify the information. After completing all configurations, click Create.