Overview
With the popularity of mobile devices, the camera has become an indispensable tool in people's lives. Camera customization is of great practical value in mobile development. You can customize unique shooting and interaction experience based on different use scenarios and requirements.
If you only need to call the system camera to take photos or record videos, use CameraPicker. To build a highly customized camera application or implement complex features such as real-time analysis of camera data streams, you have to call Camera Kit to access and operate camera hardware.
Camera preview displays the real-time image captured by the camera lens, serving as a foundation for subsequent operations like taking photos and recording videos. This section elaborates on the implementation of basic previews, preview adjustment (such as lens switching, flash setting, zoom, and focus), advanced preview features (such as grid lines and level), as well as the acquisition of frame data for previews. Additionally, it covers both basic and advanced practices in customizing camera previews.
[h2]When to Use
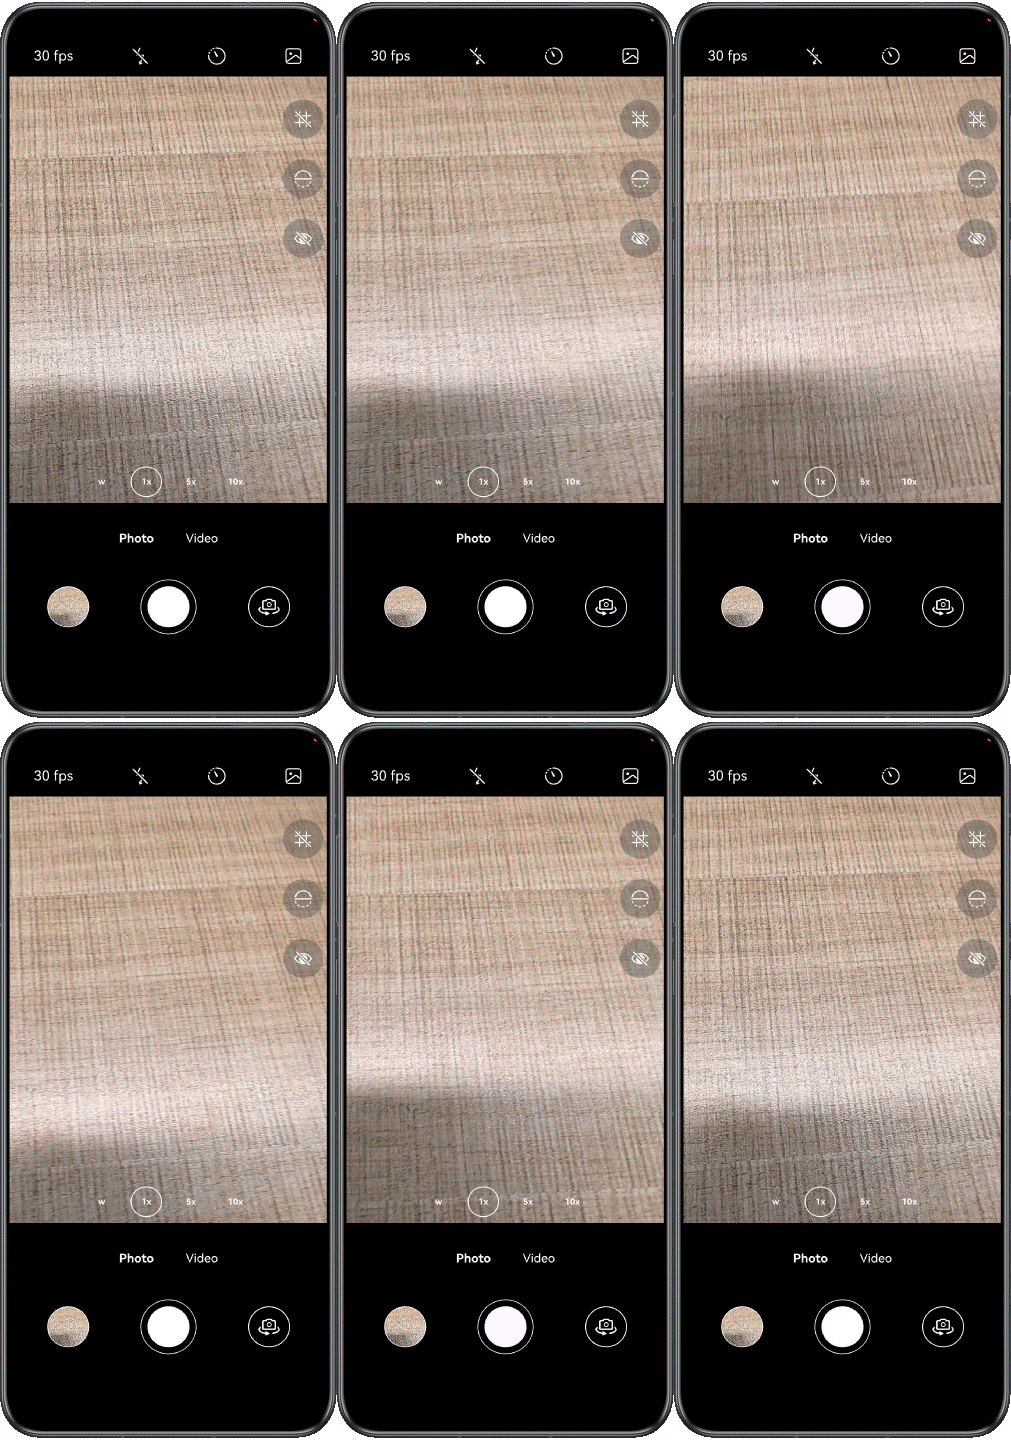
Basic preview is the core feature of the custom camera. Once a user launches the camera application, a real-time preview image is displayed, laying the groundwork for operations like image adjustment and shooting.
[h2]How to Implement
Key Technologies
- Surface: abstract concept of an image data buffer.
- XComponent: component used for complex custom rendering. It serves as a surface for the camera. The camera writes preview stream data to this surface, while the XComponent reads data from it and renders the content.
- Camera Kit: used to manage camera devices, camera output streams, and camera sessions. A camera session is used to configure input and output streams, and set parameters such as the flash and focal length.
Development Process
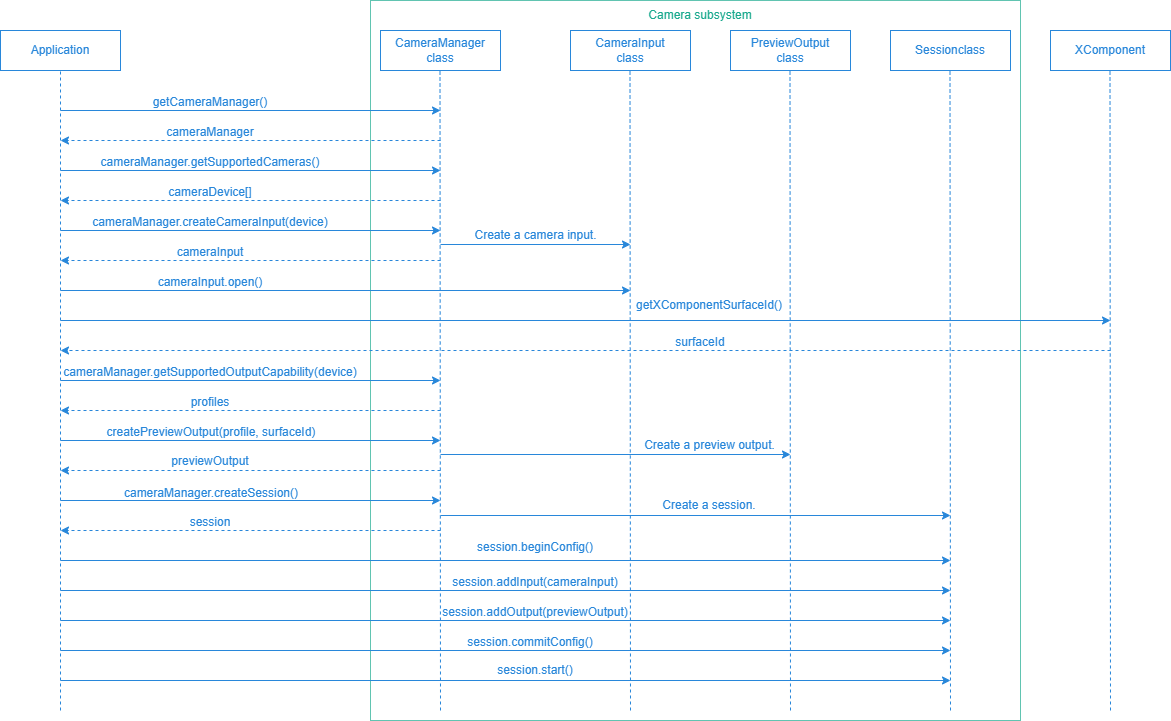
- Apply for the permission.
- Obtain the camera device. Create and start the camera input stream.
- Use the XComponent to create a surface and obtain the surface ID.
- Create a preview output stream.
- Configure a camera session and start the session.
[h2]How to Develop
- Before using the camera, apply for the ohos.permission.CAMERA permission as follows:
Configure this permission in module.json5. For more camera-related permissions, see Camera Development Preparations.
"requestPermissions": [
  {
    "name": "ohos.permission.CAMERA",
    "reason": "$string:permission_CAMERA",
    "usedScene": {
      "abilities": [
        "EntryAbility"
      ]
    }
  },
  // ...
]
Call the AtManager.requestPermissionsFromUser() method to start a dialog box to request user authorization. If the user rejects the request, call the requestPermissionOnSetting() method to start a dialog box for requesting permissions again. You can adjust the authorization logic based on your service requirements. For details, see Application Permission Request.
class PermissionManager { private static atManager: abilityAccessCtrl.AtManager = abilityAccessCtrl.createAtManager(); static async request(permissions: Permissions[], context: Context): Promise<void> { try { const data = await PermissionManager.atManager.requestPermissionsFromUser(context, permissions); const grantStatus: number[] = data.authResults; const deniedPermissions = permissions.filter((_, i) => grantStatus[i] !== 0); for (const permission of deniedPermissions) { const secondGrantStatus = await PermissionManager.atManager.requestPermissionOnSetting(context, [permission]); if (secondGrantStatus[0] !== 0) { Logger.error(TAG, 'permission denied'); throw new Error('permission denied'); } } } catch (exception) { Logger.error(TAG, `request failed, code is ${exception.code}, message is ${exception.message}`); throw new Error('permission failed'); } } } - Obtain the camera device. Create and start the camera input stream.
Obtain the cameraManager instance using camera.getCameraManager().
this.cameraManager = camera.getCameraManager(context);
Obtain the list of camera devices using camera.getSupportedCameras(). Obtain the corresponding camera device using camera.CameraPosition. CAMERA_POSITION_BACK indicates the rear camera, and CAMERA_POSITION_FRONT indicates the front camera.
getCameraDevice(cameraPosition: camera.CameraPosition): camera.CameraDevice | undefined {
  const cameraDevices = this.cameraManager?.getSupportedCameras();
  if (!cameraDevices) {
    Logger.error(TAG, `Failed to get camera device. cameraPosition: ${cameraPosition}}`);
    return undefined;
  }
  const device = cameraDevices?.find(device => device.cameraPosition === cameraPosition) || cameraDevices[0];
  if (!device) {
    Logger.error(TAG, `Failed to get camera device. cameraPosition: ${cameraPosition}}`);
  }
  return device;
}
Create an input stream of the camera device using camera.createCameraInput() and open the camera.
this.cameraInput = this.cameraManager?.createCameraInput(device);
await this.cameraInput?.open();
- Create a surface.
Render the preview image using the XComponent. Set the type of the XComponent to SURFACE.
Obtain the surface ID using getXComponentSurfaceId().
Set the width and height of the surface to those of the preview display area using setXComponentSurfaceRect().
Lock the surface orientation during screen rotation using setXComponentSurfaceRotation().

If the width and height of the surface are not set, the width and height of the XComponent are used. You are advised to explicitly set the width and height of the surface instead of relying on the width and height of the XComponent to prevent image distortion caused by incorrect width and height settings of the surface.
XComponent({
  type: XComponentType.SURFACE,
  controller: this.previewVM.xComponentController
})
  .onLoad(async () => {
    // ...
    this.previewVM.surfaceId = this.previewVM.xComponentController.getXComponentSurfaceId();
    this.previewVM.setPreviewSize();
    this.previewVM.xComponentController.setXComponentSurfaceRotation({ lock: true });
    // ...
  })
setPreviewSize(): void { const displaySize: Size = WindowUtil.getMaxDisplaySize(this.getPreviewRatio()); this.previewSize = displaySize; this.xComponentController.setXComponentSurfaceRect({ surfaceWidth: displaySize.width, surfaceHeight: displaySize.height }); } - Create a preview output stream.
- Select the corresponding camera.SceneMode. Select SceneMode.NORMAL_PHOTO for preview in photo shooting mode, and SceneMode.NORMAL_VIDEO for preview in video recording mode.
- Obtain the output capability of the camera device based on camera.SceneMode.
- Search for the preview profile of the required preview output capability in the previewProfiles property of the CameraOutputCapability class. Note the following when selecting a profile:
- Resolution: The selected resolution ratio must be the same as the surface ratio to avoid image distortion. Select a proper resolution based on the service requirements and device performance. An excessively low resolution may result in blurry images, while an excessively high resolution could lead to resource waste, increased power consumption, and high memory usage.
- Format: The selected format must be the same as the pixel format of the camera buffer data to be processed subsequently to avoid image exceptions.
- Create a preview output stream using CameraManager.createPreviewOutput().
async createOutput(config: CreateOutputConfig): Promise<camera.PreviewOutput | undefined> {
  const cameraOutputCap = config.cameraManager?.getSupportedOutputCapability(config.device, config.sceneMode);
  const displayRatio = config.profile.size.width / config.profile.size.height;
  const profileWidth = config.profile.size.width;
  const previewProfile = cameraOutputCap?.previewProfiles
    .sort((a, b) => Math.abs(a.size.width - profileWidth) - Math.abs(b.size.width - profileWidth))
    .find(pf => {
      const pfDisplayRatio = pf.size.width / pf.size.height;
      return pf.format === config.profile.format &&
        Math.abs(pfDisplayRatio - displayRatio) <= CameraConstant.PROFILE_DIFFERENCE;
    });
  if (!previewProfile) {
    Logger.error(TAG_LOG, 'Failed to get preview profile');
    return undefined;
  }
  try {
    this.output = config.cameraManager?.createPreviewOutput(previewProfile, config.surfaceId);
    if (this.output) {
      this.addOutputListener(this.output);
    }
  } catch (exception) {
    Logger.error(TAG_LOG, `createPreviewOutput failed, code is ${exception.code}, message is ${exception.message}`);
  }
  return this.output;
}
For example, the lens of the rear camera on a bar-type phone is installed at a 90-degree angle when the device is in its natural orientation, with the screen rotation angle set to 0 degrees. The camera installation angle for different devices can be retrieved through CameraDevice.cameraOrientation. Therefore, the width and height in the output capability profile are inversely proportional to the width and height of the preview display area or surface. For example, if the width and height of the display area are 1080 x 1920, the width and height of the profile to be queried are 1920 x 1080. In landscape display mode, the width and height of the profile are the same as those of the preview display area or surface.
// Get the camera's width, height, and format params. public getProfile: (cameraOrientation: number) => camera.Profile = cameraOrientation => { const displaySize: Size = WindowUtil.getMaxDisplaySize(this.getPreviewRatio()); let displayDefault: display.Display | null = null; try { displayDefault = display.getDefaultDisplaySync(); } catch (exception) { Logger.error(TAG, `getDefaultDisplaySync failed, code is ${exception.code}, message is ${exception.message}`); } // Get actual rotation angle. const displayRotation = (displayDefault?.rotation ?? 0) * 90; const isRevert = (cameraOrientation + displayRotation) % 180 !== 0; return { format: camera.CameraFormat.CAMERA_FORMAT_YUV_420_SP, size: { height: isRevert ? displaySize.width : displaySize.height, width: isRevert ? displaySize.height : displaySize.width } }; }; - Configure and start the camera session.
Create a camera session using CameraManager.createSession().
Configure the camera session using Session.beginConfig().
Use Session.addInput() and Session.addOutput() to configure the camera input stream and output stream for preview into the camera session, respectively.
Submit the camera session configuration information using Session.commitConfig().
Start the camera session using Session.start().
const session = this.cameraManager?.createSession(sceneMode);
session?.beginConfig();
session?.addInput(this.cameraInput);
// ...
for (const outputManager of this.outputManagers) {
  if (outputManager.isActive) {
    const output = await outputManager.createOutput(config);
    session?.addOutput(output);
  }
}
await session?.commitConfig();
if (sceneMode === camera.SceneMode.NORMAL_VIDEO && session) {
  this.setVideoStabilizationMode(isStabilizationEnabled, session as camera.VideoSession);
}
await session?.start();
export interface OutputManager { output?: camera.CameraOutput; isActive: boolean; createOutput: (config: CreateOutputConfig) => Promise<camera.CameraOutput | undefined>; release: () => Promise<void>; } - Release resources in the correct sequence.
Release the preview output stream using CameraOutput.release().
async release(): Promise<void> {
  try {
    await this.output?.release();
  } catch (exception) {
    Logger.error(TAG_LOG, `release failed, code is ${exception.code}, message is ${exception.message}`);
  }
  this.output = undefined;
}
Use CameraInput.close() to close the camera and Session.release() to release the camera session resources.
async release(): Promise<void> { try { await this.session?.stop(); for (const outputManager of this.outputManagers) { if (outputManager.isActive) { await outputManager.release(); } } await this.cameraInput?.close(); await this.session?.release(); } catch (exception) { Logger.error(TAG, `release failed, code is ${exception.code}, message is ${exception.message}`); } } - Listen for the preview stream status.
Register the events of frameStart (preview frame start) and frameEnd (preview frame end) and implement the corresponding service processing in the event callback.
addFrameStartEventListener(output: camera.PreviewOutput): void {
  output.on('frameStart', (err: BusinessError) => {
    if (err !== undefined && err.code !== 0) {
      Logger.error(TAG_LOG, `FrameStart callback Error, errorMessage: ${err.message}`);
      return;
    }
    Logger.info(TAG_LOG, 'Preview frame started');
    this.onPreviewStart();
  });
}

addFrameEndEventListener(output: camera.PreviewOutput): void {
  output.on('frameEnd', (err: BusinessError) => {
    if (err !== undefined && err.code !== 0) {
      Logger.error(TAG_LOG, `frameEnd callback Error, errorMessage: ${err.message}`);
      return;
    }
    Logger.info(TAG_LOG, 'Preview frame end');
  });
}
Preview Image Adjustments
Built on the basic preview, a custom camera usually has to support preview image adjustments, including switching between the front and rear cameras, focusing, switching the flash mode, and more.
[h2]Switching Between Front and Rear Cameras
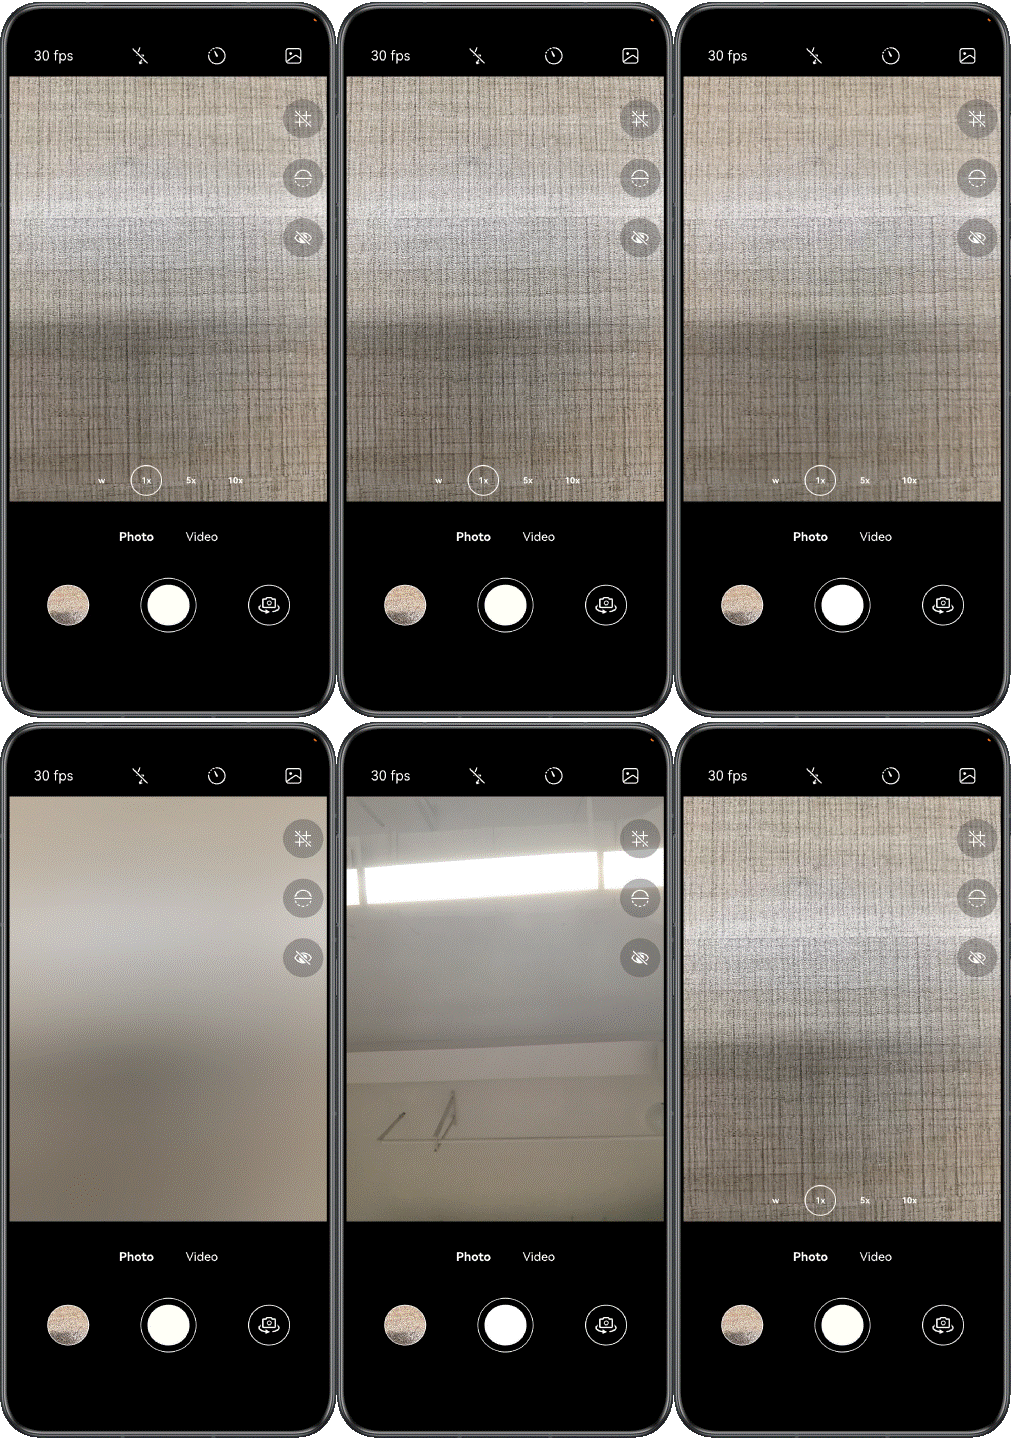
isFront on the preview page is used to identify whether the camera is front-facing or rear-facing. You can obtain the value of camera.CameraPosition from the isFront property. For details about how to select a CameraPosition value for foldable phones, see Cross-Device Camera Interface Adaptation.
public isFront: boolean = false;
// ...
getCameraPosition(): camera.CameraPosition {
  return this.isFront
    ? camera.CameraPosition.CAMERA_POSITION_FRONT
    : camera.CameraPosition.CAMERA_POSITION_BACK;
}
Bind the click event to the camera switch button. In the callback function, switch the status of the isFront property, obtain the new CameraPosition, release the camera resources such as the input and output streams, create the input and output streams of the new camera, and start the camera. For details, see steps 2, 4, and 5 in How to Develop.

In this example, the startup process of the camera and basic preview is encapsulated in the start() method of the custom CameraManager class, and the release of camera resources and input and output streams is encapsulated in the release() method.
@Builder
toggleCameraPositionButton() {
  Image($r('app.media.toggle_position'))
    .width(48)
    .height(48)
    .onClick(async () => {
      // ...
      this.previewVM.isFront = !this.previewVM.isFront;
      await this.previewVM.cameraManagerRelease();
      await this.previewVM.cameraManagerStart();
      // ...
    })
}
For details about how to implement the transition effect of switching between the front and rear cameras, see Basic Camera Animation (ArkTS).
[h2]Setting the Camera Focal Length
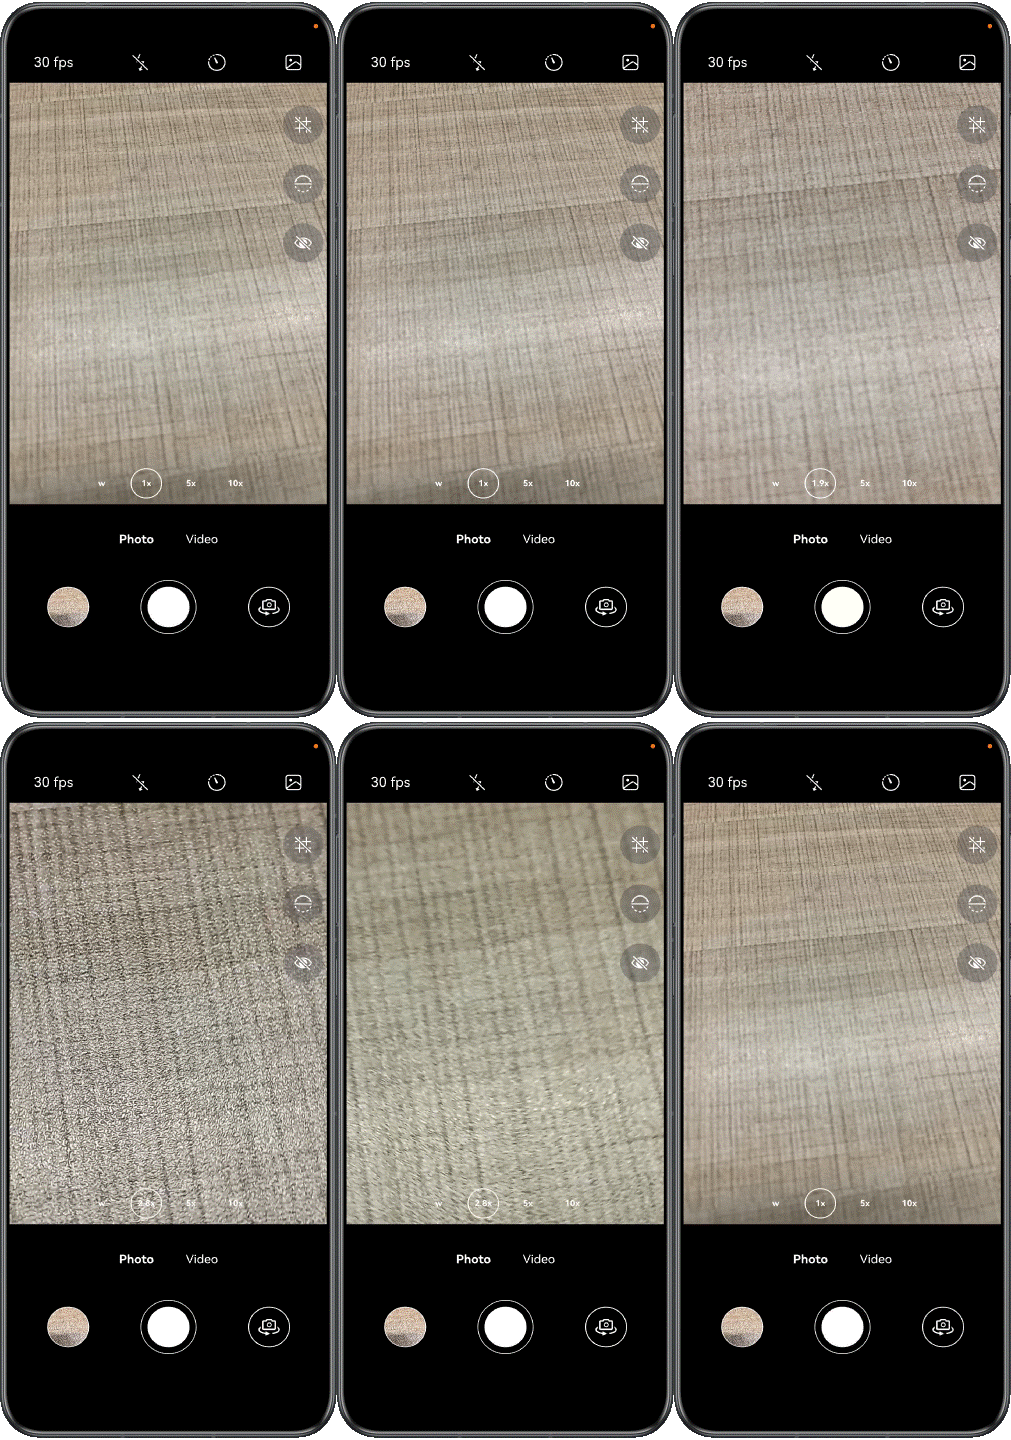
Call the getZoomRatioRange() method to obtain the zoom ratio range supported by the current camera device, and generate buttons on the page based on this range.
getZoomRange(): number[] {
  try {
    return this.session!.getZoomRatioRange();
  } catch (exception) {
    Logger.error(TAG, `getZoomRange failed, code is ${exception.code}, message is ${exception.message}`);
    return [];
  }
}
Within the tap event callback of the focal length button, call setSmoothZoom() to smoothly zoom in or out to the focal length corresponding to the button.
setSmoothZoom(zoom: number): void {
  try {
    this.session?.setSmoothZoom(zoom);
  } catch (e) {
    Logger.error(TAG, 'setSmoothZoom error ' + JSON.stringify(e));
  }
}
[h2]Setting the Flash Mode
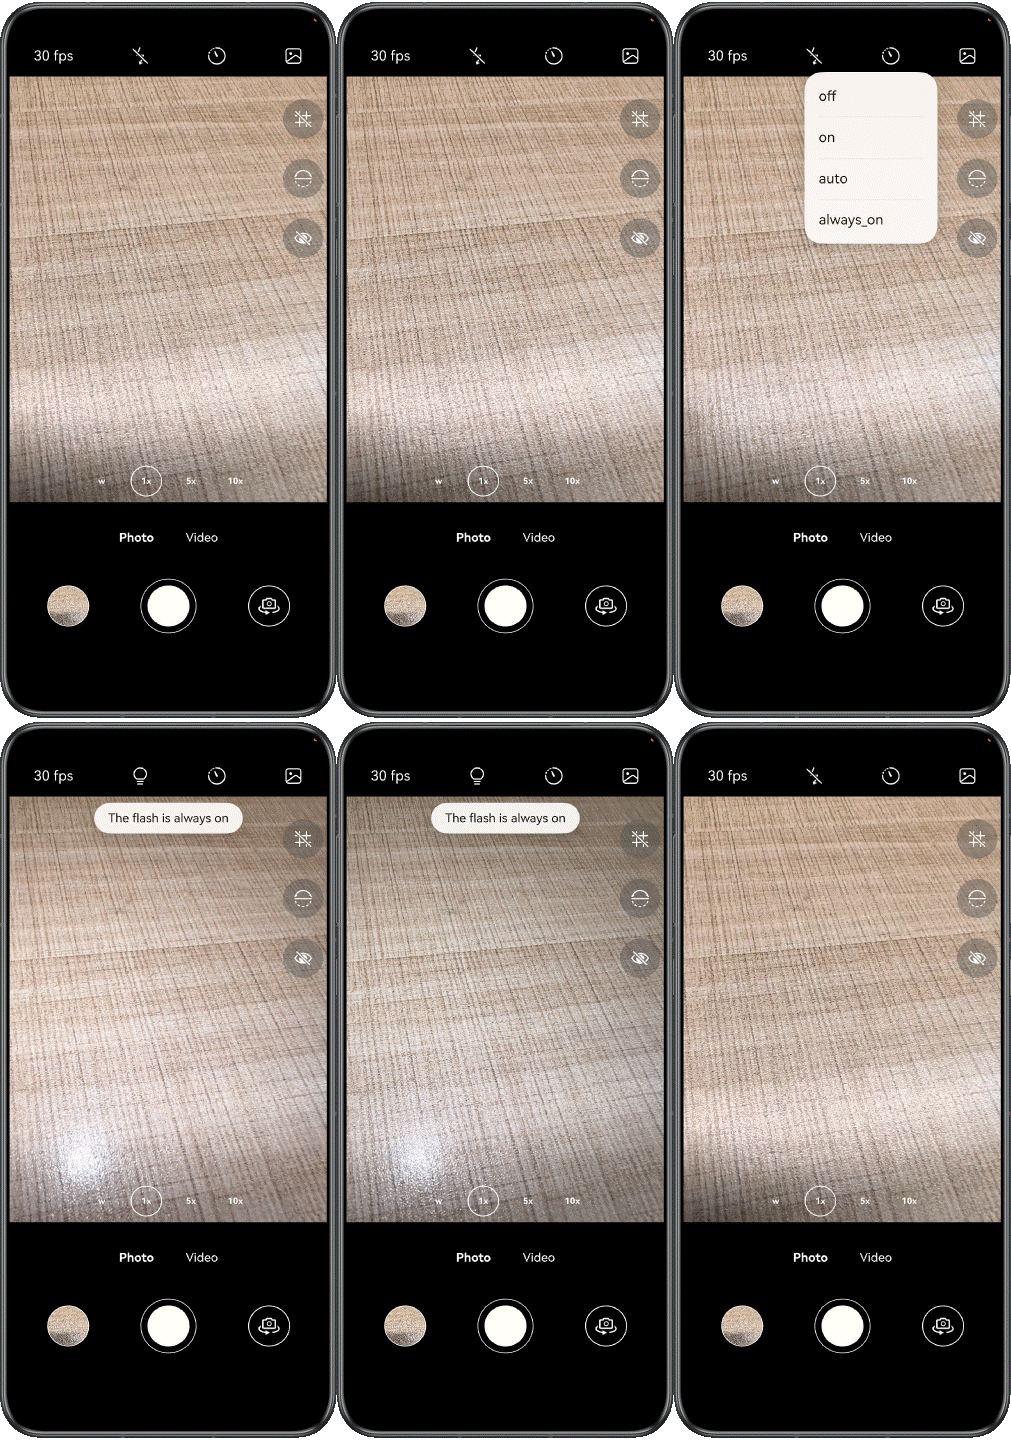
Before calling setFlashMode(), call isFlashModeSupported() to check whether the device supports the selected flash mode.
setFlashMode(flashMode: camera.FlashMode): void {
  try {
    const isSupported = this.session?.isFlashModeSupported(flashMode);
    if (!isSupported) {
      Logger.error(TAG, `setFlashMode error: flash mode ${flashMode} is not supported`);
      return;
    }
    this.session?.setFlashMode(flashMode);
  } catch (e) {
    Logger.error(TAG, 'setFlashMode error ' + JSON.stringify(e));
  }
}
[h2]Implementing the Touch Focus
Touch the preview area to focus on the touched position. The focus frame is displayed.
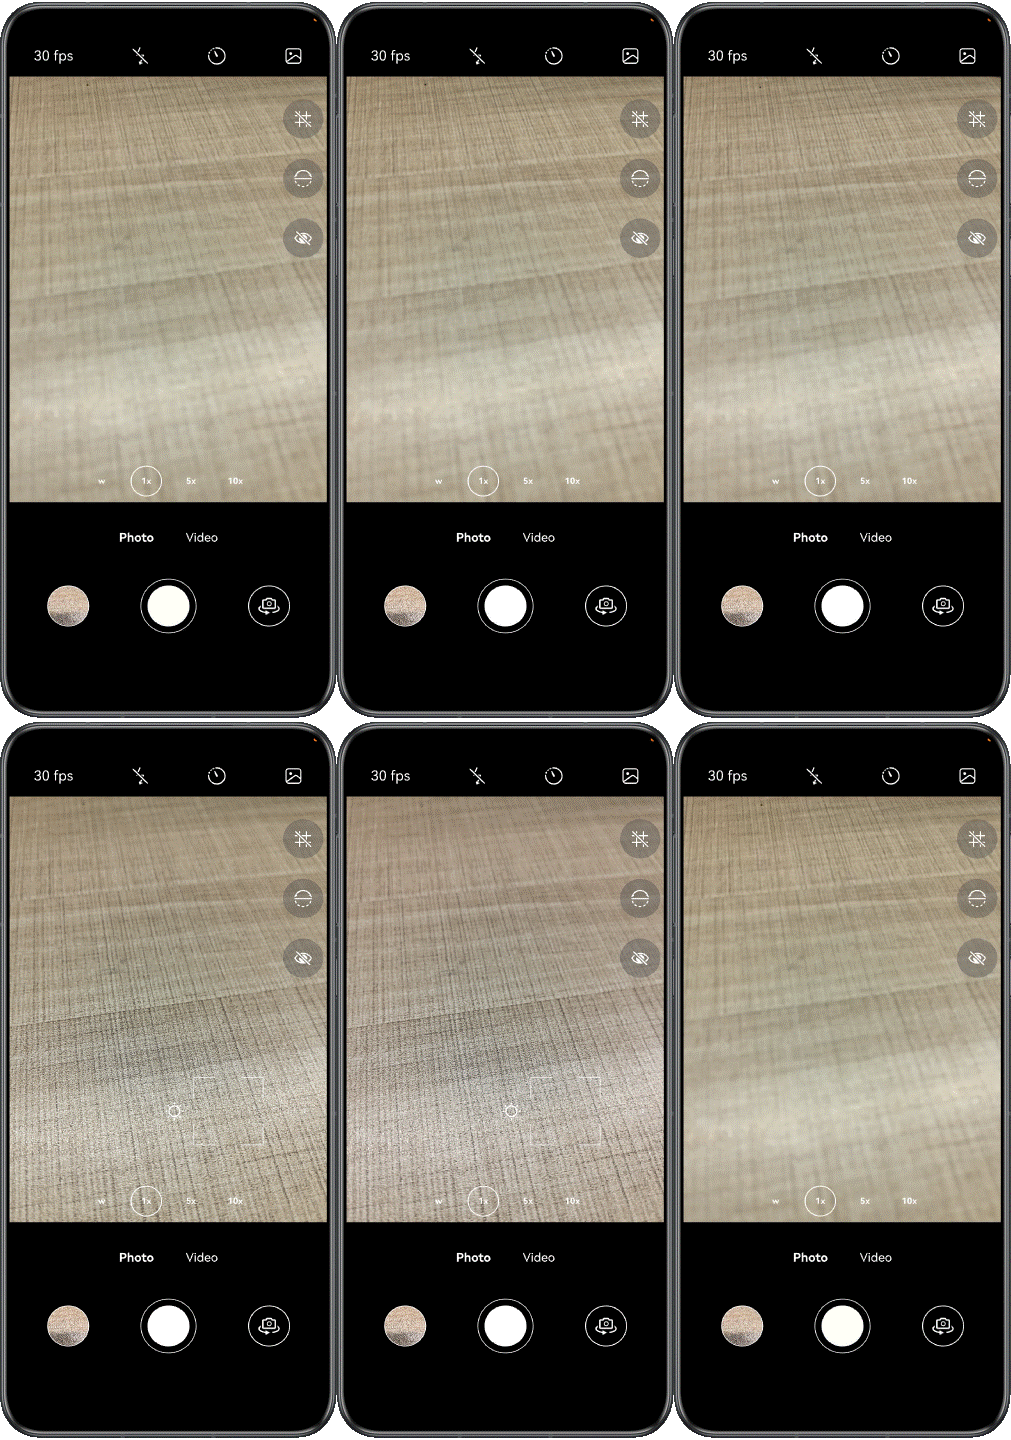
The coordinates of camera.Point (the focus) are based on the device's horizontal direction with the charging port on the right. The coordinate system has its origin {0, 0} at the top left corner and {1, 1} at the lower right corner.
In the device's natural orientation, the coordinates obtained upon touch are based on the vertical direction with the charging port at the bottom, thus requiring coordinate system conversion.
Assume that the touch point is {x, y} and the preview area is {w, h}.
- If the screen rotation angle is 0, the distance between the touch point and the origin in the x-axis direction is y, and the distance between the touch point and the origin in the y-axis direction is w – x. As this is a 0-1 coordinate system, the actual focus coordinates are {y/h, (w – x)/w}, that is, {y/h, 1 – x/w}.
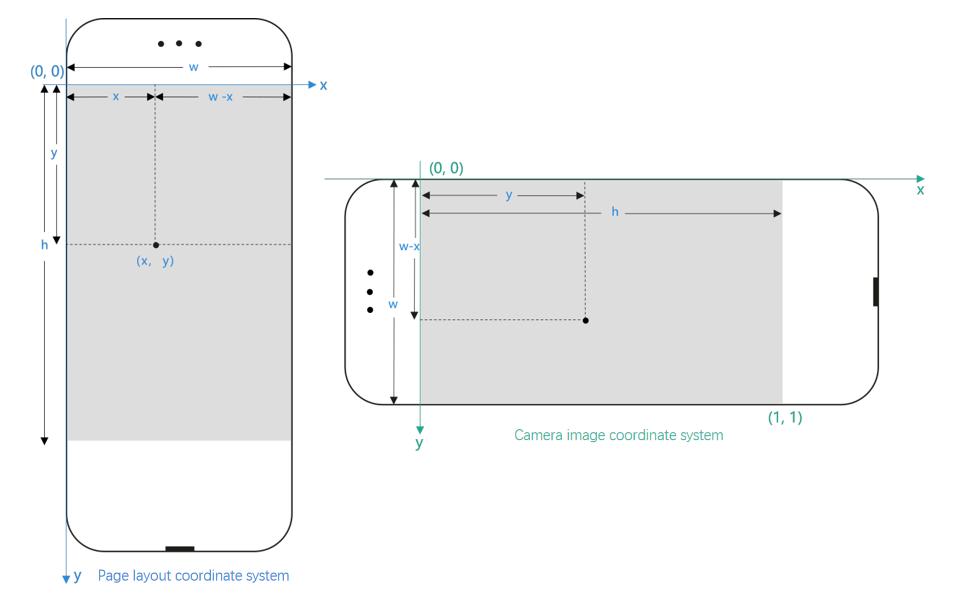
Similarly, the focus coordinates are calculated in other screen rotation directions.
- If the screen rotation angle is 90 degrees, the focus coordinates are {1 – x/w, 1 – y/h}.
- If the screen rotation angle is 180 degrees, the focus coordinates are {1 – y/h, x/w}.
- If the screen rotation angle is 270 degrees, the focus coordinates are {x/w, y/h}.
export function calCameraPoint(eventX: number, eventY: number, width: number, height: number): camera.Point {
  let displayDefault: display.Display | null = null;
  try {
    displayDefault = display.getDefaultDisplaySync();
  } catch (exception) {
    Logger.error('calCameraPoint', `calCameraPoint failed, code is ${exception.code}, message is ${exception.message}`);
  }
  const displayRotation = (displayDefault?.rotation ?? 0) * 90;
  if (displayRotation === 0) {
    return { x: eventY / height, y: 1 - eventX / width };
  }
  if (displayRotation === 90) {
    return { x: 1 - eventX / width, y: 1 - eventY / height };
  }
  if (displayRotation === 180) {
    return { x: 1 - eventY / height, y: eventX / width };
  }
  return { x: eventX / width, y: eventY / height };
}
After the camera session is started, call setFocusMode() to set the focus mode to FOCUS_MODE_CONTINUOUS_AUTO. For touch-to-focus interactions on the preview image, switch to FOCUS_MODE_AUTO to enable focus settings. Ensure the camera supports the requested focus mode before applying it. Once the manual focusing is complete, switch to FOCUS_MODE_CONTINUOUS_AUTO to ensure a better user experience.
setFocusMode(focusMode: camera.FocusMode): void {
  try {
    const isSupported = this.session?.isFocusModeSupported(focusMode);
    if (!isSupported) {
      Logger.error(TAG, `setFocusMode error: focus mode ${focusMode} is not supported`);
      return;
    }
    this.session?.setFocusMode(focusMode);
  } catch (e) {
    Logger.error(TAG, 'setFocusMode error ' + JSON.stringify(e));
  }
}
Call setFoucusPoint() to implement tap-to-focus.
setFocusPoint(point: camera.Point): void {
  try {
    this.session?.setFocusPoint(point);
  } catch (e) {
    Logger.error(TAG, 'setFocusPoint error ' + JSON.stringify(e));
  }
}
Calculate the position of the focus frame relative to the preview area based on their widths and heights as well as the coordinates of the touch point. Ensure that the focus frame does not exceed the boundaries of the preview area.
// cal absolute position in parent area
export function getClampedChildPosition(childSize: Size, parentSize: Size, point: Point): Edges {
  // center point
  let left = point.x - childSize.width / 2;
  let top = point.y - childSize.height / 2;
  // limit in left
  if (left < 0) {
    left = 0;
  }
  // limit in right
  if (left + childSize.width > parentSize.width) {
    left = parentSize.width - childSize.width;
  }
  // limit in top
  if (top < 0) {
    top = 0;
  }
  // limit in bottom
  if (top + childSize.height > parentSize.height) {
    top = parentSize.height - childSize.height;
  }
  return { left, top };
}
[h2]Setting the Exposure Area Center
Touch the preview area to set the touch point as the exposure center.
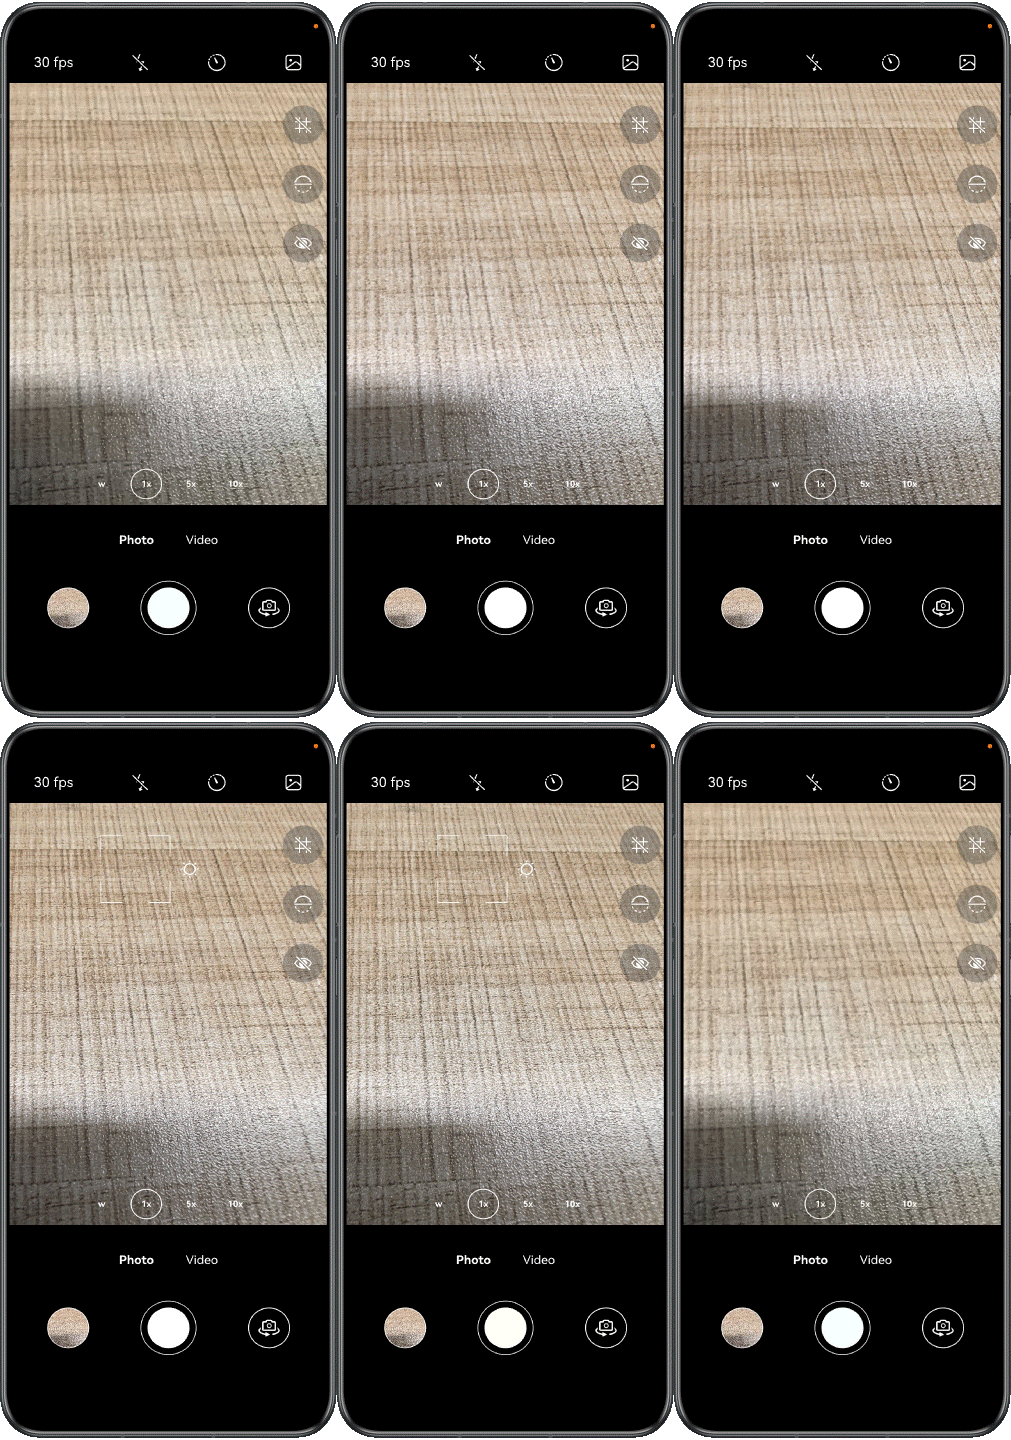
After the camera session is started, call setExposureMode() to set the exposure mode to EXPOSURE_MODE_CONTINUOUS_AUTO. For touch-to-expose interactions on the preview image, switch to EXPOSURE_MODE_AUTO to enable the setting of the exposure area center. Ensure the camera supports the requested exposure mode before applying it. Once the manual setting is complete, switch to EXPOSURE_MODE_CONTINUOUS_AUTO to ensure a better user experience.
setExposureMode(exposureMode: camera.ExposureMode): void {
  try {
    const isSupported = this.session?.isExposureModeSupported(exposureMode);
    if (!isSupported) {
      Logger.error(TAG, `setExposureMode error: focus mode ${exposureMode} is not supported`);
      return;
    }
    this.session?.setExposureMode(exposureMode);
  } catch (e) {
    Logger.error(TAG, 'setExposureMode error ' + JSON.stringify(e));
  }
}
Touch the preview area on the screen and call setMeteringPoint() to set the center of the exposure area. For details about the logic of converting between the screen layout coordinates and camera coordinates, see Implementing Tap-to-Focus.
setMeteringPoint(point: camera.Point): void {
  try {
    this.session?.setMeteringPoint(point);
  } catch (e) {
    Logger.error(TAG, 'setMeteringPoint error ' + JSON.stringify(e));
  }
}
[h2]Setting the Preview Frame Rate
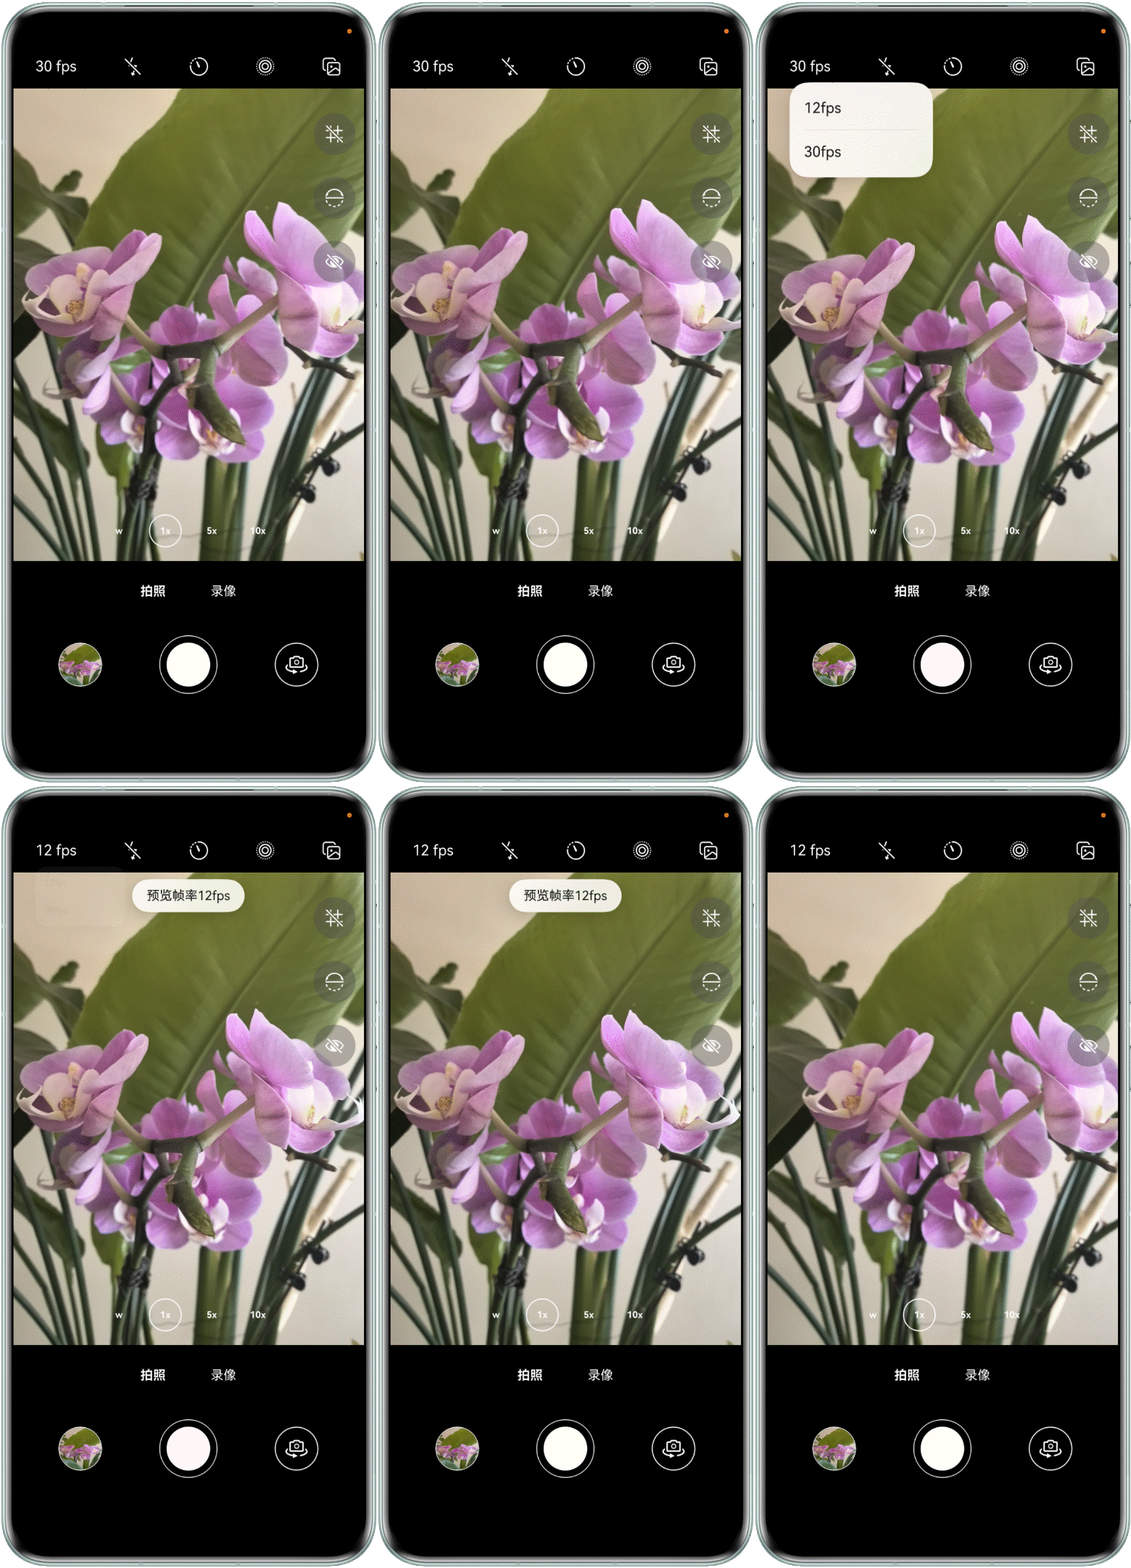
Call PreviewOutput.getSupportedFrameRates() to obtain the frame rate range supported by preview streams.
getSupportedFrameRates(): camera.FrameRateRange[] | undefined {
  return this.output?.getSupportedFrameRates();
}
Within the tap event callback of the frame rate switch button, call PreviewOutput.setFrameRate() to dynamically adjust the preview frame rate.
setFrameRate(minFps: number, maxFps: number): void {
  try {
    this.output?.setFrameRate(minFps, maxFps);
  } catch (e) {
    Logger.error(TAG_LOG, 'setFrameRate error ' + JSON.stringify(e));
  }
} [h2]Zoom In/Out
You can pinch the preview image to adjust its focal length.
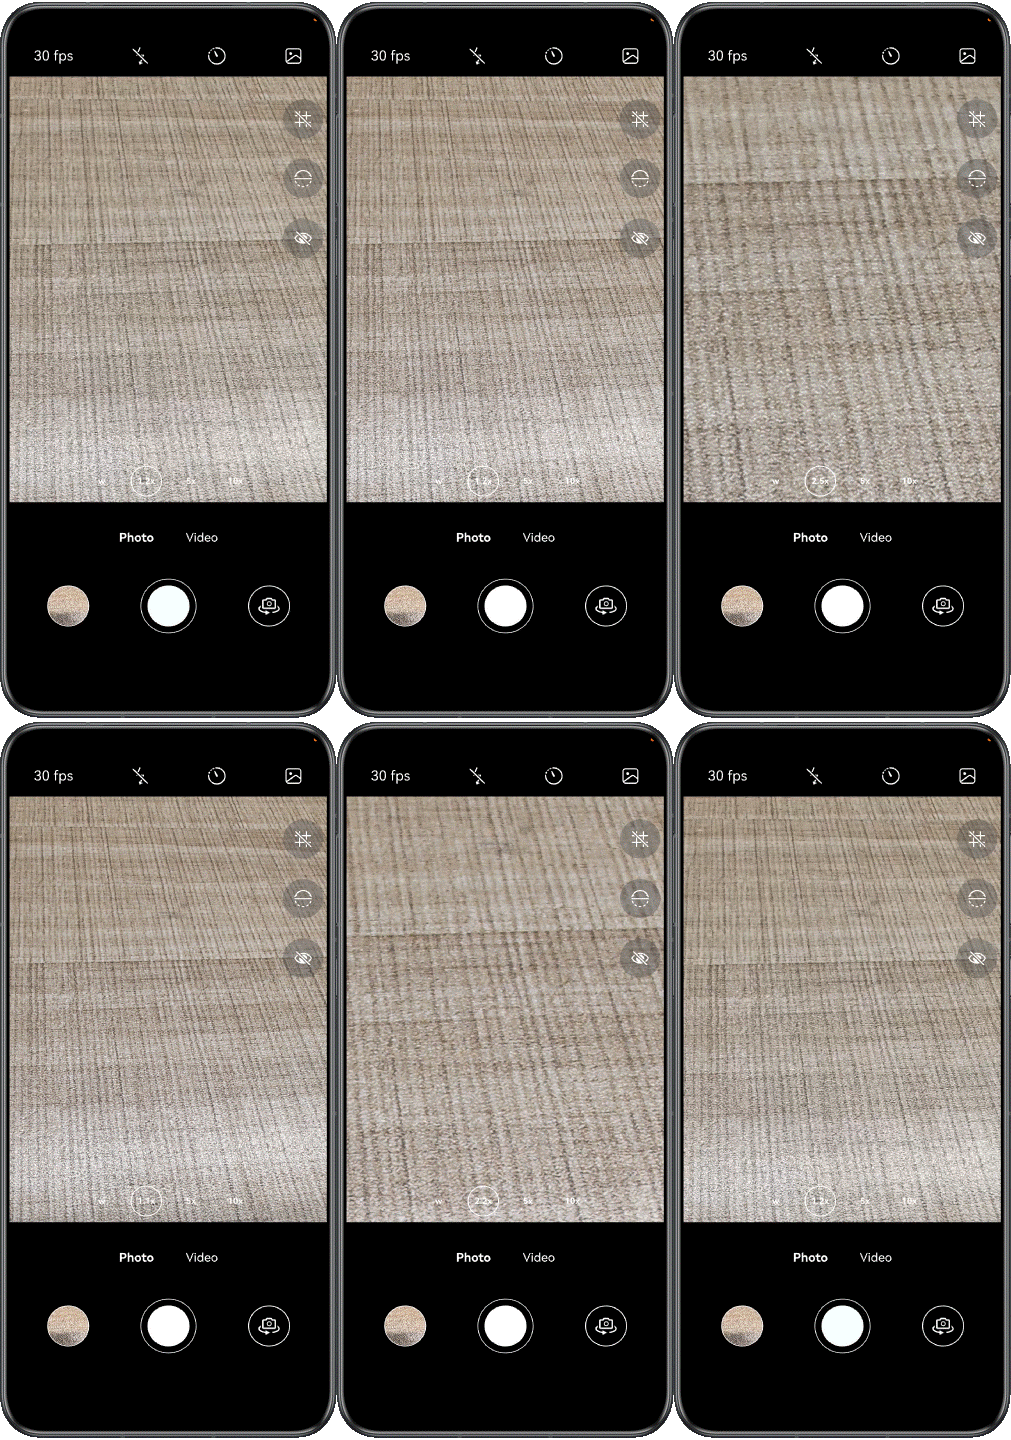
Call the PinchGesture() API to attach pinch events to the preview area.
Within the onActionStart() event callback, record the focal length before the pinch gesture starts. Within the onActionUpdate() event callback, calculate the current focal length based on the focal length before the pinch gesture starts and the pinch ratio. Note that the focal length must be within the focal length range of the current camera device.
XComponent({
  type: XComponentType.SURFACE,
  controller: this.previewVM.xComponentController
})
// ...
  .gesture(
    // Adjust focus with two fingers pinchGesture.
    PinchGesture({ fingers: 2 })
      .onActionStart(() => {
        this.originZoomBeforePinch = this.previewVM.currentZoom;
        this.isZoomPinching = true;
        this.previewVM.sleepTimer?.refresh();
      })
      .onActionUpdate((event: GestureEvent) => {
        if (this.previewVM.isVideoMode() && this.previewVM.isStabilizationEnabled) {
          return;
        }
        const targetZoom = this.originZoomBeforePinch * event.scale;
        this.previewVM.currentZoom = limitNumberInRange(targetZoom, this.previewVM.zoomRange);
        this.previewVM.setCameraZoomRatio();
      })
      .onActionEnd(() => {
        this.isZoomPinching = false;
      })
  )
[h2]Grid Line
A camera preview image is divided into nine equal areas (3 x 3 grids) to provide a precise composition reference guide for users.
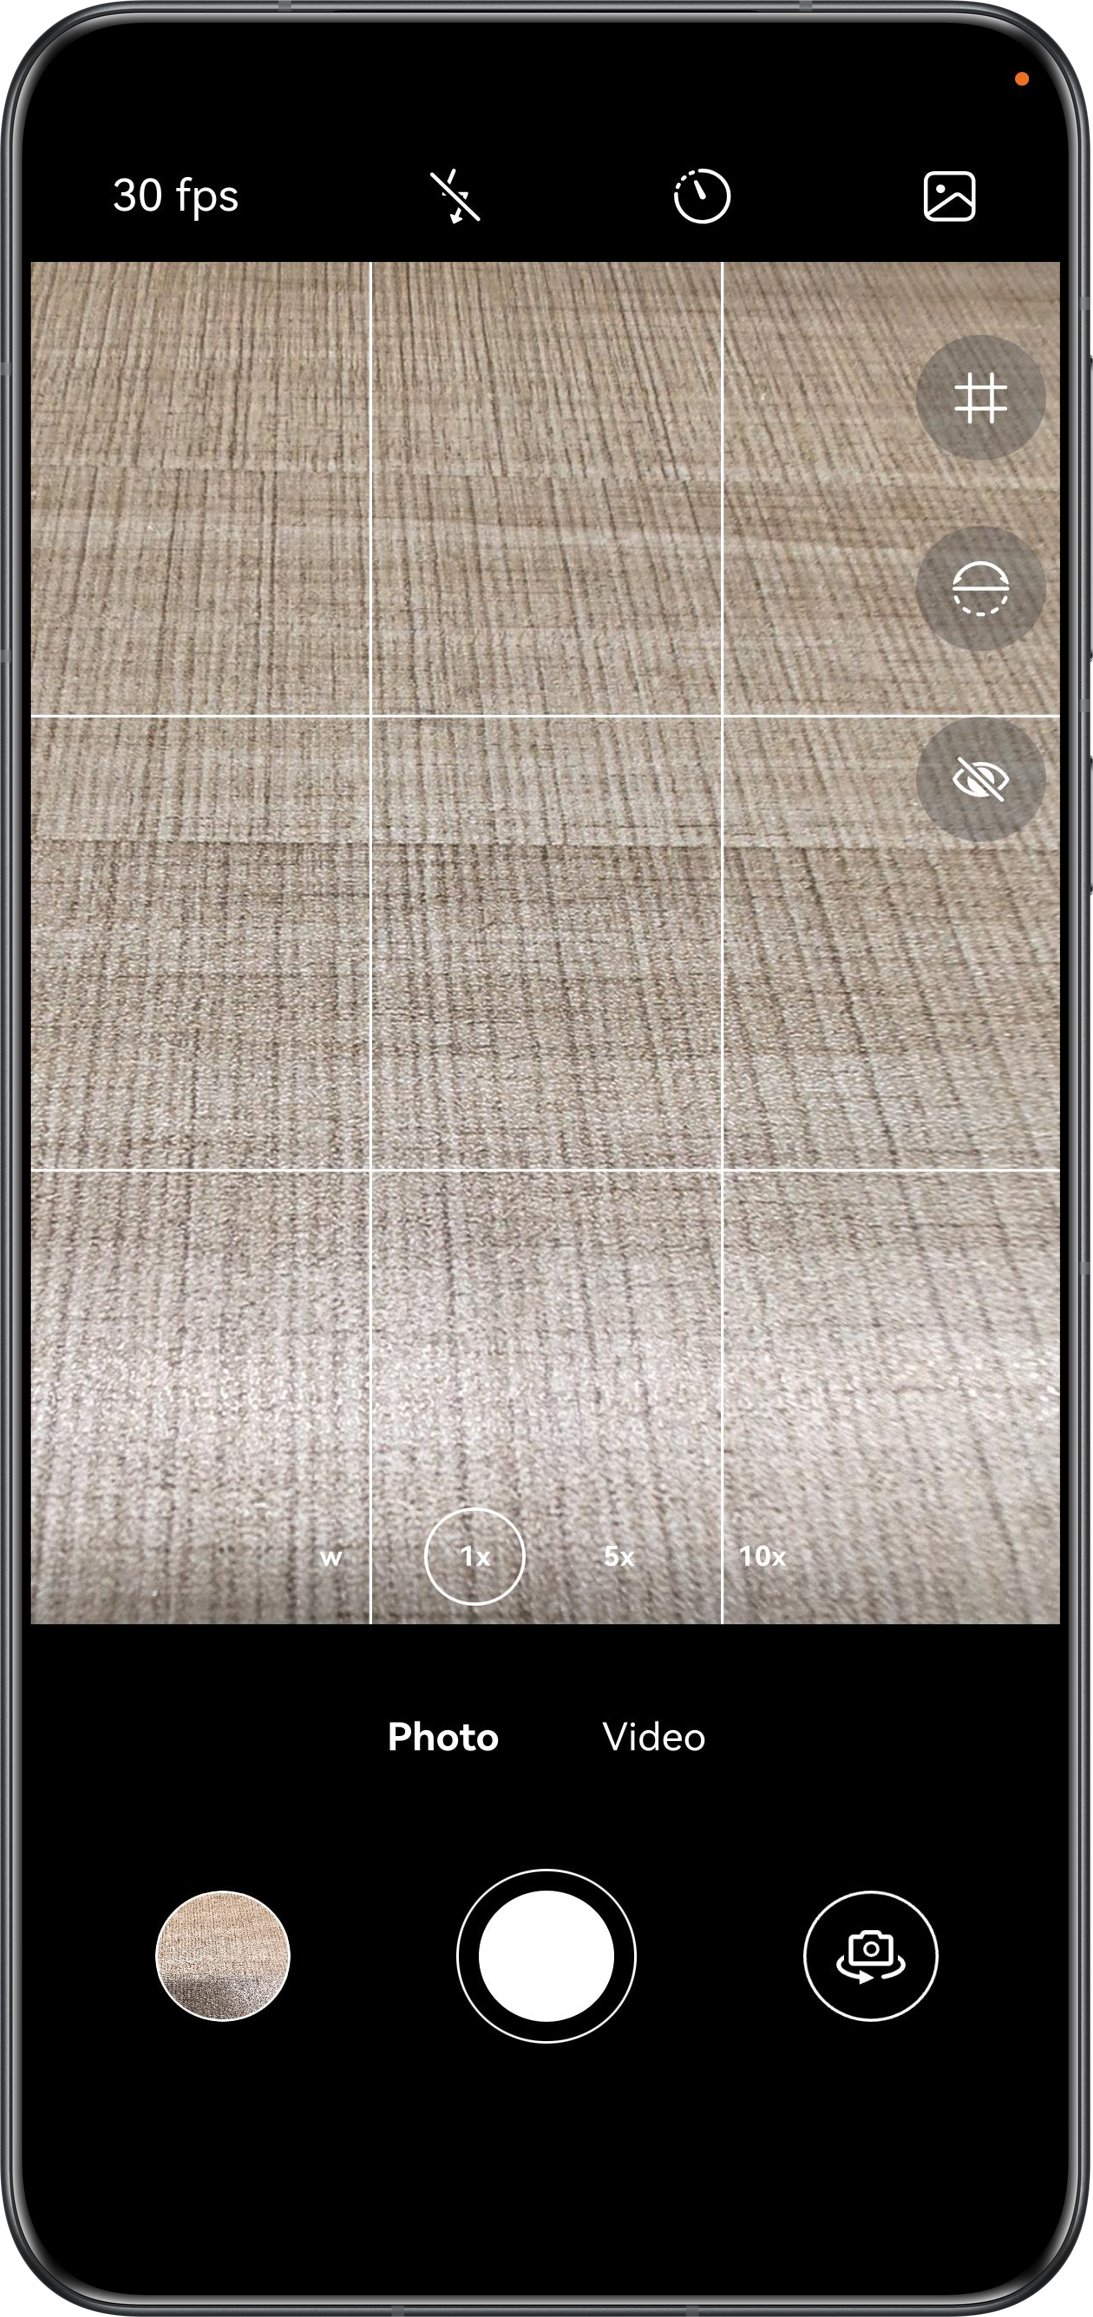
Obtain the width and height of the preview area, calculate the start coordinates of each grid line based on the number of rows and columns, and draw the grid lines on the canvas. Note that you need to set hitTestBehavior to HitTestMode.Transparent to ensure interactions with the underlying preview area remain unaffected.
draw(): void {
  const ctx = this.context;
  ctx.strokeStyle = this.strokeStyle;
  ctx.lineWidth = this.lineWidth;
  const height = this.context.height;
  const width = this.context.width;
  // horizontal
  for (let i = 1; i < this.cols; i++) {
    const x = (width / this.cols) * i;
    ctx.beginPath();
    ctx.moveTo(x, 0);
    ctx.lineTo(x, height);
    ctx.stroke();
  }
  // vertical
  for (let i = 1; i < this.rows; i++) {
    const y = (height / this.rows) * i;
    ctx.beginPath();
    ctx.moveTo(0, y);
    ctx.lineTo(width, y);
    ctx.stroke();
  }
}

build() {
  Canvas(this.context)
    .width('100%')
    .height('100%')
    .hitTestBehavior(HitTestMode.Transparent)
    .onReady(() => this.draw())
}
Use the Stack component to stack the grid line component on top of the preview area.
Stack({
  alignContent: Alignment.Center
}) {
  XComponent({
    type: XComponentType.SURFACE,
    controller: this.previewVM.xComponentController
  })
  // ...
  if (this.previewVM.isGridLineVisible) {
    GridLine();
  }
  // ...

  if (this.isShowBlack) {
    Column()
      .id('black')
      .width('100%')
      .height('100%')
      .backgroundColor(Color.Black)
      .opacity(this.flashBlackOpacity)
  }
}
[h2]Horizontal Level
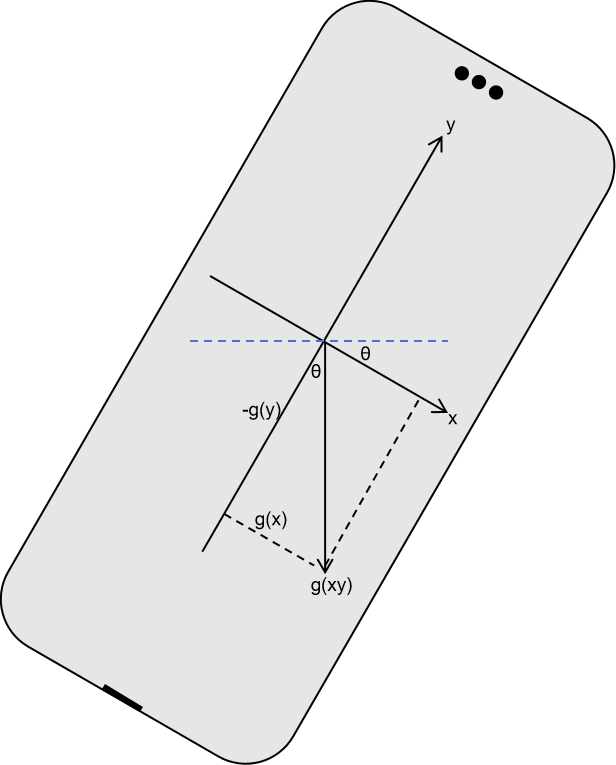
During device rotation, the level indicator line remains perpendicular to the direction of gravity. When the device is level (with either the x or y axis perpendicular to gravity), the line switches from dashed to solid.
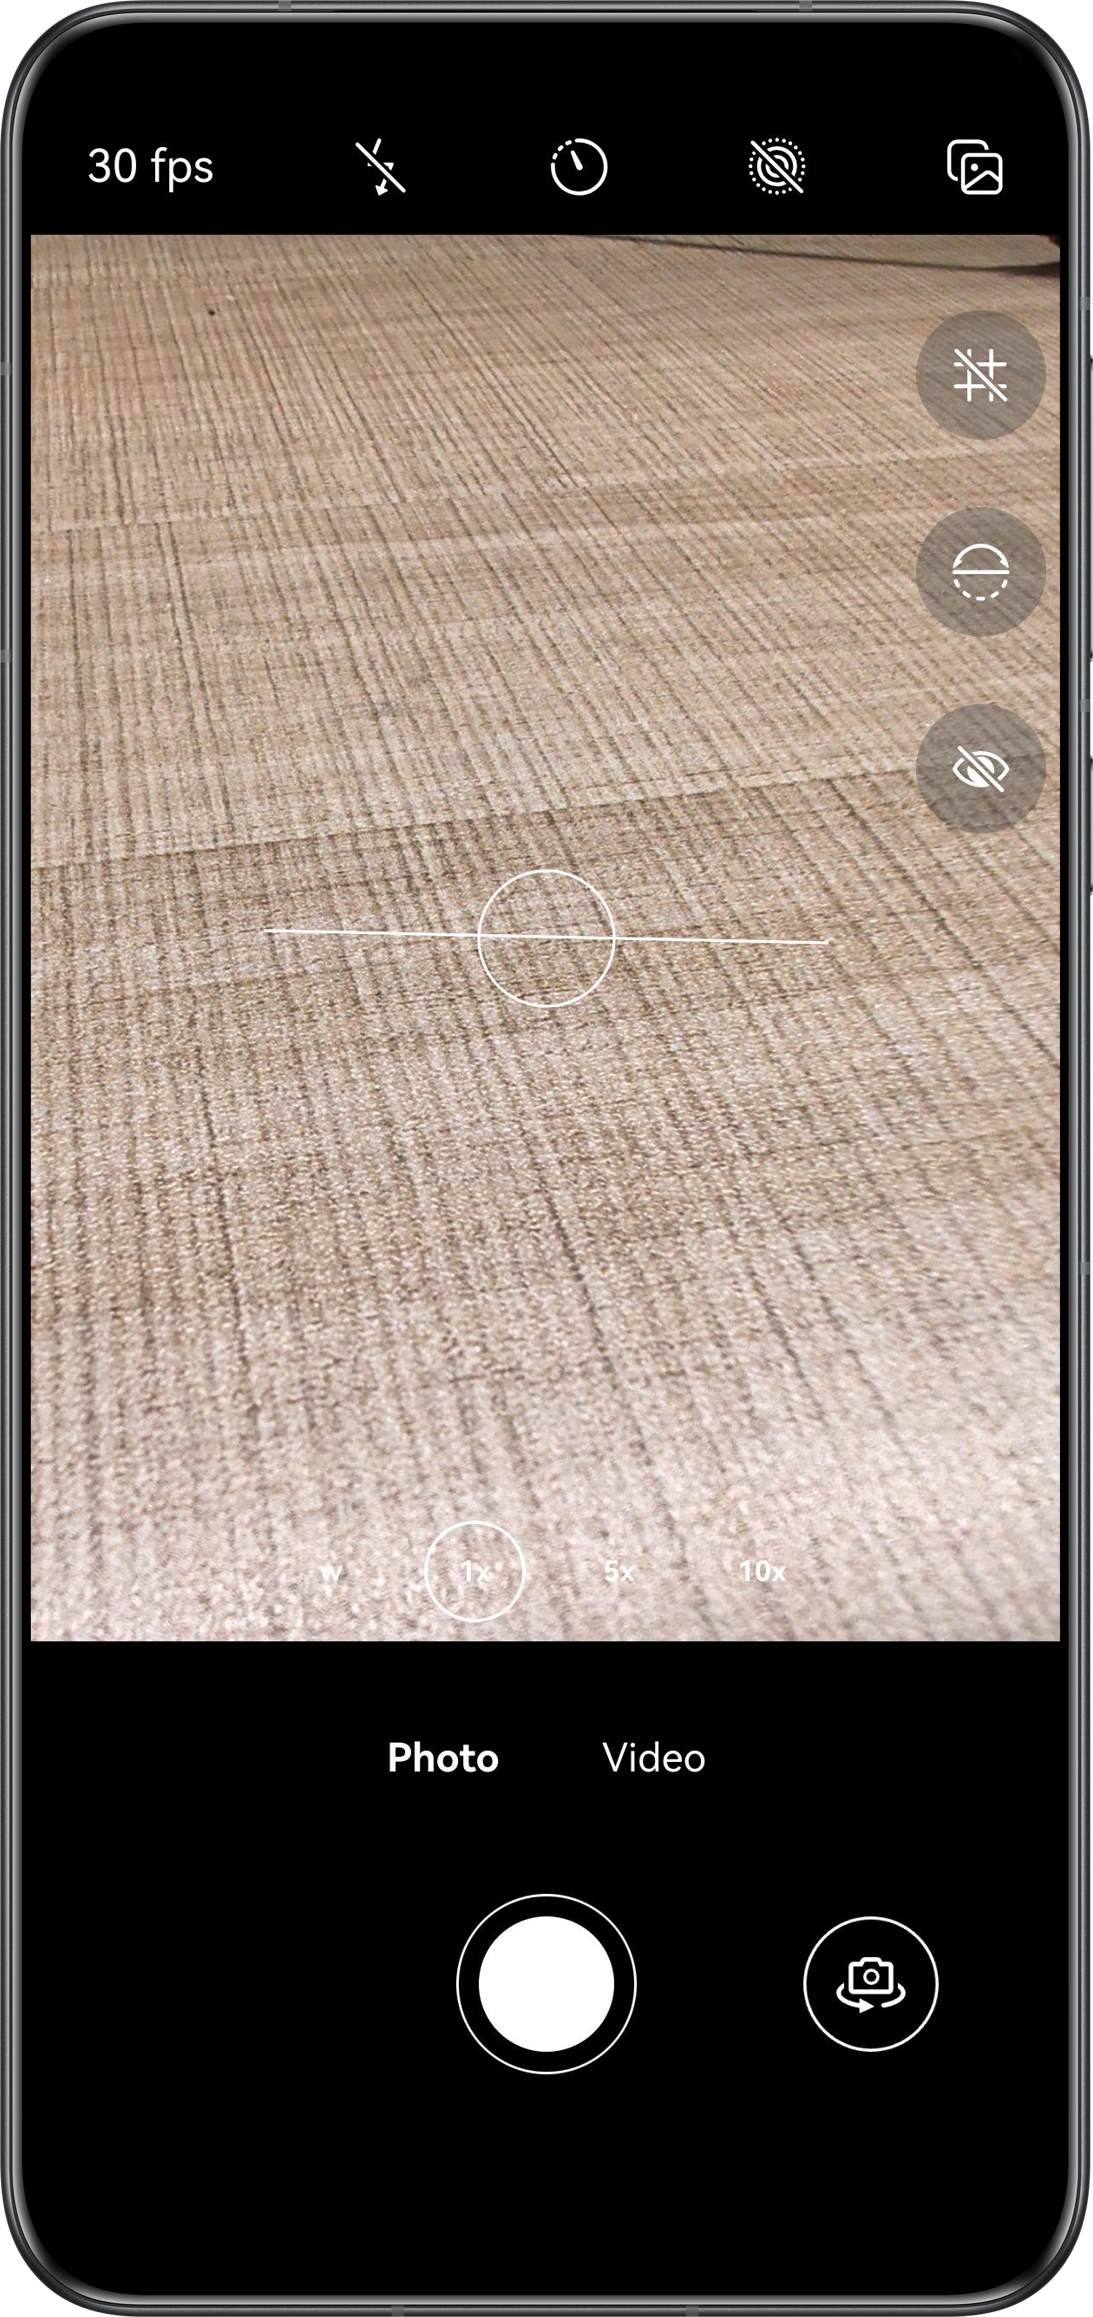
The level indicator is used with the gravity acceleration sensor. The sensor module is used to obtain the gravity acceleration components in directions x, y, and z. The following figures show the x, y, and z axes in portrait orientation with the charging port at the bottom.
- x axis: horizontally to the right
- y axis: vertically upwards
- z axis: perpendicular to the screen outward
As shown in the following figure, θ indicates the angle between the level indicator line and the x axis. If the indicator line is always perpendicular to the gravity direction, tanθ = g(x) / -g(y).
Add the acceleration sensor permission to module.json5.
"requestPermissions": [
  // ...
  {
    "name": "ohos.permission.ACCELEROMETER",
    "reason": "$string:permission_SENSOR",
    "usedScene": {
      "abilities": [
        "EntryAbility"
      ]
    }
  }
]
Subscribe to gravity sensor data using the sensor.on() method.
// Add a gravity sensor listener callback function.
addGravityEventListener(): void {
  try {
    sensor.on(sensor.SensorId.GRAVITY, (data) => {
      this.previewVM.acc = data;
    }, { interval: 100 * 1000 * 1000 }); // 100ms
  } catch (exception) {
    Logger.error(TAG, `addGravityEventListener failed, code is ${exception.code}, message is ${exception.message}`);
  }
}
Calculate the rotation angle of the indicator line and whether the device is level. Note that you need to set hitTestBehavior to HitTestMode.Transparent to ensure interactions with the underlying preview area remain unaffected.
@Component
export struct LevelIndicator {
  @Prop acc: sensor.AccelerometerResponse;

  getRotate(): number {
    let displayDefault: display.Display | null = null;
    try {
      displayDefault = display.getDefaultDisplaySync();
    } catch (exception) {
      Logger.error(TAG, `getDefaultDisplaySync failed, code is ${exception.code}, message is ${exception.message}`);
    }
    const rotation = (displayDefault?.rotation ?? 0) * 90;
    if (rotation === 90 || rotation === 270) {
      return -Math.atan2(-this.acc.y, this.acc.x) * (180 / Math.PI);
    }
    return -Math.atan2(-this.acc.x, this.acc.y) * (180 / Math.PI);
  }

  isAlign(): boolean {
    return Math.abs(this.getRotate()) - 0 <= ANGLE_DIFFERENCE ||
      Math.abs(Math.abs(this.getRotate()) - 90) <= ANGLE_DIFFERENCE;
  }

  build() {
    Stack({ alignContent: Alignment.Center }) {
      Line({
        width: 200,
        height: 1
      })
      // ...
        .strokeDashArray([3, this.isAlign() ? 0 : 3])
        .opacity(this.isAlign() ? 1 : 0.5)
        .rotate({ angle: this.getRotate(), centerX: '50%', centerY: '50%' })
        .animation({
          curve: curves.springMotion(0.6, 0.8),
          iterations: 1,
          playMode: PlayMode.Normal
        })
      Circle()
      // ...
        .opacity(this.isAlign() ? 1 : 0.5)
    }
    // ...
    .hitTestBehavior(HitTestMode.Transparent)
  }
}
[h2]Stopping Preview upon Timeout
If no operation is performed on the camera within a specified period of time, the preview stops and a mask is displayed. You can tap the mask to restart the preview, thus preventing the long-term waste of camera resources and reducing power consumption.
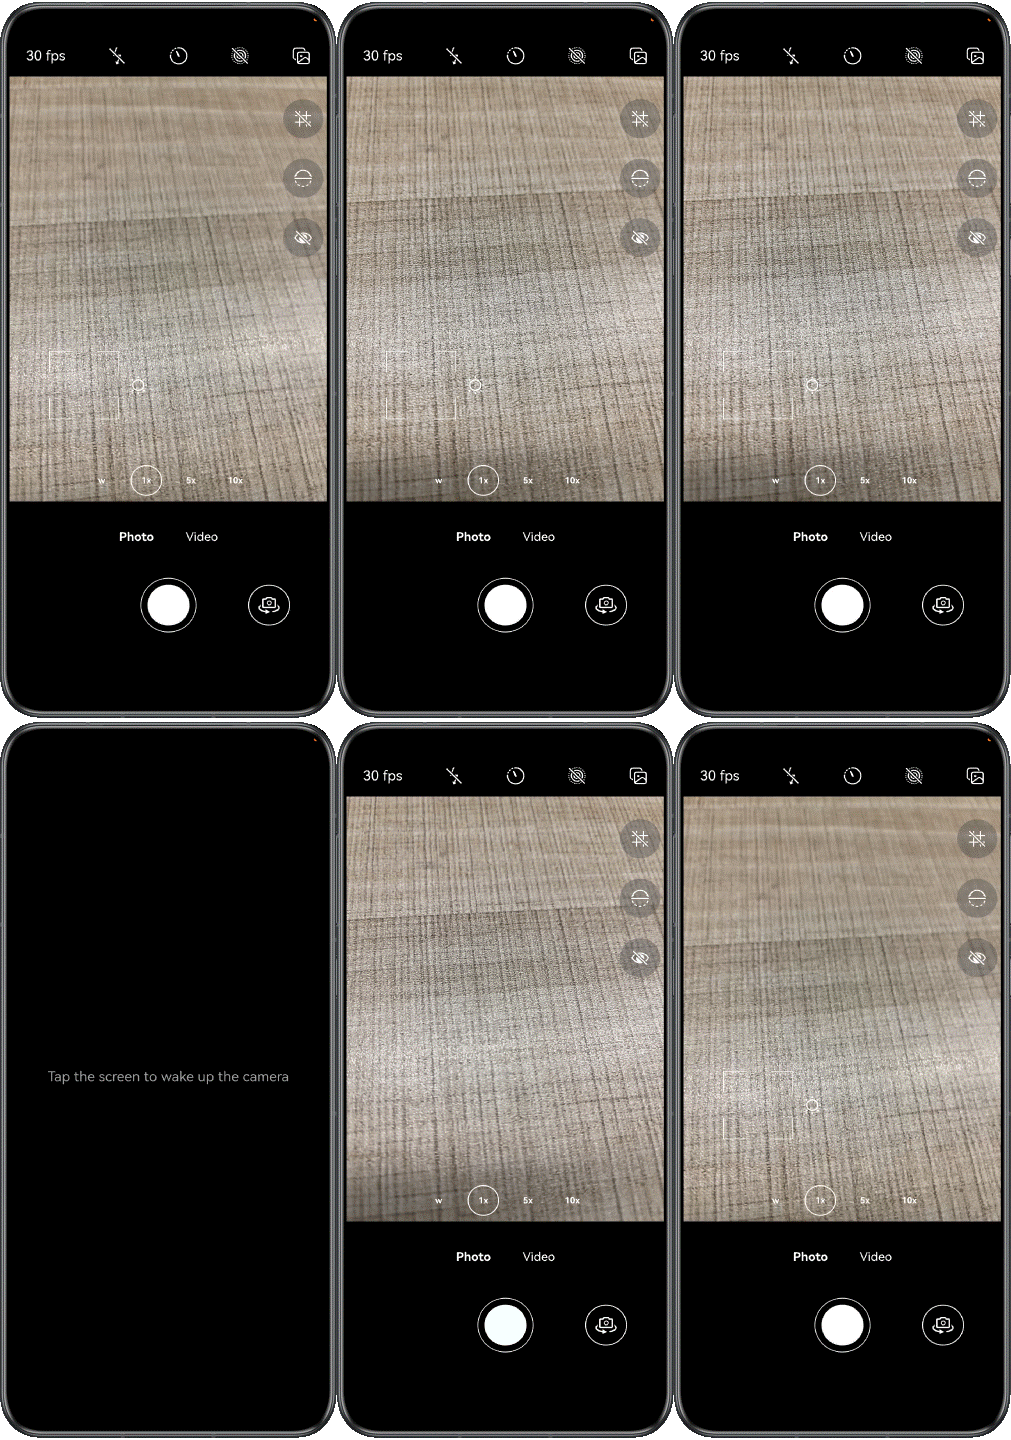
Implement a timer class with the refresh method. A callback function for timer expiration is passed during initialization. To reset the timer, call the refresh() method.
class RefreshableTimer {
  private timerId?: number;
  private readonly timeout: number;
  private callback: () => void;
  private isActive: boolean = false;

  constructor(callback: () => void, timeout: number) {
    this.callback = callback;
    this.timeout = timeout;
  }

  start(): void {
    clearTimeout(this.timerId);
    this.timerId = setTimeout(() => {
      this.callback();
      this.isActive = false;
    }, this.timeout);
    this.isActive = true;
  }

  clear(): void {
    clearTimeout(this.timerId);
    this.timerId = undefined;
    this.isActive = false;
  }

  refresh(): void {
    this.clear();
    this.start();
  }

  isRunning(): boolean {
    return this.isActive;
  }
}
Start the timer when the preview page is initialized. Use UIObserver to listen for the willClick() event. If any operation is performed within 30 seconds, reset the timer. If no operation is performed within 30 seconds, set the status variable isSleeping to true to control the display of the mask, and release the camera resources.
initSleepTimer(): void {
  this.previewVM.sleepTimer = new RefreshableTimer(() => {
    this.previewVM.openPreviewBlur();
    this.previewVM.isSleeping = true;
    this.previewVM.cameraManagerRelease();
  }, 30 * 1000);
  this.previewVM.sleepTimer.start();
  const observer = this.getUIContext().getUIObserver();
  observer.on('willClick', () => {
    this.previewVM.sleepTimer?.refresh();
  });
}
Tap the mask, set isSleeping to false, and restart the camera preview.
@Builder
wakeupMask() {
  Column() {
    Text($r('app.string.wakeup_text'))
      .fontColor(Color.White)
      .opacity(0.6)
  }
  // ...
  .onClick(async () => {
    this.previewVM.isSleeping = false;
    this.previewVM.sleepTimer?.refresh();
    await this.previewVM.cameraManagerStart();
    this.previewVM.syncButtonSettings();
  })
}
[h2]Switching Between Foreground and Background
After the camera application is switched to the background, the stream is forcibly interrupted for security purposes. When the camera application is switched from the background to foreground, its preview stream, photo stream, and camera session need to be restarted.
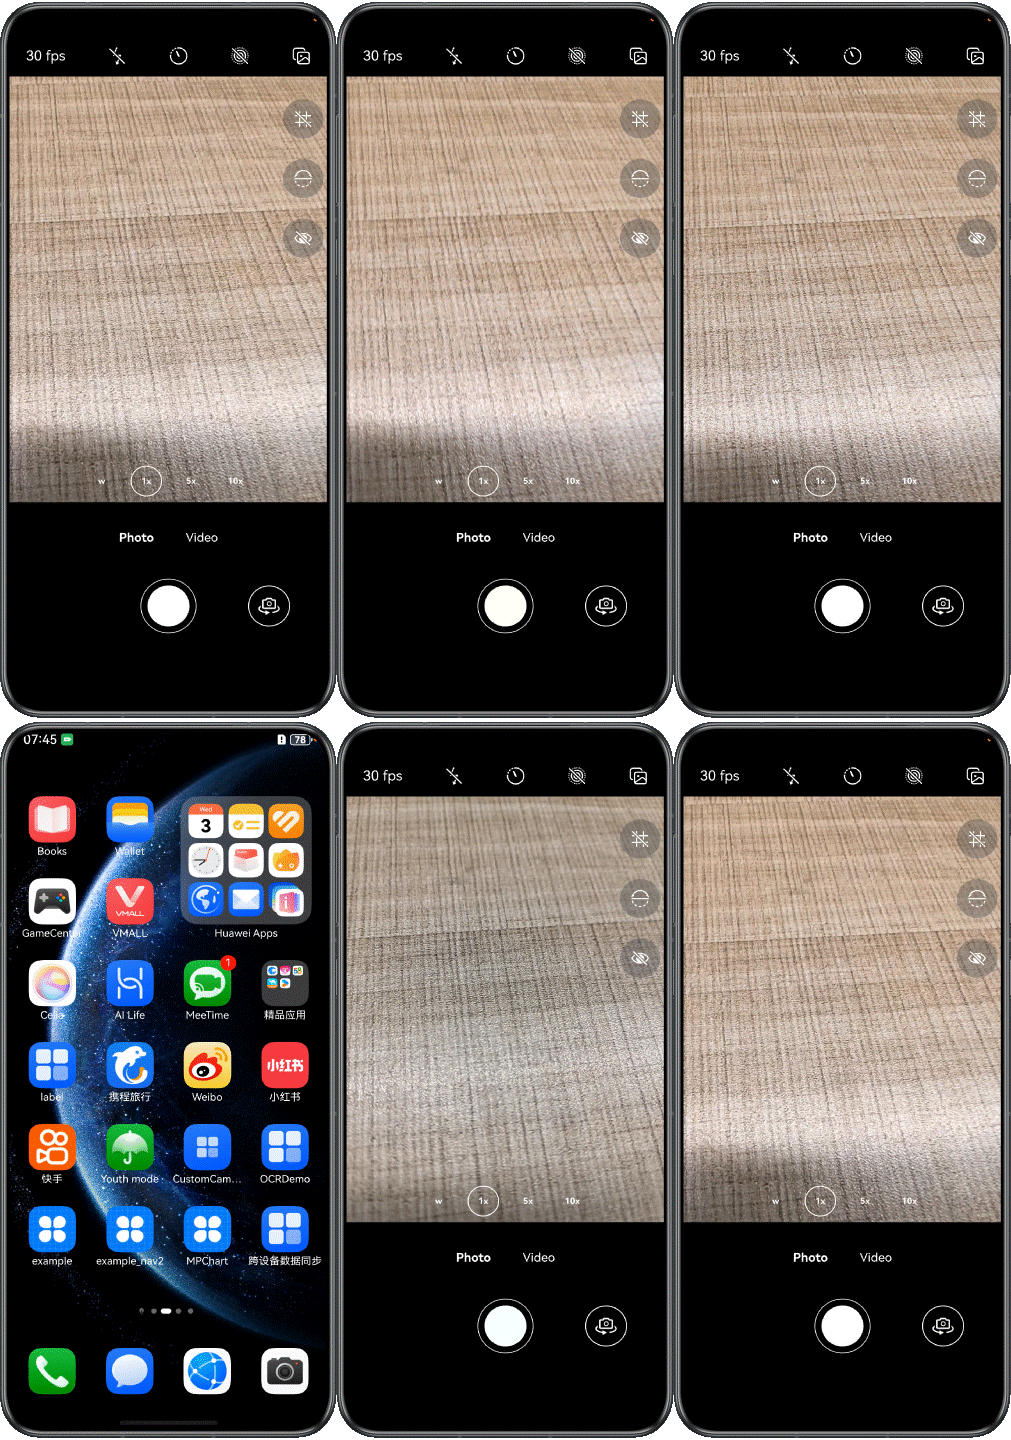
Register the listener for the foreground and background status change of the current application using the ApplicationContext.on('applicationStateChange') method. Release camera resources within the onApplicationBackground() callback triggered when the camera application is switched to the background. Restart the camera and preview within the onApplicationForeground() callback triggered when the camera application is switched to the foreground.
registerApplicationStateChange(): void {
  this.applicationContext.on('applicationStateChange', {
    onApplicationForeground: async () => {
      await this.previewVM.cameraManagerStart();
      // ...
    },
    onApplicationBackground: () => {
      // ...
      this.previewVM.cameraManagerRelease();
    }
  });
}
[h2]Face Detection in Preview
When the camera is used to capturing portraits, displaying face detection bounding boxes on the preview image assists users with focus and composition.
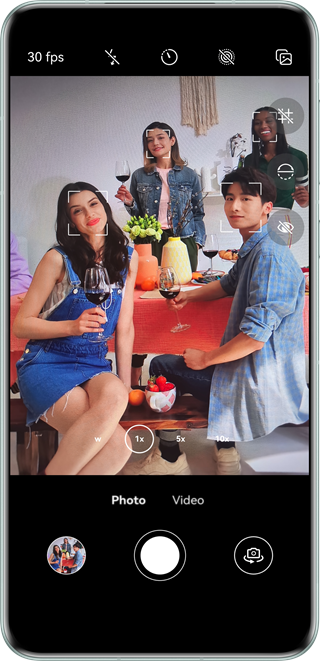
The camera's metadata output stream carries face detection information. This stream can be configured for your application to retrieve relevant data and draw face detection bounding boxes accordingly. Compared with Core Vision Kit's face detection capability, the metadata output stream returns data faster and has better performance during camera preview. The details are as follows.
Capability | Face Detection Capability | Supported Data Sources | Performance in Camera Preview |
|---|---|---|---|
Face detection based on the camera metadata output stream | Face coordinates | Camera preview image | Faster result return |
Face detection based on Core Vision Kit | Face coordinates, facial landmark positions, facial orientation, and confidence levels | Image pixel maps | Slower result return |
To develop the face detection capability based on the metadata output stream, perform the following steps.
- Create a camera metadata output stream.
async createOutput(config: CreateOutputConfig): Promise<camera.CameraOutput | undefined> { const cameraOutputCap = config.cameraManager?.getSupportedOutputCapability(config.device, config.sceneMode); if (!cameraOutputCap) { Logger.error(TAG_LOG, 'Failed to get supported output capability.'); return undefined; } let metadataObjectTypes: camera.MetadataObjectType[] = cameraOutputCap!.supportedMetadataObjectTypes; try { this.output = config.cameraManager?.createMetadataOutput(metadataObjectTypes); if (this.output) { this.addOutputListener(this.output); } } catch (error) { Logger.error(TAG_LOG, `Failed to createMetadataOutput, error code: ${error.code}`); } return this.output; } - Add the metadata output stream to the session.
for (const outputManager of this.outputManagers) { if (outputManager.isActive) { const output = await outputManager.createOutput(config); session?.addOutput(output); } } await session?.commitConfig(); await session?.start(); - Register the on('metadataObjectsAvailable') callback to listen for the face information in the metadata stream.
addMetadataObjectsAvailableListener(metadataOutput: camera.MetadataOutput): void { metadataOutput.on('metadataObjectsAvailable', (err: BusinessError, metadataObjectArr: Array<camera.MetadataObject>) => { if (err && err.code !== 0) { Logger.error(TAG_LOG, `Metadata output on metadataObjectsAvailable error code: ${err.code}`); return; } let boxRectArr: camera.Rect[] = []; metadataObjectArr.forEach((obj: camera.MetadataObject)=>{ boxRectArr.push(obj.boundingBox); }); this.onMetadataObjectsAvailable(boxRectArr); }); } - Calculate the actual coordinates of the bounding box based on the normalized data returned by the callback API.

- The coordinates returned by the API use the top-left corner of the preview image as the origin. For details, see the page layout coordinate system in Implementing the Touch Focus.
- The metadata output stream supports a maximum of 10 concurrent face detection bounding boxes.
// Face detection information listener callback. onMetadataObjectsAvailable(faceBoxArr: camera.Rect[]) { faceBoxArr.forEach((value) => { // Convert normalized coordinates to actual coordinates. value.topLeftX *= this.previewVM.getPreviewWidth(); value.topLeftY *= this.previewVM.getPreviewHeight(); value.width *= this.previewVM.getPreviewWidth(); value.height *= this.previewVM.getPreviewHeight(); }) this.previewVM.faceBoundingBoxArr = faceBoxArr; } - Calculate the start and end coordinates of each edge of the bounding box.
// Calculate the coordinates of the face detection box. export function calFaceBoxLinePoint(faceBoxRect: camera.Rect): LinePoint[] { // The length of the sides of the box. let lineLength: number = Math.min(faceBoxRect.width, faceBoxRect.height) * FACE_BOX_LINE_RATIO; let linePoints: LinePoint[] = []; // The coordinates of the four vertices of the detection box. let startPoints: camera.Point[] = [ { x: faceBoxRect.topLeftX, y: faceBoxRect.topLeftY }, { x: faceBoxRect.topLeftX + faceBoxRect.width, y: faceBoxRect.topLeftY }, { x: faceBoxRect.topLeftX, y: faceBoxRect.topLeftY + faceBoxRect.height }, { x: faceBoxRect.topLeftX + faceBoxRect.width, y: faceBoxRect.topLeftY + faceBoxRect.height }]; // Calculate the relative coordinates of each edge. startPoints.forEach((startPoint: camera.Point) => { let horizontalLine: LinePoint = { start: startPoint, increment: { x: startPoint.x > faceBoxRect.topLeftX ? -lineLength : lineLength, y: 0 } }; let verticalLine: LinePoint = { start: startPoint, increment: { x: 0, y: startPoint.y > faceBoxRect.topLeftY ? -lineLength : lineLength } }; linePoints.push(horizontalLine, verticalLine); }); return linePoints; } - Use the Line component to draw the face detection bounding frame on the preview image.
@Builder
// Face detection box component.
faceBox(faceBoxRect: camera.Rect) {
  ForEach(calFaceBoxLinePoint(faceBoxRect), (linePoint: LinePoint) => {
    Line()
      .startPoint([0, 0])
      .endPoint([linePoint.increment.x, linePoint.increment.y])
      .stroke(Color.White)
      .position({ x: linePoint.start.x, y: linePoint.start.y })
  }, (linePoint: LinePoint) => JSON.stringify(linePoint));
}
[h2]When to Use
During camera application development, if the preview stream is used only for display, the XComponent is usually used. If you need to acquire each frame of image data for further processing (e.g., QR code recognition or facial recognition), you need to use ImageReceiver to listen for each frame of the preview stream and create a second preview stream.
[h2]How to Implement
Key Technologies
- ImageReceiver is used to create a surface to receive each frame of image data.
- You can listen for each frame of the preview stream through the imageArrival event in ImageReceiver and parse the image content.
- Check whether the image width is the same as the stride. If not, crop the image. (The stride refers to the number of bytes occupied by a row of data in the memory. Generally, the stride is greater than the image width to meet memory requirements for alignment and read efficiency.) For details, see Solution to Screen Artifacts During Camera Preview.
- When the screen is in different display directions, the source image needs to be rotated at different angles to ensure its proper display. You need to consider the screen rotation angle and camera lens installation angle. For details about the implementation mechanism, see Screen Rotation Angle. In actual development, you are advised to call the PreviewOutput.getPreviewRotation() method to directly obtain the rotation angle.
- For the front camera, you also need to horizontally flip the data to emulate the mirror effect based on service requirements.
Development Process
- Create the ImageReceiver component.
- Obtain the surface ID.
- Create the second preview output stream.
- Add it to the session.
- Listen for the frame arrival event.
- Process and release the frame data.
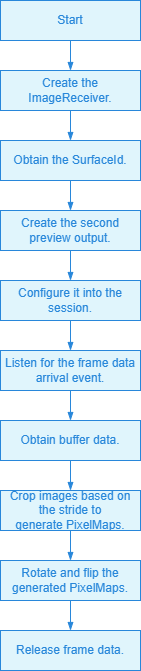
[h2]How to Develop
- Create the ImageReceiver component and obtain the surface ID.
async init(size: Size, format = image.ImageFormat.JPEG, capacity = 8): Promise<string> { const receiver = image.createImageReceiver(size, format, capacity); const surfaceId = await receiver.getReceivingSurfaceId(); this.onImageArrival(receiver); return surfaceId; } - Create a preview stream and configure it to the camera session, which is the same as that of the basic preview. For details, see how to create a preview output stream.
- Register the imageArrival event using ImageReceiver.on() to receive image data. Call ImageReceiver.read() and image.getComponent() to parse the buffer of the obtained image.
onImageArrival(receiver: image.ImageReceiver): void { receiver.on('imageArrival', () => { Logger.info(TAG, 'image arrival'); receiver.readNextImage((err: BusinessError, nextImage: image.Image) => { if (err || nextImage === undefined) { nextImage?.release(); Logger.error(TAG, 'readNextImage failed'); return; } nextImage.getComponent(image.ComponentType.JPEG, async (err: BusinessError, imgComponent: image.Component) => { if (err || imgComponent === undefined) { Logger.error(TAG, 'getComponent failed'); } if (imgComponent.byteBuffer) { // ... } else { Logger.error(TAG, 'byteBuffer is null'); } // ... }); }); }); } - Crop the buffer data based on the stride and image's width and height. Call image.createPixelMap() to create PixelMap data.

When the createPixelMap() method is used to process buffer data, the pixel format (srcPixelFormat: PixelMapFormat) of the input buffer data must match the output format (format: CameraFormat) in the capability profile of the preview output stream to prevent abnormal image display. For details about the mapping between formats, see Dual-Channel Preview (ArkTS).
async getPixelMap(imgComponent: image.Component, width: number, height: number, stride: number): Promise<image.PixelMap> { if (stride === width) { return await image.createPixelMap(imgComponent.byteBuffer, { size: { height: height, width: width }, srcPixelFormat: image.PixelMapFormat.NV21, }); } const dstBufferSize = width * height * 1.5; const dstArr = new Uint8Array(dstBufferSize); for (let j = 0; j < height * 1.5; j++) { const srcBuf = new Uint8Array(imgComponent.byteBuffer, j * stride, width); dstArr.set(srcBuf, j * width); } return await image.createPixelMap(dstArr.buffer, { size: { height: height, width: width }, srcPixelFormat: image.PixelMapFormat.NV21, }); } - Call PreviewOutput.getPreviewRotation() to obtain the image rotation angle, and PixelMap.rotate() to rotate the image data. When using the front camera, there are differences between horizontal mirroring and vertical mirroring. To unify the flipping logic, it is necessary to additionally rotate the image by 180 degrees for correction when the screen rotation angle is 90 degrees or 270 degrees. Use the PixelMap.flip() method to horizontally flip the image data to achieve the mirroring effect. For details, see Preview Rotation Angle in Self-Drawing Scenarios.
nextImage.getComponent(image.ComponentType.JPEG, async (err: BusinessError, imgComponent: image.Component) => { if (err || imgComponent === undefined) { Logger.error(TAG, 'getComponent failed'); } if (imgComponent.byteBuffer) { const width = nextImage.size.width; const height = nextImage.size.height; const stride = imgComponent.rowStride; Logger.info(TAG, `getComponent with width:${width} height:${height} stride:${stride}`); const pixelMap = await this.getPixelMap(imgComponent, width, height, stride); let displayDefault: display.Display | null = null; try { displayDefault = display.getDefaultDisplaySync(); const displayRotation = (displayDefault?.rotation ?? 0) * camera.ImageRotation.ROTATION_90; const rotation = this.output?.getPreviewRotation(displayRotation) || 0; if (this.position === camera.CameraPosition.CAMERA_POSITION_FRONT) { if (displayRotation === 90 || displayRotation === 270) { await pixelMap.rotate((rotation + 180) % 360); } else { await pixelMap.rotate(rotation); } await pixelMap.flip(true, false); } else { await pixelMap.rotate(rotation); } this.callback(pixelMap); } catch (exception) { Logger.error(TAG, `getDefaultDisplaySync failed, code is ${exception.code}, message is ${exception.message}`); } } else { Logger.error(TAG, 'byteBuffer is null'); } // ... }); - After the image data obtained by the ImageReceiver component is processed, release the corresponding image buffer to ensure that the buffer queue of the surface rotates properly and prevent problems such as buffer overflow. If the buffer is operated asynchronously, ensure that it is not used before release.
nextImage.getComponent(image.ComponentType.JPEG, async (err: BusinessError, imgComponent: image.Component) => {
  // ...
  nextImage.release();
  Logger.info(TAG, 'image process done');
});